navigation system MERCEDES-BENZ E-SEDAN 2014 Owners Manual
[x] Cancel search | Manufacturer: MERCEDES-BENZ, Model Year: 2014, Model line: E-SEDAN, Model: MERCEDES-BENZ E-SEDAN 2014Pages: 430, PDF Size: 5.8 MB
Page 16 of 430
Multifunction display
Function/notes ............................. 240
Permanent displa y......................... 249
Multifunction steering wheel
Operating the on-board computer .239
Overview .......................................... 33N
Navigation Menu (on-board computer) ............243
NECK-PRO head restraints
Operation ........................................ .53
Resetting after being triggered ........54
NECK-PRO luxury head restraints
Operation ........................................ .53
Resetting after being triggered ........54
Notes on breaking-in a new vehicle 158O
Occupant Classification System
(OCS) Faults ............................................... 52
Operation ........................................ .48
System self-test ............................... 50
Occupant safety
Children in the vehicle .....................60
Important safety notes ....................40
OCS
Faults ............................................... 52
Operation ........................................ .48
System self-test ............................... 50
Odometer ........................................... 241
Oil see Engine oil
On-board computer
AMG menu ..................................... 253
Assistance menu ........................... 246
Audio menu ................................... 244
Convenience submenu ..................252
Displaying a service message ........341
Display messages ..........................257
DISTRONIC PLUS ........................... 197
Factory settings submenu .............253
Important safety notes ..................238
Instrument cluster submenu ..........249
Lighting submenu .......................... 250Menu overview
.............................. 241
Message memory .......................... 257
Navigation menu ............................ 243
Operation ....................................... 239
RACETIMER ................................... 254
Service menu ................................. 249
Settings menu ............................... 249
Standard displa y............................ 241
Telephone menu ............................ 245
Trip menu ...................................... 241
Vehicle submenu ........................... 251
Video DVD operation .....................245
Operating safety
Declaration of conformity ................26
Important safety notes ....................25
Operating system
see On-board computer
Operator's Manual
Vehicle equipment ...........................23
Outside temperature display ...........239
Overhead control panel ......................37
Override feature Rear side windows ...........................66 P
Paint code number ............................416
Paintwork (cleaning instructions) ...344
Panic alarm .......................................... 40
Panorama roof with power tilt/
sliding panel
Opening/closing ............................ 104
Opening/closing the roller
sunblind ......................................... 105
Problem (malfunction) ...................106
Resetting ....................................... 105
Panorama sliding sunroof
Important safety notes ..................102
Parking ............................................... 182
Important safety notes ..................182
Parking brake ................................ 183
Position of exterior mirror, front-
passenger side ............................... 124
Rear view camera .......................... 217
see PARKTRONIC 14
IndexProCarManuals.com
Page 245 of 430
Navigation system menu
Displaying navigation instructions In the
Navi
Navimenu, the multifunction display
shows navigation instructions. For more
information on navigation, see the separate
operating instructions.
X Switch on COMAND (see the separate
operating instructions).
X Press the =or; button on the
steering wheel to select the Navi
Navi menu.
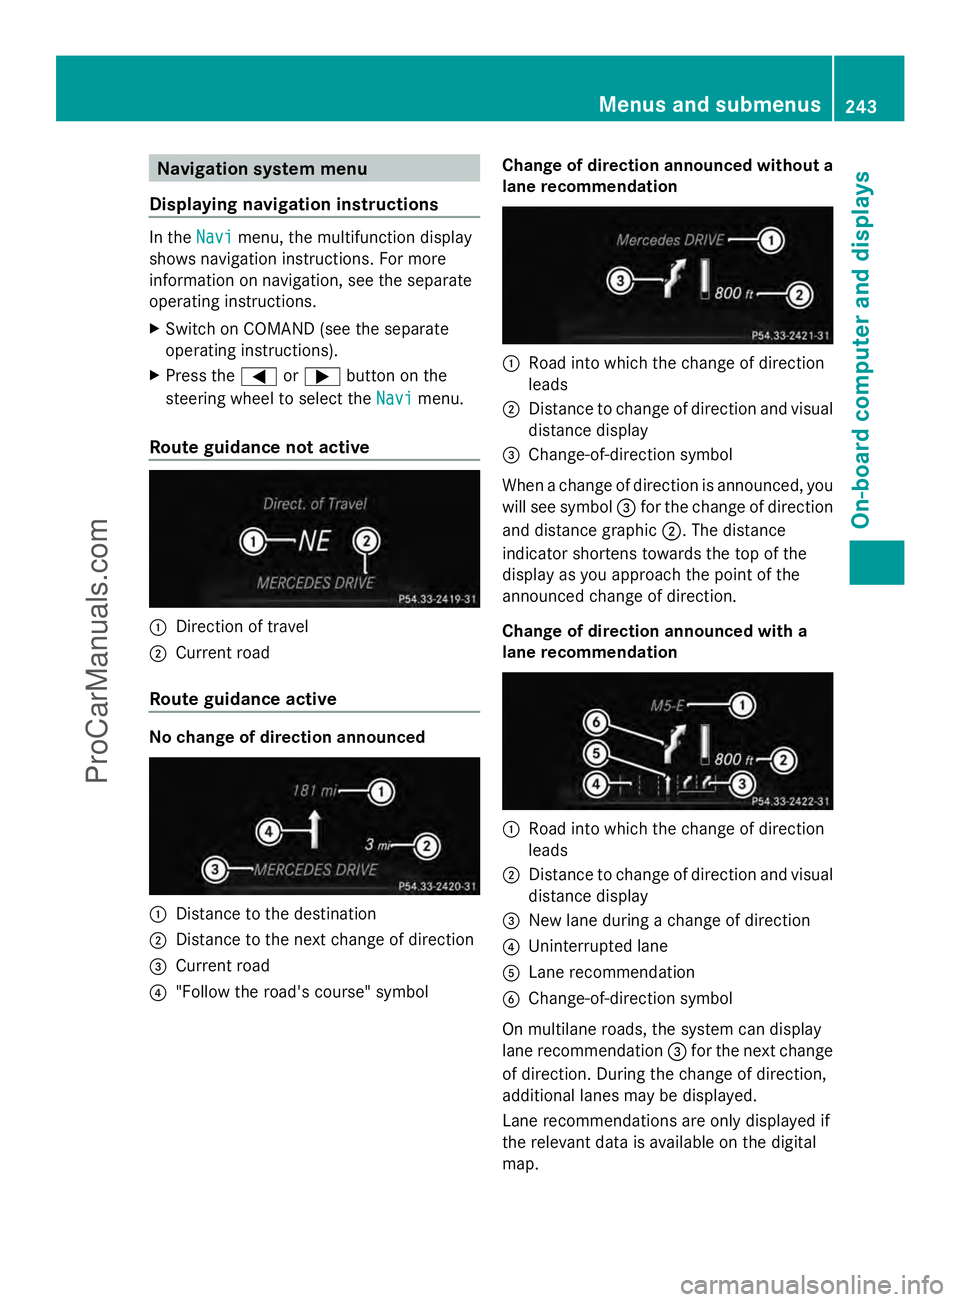
Route guidance not active :
Direction of travel
; Current road
Route guidance active No change of direction announced
:
Distance to the destination
; Distance to the next change of direction
= Current road
? "Follow the road's course" symbol Change of direction announced without a
lane recommendation :
Road into which the change of direction
leads
; Distance to change of direction and visual
distance display
= Change-of-direction symbol
When a change of direction is announced, you
will see symbol =for the change of direction
and distance graphic ;. The distance
indicator shortens towards the top of the
display as you approach the point of the
announced change of direction.
Change of direction announced with a
lane recommendation :
Road into which the change of direction
leads
; Distance to change of direction and visual
distance display
= New lane during a change of direction
? Uninterrupted lane
A Lane recommendation
B Change-of-direction symbol
On multilane roads, the system can display
lane recommendation =for the next change
of direction. During the change of direction,
additional lanes may be displayed.
Lane recommendations are only displayed if
the relevant data is available on the digital
map. Menus and submenus
243On-board computer and displays Z
ProCarManuals.com
Page 246 of 430
Other status indicators of the
navigation system
R
O: you have reached the destination or an
intermediate destination.
R New Route...
New Route... orCalculating Route Calculating Route :
calculating a new route
R Off Map
Off Map orOff
Off Mapped
Mapped Road
Road: the vehicle
position is outside the area of the digital
map (off-map position).
R No Route
No Route : no route could be calculated to
the selected destination. Audio menu
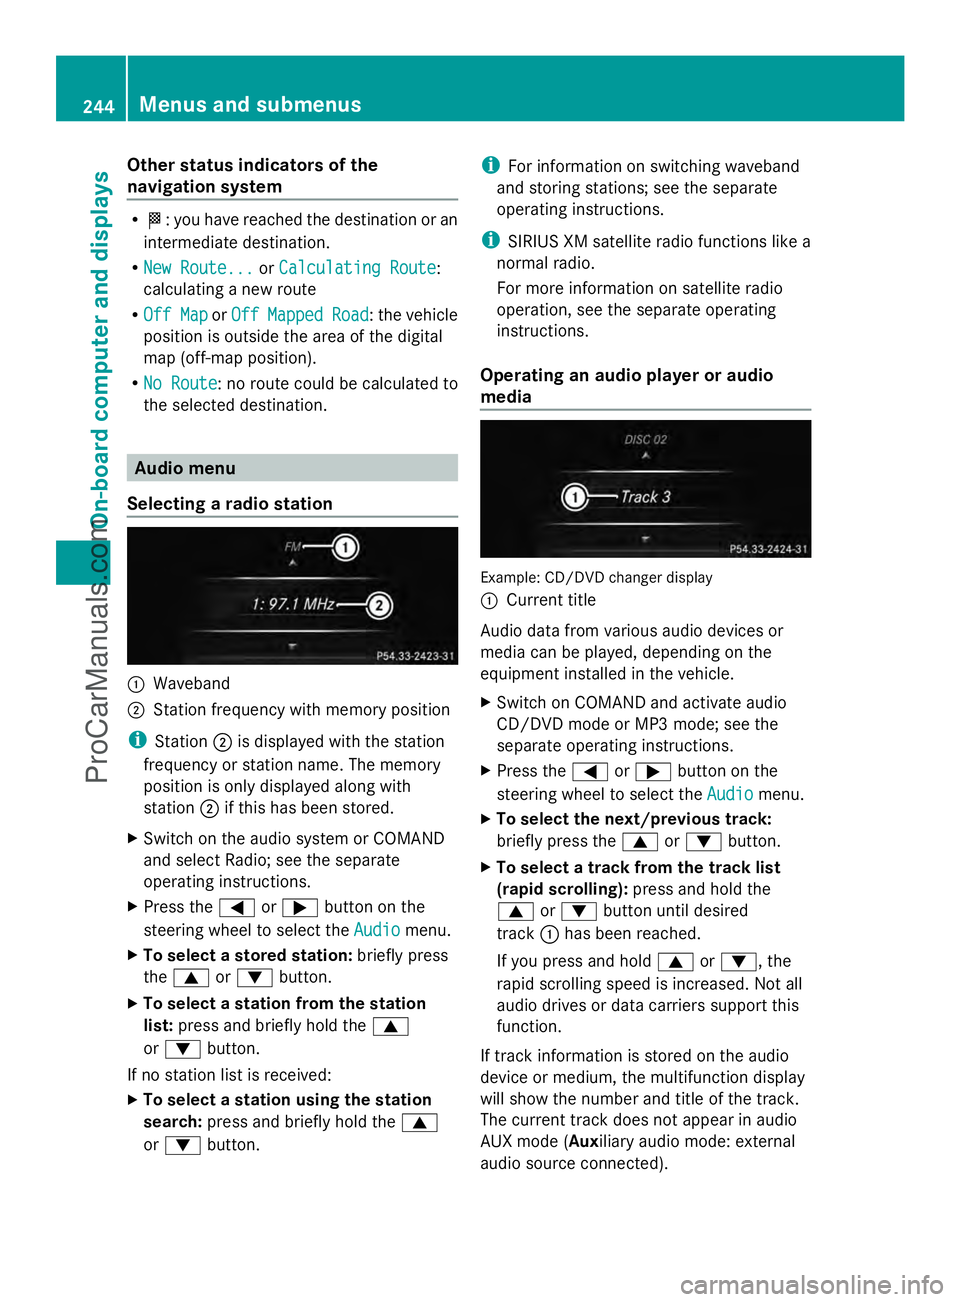
Selecting a radio station :
Waveband
; Station frequency with memory position
i Station ;is displayed with the station
frequency or station name. The memory
position is only displayed along with
station ;if this has been stored.
X Switch on the audio system or COMAND
and select Radio; see the separate
operating instructions.
X Press the =or; button on the
steering wheel to select the Audio
Audio menu.
X To select a stored station: briefly press
the 9 or: button.
X To select a station from the station
list: press and briefly hold the 9
or : button.
If no station list is received:
X To select a station using the station
search: press and briefly hold the 9
or : button. i
For information on switching waveband
and storing stations; see the separate
operating instructions.
i SIRIUS XM satellite radio functions like a
normal radio.
For more information on satellite radio
operation, see the separate operating
instructions.
Operating an audio player or audio
media Example: CD/DVD changer display
:
Current title
Audio data from various audio devices or
media can be played, depending on the
equipment installed in the vehicle.
X Switch on COMAND and activate audio
CD/DVD mode or MP3 mode; see the
separate operating instructions.
X Press the =or; button on the
steering wheel to select the Audio Audiomenu.
X To select the next/previous track:
briefly press the 9or: button.
X To select a track from the track list
(rapid scrolling): press and hold the
9 or: button until desired
track :has been reached.
If you press and hold 9or:, the
rapid scrolling speed is increased. Not all
audio drives or data carriers support this
function.
If track information is stored on the audio
device or medium, the multifunction display
will show the number and title of the track.
The current track does not appear in audio
AUX mode (Auxiliary audio mode: external
audio source connected). 244
Menus and submenusOn-board computer and displays
ProCarManuals.com
Page 251 of 430
Maintenance menu
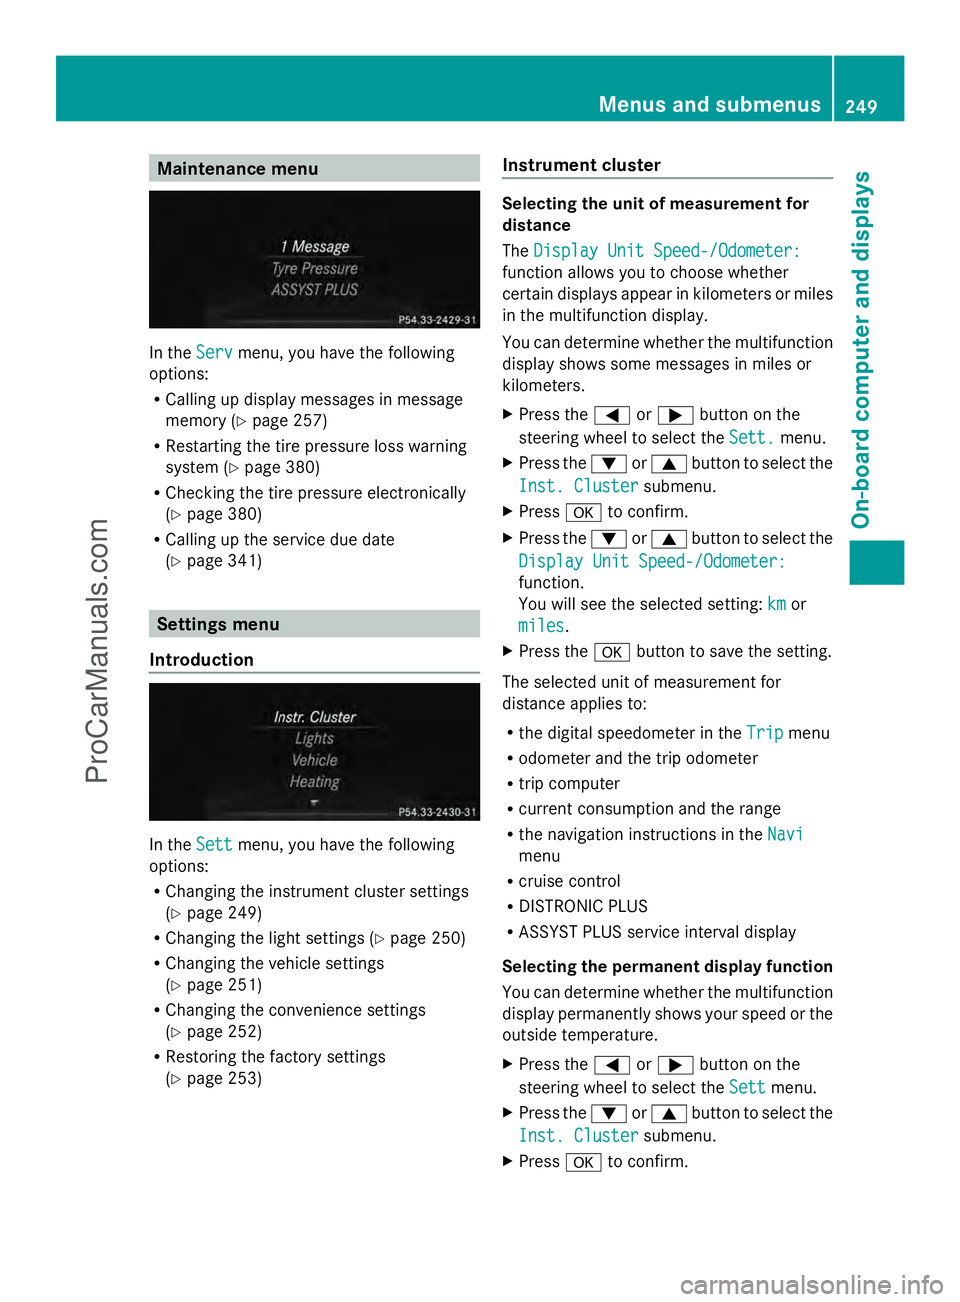
In the
Serv
Servmenu, you have the following
options:
R Calling up display messages in message
memory (Y page 257)
R Restarting the tire pressure loss warning
system (Y page 380)
R Checking the tire pressure electronically
(Y page 380)
R Calling up the service due date
(Y page 341) Settings menu
Introduction In the
Sett Settmenu, you have the following
options:
R Changing the instrument cluster settings
(Y page 249)
R Changing the light settings (Y page 250)
R Changing the vehicle settings
(Y page 251)
R Changing the convenience settings
(Y page 252)
R Restoring the factory settings
(Y page 253) Instrument cluster Selecting the unit of measurement for
distance
The
Display Unit Speed-/Odometer: Display Unit Speed-/Odometer:
function allows you to choose whether
certain displays appear in kilometers or miles
in the multifunction display.
You can determine whether the multifunction
display shows some messages in miles or
kilometers.
X Press the =or; button on the
steering wheel to select the Sett.
Sett. menu.
X Press the :or9 button to select the
Inst. Cluster Inst. Cluster submenu.
X Press ato confirm.
X Press the :or9 button to select the
Display Unit Speed-/Odometer:
Display Unit Speed-/Odometer:
function.
You will see the selected setting: km kmor
miles
miles .
X Press the abutton to save the setting.
The selected unit of measurement for
distance applies to:
R the digital speedometer in the Trip Tripmenu
R odometer and the trip odometer
R trip computer
R current consumption and the range
R the navigation instructions in the Navi Navi
menu
R cruise control
R DISTRONIC PLUS
R ASSYST PLUS service interval display
Selecting the permanent display function
You can determine whether the multifunction
display permanently shows your speed or the
outside temperature.
X Press the =or; button on the
steering wheel to select the Sett
Sett menu.
X Press the :or9 button to select the
Inst. Cluster
Inst. Cluster submenu.
X Press ato confirm. Menus and submenus
249On-board computer and displays Z
ProCarManuals.com
Page 290 of 430
Problem Possible causes/consequences and
M
MSolutions !
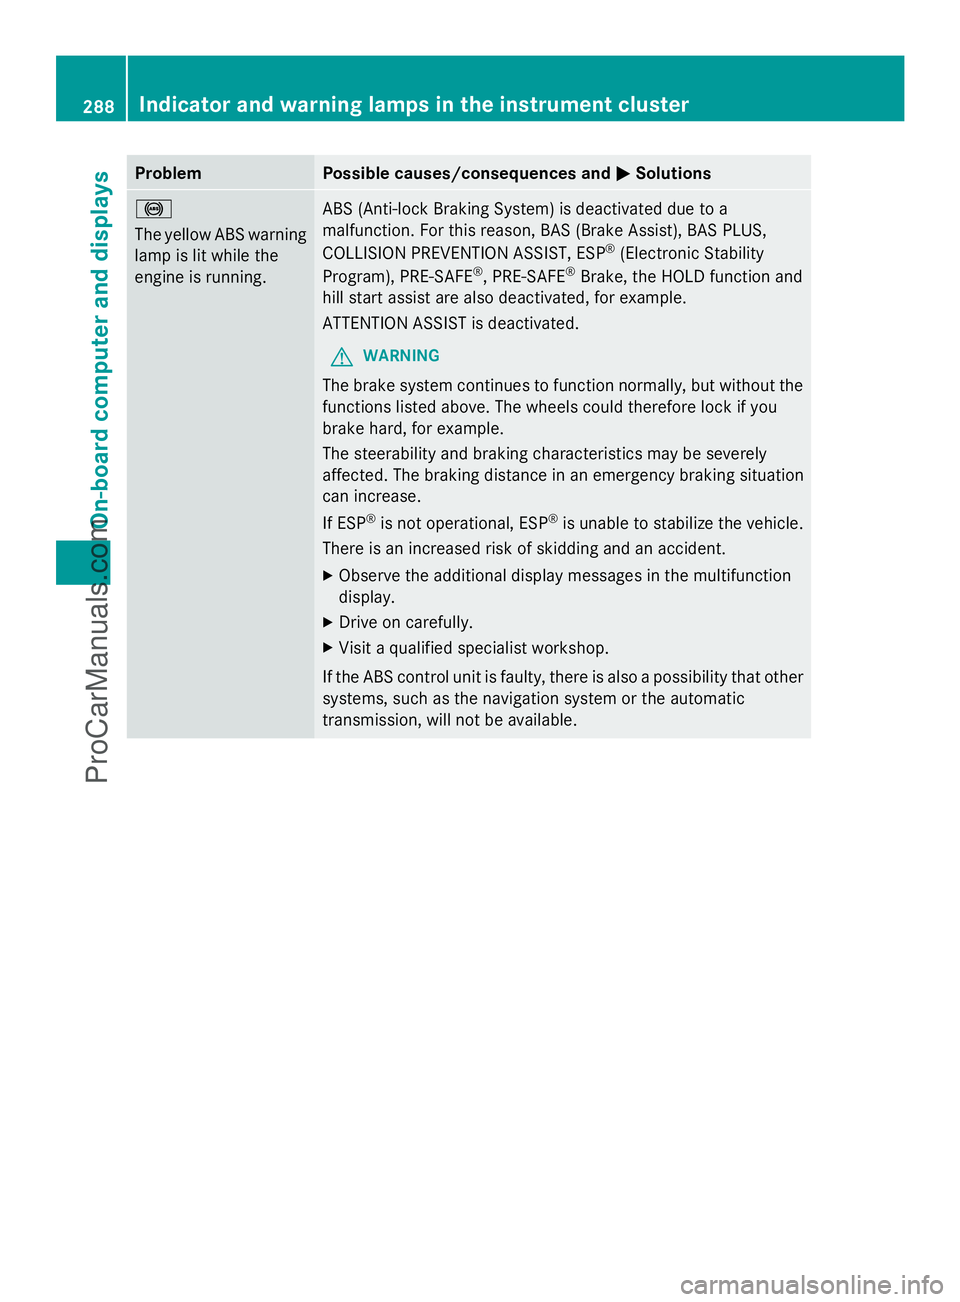
The yellow ABS warning
lamp is lit while the
engine is running.
ABS (Anti-lock Braking System) is deactivated due to a
malfunction. For this reason, BAS (Brake Assist), BAS PLUS,
COLLISION PREVENTION ASSIST, ESP
®
(Electronic Stability
Program), PRE-SAFE ®
, PRE-SAFE ®
Brake, the HOLD function and
hill start assist are also deactivated, for example.
ATTENTION ASSIST is deactivated.
G WARNING
The brake system continues to function normally, but without the
functions listed above. The wheels could therefore lock if you
brake hard, for example.
The steerability and braking characteristics may be severely
affected. The braking distance in an emergency braking situation
can increase.
If ESP ®
is not operational, ESP ®
is unable to stabilize the vehicle.
There is an increased risk of skidding and an accident.
X Observe the additional display messages in the multifunction
display.
X Drive on carefully.
X Visit a qualified specialist workshop.
If the ABS control unit is faulty, there is also a possibility that other
systems, such as the navigation system or the automatic
transmission, will not be available. 288
Indicator and warning lamps in the instrument clusterOn-board computer and displays
ProCarManuals.com
Page 327 of 430
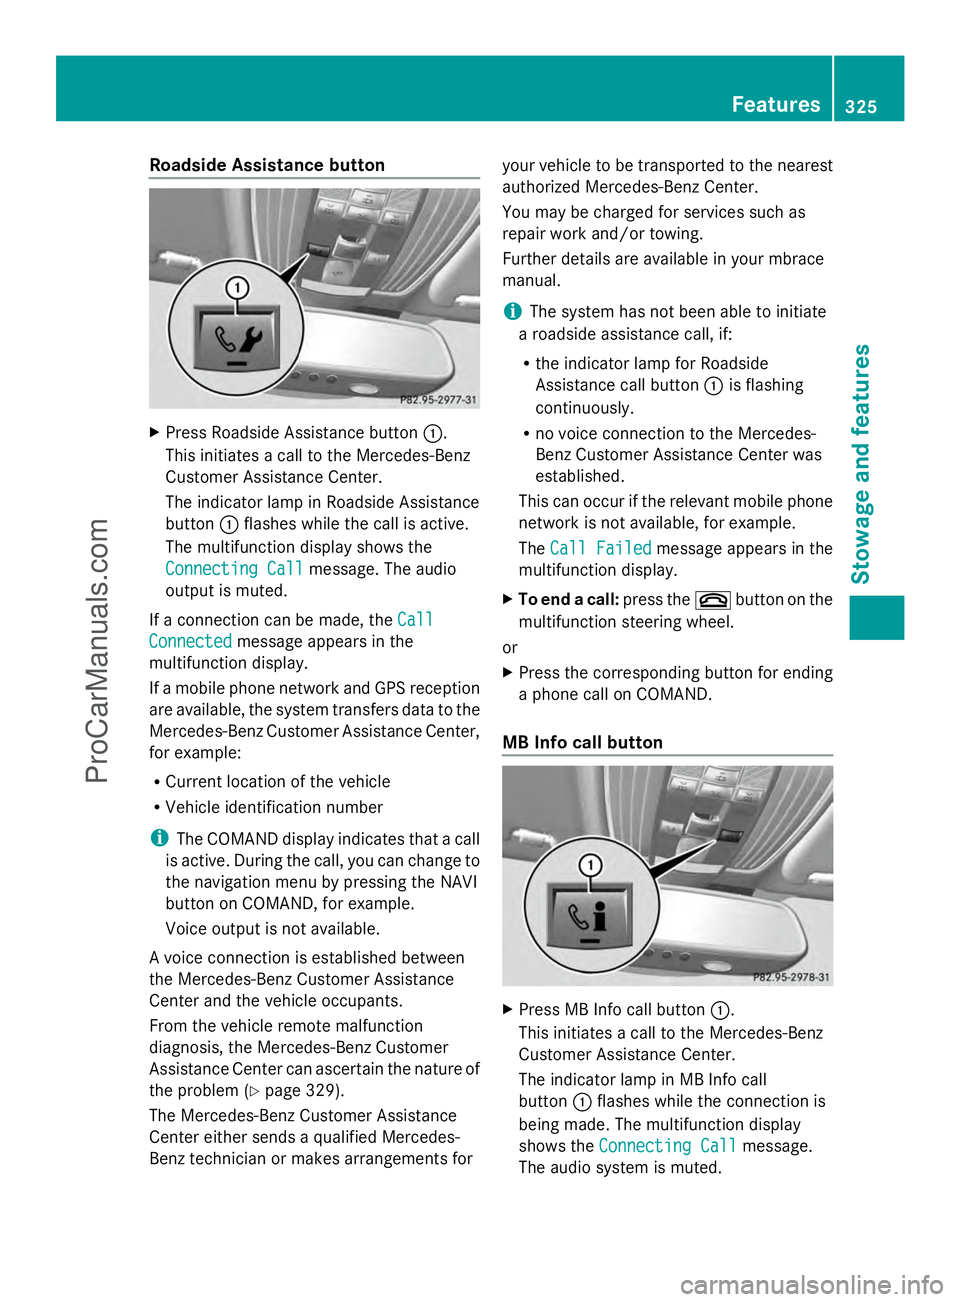
Roadside Assistance button
X
Press Roadside Assistance button :.
This initiates a call to the Mercedes-Benz
Customer Assistance Center.
The indicator lamp in Roadside Assistance
button :flashes while the call is active.
The multifunction display shows the
Connecting Call Connecting Call message. The audio
output is muted.
If a connection can be made, the Call
Call
Connected
Connected message appears in the
multifunction display.
If a mobile phone network and GPS reception
are available, the system transfers data to the
Mercedes-Benz Customer Assistance Center,
for example:
R Current location of the vehicle
R Vehicle identification number
i The COMAND display indicates that a call
is active. During the call, you can change to
the navigation menu by pressing the NAVI
button on COMAND, for example.
Voice output is not available.
A voice connection is established between
the Mercedes-Benz Customer Assistance
Center and the vehicle occupants.
From the vehicle remote malfunction
diagnosis, the Mercedes-Benz Customer
Assistance Center can ascertain the nature of
the problem (Y page 329).
The Mercedes-Benz Customer Assistance
Center either sends a qualified Mercedes-
Benz technician or makes arrangements for your vehicle to be transported to the nearest
authorized Mercedes-Benz Center.
You may be charged for services such as
repair work and/or towing.
Further details are available in your mbrace
manual.
i
The system has not been able to initiate
a roadside assistance call, if:
R the indicator lamp for Roadside
Assistance call button :is flashing
continuously.
R no voice connection to the Mercedes-
Benz Customer Assistance Center was
established.
This can occur if the relevant mobile phone
network is not available, for example.
The Call Failed
Call Failed message appears in the
multifunction display.
X To end a call: press the~button on the
multifunction steering wheel.
or
X Press the corresponding button for ending
a phone call on COMAND.
MB Info call button X
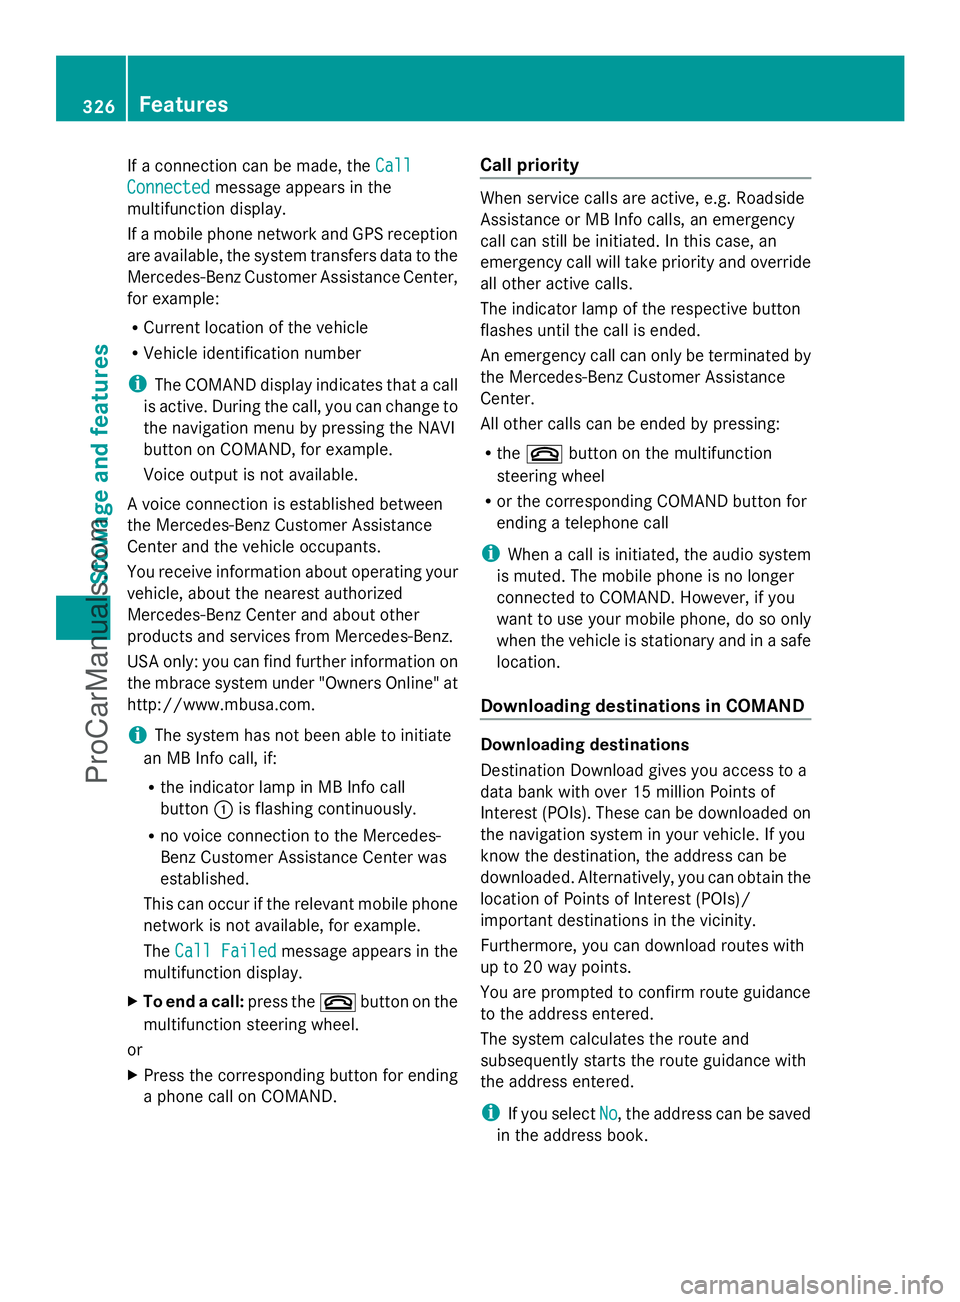
Press MB Info call button :.
This initiates a call to the Mercedes-Benz
Customer Assistance Center.
The indicator lamp in MB Info call
button :flashes while the connection is
being made. The multifunction display
shows the Connecting Call Connecting Call message.
The audio system is muted. Features
325Stowage and features Z
ProCarManuals.com
Page 328 of 430
If a connection can be made, the
Call
Call
Connected
Connected message appears in the
multifunction display.
If a mobile phone network and GPS reception
are available, the system transfers data to the
Mercedes-Benz Customer Assistance Center,
for example:
R Current location of the vehicle
R Vehicle identification number
i The COMAND display indicates that a call
is active. During the call, you can change to
the navigation menu by pressing the NAVI
button on COMAND, for example.
Voice output is not available.
A voice connection is established between
the Mercedes-Benz Customer Assistance
Center and the vehicle occupants.
You receive information about operating your
vehicle, about the nearest authorized
Mercedes-Benz Center and about other
products and services from Mercedes-Benz.
USA only: you can find further information on
the mbrace system under "Owners Online" at
http://www.mbusa.com.
i The system has not been able to initiate
an MB Info call, if:
R the indicator lamp in MB Info call
button :is flashing continuously.
R no voice connection to the Mercedes-
Benz Customer Assistance Center was
established.
This can occur if the relevant mobile phone
network is not available, for example.
The Call Failed
Call Failed message appears in the
multifunction display.
X To end a call: press the~button on the
multifunction steering wheel.
or
X Press the corresponding button for ending
a phone call on COMAND. Call priority When service calls are active, e.g. Roadside
Assistance or MB Info calls, an emergency
call can still be initiated. In this case, an
emergency call will take priority and override
all other active calls.
The indicator lamp of the respective button
flashes until the call is ended.
An emergency call can only be terminated by
the Mercedes-Benz Customer Assistance
Center.
All other calls can be ended by pressing:
R
the ~ button on the multifunction
steering wheel
R or the corresponding COMAND button for
ending a telephone call
i When a call is initiated, the audio system
is muted. The mobile phone is no longer
connected to COMAND. However, if you
want to use your mobile phone, do so only
when the vehicle is stationary and in a safe
location.
Downloading destinations in COMAND Downloading destinations
Destination Download gives you access to a
data bank with over 15 million Points of
Interest (POIs). These can be downloaded on
the navigation system in your vehicle. If you
know the destination, the address can be
downloaded. Alternatively, you can obtain the
location of Points of Interest (POIs)/
important destinations in the vicinity.
Furthermore, you can download routes with
up to 20 way points.
You are prompted to confirm route guidance
to the address entered.
The system calculates the route and
subsequently starts the route guidance with
the address entered.
i If you select No
No, the address can be saved
in the address book. 326
FeaturesStowage and features
ProCarManuals.com
Page 329 of 430
i
The destination download function is
available if the relevant mobile phone
network is available and data transfer is
possible.
i The destination download function can
only be used if the vehicle is equipped with
a navigation system.
Route Assistance
This service is part of the mbrace PLUS
Package and cannot be purchased
separately.
i You can also use the Route Assistance
function if your vehicle is not equipped with
a navigation system.
Within the framework of this service, you
receive a professional and reliable form of
navigation support without having to leave
your vehicle.
The customer service representative finds a
suitable route depending on your vehicle's
current position and the desired destination.
You will then be guided live through the
current route section.
Search & Send General notes
i
To use "Search & Send", your vehicle
must be equipped with mbrace and a
navigation system. Additionally, an mbrace
service subscription must be completed.
"Search & Send" is a destination entry
service. A destination address which is found
on Google Maps ®
can be transferred via
mbrace directly to your vehicle's navigation
system.
Specifying and sending the destination
address
X Go to the website http://
www.maps.google.com and enter a
destination address into the entry field.
X To send the destination address to the
e-mail address of your mbrace account:
click on the corresponding
button on the website.
i Example:
If you select 'Send to vehicle' and then
'Mercedes-Benz', the destination address
will be sent to your vehicle.
X When the "Send" dialog window appears:
Enter the e-mail address you specified
when setting up your mbrace account into
the corresponding field.
X Click "Send".
i Information on specific commands such
as "Address entry" or "Send" can be found
on the website.
Calling up destination addresses
X Switch on the ignition.
The destination address is loaded into the
vehicle's navigation system.
A display message appears, asking
whether navigation should be started.
X Select Yes Yesby turning cVdor sliding
XVY the COMAND controller and press
W to confirm.
The system calculates the route and
subsequently starts the route guidance
with the address entered.
i If you select No No, the address can be saved
in the address book.
i If you have sent more than one
destination address, each individual
destination must be confirmed separately.
i Destination addresses are loaded in the
same order as the order in which they were
sent.
If you own multiple Mercedes-Benz
vehicles with mbrace and activated mbrace
accounts:
If multiple vehicles are registered under the
same e-mail address, the destination will
be sent to all the vehicles. Features
327Stowage and features Z
ProCarManuals.com
Page 332 of 430
Downloading routes
Downloading routes allows you to transfer
and save predefined routes in the navigation
system. To do this, an SD memory card must
be inserted into the COMAND system. If no
SD memory card is inserted, you must insert
the card into the card slot on the COMAND
system before saving.
A route can be prepared and sent either by a
customer service representative or via the
mbrace portal on the Internet.
Each route can include up to 20 way points.
Once a route has been received by the
navigation system, you will see the
hasbeen
been saved
saved to
tomemory
memory card.
card.
Do you want to start route
Do you want to start route
guidance? guidance? message in the COMAND display.
The route is saved to the SD memory card.
X To start route guidance: selectYes
Yes.
An overview of the route is shown in the
display.
i If you select No No, the saved route can be
called up later via the navigation menu.
X Select Start
Start.
Route guidance is started.
i Downloaded and saved data can be called
up again in COMAND.
You can find further information in the
separate COMAND Operating Instructions.
Speed alert You can define the upper speed limit, which
must not be exceeded by the vehicle.
If this selected speed is exceeded by the
vehicle, a message will be sent to the
Customer Assistance center. The Customer
Assistance center then forwards this
information to you.
You can select the way in which you receive
this information beforehand. Possible options
include text message, e-mail or an automated
call. The data you receive contains the following
information:
R
the location where the speed limit was
exceeded
R the time at which the speed limit was
exceeded
R the selected speed limit which was
exceeded
Geo fencing Geo fencing allows you to select areas which
the vehicle should not enter or leave. You will
be informed if the vehicle crosses the
boundaries of the selected areas. You can
select the way in which you receive this
information beforehand. Possible options
include text message, e-mail or an automated
call.
The area can be determined as either a circle
or a polygon with a maximum of ten corners.
You can specify up to ten areas
simultaneously. Different settings are
possible for each area.
USA only: these settings can be called up
under "Owners Online" at http://
www.mbusa.com.
Alternatively, you can trigger an MB Info call
and inform the customer service
representative that you wish to activate geo
fencing.
Currently inactive areas can be activated by
text message.
Triggering the vehicle alarm With this function, you can trigger the
vehicle's panic alarm via text message. An
alarm sounds and the exterior lighting
flashes. Depending on the setting, the panic
alarm lasts five or ten seconds. Afterwards,
the alarm switches off. 330
FeaturesStowage and fea
tures
ProCarManuals.com
Page 362 of 430
vehicle literature. You could otherwise fail to
recognize dangers e.g. due to high voltage.
For safety reasons, Mercedes-Benz
recommends that you only use batteries
which have been tested and approved for
your vehicle by Mercedes-Benz. These
batteries provide increased impact
protection to prevent vehicle occupants from
suffering acid burns should the battery be
damaged in the event of an accident.
In order for the battery to achieve the
maximum possible service life, it must always
be sufficiently charged.
The vehicle battery, like other batteries, can
discharge over time if you do not use the
vehicle. In this case, have the battery
disconnected at a qualified specialist
workshop. You can also charge the battery
with a charger recommended by Mercedes-
Benz. Contact a qualified specialist workshop
for further information.
Have the battery condition of charge checked
more frequently if you use the vehicle mainly
for short trips or if you leave it standing idle
for a lengthy period. Consult a qualified
specialist workshop if you wish to leave your
vehicle parked for a long period of time.
i Remove the SmartKey if you park the
vehicle and do not require any electrical
consumers. The vehicle will then use very
little energy, thus conserving battery
power.
i If the power supply has been interrupted,
e.g. if you reconnect the battery, you will
have to:
R set the clock. Information on setting the
clock can be found in the separate
operating instructions.
On vehicles with COMAND and a
navigation system, the clock is set
automatically.
R reset the function for folding the exterior
mirrors in/out automatically, by folding
the mirrors out once (Y page 123). Charging the battery
G
WARNING
During charging and jump-starting, explosive
gases can escape from the battery. There is a
risk of an explosion.
Particularly avoid fire, open flames, creating
sparks and smoking. Ensure there is sufficient
ventilation while charging and jump-starting.
Do not lean over a battery. G
WARNING
Battery acid is caustic. There is a risk of injury.
Avoid contact with the skin, eyes or clothing.
Do not inhale any battery gases. Do not lean
over the battery. Keep children away from
batteries. Wash battery acid immediately with
water and seek medical attention. G
WARNING
A discharged battery can freeze at
temperatures below freezing point. When
jump-starting the vehicle or charging the
battery, gases can escape from the battery.
There is a risk of an explosion.
Allow the frozen battery to thaw out before
charging it or jump-starting.
! Only use battery chargers with a
maximum charging voltage of 14.8 V.
! Only charge the battery using the jump-
starting connection point.
The jump-starting connection point is in the
engine compartment (Y page 362).
X Open the hood.
X Connect the battery charger to the positive
terminal and ground point in the same
order as when connecting the donor
battery in the jump-starting procedure
(Y page 362).
If, at low temperatures, the indicator lamps/
warning lamps in the instrument cluster do
not light up, it is highly likely that the
discharged battery has frozen. In this case,
you may neither charge the battery nor jump- 360
Battery (vehicle)Breakdown assistance
ProCarManuals.com