check oil MERCEDES-BENZ E300 BLUETEC 2011 W212 Owner's Manual
[x] Cancel search | Manufacturer: MERCEDES-BENZ, Model Year: 2011, Model line: E300 BLUETEC, Model: MERCEDES-BENZ E300 BLUETEC 2011 W212Pages: 400, PDF Size: 16.3 MB
Page 11 of 400
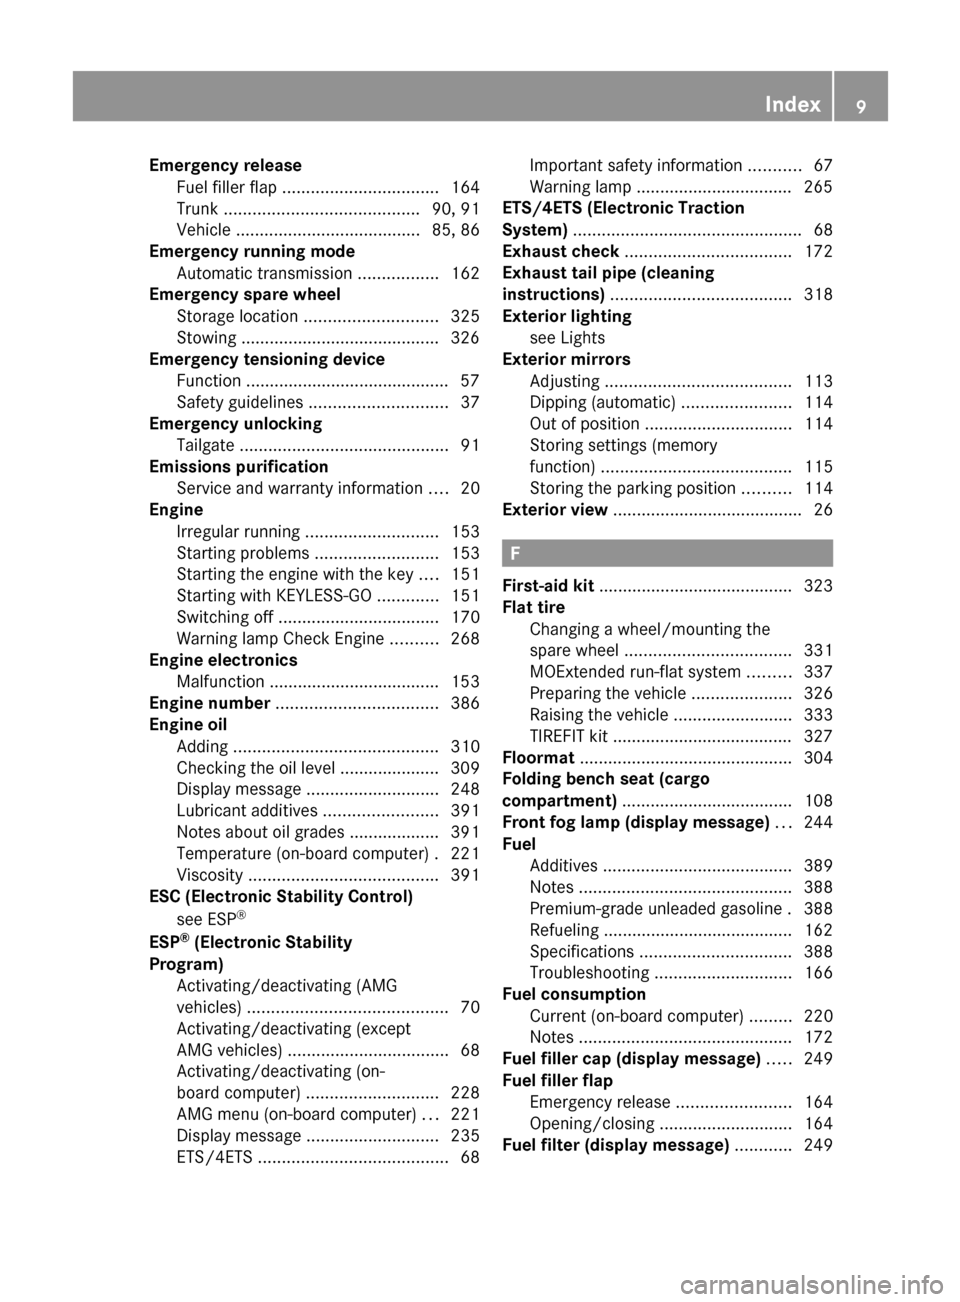
Emergency releaseFuel filler flap ................................. 164
Trunk ......................................... 90, 91
Vehicle ....................................... 85, 86
Emergency running mode
Automatic transmission .................162
Emergency spare wheel
Storage location ............................ 325
Stowing .......................................... 326
Emergency tensioning device
Function ........................................... 57
Safety guidelines ............................. 37
Emergency unlocking
Tailgate ............................................ 91
Emissions purification
Service and warranty information ....20
Engine
Irregular running ............................ 153
Starting problems ..........................153
Starting the engine with the key ....151
Starting with KEYLESS-GO .............151
Switching off .................................. 170
Warning lamp Check Engine ..........268
Engine electronics
Malfunction .................................... 153
Engine number .................................. 386
Engine oil Adding ........................................... 310
Checking the oil level ..................... 309
Display message ............................ 248
Lubricant additives ........................391
Notes about oil grades ................... 391
Temperature (on-board computer) . 221
Viscosity ........................................ 391
ESC (Electronic Stability Control)
see ESP ®
ESP ®
(Electronic Stability
Program) Activating/deactivating (AMG
vehicles) .......................................... 70
Activating/deactivating (except
AMG vehicles) .................................. 68
Activating/deactivating (on-
board computer) ............................ 228
AMG menu (on-board computer) ...221
Display message ............................ 235
ETS/4ETS ........................................ 68Important safety information ...........67
Warning lamp ................................. 265
ETS/4ETS (Electronic Traction
System) ................................................ 68
Exhaust check ................................... 172
Exhaust tail pipe (cleaning
instructions) ...................................... 318
Exterior lighting see Lights
Exterior mirrors
Adjusting ....................................... 113
Dipping (automatic) .......................114
Out of position ............................... 114
Storing settings (memory
function) ........................................ 115
Storing the parking position ..........114
Exterior view ........................................ 26
F
First-aid kit ......................................... 323
Flat tire Changing a wheel/mounting the
spare wheel ................................... 331
MOExtended run-flat system .........337
Preparing the vehicle .....................326
Raising the vehicle .........................333
TIREFIT kit ...................................... 327
Floormat ............................................. 304
Folding bench seat (cargo
compartment) .................................... 108
Front fog lamp (display message) ... 244
Fuel Additives ........................................ 389
Notes ............................................. 388
Premium-grade unleaded gasoline . 388
Refueling ........................................ 162
Specifications ................................ 388
Troubleshooting ............................. 166
Fuel consumption
Current (on-board computer) .........220
Notes ............................................. 172
Fuel filler cap (display message) ..... 249
Fuel filler flap Emergency release ........................164
Opening/closing ............................ 164
Fuel filter (display message) ............ 249
Index9BA 212 USA, CA Edition B 2011; 1; 5, en-USdimargiVersion: 3.0.3.62010-05-20T13:33:46+02:00 - Seite 9
Page 17 of 400
Service interval display .................... 313
Displaying a service message (on-
board computer) ............................ 313
Service menu (on-board computer) . 229
Service products
AdBlue ®
special additives ..............390
Brake fluid ..................................... 392
Capacities ...................................... 387
Coolant (engine) ............................ 392
Engine oil ....................................... 391
Fuel ................................................ 388
Important safety notes ..................386
Notes ............................................. 386
Refrigerant (air-conditioning
system) .......................................... 392
Washer fluid ................................... 393
Settings
Factory (on-board computer) .........233
On-board computer .......................229
SETUP (on-board computer) ............. 221
Shift ranges ....................................... 159
Showing the distance display (on-
board computer) ............................... 227
Side impact air bag ............................. 41
Side marker lamp (display
message) ............................................ 245
Side windows Convenience closing feature ............93
Convenience opening feature ..........93
Important safety information ...........91
Opening/closing .............................. 92
Resetting ......................................... 94
Troubleshooting ............................... 94
Skibag ................................................ 276
Sliding sunroof Important safety information ...........95
Troubleshooting ............................... 99
see Panorama roof with power
tilt/sliding panel
see Tilt/sliding sunroof
SmartKey
Changing the battery .......................80
Changing the programming .............79
Checking the battery .................76, 80
Convenience closing feature ............93
Convenience opening feature ..........93
Display message ............................ 260Important safety notes ....................76
Malfunction ...................................... 82
Starting the engine ........................151
Snow chains ...................................... 176
Socket ................................................ 292
Dashboard ..................................... 293
Rear compartment .........................293
SOS
see mbrace
Spare wheel
Notes/data .................................... 380
Storage location ............................ 325
Stowing .......................................... 326
see Emergency spare wheel
Speedometer
Additional speedometer (on-
board computer) ............................ 220
Segments ...................................... 217
Setting the unit (on-board
computer) ...................................... 229
SPORT handling mode
Activating/deactivating (AMG
vehicles) .......................................... 69
Warning lamp ................................. 266
SRS (Supplemental Restraint
System) Display message ............................ 237
Introduction ..................................... 36
Warning lamp ................................. 267
Warning lamp (function) ................... 36
Standard display (on-board
computer) .......................................... 220
Starting the engine Important safety notes ..................151
Station
see Radio
Steering (display message) .............. 260
Steering wheel Adjusting (electrically) ...................111
Buttons (on-board computer) ......... 217
Cleaning ......................................... 319
Important safety notes ..................111
Memory function (storing
settings) ......................................... 111
Steering wheel heating ..................112
Storing settings (memory
function) ........................................ 115Index15BA 212 USA, CA Edition B 2011; 1; 5, en-USdimargiVersion: 3.0.3.62010-05-20T13:33:46+02:00 - Seite 15
Page 18 of 400
Steering wheel heatingIndicator lamp (Malfunction) ..........112
Steering wheel paddle shifters ........ 159
Stowage compartments Armrest (under) ............................. 275
Glove box ....................................... 274
Stowage space
Center console .............................. 275
Cup holders ................................... 288
Important safety information .........274
Stowage well
Trunk floor (under) .........................285
Submenu (on-board computer)
Convenience .................................. 232
Factory setting ............................... 233
Instrument cluster .........................229
Lights ............................................. 230
Standard display ............................ 220
Vehicle ........................................... 231
Summer opening
see Convenience opening feature
Sun visor ............................................ 289
Supplemental Restraint System see SRS
Surround lighting (on-board
computer) .......................................... 231
Suspension tuning ............................ 192
SETUP (on-board computer) ..........221
Switching off the alarm (ATA) ............ 74
T
Tachometer ........................................ 217
Tailgate Display message ............................ 259
Emergency unlocking .......................91
Limiting the opening angle ...............90
Tail lamps (Display message) ........... 244
Tank content Fuel gauge ....................................... 28
Technical data ................................... 384
E 350 ............................................. 393
E 350 4MATIC ................................ 394
E 350 BlueTEC ............................... 393
E 550 ............................................. 394
E 550 4MATIC ................................ 395
E 63 AMG ...................................... 395
Tires/wheels ................................. 374
TELEAID
Call priority .................................... 299
Display message ............................ 235
Downloading destinations
(COMAND) ..................................... 299
Emergency call .............................. 296
Important safety notes ..................295
Locating a stolen vehicle ...............300
MB info call button ........................298
Remote vehicle locking ..................300
Roadside Assistance button ..........297
Self-test ......................................... 295
System .......................................... 295
Vehicle remote unlocking ..............299
Telephone
Accepting a call ............................. 227
Display message ............................ 260
Menu (on-board computer) ............226
Number from the phone book ........ 227
Redialing ........................................ 227
Rejecting/ending a call .................227
Telephone compartment .................. 275
Telescopic rod (EASY-PACK load-
securing kit) ....................................... 285
Temperature Coolant .......................................... 216
Coolant (on-board computer) ......... 221
Engine oil (on-board computer) ...... 221
Outside temperature ...................... 217
Setting ........................................... 139
Theft deterrent locking system
Immobilizer ...................................... 73
Through-loading ................................ 278
Through-loading feature ................... 278
Tilt/sliding sunroof Opening/closing .............................. 97
Resetting ......................................... 97
Timer (on-board computer) .............. 222
Tiredness assistant see ATTENTION ASSIST
TIREFIT kit .......................................... 327
Tire pressure Calling up (on-board computer) .....357
Checking manually ........................355
Display message ............................ 255
Maximum ....................................... 360
Notes ............................................. 353
Not reached (TIREFIT) ....................33016IndexBA 212 USA, CA Edition B 2011; 1; 5, en-USdimargiVersion: 3.0.3.62010-05-20T13:33:46+02:00 - Seite 16
Page 80 of 400
Rthis equipment must not emit harmful,
electromagnetic radiation.
R this equipment receives electromagnetic
radiation, including radiation which can
trigger unwanted functions.
Any unauthorized change to this equipment
can lead to the user's operating license
being withdrawn.
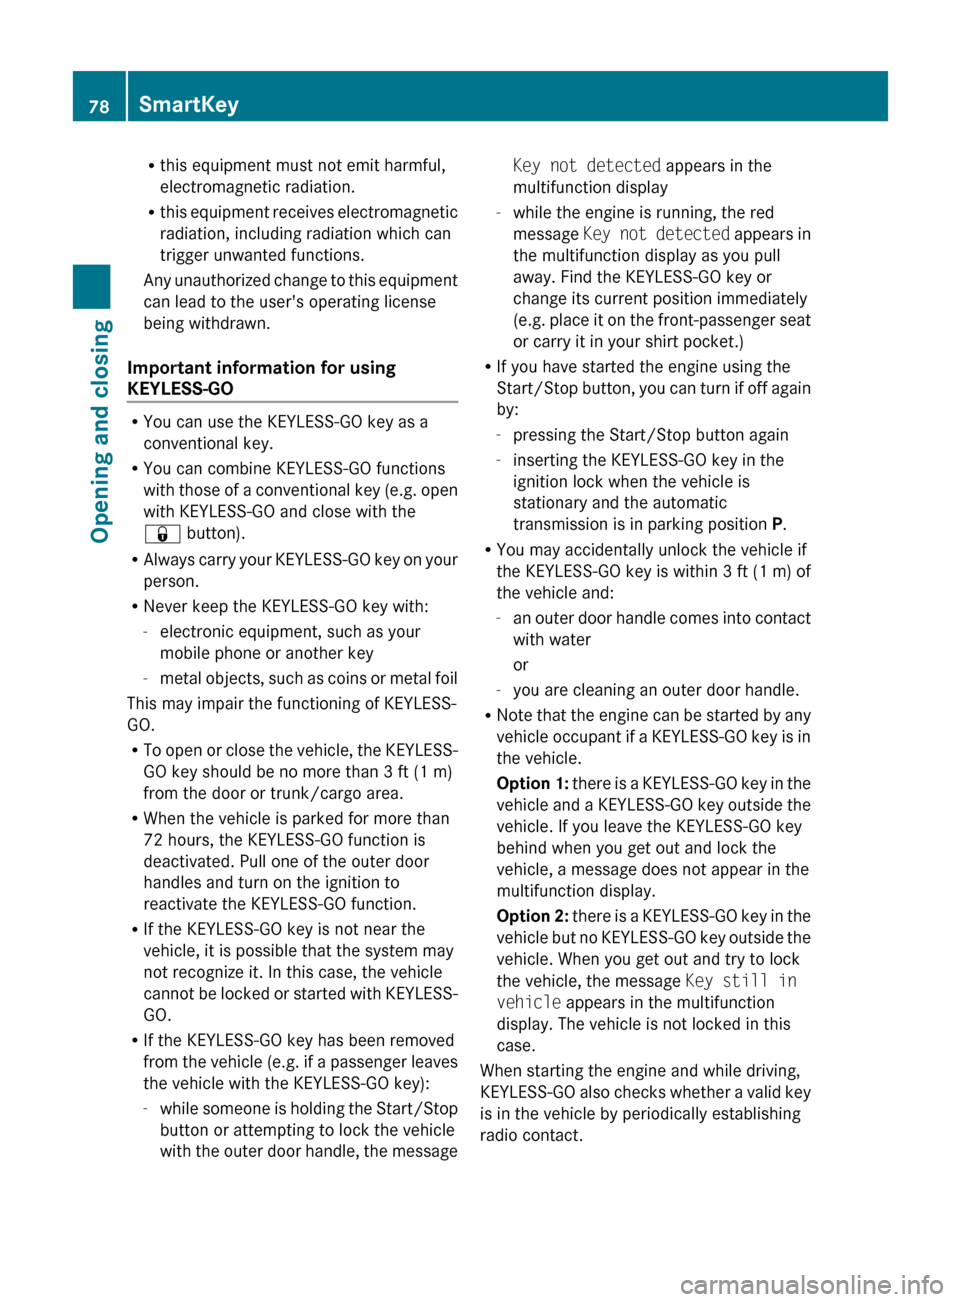
Important information for using
KEYLESS-GO
R You can use the KEYLESS-GO key as a
conventional key.
R You can combine KEYLESS-GO functions
with those of a conventional key (e.g. open
with KEYLESS-GO and close with the
& button).
R Always carry your KEYLESS-GO key on your
person.
R Never keep the KEYLESS-GO key with:
- electronic equipment, such as your
mobile phone or another key
- metal objects, such as coins or metal foil
This may impair the functioning of KEYLESS-
GO.
R To open or close the vehicle, the KEYLESS-
GO key should be no more than 3 ft (1 m)
from the door or trunk/cargo area.
R When the vehicle is parked for more than
72 hours, the KEYLESS-GO function is
deactivated. Pull one of the outer door
handles and turn on the ignition to
reactivate the KEYLESS-GO function.
R If the KEYLESS-GO key is not near the
vehicle, it is possible that the system may
not recognize it. In this case, the vehicle
cannot be locked or started with KEYLESS-
GO.
R If the KEYLESS-GO key has been removed
from the vehicle (e.g. if a passenger leaves
the vehicle with the KEYLESS-GO key):
- while someone is holding the Start/Stop
button or attempting to lock the vehicle
with the outer door handle, the message
Key not detected appears in the
multifunction display
- while the engine is running, the red
message Key not detected appears in
the multifunction display as you pull
away. Find the KEYLESS-GO key or
change its current position immediately
(e.g. place it on the front-passenger seat
or carry it in your shirt pocket.)
R If you have started the engine using the
Start/Stop button, you can turn if off again
by:
- pressing the Start/Stop button again
- inserting the KEYLESS-GO key in the
ignition lock when the vehicle is
stationary and the automatic
transmission is in parking position P.
R You may accidentally unlock the vehicle if
the KEYLESS-GO key is within 3 ft (1 m) of
the vehicle and:
- an outer door handle comes into contact
with water
or
- you are cleaning an outer door handle.
R Note that the engine can be started by any
vehicle occupant if a KEYLESS-GO key is in
the vehicle.
Option 1: there is a KEYLESS-GO key in the
vehicle and a KEYLESS-GO key outside the
vehicle. If you leave the KEYLESS-GO key
behind when you get out and lock the
vehicle, a message does not appear in the
multifunction display.
Option 2: there is a KEYLESS-GO key in the
vehicle but no KEYLESS-GO key outside the
vehicle. When you get out and try to lock
the vehicle, the message Key still in
vehicle appears in the multifunction
display. The vehicle is not locked in this
case.
When starting the engine and while driving,
KEYLESS-GO also checks whether a valid key
is in the vehicle by periodically establishing
radio contact.78SmartKeyOpening and closing
BA 212 USA, CA Edition B 2011; 1; 5, en-USdimargiVersion: 3.0.3.62010-05-20T13:33:46+02:00 - Seite 78
Page 151 of 400
GWarning
It is dangerous to shift the automatic
transmission out of parking position P or
neutral position N if the engine speed is
higher than idle speed. If your foot is not firmly
on the brake pedal, the vehicle could
accelerate quickly forward or in reverse. You
could lose control of the vehicle and hit
someone or something. Only shift into gear
when the engine is idling normally and when
your right foot is firmly on the brake pedal.
! Warm up the engine quickly. Do not use
the engine's full performance until it has
reached operating temperature.
Only shift the automatic transmission to
the desired drive position when the vehicle
is stationary.
Where possible, avoid spinning the drive
wheels when pulling away on slippery
roads. You could otherwise damage the
drive train.
! AMG vehicles: at low engine oil
temperatures (below 68 ‡ (+20 †), the
maximum engine speed is restricted in
order to protect the engine. To protect the
engine and maintain smooth engine
operation, avoid driving at full throttle when
the engine is cold.
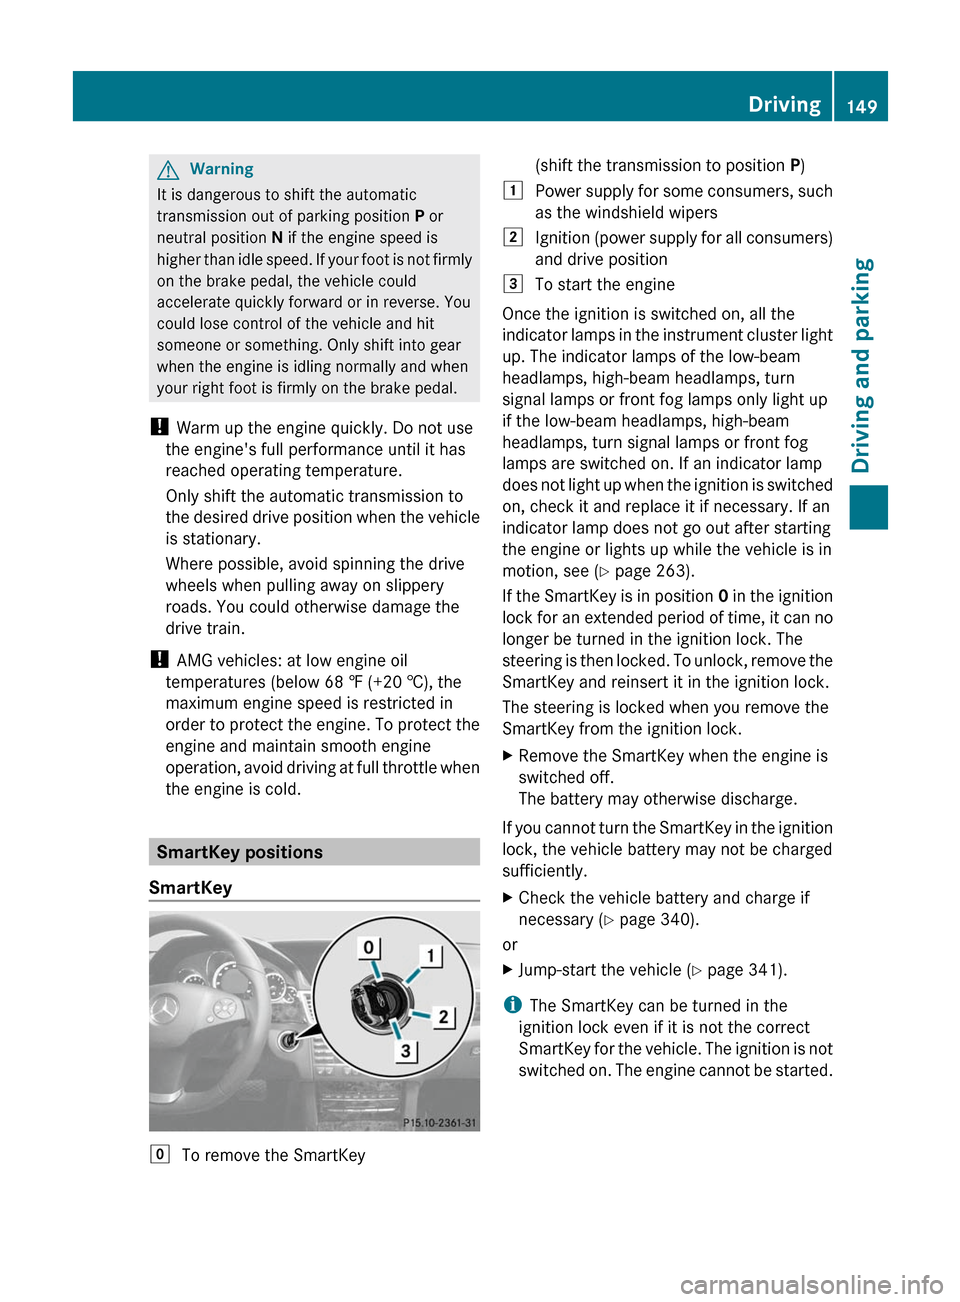
SmartKey positions
SmartKey
gTo remove the SmartKey(shift the transmission to position P)1Power supply for some consumers, such
as the windshield wipers2Ignition (power supply for all consumers)
and drive position3To start the engine
Once the ignition is switched on, all the
indicator lamps in the instrument cluster light
up. The indicator lamps of the low-beam
headlamps, high-beam headlamps, turn
signal lamps or front fog lamps only light up
if the low-beam headlamps, high-beam
headlamps, turn signal lamps or front fog
lamps are switched on. If an indicator lamp
does not light up when the ignition is switched
on, check it and replace it if necessary. If an
indicator lamp does not go out after starting
the engine or lights up while the vehicle is in
motion, see ( Y page 263).
If the SmartKey is in position 0 in the ignition
lock for an extended period of time, it can no
longer be turned in the ignition lock. The
steering is then locked. To unlock, remove the
SmartKey and reinsert it in the ignition lock.
The steering is locked when you remove the
SmartKey from the ignition lock.
XRemove the SmartKey when the engine is
switched off.
The battery may otherwise discharge.
If you cannot turn the SmartKey in the ignition
lock, the vehicle battery may not be charged
sufficiently.
XCheck the vehicle battery and charge if
necessary ( Y page 340).
or
XJump-start the vehicle ( Y page 341).
i
The SmartKey can be turned in the
ignition lock even if it is not the correct
SmartKey for the vehicle. The ignition is not
switched on. The engine cannot be started.
Driving149Driving and parkingBA 212 USA, CA Edition B 2011; 1; 5, en-USdimargiVersion: 3.0.3.62010-05-20T13:33:46+02:00 - Seite 149Z
Page 165 of 400
GWarning!
Do not fill diesel tanks with gasoline. Do not
mix diesel fuel with gasoline. Otherwise the
fuel system and engine could be damaged. In
addition, the vehicle could catch fire.
! Do not use gasoline to refuel vehicles with
a diesel engine. Do not use diesel to refuel
vehicles with a gasoline engine. Even small
amounts of the wrong fuel result in damage
to the fuel system and engine.
! Do not switch on the ignition if you
accidentally refuel with the wrong fuel.
Otherwise, the fuel will enter the fuel lines.
Notify a qualified specialist workshop and
have the fuel tank and fuel lines drained
completely.
Gasoline
Fuel grade
! You should only refuel with unleaded
premium-grade gasoline as this avoids
damaging the catalytic converter.
If engine running problems are apparent,
have the cause checked immediately and
repaired. Excess unburned fuel can
otherwise enter the catalytic converter,
leading to overheating and possibly
causing a fire.
i Only refuel with unleaded premium-grade
gasoline with a specified minimum octane
number of 91 (average value of 96 RON/
86 MON).
Usually you will find information about the
fuel grade on the pump. If you cannot find
the label on the gasoline pump, ask the gas
station staff.
You can find further information under
"Fuel" ( Y page 388), by consulting an
authorized Mercedes-Benz Center or
visiting http://www.mbusa.com (USA
only).
Diesel
Fuel grade
! Only refuel with ULTRA-LOW SULFUR
DIESEL FUEL (ULSD, 15 ppm SULFUR
MAXIMUM). Using other diesel fuels could
result in increased wear and damage to the
engine and/or exhaust system.
Never refuel with marine diesel or heating
oil.
Do not mix these fuels with diesel fuels and
do not use any special additives, as this
may result in damage.
! Use a filter when adding fuel from a fuel
can. Otherwise, the fuel lines and/or the
fuel injection system could be blocked by
particles from the fuel can.
i Refuel only with ULTRA-LOW SULFUR
HIGHWAY DIESEL FUEL (ULSD, 15 ppm
SULFUR MAXIMUM).
Usually you will find information about the
fuel grade on the pump. If you cannot find
the label on the gasoline pump, ask the gas
station staff.
You can find further information under
"Fuel" ( Y page 388), by consulting an
authorized Mercedes-Benz Center or by
visiting http://www.mbusa.com (USA
only).
Low outside temperatures
! Do not use gasoline to refuel vehicles with
a diesel engine. Never mix diesel with
gasoline or kerosene, as this may result in
damage to the engine or fuel system.
Diesel fuel with improved cold flow properties
is available during the winter months. Further
information on fuel properties can be
obtained from oil companies, e.g. at filling
stations.
Refueling163Driving and parkingBA 212 USA, CA Edition B 2011; 1; 5, en-USdimargiVersion: 3.0.3.62010-05-20T13:33:46+02:00 - Seite 163Z
Page 250 of 400
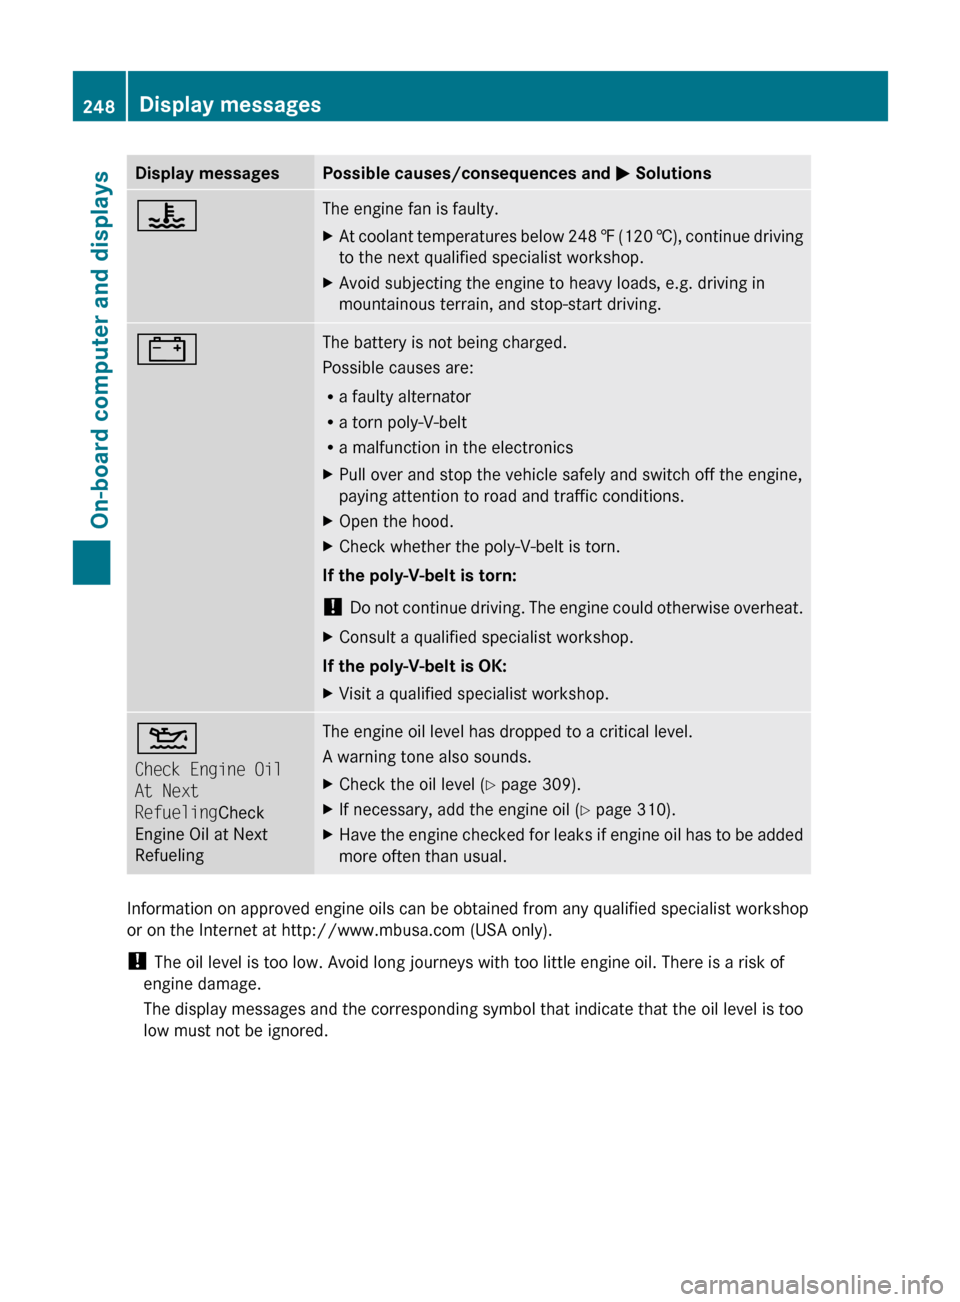
Display messagesPossible causes/consequences and M Solutions?The engine fan is faulty.XAt coolant temperatures below 248 ‡ (120 †), continue driving
to the next qualified specialist workshop.XAvoid subjecting the engine to heavy loads, e.g. driving in
mountainous terrain, and stop-start driving.#The battery is not being charged.
Possible causes are:
R a faulty alternator
R a torn poly-V-belt
R a malfunction in the electronicsXPull over and stop the vehicle safely and switch off the engine,
paying attention to road and traffic conditions.XOpen the hood.XCheck whether the poly-V-belt is torn.
If the poly-V-belt is torn:
! Do not continue driving. The engine could otherwise overheat.
XConsult a qualified specialist workshop.
If the poly-V-belt is OK:
XVisit a qualified specialist workshop.4
Check Engine Oil
At Next
Refueling Check
Engine Oil at Next
RefuelingThe engine oil level has dropped to a critical level.
A warning tone also sounds.XCheck the oil level ( Y page 309).XIf necessary, add the engine oil ( Y page 310).XHave the engine checked for leaks if engine oil has to be added
more often than usual.
Information on approved engine oils can be obtained from any qualified specialist workshop
or on the Internet at http://www.mbusa.com (USA only).
! The oil level is too low. Avoid long journeys with too little engine oil. There is a risk of
engine damage.
The display messages and the corresponding symbol that indicate that the oil level is too
low must not be ignored.
248Display messagesOn-board computer and displays
BA 212 USA, CA Edition B 2011; 1; 5, en-USdimargiVersion: 3.0.3.62010-05-20T13:33:46+02:00 - Seite 248
Page 311 of 400
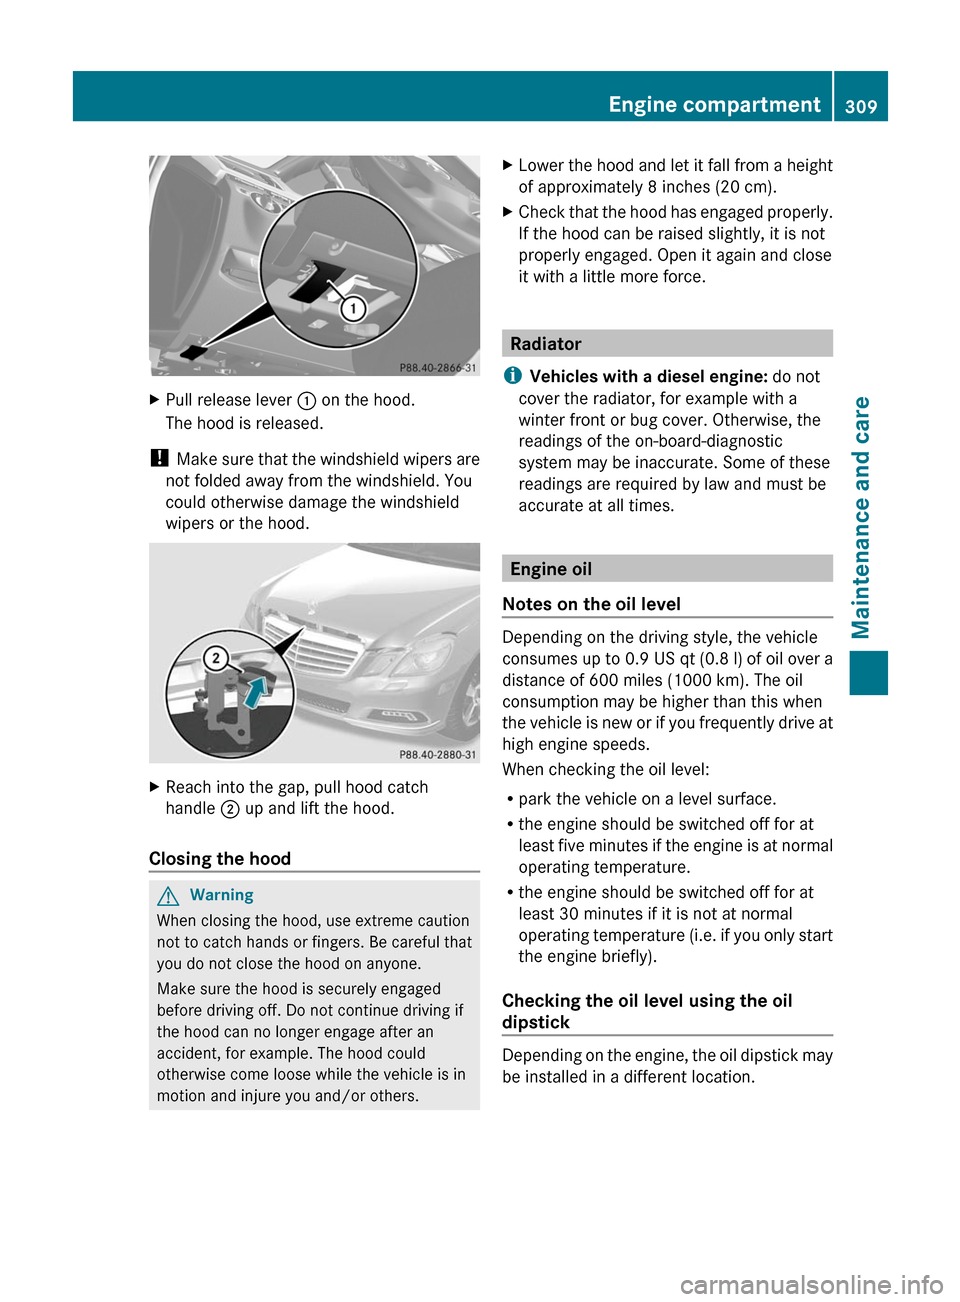
XPull release lever : on the hood.
The hood is released.
! Make sure that the windshield wipers are
not folded away from the windshield. You
could otherwise damage the windshield
wipers or the hood.
XReach into the gap, pull hood catch
handle ; up and lift the hood.
Closing the hood
GWarning
When closing the hood, use extreme caution
not to catch hands or fingers. Be careful that
you do not close the hood on anyone.
Make sure the hood is securely engaged
before driving off. Do not continue driving if
the hood can no longer engage after an
accident, for example. The hood could
otherwise come loose while the vehicle is in
motion and injure you and/or others.
XLower the hood and let it fall from a height
of approximately 8 inches (20 cm).
XCheck that the hood has engaged properly.
If the hood can be raised slightly, it is not
properly engaged. Open it again and close
it with a little more force.
Radiator
iVehicles with a diesel engine: do not
cover the radiator, for example with a
winter front or bug cover. Otherwise, the
readings of the on-board-diagnostic
system may be inaccurate. Some of these
readings are required by law and must be
accurate at all times.
Engine oil
Notes on the oil level
Depending on the driving style, the vehicle
consumes up to 0.9 US qt (0.8 l) of oil over a
distance of 600 miles (1000 km). The oil
consumption may be higher than this when
the vehicle is new or if you frequently drive at
high engine speeds.
When checking the oil level:
Rpark the vehicle on a level surface.
Rthe engine should be switched off for at
least five minutes if the engine is at normal
operating temperature.
Rthe engine should be switched off for at
least 30 minutes if it is not at normal
operating temperature (i.e. if you only start
the engine briefly).
Checking the oil level using the oil
dipstick
Depending on the engine, the oil dipstick may
be installed in a different location.
Engine compartment309Maintenance and careBA 212 USA, CA Edition B 2011; 1; 5, en-USdimargiVersion: 3.0.3.62010-05-20T13:33:46+02:00 - Seite 309Z
Page 313 of 400
dipstick is (depending on the engine)
approximately 1.6 to 2.1 US qt. (1.5 to 2 l).
! Do not add too much oil. If the oil level is
above the MAX mark on the dipstick, too
much oil has been added. This can lead to
damage to the engine or the catalytic
converter. Have excess oil siphoned off.
Further information on engine oil
(Y page 391).
XReplace cap : on the filler neck and
tighten clockwise.
Ensure that the cap locks into place
securely.
Checking and adding other service
products
Checking the coolant level
Only check the coolant level when the vehicle
is on a level surface and the engine has cooled
down.
XTurn the SmartKey to position
2(Y page 149) in the ignition lock.
On vehicles with KEYLESS-GO, press the
Start/Stop button twice (Y page 150).
XCheck the coolant temperature display in
the instrument cluster.
The coolant temperature must be below
158 ‡ (70 †).
GWarning
In order to avoid any potentially serious burns:
Ruse extreme caution when opening the
hood if there are any signs of steam or
coolant leaking from the cooling system, or
if the coolant temperature display indicates
that the coolant is overheated.
Rdo not remove the pressure cap on the
coolant reservoir if the coolant temperature
is above 158 ‡ (70 †). Allow the engine to
cool down before removing the cap. The
coolant reservoir contains hot fluid and is
under pressure.
Rusing a rag, slowly turn the cap
approximately 1/2 turn to relieve excess
pressure. If opened immediately, scalding
hot fluid and steam will be blown out under
pressure.
Rdo not spill antifreeze on hot engine parts.
Antifreeze contains ethylene glycol which
may burn if it comes into contact with hot
engine parts.
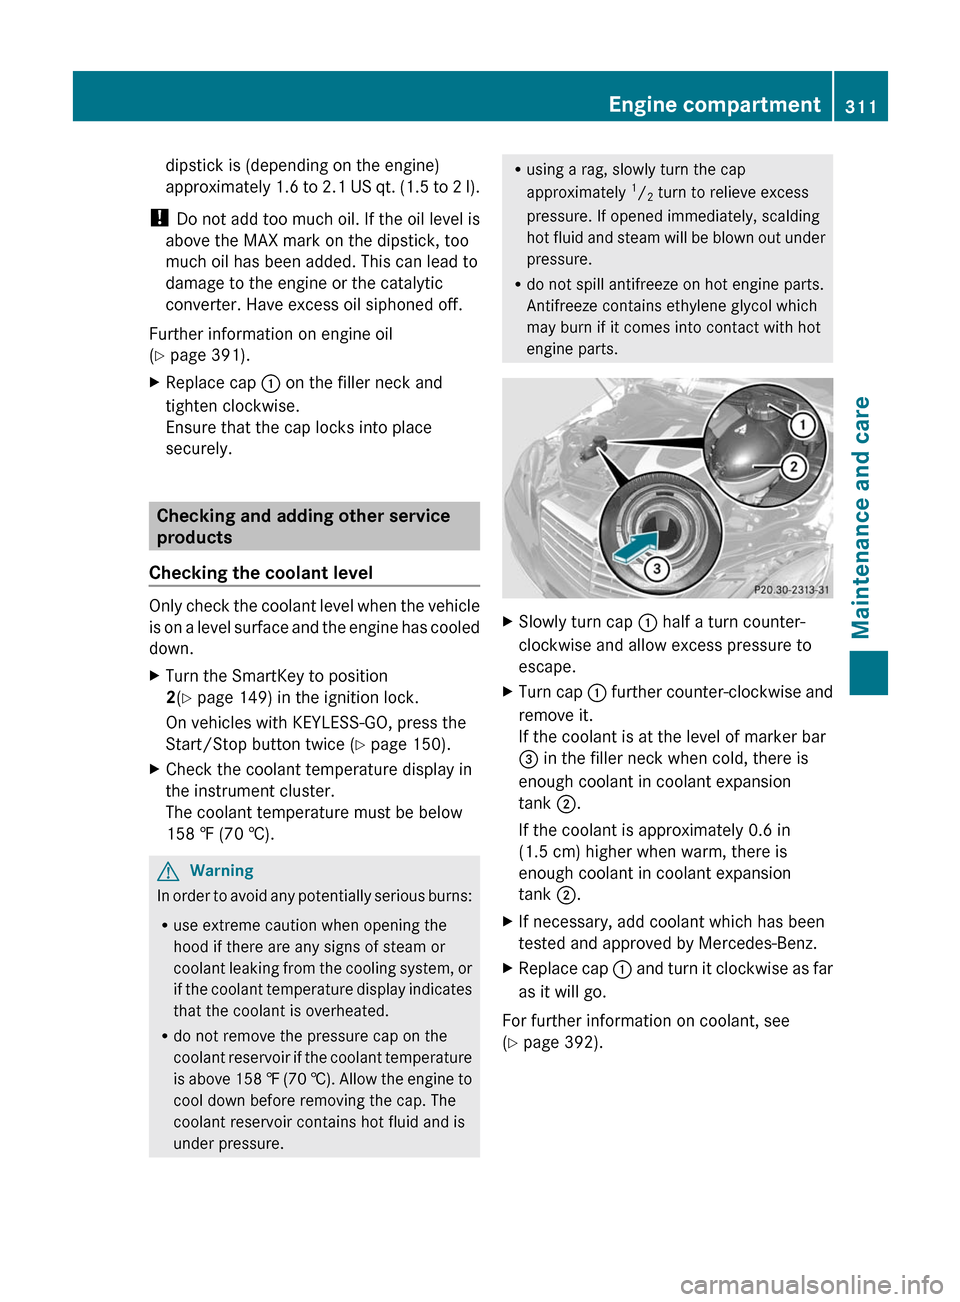
XSlowly turn cap : half a turn counter-
clockwise and allow excess pressure to
escape.
XTurn cap : further counter-clockwise and
remove it.
If the coolant is at the level of marker bar
= in the filler neck when cold, there is
enough coolant in coolant expansion
tank ;.
If the coolant is approximately 0.6 in
(1.5 cm) higher when warm, there is
enough coolant in coolant expansion
tank ;.
XIf necessary, add coolant which has been
tested and approved by Mercedes-Benz.
XReplace cap : and turn it clockwise as far
as it will go.
For further information on coolant, see
(Y page 392).
Engine compartment311Maintenance and careBA 212 USA, CA Edition B 2011; 1; 5, en-USdimargiVersion: 3.0.3.62010-05-20T13:33:46+02:00 - Seite 311Z
Page 354 of 400
Depending upon the weather and/or road
surface (conditions), the tire traction varies
widely.
Do not use tires until they are excessively
worn as the tire traction on wet road surfaces
decreases significantly when the tread depth
is less than 1
/ 8 in (3 mm).
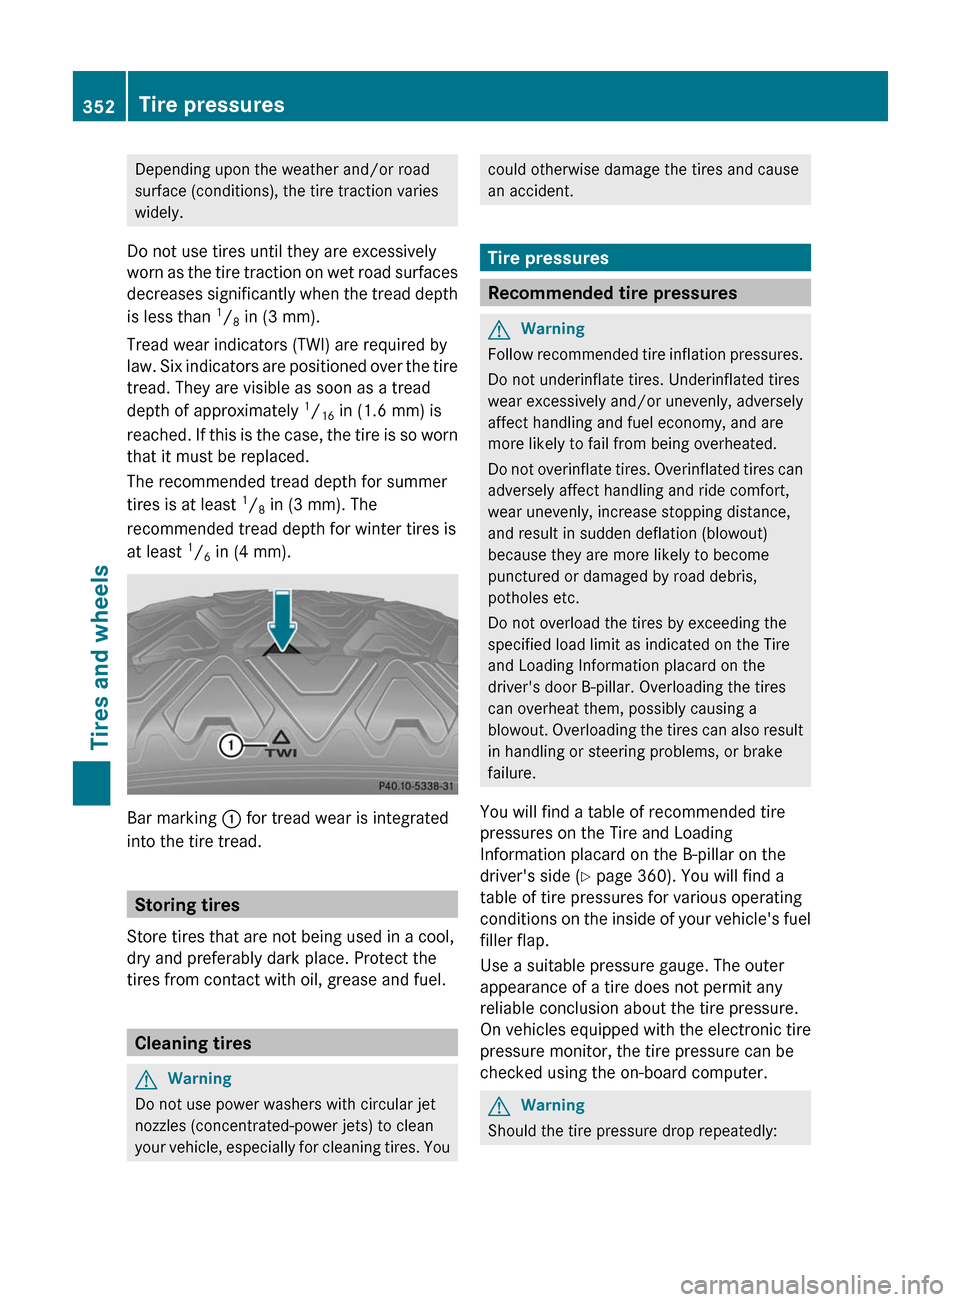
Tread wear indicators (TWI) are required by
law. Six indicators are positioned over the tire
tread. They are visible as soon as a tread
depth of approximately 1
/ 16 in (1.6 mm) is
reached. If this is the case, the tire is so worn
that it must be replaced.
The recommended tread depth for summer
tires is at least 1
/ 8 in (3 mm). The
recommended tread depth for winter tires is
at least 1
/ 6 in (4 mm).
Bar marking
: for tread wear is integrated
into the tire tread.
Storing tires
Store tires that are not being used in a cool,
dry and preferably dark place. Protect the
tires from contact with oil, grease and fuel.
Cleaning tires
GWarning
Do not use power washers with circular jet
nozzles (concentrated-power jets) to clean
your vehicle, especially for cleaning tires. You
could otherwise damage the tires and cause
an accident.
Tire pressures
Recommended tire pressures
GWarning
Follow recommended tire inflation pressures.
Do not underinflate tires. Underinflated tires
wear excessively and/or unevenly, adversely
affect handling and fuel economy, and are
more likely to fail from being overheated.
Do not overinflate tires. Overinflated tires can
adversely affect handling and ride comfort,
wear unevenly, increase stopping distance,
and result in sudden deflation (blowout)
because they are more likely to become
punctured or damaged by road debris,
potholes etc.
Do not overload the tires by exceeding the
specified load limit as indicated on the Tire
and Loading Information placard on the
driver's door B-pillar. Overloading the tires
can overheat them, possibly causing a
blowout. Overloading the tires can also result
in handling or steering problems, or brake
failure.
You will find a table of recommended tire
pressures on the Tire and Loading
Information placard on the B-pillar on the
driver's side ( Y page 360). You will find a
table of tire pressures for various operating
conditions on the inside of your vehicle's fuel
filler flap.
Use a suitable pressure gauge. The outer
appearance of a tire does not permit any
reliable conclusion about the tire pressure.
On vehicles equipped with the electronic tire
pressure monitor, the tire pressure can be
checked using the on-board computer.
GWarning
Should the tire pressure drop repeatedly:
352Tire pressuresTires and wheels
BA 212 USA, CA Edition B 2011; 1; 5, en-USdimargiVersion: 3.0.3.62010-05-20T13:33:46+02:00 - Seite 352