manual transmission MERCEDES-BENZ E320 WAGON 2003 S210 Owner's Manual
[x] Cancel search | Manufacturer: MERCEDES-BENZ, Model Year: 2003, Model line: E320 WAGON, Model: MERCEDES-BENZ E320 WAGON 2003 S210Pages: 354, PDF Size: 13.99 MB
Page 7 of 354
4 Contents
BRAKE FLUID .............................254
PARKING BRAKE .......................255
ENGINE FAN ...............................255
COOLANT (coolant level) ..........256
COOLANT TEMP. ........................257
LIGHTING SYSTEM ....................258
LIGHT SENSOR ...........................259
REMOVE KEY .............................259
STEERING GEAR OIL .................260
ENGINE OIL LEVEL ................... 261
WASHER FLUID ..........................262
ELEC. STABIL. PROG. (Electronic
stability program) ......................263
TELE AID .....................................263
Practical hintsFirst aid kit .....................................266
Fuses ................................................267
Electrical outlet ..............................269
Hood .................................................270
Checking engine oil level .............273
Automatic transmission fluid
level ............................................. 274Coolant level ....................................274
Adding coolant ........................... 275
Windshield and headlamp washer
system .........................................276
Windshield and headlamp washer
fluid mixing ratio .......................276
Spare wheel, vehicle tools, storage
compartment ............................. 277
Vehicle jack .................................... 278
Wheels ............................................ 279
Tire replacement ....................... 279
Rotating wheels ......................... 280
Spare wheel .................................... 281
Spare wheel bolts ...................... 281
Changing wheels ........................... 282
Tire inflation pressure ................. 287
Battery ............................................. 289
Jump starting ................................. 291
Towing the vehicle ........................ 294
Transmission selector lever,
manually unlocking ................. 296
Exterior lamps ............................... 297
Headlamp assembly .................. 298
Taillamp assemblies .................. 301Changing batteries in the
electronic key ............................304
Synchronizing remote control .306
Emergency engine shut-down .....306
Emergency operation of sliding /
pop-up roof .................................307
Manual release for fuel
filler flap ....................................308
Replacing wiper blade insert .......308
Roof rack ..........................................311
Vehicle careCleaning and care of the vehicle . 314
Power washer .............................. 315
Tar stains ..................................... 315
Paintwork, painted body
components ................................. 315
Engine cleaning .......................... 316
Vehicle washing ......................... 316
Ornamental moldings ................ 316
Headlamps, taillamps, turn signal
lenses ........................................... 316
Cleaning the parktronic system
sensors ......................................... 317
Page 197 of 354
194 Tele Aid
Te ch n i c a l
data Instruments
and controlsOperationDrivingInstrument
cluster displayPractical hints Car care Index
If the indicator lamp in the Information button¡ is
illuminated continuously and there was no voice
connection to the Response Center established, then the
Tele Aid system could not initiate an Information call
(e.g. the relevant cellular phone network is not
available). The message “INFO – CALL FAILED” appears
in the multifunction display.
Information calls can be terminated using the
ìbutton on the multifunction steering wheel.
Important!
If the indicator lamps do not start flashing after
pressing one of the buttons or remain illuminated (in
red) at any time, the Tele Aid system has detected a fault
or the service is not currently active, and may not
initiate a call. Visit your Mercedes-Benz Center and
have the system checked or contact the Response Center
at 1-800-756-9018 (in the USA) or 1-888-923-8367 (in
Canada) as soon as possible.Upgrade Signals
Tele Aid system processes calls using the following
priority.
•Automatic emergency – First priority
•Manual emergency – Second priority
•Roadside assistance – Third priority
•Information – Fourth priority
Should a higher priority call be initiated while you are
connected, an upgrade (alternating) tone will be heard,
and the appropriate indicator lamp will flash. If certain
information such as vehicle identification number or
customer information is not available, the operator may
need to retransmit. During this time you will hear a
beep and voice contact will be interrupted. Voice contact
will resume once the retransmission is completed. Once
a call is concluded, a beep will be heard and the
appropriate indicator lamp will stop flashing. The
COMAND system operation will resume (only vehicles
with COMAND).
Page 209 of 354
206 Automatic transmission
Te ch n i c a l
data Instruments
and controlsOperationDrivingInstrument
cluster displayPractical hints Car care Index
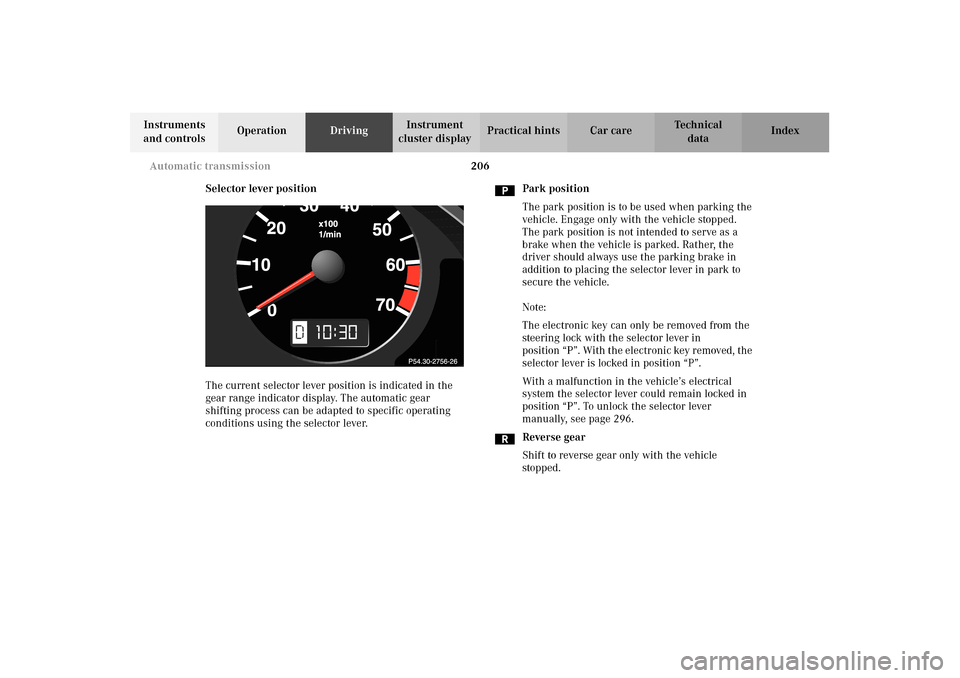
Selector lever position
The current selector lever position is indicated in the
gear range indicator display. The automatic gear
shifting process can be adapted to specific operating
conditions using the selector lever.Park position
The park position is to be used when parking the
vehicle. Engage only with the vehicle stopped.
The park position is not intended to serve as a
brake when the vehicle is parked. Rather, the
driver should always use the parking brake in
addition to placing the selector lever in park to
secure the vehicle.
Note:
The electronic key can only be removed from the
steering lock with the selector lever in
position “P”. With the electronic key removed, the
selector lever is locked in position “P”.
With a malfunction in the vehicle’s electrical
system the selector lever could remain locked in
position “P”. To unlock the selector lever
manually, see page 296.
Reverse gear
Shift to reverse gear only with the vehicle
stopped.
10
Page 214 of 354
211 Automatic transmission
Te ch n i c a l
data Instruments
and controlsOperationDrivingInstrument
cluster displayPractical hints Car care Index Caution!
Never change the program mode when the selector lever
is out of position “P”. It could result in a change of
driving characteristics for which you may not be
prepared.
Important!
Always be certain of the program mode selected since
the vehicle driving characteristics change with the
selection of the program mode.
Dependent on the program mode selector switch
position “S” or “W” and the gear selector lever in
position “R”, the ratio of power transmission changes.
Emergency operation
(Limp home mode)
If vehicle acceleration worsens or the transmission no
longer shifts, the transmission is most likely operating
in Limp Home Mode which engages when there is a
malfunction of the transmission. This condition may be
accompanied by the “CHECK ENGINE” malfunction
indicator lamp in the instrument cluster coming on.In this mode only the 2nd gear or reverse gear can be
activated.
To engage 2nd gear or reverse:
1. Stop the vehicle.
2. Move selector lever to position “P”.
3. Turn off the engine.
4. Wait approximately 10 seconds.
5. Restart the engine.
6. Move selector lever to position “D” (for 2nd gear), or
move selector lever to position “R” (for reverse gear).
Have the transmission checked at your authorized
Mercedes-Benz Center as soon as possible.
With a malfunction in the vehicles electrical system the
selector lever my be locked in position “P”. To unlock
the selector lever manually, see page 296.
Page 268 of 354
265 Contents – Practical hints
Te ch n i c a l
data Instruments
and controlsOperation DrivingInstrument
cluster displayPractical hintsCar care Index
Practical hintsFirst aid kit .....................................266
Fuses ................................................267
Electrical outlet ..............................269
Hood .................................................270
Checking engine oil level .............273
Automatic transmission fluid
level ............................................. 274
Coolant level ................................... 274
Adding coolant ...........................275
Windshield and headlamp washer
system ......................................... 276
Windshield and headlamp washer
fluid mixing ratio ....................... 276Spare wheel, vehicle tools, storage
compartment ............................. 277
Vehicle jack .................................... 278
Wheels ............................................ 279
Tire replacement ....................... 279
Rotating wheels ......................... 280
Spare wheel .................................... 281
Spare wheel bolts ...................... 281
Changing wheels ........................... 282
Tire inflation pressure ................. 287
Battery ............................................. 289
Jump starting ................................. 291
Towing the vehicle ........................ 294
Transmission selector lever,
manually unlocking ................. 296Exterior lamps ................................297
Headlamp assembly ...................298
Taillamp assemblies .................. 301
Changing batteries in the
electronic key ............................304
Synchronizing remote control .306
Emergency engine shut-down .....306
Emergency operation of sliding /
pop-up roof .................................307
Manual release for fuel
filler flap ....................................308
Replacing wiper blade insert .......308
Roof rack ..........................................311
Page 299 of 354
296 Towing the vehicle
Te ch n i c a l
data Instruments
and controlsOperation DrivingInstrument
cluster displayPractical hintsCar care Index
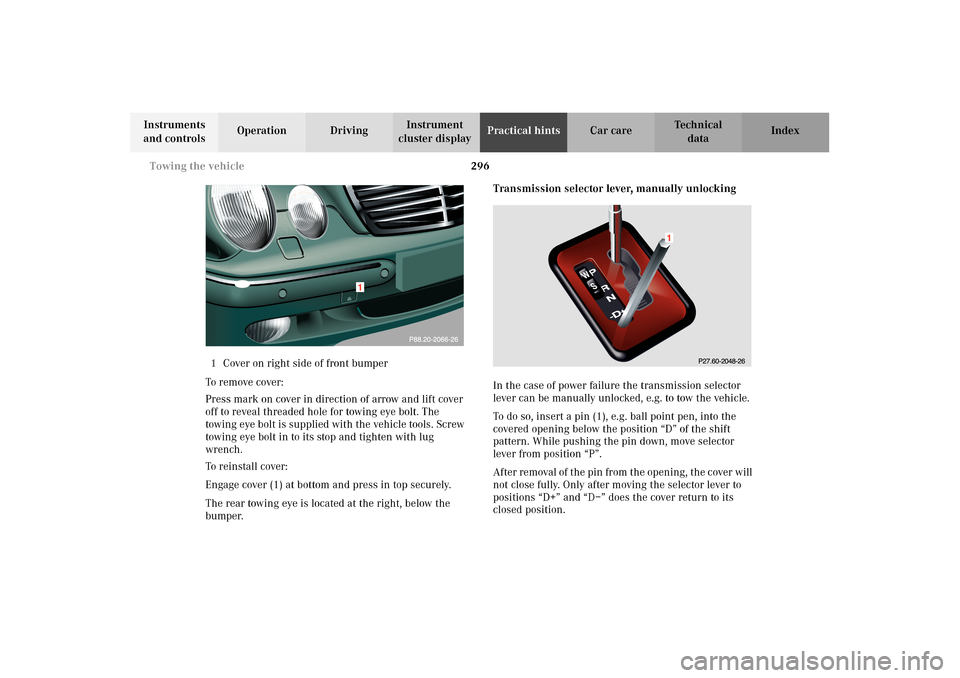
1Cover on right side of front bumper
To remove cover:
Press mark on cover in direction of arrow and lift cover
off to reveal threaded hole for towing eye bolt. The
towing eye bolt is supplied with the vehicle tools. Screw
towing eye bolt in to its stop and tighten with lug
wrench.
To reinstall cover:
Engage cover (1) at bottom and press in top securely.
The rear towing eye is located at the right, below the
bumper.Transmission selector lever, manually unlocking
In the case of power failure the transmission selector
lever can be manually unlocked, e.g. to tow the vehicle.
To do so, insert a pin (1), e.g. ball point pen, into the
covered opening below the position “D” of the shift
pattern. While pushing the pin down, move selector
lever from position “P”.
After removal of the pin from the opening, the cover will
not close fully. Only after moving the selector lever to
positions “D+” and “D–” does the cover return to its
closed position.
Page 340 of 354
337 Index
Te ch n i c a l
data Instruments
and controlsOperation DrivingInstrument
cluster displayPractical hints Car careIndex Economy ..................................................................... 129
Front center console compartment ventilation .... 133
Rear passenger compartment adjustable
air outlet ................................................................ 134
Rear window defroster ............................................. 130
Residual engine heat utilization (REST) ............... 132
Special settings ......................................................... 129
Automatic transmission ...............................................203
Emergency operation ............................................... 211
Fluid level ................................................................... 274
Program mode selector switch ............................... 210
Selector lever position ..............................................206
Transmission selector lever, manually
unlocking .............................................................. 296
BBabySmart
TM airbag deactivation system ..................... 65
Self-test ......................................................................... 65
BAS (Brake assist system) ............................................ 225
Malfunction indicator lamp ..................................... 247
Battery .............................................................................289
Battery recycling ....................................................... 290
BATTERY / ALTERNATOR - malfunction and
warning messages ....................................................252
Block heater .................................................................... 221BRAKE ASSIST - malfunction and warning
messages ................................................................... 253
Brake assist system (BAS) ........................................... 225
Malfunction indicator lamp .................................... 247
Brake fluid ..................................................................... 330
BRAKE FLUID - malfunction and warning
messages ................................................................... 254
BRAKE LINING WEAR - malfunction and warning
messages ................................................................... 254
Brake pad wear .............................................................. 254
Brake warning lamp ..................................................... 245
Brake fluid low ......................................................... 245
Brakes .................................................... 214, 225, 227, 230
Bulbs
Replacing bulbs ........................................................ 297
CCapacities
Fuels, coolants, lubricants etc. .............................. 328
Cargo tie-down rings ..................................................... 178
Catalytic converter ......................................................... 198
CD changer ...................................................................... 148
Audio systems ..............................................................97
Cellular telephone .......................................................... 179
Center console .................................................................. 20
Page 349 of 354
346 Index
Te ch n i c a l
data Instruments
and controlsOperation DrivingInstrument
cluster displayPractical hints Car careIndex
TELE AID - malfunction and warning messages ...... 263
Telephone ........................................................................ 100
General notes ............................................................. 186
Incoming call ............................................................. 104
Redialing .................................................................... 102
Telephone book ......................................................... 100
Telephones and two-way radios ................................... 186
The first 1 000 miles (1 500 km) ................................ 187
Tires ................................................................................. 216
Driving instructions ................................................. 216
Rims and tires ...........................................................326
Rotating wheels ......................................................... 280
Tire inflation pressure ............................................. 287
Tire replacement ....................................................... 279
Tire speed rating ....................................................... 218
Tire traction ............................................................... 218
Winter driving instructions .................................... 219
Tool kit
Vehicle tools ............................................................... 277
Tow-away alarm ................................................................ 41
Towing the vehicle ......................................................... 294
Transmission selector lever, manually unlocking .... 296
Traveling abroad ............................................................ 221
Trip computer ................................................................. 106
Trip odometer ................................................................... 91
Turn signal failure ......................................................... 122Turn signals ....................................................................122
VVanity mirrors ................................................................ 161
Vehicle jack .................................................................... 278
Vehicle tools ................................................................... 277
Ventilated seats ................................................................54WWa r n i n g l a m p s
Indicator lamps in the instrument cluster .............. 88
Warranty Coverage ....................................................... 322
WASHER FLUID - malfunction and warning
messages ................................................................... 262
What you should know at the gas station ................. 239
Wheels ............................................................................ 279
Changing ................................................................... 282
Light alloy wheels ..................................................... 318
Rims and tires .......................................................... 326
Rotating ..................................................................... 280
Spare wheel ................................................................ 281
Where to find it ................................................................ 13