sd card MERCEDES-BENZ E350 2010 W212 Owner's Manual
[x] Cancel search | Manufacturer: MERCEDES-BENZ, Model Year: 2010, Model line: E350, Model: MERCEDES-BENZ E350 2010 W212Pages: 372, PDF Size: 8.55 MB
Page 13 of 372
Rear ............................................... 104
Rear reading lamps ........................104
Interior rear view mirror ..................... 94
Auto-dimming rear view mirrors ....... 95
Interior storage spaces
see Storage compartments
Intermittent wiping ........................... 104
Rain sensor .................................... 104
IR emitter
Replacing bulbs ............................. 319
ISOFIX (Child seat anchors –
LATCH-type) see Children in the vehicle
J
Jack ..................................................... 270
Jump starting ..................................... 338
K
Key, Mechanical
Loss of ............................................. 79
Replacing ......................................... 80
Unlocking/locking manually ..........314
Valet locking .................................... 85
Key, SmartKey
Battery check lamp ..........................79
Checking batteries ...........................79
Factory setting ........................... 77, 79
Global locking (KEYLESS-
GO) .................................................. 79
Global locking (SmartKey) ................ 77
Global unlocking (KEYLESS-
GO) .................................................. 79
Global unlocking
(SmartKey) ....................................... 77
Important notes on KEYLESS-GO .....78
Locking/unlocking ........................... 76
Loss of ............................................. 79
Messages in the multifunction
display ........................................... 293
Opening, trunk ................................. 82
Opening and closing the power
tilt/sliding sunroof or the
panorama roof ............................... 107
Opening and closing the windows . 107
Remote control ................................ 76
Replacing ......................................... 80
Replacing batteries ........................317
Restoring to factory setting .......77, 79
Selective setting ........................77, 79
Starter switch positions ...................85
KEYLESS-GO
Starter switch positions ...................86
Kickdown ........................................... 119
Kickdown (manual shift program) ... 124
Kilopascal (air pressure unit) ........... 250
Knee bag .............................................. 40
L
Labels
Certification ................................... 346
Emission control information .........347
Tire and Loading Information
placard ........................................... 237
Tire inflation pressure ....................230
Lamps, exterior
Exterior lamp switch ........................97
Front .............................................. 319
Messages in the multifunction
display ........................................... 299
Switching on/off .............................. 97
Lamps, indicator and warning
ABS .......................................... 29, 305
Adaptive Highbeam Assist .............100
Brakes ........................................... 305
Coolant .......................................... 311
Distance warning lamp ..........151, 309
Engine malfunction ........................310
ESC .......................................... 29, 309
ESC OFF ........................................ 308
Fog lamps ........................................ 99
Front passenger front air bag off
(Canada only) .......................... 46, 313
Front passenger front air bag off
(USA only) ................................ 43, 314
Fuel tank reserve ........................... 310
High-beam headlamps .............29, 100
Instrument cluster .........................304
Low-beam headlamps ................30, 98
Low tire pressure/TPMS
malfunction telltale ........................312
Seat belt telltale ................29, 52, 307
Index11212_AKB; 2; 41, en-USd2ureepe,Version: 2.11.8.12009-07-17T09:14:21+02:00 - Seite 11
Page 19 of 372
T
Tachometer .................................. 28, 126
Overspeed range ........................... 126
Tail lamps
Cleaning lenses ............................. 262
Tar stains ........................................... 261
Technical data
Air conditioning refrigerant ............362
Brake fluid ..................................... 362
Capacities fuels, coolants,
lubricants etc. ................................ 359
Coolant .......................................... 365
Engine oil additives ........................362
Engine oils ..................................... 361
Fuel requirements .......................... 363
Gasoline additives .......................... 364
Identification labels .......................346
Premium unleaded gasoline ...........362
Rims and tires ................................ 353
Spare wheel ................................... 358
Vehicle specification E 350 ............ 348
Vehicle specification
E 350 4MATIC ................................ 349
Vehicle specification
E 350 BlueTEC ............................... 348
Vehicle specification E 550 ............ 350
Vehicle specification
E 550 4MATIC ................................ 351
Vehicle specification E 63 AMG .....352
Washer and headlamp cleaning
system ................................... 361, 367
Technical data (dimensions)
see Vehicle specification
Technical data (electrical system)
see Vehicle specification
Technical data (engine)
see Vehicle specification
Technical data (weights)
see Vehicle specification
Tele Aid ............................................... 207
Emergency calls ............................. 208
Information button .........................210
Initiating an emergency call
manually ........................................ 209
Messages in the multifunction
display ........................................... 290
Remote door lock .......................... 212Remote door unlock ......................211
Roadside Assistance button ..........210
Search & Send ............................... 211
SOS button .................................... 209
Stolen Vehicle Recovery Services ..212
System self-test ............................. 208
Telephone ............................................. 30
Answering/ending a call ................136
Hands-free microphone ...................33
Menu ............................................. 135
Operation ....................................... 135
Phone book .................................... 136
Redialing ........................................ 137
Temperature
Coolant .......................................... 125
Interior temperature ......................186
Outside .......................................... 126
Tether anchorage points
see Children in the vehicle
Through-loading feature ................... 198
Tie-down rings ................................... 199
Tightening torque
Wheels ........................................... 328
TIN (Tire Identification Number) ...... 251
Tire and Loading Information
placard ............................................... 237
Tire and loading terminology ........... 249
TIREFIT ............................................... 329
Tire Identification Number see TIN
Tire inflation pressure
Checking ........................................ 231
Important notes on ........................230
Label on the inside of fuel filler
flap ................................................ 230
Placard on driver’s door B-pillar .....237
Tire labeling ....................................... 245
Tire load rating .................................. 250
Tire ply composition and material
used .................................................... 251
Tire pressure loss warning system . 232
Tire repair kit see TIREFIT
Tires ........................................... 228, 353
Advanced Tire Pressure
Monitoring System (Advanced
TPMS) ............................................ 233Index17212_AKB; 2; 41, en-USd2ureepe,Version: 2.11.8.12009-07-17T09:14:21+02:00 - Seite 17
Page 20 of 372
Air pressure ................................... 229
Care and maintenance ...................242
Cleaning ......................................... 243
Direction of rotation, spinning .......241
Important notes on tire inflation
pressure ........................................ 230
Inflation pressure ........................... 231
Information placard .......................237
Inspection ...................................... 242
Labeling ......................................... 245
Load index ............................. 246, 250
Load rating .................................... 250
Messages in the multifunction
display ................................... 284, 304
MOExtended .................................. 353
Ply composition and material
used ............................................... 251
Problems under-/overinflation ......231
Retreads ........................................ 228
Rims and tires (technical data) ......353
Rotation ......................................... 244
Service life ..................................... 242
Sizes .............................................. 353
Snow chains .................................. 252
Speed rating .......................... 247, 251
Storing ........................................... 243
Temperature .......................... 230, 244
Terminology ................................... 249
TIREFIT (tire repair kit) ...................329
Tire Identification Number .............251
Tire pressure loss warning system . 232
TPMS low tire pressure/
malfunction telltale ........................312
Traction ................................. 244, 251
Tread ............................................. 251
Tread depth ........................... 242, 252
Treadwear ...................................... 243
Treadwear indicators .............242, 252
Vehicle maximum load on ..............252
Wear pattern .................................. 244
Winter tires ............................ 252, 353
Tire speed rating ....................... 247, 251
Top tether see Children in the vehicle
Total load limit ................................... 251
Towing
Towing eye bolt .............................. 341
Vehicle ........................................... 340Towing eye bolt ................................. 341
Traction ...................................... 244, 251
Transfer case ..................................... 124
Transmission see Automatic transmission
Transmission fluid level .................... 226
Transmission gear selector lever see Gear selector lever
Transmission positions .................... 118
Traveling abroad ............................... 257
Tread (tires) ....................................... 251
Tread depth (tires) .................... 242, 252
Treadwear .......................................... 243
Treadwear indicators (tires) .... 242, 252
Trip menu ........................................... 129
Trunk
Closing ............................................. 82
Fuse box ........................................ 343
Messages in the multifunction
display ........................................... 293
Opening ........................................... 82
Opening/closing system .................. 83
Tie-down rings ............................... 199
Trunk lid emergency release ............84
Unlocking manually .......................315
Valet locking .................................... 85
Turning off the engine ...................... 113
Turn signals ....................................... 100
Cleaning lenses ............................. 262
Indicator lamps ................................ 29
Messages in the multifunction
display ........................................... 303
Replacing bulbs ............................. 319
U
Uniform Tire Quality Grading
Standards .................................. 243, 252
Units
Selecting speedometer display
mode ............................................. 141
Unleaded gasoline, premium ........... 362
Unlocking the vehicle
KEYLESS-GO .................................... 77
Manually ........................................ 314
SmartKey ......................................... 76
Upholstery, cleaning ......................... 266
Useful features .................................. 203
18Index212_AKB; 2; 41, en-USd2ureepe,Version: 2.11.8.12009-07-17T09:14:21+02:00 - Seite 18
Page 82 of 372
XHave the SmartKey deactivated by an
authorized Mercedes-Benz Center.
XReport the loss of the SmartKey or the
mechanical key to your car insurance
company immediately.
XHave the mechanical lock replaced if
necessary.
Any authorized Mercedes-Benz Center will be
glad to supply you with a replacement. For
information on replacing the SmartKey, see
“Replacing the SmartKey” (Y page 80).
Replacing the SmartKey
Only you, or someone authorized by you can
order a replacement key from any Mercedes-
Benz Center. In order to do so, the Mercedes-
Benz Center will require proof of identity and
vehicle ownership with original documents,
including the following:
If you are the current owner of the vehicle:
Rthe vehicle’s current state registration
Ra current identity card, passport, or drivers
license
If you are an authorized person:
Rthe vehicle’s current state registration
Ra current identity card, passport, or drivers
license for the authorized individual
Rsigned and dated authorization from the
owner of the vehicle for which the key is
being requested
iDuplicated or photocopied
documentation will not be accepted.
Activating the key
Once you, or an authorized person, has
provided the appropriate documents, the
Mercedes-Benz Center will need to
synchronize the key to your vehicle before it
can be used. In order to do so, the Mercedes-
Benz Center need access to your vehicle.
Opening the doors from the inside
You can open a door from the inside even
when it is locked unless it is secured with the
child safety lock (Y page 60).
Open door only when conditions are safe to
do so.
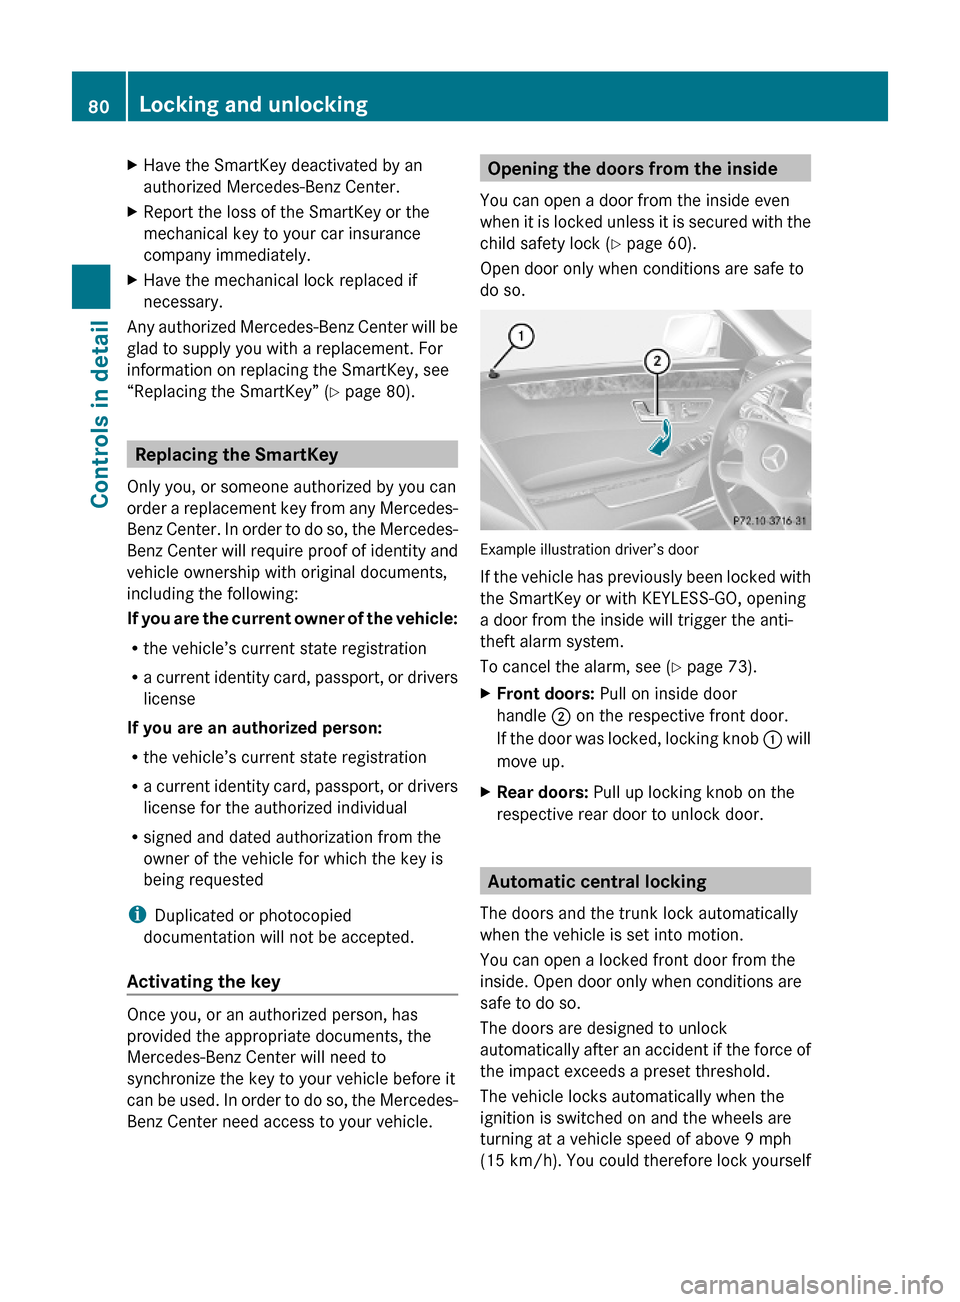
Example illustration driver’s door
If the vehicle has previously been locked with
the SmartKey or with KEYLESS-GO, opening
a door from the inside will trigger the anti-
theft alarm system.
To cancel the alarm, see (Y page 73).
XFront doors: Pull on inside door
handle ; on the respective front door.
If the door was locked, locking knob : will
move up.
XRear doors: Pull up locking knob on the
respective rear door to unlock door.
Automatic central locking
The doors and the trunk lock automatically
when the vehicle is set into motion.
You can open a locked front door from the
inside. Open door only when conditions are
safe to do so.
The doors are designed to unlock
automatically after an accident if the force of
the impact exceeds a preset threshold.
The vehicle locks automatically when the
ignition is switched on and the wheels are
turning at a vehicle speed of above 9 mph
(15 km/h). You could therefore lock yourself
80Locking and unlockingControls in detail
212_AKB; 2; 41, en-USd2ureepe,Version: 2.11.8.12009-07-17T09:14:21+02:00 - Seite 80
Page 138 of 372
Some jurisdictions prohibit the driver from
using a mobile phone while driving a vehicle.
Bear in mind that at a speed of just 30 mph
(approximately 50 km/h), your vehicle is
covering a distance of 44 feet (approximately
14 m) every second.
You can connect your telephone to the
COMAND system via Bluetooth®, see
separate COMAND system operating
instructions.
XSwitch on the COMAND system.
Refer to separate COMAND system
operating instructions.
XPress button = or ; to select the
Tel menu.
One of the following messages will appear
in the multifunction display:
RNo Service: No network is available.
RReady for Bluetooth Telephony...:
The telephone has not been connected
to the COMAND system via Bluetooth®
yet.
XConnect the telephone to the
COMAND system via Bluetooth®.
RPhone READY or name of the network
provider (if available): The telephone has
found a network and is ready for use. You
can operate it using the control system.
Answering a call
When your telephone is ready to receive calls,
you can answer a call at any time. In the
multifunction display you will then see the
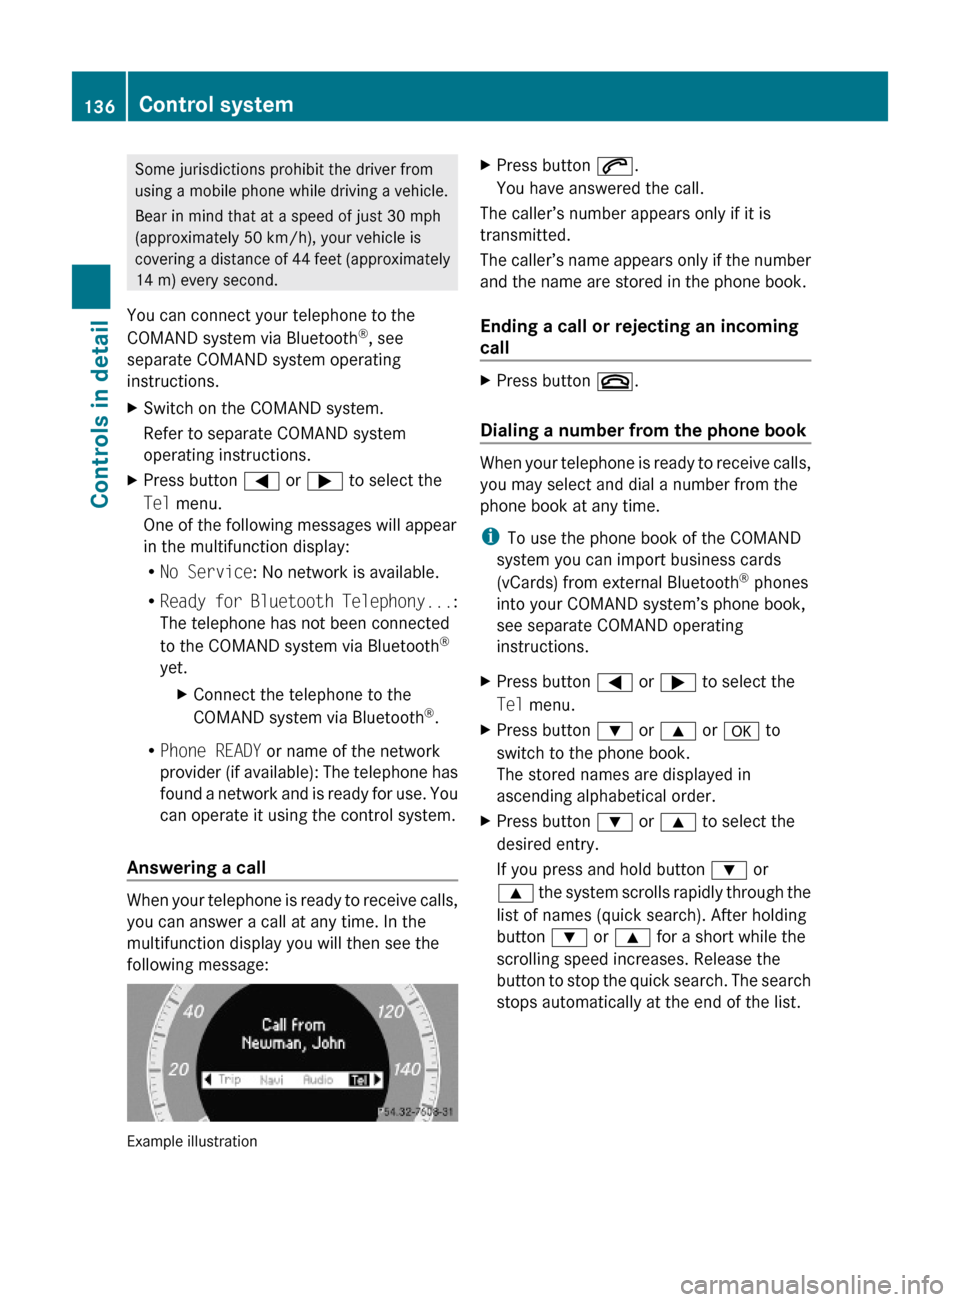
following message:
Example illustration
XPress button 6.
You have answered the call.
The caller’s number appears only if it is
transmitted.
The caller’s name appears only if the number
and the name are stored in the phone book.
Ending a call or rejecting an incoming
call
XPress button ~.
Dialing a number from the phone book
When your telephone is ready to receive calls,
you may select and dial a number from the
phone book at any time.
iTo use the phone book of the COMAND
system you can import business cards
(vCards) from external Bluetooth® phones
into your COMAND system’s phone book,
see separate COMAND operating
instructions.
XPress button = or ; to select the
Tel menu.
XPress button : or 9 or a to
switch to the phone book.
The stored names are displayed in
ascending alphabetical order.
XPress button : or 9 to select the
desired entry.
If you press and hold button : or
9 the system scrolls rapidly through the
list of names (quick search). After holding
button : or 9 for a short while the
scrolling speed increases. Release the
button to stop the quick search. The search
stops automatically at the end of the list.
136Control systemControls in detail
212_AKB; 2; 41, en-USd2ureepe,Version: 2.11.8.12009-07-17T09:14:21+02:00 - Seite 136
Page 199 of 372
if the tilt/sliding panel does not open
smoothly.
! Do not attempt to open the tilt/sliding
panel before the tilt/sliding panel is
properly synchronized. The tilt/sliding
panel could otherwise lock-up in the open
position.
If the tilt/sliding panel cannot be closed or
synchronized, contact an authorized
Mercedes-Benz Center or call Roadside
Assistance.
XSwitch on the ignition.XPull the roof panel switch repeatedly in
direction of arrow = to the resistance
point until the tilt/sliding panel is closed
completely.
XPull and hold the roof panel switch in
direction of arrow = for 1 more second.
XPull the roof panel switch repeatedly in
direction of arrow = to the resistance
point until the roller sunblinds are closed
completely.
XPull and hold the roof panel switch in
direction of arrow = for 1 more second.
XCheck whether the tilt/sliding panel and
the roller sunblinds can be opened
completely (Y page 195).
Loading and storing
Loading instructions
GWarning!
Always fasten items being carried as securely
as possible. Use cargo tie-down rings and
fastening materials appropriate for the weight
and size of the load.
In an accident, during hard braking or sudden
maneuvers, loose items will be thrown around
inside the vehicle. This can cause injury to
vehicle occupants unless the items are
securely fastened in the vehicle.
To help avoid personal injury during a collision
or sudden maneuver, exercise care when
transporting cargo. Do not pile luggage or
cargo higher than the seat backrests.
The trunk is the preferred place to carry
objects.
Never drive a vehicle with the trunk open.
Deadly carbon monoxide (CO) gases may
enter vehicle interior resulting in
unconsciousness and death.
Load distribution
The total load weight including vehicle
occupants and luggage/cargo should not
exceed the total load limit indicated on the
corresponding Tire and Loading Information
placard located on the driver’s door B-pillar
(Y page 238).
The handling characteristics of a fully loaded
vehicle depend greatly on the load
distribution. It is therefore recommended to
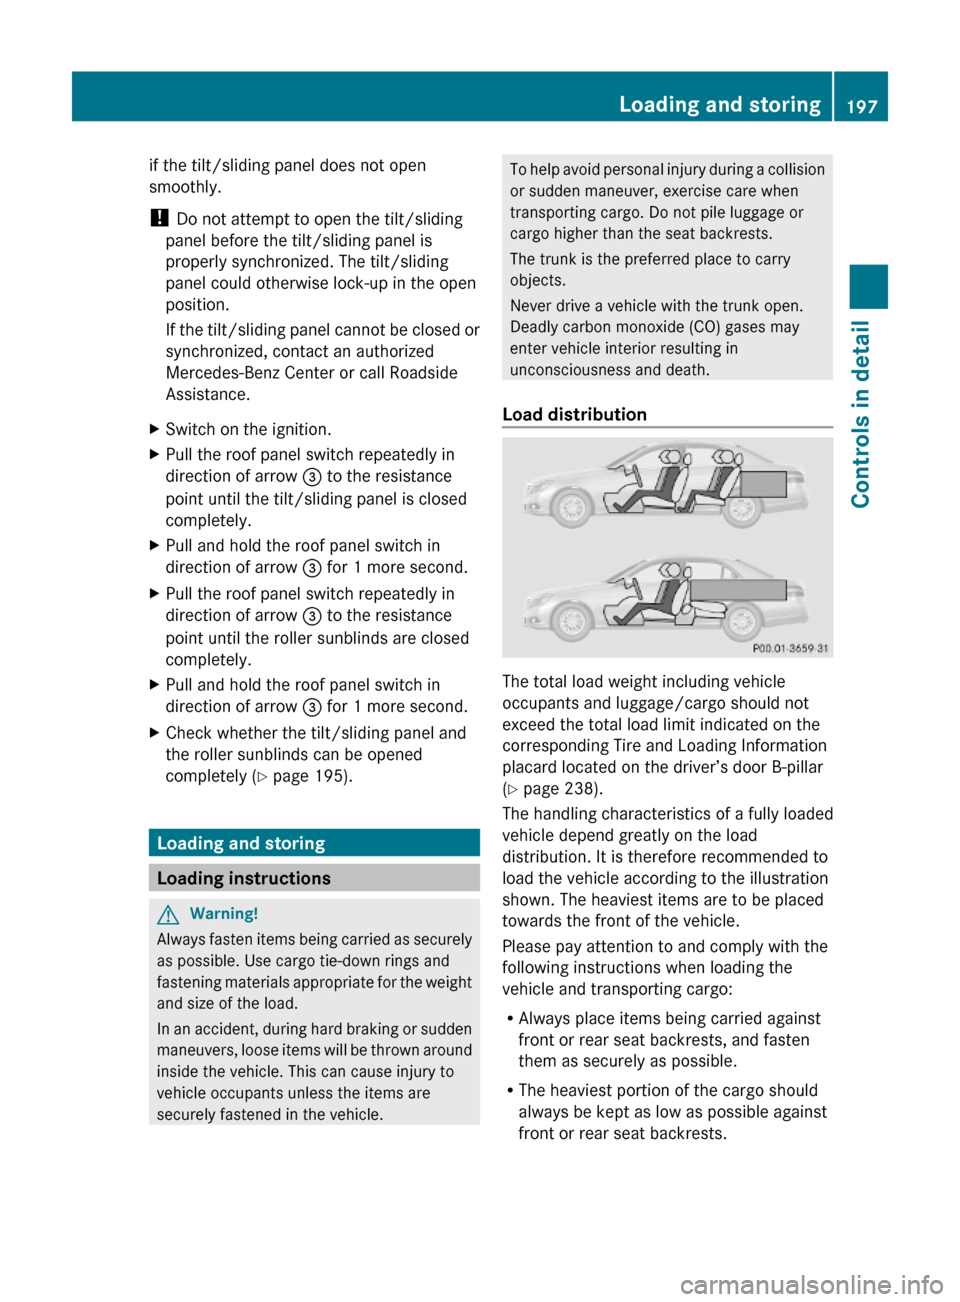
load the vehicle according to the illustration
shown. The heaviest items are to be placed
towards the front of the vehicle.
Please pay attention to and comply with the
following instructions when loading the
vehicle and transporting cargo:
RAlways place items being carried against
front or rear seat backrests, and fasten
them as securely as possible.
RThe heaviest portion of the cargo should
always be kept as low as possible against
front or rear seat backrests.
Loading and storing197Controls in detail212_AKB; 2; 41, en-USd2ureepe,Version: 2.11.8.12009-07-17T09:14:21+02:00 - Seite 197Z
Page 207 of 372
closed while vehicle is in motion. Reflected
glare can endanger you and others.
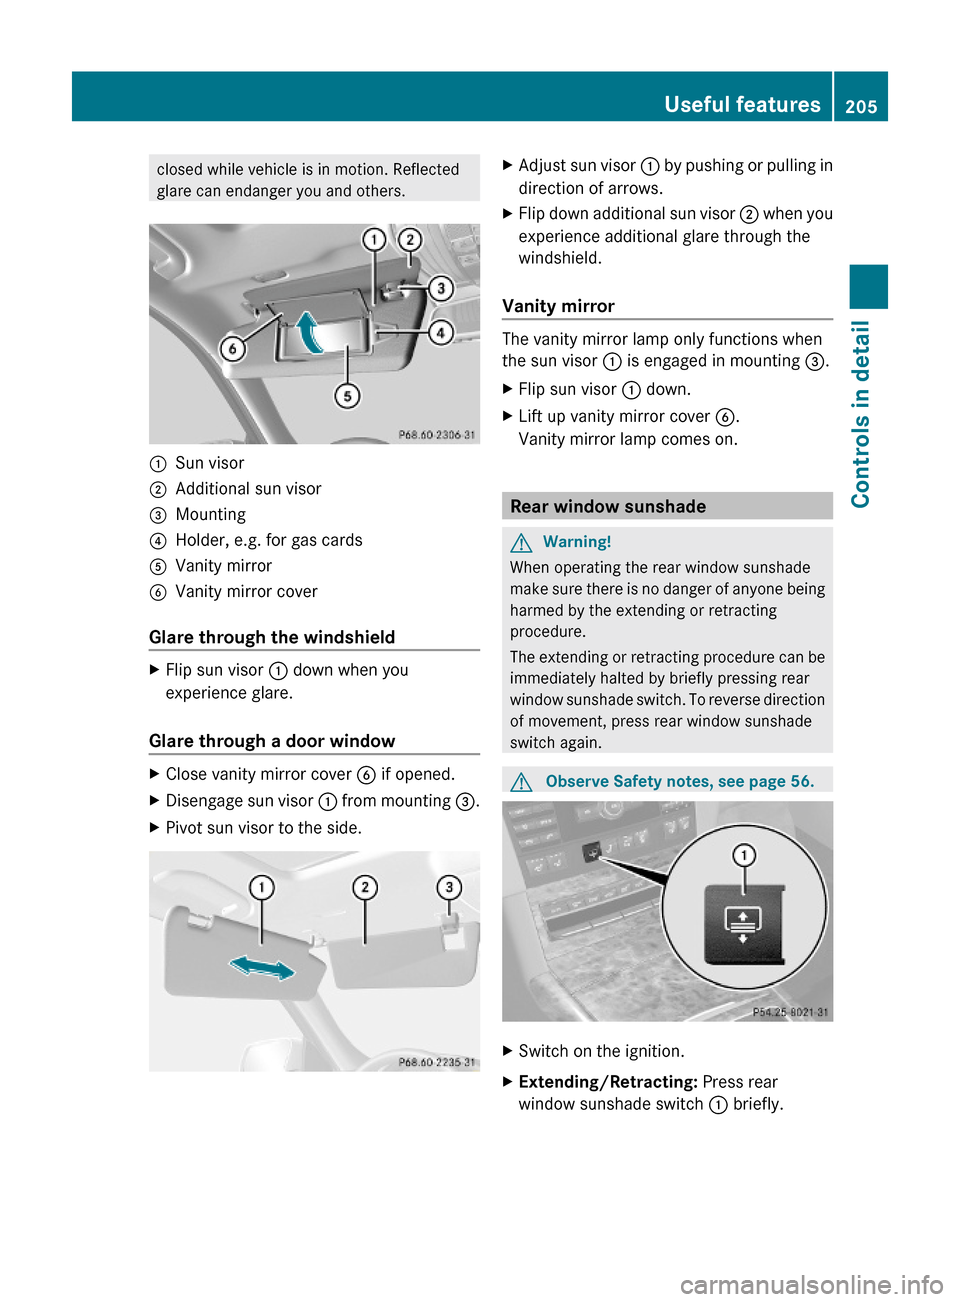
:Sun visor;Additional sun visor=Mounting?Holder, e.g. for gas cardsAVanity mirrorBVanity mirror cover
Glare through the windshield
XFlip sun visor : down when you
experience glare.
Glare through a door window
XClose vanity mirror cover B if opened.XDisengage sun visor : from mounting =.XPivot sun visor to the side.XAdjust sun visor : by pushing or pulling in
direction of arrows.
XFlip down additional sun visor ; when you
experience additional glare through the
windshield.
Vanity mirror
The vanity mirror lamp only functions when
the sun visor : is engaged in mounting =.
XFlip sun visor : down.XLift up vanity mirror cover B.
Vanity mirror lamp comes on.
Rear window sunshade
GWarning!
When operating the rear window sunshade
make sure there is no danger of anyone being
harmed by the extending or retracting
procedure.
The extending or retracting procedure can be
immediately halted by briefly pressing rear
window sunshade switch. To reverse direction
of movement, press rear window sunshade
switch again.
GObserve Safety notes, see page 56.XSwitch on the ignition.XExtending/Retracting: Press rear
window sunshade switch : briefly.
Useful features205Controls in detail212_AKB; 2; 41, en-USd2ureepe,Version: 2.11.8.12009-07-17T09:14:21+02:00 - Seite 205Z
Page 231 of 372
Recommended tire inflation pressureGWarning!
Follow recommended tire inflation pressures.
Do not underinflate tires. Underinflated tires
wear excessively and/or unevenly, adversely
affect handling and fuel economy, and are
more likely to fail from being overheated.
Do not overinflate tires. Overinflated tires can
adversely affect handling and ride comfort,
wear unevenly, increase stopping distance,
and result in sudden deflation (blowout)
because they are more likely to become
punctured or damaged by road debris,
potholes etc.
Do not overload the tires by exceeding the
specified load limit as indicated on the Tire
and Loading Information placard on the
driver’s door B-pillar. Overloading the tires
can overheat them, possibly causing a
blowout. Overloading the tires can also result
in handling or steering problems, or brake
failure.
Your vehicle is equipped with the Tire and
Loading Information placard located on the
driver’s door B-pillar (Y page 237).
The tire inflation pressure should be checked
regularly. Only adjust the tire inflation
pressure on cold tires. The tires can be
considered cold if the vehicle has been
parked for at least 3 hours or driven less than
1 mile (1.6 km). Depending on the ambient
temperature, the driving speed and the tire
load, the tire temperature changes. When the
tire temperature changes by 18‡ (10†), the
tire inflation pressure will change by
approximately 1.5 psi (0.1 bar). Keep this in
mind when checking tire inflation pressure on
warm tires and adjust the tire pressure only
if the tire inflation pressure is too low for the
current operating conditions. If you check the
tire inflation pressure when the tires are
warm, the reading will be higher than the cold
reading. This is normal. Do not let air out to
match the specified cold tire inflation
pressure. Otherwise, the tire will be
underinflated.
Follow recommended cold tire inflation
pressures listed on Tire and Loading
Information placard on the driver’s door
B-pillar.
Keeping the tires properly inflated provides
the best handling, tread life and riding
comfort.
In addition to the Tire and Loading
Information placard on the driver’s door
B-pillar, also consult the tire inflation
pressure label on the inside of the filler flap
for any additional information pertaining to
special driving situations. For more
information, see “Important notes on tire
inflation pressure” (Y page 230).
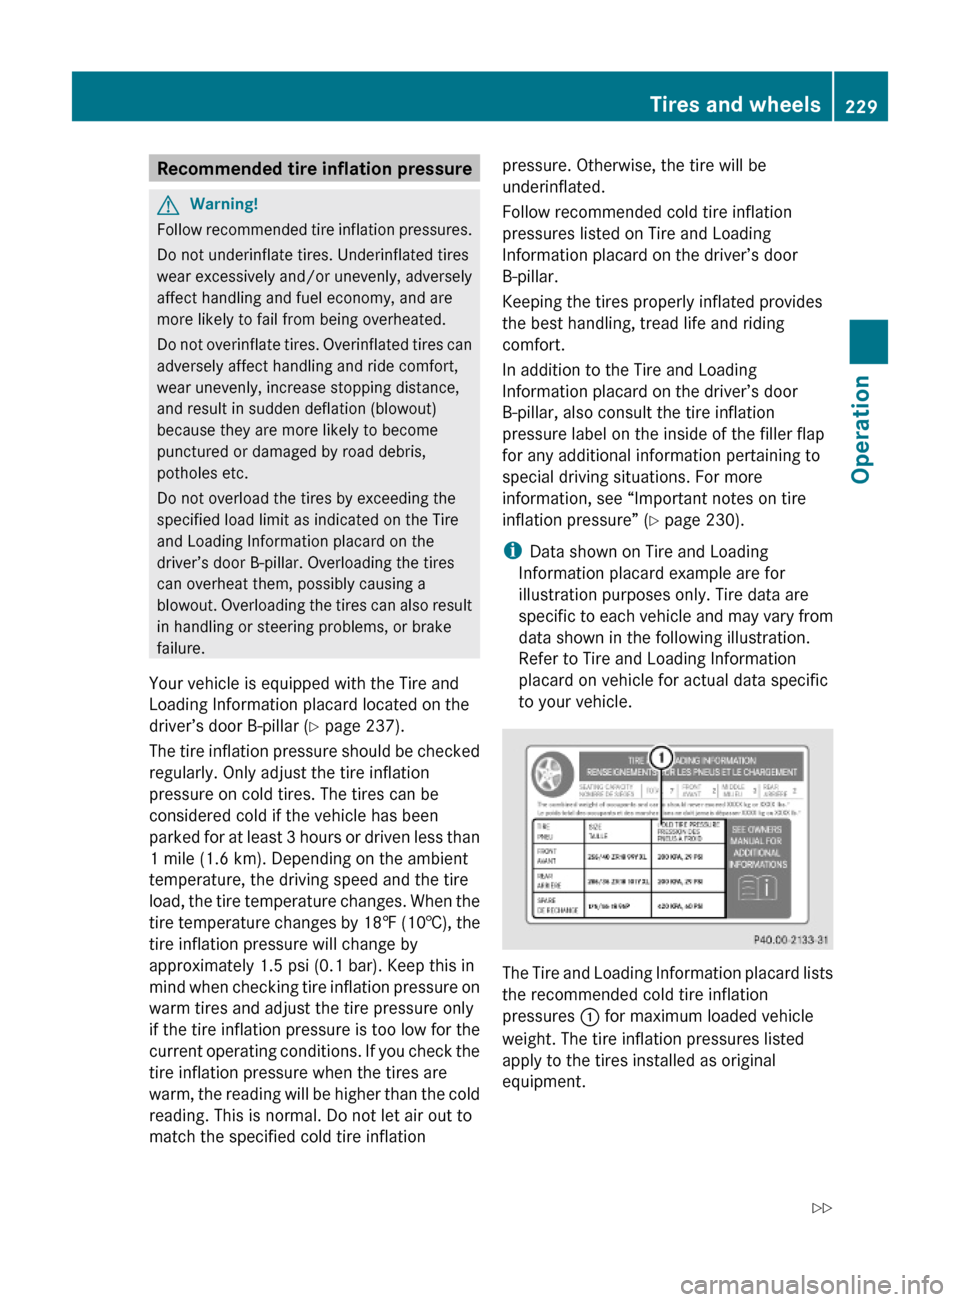
iData shown on Tire and Loading
Information placard example are for
illustration purposes only. Tire data are
specific to each vehicle and may vary from
data shown in the following illustration.
Refer to Tire and Loading Information
placard on vehicle for actual data specific
to your vehicle.
The Tire and Loading Information placard lists
the recommended cold tire inflation
pressures : for maximum loaded vehicle
weight. The tire inflation pressures listed
apply to the tires installed as original
equipment.
Tires and wheels229Operation212_AKB; 2; 41, en-USd2ureepe,Version: 2.11.8.12009-07-17T09:14:21+02:00 - Seite 229Z
Page 232 of 372
Important notes on tire inflation
pressure
GWarning!
If the tire inflation pressure drops repeatedly,
check the tires for punctures from foreign
objects and/or whether air is leaking from the
valves or from around the rim.
Tire temperature and tire inflation pressure
are also increased while driving, depending
on the driving speed and the tire load.
If you will be driving your vehicle at high
speeds of 100 mph (160 km/h) or higher,
where it is legal and conditions allow, consult
the tire inflation pressure label on the inside
of the fuel filler flap on how to adjust the cold
tire inflation pressure. If you do not adjust the
tire inflation pressure, excessive heat can
build up and result in sudden tire failure.
If you are not sure about the proper tire
inflation pressure, contact an authorized
Mercedes-Benz Center.
iDriving comfort may be reduced when the
tire inflation pressure is adjusted to the
value for speeds above 100 mph
(160 km/h) as specified on the tire inflation
pressure label located on the inside of the
fuel filler flap.
Make sure to readjust the tire inflation
pressure for normal driving speeds.
Supplemental tire inflation pressure
information for different loading conditions of
the vehicle can be found on the tire inflation
pressure label. The tire inflation pressure
label is located on the inside of the fuel filler
flap.
For the tire inflation pressure for spare
wheels such as Minispare wheels or spare
wheels with collapsible tire refer to
Rthe yellow label on the spare wheel rim
Rthe “Technical data” section of this
Operator’s Manual (Y page 358)
Rthe Tire and Loading Information placard on
the driver’s door B-pillar
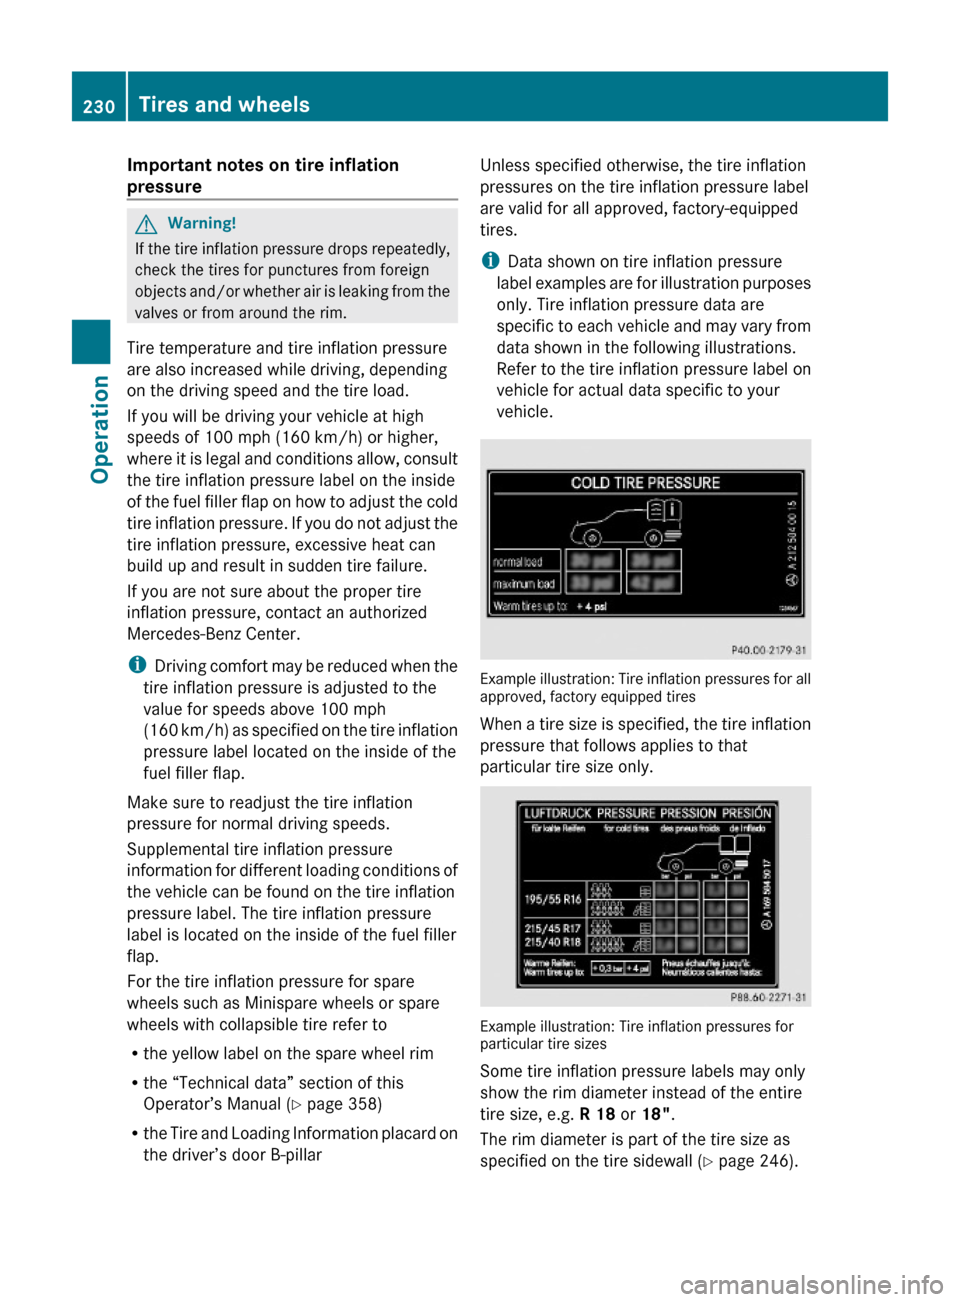
Unless specified otherwise, the tire inflation
pressures on the tire inflation pressure label
are valid for all approved, factory-equipped
tires.
iData shown on tire inflation pressure
label examples are for illustration purposes
only. Tire inflation pressure data are
specific to each vehicle and may vary from
data shown in the following illustrations.
Refer to the tire inflation pressure label on
vehicle for actual data specific to your
vehicle.
Example illustration: Tire inflation pressures for allapproved, factory equipped tires
When a tire size is specified, the tire inflation
pressure that follows applies to that
particular tire size only.
Example illustration: Tire inflation pressures forparticular tire sizes
Some tire inflation pressure labels may only
show the rim diameter instead of the entire
tire size, e.g. R 18 or 18".
The rim diameter is part of the tire size as
specified on the tire sidewall (Y page 246).
230Tires and wheelsOperation
212_AKB; 2; 41, en-USd2ureepe,Version: 2.11.8.12009-07-17T09:14:21+02:00 - Seite 230
Page 233 of 372
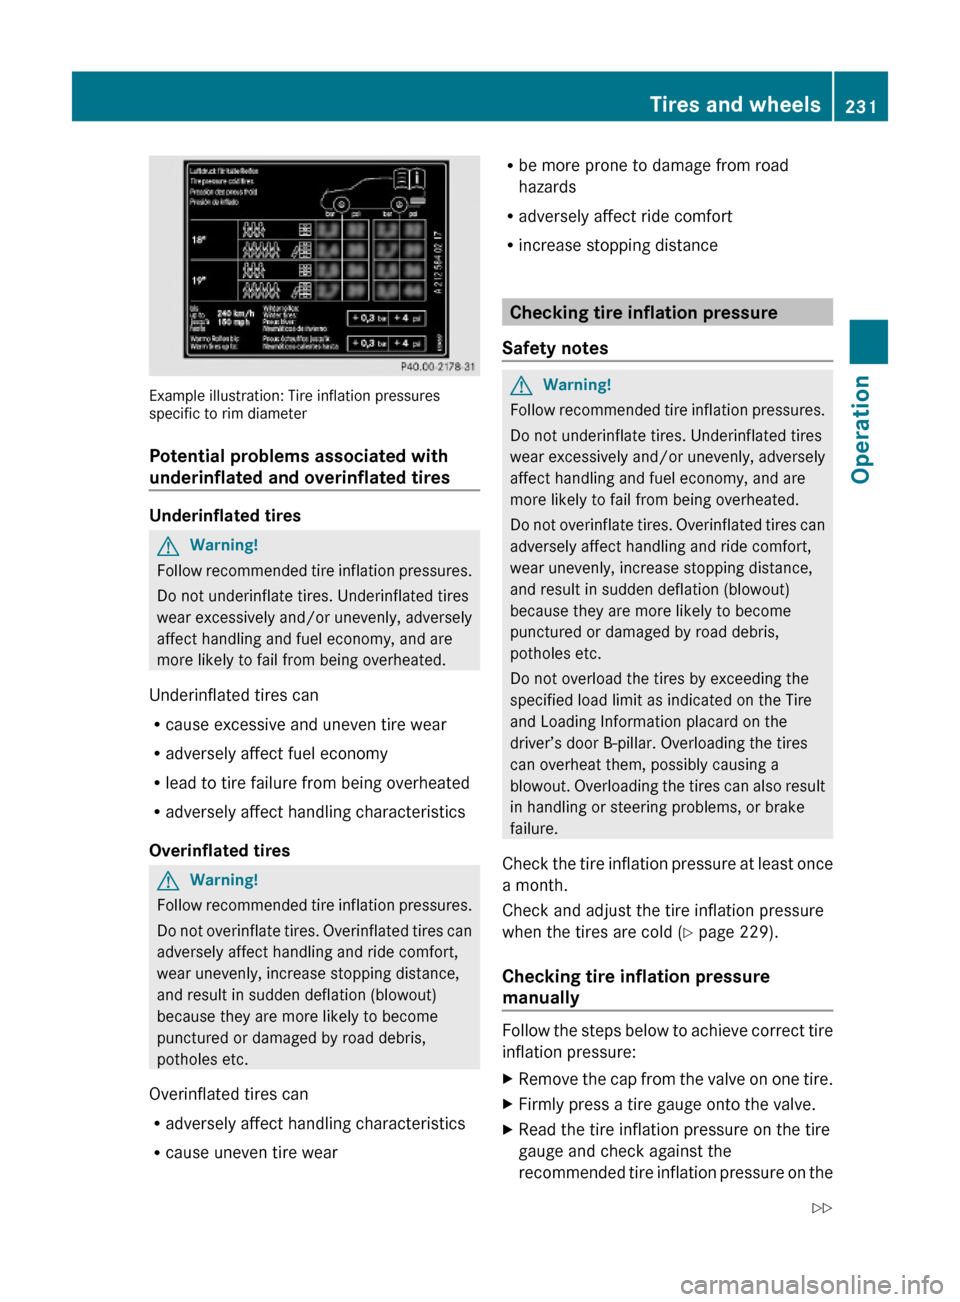
Example illustration: Tire inflation pressuresspecific to rim diameter
Potential problems associated with
underinflated and overinflated tires
Underinflated tires
GWarning!
Follow recommended tire inflation pressures.
Do not underinflate tires. Underinflated tires
wear excessively and/or unevenly, adversely
affect handling and fuel economy, and are
more likely to fail from being overheated.
Underinflated tires can
Rcause excessive and uneven tire wear
Radversely affect fuel economy
Rlead to tire failure from being overheated
Radversely affect handling characteristics
Overinflated tires
GWarning!
Follow recommended tire inflation pressures.
Do not overinflate tires. Overinflated tires can
adversely affect handling and ride comfort,
wear unevenly, increase stopping distance,
and result in sudden deflation (blowout)
because they are more likely to become
punctured or damaged by road debris,
potholes etc.
Overinflated tires can
Radversely affect handling characteristics
Rcause uneven tire wear
Rbe more prone to damage from road
hazards
Radversely affect ride comfort
Rincrease stopping distance
Checking tire inflation pressure
Safety notes
GWarning!
Follow recommended tire inflation pressures.
Do not underinflate tires. Underinflated tires
wear excessively and/or unevenly, adversely
affect handling and fuel economy, and are
more likely to fail from being overheated.
Do not overinflate tires. Overinflated tires can
adversely affect handling and ride comfort,
wear unevenly, increase stopping distance,
and result in sudden deflation (blowout)
because they are more likely to become
punctured or damaged by road debris,
potholes etc.
Do not overload the tires by exceeding the
specified load limit as indicated on the Tire
and Loading Information placard on the
driver’s door B-pillar. Overloading the tires
can overheat them, possibly causing a
blowout. Overloading the tires can also result
in handling or steering problems, or brake
failure.
Check the tire inflation pressure at least once
a month.
Check and adjust the tire inflation pressure
when the tires are cold (Y page 229).
Checking tire inflation pressure
manually
Follow the steps below to achieve correct tire
inflation pressure:
XRemove the cap from the valve on one tire.XFirmly press a tire gauge onto the valve.XRead the tire inflation pressure on the tire
gauge and check against the
recommended tire inflation pressure on the
Tires and wheels231Operation212_AKB; 2; 41, en-USd2ureepe,Version: 2.11.8.12009-07-17T09:14:21+02:00 - Seite 231Z