warning MERCEDES-BENZ G-Class 2017 W463 Comand Manual
[x] Cancel search | Manufacturer: MERCEDES-BENZ, Model Year: 2017, Model line: G-Class, Model: MERCEDES-BENZ G-Class 2017 W463Pages: 198, PDF Size: 4.53 MB
Page 126 of 198
Your multimediasyste mequipment
These operatin ginstruction sdescribe all th e
standar dan doptional equipment of your multi-
media system, as available at th etime of going
to press. Country-specifi cdifference sare pos -
sible. Bear in min dthat your vehicle may no t
feature all function sdescribed here. Thi salso
applies to safety-relevan tsystems an dfunc-
tions.
Read th einformation on qualifie dspecialis t
workshop sin th evehicle Operator's Manual.
Important safet ynotes
GWARNING
If you operat einformation systems an dcom-
munication equipment integrated in th evehi-
cl e whil edriving, you will be distracted from
traffic conditions. You could also los econtro l
of th evehicle. There is aris kof an accident.
Only operat eth eequipment when th etraffic
situation permits. If you are no tsur ethat this
is possible, par kth evehicle payin gattention
to traffic condition san doperat eth eequip-
men twhen th evehicle is stationary.
You mus tobserv eth elegal requirements fo rth e
country in whic hyou are drivin gwhen operatin g
th esystem.
General notes
Connection difficulties whil eth evehi-
cle is in motion
The connection may be los tif:
Rth emobile phone networ kcoverage is insuf -
ficien t
Rthevehicle has moved into amobile phone
cell wit hno free channels
Rth eSI M car dused is no tcompatible wit hth e
networ kavailable
Function restrictions (Canada)
You will no tbe able to use th eMercedes-Ben z
Apps an dInternet connection ,or will no longer
be able to use them, or may hav eto wait befor e
usin gthem, in th efollowin gsituations:
Rif your mobile phone is switched of f
Rif your mobile phone has notbee nenable dfo r
Internet access
Rif th eBluetoot h®function is switched of fon
th emultimedia syste mandth edesire d
mobile phone is suppose dto be connecte d
via Bluetoot h
®
Rif theBluetoot h®function is switched of fon
th emobile phone an dth ephone is suppose d
to be connecte dvia Bluetoot h
®
Rif either themobile phone networ kor th e
mobile phone doe sno tallo wsimultaneous
use of aphone an dan Internet connection
Rif th emobile phone has no tbee nenable dfo r
Internet access via Bluetoot h®
The driver is notpermitte dto cal lup websites
whil edrivin gan duse of th eMercedes-Ben z
Apps is restricted.
iIt is possible that you may no tbe able to
receiv ecalls when an Internet connection is
active .Thi sdepends on th emobile phone an d
th emobile phone networ kused .
Conditions for access
USA: to use Mercedes-Ben zApps an dInternet
access ,mbrace mus tbe activated an dopera-
tional. Furthermore, mbrace mus tbe activated
fo rMercedes-Ben zApps an dInternet access .
Tak enote of th econnection priorities .An emer-
gency cal lhas th ehighes tpriority. Whe n aser-
vic ecall, e.g. abreakdown servic ecal lor th eMB
Info Call, is active ,an emergency cal lcan still be
initiated. Aservic ecall, on th eother hand, has
priorit yover acurren tInternet connection .
Therefore, you canno testablis han Internet con-
nection durin g aservic ecall.
Canada: amobile phone mus tbe connecte dvia
Bluetoot h
®(Ypage 92) wit hth emultimedia sys -
tem. Furthermore, you need avalid mobile ser -
vic econtrac twit h a dat aoption ,whic his used to
calculat eth eassociated connection costs.
124Conditions for access
Online and Internet functions
Page 146 of 198
XTo selectMediain media mode: slide 5and
press the controller.
The menu appears with the available media
sources.
XTo select the media source: turn the control-
ler and press to confirm.
If the media source contains music or video
files, these will be played. The corresponding
basic menu will be shown.
Activating media using the number
keypad
XTo select a media source: press the corre-
sponding number key.
If the media source contains music or video
files, these will be played. The corresponding
basic menu will be shown.
XTo enter the track number: press the g
button.
A menu appears.
XUse the number keypad to enter the track
number.
The track is played.
Use the sbutton to show the track infor-
mation for the track that is currently playing.
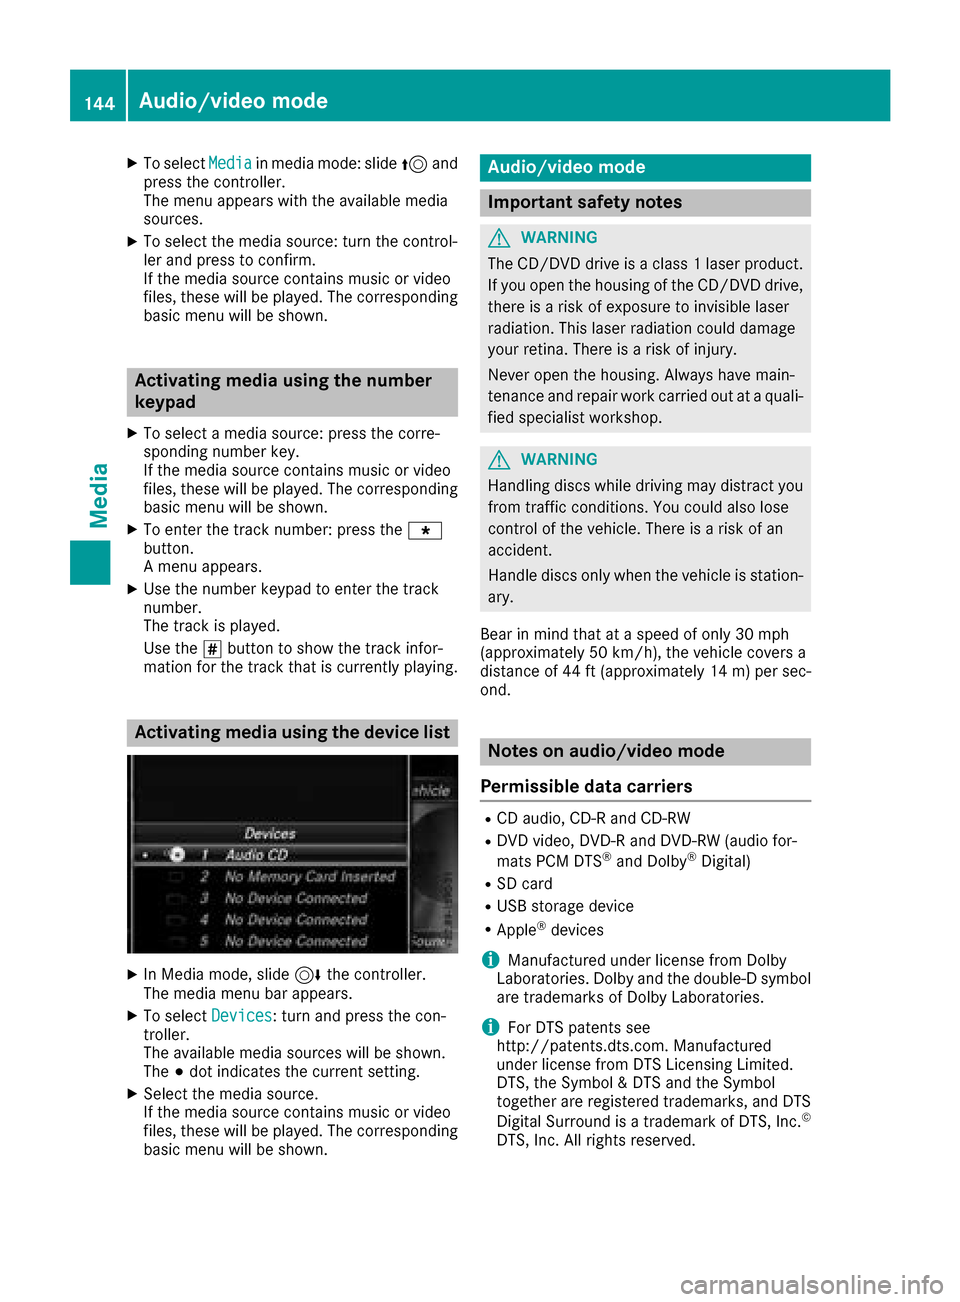
Activating media using the device list
XIn Media mode, slide 6the controller.
The media menu bar appears.
XTo select Devices: turn and press the con-
troller.
The available media sources will be shown.
The #dot indicates the current setting.
XSelect the media source.
If the media source contains music or video
files, these will be played. The corresponding
basic menu will be shown.
Audio/video mode
Important safety notes
GWARNING
The CD/DVD drive is a class 1 laser product.
If you open the housing of the CD/DVD drive,
there is a risk of exposure to invisible laser
radiation. This laser radiation could damage
your retina. There is a risk of injury.
Never open the housing. Always have main-
tenance and repair work carried out at a quali- fied specialist workshop.
GWARNING
Handling discs while driving may distract you from traffic conditions. You could also lose
control of the vehicle. There is a risk of an
accident.
Handle discs only when the vehicle is station-
ary.
Bear in mind that at a speed of only 30 mph
(approximately 50 km/h), the vehicle covers a
distance of 44 ft (approximately 14 m)per sec-
ond.
Notes on audio/video mode
Permissible data carriers
RCD audio, CD-R and CD-RW
RDVD video, DVD-R and DVD-RW (audio for-
mats PCM DTS®and Dolby®Digital)
RSD card
RUSB storage device
RApple®devices
iManufactured under license from Dolby
Laboratories. Dolby and the double-D symbol
are trademarks of Dolby Laboratories.
iFor DTS patents see
http://patents.dts.com. Manufactured
under license from DTS Licensing Limited.
DTS, the Symbol & DTS and the Symbol
together are registered trademarks, and DTS
Digital Surround is a trademark of DTS, Inc.
©
DTS, Inc. All rights reserved.
144Audio/video mode
Media
Page 150 of 198
Ejecting all CDs/DVDs
XTo show the magazine menu: press theV
button.
XSelect Eject All.
The last active disc is ejected.
The Please remove disc 1.
message
appears.
XRemove the disc.
XRepeat the last step until the magazine is
empty.
If you take too long removing the disc, the disc
is re-loaded.
Exiting a menu
XPress the Vbutton.
or
XSelect %in the magazine menu.
Inserting/removing an SD card
Important safety notes
GWARNING
SD cards are small parts. They can be swal-
lowed and cause choking. This poses an
increased risk of injury or even fatal injury.
Keep the SD card out of the reach of children. If a SD card is swallowed, seek medical atten-
tion immediately.
!If you are no longer using the SD card, you
should remove it and store it outside the vehi-
cle. High temperatures can damage the card.
The multimedia system supports SD cards
(Secure Digital), SDHC cards ( SecureDigital
High Capacity), and SDXC cards ( SecureDigital
eXtended Capacity.
Inserting an SD card
XInsert the SD card into the SD card slot on the
control panel until the SD card engages. The
side with the contacts must face down.
The medium is played and the files are loaded
in the background. If there are no supported
audio or video files, you will see a message to
this effect.
Removing an SD card
XPress the SD card.
The SD card is ejected.
XRemove the SD card.
Connecting USB devices
Two USB ports are located in the stowage space
under the armrest (Ypage 143).
XConnect the USB device with a suitable USB
port.
If the corresponding media display is visible,
the medium is played and the files are loaded
in the background. Otherwise, the system
does not automatically switch to USB. If there
are no supported audio or video files, you will
see a message to this effect.
iMP3 players must support Media Transfer
Protocol (MTP).
Selecting the playback option
XIn media mode, slide 6the controller.
The media menu bar is shown.
XTo select Options: turn and press the con-
troller.
Playing similar tracks
iThis option is available as soon as the music
collection has been read and analyzed.
XTo select Play More Like This: turn and
press the controller.
Selecting Play mode
XTo select PlaybackMode: turn and press the
controller.
XSelect Normal Track Sequence.
The current track list is played in the order it is
stored on the data medium.
XSelect Random Track List.
The current track list is played in random
order.
XSelect Random Medium.
All tracks on the data medium are played in
random order.
148Audio/video mode
Media
Page 161 of 198
Selecting the playback option
XIn media mode, slide6the controller.
The media menu bar is shown.
XTo select Options: turn and press the con-
troller.
XSelect the playback option (Ypage 148)
iThe Play More Like Thisoption is also
available for Apple®devices. For this, the
Genius functionality must be activated in
iTunes
®. Then synchronization of the Apple®
device with iTunes®must be carried out
again.
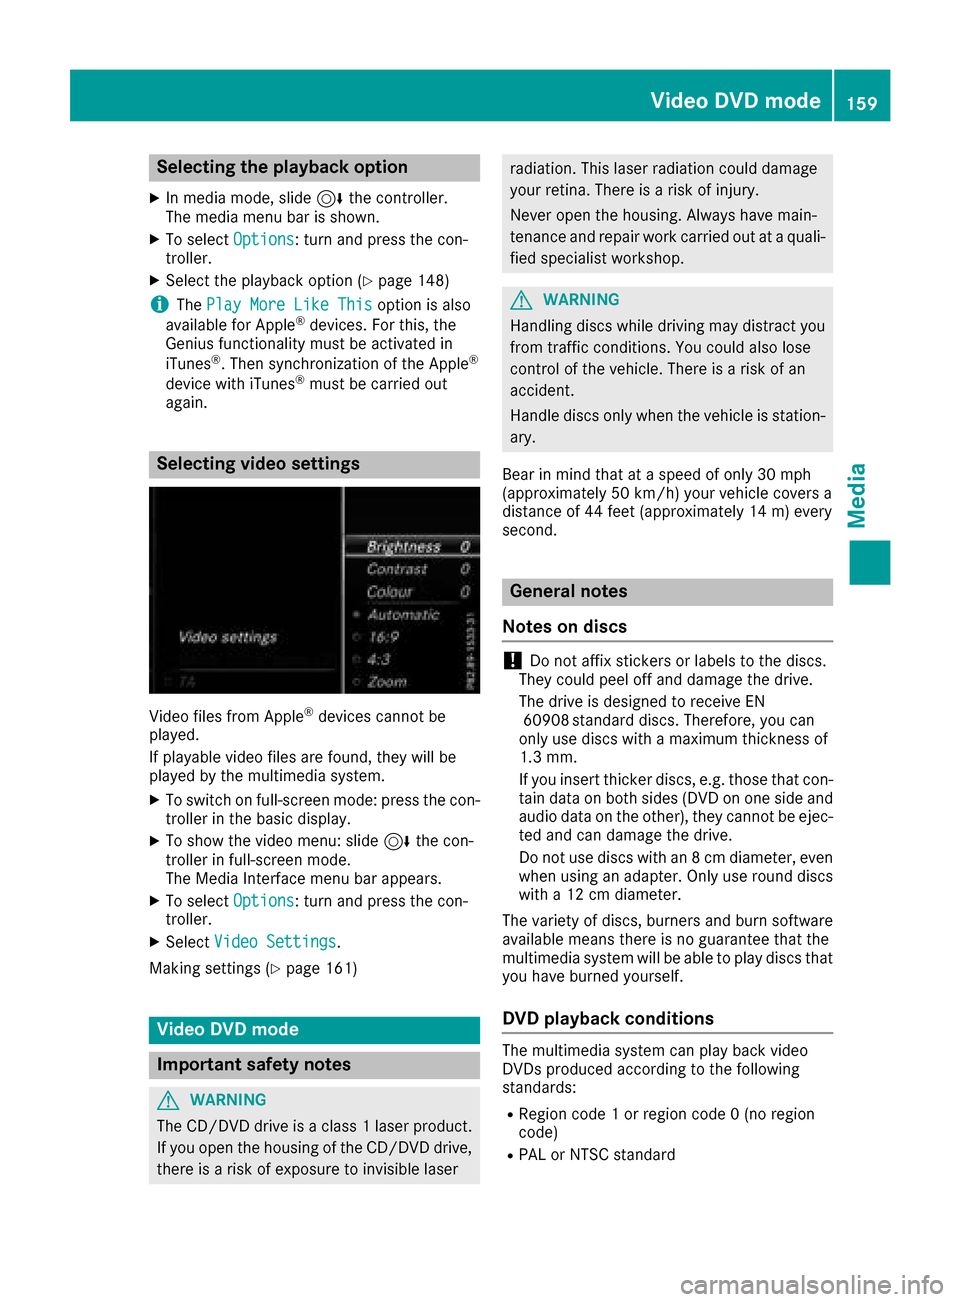
Selecting video settings
Video files from Apple®devices cannot be
played.
If playable video files are found, they will be
played by the multimedia system.
XTo switch on full-screen mode: press the con-
troller in the basic display.
XTo show the video menu: slide 6the con-
troller in full-screen mode.
The Media Interface menu bar appears.
XTo select Options: turn and press the con-
troller.
XSelect Video Settings.
Making settings (
Ypage 161)
Video DVD mode
Important safety notes
GWARNING
The CD/DVD drive is a class 1 laser product.
If you open the housing of the CD/DVD drive,
there is a risk of exposure to invisible laser
radiation. This laser radiation could damage
your retina. There is a risk of injury.
Never open the housing. Always have main-
tenance and repair work carried out at a quali- fied specialist workshop.
GWARNING
Handling discs while driving may distract you from traffic conditions. You could also lose
control of the vehicle. There is a risk of an
accident.
Handle discs only when the vehicle is station-
ary.
Bear in mind that at a speed of only 30 mph
(approximately 50 km/h) your vehicle covers a
distance of 44 feet (approximately 14 m) every
second.
General notes
Notes on discs
!Do not affix stickers or labels to the discs.
They could peel off and damage the drive.
The drive is designed to receive EN 60908 standard discs. Therefore, you can
only use discs with a maximum thickness of
1.3 mm.
If you insert thicker discs, e.g. those that con-
tain data on both sides (DVD on one side and
audio data on the other), they cannot be ejec-
ted and can damage the drive.
Do not use discs with an 8 cm diameter, even
when using an adapter. Only use round discs
with a 12 cm diameter.
The variety of discs, burners and burn software
available means there is no guarantee that the
multimedia system will be able to play discs that
you have burned yourself.
DVD playback conditions
The multimedia system can play back video
DVDs produced according to the following
standards:
RRegion code 1 or region code 0 (no region
code)
RPAL or NTSC standard
Video DVD mode159
Media
Z
Page 173 of 198
Your multimediasyste mequipment
These operatin ginstruction sdescribe all th e
standar dan doptional equipment of your multi-
media system, as available at th etime of going
to press. Country-specifi cdifference sare pos -
sible. Bear in min dthat your vehicle may no t
feature all function sdescribed here. Thi salso
applies to safety-relevan tsystems an dfunc-
tions.
Read th einformation on qualifie dspecialis t
workshop sin th evehicle Operator's Manual.
Weather forecasts
Introduction
Thi sfunction is currentl yno tavailable fo rCan -
ada.
Fo rth ereception of weather forecast svia sat -
ellite radio, you will need aSIRIU SXM Satellite
Weather subscription .
If th emessage: Please call SIRIUS to
activate the system at :888-539-7474ESN :SIRIUS IDappears alon gwit hth eID
number of th eSIRIU Sdevice, you will need to
hav eth eweather servic eactivated first .
XTo selectCal lorCancel:turn an dpress th e
controller .
If amobile phone is connecte dto th emulti-
media syste m (
Ypage 92), when you selec t
Cal l, acal lis placed to amember of th eSIR-
IU Sservic estaff .The ID number of th eSIRIU S
devic ewill be transferred to th etelephon e
display.
XThi swill be followed by instruction sfrom th e
servic eemployee.
The multimedia syste mcan receiv eweather
forecast sfo rth eUS A(includin gAlask aan d
Hawaii) via satellite radio.
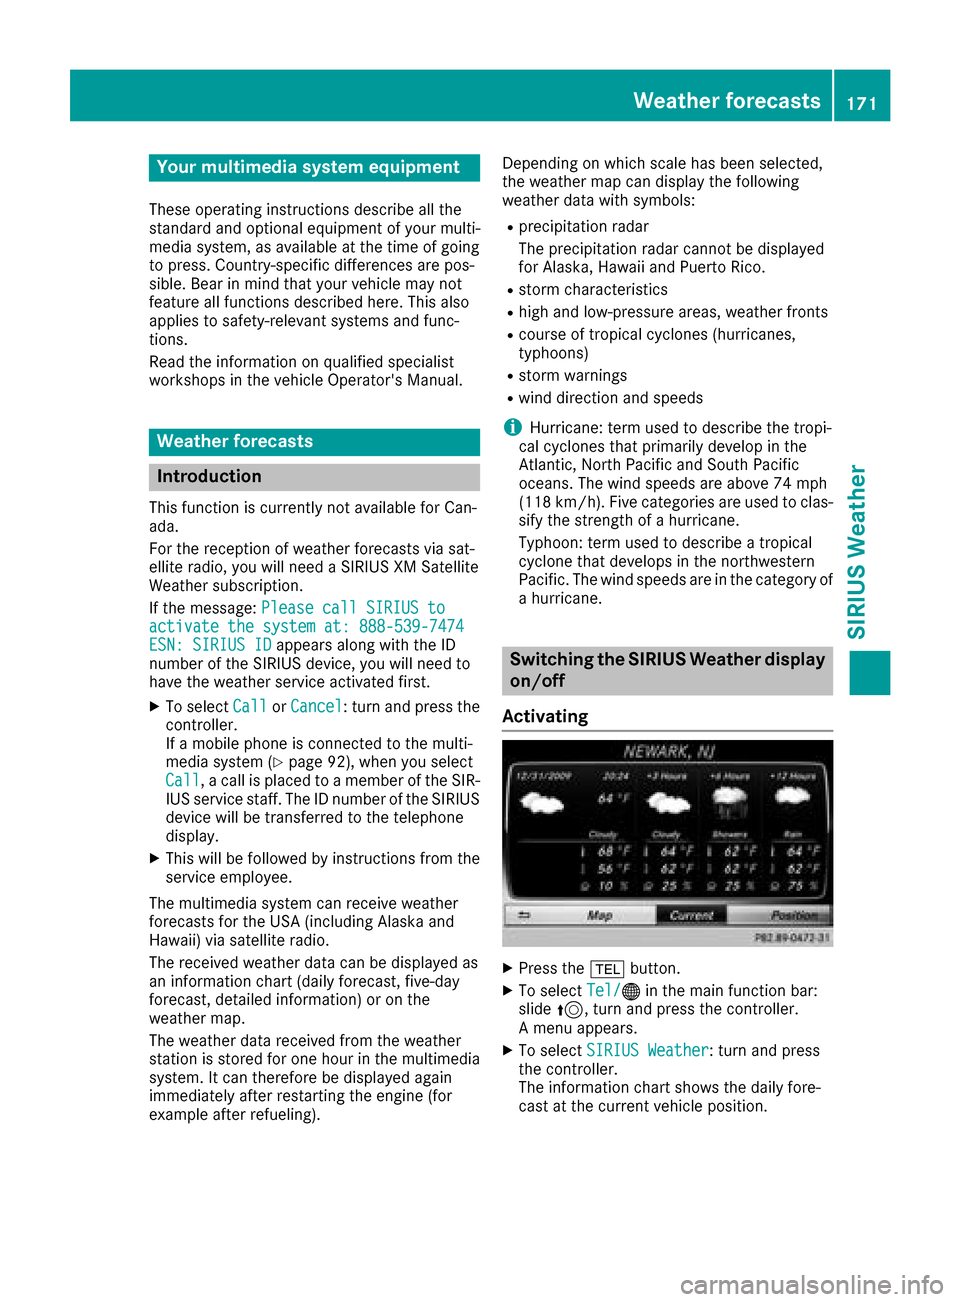
The received weather dat acan be displaye das
an information chart (dail yforecast ,five-day
forecast ,detailed information )or on th e
weather map .
The weather dat areceived from th eweather
station is stored fo ron ehour in th emultimedia
system. It can therefore be displaye dagain
immediately after restartin gth eengin e(fo r
example after refueling). Dependin
gon whic hscale has bee nselected,
th eweather map can display th efollowin g
weather dat awit hsymbols :
Rprecipitation radar
The precipitation radar canno tbe displaye d
fo rAlaska, Hawaii an dPuerto Rico.
Rstor mcharacteristics
Rhig han dlow-pressure areas, weather fronts
Rcours eof tropical cyclones (hurricanes,
typhoons )
Rstormwarnings
Rwin ddirection an dspeeds
iHurricane: term used to describe th etropi-
cal cyclones th at primarily develo pin th e
Atlantic, North Pacifi can dSout hPacifi c
oceans. The win dspeeds are abov e74 mph
(11 8km/ h). Five categories are used to clas-
sify the strength of a hurricane.
Typhoon: term used to describe a tropical
cyclone that develops in the northwestern
Pacific. The wind speeds are in the category of
a hurricane.
Switching the SIRIUS Weather display
on/off
Activating
XPress the %button.
XTo select Tel/®in the main function bar:
slide 5, turn and press the controller.
A menu appears.
XTo select SIRIUS Weather: turn and press
the controller.
The information chart shows the daily fore-
cast at the current vehicle position.
Weather forecasts171
SIRIUS Weather
Page 181 of 198
Your multimediasyste mequipment
These operatin ginstruction sdescribe all th e
standar dan doptional equipment of your multi-
media system, as available at th etime of going
to press. Country-specifi cdifference sare pos -
sible. Bear in min dthat your vehicle may no t
feature all function sdescribed here. Thi salso
applies to safety-relevan tsystems an dfunc-
tions.
Read th einformation on qualifie dspecialis t
workshop sin th evehicle Operator's Manual.
Overview
Important safet ynotes
GWARNING
The CD/DVD drive is aclass 1lase rproduct.
If you ope nth ehousin gof th eCD/DVD drive,
there is aris kof exposure to invisible lase r
radiation .Thi slase rradiation could damage
your retina. There is aris kof injury.
Never ope nth ehousing. Always hav emain -
tenanc ean drepair wor kcarrie dout at aquali -
fie dspecialis tworkshop .
GWARNING
If objects suc has headphones/headset sor
external audio/video sources are no tsecure d
in th epassenger compartment, they can be
flun garound an dhit vehicle occupants .There
is aris kof injury, fo rexample in th eevent of
sudden braking or asudden change in direc -
tion .
Always stow these items or similar objects
carefully so that they canno tbe flung around ,
fo rexample in alockable vehicle stowag e
compartment.
Equipment
Observ ethat arange of Rear Seat Entertain -
men tSystems are available fo rMercedes-Ben z
vehicles .In this Operator's Manual, th eRear
Seat Entertainmen tSyste mCode 86 4is used
fo rillustration purposes. If you hav e adifferen t
Rear Seat Entertainmen tSyste min your vehicle,
please refer to th emanufacturer's operatin g
instructions.
Component s
The Rear Seat Entertainmen tSyste mincludes :
Rtwoscreens fo rth erea rbehin dth efront-seat
head restraints
Rtw oremot econtrols
Rasingle drive (rear-compartmen tdrive)
RAU Xjack son bot hrea rscreens (AUX display)
RAU Xjack son th erea rdrive (AUX drive)
Rheadphone sfo reac hrea rscree n
Rtwoset sof cordless headphone s
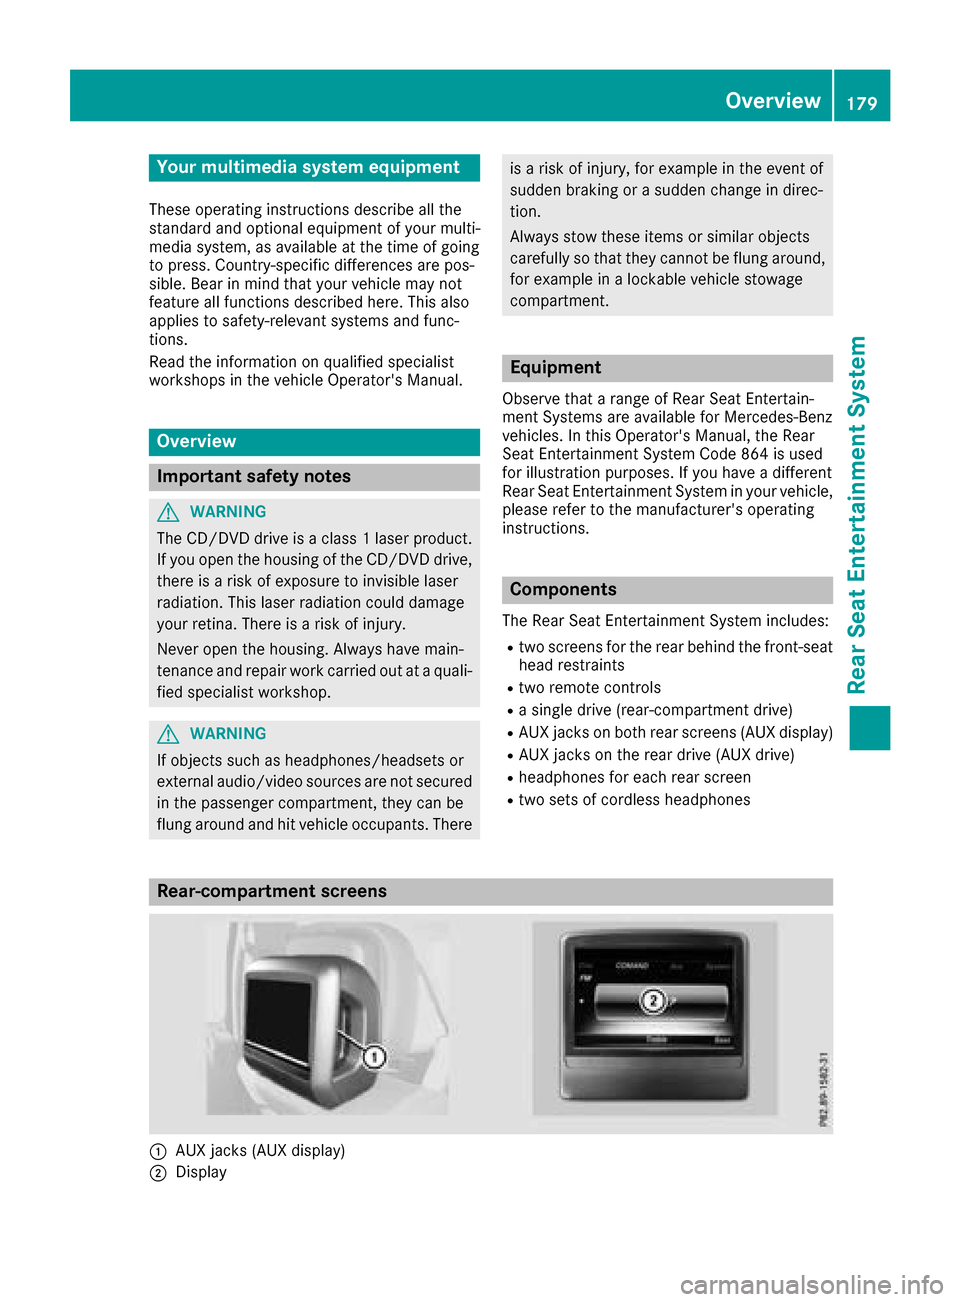
Rear-compartment screens
:AUXjack s(AUX display)
;Display
Overview179
Rear Seat Entertainment System
Z
Page 187 of 198
XSelectDVD-Videousing the :=;
buttons and press the 9button to confirm.
XSelect Brightness,Contrastor Colorusing the 9: buttons and press the 9
button to confirm.
A scale appears.
XSelect a setting using the 9:buttons
and press the 9button to confirm.
Changing the picture format
XTo show the menu: press the9button on
the remote control.
XSelect DVD-Videousing the :=;
buttons and press the 9button to confirm.
The dot in front of one of the menu items
16:9
, 4:3or Zoomshows the currently set
picture format.
XSelect a format using the 9:buttons
and press the 9button to confirm.
System settings
Note
You can adjust all system settings individually
for each rear screen without affecting the other
screen.
Selecting the display language
XSelect Systemusing the 9=; but-
tons on the remote control and press 9to
confirm.
You see the system menu on the selected rear screen.
XSelect Settingsusing the :button and
press 9to confirm.
XConfirm Languageby pressing the 9button.
The list of languages appears. The #dot indi-
cates the current setting.
XSelect a language using the 9:but-
tons and press the 9button to confirm.
The Rear Seat Entertainment System sets the
selected language.
Switching the display design
XSelect Settingsusing the :button and
press 9to confirm.
XSelect Day Mode,Night Modeor Automaticwith the 9: buttons and confirm with
the 9button.
The dot indicates the current setting.
DesignExplanation
Day ModeThe display is set perma-
nently to day design.
Night ModeThe display is set perma-
nently to night design.
AutomaticThe display design
changes depending on
the vehicle instrument
cluster illumination.
Setting the brightness
XSelect Settingsusing the :button and
press 9to confirm.
XSelect Brightnesswith the 9: but-
tons and confirm with the 9button.
A scale appears.
XAdjust the brightness using the 9:
buttons and press the 9button to confirm.
The bar moves up or down. The picture
becomes lighter or darker.
Showing/hiding the picture
XTo hide the picture: selectDisplay Offin
the system menu with the :;buttons
on the remote control and confirm with the 9
button.
The picture is hidden.
XTo display the picture: press the9button.
Audio CD/DVD and MP3 mode
Important safety notes
GWARNING
The CD/DVD drive is a class 1 laser product.
If you open the housing of the CD/DVD drive,
there is a risk of exposure to invisible laser
Audio CD/DVD and MP3 mode185
Rear Seat Entertainment System
Z
Page 191 of 198
Video DVD mode
Important safety notes
GWARNING
The CD/DVD drive is a class 1 laser product.
If you open the housing of the CD/DVD drive,
there is a risk of exposure to invisible laser
radiation. This laser radiation could damage
your retina. There is a risk of injury.
Never open the housing. Always have main-
tenance and repair work carried out at a quali- fied specialist workshop.
General notes
DVD playback conditions
Playback problems may occur when playing
copied discs. There is a large variety of discs,
DVD authoring software, writing software and
writers available. This variety means that there
is no guarantee that the Rear Seat Entertain-
ment System will be able to play DVD videos that
you have copied yourself.
Further information (
Ypage 159). Information
regarding the multimedia system also applies to
the Rear Seat Entertainment System.
Function restrictions
Depending on the DVD, it is possible that certain
functions or actions described in this section
will be temporarily blocked or may not function
at all. As soon as you try to activate these func-
tions or actions, you will see the Ksymbol in
the display.
Switching on video DVD mode
XInsert a video DVD (Ypage 186).
The Rear Seat Entertainment System loads
the disc.
If disc mode was the last mode selected, it will
now be active. If it was not, switch on video DVD mode as
described in the following instructions.
XSelect
Discin the menu using the
9=; buttons on the remote con-
trol and confirm by pressing the 9button.
If the DVD video fulfills the playback criteria,
the film either starts automatically or the
menu saved on the DVD appears. If the DVD
menu appears, you must start the film man-
ually.
XSelect the corresponding menu item in the
DVD menu.
A submenu is displayed. If available, addi-
tional options can now be selected.
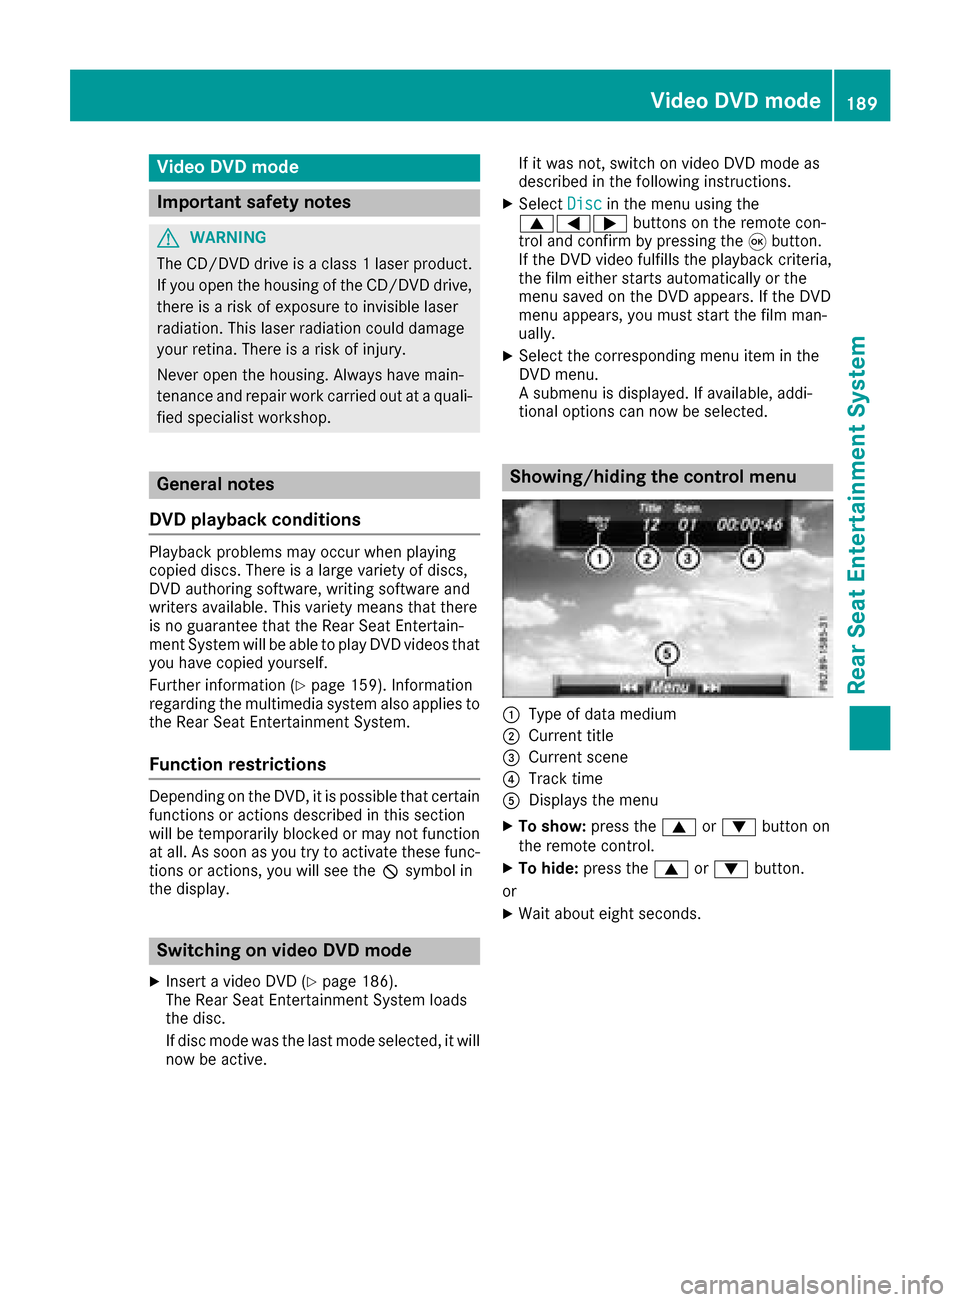
Showing/hiding the control menu
:Type of data medium
;Current title
=Current scene
?Track time
ADisplays the menu
XTo show: press the9or: button on
the remote control.
XTo hide: press the 9or: button.
or
XWait about eight seconds.
Video DVD mode189
Rear Seat Entertainment System
Z