tire pressure MERCEDES-BENZ G-Class 2017 W463 Owner's Manual
[x] Cancel search | Manufacturer: MERCEDES-BENZ, Model Year: 2017, Model line: G-Class, Model: MERCEDES-BENZ G-Class 2017 W463Pages: 286, PDF Size: 4.91 MB
Page 5 of 286
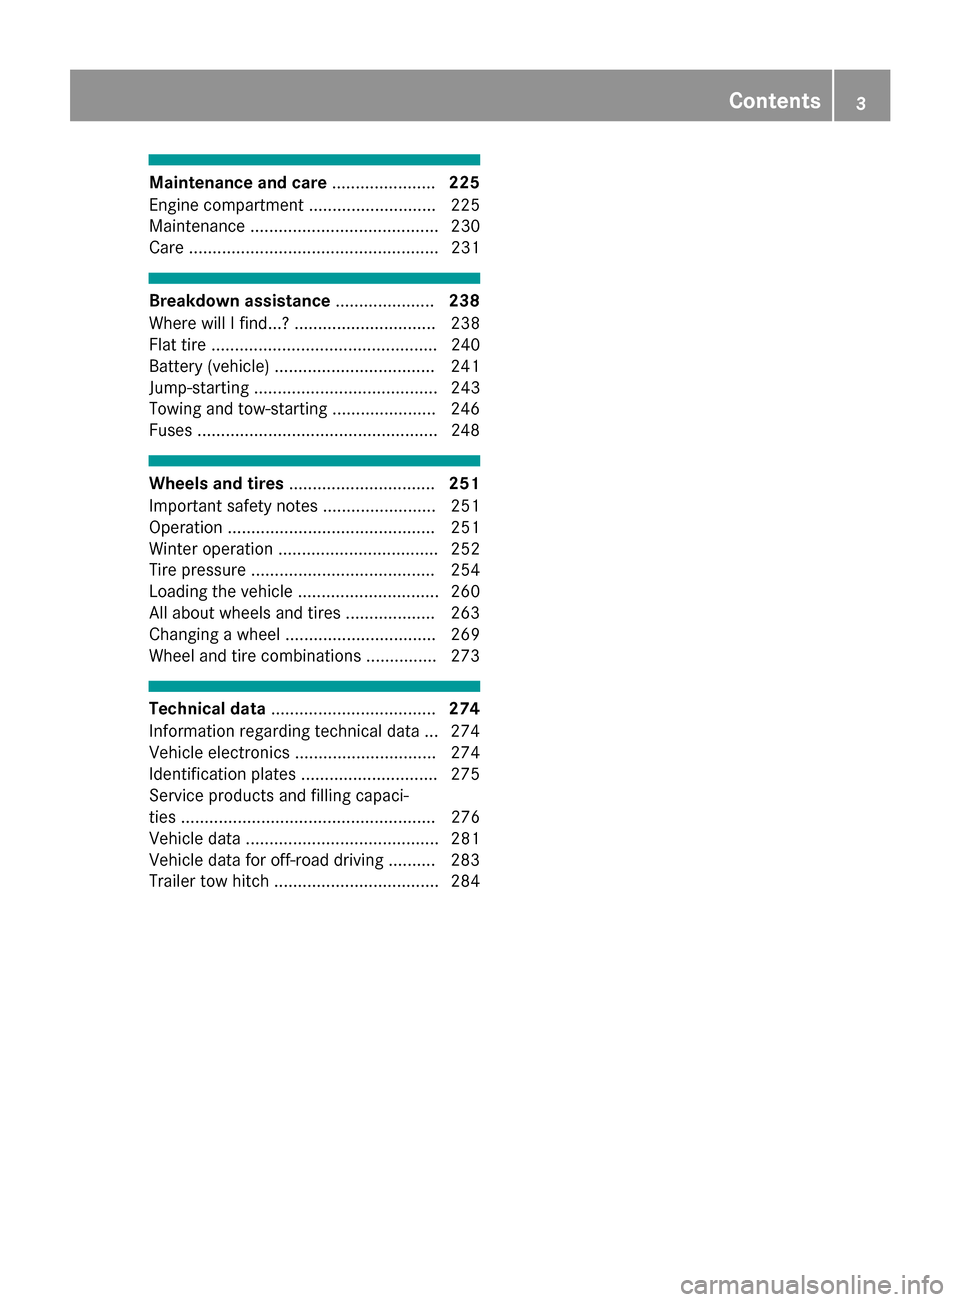
Maintenance and care......................225
Engine compartment ........................... 225
Maintenance ........................................ 230
Care ..................................................... 231
Breakdown assistance .....................238
Where wil lIfind...? .............................. 238
Flat tire ................................................ 240
Battery (vehicle) .................................. 241
Jump-starting ....................................... 243
Towing and tow-starting ...................... 246
Fuses ...................................................2 48
Wheels and tires............................... 251
Important safety notes ........................ 251
Operation ............................................ 251
Winter operatio n.................................. 252
Tire pressure ....................................... 254
Loading the vehicle .............................. 260
All about wheels and tires ................... 263
Changing awheel ................................ 269
Wheela nd tire combinations ...............2 73
Technical data................................... 274
Information regarding technical data ... 274
Vehicle electronics .............................. 274
Identification plates .............................2 75
Service products and filling capaci-
ties ...................................................... 276
Vehicle data ......................................... 281
Vehicle data for off-roadd riving .......... 283
Trailer tow hitch ................................... 284
Contents3
Page 20 of 286
Connectingamobile phone( gen-
eral information). ...........................201
Dis play message ............................ 187
Menu( on-board computer) ............ 163
Number from th ephoneb ook ........ 163
Redialin g........................................ 164
Rejecting/ending acall. ................ 163
see also Digital Operator's Man-
ua l.................................................. 198
Switching between mobile
phones ........................................... 203
see Mobil ephone
Temperature
Coolant .......................................... 158
Coolant (on-board computer) ......... 167
Engine oil( on-board computer) ...... 167
Outsid etemperature ...................... 157
Setting (climate control ).................. 98
Tilt/slidin gsunroof
see Sliding sunroof
Time
see separate operating instructions
Timing (RACETIMER) ......................... 168
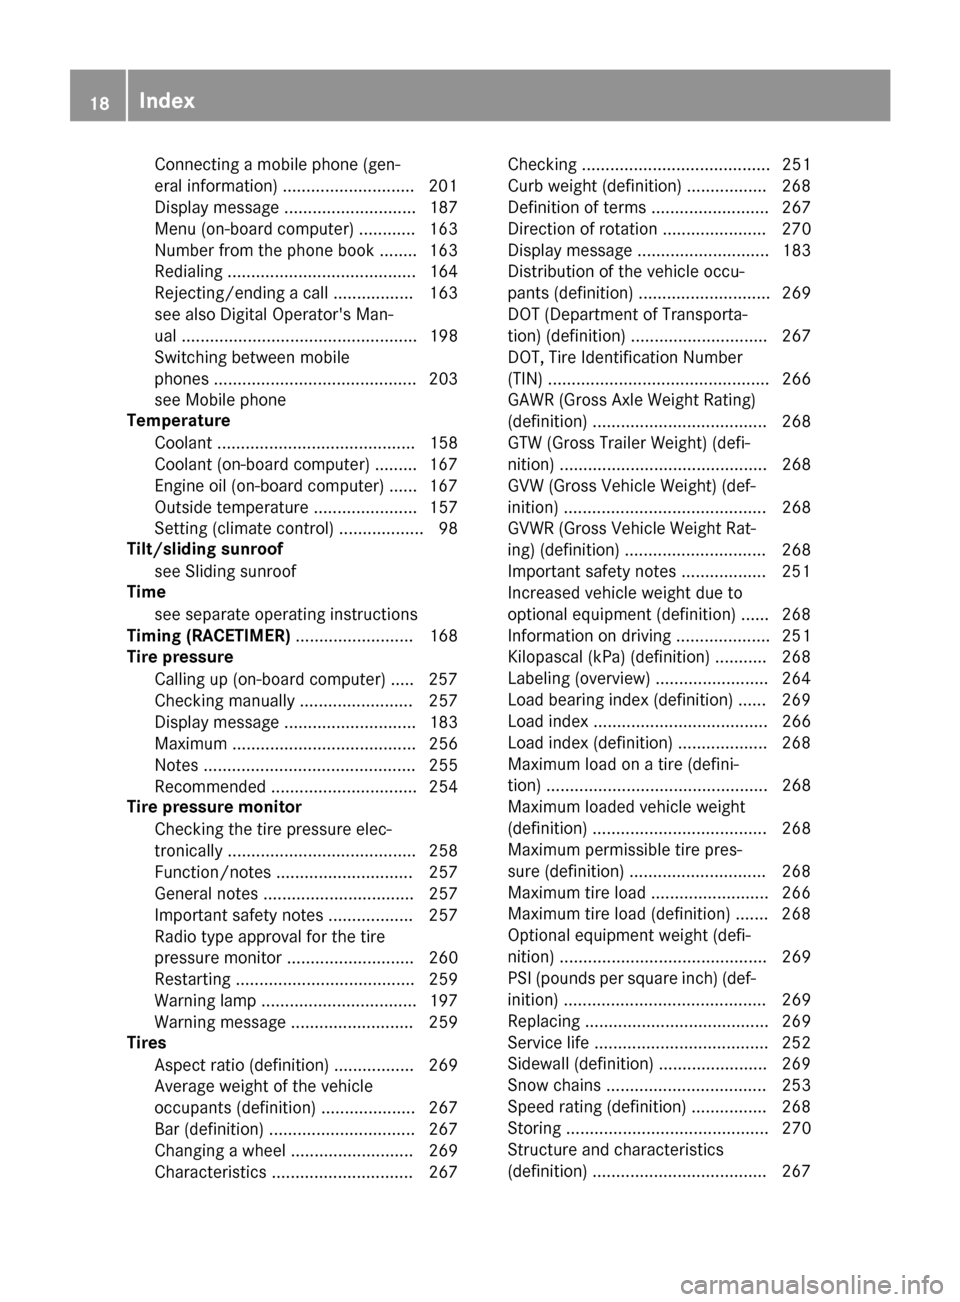
Tire pressure
Calling up (on-board computer) ..... 257
Checking manually ........................ 257
Displa ymessage ............................ 183
Maximu m....................................... 256
Notes. ............................................ 255
Recommended ............................... 254
Tire pressure monitor
Checking the tire pressure elec-
tronically ........................................ 258
Function/note s............................. 257
Generaln otes ................................ 257
Important safety notes .................. 257
Radi otypea pproval for the tire
pressure monitor ........................... 260
Restarting ...................................... 259
Warning lamp ................................. 197
Warning message .......................... 259
Tires
Aspect rati o(definition) ................. 269
Average weight of the vehicle
occupants (definition) .................... 267
Bar (definition) ............................... 267
Changing awheel .......................... 269
Characteristics .............................. 267 Checking ........................................ 251
Curb weight (definition) ................. 268
Definition of
terms ......................... 267
Di
rectio nofrotation ...................... 270
Displa ymessage ............................ 183
Distribution of the vehicl eoccu-
pants (definition) ............................ 269
DOT (Department of Transporta-
tion) (definition) ............................. 267
DOT, Tire Identification Number
(TIN) ............................................... 266
GAW R(GrossA xle Weight Rating)
(definition) ..................................... 268
GT W( GrossT railer Weight) (defi-
nition) ............................................ 268
GV W( GrossV ehicleWeight) (def-
inition) ........................................... 268
GVWR (GrossV ehicleWeight Rat-
ing )(de finition) .............................. 268
Important safety notes .................. 251
Increased vehicl eweigh tdue to
optionale quipment (definition) ...... 268
Information on driving .................... 251
Kilopascal( kPa)(de finition) ........... 268
Labeling (overview) ........................ 264
Loadb earing index (definition) ...... 269
Loadi ndex ..................................... 266
Loadi ndex (definition) ................... 268
Maximu mloadona tire (defini-
tion) ............................................... 268
Maximu mloaded vehicleweigh t
(definition) ..................................... 268
Maximu mpermissibl etire pres-
sure (definition) ............................. 268
Maximu mtire load ......................... 266
Maximu mtire load (definition) ....... 268
Optionale quipmentweight (defi-
nition) ............................................ 269
PSI (pounds pe rsquare inch )(de f-
inition) ........................................... 269
Replacing ....................................... 269
Service life ..................................... 252
Sidewal l(de finition) ....................... 269
Snow chains .................................. 253
Speed rating (definition) ................ 268
Storing ........................................... 270
Structure and characteristics
(definition) ..................................... 267
18Index
Page 21 of 286
Summer tiresinwinter .................. 253
Temperature .................................. 263
TIN (Tire Identification Number)
(definition) ..................................... 269
Tire bead (definition) ...................... 269
Tire pressure (definition) ................ 269
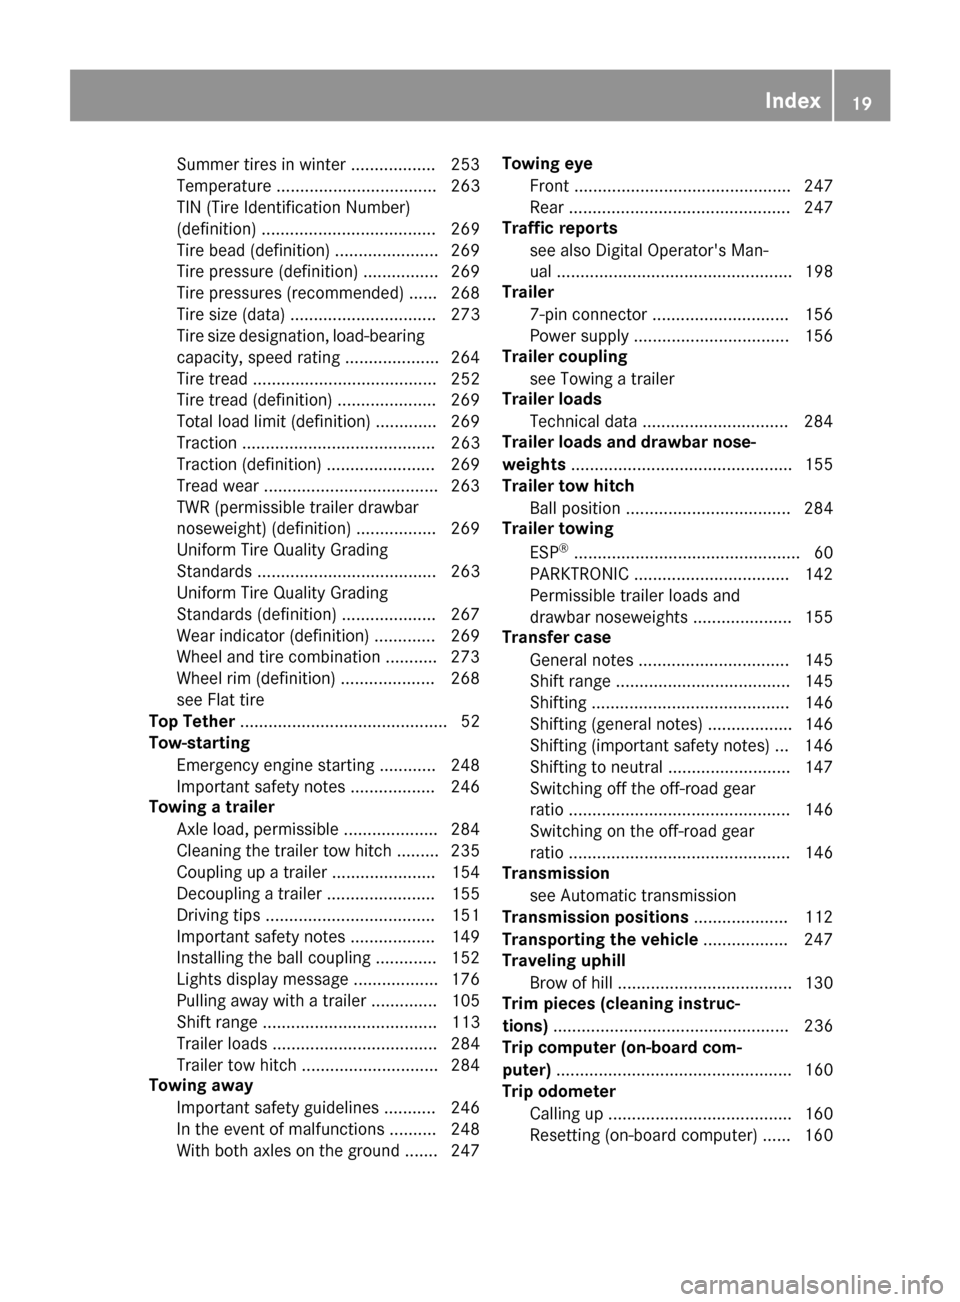
Tire pressures (recommended )...... 268
Tire size (data )............................... 273
Tire size designation, load-bearing
capacity, speed rating .................... 264
Tire tread. ...................................... 252
Tire tread( definition) ..................... 269
Totall oadlim it (definition) ............. 269
Tractio n......................................... 263
Tractio n(definition) ....................... 269
Tread wear ..................................... 263
TWR (permissibl etraile rdrawbar
noseweight) (definition) ................. 269
Uniform Tire Quality Grading
Standard s...................................... 263
Uniform Tire Quality Grading
Standard s(de finition) .................... 267
Wea rindicator (definition) ............. 269
Wheel and tire combination ........... 273
Wheel rim (definition) .................... 268
see Fla ttire
Top Tether ............................................ 52
Tow-starting
Emergency engine starting ............ 248
Important safety notes .................. 246
Towin gatrailer
Axle load ,permissibl e.................... 284
Cleaning the traile rtow hitch ......... 235
Coupling up atraile r...................... 154
Decoupling atraile r....................... 155
Driving tip s.................................... 151
Important safety notes .................. 149
Installing the ball coupling ............. 152
Lights display message .................. 176
Pulling away with atraile r.............. 105
Shift rang e..................................... 113
Trailer load s................................... 284
Trailer tow hitch ............................. 284
Towin gaway
Important safety guideline s........... 246
In the event of malfunctions .......... 248
With both axle
s on the ground ....... 247 Towin
geye
Front .............................................. 247
Rear ............................................... 247
Trafficr eports
see also Digital Operator's Man-
ua l.................................................. 198
Trailer
7-pi nconnecto r............................. 156
Power supply ................................. 156
Trailer coupling
see Towing atrailer
Trailer loads
Technical data ............................... 284
Trailer loads and drawbar nose-
weights ............................................... 155
Trailer tow hitch
Ballposition ................................... 284
Trailer towing
ESP
®................................................ 60
PARKTRONIC ................................. 142
Permissibl etraile rloads and
drawbar noseweights ..................... 155
Transfer case
Generaln otes ................................ 145
Shift rang e..................................... 145
Shifting .......................................... 146
Shifting (general notes). ................. 146
Shifting (important safety notes). .. 146
Shifting to neutral .......................... 147
Switching off the off-road gear
rati o............................................... 146
Switching on the off-road gear
rati o............................................... 146
Transmission
see Automati ctransmission
Transmissio npositions .................... 112
Transporting the vehicle .................. 247
Traveling uphill
Brow of hill ..................................... 130
Trim piece s(clea ning instruc-
tions) .................................................. 236
Trip computer (on-board com-
puter) .................................................. 160
Trip odometer
Calling up ....................................... 160
Resetting (on-board computer) ...... 160
Index19
Page 22 of 286
Turn signalsDisplay message ............................ 176
Replacing bulb s(front) ..................... 90
Switching on/off .............................. 87
TV
Operating (on-boar dcomputer) ..... 163
see Separate operating instructions
Two-way radio
Frequencie s................................... 274
Installation ..................................... 274
Transmission output( maximum) .... 274
TWR (Tongue Weight Rating) (defi-
nition) ................................................. 269
Type identificatio nplate
see Vehicl eide ntificatio nplate
U
Unlocking
Emergency unlocking ....................... 68
From insid ethe vehicl e(central
unlocking button) ............................. 67
US Bd evices
Connecting to the Media Inter-
face ...............................................2 03
V
Vanity mirror
Sun visor. ....................................... 211
Vehicle
Correct use ...................................... 27
Data acquisition ............................... 28
Display message ............................ 186
Equipment ....................................... 24
Individua lsettings .......................... 164
Limited Warranty .............................2 8
Loading .......................................... 260
Locking (in an emergency) ............... 68
Locking (SmartKey) .......................... 63
Lowering ........................................ 272
Maintenance .................................... 25
Operation outsidet he USA/
Canada ............................................ 25
Parking .......................................... 120
Parking for along period. ............... 122
Pulling awa y................................... 105
Raising ........................................... 270
Securing from rolling away ............ 270 Tow-starting ................................... 248
Towing ........................................... 246
Transporting .................................. 247
Unlocking (i
nanemergency) ........... 68
Unlocking (SmartKey). ..................... 63
Vehicl edata. .................................. 281
Vehicl edata ....................................... 281
Vehicl edata (off-road driving)
Approach/departure angle ............ 283
Fording depth ................................ 283
Maximu mgradient climbing abil-
ity .................................................. 283
Vehicl edimensions ........................... 281
Vehicl eemergencyl ocking ................ 68
Vehicl eidentificatio nnumber
see VIN
Vehicl eidentificatio nplate .............. 275
Vehicl etoolkit.................................. 239
Ventilation
Setting the airflow ........................... 98
Video
Operating the DVD ......................... 162
see also Digital Operator's Man-
ual.................................................. 198
VIN
Type plate ...................................... 275W
Warning and indicator lampsABS ................................................ 190
Brakes ........................................... 189
Check Engine ................................. 194
Coolant .......................................... 194
Distance warning ........................... 196
DISTRONIC PLUS. .......................... 196
ESP
®.............................................. 191
ESP®OFF ....................................... 192
Fue ltank ........................................ 194
Generaln otes ................................ 187
Overview .......................................... 32
Parking brake ................................ 193
PASSENGER AIR BAG OFF ............... 39
Reserve fue l................................... 194
Restraint system ............................ 193
Seatb elt. ....................................... 188
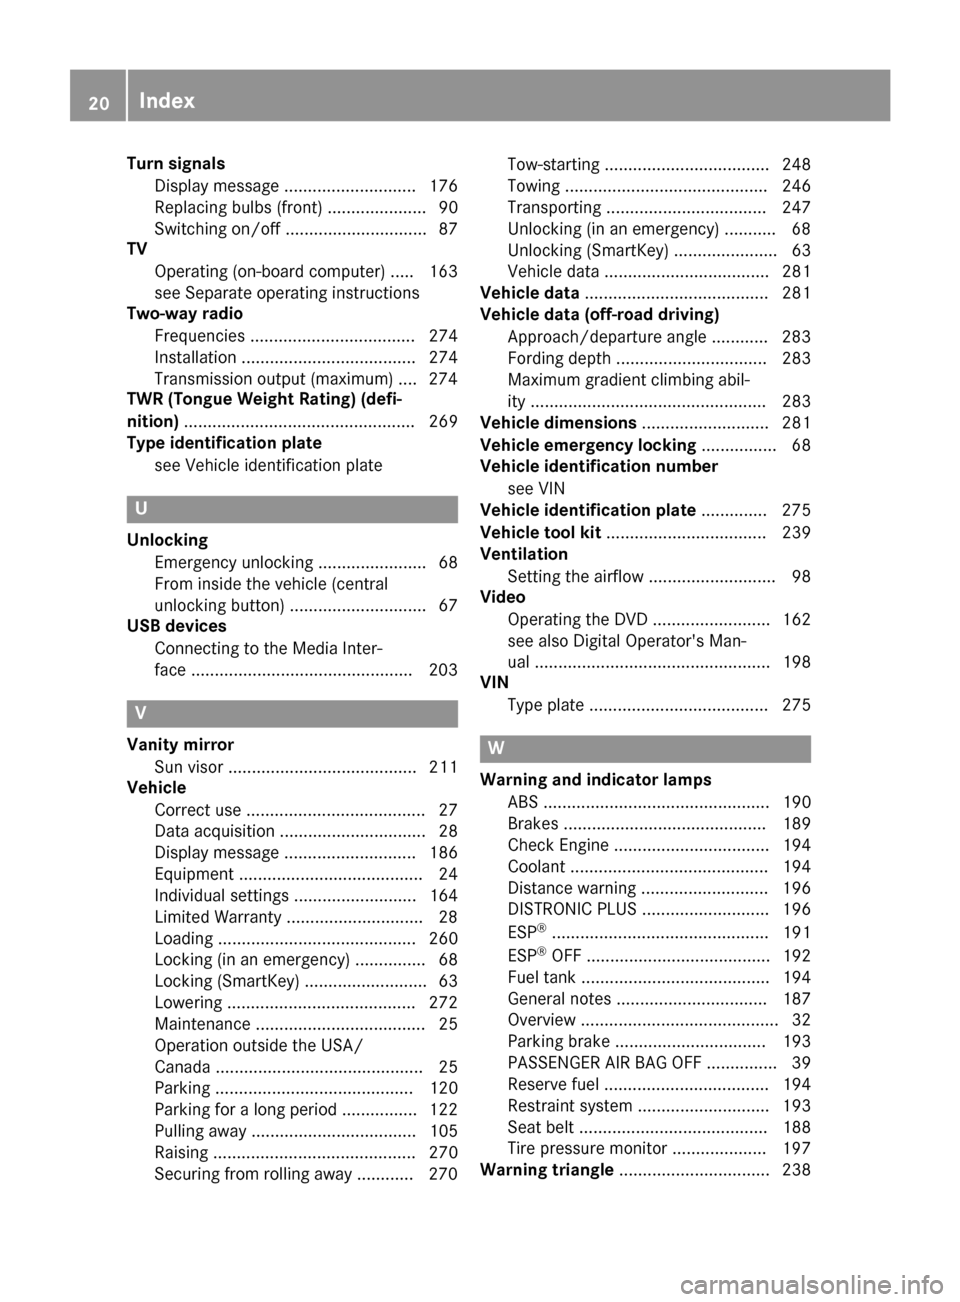
Tire pressure monitor .................... 197
Warning triangle ................................ 238
20Index
Page 25 of 286
Protecting the environment
General notes
HEnvironmental note
Daimler's declared policy is one of compre-
hensive environmental protection.
The objectives are for the natural resources
that form the basis of our existence on this
planet to be used sparingly and in amanner
that takes the requirements of both nature
and humanity into account.
You too can help to protect the environment
by operating your vehicle in an environmen-
tally responsible manner.
Fuel consumption and the rate of engine,
transmission, brake and tire wear are affected by these factors:
Roperating conditionsofy our vehicle
Ryour personal driving style
You can influence both factors. You should
bear the following in mind:
Operating conditions:
Ravoid short trips as these increase fuel con-
sumption.
Ralways make sure that the tire pressures
are correct.
Rdo not carry any unnecessary weight.
Rremove roof racks once you no longer need
them.
Rar egularly serviced vehicle will contribute
to environmental protection. You should
therefore adhere to the service intervals.
Ralways have service work carried out at a
qualified specialist workshop.
Personal driving style:
Rdo not depress the accelerator pedal when
startin gthe engine.
Rdo not warm up the engine when the vehicle
is stationary.
Rdrive carefully and maintain asafe distance
from the vehicle in front.
Ravoid frequent, sudden acceleration and
braking.
Rchange gear in good time and use each gear
only up to Ôof its maximum engine speed.
Rswitch off the engine in stationary traffic.
Rkeep an eye on the vehicle's fuel consump-
tion.
Environmental concerns and recom-
mendations
Wherever the Operator's Manual requires you to
dispose of materials, first try to regenerate or re-
use them. Observe the relevant environmental
rules and regulations when disposing of materi-
als. In this way you will help to protect the envi-
ronment.
Genuine Mercedes-Benz parts
HEnvironmental note
Daimler AG also suppliesr econditioned major
assemblies and parts which are of the same
quality as new parts. They are covered by the
same Limited Warranty entitlements as new
parts.
!Air bags and Emergency Tensioning Devi-
ces, as well as control units and sensors for
these restraint systems, may be installed in
the following areas of your vehicle:
Rdoors
Rdoor pillars
Rdoor sills
Rseats
Rcockpit
Rinstrumentc luster
Rcenter console
Do not install accessories such as audio sys-
tems in these areas. Do not carry out repairs or welding. You could impair the operating
efficiency of the restraint systems.
Have aftermarket accessories installed at a
qualified specialist workshop.
You could jeopardize the operating safety of
your vehicle if you use parts, tires and wheels as
well as accessories relevant to safety which
have not been approved by Mercedes-Benz. This
could lead to malfunction sinsafety-relevant
Genuine Mercedes-Benz parts23
Introduction
Z
Page 59 of 286
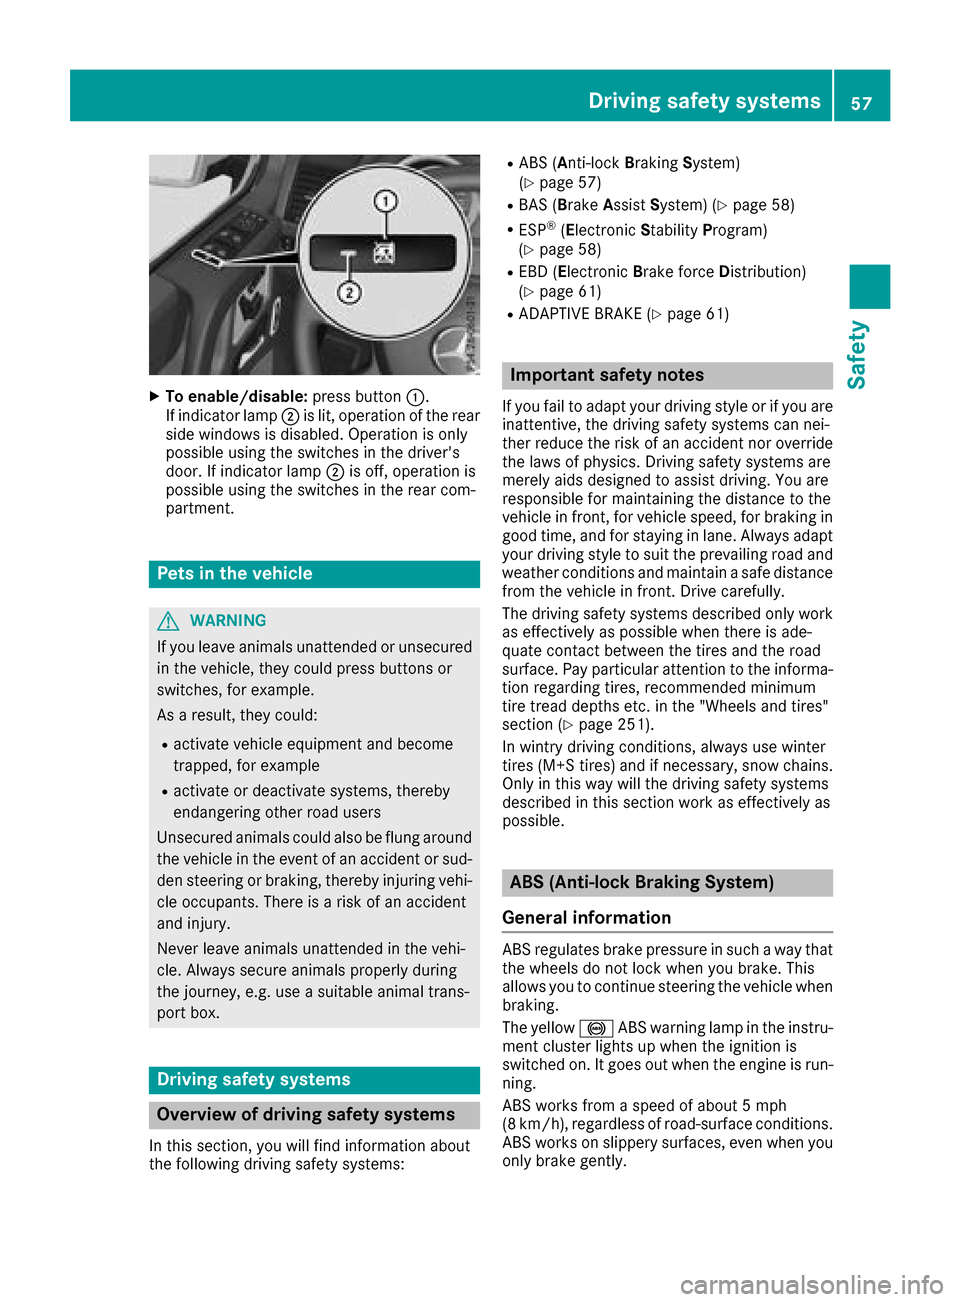
XTo enable/disable:press button:.
If indicator lamp ;is lit, operatio nofthe rear
side windows is disabled .Operation is only
possibl eusing the switches in the driver's
door. If indicator lamp ;is off, operatio nis
possibl eusing the switches in the rearc om-
partment.
Pets in the vehicle
GWARNING
If yo ulea ve animals unattende dorunsecured
in the vehicle, they could press buttons or
switches, for example.
As aresult, they could:
Ractivate vehicl eequipment and become
trapped, for example
Ractivate or deactivate systems, thereby
endangering othe rroadu sers
Unsecured animals could also be flung around
the vehicl einthe event of an accident or sud-
de ns teering or braking ,thereb yinjuring vehi-
cle occupants. There is ariskofana ccident
and injury.
Never leave animals unattende dinthe vehi-
cle .Alway ssecure animals properly during
the journey ,e.g.u se asuitabl eanimal trans-
port box.
Driving safety systems
Overvie wofdriving safety systems
In thiss ection, yo uwillf ind informatio nabout
the following driving safety systems:
RABS ( Anti-lock Braking System)
(Ypage 57)
RBAS ( Brake Assis tSys tem )(Ypage 58)
RESP®(E le ctronic Stability Program)
(Ypage 58)
REBD ( Ele ctronic Brake force Dis tribution)
(Ypage 61)
RADAPTIVE BRAK E(Ypage 61)
Important safety notes
If youfailtoa dapt your driving style or if yo uare
inattentive, the driving safety systemsc an nei-
ther reduce the ris kofanaccident nor override
the laws of physics. Driving safety systemsa re
merel yaidsd esig ned to assist driving .You are
responsibl efor maintaining the distance to the
vehicl einfront, for vehicl espeed ,for braking in
goo dtime ,and for staying in lane. Alway sadapt
your driving style to suit the prevailing roada nd
weather conditions and maintain asafed istance
from the vehicl einfront. Driv ecarefully.
The driving safety systemsd escribe donlyw ork
as effectively as possibl ewhent her eisa de-
quate contact between the tire sand the road
surface. Payp articula rattentio ntothe informa-
tio nr egarding tires, recommende dminimum
tire trea ddepths etc. in the "Wheels and tires"
section (
Ypage 251).
In wintry driving conditions, always us ewinter
tire s(M+ Stires) and if necessary,s now chains.
Onlyint hiswaywill the driving safety systems
describe dinthissection work as effectively as
possible.
ABS (Anti-lock Brakin gSystem)
General information
ABS regulate sbrake pressure in such awaythat
the wheels do not lock when yo ubrake. This
allows yo utocontinue steering the vehicl ewhen
braking.
The yellow !ABS warning lamp in the instru-
ment cluster lights up when the ignition is
switched on. It goe soutwhen the engine is run-
ning.
ABS works from aspeed of about5m ph
(8 km/h), regardless of road-surface conditions.
ABS works on slippery surfaces, eve nwheny ou
onlyb rake gently.
Driving safety systems57
Safety
Z
Page 121 of 286
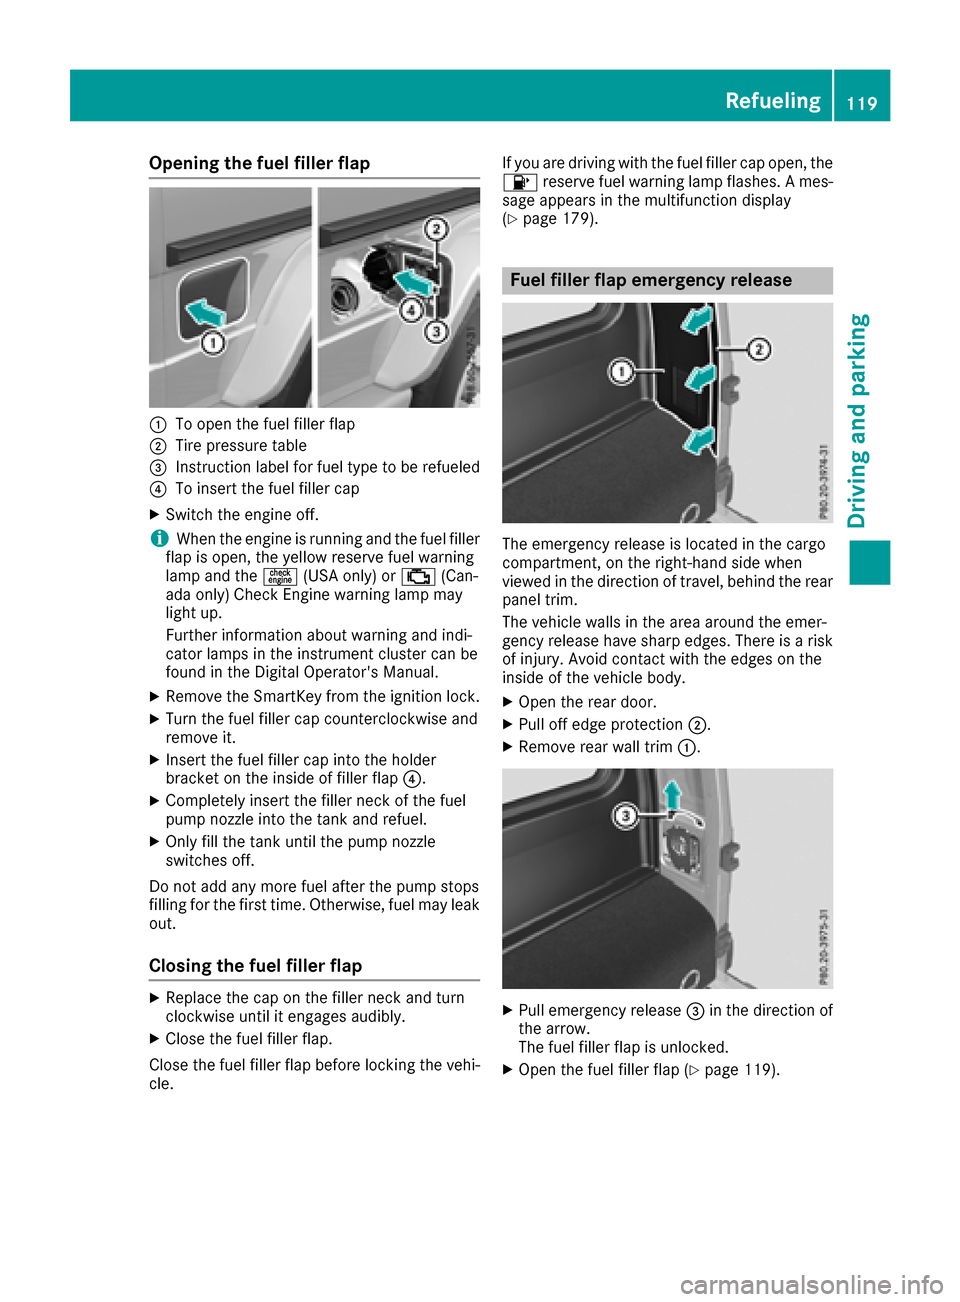
Opening the fuel filler flap
:To open the fuel filler flap
;Tire pressure table
=Instruction label for fuel type to be refueled
?To insert the fuel filler cap
XSwitchthe engine off.
iWhen the engine is running and the fuel filler
flap is open, the yellow reserve fuel warning
lamp and the =(USA only) or ;(Can-
ada only) Check Engine warning lamp may
light up.
Further information about warning and indi-
cator lamps in the instrument cluster can be
found in the Digital Operator's Manual.
XRemove the SmartKey from the ignition lock.
XTurn the fuel filler cap counterclockwise and
remove it.
XInser tthe fuel filler cap into the holder
bracket on the inside of filler flap ?.
XCompletely insert the filler neck of the fuel
pump nozzle into the tank and refuel.
XOnly fill the tank until the pump nozzle
switches off.
Do not add any more fuel after the pump stops
filling for the first time. Otherwise, fuel may leak
out.
Closing the fuel filler flap
XReplace the cap on the filler neck and turn
clockwise until it engages audibly.
XClose the fuel filler flap.
Close the fuel filler flap before lockin gthe vehi-
cle. If you are driving with the fuel filler cap open, the
8
reservef uel warning lamp flashes. Ames-
sage appears in the multifunction display
(
Ypage 179).
Fuel filler flap emergency release
The emergency release is located in the cargo
compartment ,onthe right-hand side when
viewed in the direction of travel, behind the rear
panel trim.
The vehicle walls in the area around the emer-
genc yrelease have sharp edges. There is arisk
of injury. Avoid contact with the edges on the
inside of the vehicle body.
XOpen the rear door.
XPull off edge protection ;.
XRemove rear wall trim:.
XPull emergency release =in the direction of
the arrow.
The fuel filler flap is unlocked.
XOpen the fuel filler flap (Ypage 119).
Refueling119
Driving and parking
Z
Page 124 of 286
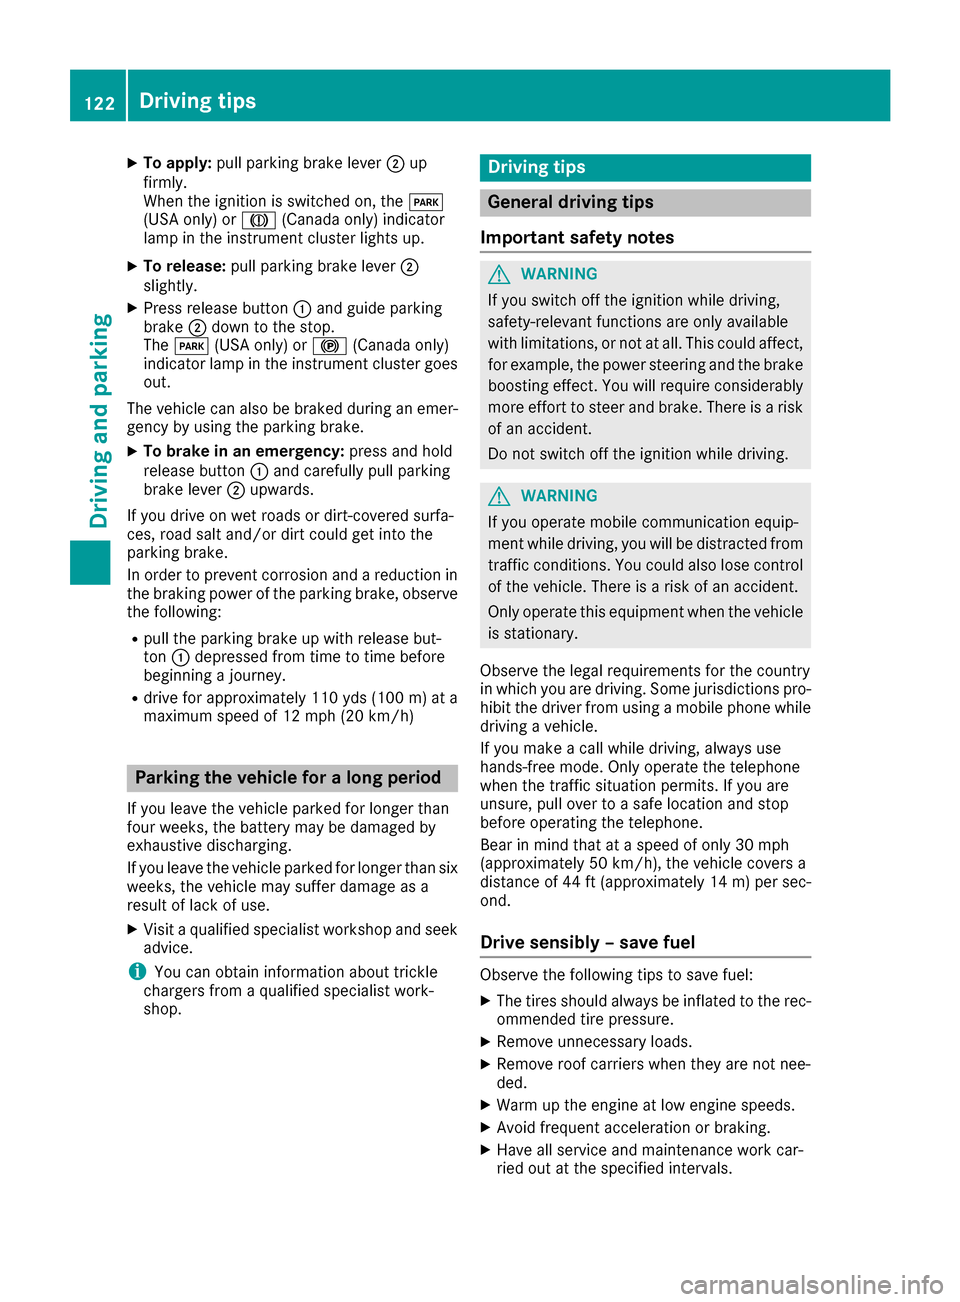
XTo apply:pull parking brake lever ;up
firmly.
Whe nthe ignition is switched on, the F
(US Aonly) or J(Canada only) indicator
lamp in the instrument cluster lights up.
XTo release: pull parking brake lever ;
slightly.
XPress release button :and guid eparking
brake ;down to the stop.
The F (USAonly) or !(Canada only)
indicator lamp in the instrument cluster goes
out.
The vehicl ecan also be braked during an emer-
genc ybyu sing the parking brake.
XTo brake in an emergency: press and hold
release button :and carefull ypullp arking
brake lever ;upwards.
If yo udrive on we troads or dirt-covered surfa-
ces, roads alta nd/or dirt could get into the
parking brake.
In order to prevent corrosion and areduction in
the braking powe rofthe parking brake, observe
the following:
Rpull the parking brake up with release but-
ton :depressedf rom time to time before
beginning ajourney.
Rdrive for approximately1 10 yds(100 m) at a
maximu mspeed of 12 mph (20 km/h)
Parking the vehicle for alon gp eriod
If yo uleave the vehicl eparked for longer than
fourw eeks, the battery maybed amaged by
exhaustive discharging.
If yo ulea ve the vehicl eparked for longer thans ix
weeks, the vehicl emaysuffer damage as a
resul toflackofu se.
XVisit aquali fied specialist workshop and seek
advice.
iYo uc an obtai ninformatio nabout trickle
chargers from aquali fied specialist work-
shop.
Driving tips
General driving tips
Important safety notes
GWARNING
If yo uswitch off the ignition whil edriving,
safety-relevant functions are onlya vailable
with limitations, or not at all. Thi scould affect,
for example, the powe rsteering and the brake
boosting effect. Yo uwillr equire considerably
more effort to steera nd brake. There isarisk
of an accident.
Do not switch off the ignition whil edriving.
GWARNING
If yo uoperate mobil ecommunication equip-
ment whil edriving ,you will be distracted from
traffic conditions. Yo ucould also lose control
of the vehicle. There is ariskofana ccident.
Onlyo perate thise quipment when the vehicle
is stationary.
Observe the legalr equirements for the country
in which yo uare driving .Some jurisdictions pro-
hibi tthe driver from using amobilephone while
driving avehicle.
If yo umakeac allw hile driving ,alway suse
hands-free mode. Onlyo perate the telephone
when the traffic situatio npermits. If yo uare
unsure, pull overtoas afel oc ation and stop
before operating the telephone.
Bea rinm ind thatata speed of only30m ph
(approximately50k m/h), the vehiclecovers a
distance of 44 ft (approximately1 4m)per sec-
ond.
Drive sensibly –save fuel
Observe the following tips to save fuel:
XThe tires should always be inflated to the rec-
ommended tire pressure.
XRemove unnecessary loads.
XRemove roof carriersw hen they are not nee-
ded.
XWarm up the engin eatlow engin espeeds.
XAvoid frequenta cceleration or braking.
XHave all servicea nd maintenancework car-
ried out at the specified intervals.
122Driving tips
Driving and parking
Page 130 of 286
Familiarize yourself with the characteristics of
your vehicle and the gearshift operation before
driving through difficult terrain.
The following driving systems are specially
adapted to off-roadd riving:
R4ETS (Ypage 59)
ROff-roadABS (Ypage 58)
RTransfer case (Ypage 145)
RDifferentia llocks (Ypage 120)
Observe the following notes:
RStop the vehicle before yo udrive off-roada nd,
if necessary ,shift the transfe rcase to the off-
roadd riving position LOW RANGE
(
Ypage 146).
REngag ethe differential locks if necessary
(Ypage 148).
iABS, 4ETS, ESP®and BAS are deactivated
while the differential locks are engaged.T his
allow sthe front wheels to lock briefly, so that
these can dig into aloose surface .However,
please note that locke dwheels skid and can
no longer steer.
RCheck that items of luggage and loads are
stowed safely and are well secured
(
Ypage 209).
RTo avoid damaging the vehicle, make sure
there is always sufficient ground clearance.
RAlway skeep the engine running and in gear
whe ndriving on adownhil lgradient.
RAlway skeep the engine running and in gear
whe ndriving downani ncline.
RDrive slowlyand evenly, if necessary at a
walking pace.
REnsure that the wheels are in contact with the
ground at al ltimes.
RDrive with extreme care on unfamilia roff-road
routes where visibility is poor. For safety rea-
sons, get ou
tofthe vehicle firs tand survey
the off-roadr oute.
RCheck the depth of water before fording rivers
and streams.
RWatch outfor obstacles.
RAlwayskeep the doors, reard oor, sidewin-
dowsa nd the sliding sunroof closed while the
vehicle is in motion.
RSwitch off cruise control.
RDo not deviate from marke droutes.
RAdap tyou rspeed to the terrain. The rougher,
steeper or more ruts on the terrain, the slower
your speed should be.
RDo not jump with the vehicle. as this will inter-
rup tthe vehicle' spropulsion.
RAvoid hig hengine speeds .Drive at appropri-
ate engine speeds (maximu m3,000 rpm).
RDo not shift the automatic transmission to
position N.
RAlwayscheck the vehicle for damag eafteroff-
roadd riving.
Do not use the HOLD function whe ndriving off-
road, on steep uphil lordownhil lgradients or on
slippery or loose surfaces. The HOLD function
cannot holdt he vehicle on such surfaces.
You can obtain further information aboutr etro-
fitting specia lall-terrain tires from aquali fied
specialist workshop.
Checklist before driving off-road
!If the engine oil warning lamp lights up while
the vehicle is in motion, stop the vehicle in a
saf ep lace as soona spossible. Check the
engine oil level. The engine oil warning lamp
warning mus tnot be ignored.C ontinuing the
journey while the symbol is displaye dcould
lea dtoe ngine damage.
XEngin eoillevel: check the engine oil level
and ad doil if necessary.
Whend riving on steep gradients, the engine
oil level mus tbes ufficiently hig htoensure a
correct oil supply in the vehicle.
XTire-changing too lkit: check that the jack is
working and make sur eyou hav ethe lug
wrench, arobust tow cable and afolding
spade in the vehicle.
XWheels and tires: check the tire treadd epth
and tire pressure.
XCheck for damag eand remove any foreign
objects, e.g. small stones,f rom the wheels/
tires.
XReplace any missing valve caps.
XReplace dente dordamaged wheels .Also
check the spare wheel.
XRims: dentedorbent rims can result in aloss
of tire pressure and damag ethe tire bead.
Befored riving off-road, check the wheels and
replace them if necessary.
128Drivin gtips
Drivin gand parking
Page 153 of 286
When towingatrailer, your vehicle's handling
characteristic swill be differentinc omparison
with when driving without atrailer.
The vehicle/trailer combination:
Ris heavier
Ris restricted in its acceleration and gradient-
climbing capability
Rhas an increased braking distance
Ris affected more by stron gcrosswinds
Rdemands more sensitive steering
Rhas alarger turning radius
This could impair the handling characteristics.
Adapt your driving style accordingly. Maintain a
safe distance. Drive carefully.
When towing atrailer, alwaysa djust your speed
to the currentr oad and weather conditions. Do
not exceed the maximum permissible speed for
your vehicle/trailer combination.
Notes on towing atrailer
General notes
RDo not exceed the maximum permissible
speed for vehicle/trailer combinations in the
relevant country.
This lowers the risk of an accident.
ROnly install an approved trailer coupling on
your vehicle.
Further information on availability and on
installation is available from any authorized
Mercedes-Benz Center.
RThe bumpers of your vehicle are not suitable
for installing detachable trailer couplings.
RDo not install hired trailer couplings or other
detachable trailer couplings on the bumpers
of your vehicle.
RIf you do not need the ball coupling, remove
the ball coupling from the ball coupling
recess. This will reduce the risk of damage to
the ball coupling.
When towing atrailer, set the tire pressure on
the rear axle of the towing vehicle for the max-
imum load. Further information on the tire pres-
sure table in the fuel filler flap (
Ypage 119).
Please not ethat when towing atrailer,
PARKTRONIC (
Ypage 140) and Blind Spot
Assist (Ypage 137) availability is limited or not
available at all. The height of the ball coupling changes with the
load of the vehicle. If necessary, use
atrailer
with aheight-adjustable drawbar.
You will find permissible trailer loads under
"Technical data" (
Ypage 284).
Driving tips
XObserve the notes on ESP®trailer stabiliza-
tion (Ypage 60).
XOn long and steep downhill gradients ,select
shift range 1,2or 3(Ypage 114) in good time.
This also applies if you have activated cruise
control or the speed limiter.
XIf necessary, shift the transfer case to LOW
RANGE (Ypage 146).
This will use the braking effect of the engine, so that less braking will be required to main-
tain the speed. This relieves the load on the
brake system and preventst he brakes from
overheatin gand wearing too quickly. If you
need additional braking, depress the brake
pedal repeatedly rather than continuously.
The maximum permissible speed for vehicle/
trailer combinations depends on the type of
trailer. Beforeb eginningthe journey, check the
trailer's document stosee what the maximum
permitted speed is. Observe the maximum per-
missible speed in the relevant country.
For certain Mercedes-Benz vehicles, the maxi-
mum permissible rear axle load is increased
when towing atrailer. See the "Technical data"
section to find out whether this applies to your
vehicle (
Ypage 284). In the event of increased
rear axle load, the car/trailer combination may
not exceed amaximum speed of 60 mph
(100 km/ h)for reasons concerning the operat-
ing permit. This als oapplie sinc ountries in
which the maximu mpermissible speedf or car/
trailer combinations is greater than 60 mph
(100 km/h).
When towing atrailer, you rvehicle's handling
characteristics wil lbedifferent in comparison to
when driving without atrailer and it wil lcon-
sume more fuel.
Towing atrailer151
Driving and parking
Z