ECO mode MERCEDES-BENZ G-CLASS 2018 Owner's Manual
[x] Cancel search | Manufacturer: MERCEDES-BENZ, Model Year: 2018, Model line: G-CLASS, Model: MERCEDES-BENZ G-CLASS 2018Pages: 294, PDF Size: 4.86 MB
Page 6 of 294
1, 2, 3 ...
4ETS (Electronic Traction System).... 59
12 V socket
see Socket (12 V)
115 V socket ...................................... 218
A
ABS (Anti-lock Braking System)
Display message ............................ 175
Function/notes ................................ 58
Warning lamp ................................ .194
Accident
Automatic measures after an acci-
dent ................................................. 50
Activating media mode
General notes ................................ 208
ADAPTIVE BRAKE ................................. 61
Additives (engine oil) ........................ 286
Address book
see also Digital Operator's Man-
ual ..................................................2 03
Adjustable damping .......................... 111
Adjusting the volume
Multimedia system ........................ 204
Air bags
Deployment ..................................... 47
Display message ............................ 179
Front air bag (driver, front
passenger) ....................................... 45
Important safety notes .................... 44
Introduction ..................................... 44
PASSENGER AIR BAG OFF indica-
tor lamp ...........................................3 9
Pelvis air bag ................................... 46
Side impact air bag .......................... 45
Window curtain air bag .................... 46
Air vents
Important safety notes .................. 102
Rear ............................................... 103
Setting ...........................................1 02
Setting the center air vents ........... 103
Setting the side air vents ...............1 03
Air-conditioning system
see Climate control
Alarm
ATA (Anti-Theft Alarm system) ......... 62 Switching off (ATA) .......................... 62
Switching the function on/off
(ATA) ................................................ 62
Alarm system
see ATA (Anti
-Theft Alarm system)
All-wheel drive
Transfer case ................................. 149
AMG menu (on-board computer) ..... 171
Anti-theft alarm system
see ATA (Anti-Theft Alarm system)
Approach/departure angle .............. 132
Ashtray ............................................... 216
Assistance display (on-board com-
puter) ..................................................1 67
Assistance menu (on-board com-
puter) ..................................................1 67
ASSYST service interval display
Service messages .......................... 235
ATA (Anti-Theft Alarm system)
Activating/deactivating ................... 62
Function ...........................................6 2
Switching off the alarm .................... 62
Authorized Mercedes-Benz Center
see Qualified specialist workshop
AUTO lights
Display message ............................ 180
see Lights
Automatic car wash (care) ............... 236
Automatic engine start (ECO start/
stop function) .................................... 109
Automatic engine switch-off (ECO
start/stop function) .......................... 108
Automatic headlamp mode ................ 87
Automatic transmission
Display message ............................ 190
Drive position (ECO start/stop
function) ........................................ 113
Drive program ................................ 116
Driving tips .................................... 114
Emergency running mode .............. 119
Engaging drive position .................. 113
Engaging neutral ............................ 113
Engaging reverse gear ................... 112
Engaging the park position ............ 112
Important safety notes .................. 111
Kickdown ....................................... 114
Manual shifting .............................. 117
4Index
Page 7 of 294
Neutral (ECO start/stop func-
tion) ............................................... 113
Overview ........................................ 111
Problem (malfunction) ................... 119
Program selector button ................ 115
Pulling away ................................... 106
Selector lever ................................ 112
Shift ranges ................................... 116
Steering wheel paddle shifters ...... 116
Trailer towing ................................. 115
Transmission position display ........ 112
Automatic transmission emer-
gency mode ....................................... 119
Axle load, permissible (trailer tow-
ing) ...................................................... 291
B
BabySmart™
Air bag deactivation system ............. 53
Back button ....................................... 204
Backup lamp
Replacing bulbs ............................... 92
Ball coupling
Installing ........................................ 156
BAS (Brake Assist System) ................. 59
Battery (SmartKey)
Checking .......................................... 65
Important safety notes .................... 64
Replacing ......................................... 65
Battery (vehicle)
Charging ........................................ 248
Display message ............................ 182
Important safety notes .................. 246
Jump starting ................................. 249
Overview ........................................ 246
Belt warning ......................................... 43
Blind Spot Assist
Activating/deactivating ................. 167
Activating/deactivating (on-
board computer) ............................ 167
Display message ............................ 185
Notes/function .............................. 140
Bluetooth
®
Searching for a mobile phone ........ 207
see also Digital Operator's Man-
ual .................................................. 203
Telephony ...................................... 206 Brake fluid
Display message ............................ 177
Notes ............................................. 286
Brake fluid level ................................ 235
Brake force distribution
see EBD (electronic brake force
distribution)
Brake lamp
Replacing bulbs ............................... 92
Brake lamps
Display message ............................ 180
Brakes
ABS .................................................. 58
BAS .................................................. 59
Brake fluid (notes) ......................... 286
Display message ............................ 175
EBD .................................................. 61
High-performance brake system .... 127
Hill start assist ............................... 107
HOLD function ............................... 142
Important safety notes .................. 125
Maintenance .................................. 126
Parking brake ................................ 123
Riding tips ...................................... 125
Warning lamp ................................. 193
Breakdown
see Flat tire
see Towing away
Brightness control (instrument
cluster lighting) ................................... 32
Brush guard ....................................... 226
Bulbs
Backup lamp .................................... 90
Brake lamp ...................................... 90
Rear fog lamp .................................. 90
Standing lamps (rear) ...................... 90
T
ail lamp .......................................... 90
Turn signal lamp (front) .................... 90
Turn signal lamp (rear) ..................... 90
see Replacing bulbs
C
California
Important notice for retail cus-
tomers and lessees .......................... 24
Calling up a malfunction
see Display messages
Index5
Page 98 of 294
Overview of the climate control sys-
tem
General notes
Observe the settings recommended on the fol-
lowing pages. The windows could otherwise fog
up.
To prevent the windows from fogging up:
Rswitch off climate control only briefly
Rswitch on air-recirculation mode only briefly
Rswitch on the cooling with air dehumidifica-
tion function
Ractivate the "Windshield defrosting" function
briefly, if required
Climate control regulates the temperature and
the humidity in the vehicle interior and filters
undesirable substances out of the air.
The "Cooling with air dehumidification" function
is only available when the engine is running.
Optimum operation is only achieved when the
side windows and the sliding sunroof are closed. The climatic comfort deteriorates whilst the slid-
ing sunroof is open. Set the temperature man-
ually if the sliding sunroof is open.
The residual heat function can only be activated
or deactivated with the ignition switched off
(
Ypage 102).
The integrated filter can filter out most particles
of dust and completely filters out pollen. A clog-
ged filter reduces the amount of air supplied to
the vehicle interior. Depending on the operating
conditions and environmental influences, the
interval for replacing the filter may be shorter
than specified.
iVentilate the vehicle for a brief period during
warm weather, e.g. using the convenience
opening feature (
Ypage 70). This will speed
up the cooling process and the desired vehi-
cle interior temperature will be reached more
quickly.
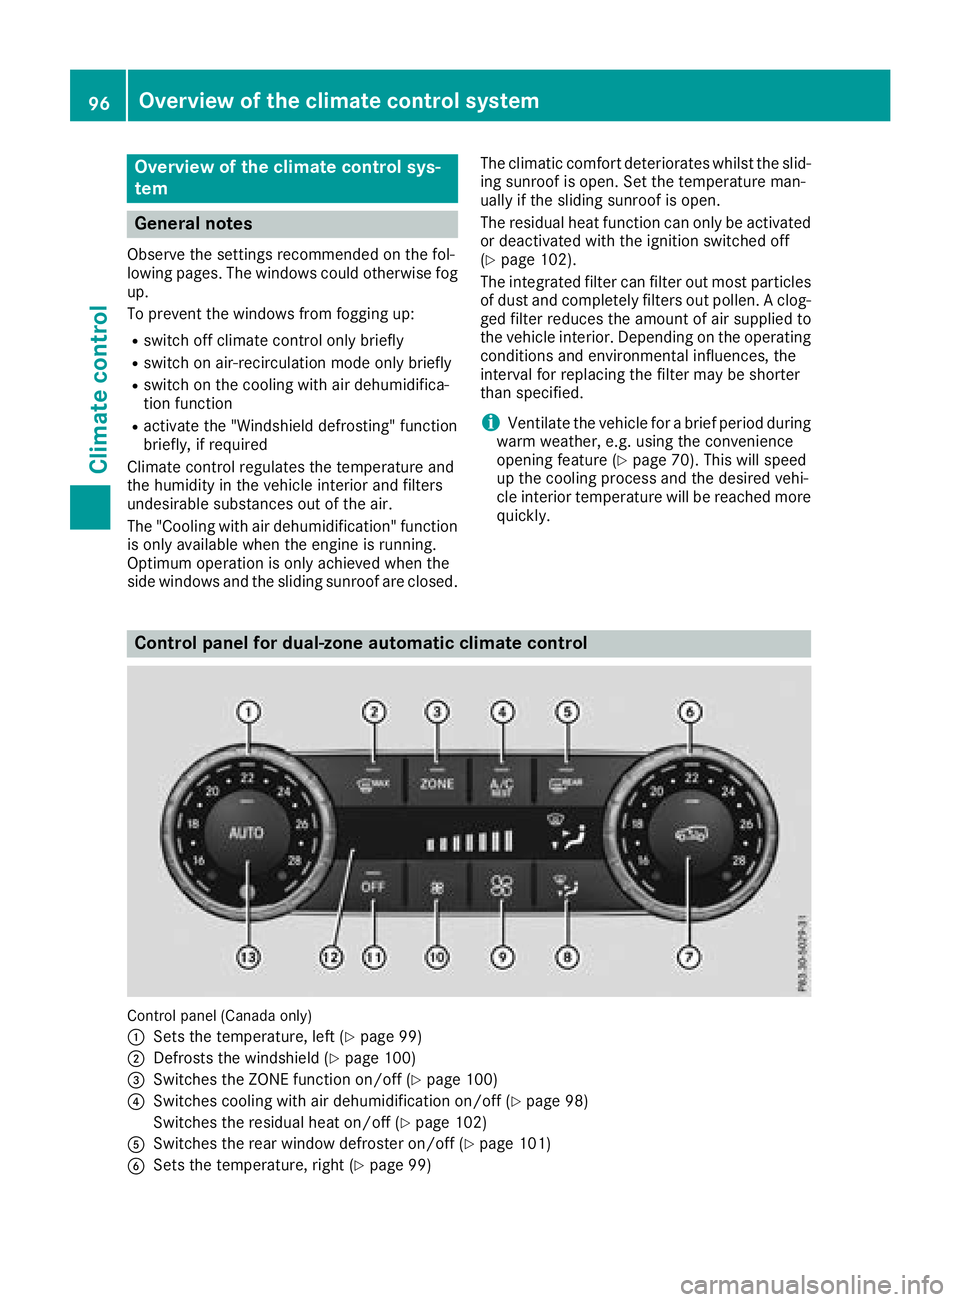
Control panel for dual-zone automatic climate control
Control panel (Canada only)
:
Sets the temperature, left (Ypage 99)
;Defrosts the windshield (Ypage 100)
=Switches the ZONE function on/off (Ypage 100)
?Switches cooling with air dehumidification on/off (Ypage 98)
Switches the residual heat on/off (
Ypage 102)
ASwitches the rear window defroster on/off (Ypage 101)
BSets the temperature, right (Ypage 99)
96Overview of the climate control system
Climate control
Page 99 of 294
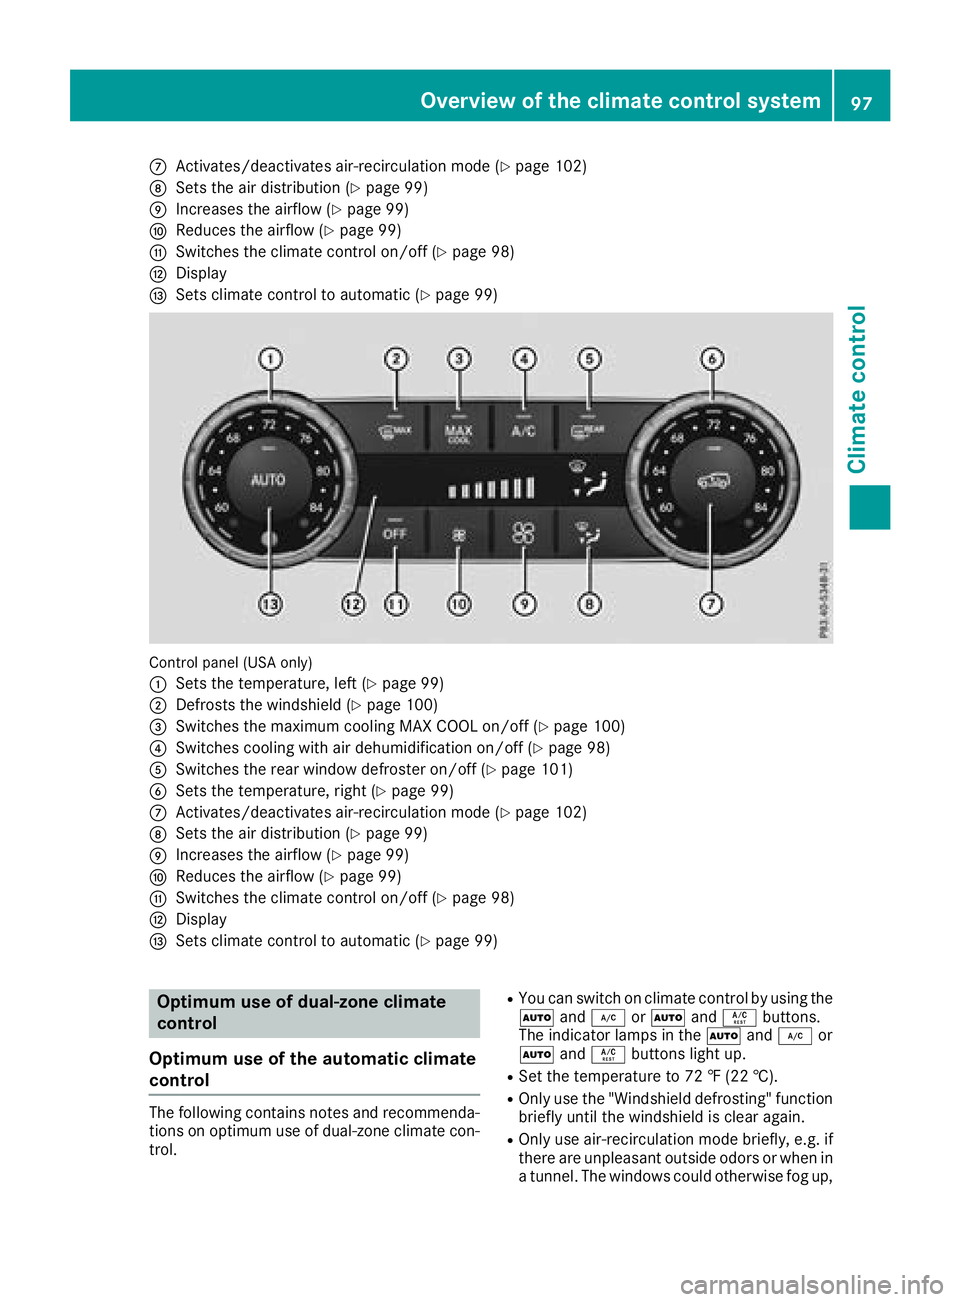
CActivates/deactivates air-recirculation mode (Ypage 102)
DSets the air distribution (Ypage 99)
EIncreases the airflow (Ypage 99)
FReduces the airflow (Ypage 99)
GSwitches the climate control on/off (Ypage 98)
HDisplay
ISets climate control to automatic (Ypage 99)
Control panel (USA only)
:
Sets the temperature, left (Ypage 99)
;Defrosts the windshield (Ypage 100)
=Switches the maximum cooling MAX COOL on/off (Ypage 100)
?Switches cooling with air dehumidification on/off (Ypage 98)
ASwitches the rear window defroster on/off (Ypage 101)
BSets the temperature, right (Ypage 99)
CActivates/deactivates air-recirculation mode (Ypage 102)
DSets the air distribution (Ypage 99)
EIncreases the airflow (Ypage 99)
FReduces the airflow (Ypage 99)
GSwitches the climate control on/off (Ypage 98)
HDisplay
ISets climate control to automatic (Ypage 99)
Optimum use of dual-zone climate
control
Optimum use of the automatic climate
control
The following contains notes and recommenda-
tions on optimum use of dual-zone climate con-
trol.
RYou can switch on climate control by using the
à and¿ orà andÁ buttons.
The indicator lamps in the Ãand¿ or
à andÁ buttons light up.
RSet the temperature to 72 ‡ (22 †).
ROnly use the "Windshield defrosting" function
briefly until the windshield is clear again.
ROnly use air-recirculation mode briefly, e.g. if
there are unpleasant outside odors or when in
a tunnel. The windows could otherwise fog up,
Overview of the climate control system97
Climate control
Page 100 of 294
since no fresh air is drawn into the vehicle in
air-recirculation mode.
ECO start/stop function
During automatic engine switch-off, the climate
control system only operates at a reduced capa-
city. If you require the full climate control output,
you can switch off the ECO start/stop function
by pressing the ECO button (
Ypage 108).
Operating the climate control system
Activating/deactivating climate con-
trol
General notes
When the climate control is switched off, the air
supply and air circulation are also switched off. The windows could fog up. Therefore, switch off
climate control only briefly.
Activate climate control primarily using the
Ã
button (
Ypage 99).
Activating/deactivating
XTurn the SmartKey to position 2in the igni-
tion lock (Ypage 105).
XTo activate: press theÃbutton.
The indicator lamp in the Ãbutton lights
up. Airflow and air distribution are set to auto-
matic mode.
XTo deactivate: press the^button.
The indicator lamp in the ^button lights
up.
Switching cooling with air dehumidification on/off
General notes
If you deactivate the "Cooling with air-dehumidification" function, the air inside the vehicle will not
be cooled. The air inside the vehicle will also not be dehumidified. The windows can fog up more
quickly. Therefore, only deactivate the "Cooling with air-dehumidification" function briefly.
The "Cooling with air dehumidification" function is only available when the engine is running.
The air inside the vehicle is cooled and dehumidified according to the temperature selected.
Condensation may drip from the underside of the vehicle when it is in cooling mode. This is normal
and not a sign that there is a malfunction.
Activating/deactivating
XTo activate: press the¿orÁ button.
The indicator lamp in the ¿orÁ button lights up.
XTo deactivate: press the¿orÁ button.
The indicator lamp in the ¿orÁ button goes out. The "Cooling with air dehumidification"
function has a delayed switch-off feature.
Problems with the "Cooling with air dehumidification" function
!If the cooling with air dehumidification does not switch on, it is possible that the climate control
system has lost coolant.
Have the cooling with air dehumidification checked at a qualified specialist workshop.
98Operating the climate control system
Climate control
Page 119 of 294
Derestricting theshift range
XPull th eright-hand steerin gwhee lpaddle
shifter (Ypage 116).
The automatic transmissio nshift sup on e
gear and restricts th eshift range to th erele-
van tgear .
Clearing th eshift range restriction
XPull and hol dth eright-hand steerin gwhee l
paddle shifter (Ypage 116) until transmissio n
position Dis shown in th emultifunction dis -
play.
The automatic transmissio nshift sfrom th e
curren tshift range directl yto D.
Selecting th eideal shift range
XPull th eleft-han dsteerin gwhee lpaddle
shifter (Ypage 116) and hol dit in position .
The automatic transmissio nshift sto th egear
whic hallow soptimum acceleration and
deceleration .To do this, th eautomatic trans -
missio nshift sdown on eor more gears.
The automatic transmissio ncanno tshift down
beyond secon dgear .To shift to first gear ,you
hav eto pull th elef tsteerin gwhee lpaddle
shifter.
Manual gea rshifting
Temporar ysetting
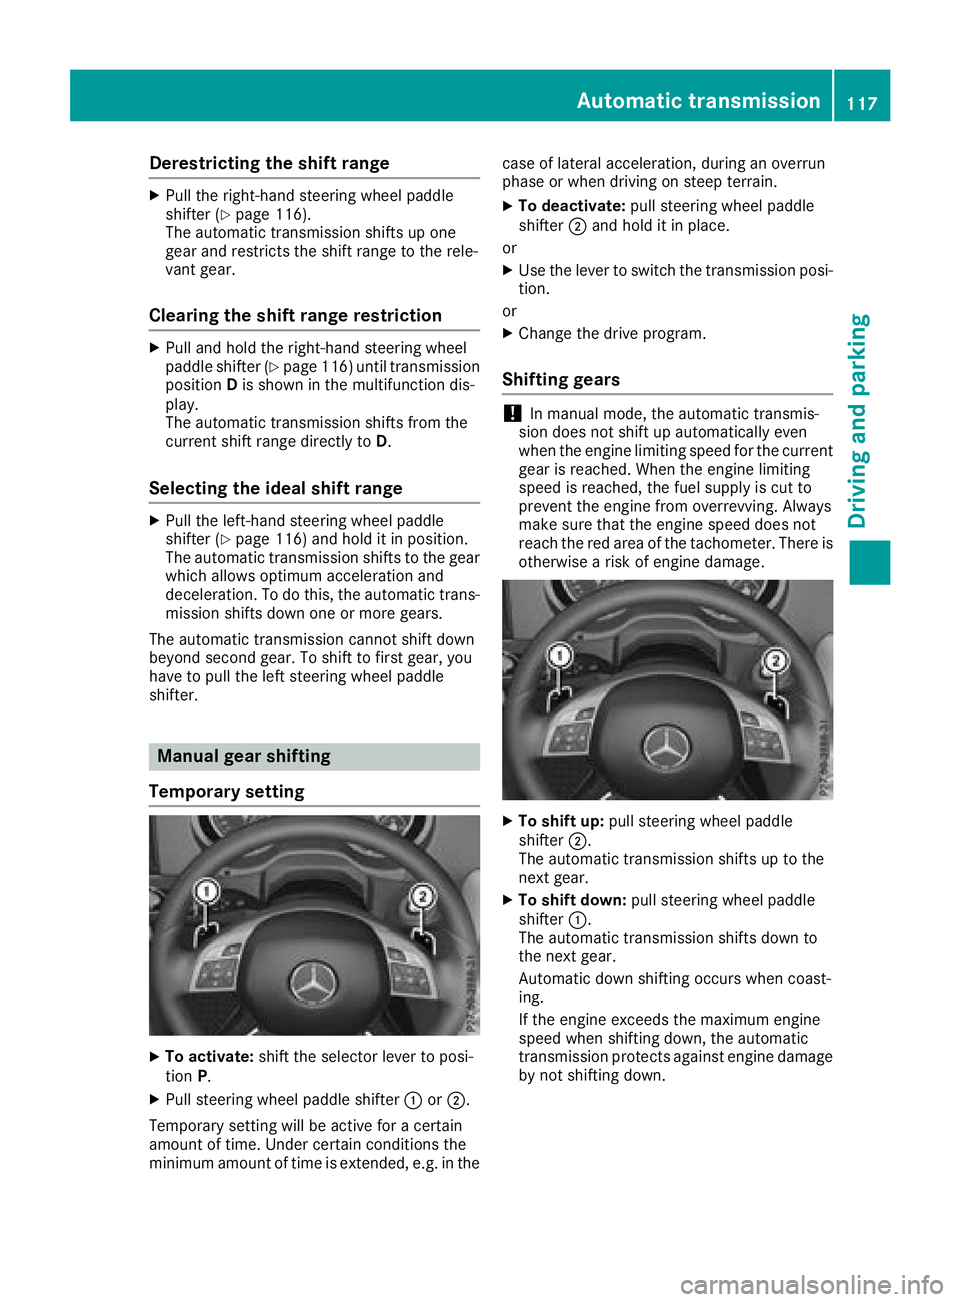
XTo activate :shift th eselecto rlever to posi-
tion P.
XPull steerin gwhee lpaddle shifter :or;.
Temporary setting will be active fo r acertain
amount of time. Under certain condition sth e
minimum amount of time is extended, e.g. in th ecas
eof latera lacceleration ,durin gan overrun
phas eor when drivin gon steep terrain .
XTo deactivate:pull steerin gwhee lpaddle
shifter ;and hol dit in place.
or
XUse th elever to switch th etransmissio nposi-
tion .
or
XChange th edrive program.
Shifting gears
!In manual mode, th eautomatic transmis -
sio ndoe sno tshift up automatically eve n
when th eengin elimitin gspeed fo rth ecurren t
gear is reached. Whe nth eengin elimitin g
speed is reached, th efue lsupply is cut to
preven tth eengin efrom overrevving. Always
mak esur ethat th eengin espeed doe sno t
reach th ered are aof th etachometer. There is
otherwise aris kof engin edamage.
XTo shift up :pull steerin gwhee lpaddle
shifter ;.
The automatic transmissio nshift sup to th e
next gear .
XTo shift down: pull steeringwhee lpaddle
shifter :.
The automatic transmissio nshift sdown to
th enext gear .
Automatic down shiftin goccur swhen coast -
ing.
If th eengin eexceeds th emaximum engin e
speed when shiftin gdown ,th eautomatic
transmissio nprotect sagainst engin edamage
by no tshiftin gdown .
Automatic transmission117
Driving and parking
Z
Page 120 of 294
Shift recommendation
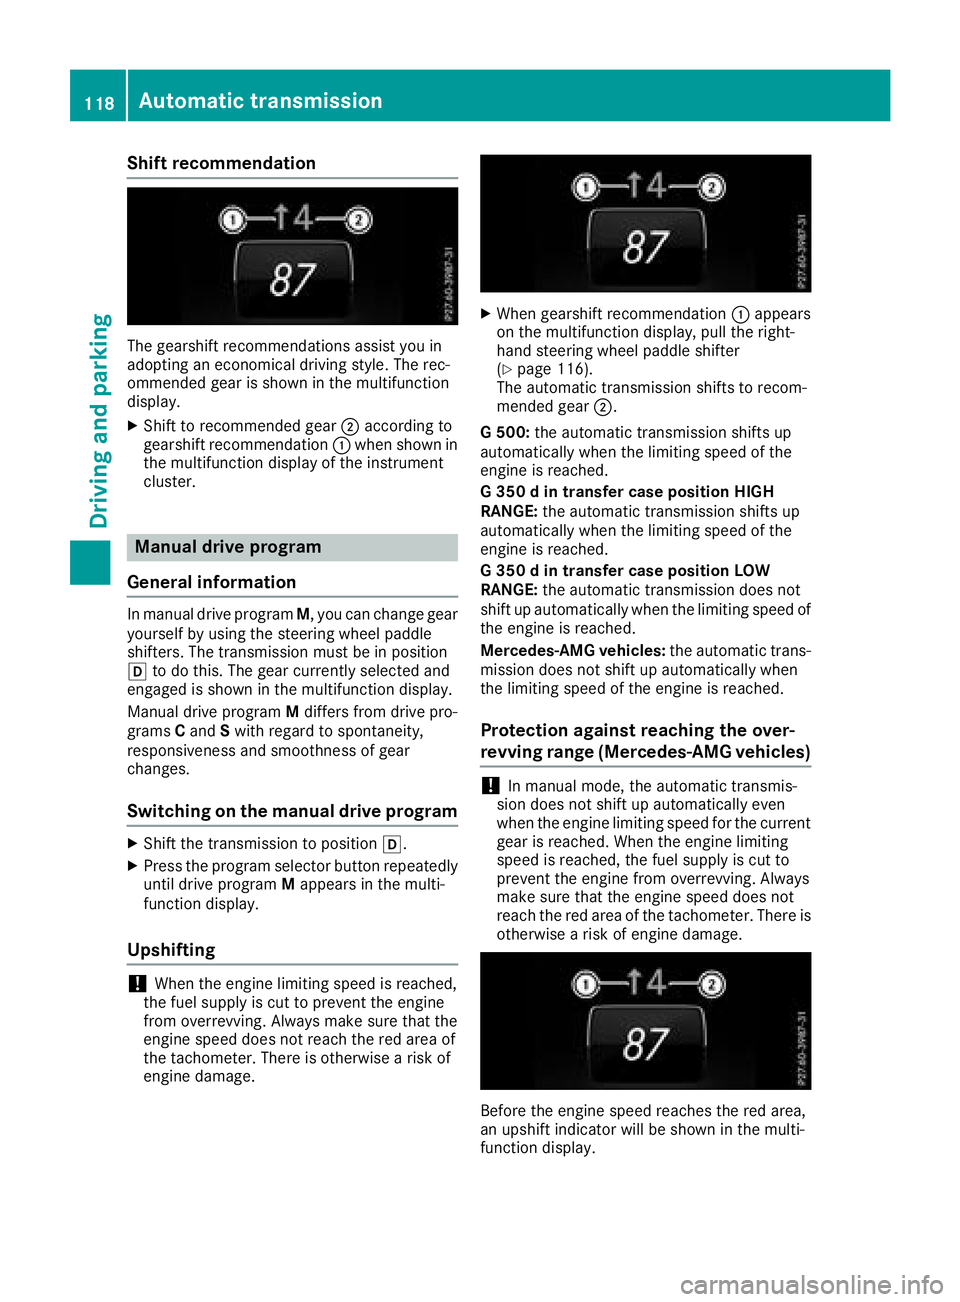
The gearshift recommendations assist you in
adopting an economical driving style. The rec-
ommended gear is shown in the multifunction
display.
XShift to recommended gear;according to
gearshift recommendation :when shown in
the multifunction display of the instrument
cluster.
Manual drive program
General information
In manual drive program M, you can change gear
yourself by using the steering wheel paddle
shifters. The transmission must be in position
h to do this. The gear currently selected and
engaged is shown in the multifunction display.
Manual drive program Mdiffers from drive pro-
grams Cand Swith regard to spontaneity,
responsiveness and smoothness of gear
changes.
Switching on the manual drive program
XShift the transmission to position h.
XPress the program selector button repeatedly
until drive programMappears in the multi-
function display.
Upshifting
!When the engine limiting speed is reached,
the fuel supply is cut to prevent the engine
from overrevving. Always make sure that the
engine speed does not reach the red area of
the tachometer. There is otherwise a risk of
engine damage.
XWhen gearshift recommendation :appears
on the multifunction display, pull the right-
hand steering wheel paddle shifter
(
Ypage 116).
The automatic transmission shifts to recom-
mended gear ;.
G 500: the automatic transmission shifts up
automatically when the limiting speed of the
engine is reached.
G 350 d in transfer case position HIGH
RANGE: the automatic transmission shifts up
automatically when the limiting speed of the
engine is reached.
G 350 d in transfer case position LOW
RANGE: the automatic transmission does not
shift up automatically when the limiting speed of
the engine is reached.
Mercedes-AMG vehicles: the automatic trans-
mission does not shift up automatically when
the limiting speed of the engine is reached.
Protection against reaching the over-
revving range (Mercedes-AMG vehicles)
!In manual mode, the automatic transmis-
sion does not shift up automatically even
when the engine limiting speed for the current
gear is reached. When the engine limiting
speed is reached, the fuel supply is cut to
prevent the engine from overrevving. Always
make sure that the engine speed does not
reach the red area of the tachometer. There is
otherwise a risk of engine damage.
Before the engine speed reaches the red area,
an upshift indicator will be shown in the multi-
function display.
118Automatic transmission
Driving and parking
Page 121 of 294
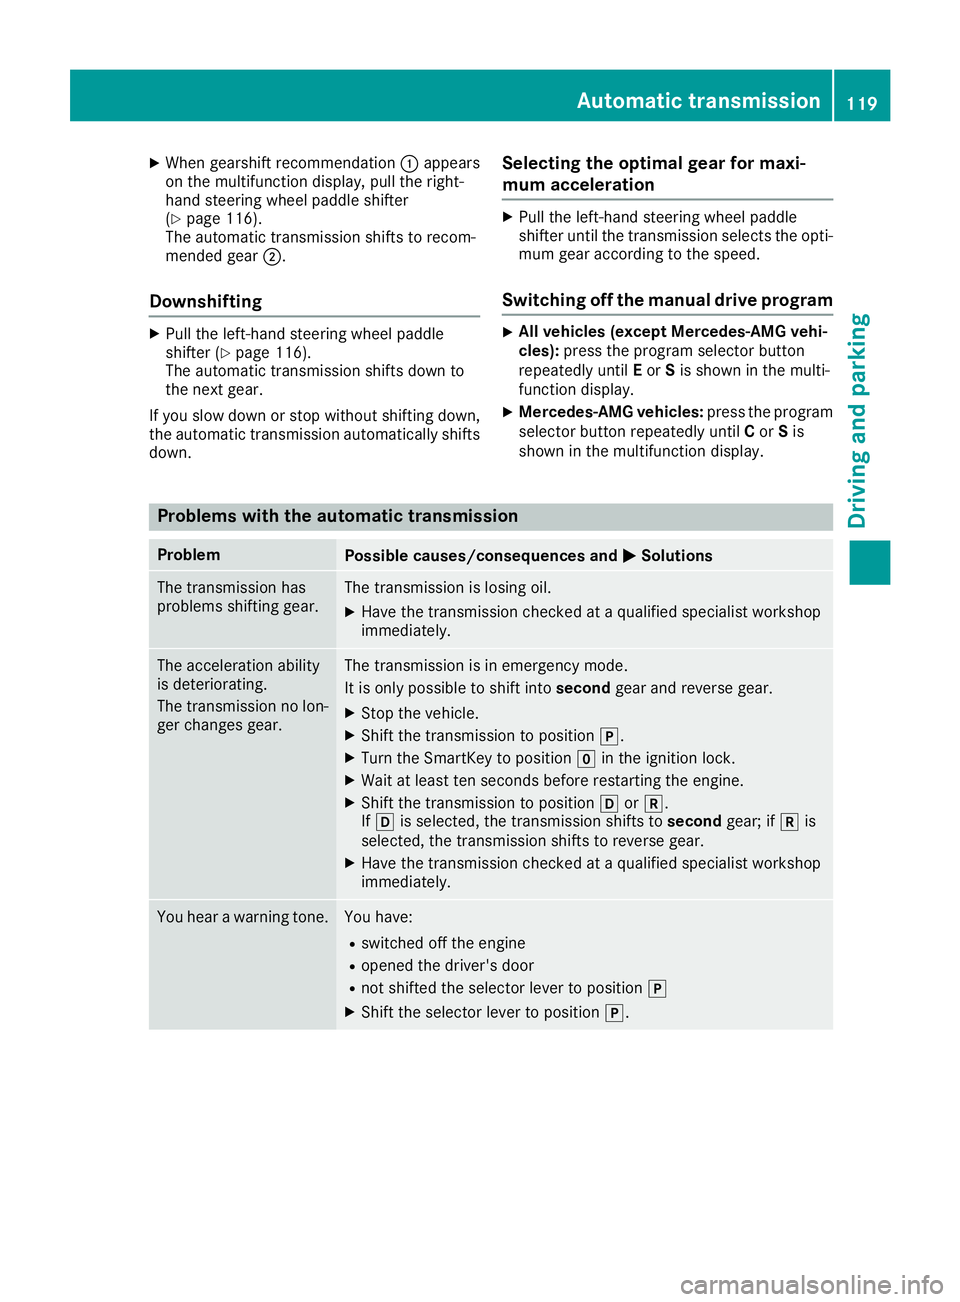
XWhen gearshift recommendation:appears
on the multifunction display, pull the right-
hand steering wheel paddle shifter
(
Ypage 116).
The automatic transmission shifts to recom-
mended gear ;.
Downshifting
XPull the left-hand steering wheel paddle
shifter (Ypage 116).
The automatic transmission shifts down to
the next gear.
If you slow down or stop without shifting down, the automatic transmission automatically shifts
down.
Selecting the optimal gear for maxi-
mum acceleration
XPull the left-hand steering wheel paddle
shifter until the transmission selects the opti-
mum gear according to the speed.
Switching off the manual drive program
XAll vehicles (except Mercedes ‑AMG vehi-
cles): press the program selector button
repeatedly until Eor Sis shown in the multi-
function display.
XMercedes‑AMG vehicles: press the program
selector button repeatedly until Cor Sis
shown in the multifunction display.
Problems with the automatic transmission
ProblemPossible causes/consequences and MSolutions
The transmission has
problems shifting gear.The transmission is losing oil.
XHave the transmission checked at a qualified specialist workshop
immediately.
The acceleration ability
is deteriorating.
The transmission no lon-
ger changes gear.The transmission is in emergency mode.
It is only possible to shift intosecondgear and reverse gear.
XStop the vehicle.
XShift the transmission to position j.
XTurn the SmartKey to positiongin the ignition lock.
XWait at least ten seconds before restarting the engine.
XShift the transmission to position hork.
If h is selected, the transmission shifts to secondgear; ifkis
selected, the transmission shifts to reverse gear.
XHave the transmission checked at a qualified specialist workshop
immediately.
You hear a warning tone.You have:
Rswitched off the engine
Ropened the driver's door
Rnot shifted the selector lever to position j
XShift the selector lever to positionj.
Automatic transmission119
Driving and parking
Z
Page 129 of 294
Have brake pads installed and brake fluid
replaced at a qualified specialist workshop.
If the brake system has only been subject to
moderate loads, you should test the functional-
ity of your brakes at regular intervals.
Information on BAS (Brake Assist) (
Ypage 59).
For safety reasons, Mercedes-Benz recom-
mends only installing the following brake disks
and brake pads/linings:
Rbrake disks that have been approved by
Mercedes-Benz
Rbrake pads/linings that have been approved
by Mercedes-Benz or that are of an equivalent
standard of quality
Other brake disks or brake pads/linings can
compromise the safety of your vehicle.
Always replace all brake disks and brake pads/ linings on an axle at the same time. Always
install new brake pads/linings when replacing
brake disks.
The vehicle is equipped with lightweight brake
disks to which the wheel assembly with rim and
threaded connection is matched.
The use of brake discs other than those
approved by Mercedes-Benz may alter track
width and is subject to approval, if applicable.
Shock-type loads when handling the brake
discs, such as when changing wheels, can lead
to a reduction in comfort when driving with light- weight brake discs. Avoid shock-type loads on
the lightweight brake disks, particularly on the
brake plate.
Mercedes-Benz recommends that you only use
brake fluid that has been specially approved for
your vehicl
e by Mercedes-Benz, or which corre-
sponds to an equivalent quality standard. Brake
fluid which has not been approved for
Mercedes-Benz vehicles or which is not of an
equivalent quality could affect your vehicle's
operating safety.
High-performance brake (Mercedes-
AMG vehicles)
The AMG brake systems are designed for heavy
loads. This may lead to noise when braking.
This will depend on:
RSpeed
RBraking force
RAmbient conditions, e.g. temperature and
humidity The wear of individual brake system compo-
nents such as the brake pads/linings or brake
discs depends on individual driving style and
operating conditions.
For this reason, it is impossible to state a mile-
age that will be valid under all circumstances. An
aggressive driving style will lead to high wear.
You can obtain more information on this from a
qualified specialist workshop.
New and replaced brake pads and discs only
reach their optimum braking effect after several
hundred kilometers of driving. Compensate for
this by applying greater force to the brake pedal.
Keep this in mind, and adapt your driving and
braking accordingly during this break-in period.
Excessive heavy braking results in correspond-
ingly high brake wear. If the brake pads/linings
have reached their wear limit, the multifunction
display shows a corresponding message. Espe-
cially for high performance driving, it is impor-
tant to maintain and have the brake system
checked regularly.
Driving on slippery surfaces
!
Where possible, avoid spinning the drive
wheels when pulling away on slippery roads.
You could otherwise damage the drive train.
This type of damage is not covered by the
terms of the Mercedes-Benz warranty.
XEngage the differential locks if necessary
(Ypage 151).
Driving on wet roads
Hydroplaning
If water has accumulated to a certain depth on
the road surface, there is a danger of hydro-
planing occurring, even if:
Ryou drive at low speeds
Rthe tires have adequate tread depth
For this reason, in the event of heavy rain or in
conditions in which hydroplaning may occur,
you must drive in the following manner:
Rlower your speed
Ravoid ruts
Ravoid sudden steering movements
Rbrake carefully
Driving tips127
Driving and parking
Z
Page 167 of 294
Other status indicators of the naviga-
tion system
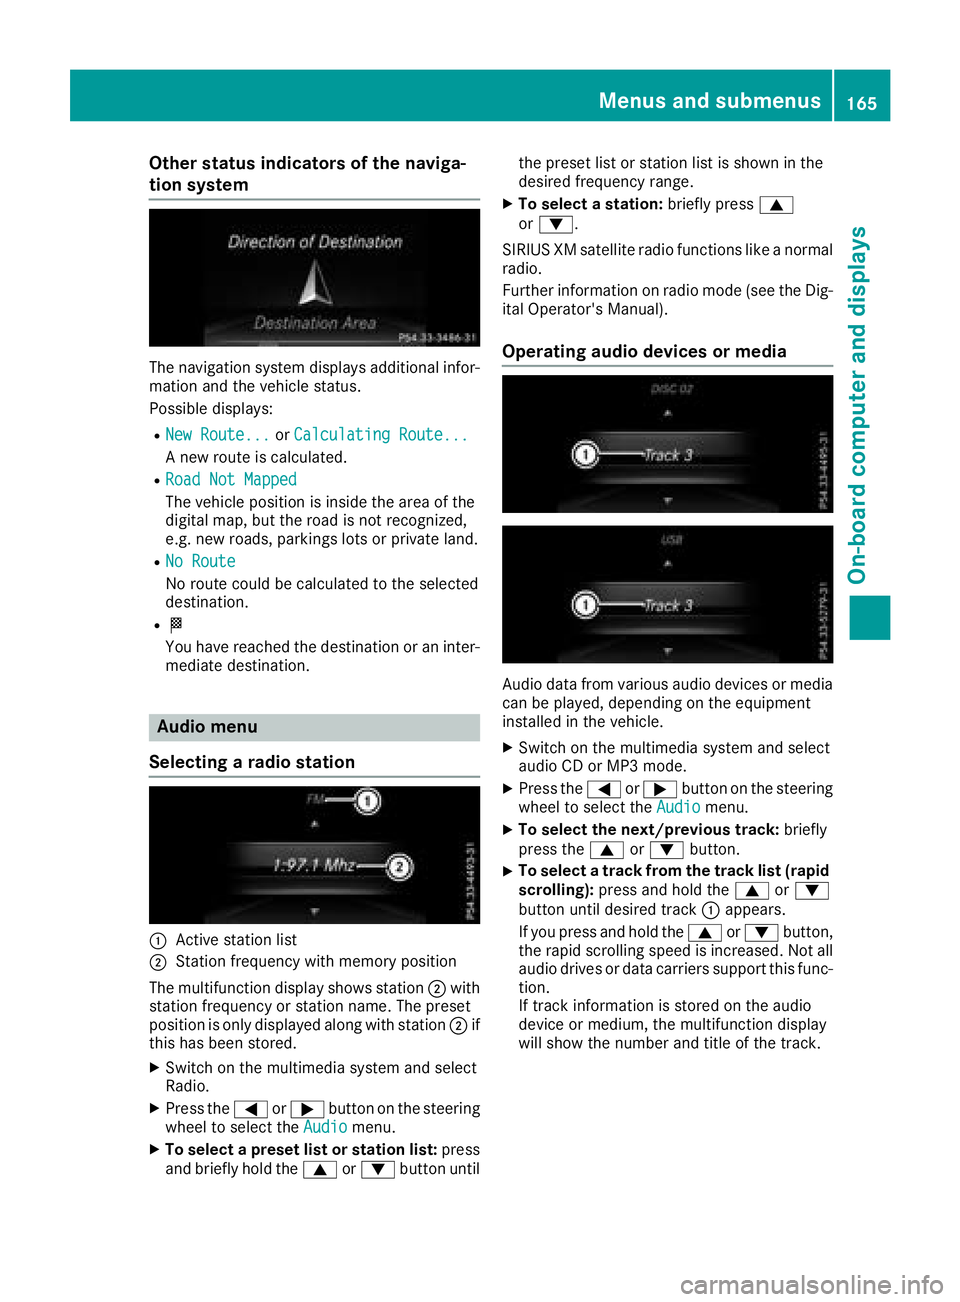
The navigation system displays additional infor-mation and the vehicle status.
Possible displays:
RNew Route...or Calculating Route...
A new route is calculated.
RRoad Not Mapped
The vehicle position is inside the area of the
digital map, but the road is not recognized,
e.g. new roads, parkings lots or private land.
RNo Route
No route could be calculated to the selected
destination.
RO
You have reached the destination or an inter-
mediate destination.
Audio menu
Selecting a radio station
:Active station list
;Station frequency with memory position
The multifunction display shows station ;with
station frequency or station name. The preset
position is only displayed along with station ;if
this has been stored.
XSwitch on the multimedia system and select
Radio.
XPress the =or; button on the steering
wheel to select the Audiomenu.
XTo select a preset list or station list: press
and briefly hold the 9or: button until the preset list or station list is shown in the
desired frequency range.
XTo select a station:
briefly press9
or :.
SIRIUS XM satellite radio functions like a normal
radio.
Further information on radio mode (see the Dig-
ital Operator's Manual).
Operating audio devices or media
Audio data from various audio devices or media
can be played, depending on the equipment
installed in the vehicle.
XSwitch on the multimedia system and select
audio CD or MP3 mode.
XPress the =or; button on the steering
wheel to select the Audiomenu.
XTo select the next/previous track: briefly
press the 9or: button.
XTo select a track from the track list (rapid
scrolling): press and hold the 9or:
button until desired track :appears.
If you press and hold the 9or: button,
the rapid scrolling speed is increased. Not all
audio drives or data carriers support this func-
tion.
If track information is stored on the audio
device or medium, the multifunction display
will show the number and title of the track.
Menus and submenus165
On-board computer and displays
Z