differential MERCEDES-BENZ G-CLASS 2018 Owner's Manual
[x] Cancel search | Manufacturer: MERCEDES-BENZ, Model Year: 2018, Model line: G-CLASS, Model: MERCEDES-BENZ G-CLASS 2018Pages: 294, PDF Size: 4.86 MB
Page 9 of 294
Problem with the rear window
defroster ........................................101
Problems with "cooling with air
dehumidification" .............................9 8
Refrigerant .................................... .287
Refrigerant filling capacity ............. 288
Setting the air distribution ...............9 9
Setting the air vents ...................... 102
Setting the airflow ........................... 99
Setting the temperature .................. 99
Switching air-recirculation mode
on/off ............................................ 102
Switching on/off .............................. 98
Switching residual heat on/off ...... 102
Switching the rear window
defroster on/off ............................ 101
Switching the ZONE function
on/off ............................................ 100
Windshield defroster ...................... 101
Clock (on-board computer) ............... 169
Cockpit
Overview .......................................... 31
COMAND
see separate operating instructions
COMAND display
Cleaning ......................................... 241
Combination switch ............................ 88
Connecting a USB device
see also Digital Operator's Man-
ual .................................................. 203
Consumption statistics (on-board
computer) .......................................... 163
Controller ........................................... 204
Controlling speed
see DISTRONIC PLUS
Convenience closing feature .............. 70
Convenience opening feature ............ 70
Coolant (engine)
Checking the level ......................... 234
Display message ............................ 180
Filling capacity ............................... 287
Notes ............................................. 286
Temperature (on-board com-
puter) ............................................. 171
Temperature gauge ........................ 161
Warning lamp ................................. 199 Cooling
see Climate control
Copyright ............................................. 29
Cruise control
Cruise control lever ....................... 133
Deactivating ................................... 134
Driving system ............................... 133
Functio
n/notes ............................. 133
General notes ................................ 133
Important safety notes .................. 133
Resuming the stored speed ........... 134
Setting a speed .............................. 134
Storing and maintaining current
speed ............................................. 133
Cup holder
Center console .............................. 215
Important safety notes .................. 215
Rear compartment ......................... 215
D
Datasee Technical data
Date (on-board computer) ................ 168
Daytime running lamps
Display message ............................ 180
Switching on/off (on-board com-
puter) ............................................. 169
Switching on/off (switch) ................ 86
Delayed switch-off
Exterior lighting (on-board com-
puter) ............................................. 169
Interior lighting .............................. 169
Diagnostics connection ...................... 27
Differential locks
Disengaging ................................... 153
Engaging ........................................ 151
Front axle ...................................... 152
General notes ................................ 151
Rear axle ........................................ 152
Terrain ........................................... 151
Transfer case ................................. 152
Digital Operator's Manual
Help ................................................. 22
Introduction ..................................... 22
Digital speedometer ......................... 163
Display messages
Calling up (on-board computer) ..... 174
Index7
Page 15 of 294
Mobile phoneConnecting (Bluetooth®inter-
face) ..............................................2 06
Frequencies ................................... 281
Installation ..................................... 281
Menu (on-board computer) ............ 166
Transmission output (maximum) .... 281
Modifying the programming
(SmartKey) ...........................................6 4
Mounting wheels
Lowering the vehicle ...................... 278
Mounting a new wheel ................... 278
Preparing the vehicle .....................2 76
Raising the vehicle ......................... 276
Removing a wheel .......................... 278
Securing the vehicle against roll-
ing away ........................................ 276
MP3
Operation ....................................... 165
see also Digital Operator's Man-
ual ..................................................2 03
see separate operating instructions
Multifunction display
Function/notes .............................1 62
Permanent display ......................... 168
Multifunction steering wheel
Operating the on-board computer .. 161Overview .......................................... 33
Multimedia system
Switching on and off ......................2 04
Music files
see also Digital Operator's Man-
ual .................................................. 203
N
NavigationEntering a destination .................... 205
Menu (on-board computer) ............ 164
see also Digital Operator's Man-
ual .................................................. 203
see separate operating instructions
NECK-PRO head restraints
Operation ......................................... 48
Resetting triggered .......................... 49
NECK-PRO luxury head restraints
Important safety notes .................... 48
Operation ......................................... 48 Resetting when triggered ................. 49
Notes on breaking-in a new vehi-
cle ....................................................... 104
O
Occupant safety
Air bags ........................................... 44
Automatic measures after an acci-
dent ................................................. 50
BabySmart™ air bag deactivation
system ............................................. 53
Belt warning ..................................... 43
Children in the vehicle ..................... 50
Important safety notes .................... 38
Introduction to the restraint sys-
tem .................................................. 38
PASSENGER AIR BAG indicator
lamps ............................................... 39
Pets in the vehicle ........................... 57
Restraint system warning lamp ........ 38
Seat belt .......................................... 39
Odometer ........................................... 163
Off-road
Differential locks ............................ 151
Off-road ABS .................................... 59
Off-road driving
Checklist after driving off-road ...... 131
Checklist before driving off-road .... 130
Driving on sand .............................. 131
General information ....................... 130
Important safety notes .................. 129
Traveling uphill ............................... 132
Off-road fording ................................. 128
Off-road system
Permanent all-wheel drive ............. 143
Oil
see Engine oil
On-board computer
AMG menu ..................................... 171
Assistance menu ........................... 167
Audio menu ................................... 165
Convenience submenu .................. 170
Display messages .......................... 173
DISTRONIC PLUS ........................... 139
Factory settings submenu ............. 171
Important safety notes .................. 160
Instrument cluster submenu .......... 168
Index13
Page 62 of 294
!Only operate the vehicle for a maximum of
ten seconds on a brake test dynamometer.
Switch off the ignition.
Application of the brakes by ESP
®may oth-
erwise destroy the brake system.
!A function or performance test should only
be carried out on a two-axle dynamometer.
Before you operate the vehicle on such a
dynamometer, please consult a qualified
workshop. You could otherwise damage the
drive train or the brake system.
If the å ESP
®OFF warning lamp lights up
continuously, ESP®is deactivated.
If the ÷ ESP®warning lamp lights up contin-
uously, ESP®is not available due to a malfunc-
tion.
Observe the information on warning lamps
(
Ypage 196) and display messages which may
be displayed in the instrument cluster
(
Ypage 175).
Only use wheels with the recommended tire
sizes. Only then will ESP
®function properly.
If differential locks are switched on, ABS, BAS
and ESP
®switch off automatically.
Characteristics of ESP®
General information
If the ÷ ESP®warning lamp goes out before
beginning the journey, ESP®is automatically
active.
If ESP
®intervenes, the ÷ESP®warning lamp
flashes in the instrument cluster.
If ESP
®intervenes:
XDo not deactivate ESP®under any circum-
stances.
XOnly depress the accelerator pedal as far as
necessary when pulling away.
XAdapt your driving style to suit the prevailing
road and weather conditions.
ECO start/stop function
The ECO start/stop function switches the
engine off automatically when the vehicle stops
moving. The engine starts automatically when
the driver wants to pull away again. ESP
®
remains in its previously selected status, e.g. if
ESP®was deactivated before the engine was
automatically switched off.
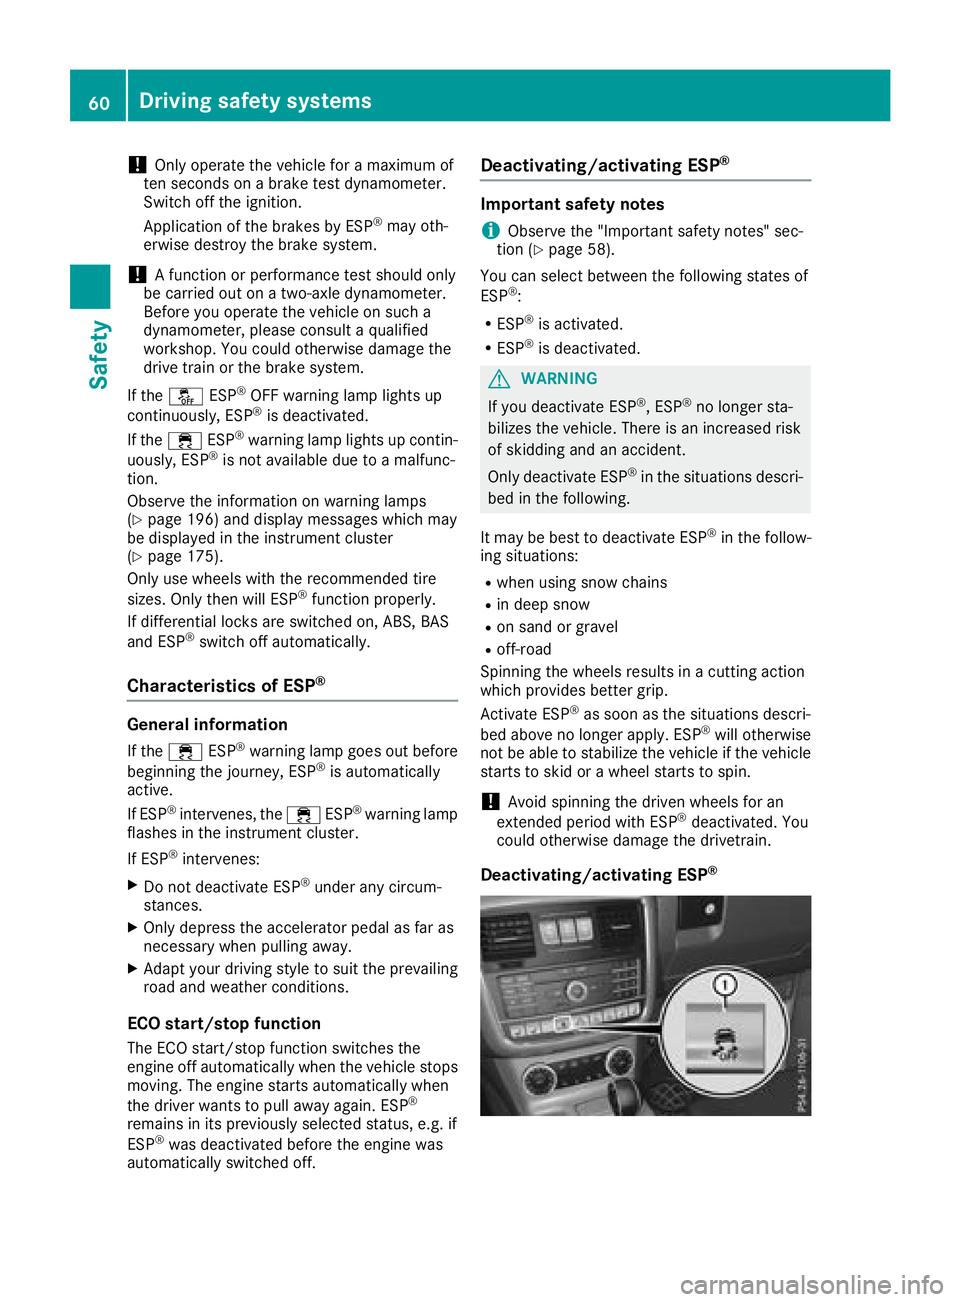
Deactivating/activating ESP®
Important safety notes
iObserve the "Important safety notes" sec-
tion (Ypage 58).
You can select between the following states of
ESP
®:
RESP®is activated.
RESP®is deactivated.
GWARNING
If you deactivate ESP
®, ESP®no longer sta-
bilizes the vehicle. There is an increased risk
of skidding and an accident.
Only deactivate ESP
®in the situations descri-
bed in the following.
It may be best to deactivate ESP
®in the follow-
ing situations:
Rwhen using snow chains
Rin deep snow
Ron sand or gravel
Roff-road
Spinning the wheels results in a cutting action
which provides better grip.
Activate ESP
®as soon as the situations descri-
bed above no longer apply. ESP®will otherwise
not be able to stabilize the vehicle if the vehicle
starts to skid or a wheel starts to spin.
!Avoid spinning the driven wheels for an
extended period with ESP®deactivated. You
could otherwise damage the drivetrain.
Deactivating/activating ESP®
60Driving safety systems
Safety
Page 106 of 294
Notes on breaking-in a new vehicle
Important safety notes
The sensor system of some driving and driving
safety systems adjusts automatically while a
certain distance is being driven after the vehiclehas been delivered or after repairs. Full system
effectiveness is not reached until the end of this
teach-in procedure.
New and replaced brake pads and discs only
reach their optimum braking effect after several hundred kilometers of driving. Compensate for
this by applying greater force to the brake pedal.
The first 1000 miles (1500 km)
The more you look after the engine when it is
new, the more satisfied you will be with its per-
formance in the future.
RYou should therefore drive at varying vehicle
and engine speeds for the first 1,000 miles
(1,500 km).
RAvoid heavy loads, e.g. driving at full throttle,
during this period.
RWhen shifting gears manually, shift up in good
time, before the tachometer needle reaches
Ô of the way to the red area of the tachom-
eter display.
RDo not manually shift to a lower gear to brake
the vehicle.
RTry to avoid depressing the accelerator pedal
beyond the pressure point (kickdown).
Additional breaking-in notes for Mercedes-AMG
vehicles:
RDo not drive faster than 85 mph (140 km/h)
for the first 1,000 miles (1,500 km).
ROnly briefly allow the engine to reach a max-
imum engine speed of 4,500 rpm.
RAvoid driving off-road before the first differ-
ential oil change at 2,000 miles (3,000 km).
RIdeally, for the first 1,000 miles (1,500 km),
drive in program C.
After 1,000 mile s(1,500 km), you can increase
the engine speed gradually and bring the vehicle
to full speed.
You shoul
d also observe these notes on break-
ing in if the engine or parts of the drive train on
your vehicle have been replaced.
Always observe the maximum permissible
speed.
Axle differential transmission
(Mercedes-AMG vehicles)
Change the oil after a breaking-in period of
2,000 miles (3,000 km) to improve protection of
the axle differential transmission.
This oil change prolongs the service life of the
axle differential transmission. Have the oil
change carried out at a qualified specialist work- shop.
Axle differential transmission and
portal transmission (G 500 4x42)
Change the oil after a breaking-in period of
2,000 miles (3,000 km) to improve protection of
the axle differential transmission and portal
transmission.
This oil change prolongs the service life of the
axle differential and portal transmission. Have
the oil change carried out at a qualified special-ist workshop.
Driving
Important safety notes
GWARNING
Objects in the driver's footwell may restrict
the clearance around the pedals or block a
depressed pedal. This jeopardizes the oper-
ating and road safety of the vehicle. There is a risk of an accident.
Stow all objects securely in the vehicle so that
they do not get into the driver's footwell.
When using floormats or carpets, make sure
that they are properly secured so that they do not slip or obstruct the pedals. Do not place
several floormats or carpets on top of one
another.
GWARNING
Unsuitable footwear can hinder correct usage of the pedals, e.g.:
Rshoes with thick soles
Rshoes with high heels
Rslippers
104Driving
Driving and parking
Page 129 of 294
Have brake pads installed and brake fluid
replaced at a qualified specialist workshop.
If the brake system has only been subject to
moderate loads, you should test the functional-
ity of your brakes at regular intervals.
Information on BAS (Brake Assist) (
Ypage 59).
For safety reasons, Mercedes-Benz recom-
mends only installing the following brake disks
and brake pads/linings:
Rbrake disks that have been approved by
Mercedes-Benz
Rbrake pads/linings that have been approved
by Mercedes-Benz or that are of an equivalent
standard of quality
Other brake disks or brake pads/linings can
compromise the safety of your vehicle.
Always replace all brake disks and brake pads/ linings on an axle at the same time. Always
install new brake pads/linings when replacing
brake disks.
The vehicle is equipped with lightweight brake
disks to which the wheel assembly with rim and
threaded connection is matched.
The use of brake discs other than those
approved by Mercedes-Benz may alter track
width and is subject to approval, if applicable.
Shock-type loads when handling the brake
discs, such as when changing wheels, can lead
to a reduction in comfort when driving with light- weight brake discs. Avoid shock-type loads on
the lightweight brake disks, particularly on the
brake plate.
Mercedes-Benz recommends that you only use
brake fluid that has been specially approved for
your vehicl
e by Mercedes-Benz, or which corre-
sponds to an equivalent quality standard. Brake
fluid which has not been approved for
Mercedes-Benz vehicles or which is not of an
equivalent quality could affect your vehicle's
operating safety.
High-performance brake (Mercedes-
AMG vehicles)
The AMG brake systems are designed for heavy
loads. This may lead to noise when braking.
This will depend on:
RSpeed
RBraking force
RAmbient conditions, e.g. temperature and
humidity The wear of individual brake system compo-
nents such as the brake pads/linings or brake
discs depends on individual driving style and
operating conditions.
For this reason, it is impossible to state a mile-
age that will be valid under all circumstances. An
aggressive driving style will lead to high wear.
You can obtain more information on this from a
qualified specialist workshop.
New and replaced brake pads and discs only
reach their optimum braking effect after several
hundred kilometers of driving. Compensate for
this by applying greater force to the brake pedal.
Keep this in mind, and adapt your driving and
braking accordingly during this break-in period.
Excessive heavy braking results in correspond-
ingly high brake wear. If the brake pads/linings
have reached their wear limit, the multifunction
display shows a corresponding message. Espe-
cially for high performance driving, it is impor-
tant to maintain and have the brake system
checked regularly.
Driving on slippery surfaces
!
Where possible, avoid spinning the drive
wheels when pulling away on slippery roads.
You could otherwise damage the drive train.
This type of damage is not covered by the
terms of the Mercedes-Benz warranty.
XEngage the differential locks if necessary
(Ypage 151).
Driving on wet roads
Hydroplaning
If water has accumulated to a certain depth on
the road surface, there is a danger of hydro-
planing occurring, even if:
Ryou drive at low speeds
Rthe tires have adequate tread depth
For this reason, in the event of heavy rain or in
conditions in which hydroplaning may occur,
you must drive in the following manner:
Rlower your speed
Ravoid ruts
Ravoid sudden steering movements
Rbrake carefully
Driving tips127
Driving and parking
Z
Page 130 of 294
Drivingon flooded road s
!Do notdrive through floode dareas. Chec k
th edept hof any water befor edrivin gthrough
it .Drive slowly through standin gwater. Oth-
erwise ,water may ente rth evehicle interio ror
th eengin ecompartment. Thi scan damage
th eelectronic component sin th eengin eor
th eautomatic transmission. Water can also
be drawn in by th eengine's air suction nozzles
and this can cause engin edamage.
If you hav eto drive on stretches of road on whic h
water has collected, please bear in min dthat :
Rin th ecas eof standin gwater, th ewater level
mus tbe no higher than th elowe redg eof th e
vehicle bod y
Ryou should drive no faste rthan walkin gpac e
Off-road fording
!Under no circumstances should you accel-
erate befor eenterin gth ewater. The bow
wave could cause water to ente rand damage
th eengin eand other assemblies .
!Do notope nany of th evehicle' sdoors whil e
fording .Otherwise ,water could get into th e
vehicle interio rand damage th evehicle' s
electronic sand interio requipment.
iYou may only drive through fresh water.
RObserv eth esafet ynote s (Ypage 129) and
genera lnote s (Ypage 130) on drivin goff-
road.
REstablis hhow dee pth ewater is and th echar-
acteristic sof th ebod yof water befor eford-
ing.
RSwitc hof fautomatic climat econtro l
RShift th etransfe rcas eto th eoff-road drivin g
position LOW RANGE (Ypage 149).
REngage thedifferential locks if necessary
(Ypage 151).
RAvoid hig hengin espeeds .
REnterand exit th ewater at afla tplac eand at
a steady walkin gpace.
RDrive slowly and at an eve nspeed through th e
water.
REnsur ethat abow wave doe sno tform as you
drive.
RDo no tstop and do no tswitch of fth eengine.
Water offers ahig hdegree of resistance, and
th egroun dis slipper yand i
n som
ecases unstable. Therefore, it is difficult and danger
-
ous to pull away in water.
RClean any mud from th etire tread after ford-
ing.
RApply th ebrake sto dry them after fording .
Always observ eth efording dept hvalues
(
Ypage 290).
Winte rdrivin g
GWARNING
If you shift down on aslipper yroad surfac ein
an attempt to increase th eengine's braking
effect ,th edrive wheels could los etheir grip.
There is an increase ddanger of skidding and
accidents .
Do no tshift down fo radditional engin ebrak-
in g on aslipper yroad surface.
GWARNING
If you selec tth eLO WRANGE off-road gear on
a slipper yroad surface, th ewheels could los e
traction :
Rif you remov eyour foot from th eaccelera-
to rpeda lwhen drivin g
Rif offroad AB Sintervenes when braking
If th ewheels los etraction .th evehicle can no
longer be steered. There is an increase ddan -
ger of skidding and accidents .
Never selec tth eLO WRANGE off-road gear
when drivin gon slipper yroad surfaces.
Hav eyour vehicle winter-proofed at aqualified
specialis tworkshop at th eonset of winter.
Drive particularly carefully on slipper yroad sur -
faces. Avoid sudden acceleration ,steerin gand
braking maneuvers .Do no tuse cruise contro lor
DISTRONIC PLUS.
If th evehicle threatens to skid or canno tbe
stopped when movin gat low speed:
XShift th eautomatic transmissio nto position
i .
The outsid etemperature indicator is no t
designed to serve as an ice-warnin gdevic eand
is therefore unsuitable fo rthat purpose.
Changes in th eoutsid etemperature are dis -
playe dafter ashort delay.
128Driving tips
Driving and parking
Page 132 of 294
General notes
HEnvironmental note
Protection of the environment is of primary
importance. Treat nature with respect.
Observe all prohibiting signs.
Read this section carefully before driving your
vehicle off-road. Practice by driving over more
gentle off-road terrain first.
Familiarize yourself with the characteristics of
your vehicle and the gear shift operation before
driving through difficult terrain.
The following driving systems are specially
adapted to off-road driving:
R4ETS (Ypage 59)
ROff-road ABS (Ypage 59)
RTransfer case (Ypage 149)
RDifferential locks (Ypage 151)
Observe the following notes:
Rstop the vehicle before you drive off-road and,
if necessary, shift the transfer case to the
LOW RANGE off-road gear (
Ypage 149).
REngage the differential locks if necessary
(Ypage 151).
iABS, 4ETS, ESP®and BAS are deactivated
while the differential locks are engaged. This
allows the front wheels to lock briefly, so that
these can dig into a loose surface. However,
please note that locked wheels skid and can
no longer steer.
RCheck that items of luggage and loads are
stowed safely and are well secured
(
Ypage 214).
RTo avoid damaging the vehicle, make sure
there is always sufficient ground clearance.
RAlways keep the engine running and in gear
when driving on a downhill gradient.
RAlways keep the engine running and in gear
when driving down an incline.
RDrive slowly and evenly, if necessary at a
walking pace.
REnsure that the wheels are in contact with the
ground at all times.
RDrive with extreme care on unfamiliar off-road
routes where visibility is poor. For safety rea-
sons, get out of the vehicle first and survey
the off-road route.
RCheck the depth of water before fording rivers
and streams.
RWatch out for obstacles.
RAlways keep the doors, rear door, side win-
dows and the sliding sunroof closed while the
vehicle is in motion.
RSwitch off cruise control.
RDo not deviate from marked routes.
RAdapt your speed to the terrain. The rougher,
steeper or more ruts on the terrain, the slower
your speed should be.
RDo not jump with the vehicle. as this will inter-
rupt the vehicle's propulsion.
RAvoid high engine speeds. Drive at appropri-
ate engine speeds (maximum 3,000 rpm).
RDo not shift the automatic transmission to
position i.
RAlways check the vehicle for damage after off-
road driving.
Do not use the HOLD function when driving off-
road, on steep uphill or downhill gradients or on slippery or loose surfaces. The HOLD function
cannot hold the vehicle on such surfaces.
You can obtain further information about mount-
ing special all-terrain tires from a qualified spe-
cialist workshop.
Checklist before driving off-road
!If the engine oil warning lamp lights up while
the vehicle is in motion, stop the vehicle in a
safe place as soon as possible. Check the
engine oil level. The engine oil warning lamp
warning must not be ignored. Continuing the
journey while the symbol is displayed could
lead to engine damage.
XEngine oil level: check the engine oil level
and add oil if necessary.
When driving on steep gradients, the engine
oil level must be sufficiently high to ensure a
correct oil supply in the vehicle.
XTire-changing tool kit: check that the jack is
working and make sure you have the lug
wrench, a robust tow cable and a folding
spade in the vehicle.
XWheels and tires: check the tire tread depth
and tire pressure.
XCheck for damage and remove any foreign
objects, e.g. small stones, from the wheels/
tires.
XReplace any missing valve caps.
130Driving tips
Driving and parking
Page 133 of 294
XReplacedente dor damaged wheels. Als o
chec kth espar ewheel.
XRims: dentedor ben trim scan result in aloss
of tire pressur eand damag eth etire bead.
Before driving off-road, chec kth ewheels and
replace them if necessary.
Checklist after driving off-road
!If you detec tdamag eto th evehicl eafter
driving off-road, hav eth evehicl echecke d
immediately at aqualified specialist work-
shop.
Drivin gove rroug hterrain places greate r
demand son your vehicl ethan driving on normal
roads. Afte rdriving off-road, chec kth evehicle.
This allows you to detec tdamag epromptly and
reduce th eris kof an acciden tto yourself and
other road users.
XShift th etransfer cas eto th eon-road position
HIG HRANGE (Ypage 149).
XDisengage th edifferential locks
(Ypage 153).
XClean th eheadlamps and rear lights and
chec kfor damage.
XClean th efron tand rear license plates.
XClean th ewheels and tires wit h awater je t
and remove any foreign objects .
XClean thewheels, whee lhousing sand th e
vehicl eunderside wit h awater jet; chec kfor
any foreign objects and damage.
XChec kwhether twigs or other part sof plants
hav ebecome trapped .These increas eth eris k
of fir eand can damag efuel pipes ,brak e
hoses or th erubber bellows of th eaxl ejoint s
and propelle rshafts .
XAfterth etrip, examin ewithout fail th eentire
undercarriage, wheels, tires ,brakes, body-
wor kstructure, steering ,chassi sand exhaust
system for damage.
XAfte rdriving in sand, mud, gravel, water or
similar dirt yconditions, hav eth efollowin g
checke dand cleaned:
Rbrak edisc s
Rwheels
Rbrak epads
Raxl ejoint s
XIf you notice stron gvibration safter off-road
driving ,chec kfor foreign objects in th e
wheels and driv etrain and ,if necessary, remove them. Foreign objects can disturb th
e
balance and caus evibrations.
XCarr yout abrak etest .
Driving on sand
Observ eth efollowin grule swhen driving on
sand:
RShift th etransfer cas eto th eoff-road driving
position LOW RANGE (Ypage 149).
RAvoid high engin espeeds.
RShift th eautomatic transmission to alow
gear .
RDrive quickly to overcome th erollin gresist -
ance. Otherwise th evehicle's wheels could
become stuck in loos eground .
RDrive in th etrack sof other vehicles if possi-
ble. When doin gso, mak esur ethat:
-th etire rut sare no tto odeep
-th esan dis sufficientl yfir m
-your vehicl ehas sufficien tground clear-
anc e
Tire ruts and gravel roads
!Chec kthat th erut sare no tto odeep and
that your vehicl ehas sufficien tclearance .
Otherwise, your vehicl ecould be damaged or
botto mout and get stuck .
Observ eth efollowin grule swhen driving alon g
rut sin off-road terrain or on road swit hloos e
gravel:
RShift th etransfer cas eto th eoff-road driving
position LOW RANGE (Ypage 149).
RAvoid high engin espeeds.
RObserv eth esafet ynote s (Ypage 129) and
th egeneral note s (Ypage 130) on off-road
driving .
RShift th eautomatic transmission to alow
gear .
RDrive slowly.
RWher erut sare to odeep ,driv ewit hth e
wheels of on eside on th ecenter grassy area,
if possible.
Driving over obstacles
!Obstacles could damag eth efloor of th e
vehicl eor component sof th echassis. As k
passenger sfor guidance when driving ove r
larg eobstacles. The passenger should always
Driving tips131
Driving and parking
Z
Page 134 of 294
keep a safe distance from the vehicle when
doing so in order to avoid injury as a result of
unexpected vehicle movements. After driving
off-road or over obstacles, check the vehicle
for possible damage, especially to the under-
body and the components of the chassis.
!Drive with particular care when driving over
an obstacle while driving up or down a steep
slope.
The vehicle could otherwise tilt and slide side-
ways or tip over.
Observe the following rules when driving over
tree stumps, large stones and other obstacles:
RObserve the safety notes (Ypage 129) and
the general notes (Ypage 130) on off-road
driving.
RShift the transfer case to the off-road driving
position LOW RANGE (Ypage 149).
RAvoid high engine speeds.
RShift the automatic transmission to a low
gear.
RMake sure that you have enough ground
clearance before driving across an obstacle.
RDrive very slowly.
RTry to drive straight over the center of obsta-
cles: front wheel first, then rear wheel.
Traveling uphill
Approach/departure angle
GWARNING
If you drive on a steep incline at an angle or
turn when driving on an incline, the vehicle
could slip sideways, tip and rollover. There is a risk of an accident.
Always drive on a steep incline in the line of
fall (straight up or down) and do not turn the
vehicle.
Always observe the approach/departure angle
values (
Ypage 290).
RObserve the safety notes (Ypage 129) and
general notes (Ypage 130) on driving off-
road.
RDo not drive at an angle on slopes, inclines or gradients, but instead follow the direct line of
fall. Note that the climbing ability of your vehi- cle depends on the terrain conditions.
RBefore driving on extreme uphill and downhill
gradients, shift the transfer case to the LOW
RANGE off-road gear (
Ypage 149).
REngage the differential locks if necessary
(Ypage 151).
RDrive slowly.
RAccelerate gently and make sure that the
wheels are gripping.
RAvoid high engine speeds, except when driv-
ing on sandy and muddy routes with high driv-
ing resistance.
RAvoid high engine speeds – drive at an appro-
priate engine speed (maximum 3,000 rpm).
RWhen driving down an incline, make use of the
engine's bra king effect. Observe the engine
speed; do not overrev the engine.
Further information on the maximum engine
speed (
Ypage 160).
RShift the automatic transmission to a low gear appropriate for tackling an uphill gradient or a
long, steep downhill gradient.
Hill start assist will aid you when pulling away on
a hill. For further information about hill start
assist, see (
Ypage 107).
Maximum gradient-climbing capability
Always observe the maximum gradient climbing ability values (Ypage 290).
Hilltops
When driving up an uphill gradient, slightly
reduce pressure on the accelerator immediately
before reaching the brow of the hill (do not shift
the transmission into N). Make use of the vehi-
cle's own impetus to travel over the brow.
This style of driving prevents:
Rthe vehicle from lifting off the ground on the
brow of a hill
Rloss of traction
Rthe vehicle from traveling too quickly down
the other side
Driving downhill
RDrive slowly.
RDo not drive at an angle down steep inclines.
Steer into the line of fall and drive with the
front wheels aligned straight. Otherwise, the
vehicle could slip sideways, tip and rollover.
132Driving tips
Driving an d parking
Page 136 of 294
XAccelerate the vehicle to the desired speed.
XBriefly press the cruise control lever up:or
down ;.
XRemove your foot from the accelerator pedal.
Cruise control is activated. The vehicle auto-
matically maintains the stored speed.
iCruise control may be unable to maintain
the stored speed on uphill and downhill gra-
dients. The stored speed is resumed when the
gradient levels out. Cruise control maintains
the stored speed on downhill gradients by
automatically applying the brakes.
Calling up the stored speed
GWARNING
If you call up the stored speed and it is lower
than the current speed, the vehicle deceler-
ates. If you do not know the stored speed, the vehicle could decelerate unexpectedly. There
is a risk of an accident.
Pay attention to the road and traffic condi-
tions before calling up the stored speed. If you
do not know the stored speed, store the
desired speed again.
XBriefly pull the cruise control lever towards
you ?.
XRemove your foot from the accelerator pedal.
Cruise control is activated and adjusts the
vehicle's speed to the last speed stored.
If no speed is stored, cruise control stores the
current speed and maintains it.
Setting a speed
Keep in mind that it may take a brief moment
until the vehicle has accelerated or braked to
the speed set.
XPress the cruise control lever up :for a
higher speed or down ;for a lower speed.
XTo adjust the set speed in 1 mph incre-
ments (1 km/h increments): briefly press
the cruise control lever up :or down ;to
the pressure point.
Every time the cruise control lever is pressed
up : or down ;the last speed stored is
increased or reduced.
XTo adjust the set speed in 5 mph incre-
ments (10 km/h increments): briefly pressthe cruise control lever up
:or down ;
beyond the pressure point.
Every time the cruise control lever is pressed
up : or down ;the last speed stored is
increased or reduced.
iCruise control is not deactivated if you
depress the accelerator pedal. If you acceler-
ate to overtake, cruise control adjusts the
vehicle's speed to the last speed stored after
you have finished overtaking.
Deactivating cruise control
There are several ways to deactivate cruise con-
trol:
XBriefly press the cruise control lever forwards
=.
or
XBrake.
Cruise control is automatically deactivated if:
Ryou apply the parking brake
Ryou are driving at less than 20 mph (30 km/h)
RESP®intervenes or you deactivate ESP®
Ryou shift the automatic transmission to posi-
tion iwhile driving
Ryou engage a differential lock
If cruise control is deactivated, a warning tone
sounds. You will see the Cruise Control Off
message in the multifunction display for approx-
imately five seconds. The message on the mul-
tifunction display disappears and the segments
on the speedometer go out.
iWhen you switch off the engine, the last
speed stored is cleared.
DISTRONIC PLUS
General notes
DISTRONIC PLUS regulates the speed and auto-
matically helps you maintain the distance from
the vehicle detected in front. Vehicles are detec-
ted with the aid of the radar sensor system.
DISTRONIC PLUS brakes automatically so that
the set speed is not exceeded.
Change into a lower gear in good time on long
and steep downhill gradients.
This is especially important if the vehicle is
laden. By doing so, you will make use of the
braking effect of the engine. This relieves the
134Driving systems
Driving an d parking