headlamp MERCEDES-BENZ G-CLASS SUV 2012 Owner's Manual
[x] Cancel search | Manufacturer: MERCEDES-BENZ, Model Year: 2012, Model line: G-CLASS SUV, Model: MERCEDES-BENZ G-CLASS SUV 2012Pages: 357, PDF Size: 8.86 MB
Page 225 of 357
Lights
Setting the daytime driving lights
The Day lights function can only be
switched on with the engine turned off.
X Press the =or; button on the steer-
ing wheel to selec tthe Settings menu.
X Press the :or9 button to select the
Light submenu.
X Press ato confirm.
X Press :or9 to select the Daytime driving lights: function.
If the Daytime driving lights have
been switched on, the cone of light and the
W symbol in the multifunction display
are shown in red.
X Press the abutton to save the setting.
Further information on daytime driving lights
(Y page 105).
Surround lighting and exterior lighting
delayed switch-off
X Press the =or; button on the steer-
ing wheel to select the Settings menu.
X Press the :or9 button to select the
Light submenu.
X Press ato confirm.
X Press :or9 to select the Sur‐ round lighting function.
When the Surround lighting function is
activated, the cone of light in the multi-
function display is shown in red.
X Press the abutton to save the setting.
Deactivating delayed switch-off of the exte-
rior lighting temporarily:
X Before leaving the vehicle, turn the key to
position 0(Ypage 143) in the ignition lock.
X Turn the key to position 2in the ignition
lock (Y page 143).
The exterior lighting delayed switch-off is
deactivated.
Delayed switch-off of the exterior lighting is
reactivated the next time you start the
engine. If you have activated the
Surround light‐ ing function and the light switch is set to
Ã, the following functions are activated
when it is dark:
R Surround lighting: the exterior lighting
remains lit for 40 seconds after unlocking
with the key. If you start the engine, the
surround lighting is switched off and auto-
matic headlamp mode is activated
(Y page 105).
R Exterior lighting delayed switch-off: the
exterior lighting remains lit for
60 seconds after the engine is switched off.
If you close all the doors and the boot lid,
the exterior lighting goes off after
15 seconds.
i Depending on your vehicle's equipment,
when the surround lighting and delayed
switch-off exterior lighting are on, the fol-
lowing light up:
R side lamps
R foglamps
R dipped-beamh eadlamps
R daytime driving lights
R surround lighting in the exterior mirrors
Activating/deactivating the interior light-
ing delayed switch-off
If you activate the Light. delay function,
the interior lighting remains on for
20 seconds after you remove the key from the
ignition lock.
X Press the =or; button on the steer-
ing wheel to select the Settings menu.
X Press the :or9 button to select the
Light submenu.
X Press ato confirm.
X Press :or9 to select the Light. delay function.
When the Light. delay function is acti-
vated, the vehicle interior is displayed in
red in the multifunction display.
X Press the abutton to save the setting. 222
Menus and submenusOn-board computer and displays
Page 237 of 357
Display messages Possible causes/consequences and
M Solutions
6
Rear centre mal‐
function Consult
workshop SRS has malfunctioned at the rear centre. The
6warning lamp
also lights up in the instrumen tcluster.
G WARNING
The airbags or belt tensioners may either be triggered uninten-
tionally or, in the even tofanaccident, may not be triggered.
This poses an increased ris kofinjury.
X Visi taqualified specialist workshop. 6
Left
windowbag mal‐
function Consult
workshop or
Right windowbag malfunc‐
tion Consult work‐
shop There is a malfunction in the left-hand and/or right-hand window-
bag. The
6warning lamp also lights up in the instrument clus-
ter.
G WARNING
The left or right windowbag may either be triggered unintentionally
or, in the event of an accident, may not be triggered.
This poses an increased risk of injury.
X Visit a qualified specialist workshop. Lights
i Display messages about LEDs:
This display message will only appear if all LEDs have failed. Display messages Possible causes/consequences and
M Solutions
b
Left dipped beam
or
Right dipped beam The left or right-hand dipped-beam headlamp is faulty.
X
Visit a qualified specialist workshop. b
Trailer left tail
lamp or
Trailer right tail lamp The left or right-hand trailer tail lamp is faulty.
X
Check whether you are permitted to replace the bulb yourself.
or
X Visit a qualified specialist workshop. b
Trailer left indi‐
cator or
Trailer right indicator The left or right-hand trailer turn signal lamp is faulty.
X
Check whether you are permitted to replace the bulb yourself.
or
X Visit a qualified specialist workshop. 234
Display messagesOn-board computer and displays
Page 254 of 357
Display messages Possible causes/consequences and
M Solutions
Telephone No
service Your vehicle is outside the network provider's transmitter/
receiver range.
X
Wait until the mobile phone operational readiness symbol
appears in the multifunction display. ¥
Top
up washer fluid The washer fluid level in th
ewasher fluid reservoir has dropped
below the minimum.
X Top up the washe rfluid (Y page 294). Key
Displa
ymessages Possible causes/consequences and
M Solutions
Â
Key does not
belong to vehicle You have put the wrong key in the ignitio
nlock.
X Use the correct key. Â
Replace key The key needs to be replaced.
X Visit a qualified specialist workshop. Warning and indicator lamps in the
instrument cluster Warning and indicator lamps over-
view
L Dipped-beam headlamps
(Ypage 105)
T Side lamps (Y page 105)
#! Turn signals (Y page 108)
K Main-beam headlamps
(Ypage 109)
N Foglamps (Y page 106)
R Rear fog lamp (Y page 107)
ü Seat belts (Y page 252)
J Brakes (yellow) (Y page 253)
J Brakes (red) (Y page 253)
! ABS (Ypage 254)
÷ ESP®
(Y page 256)
å ESP®
OFF (Y page 256) 6
SRS (Ypage 259)
; Engine diagnostics
(Ypage 259)
8 Reserve fuel (Y page 260)
? Coolant (Ypage 260)
· Distance warning signal
(Ypage 262)
% Diesel engine: preglow
(Ypage 144)
h Tyre pressure monitor
(Ypage 263) Warning and indicator lamps in the instrument cluster
251On-board computer and displays Z
Page 280 of 357
Stowage compartment/ashtray
Stowage compartment/ashtray in the
centre console G
WARNING
Make sure that the engine has been switched
off and that the parking brake is applied so
that the vehicle cannot pull away unintention-
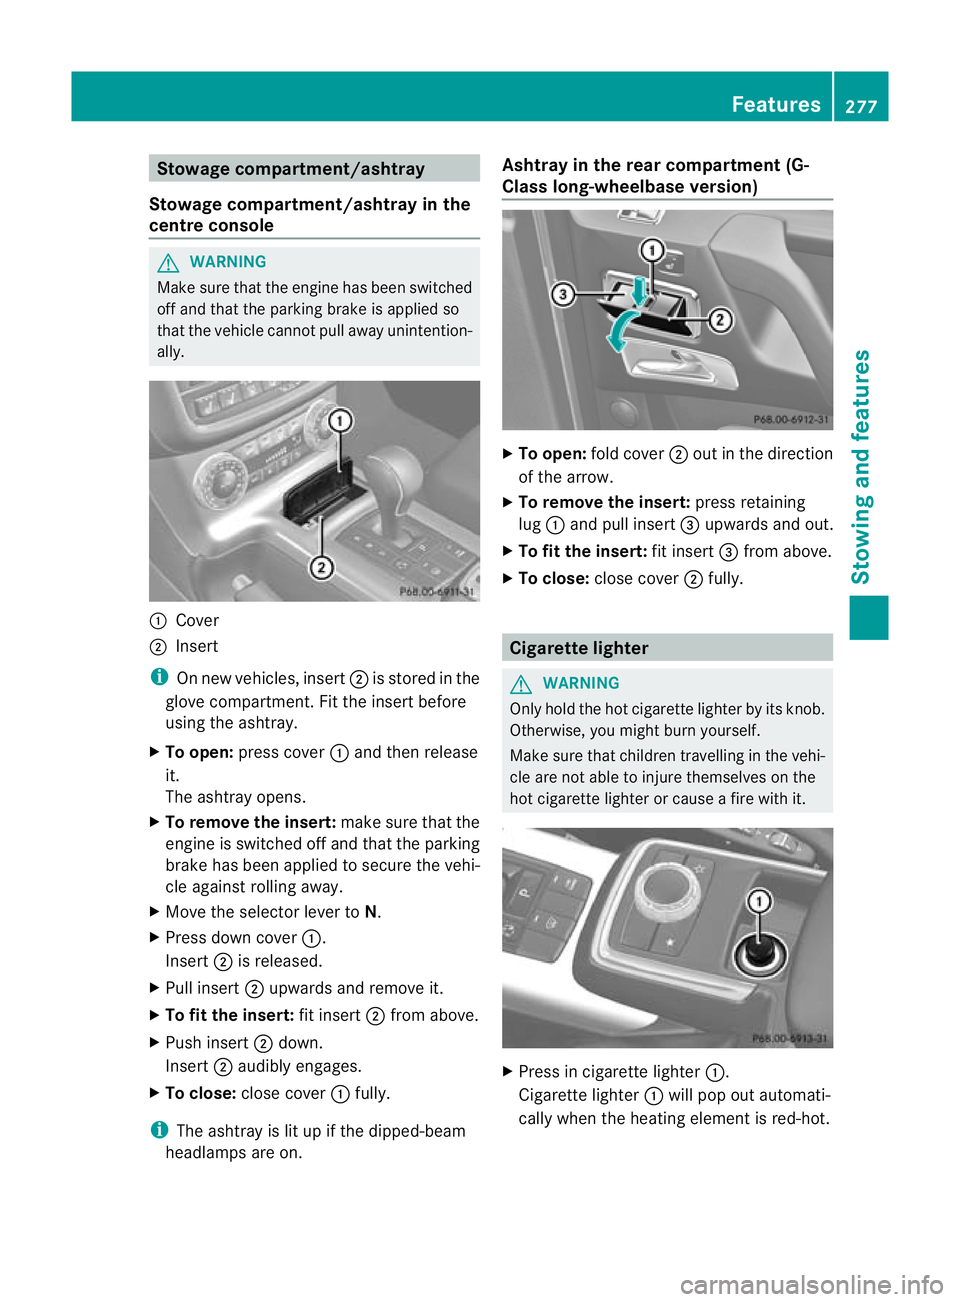
ally. :
Cover
; Insert
i On new vehicles, insert ;is stored in the
glove compartment. Fit the insert before
using the ashtray.
X To open: press cover :and then release
it.
The ashtray opens.
X To remove the insert: make sure that the
engine is switched off and that the parking
brake has been applied to secure the vehi-
cle against rolling away.
X Move the selector lever to N.
X Press down cover :.
Insert ;is released.
X Pull insert ;upwards and remove it.
X To fit the insert: fit insert;from above.
X Push insert ;down.
Insert ;audibly engages.
X To close: close cover :fully.
i The ashtray is lit up if the dipped-beam
headlamps are on. Ashtray in the rear compartment (G-
Class long-wheelbase version)
X
To open: fold cover ;out in the direction
of the arrow.
X To remove the insert: press retaining
lug :and pull insert =upwards and out.
X To fit the insert: fit insert=from above.
X To close: close cover ;fully. Cigarette lighter
G
WARNING
Only hold the hot cigarette lighter by its knob.
Otherwise, you might burn yourself.
Make sure that children travelling in the vehi-
cle are not able to injure themselves on the
hot cigarette lighter or cause a fire with it. X
Press in cigarette lighter :.
Cigarette lighter :will pop out automati-
cally when the heating element is red-hot. Features
277Stowing and features Z
Page 297 of 357
X
Chec kthe coolant temperature display in
the instrument cluster.
The coolant temperature must be below
70 †.
X Slowly turn cap :half a turn anti-clock-
wise to allow excess pressure to escape.
X Turn cap :further anti-clockwise and
remove it.
If the coolant is at the level of marker bar
= in the filler neck when cold, there is
enough coolant in coolant expansion
tank ;.
If the coolant level is approximately
1.5 cm above marker bar =in the filler
neck when warm, there is enough coolant
in coolant expansion tank ;.
X If necessary, top up with coolant that has
been tested and approved by Mercedes-
Benz.
X Replace cap :and turn it clockwise as far
as it will go.
For further information on coolant, see
(Y page 347).
Topping up the windscreen washer sys-
tem/headlampc leaning systemG
WARNING
Windscreen washer fluid is highly flammable.
Fire, naked flames and smoking are prohibi-
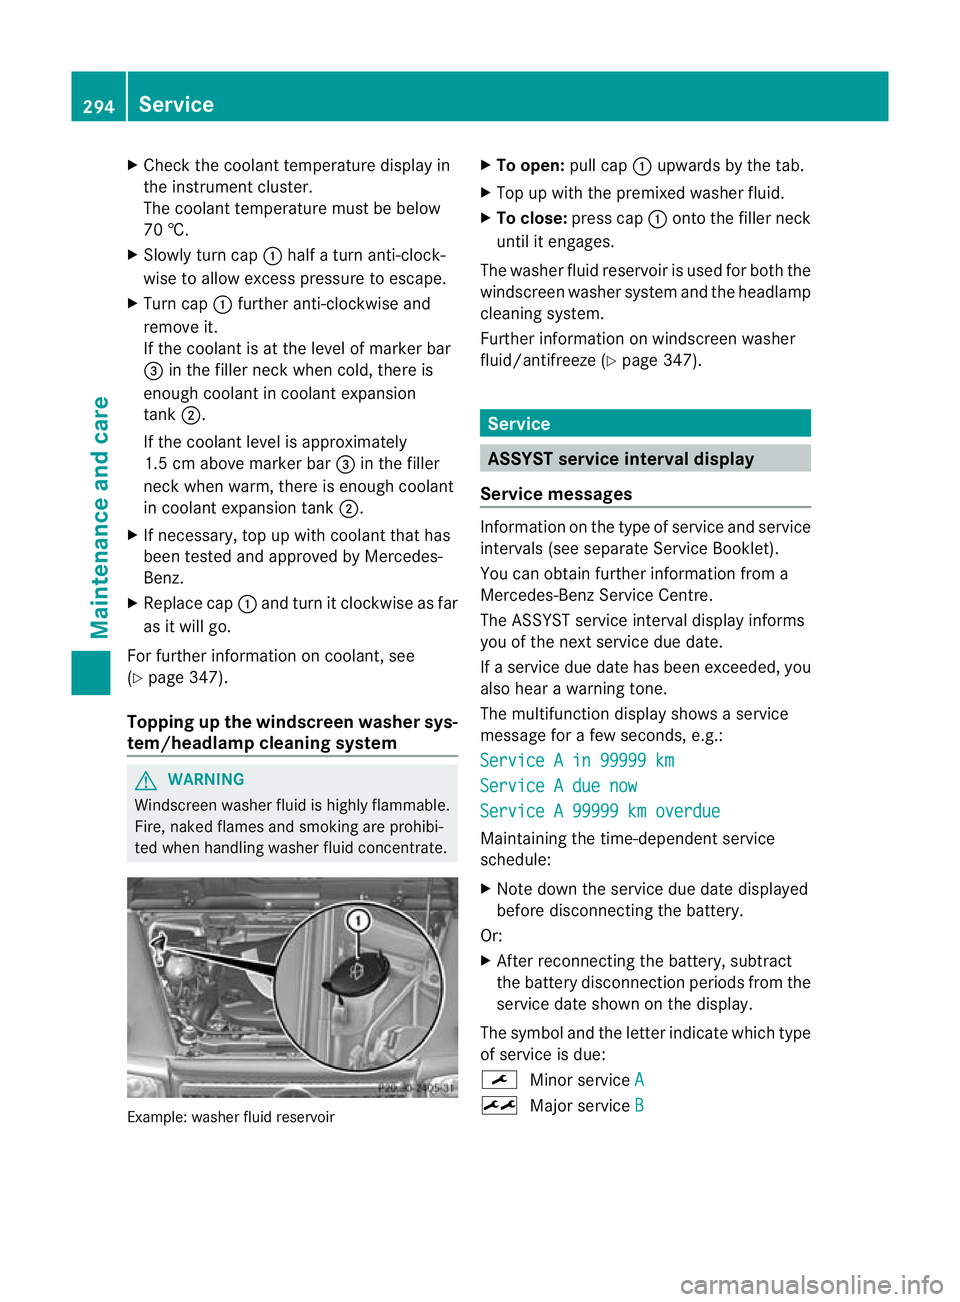
ted when handling washer fluid concentrate. Example: washer fluid reservoir X
To open: pull cap:upwards by the tab.
X Top up with the premixed washer fluid.
X To close: press cap :onto the filler neck
until it engages.
The washer fluid reservoir is used for both the
windscreen washer syste mand the headlamp
cleaning system.
Further informatio nonwindscreen washer
fluid/antifreeze (Y page 347). Service
ASSYST service interval display
Service messages Information on the type of service and service
intervals (see separate Service Booklet).
You can obtain further information from a
Mercedes-Benz Service Centre.
The ASSYST service interval display informs
you of the nex tservice due date.
If a service due date has been exceeded, you
also hear a warning tone.
The multifunction display shows a service
message for a few seconds, e.g.:
Service A in 99999 km Service A due now
Service A 99999 km overdue
Maintaining the time-dependen
tservice
schedule:
X Note down the service due date displayed
before disconnecting the battery.
Or:
X After reconnecting the battery, subtract
the battery disconnection periods from the
service date shown on the display.
The symbol and the letter indicate which type
of service is due:
¯ Minor service A ±
Major service B294
ServiceMaintenance and care
Page 301 of 357
!
Do not use wash programs with a hot wax
treatment under any circumstances.
If your vehicle has a clear matt finish, observe
the following instructions in order to avoid
damage to the paintwork due to incorrect
care.
These notes also apply to light-alloy wheels
with a clear matt finish.
i The vehicle should preferably be washed
by hand using a soft sponge, car shampoo
and plenty of water.
i Use only insect remover and car shampoo
from the range of recommended and
approved Mercedes-Benz care products.
Cleaning the windows G
WARNING
Switch off the windscreen wipers and remove
the key from the ignition lock before cleaning
the windscreen or the wiper blades. The wind-
screen wipers could otherwise move and
injure you.
! Do not use dry cloths, abrasive products,
solvents or cleaning agents containing sol-
vents to clean the inside of the windows.
Do not touch the insides of the windows
with hard objects, e.g. an ice scraper or
ring. There is otherwise a risk of damaging
the windows.
! Cleant he water drainage channels of the
windscreen and the rear window at regular
intervals. Deposits such as leaves, petals
and pollen may under certain circumstan-
ces prevent water from draining away.T his
can lead to corrosion damage and damage
to electronic components.
X Cleant he inside and outside of the win-
dows with a damp cloth and a cleaning
agent that is recommended and approved
by Mercedes-Benz. Cleaning the wiper blades G
WARNING
Switch off the windscreen wipers and remove
the key from the ignition lock before cleaning
the windscreen or the wiper blades. The wind-
screen wipers could otherwise move and
injure you.
! Do not pull on the wiper blade. Otherwise,
the wiper blade could be damaged.
! Do not clean wiper blades too often and
do not rub them too hard. Otherwise, the
graphite coating could be damaged. This
could cause wiper noise.
! Hold the wiper arm securely when folding
back. The windscreen could be damaged if
the wiper arm hits against it suddenly.
X Fold the wiper arms away from the wind-
screen.
X Carefully clean the wiper blades with a
damp cloth.
X Fold the windscreen wipers back again
before switching on the ignition.
Cleaning the headlamps !
Only use cleaning agents or cleaning
cloths which are suitable for plastic head-
lamp lenses. Unsuitable cleaning agents or
cleaning cloths could scratch or damage
the plastic headlamp lenses.
X Cleant he headlamp lenses with a damp
sponge and a mild cleaning agent, e.g.
Mercedes-Ben zcar shampoo or cleaning
cloths.
Cleaning the sensors !
If you clean the sensors with a high-pres-
sure cleaner, make sure that you keep a
distance of at least 30 cm between the
vehicle and the high-pressure cleane rnoz-
zle. Information about the correct distance
is available from the equipment manufac-
turer. 298
CareMaintenance and care
Page 351 of 357
engine components or the exhaust system it
could ignite. There is a risk of fire and injury.
Make sure that no windscreen washer con-
centrate is spilled next to the filler neck.
! Only use washer fluid that is suitable for
plastic lamp lenses, e.g. MB SummerFit or
MB WinterFit .Unsuitabl ewasher fluid
could damage the plastic lenses of the
headlamps.
! Do no tuse distilled or de-ionised water in
the washer fluid reservoir. Otherwise, the
level sensor may be damaged.
! Only the washer fluids SummerFit and
WinterFit can be mixed. Otherwise, the
spraying nozzles could become blocked.
At temperatures above freezing:
X Fill the washer fluid reservoir with a mixture
of water and washer fluid, e.g. MB Sum-
merFit.
X Mix 1 part MB SummerFit to 100 parts
water.
At temperatures below freezing:
X Fill the washer fluid reservoir with a mixture
of water and washer fluid, e.g. MB Winter-
Fit.
Adapt the mixing ratio to the outside temper-
ature.
X Down to Ò10 †: mix 1 part MB WinterFit to
2 parts water.
X Down to Ò20 †: mix 1 part MB WinterFit to
1 part water.
X Down to Ò29 †: mix 2 parts MB WinterFit
to 1 part water.
i Add washer fluid concentrate, e.g. MB
SummerFit or MB WinterFit, to the washer
fluid all year round. Vehicle data
General notes
Please note that for the specified vehicle
data:
R the heights specified may vary as a result
of:
-tyres
- load
- condition of the suspension
- optional equipment
R items of optional equipment increase the
unladen weight and reduce the maximum
payload. The unladen weight is specified in
accordance with EC directive and includes:
-driver (68 kg)
- luggage (7 kg)
- all fluids (fuel tank 90% full)
R vehicle-specific weight information can be
found on the vehicle identification plate
(Y page 340).
R Only for certain countries: you can find
vehicle-specific vehicle data in the COC
documents (CERTIFICATE OF CONFORM-
ITY). These documents are delivered with
your vehicle. Dimensions and weights
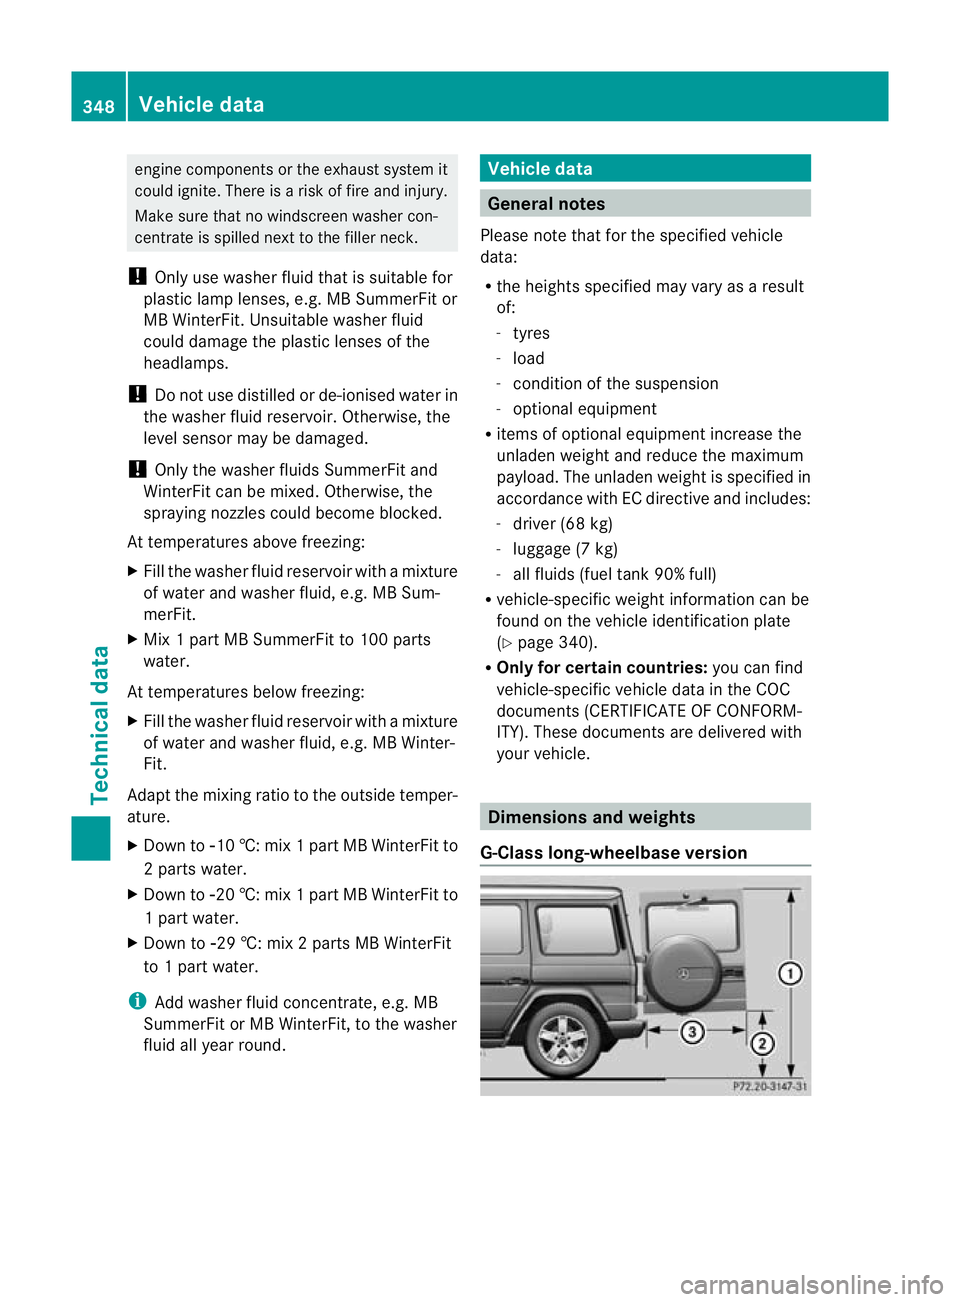
G-Class long-wheelbase version 348
Vehicle dataTechnical data