high beam MERCEDES-BENZ G-CLASS SUV 2014 Owners Manual
[x] Cancel search | Manufacturer: MERCEDES-BENZ, Model Year: 2014, Model line: G-CLASS SUV, Model: MERCEDES-BENZ G-CLASS SUV 2014Pages: 272, PDF Size: 39.13 MB
Page 6 of 272
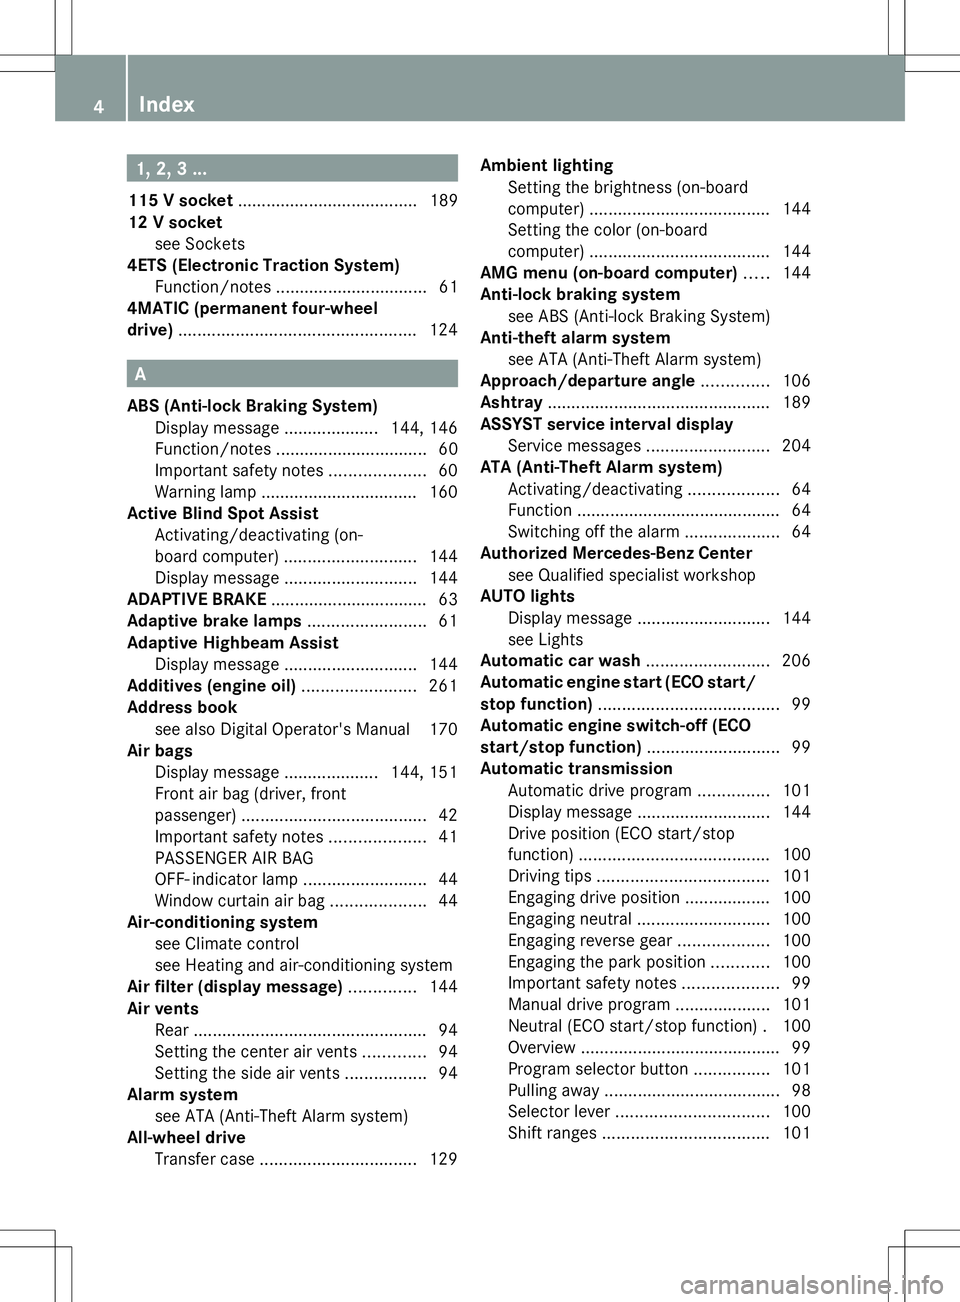
1, 2, 3 ...
115 V socket ...................................... 189
12 V socket see Sockets
4ETS (Electronic Traction System)
Function/notes ................................ 61
4MATIC (permanent four-wheel
drive) .................................................. 124A
ABS (Anti-lock Braking System) Display message .................... 144, 146
Function/notes ................................ 60
Important safety notes ....................60
Warning lamp ................................. 160
Active Blind Spot Assist
Activating/deactivating (on-
board computer) ............................ 144
Display message ............................ 144
ADAPTIVE BRAKE ................................. 63
Adaptive brake lamps .........................61
Adaptive Highbeam Assist Display message ............................ 144
Additives (engine oil) ........................261
Address book see also Digital Operator's Manual 170
Air bags
Display message .................... 144, 151
Front air bag (driver, front
passenger) ....................................... 42
Important safety notes ....................41
PASSENGER AIR BAG
OFF- indicator lamp ..........................44
Window curtain air bag ....................44
Air-conditioning system
see Climate control
see Heating and air-conditioning system
Air filter (display message) ..............144
Air vents Rear ................................................. 94
Setting the center air vents .............94
Setting the side air vents .................94
Alarm system
see ATA (Anti-Theft Alarm system)
All-wheel drive
Transfer case ................................. 129Ambient lighting
Setting the brightness (on-board
computer) ...................................... 144
Setting the color (on-board
computer) ...................................... 144
AMG menu (on-board computer) .....144
Anti-lock braking system see ABS (Anti-lock Braking System)
Anti-theft alarm system
see ATA (Anti-Theft Alarm system)
Approach/departure angle ..............106
Ashtray ............................................... 189
ASSYST service interval display Service messages ..........................204
ATA (Anti-Theft Alarm system)
Activating/deactivating ...................64
Function .......................................... .64
Switching off the alarm ....................64
Authorized Mercedes-Benz Center
see Qualified specialist workshop
AUTO lights
Display message ............................ 144
see Lights
Automatic car wash ..........................206
Automatic engine start (ECO start/
stop function) ...................................... 99
Automatic engine switch-off (ECO
start/stop function) ............................99
Automatic transmission Automatic drive program ...............101
Display message ............................ 144
Drive position (ECO start/stop
function) ........................................ 100
Driving tips .................................... 101
Engaging drive position .................. 100
Engaging neutral ............................ 100
Engaging reverse gear ...................100
Engaging the park position ............100
Important safety notes ....................99
Manual drive program ....................101
Neutral (ECO start/stop function) .100
Overview .......................................... 99
Program selector button ................101
Pulling away ..................................... 98
Selector lever ................................ 100
Shift ranges ................................... 1014
Index
Page 12 of 272
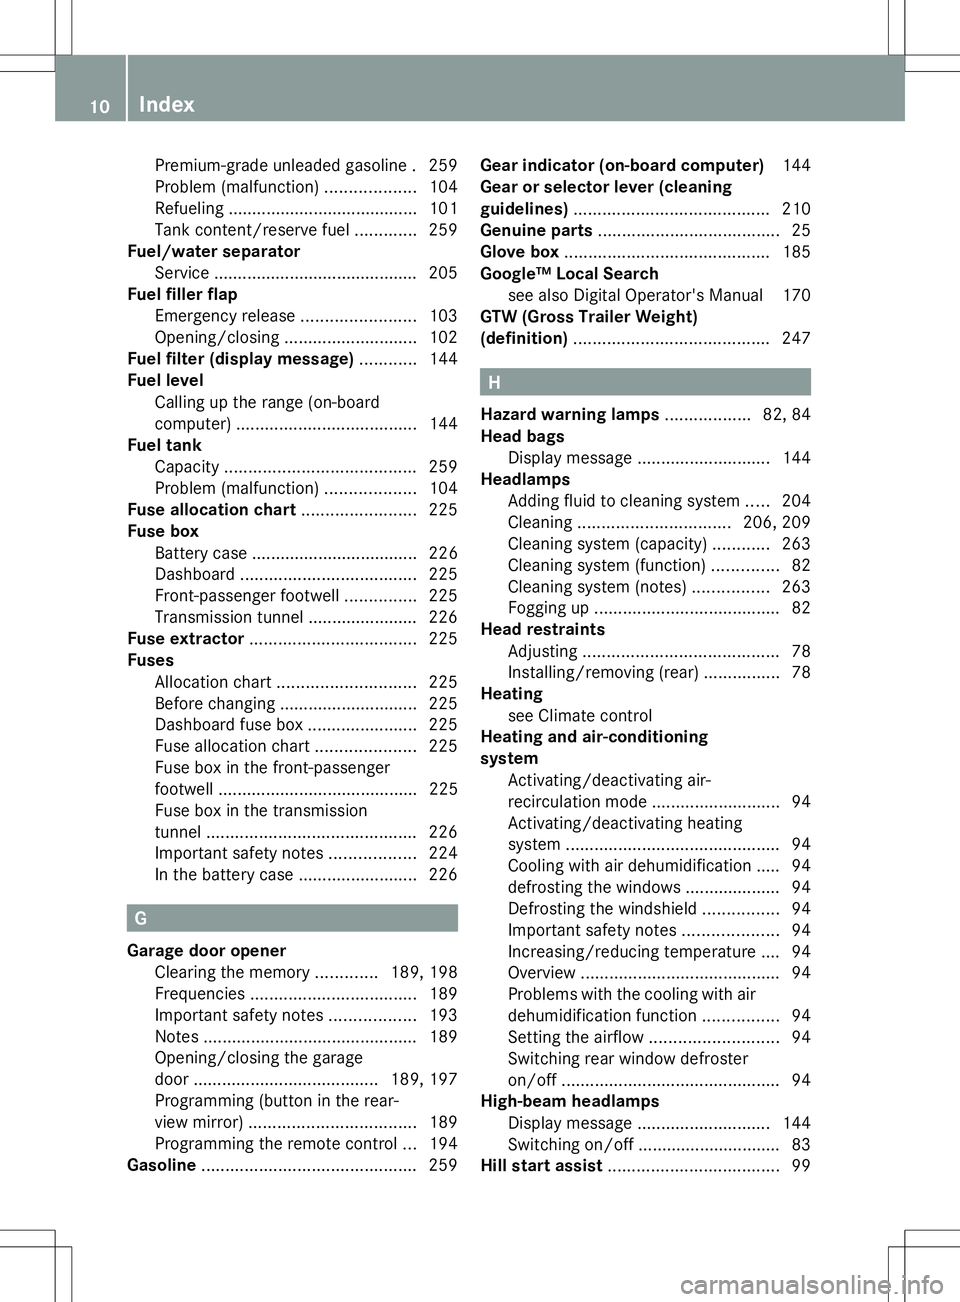
Premium-grade unleaded gasoline
.259
Problem (malfunction) ...................104
Refueling ........................................ 101
Tank content/reserve fuel .............259
Fuel/water separator
Service .......................................... .205
Fuel filler flap
Emergency release ........................103
Opening/closing ............................ 102
Fuel filter (display message) ............144
Fuel level Calling up the range (on-board
computer) ...................................... 144
Fuel tank
Capacity ........................................ 259
Problem (malfunction) ...................104
Fuse allocation chart ........................225
Fuse box Battery case ................................... 226
Dashboard ..................................... 225
Front-passenger footwell ...............225
Transmission tunnel ....................... 226
Fuse extractor ................................... 225
Fuses Allocation chart ............................. 225
Before changing ............................. 225
Dashboard fuse box .......................225
Fuse allocation chart .....................225
Fuse box in the front-passenger
footwell .......................................... 225
Fuse box in the transmission
tunnel ............................................ 226
Important safety notes ..................224
In the battery case .........................226 G
Garage door opener Clearing the memory .............189, 198
Frequencies ................................... 189
Important safety notes ..................193
Notes ............................................. 189
Opening/closing the garage
door ....................................... 189, 197
Programming (button in the rear-
view mirror) ................................... 189
Programming the remote control ...194
Gasoline ............................................. 259Gear indicator (on-board computer)
144
Gear or selector lever (cleaning
guidelines) ......................................... 210
Genuine parts ...................................... 25
Glove box ........................................... 185
Google™ Local Search see also Digital Operator's Manual 170
GTW (Gross Trailer Weight)
(definition) ......................................... 247 H
Hazard warning lamps ..................82, 84
Head bags Display message ............................ 144
Headlamps
Adding fluid to cleaning system .....204
Cleaning ................................ 206, 209
Cleaning system (capacity )............ 263
Cleaning system (function) ..............82
Cleaning system (notes) ................263
Fogging up ....................................... 82
Head restraints
Adjusting ......................................... 78
Installing/removing (rear) ................78
Heating
see Climate control
Heating and air-conditioning
system
Activating/deactivating air-
recirculation mode ...........................94
Activating/deactivating heating
system ............................................. 94
Cooling with air dehumidification ..... 94
defrosting the windows .................... 94
Defrosting the windshield ................94
Important safety notes ....................94
Increasing/reducing temperature .... 94
Overview .......................................... 94
Problems with the cooling with air
dehumidification function ................94
Setting the airflow ........................... 94
Switching rear window defroster
on/off .............................................. 94
High-beam headlamps
Display message ............................ 144
Switching on/off .............................. 83
Hill start assist .................................... 9910
Index
Page 13 of 272
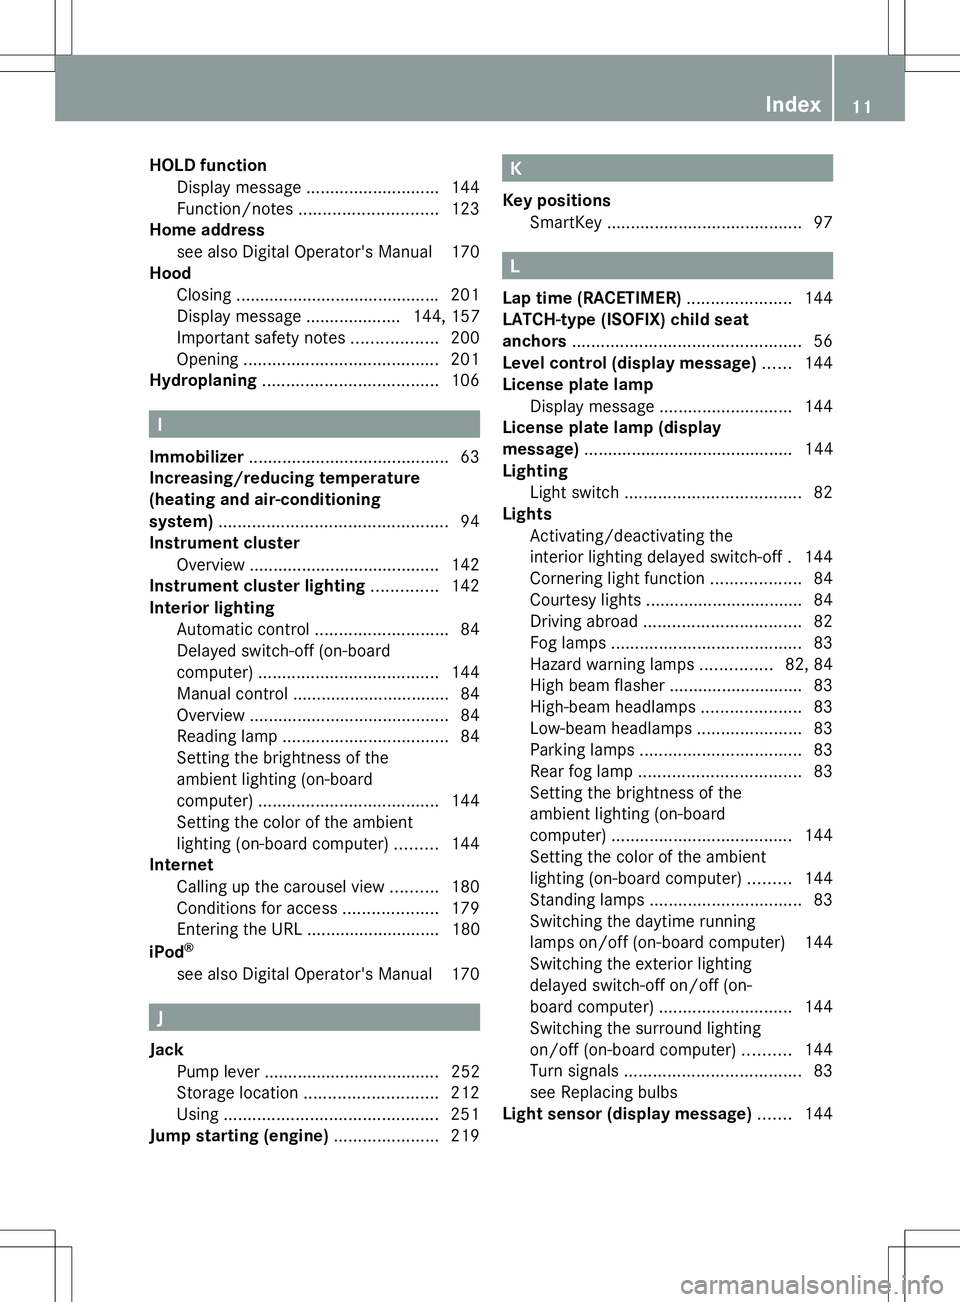
HOLD function
Display message ............................ 144
Function/notes ............................. 123
Home address
see also Digital Operator's Manual 170
Hood
Closing .......................................... .201
Display message .................... 144, 157
Important safety notes ..................200
Opening ......................................... 201
Hydroplaning ..................................... 106I
Immobilizer .......................................... 63
Increasing/reducing temperature
(heating and air-conditioning
system) ................................................ 94
Instrument cluster Overview ........................................ 142
Instrument cluster lighting ..............142
Interior lighting Automatic control ............................ 84
Delayed switch-off (on-board
computer) ...................................... 144
Manual control ................................ .84
Overview .......................................... 84
Reading lamp ................................... 84
Setting the brightness of the
ambient lighting (on-board
computer) ...................................... 144
Setting the color of the ambient
lighting (on-board computer) .........144
Internet
Calling up the carousel view ..........180
Conditions for access ....................179
Entering the URL ............................ 180
iPod ®
see also Digital Operator's Manual 170 J
Jack Pump lever ..................................... 252
Storage location ............................ 212
Using ............................................. 251
Jump starting (engine) ......................219 K
Key positions SmartKey ......................................... 97 L
Lap time (RACETIMER) ......................144
LATCH-type (ISOFIX) child seat
anchors ................................................ 56
Level control (display message) ......144
License plate lamp Display message ............................ 144
License plate lamp (display
message) ............................................ 144
Lighting Light switch ..................................... 82
Lights
Activating/deactivating the
interior lighting delayed switch-off .144
Cornering light function ...................84
Courtesy lights ................................ .84
Driving abroad ................................. 82
Fog lamps ........................................ 83
Hazard warning lamps ...............82, 84
High beam flasher ............................ 83
High-beam headlamps .....................83
Low-beam headlamps ......................83
Parking lamps .................................. 83
Rear fog lamp .................................. 83
Setting the brightness of the
ambient lighting (on-board
computer) ...................................... 144
Setting the color of the ambient
lighting (on-board computer) .........144
Standing lamps ................................ 83
Switching the daytime running
lamps on/off (on-board computer) 144
Switching the exterior lighting
delayed switch-off on/off (on-
board computer) ............................ 144
Switching the surround lighting
on/off (on-board computer) ..........144
Turn signals ..................................... 83
see Replacing bulbs
Light sensor (display message) .......144 Index
11
Page 34 of 272
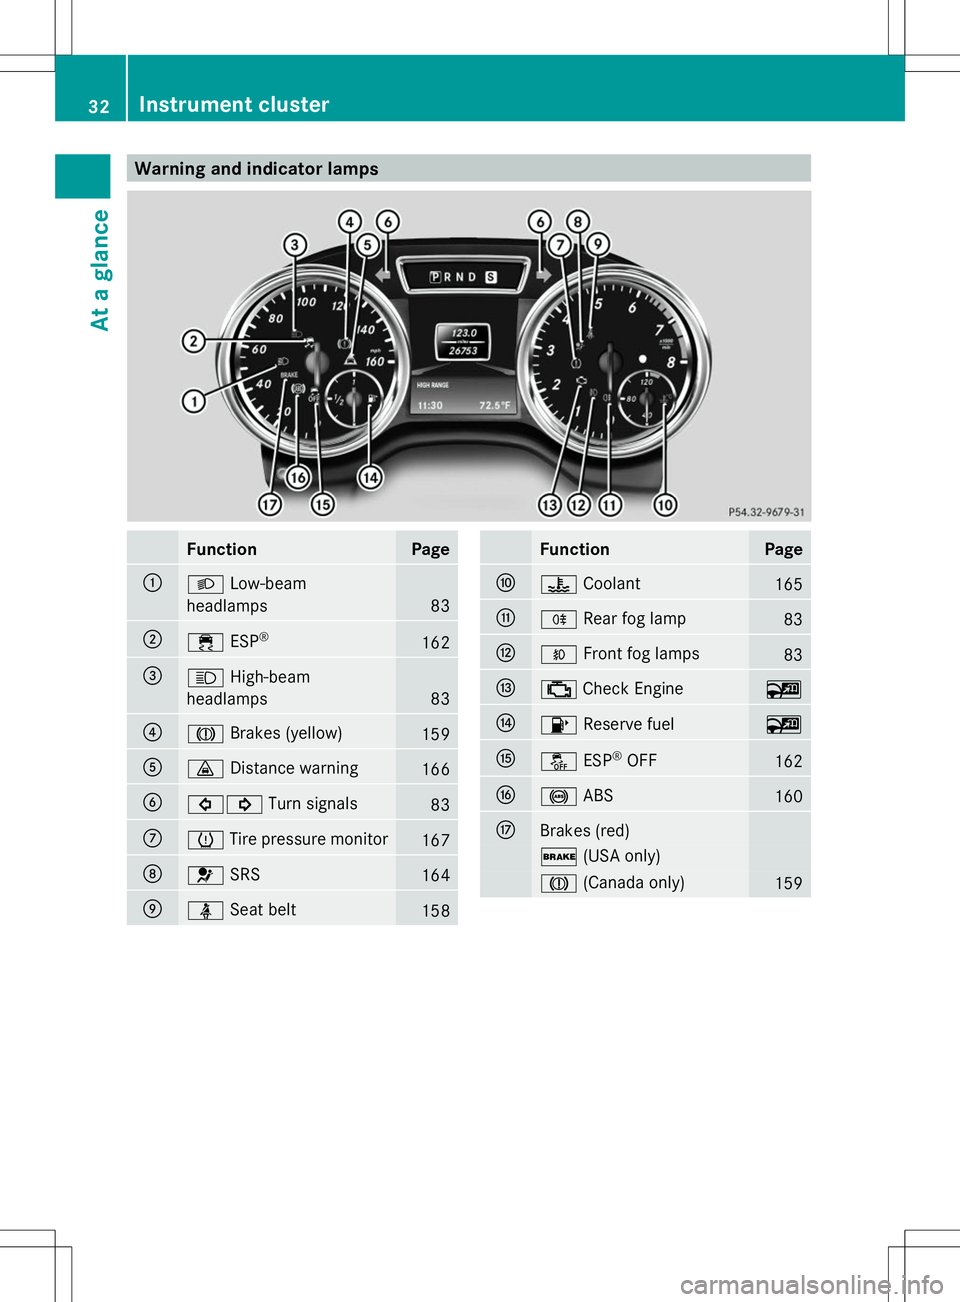
Warning and indicator lamps
Function Page
:
L
Low-beam
headlamps 83
;
÷
ESP® 162
=
K
High-beam
headlamps 83
?
J
Brakes (yellow) 159
A
·
Distance warning 166
B
#!
Turn signals 83
C
h
Tire pressure monitor 167
D
6
SRS 164
E
ü
Seat belt 158 Function Page
F
?
Coolant 165
G
R
Rear fog lamp 83
H
O
Front fog lamps 83
I
;
Check Engine ~
J
8
Reserve fuel ~
K
å
ESP®
OFF 162
L
!
ABS 160
M
Brakes (red)
$
(USA only) J
(Canada only) 15932
Instrument clusterAt a glance
Page 84 of 272
Useful information
i This Operator's Manual describes all
models and all standard and optional
equipment of your vehicle available at the
time of publication of the Operator's
Manual. Country-specific differences are
possible. Please note that your vehicle may
not be equipped with all features
described. This also applies to safety-
related systems and functions.
i Read the information on qualified
specialist workshops: (Y page 27).Exterior lighting
Important safety notes
For reasons of safety, Mercedes-Benz
recommends that you drive with the lights
switched on even during the daytime. In some
countries, operation of the headlamps varies
due to legal requirements and self-imposed
obligations. Driving abroad
Conversion to symmetrical low beam Switch the headlamps to symmetrical low
beam in countries in which traffic drives on
the opposite side of the road from the country
where the vehicle is registered. This prevents
glare to oncoming traffic. When using
symmetrical lights, the edge of the road is not
lit as widely and as far ahead as normal.
Have the headlamps converted at a qualified
specialist workshop as close to the border as
possible before driving in these countries.
Conversion to asymmetrical low beam
after returning Have the headlamps converted back to
asymmetrical low-beam headlamps at a
qualified specialist workshop as soon as
possible after crossing the border again. Information in the Digital Operator's
Manual
In the Digital Operator's Manual you will find
information on the following topics:
R Hazard warning lamps
R Headlamp cleaning system
R Headlamps fogged up on the inside Light switch
Operation !
Switch off the parking lamps and low-
beam headlamps when you leave the
vehicle. This prevents the battery from
discharging.
! If the battery has been excessively
discharged, the parking lamps or standing
lamps are automatically switched off to
enable the next engine start. Always park
your vehicle safely and sufficiently lit
according to legal standards. Avoid the
continuous use of the Tparking lamps
for several hours. If possible, switch on the
X right or the Wleft standing lamp.
If you hear a warning tone when you leave the
vehicle, the lights may still be switched on.
X Turn the light switch to Ã.
The turn signals, high-beam headlamps and
the high-beam flasher are operated using the
combination switch (Y page 83).
The exterior lighting (except the parking/
standing lamps) switches off automatically if
you:
R remove the SmartKey from the ignition lock
R open the driver's door with the SmartKey
in position 0. 82
Exterior lightingLights and windshield wipers
Page 85 of 272
Low-beam headlamps
X
To switch on the low-beam headlamps:
turn the SmartKey in the ignition lock to
position 2or start the engine.
X Turn the light switch to L.
The L indicator lamp in the instrument
cluster lights up.
Fog lamps (except AMG vehicles) G
WARNING
If you suspect that driving conditions will be
foggy, turn the light switch to Lbefore you
start your journey. Your vehicle may
otherwise not be visible and you could
endanger yourself and others.
X To switch on the fog lamps: turn the
SmartKey in the ignition lock to position 2
or start the engine.
X Turn the light switch to T,Lor
Ã.
X Press the Nbutton.
The green Nindicator lamp in the
instrument cluster lights up.
X To switch off the front fog lamps: press
the N button.
The green Nindicator lamp in the
instrument cluster goes out.
Only vehicles with front fog lamps have the
fog lamps function. Rear fog lamp
X To switch on the rear fog lamp: turn the
SmartKey in the ignition lock to position 2
or start the engine.
X Turn the light switch to LorÃ. X
Press the Rbutton.
The yellow Rindicator lamp in the
instrument cluster lights up.
X To switch off the rear fog lamp: press the
R button.
The yellow Rindicator lamp in the
instrument cluster goes out. Parking lamps
X To switch on: turn light switch to T. Standing lamps
Switching on the standing lamps ensures the
corresponding side of the vehicle is
illuminated.
X To switch on the parking lamps: the
SmartKey is not inserted in the ignition lock
or it is in position 0(Ypage 97).
X Turn the light switch to W(left-hand side
of the vehicle) or X(right-hand side of
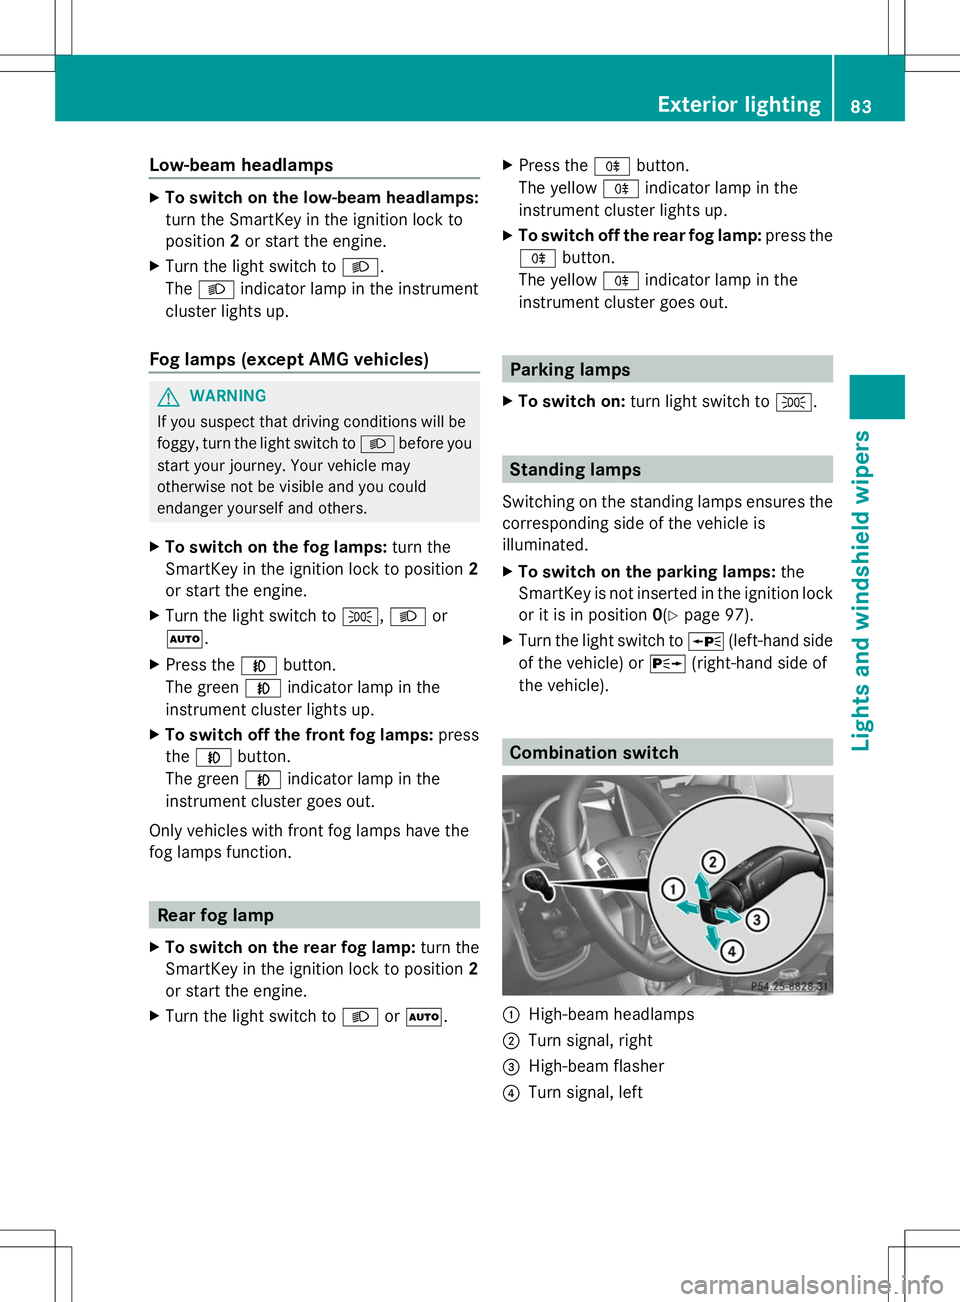
the vehicle). Combination switch
:
High-beam headlamps
; Turn signal, right
= High-beam flasher
? Turn signal, left Exterior lighting
83Lights and windshield wipers Z
Page 86 of 272
In the Digital Operator's Manual you will find
information on the following topics:
R Turn signals
R High-beam headlamps
R High-beam flasher Hazard warning lamps
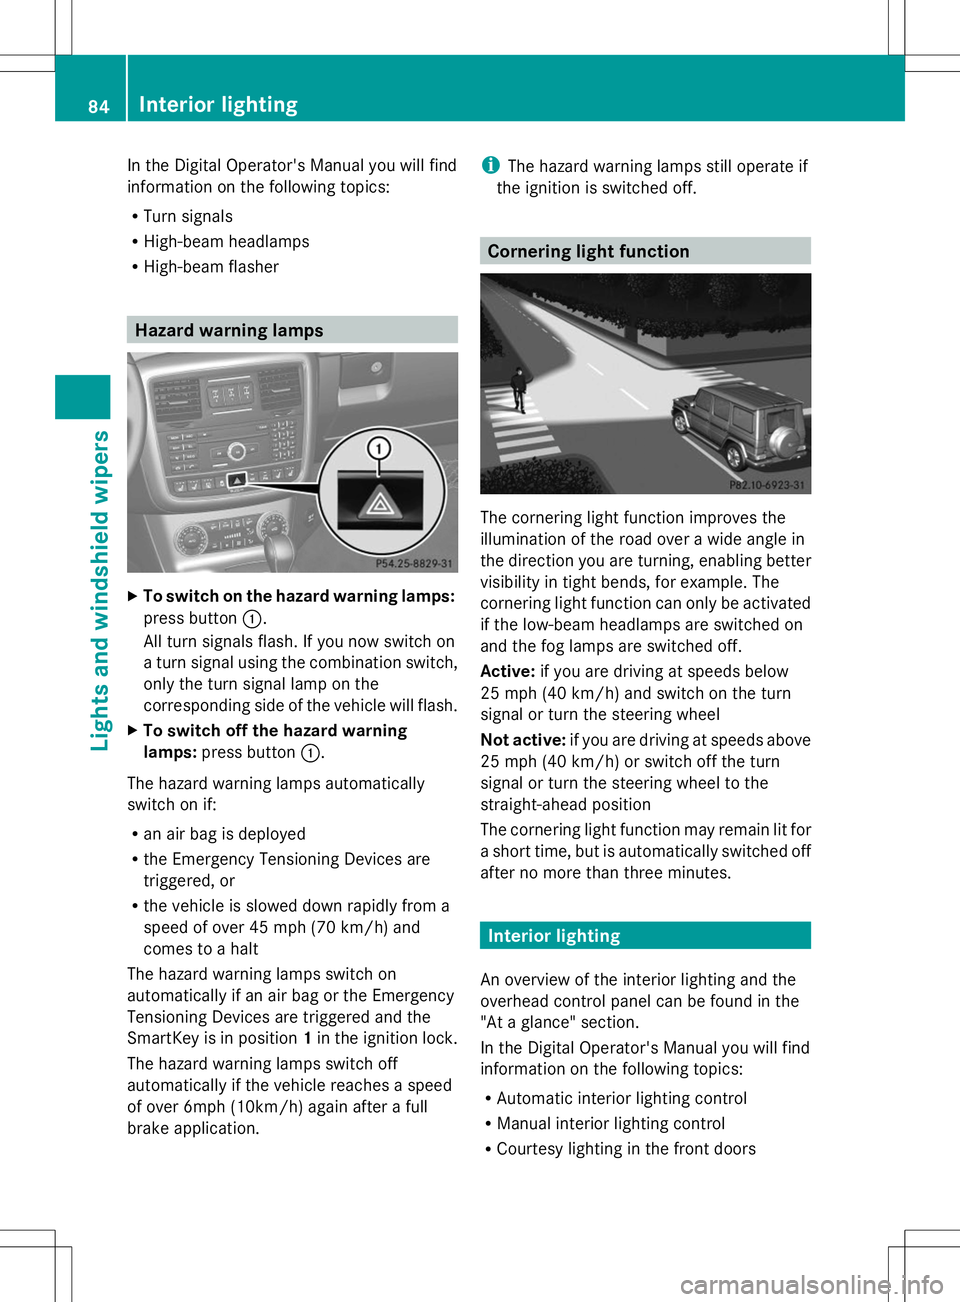
X
To switch on the hazard warning lamps:
press button :.
All turn signals flash. If you now switch on
a turn signal using the combination switch,
only the turn signal lamp on the
corresponding side of the vehicle will flash.
X To switch off the hazard warning
lamps: press button :.
The hazard warning lamps automatically
switch on if:
R an air bag is deployed
R the Emergency Tensioning Devices are
triggered, or
R the vehicle is slowed down rapidly from a
speed of over 45 mph (70 km/h) and
comes to a halt
The hazard warning lamps switch on
automatically if an air bag or the Emergency
Tensioning Devices are triggered and the
SmartKey is in position 1in the ignition lock.
The hazard warning lamps switch off
automatically if the vehicle reaches a speed
of over 6mph (10km/h) again after a full
brake application. i
The hazard warning lamps still operate if
the ignition is switched off. Cornering light function
The cornering light function improves the
illumination of the road over a wide angle in
the direction you are turning, enabling better
visibility in tight bends, for example. The
cornering light function can only be activated
if the low-beam headlamps are switched on
and the fog lamps are switched off.
Active:
if you are driving at speeds below
25 mph (40 km/h) and switch on the turn
signal or turn the steering wheel
Not active: if you are driving at speeds above
25 mph (40 km/h) or switch off the turn
signal or turn the steering wheel to the
straight-ahead position
The cornering light function may remain lit for
a short time, but is automatically switched off
after no more than three minutes. Interior lighting
An overview of the interior lighting and the
overhead control panel can be found in the
"At a glance" section.
In the Digital Operator's Manual you will find
information on the following topics:
R Automatic interior lighting control
R Manual interior lighting control
R Courtesy lighting in the front doors 84
Interior lightingLights and windshield wipers
Page 87 of 272
Replacing bulbs
Important safety notes
G
DANGER
Xenon bulbs carry a high voltage. You could
get an electric shock and be seriously or even
fatally injured if you touch the electric
contacts on Xenon bulbs. Therefore, never
remove the cover from Xenon bulbs.
Do not change the Xenon bulbs yourself, but
have them replaced at a qualified workshop.
Xenon bulbs
If your vehicle is equipped with Xenon bulbs,
you can recognize this by the following: the
cone of light from the Xenon bulbs moves
from the top to the bottom and back again
when you start the engine. For this to be
observed, the lights must be switched on
before starting the engine.
Bulbs and lamps are an important aspect of
vehicle safety. You must therefore make sure
that these function correctly at all times.
Have the headlamp setting checked regularly.
LED lamps
You can replace neither Xenon bulbs nor LED
bulbs. Have LED bulbs changed at a qualified
specialist workshop.
Bulbs and lamps are an important aspect of
vehicle safety. You must therefore make sure
that these function correctly at all times.
Have the headlamp setting checked regularly.
Before changing bulbs
Have the following bulbs changed at a
qualified specialist workshop:
R Additional turn signals in the exterior
mirrors
R High-mounted brake lamp
R High-beam/low-beam headlamps (Xenon
bulbs)
R Daytime running lamps
R Parking lamps/standing lamps
R License plate lamp i
Individual segments of the license plate
lamp LEDs may fail without a display
message appearing in the multifunction
display. Regularly check the license plate
lamp. If necessary, visit a qualified
specialist workshop.
You can replace the following bulbs:
R Fog lamp/cornering light with fog lamp
function
R Turn signal lamp (front)
R Brake/tail lamp
R Turn signal lamp (rear)
R Tail lamps/standing lamps
R Backup lamp
R Rear fog lamp
R Side marker lamps G
WARNING
Bulbs and lamps can become very hot. For
this reason, allow them to cool down before
changing them. Otherwise, you could burn
yourself when you touch them.
Keep bulbs out of the reach of children.
Otherwise, they could, for example, damage
the bulbs and injure themselves.
Never use a bulb which has been dropped.
Such a bulb may explode and injure you.
Halogen bulbs are pressurized and could
explode when you change them, especially if
they are very hot. You should therefore wear
eye protection and gloves when you are
changing them.
Other bulbs
There are bulbs other than the Xenon bulbs
that you cannot replace. Replace only the
bulbs listed (Y page 86). Have the bulbs that
you cannot replace yourself changed at a
qualified specialist workshop.
If you require assistance changing bulbs,
consult a qualified specialist workshop.
Do not touch the glass tube of new bulbs with
your bare hands. Even minor contamination
can burn into the glass surface and reduce
the service life of the bulbs. Always use a lint- Replacing bulbs
85Lights and windshield wipers Z