service indicator MERCEDES-BENZ G500 2002 W463 Owner's Manual
[x] Cancel search | Manufacturer: MERCEDES-BENZ, Model Year: 2002, Model line: G500, Model: MERCEDES-BENZ G500 2002 W463Pages: 385, PDF Size: 30.37 MB
Page 5 of 385

2 Contents
Infant and
child restraint systems ................ 73
Steering wheel adjustment
(electrical) .................................... 78
Inside rear view mirror ................... 79
Antiglare night position .............. 79
Exterior rear view mirrors ............. 80
Instrument cluster ........................... 84
Multifunction steering wheel,
multifunction display ................. 90
Trip and main odometer and
sub menu ..................................... 94
Audio systems .................................. 96
Radio .............................................. 96
CD player ....................................... 97
Telephone .......................................... 98
Navigation system .......................... 103
Trip computer ................................. 104
Malfunction/warning
message memory ...................... 106
Individual settings ......................... 108
Setting the audio volume .............. 122
Coolant temperature gauge .......... 123Flexible service system
(FSS) ........................................... 124
Engine oil level indicator ............. 127
Exterior lamp switch ..................... 129
Headlamp mode ..............................130
Night security illumination ..........132
Locator lighting ...........................133
Headlamp cleaning system ...........133
Combination switch .......................134
Rear window wiper/washer ..........138
Hazard warning flasher switch ....139
Climate control .............................. 140
Rear passenger compartment
adjustable air outlets ................150
Power windows ............................... 151
Sliding/pop-up roof ........................154
Interior lighting ..............................156
Door entry lamps ........................157
Rear interior lamps ....................158
Cargo compartment lamps ........159
Sun visors ........................................ 161
Illuminated vanity mirrors ........... 161
Interior .............................................162Storage compartments,
armrest and cup holder ........... 162
Glove box ..................................... 163
Ashtrays .......................................... 168
Lighter ............................................. 170
Floor mat ......................................... 170
Split rear seat bench ..................... 171
Rear seat head restraints .......... 173
Enlarged cargo area ....................... 174
Cargo tie-down rings ..................... 174
Partition net .................................... 175
Loading instructions ..................... 178
Parcel net in
front passenger footwell .......... 180
Cargo area cover blind .................. 180
Roof racks ........................................ 181
Brush guard .................................... 182
Telephone, general ........................ 184
Cellular telephone ......................... 184
Garage door opener ....................... 185
J_G463.book Seite 2 Mittwoch, 19. September 2001 8:06 08
Page 28 of 385
25 Contents - Operation
Te ch n i c a l
data Instruments
and controlsOperationDrivingInstrument
cluster displayPractical hints Car care Index Audio systems .................................. 96
Radio .............................................. 96
CD player ....................................... 97
Telephone .......................................... 98
Navigation system .......................... 103
Trip computer ................................. 104
Malfunction/warning
message memory ...................... 106
Individual settings ......................... 108
Setting the audio volume .............. 122
Coolant temperature gauge .......... 123
Flexible service system
(FSS) ............................................ 124
Engine oil level indicator .............. 127
Exterior lamp switch ..................... 129
Headlamp mode ............................. 130
Night security illumination ......... 132
Locator lighting .......................... 133Headlamp cleaning system ...........133
Combination switch .......................134
Rear window wiper/washer ..........138
Hazard warning flasher switch ....139
Climate control .............................. 140
Rear passenger compartment
adjustable air outlets ................150
Power windows ............................... 151
Sliding/pop-up roof ........................154
Interior lighting ..............................156
Door entry lamps ........................157
Rear interior lamps ....................158
Cargo compartment lamps ........159
Sun visors ........................................ 161
Illuminated vanity mirrors ........... 161
Interior .............................................162
Storage compartments,
armrest and cup holder ............162
Glove box ......................................163Ashtrays .......................................... 168
Lighter ............................................. 170
Floor mat ......................................... 170
Split rear seat bench ..................... 171
Rear seat head restraints .......... 173
Enlarged cargo area ....................... 174
Cargo tie-down rings ..................... 174
Partition net .................................... 175
Loading instructions ..................... 178
Parcel net in
front passenger footwell .......... 180
Cargo area cover blind .................. 180
Roof racks ........................................ 181
Brush guard .................................... 182
Telephone, general ........................ 184
Cellular telephone ......................... 184
Garage door opener ....................... 185
J_G463.book Seite 25 Mittwoch, 19. September 2001 8:06 08
Page 94 of 385
91 Multifunction steering wheel, multifunction display
Te ch n i c a l
data Instruments
and controlsOperationDrivingInstrument
cluster displayPractical hints Car care Index Depending on your vehicle’s equipment, you may use
the buttons on the multifunction steering wheel to call
up, control and set the following systems in the
multifunction display:
1Trip odometer and main odometer, see page 88 and
page 94
Flexible service system (FSS), see page 124
Vehicle speed, see page 94
Coolant temperature gauge, see page 123
Engine oil level indicator, see page 127
2Audio systems, see page 96
Radio, see page 96
CD player, see page 973Navigation system, see page 103
4Malfunction message memory, see page 106
5Individual settings, see page 108
6Trip computer, seepage104
After start
After reset
Fuel tank content
7Telephone, see page 98
Press the è or ÿ button repeatedly until the
required system is displayed.
The display advances by one system each time the
button is pressed.
You may call up add ition al d is plays wit hin som e of t hes e
categories by pressing the j or k button.
J_G463.book Seite 91 Mittwoch, 19. September 2001 8:06 08
Page 98 of 385
95 Multifunction steering wheel, multifunction display
Te ch n i c a l
data Instruments
and controlsOperationDrivingInstrument
cluster displayPractical hints Car care Index 1Trip odometer and main odometer
See page 88 for instructions on resetting the trip
odometer.
2Coolant temperature gauge, see page 123
3Vehicle speed if “SPEED DISP.” is selected in the
individual setting menu “INSTRUMENT CLUSTER” -
“SELECT DISPLAY”, refer to page 110
Outside temperature if “OUTSIDE TEMPERATURE”
is selected in the individual setting menu
“INSTRUMENT CLUSTER” - “SELECT DISPLAY”, see
page 110
4FSS (Flexible service system), see page 124
5Engine oil level indicator, see page 127Press è or ÿ button repeatedly until the trip
odometer and main odometer display (1) appears.
Press the j or k button repeatedly until the
required display (2, 3, 4, 5, 1) appears.
Pressing the è or ÿ button displays the next or
previous system.
J_G463.book Seite 95 Mittwoch, 19. September 2001 8:06 08
Page 127 of 385
124 Flexible service system
Te ch n i c a l
data Instruments
and controlsOperationDrivingInstrument
cluster displayPractical hints Car care Index
Flexible service system (FSS)
(service indicator)
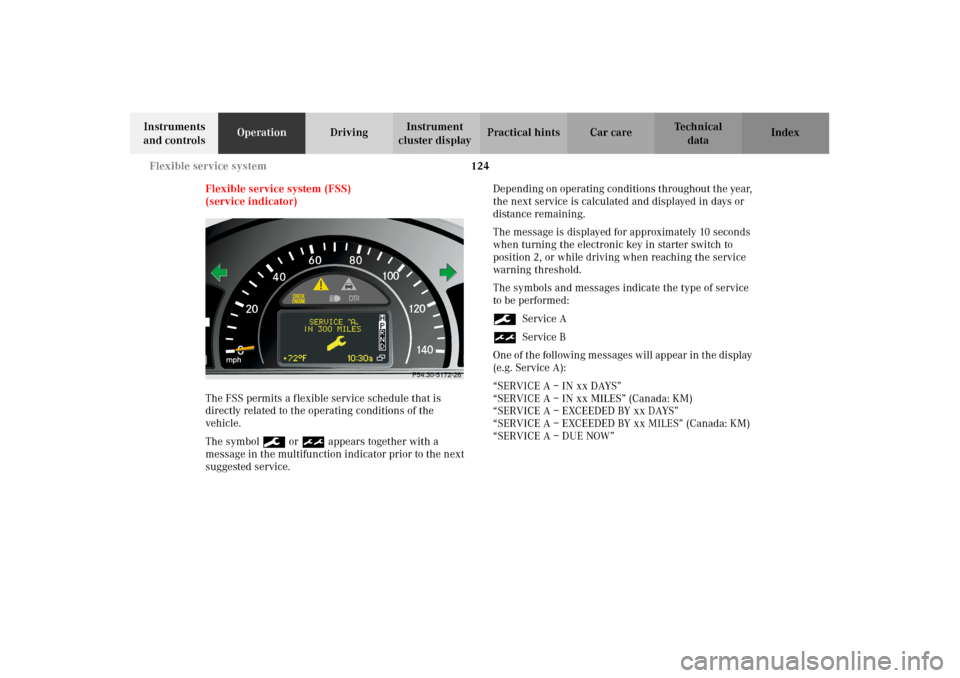
The FSS permits a flexible service schedule that is
directly related to the operating conditions of the
vehicle.
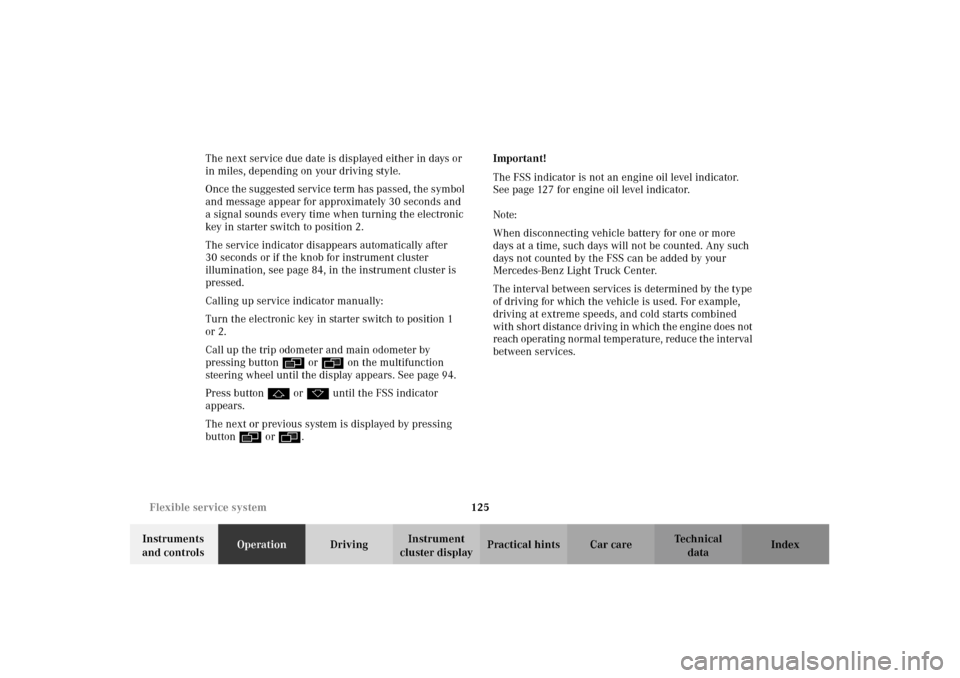
The symbol 9 or ½ appears together with a
message in the multifunction indicator prior to the next
suggested service.Depending on operating conditions throughout the year,
the next service is calculated and displayed in days or
distance remaining.
The message is displayed for approximately 10 seconds
when turning the electronic key in starter switch to
position 2, or while driving when reaching the service
warning threshold.
The symbols and messages indicate the type of service
to be performed:
9Service A
½Service B
One of the following messages will appear in the display
(e.g. Service A):
“SERVICE A – IN xx DAYS”
“SERVICE A – IN xx MILES” (Canada: KM)
“SERVICE A – EXCEEDED BY xx DAYS”
“SERVICE A – EXCEEDED BY xx MILES” (Canada: KM)
“SERVICE A – DUE NOW”
0
60
40100
120
140
mph
2080
P54.30-5172-26
J_G463.book Seite 124 Mittwoch, 19. September 2001 8:06 08
Page 128 of 385
125 Flexible service system
Te ch n i c a l
data Instruments
and controlsOperationDrivingInstrument
cluster displayPractical hints Car care Index The next service due date is displayed either in days or
in miles, depending on your driving style.
Once the suggested service term has passed, the symbol
and message appear for approximately 30 seconds and
a signal sounds every time when turning the electronic
key in starter switch to position 2.
The service indicator disappears automatically after
30 seconds or if the knob for instrument cluster
illumination, see page 84, in the instrument cluster is
pressed.
Calling up service indicator manually:
Turn the electronic key in starter switch to position 1
or 2.
Call up the trip odometer and main odometer by
pressing button è or ÿ on the multifunction
steering wheel until the display appears. See page 94.
Press button j or k until the FSS indicator
appears.
The next or previous system is displayed by pressing
button è or ÿ.Important!
The FSS indicator is not an engine oil level indicator.
See page 127 for engine oil level indicator.
Note:
When disconnecting vehicle battery for one or more
days at a time, such days will not be counted. Any such
days not counted by the FSS can be added by your
Mercedes-Benz Light Truck Center.
The interval between services is determined by the type
of driving for which the vehicle is used. For example,
driving at extreme speeds, and cold starts combined
wit h short distan ce d r iving in which the e ngin e d oes not
reach operating normal temperature, reduce the interval
between services.
J_G463.book Seite 125 Mittwoch, 19. September 2001 8:06 08
Page 129 of 385
126 Flexible service system
Te ch n i c a l
data Instruments
and controlsOperationDrivingInstrument
cluster displayPractical hints Car care Index
Followin g a c omp leted A or B s er vic e t he Me rced es -B en z
Center sets the counter mileage to 10 000 miles
(Canada: 15 000 km).
The counter can also be set by any individual. To do so:
Turn the electronic key in starter switch to position 1
or 2.
To call up the trip odometer and main odometer, press
button è or ÿ on the multifunction steering
wheel until the display appears. See page 94.
Press button j or k until the FSS indicator
appears.
Press the reset knob on the instrument cluster, see
page 84, for approximately 4 seconds.The multifunction display will show the question:
“DO YOU WANT TO RESET SERVICE INTERVAL? –
CONFIRM BY PRESSING R”
Press the reset knob on the instrument cluster again for
approximately 4 seconds to reset the service indicator
until a signal sounds.
The new service indicator is displayed with the reset
distance of 10 000 miles (Canada 15 000 km).
If the FSS counter was inadvertently reset, have a
Mercedes-Benz Center correct it.
However you choose to set your reference numbers, the
scheduled services as posted in the Service Booklet
must be followed to properly care for your vehicle.
J_G463.book Seite 126 Mittwoch, 19. September 2001 8:06 08
Page 130 of 385
127 Engine oil level indicator
Te ch n i c a l
data Instruments
and controlsOperationDrivingInstrument
cluster displayPractical hints Car care Index Engine oil level indicator
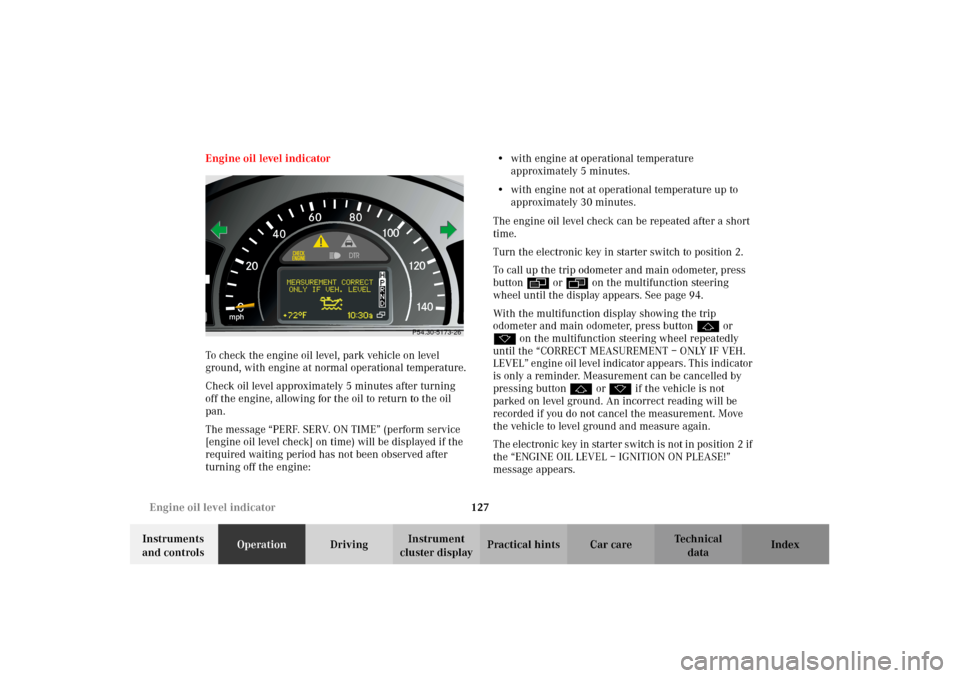
To check the engine oil level, park vehicle on level
ground, with engine at normal operational temperature.
Check oil level approximately 5 minutes after turning
off the engine, allowing for the oil to return to the oil
pan.
The message “PERF. SERV. ON TIME” (perform service
[engine oil level check] on time) will be displayed if the
required waiting period has not been observed after
turning off the engine:•with engine at operational temperature
approximately 5 minutes.
•with engine not at operational temperature up to
approximately 30 minutes.
The engine oil level check can be repeated after a short
time.
Turn the electronic key in starter switch to position 2.
To call up the trip odometer and main odometer, press
button è or ÿ on the multifunction steering
wheel until the display appears. See page 94.
With the multifunction display showing the trip
odometer and main odometer, press button j or
k on the multifunction steering wheel repeatedly
until the “CORRECT MEASUREMENT – ONLY IF VEH.
LEVEL” engine oil level indicator appears. This indicator
is only a reminder. Measurement can be cancelled by
pressing button j or k if the vehicle is not
parked on level ground. An incorrect reading will be
recorded if you do not cancel the measurement. Move
the vehicle to level ground and measure again.
The electronic key in starter switch is not in position 2 if
the “ENGINE OIL LEVEL – IGNITION ON PLEASE!”
message appears.
0
60
40100
120
140
mph
2080
P54.30-5173-26
J_G463.book Seite 127 Mittwoch, 19. September 2001 8:06 08
Page 188 of 385
185 Garage door opener
Te ch n i c a l
data Instruments
and controlsOperationDrivingInstrument
cluster displayPractical hints Car care Index Garage door opener
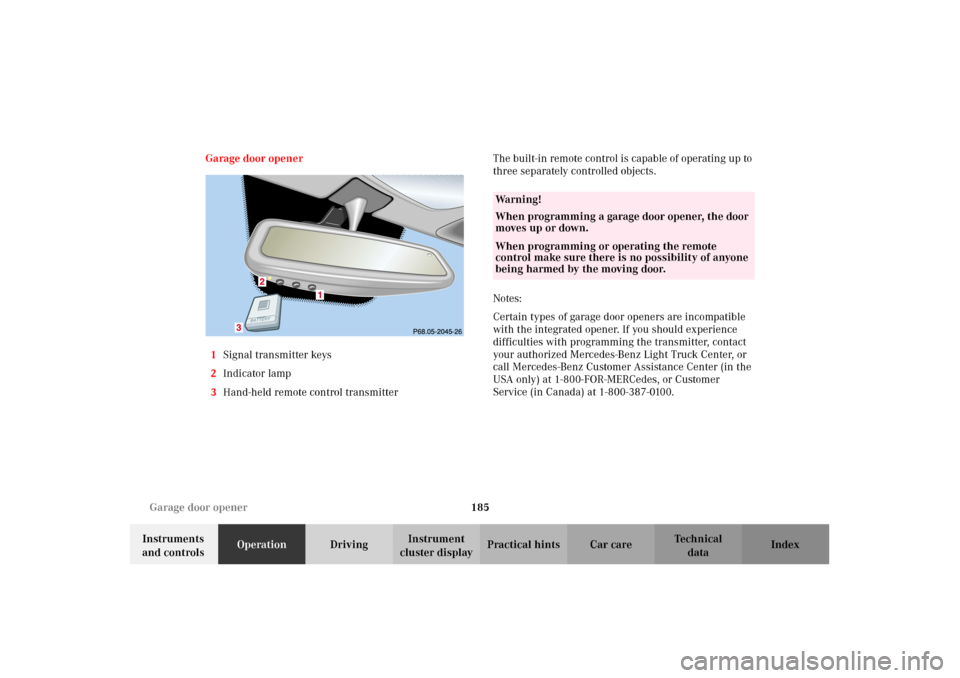
1Signal transmitter keys
2Indicator lamp
3Hand-held remote control transmitterThe built-in remote control is capable of operating up to
three separately controlled objects.
Notes:
Certain types of garage door openers are incompatible
with the integrated opener. If you should experience
difficulties with programming the transmitter, contact
your authorized Mercedes-Benz Light Truck Center, or
call Mercedes-Benz Customer Assistance Center (in the
USA only) at 1-800-FOR-MERCedes, or Customer
Service (in Canada) at 1-800-387-0100.
Wa r n i n g !
When programming a garage door opener, the door
moves up or down.When programming or operating the remote
control make sure there is no possibility of anyone
being harmed by the moving door.
J_G463.book Seite 185 Mittwoch, 19. September 2001 8:06 08
Page 195 of 385
192 Tele Aid
Te ch n i c a l
data Instruments
and controlsOperationDrivingInstrument
cluster displayPractical hints Car care Index
Tele Aid
Important!
The initial activation of the Tele Aid system may only be
performed by completing the subscriber agreement and
placing an acquaintance call using the “SOS” button.
Failure to complete either of these steps will result in a
system that is not activated. If the system is not
activated the indicator lamp in the “SOS” button stays
on after turning electronic key in starter switch to
position 2 and the message “TELE AID – NOT
ACTIVATED” will be shown in the multifunction display
for approx. 10 seconds.
If you have any questions regarding activation, please
call the Response Center at 1-800-756-9018 (in the USA)
or 1-888-923-8367 (in Canada).
(Te l ematic Alarm Identification on Demand)
The Tele Aid system consists of three types of response;
automatic and manual emergency, roadside assistance
and information.
The Tele Aid system is operational providing that the
vehicle’s battery is charged, properly connected, not
damaged and cellular and GPS coverage is available.The speaker volume of a Tele Aid call can be adjusted
when using the volume control on the multifunction
steering wheel, for raising press buttonæ and for
lowering press buttonç.
To activate, press the “SOS” button, the Roadside
Assistance button or the Information button¡,
depending on the type of response required.
Shortly after the completion of your Acquaintance Call,
you will receive a user ID and password via first call
mail. By visiting www.mbusa.com and selecting
“Tele Aid” (USA only), you will have access to account
information, remote door unlock, Info Services* profile
and more.
* Optional System self-check
Initially, after turning the electronic key in starter
switch to position 2, malfunctions are detected and
indicated (the indicator lamps in the “SOS” button, the
Roadside Assistance button and the Information
button¡ stay on longer than 10 seconds or do not
come on). The message “TELE AID – VISIT
WORKSHOP” appears for approx. 10 seconds in the
multifunction display.
J_G463.book Seite 192 Mittwoch, 19. September 2001 8:06 08