vehicle jack MERCEDES-BENZ G500 2002 W463 Owner's Manual
[x] Cancel search | Manufacturer: MERCEDES-BENZ, Model Year: 2002, Model line: G500, Model: MERCEDES-BENZ G500 2002 W463Pages: 385, PDF Size: 30.37 MB
Page 8 of 385

5 Contents
Practical hintsFirst aid kit, vehicle tools
and jack ......................................296
CD-changer .....................................296
Fuses ................................................297
Electrical outlet .............................. 301
Stowing items in the vehicle ........ 301
Hood .................................................302
Checking engine oil level .............304
Automatic transmission
fluid level ...................................305
Engine oil consumption ................305
Coolant level ...................................306
Adding coolant ...........................306
Windshield washer/headlamp
cleaning system .........................307
Windshield and headlamp
washer fluid mixing ratio .........307Vehicle jack .................................... 308
Wheels ............................................. 310
Tire replacement ........................ 310
Rotating wheels .......................... 311
Spare wheel cover ..........................312
Spare wheel ..................................... 313
Changing wheels ............................ 314
Tire inflation pressure .................. 318
Battery .............................................. 319
Jump starting ................................. 321
Towing the vehicle ........................ 324
Transmission selector lever,
manually unlocking .................. 327
Stranded vehicle ............................ 327
Exterior lamps ............................... 328
Headlamp assembly .................. 329
Fog lamp, front ........................... 332
Turn signal lamp, front ............ 334Turn signal lamp, side ...............335
Front and rear
side marker lamps .....................337
Taillamp assemblies ..................339
License plate lamp .....................340
Rear fog lamp / Backup lamp ... 341
Changing batteries in
the electronic key .....................343
Synchronizing
remote control ............................345
Emergency operation of
sliding/pop-up roof ...................346
Manual release for
fuel filler flap .............................347
Replacing wiper blades .................348
J_G463.book Seite 5 Mittwoch, 19. September 2001 8:06 08
Page 230 of 385
227 Driving instructions
Te ch n i c a l
data Instruments
and controlsOperationDrivingInstrument
cluster displayPractical hints Car care Index Be especially careful when driving in unknown
territory. It is good practice to get out of the vehicle and
scout the path you intend to take.
Continuous and speedy driving in sandy soil overcomes
the vehicle rolling resistance, and helps to prevent the
vehicle from sinking into the ground. Switch on the
differential locks, see page 253.
Do not initiate jumps with the vehicle. It interrupts the
forward momentum of the vehicle.
Always drive on slopes with the engine running and the
vehicle in gear.
Sand, dirt, mud and other material having friction
property, can cause exceptional wear and tear as well as
failure of the brakes.
In this case the brakes may be less effective or even fail
when you most need them. Always clean and check the
brakes following each off-road trip.Checklist before off-road driving
• Engine oil level: Check the engine oil level, see
page 127 and page 304. The display “ENGINE OIL
LEVEL – O.K.” must appear in the multifunction
display.
Only then is a trouble free oil supply obtained even
on steep gradients with the vehicle.
•Tires: Check t he tr ead de pt h an d main tain s pec if ied
tire pressure (see tire pressure label inside the fuel
filler flap). Check tires for possible damage and
remove foreign objects. The valve caps must be
mounted.
•Rims: Dented or bent rims can cause tire pressure
loss and damage the tire beads. For this reason,
check and, if necessary, change rims before driving
off-road.
• Vehicle tool kit: Check if the vehicle jack is
functional. In all cases take the vehicle tool kit, a
strong tow rope, a shovel and a small plank (to put
under the vehicle jack on sandy soil) with you.
J_G463.book Seite 227 Mittwoch, 19. September 2001 8:06 08
Page 298 of 385
295 Contents - Practical hints
Te ch n i c a l
data Instruments
and controlsOperation DrivingInstrument
cluster displayPractical hintsCar care Index
Practical hintsFirst aid kit, vehicle tools
and jack ......................................296
CD-changer .....................................296
Fuses ................................................297
Electrical outlet .............................. 301
Stowing items in the vehicle ........ 301
Hood .................................................302
Checking engine oil level .............304
Automatic transmission
fluid level ...................................305
Engine oil consumption ................305
Coolant level ...................................306
Adding coolant ...........................306
Windshield washer/headlamp
cleaning system .........................307
Windshield and headlamp
washer fluid mixing ratio .........307Vehicle jack .................................... 308
Wheels ............................................. 310
Tire replacement ........................ 310
Rotating wheels .......................... 311
Spare wheel cover ..........................312
Spare wheel ..................................... 313
Changing wheels ............................ 314
Tire inflation pressure .................. 318
Battery .............................................. 319
Jump starting ................................. 321
Towing the vehicle ........................ 324
Transmission selector lever,
manually unlocking .................. 327
Stranded vehicle ............................ 327
Exterior lamps ............................... 328
Headlamp assembly .................. 329
Fog lamp, front ........................... 332
Turn signal lamp, front ............ 334Turn signal lamp, side ...............335
Front and rear
side marker lamps .....................337
Taillamp assemblies ..................339
License plate lamp .....................340
Rear fog lamp / Backup lamp ... 341
Changing batteries in
the electronic key .....................343
Synchronizing
remote control ............................345
Emergency operation of
sliding/pop-up roof ...................346
Manual release for
fuel filler flap .............................347
Replacing wiper blades .................348
J_G463.book Seite 295 Mittwoch, 19. September 2001 8:06 08
Page 299 of 385
296 First aid kit, vehicle tools and jack
Te ch n i c a l
data Instruments
and controlsOperation DrivingInstrument
cluster displayPractical hintsCar care Index
First aid kit, vehicle tools and jack
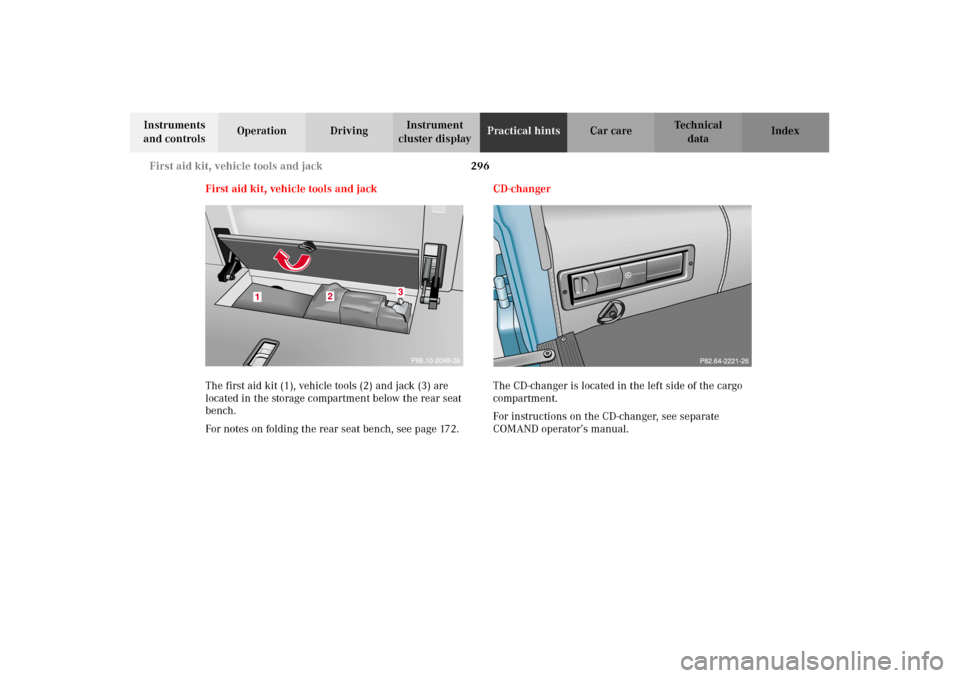
The first aid kit (1), vehicle tools (2) and jack (3) are
located in the storage compartment below the rear seat
bench.
For notes on folding the rear seat bench, see page 172.CD-changer
The CD-changer is located in the left side of the cargo
compartment.
For instructions on the CD-changer, see separate
COMAND operator’s manual.
Mercedes Benz
J_G463.book Seite 296 Mittwoch, 19. September 2001 8:06 08
Page 311 of 385
308 Spare wheel, vehicle jack
Te ch n i c a l
data Instruments
and controlsOperation DrivingInstrument
cluster displayPractical hintsCar care Index
Jack
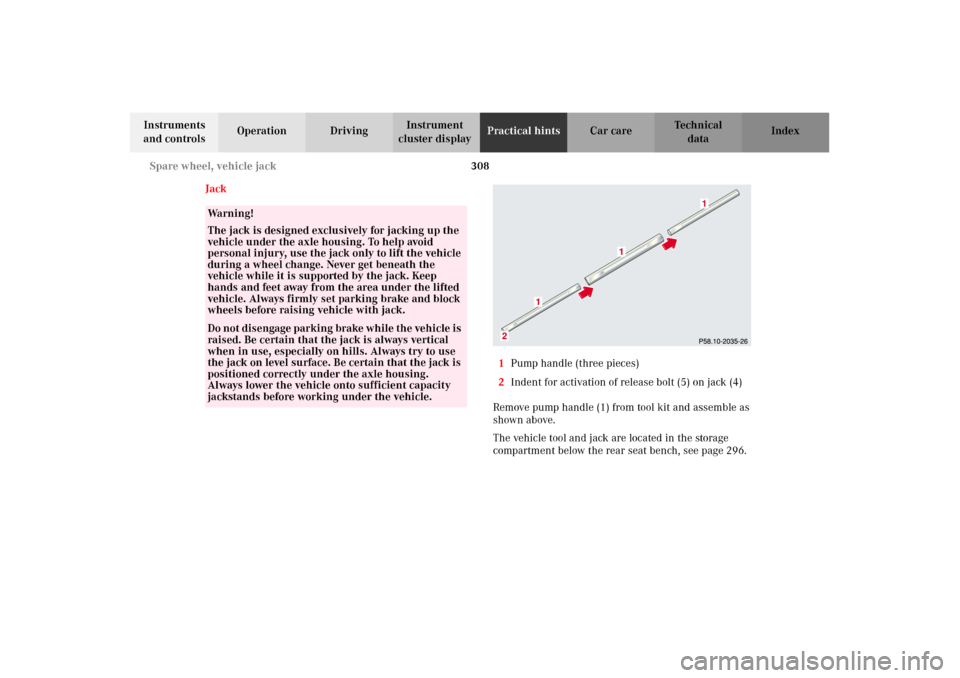
1Pump handle (three pieces)
2Indent for activation of release bolt (5) on jack (4)
Remove pump handle (1) from tool kit and assemble as
shown above.
The vehicle tool and jack are located in the storage
compartment below the rear seat bench, see page 296.
Wa r n i n g !
The jack is designed exclusively for jacking up the
vehicle under the axle housing. To help avoid
personal injury, use the jack only to lift the vehicle
during a wheel change. Never get beneath the
vehicle while it is supported by the jack. Keep
hands and feet away from the area under the lifted
vehicle. Always firmly set parking brake and block
wheels before raising vehicle with jack.Do n ot d is engage parki n g brake w hil e t he vehi c le i s
raised. Be certain that the jack is always vertical
when in use, especially on hills. Always try to use
the jack on level surface. Be certain that the jack is
positioned correctly under the axle housing.
Always lower the vehicle onto sufficient capacity
jackstands before working under the vehicle.
J_G463.book Seite 308 Mittwoch, 19. September 2001 8:06 08
Page 312 of 385
309 Spare wheel, vehicle jack
Te ch n i c a l
data Instruments
and controlsOperation DrivingInstrument
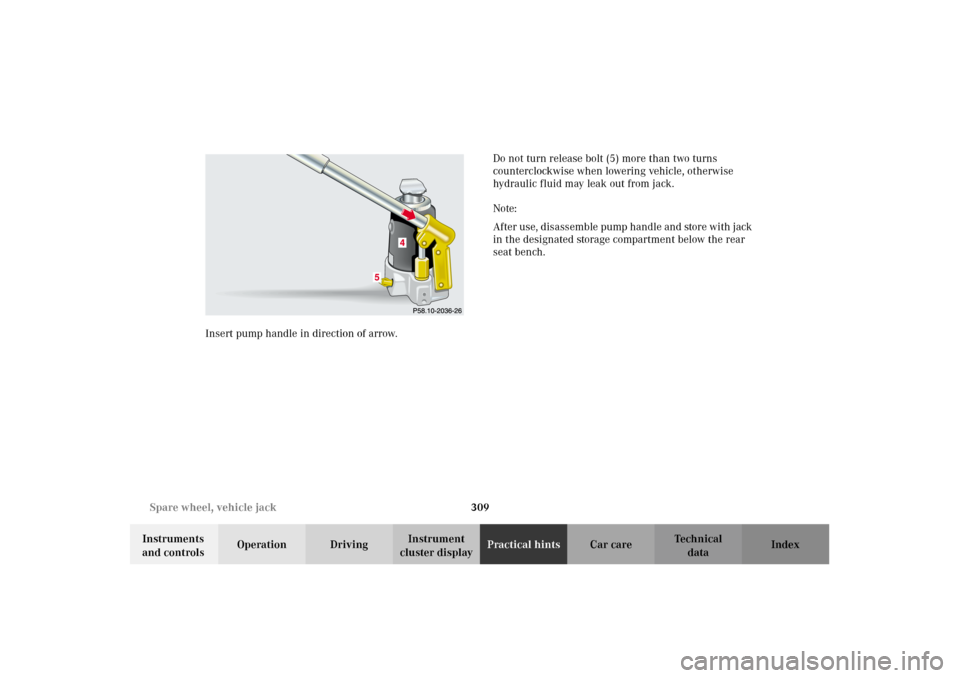
cluster displayPractical hintsCar care Index Insert pump handle in direction of arrow.Do not turn release bolt (5) more than two turns
counterclockwise when lowering vehicle, otherwise
hydraulic fluid may leak out from jack.
Note:
After use, disassemble pump handle and store with jack
in the designated storage compartment below the rear
seat bench.
J_G463.book Seite 309 Mittwoch, 19. September 2001 8:06 08
Page 317 of 385
314 Tires, Wheels
Te ch n i c a l
data Instruments
and controlsOperation DrivingInstrument
cluster displayPractical hintsCar care Index
Changing wheels
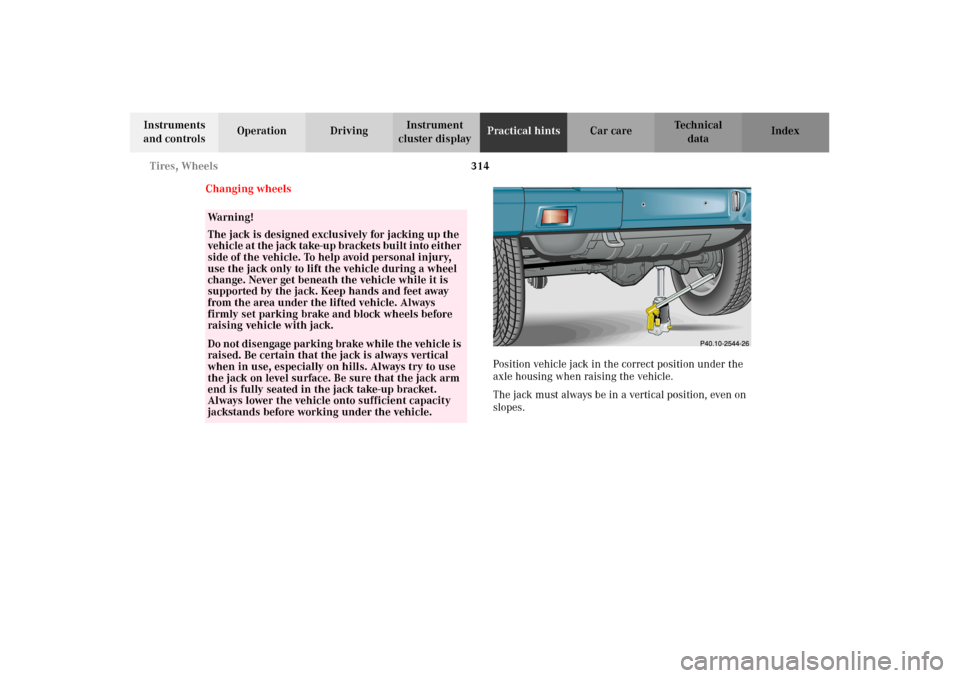
Position vehicle jack in the correct position under the
axle housing when raising the vehicle.
The jack must always be in a vertical position, even on
slopes.
Wa r n i n g !
The jack is designed exclusively for jacking up the
vehi c le a t the j ack take-up b ra ckets b ui lt i nto eit her
side of the vehicle. To help avoid personal injury,
use the jack only to lift the vehicle during a wheel
change. Never get beneath the vehicle while it is
supported by the jack. Keep hands and feet away
from the area under the lifted vehicle. Always
firmly set parking brake and block wheels before
raising vehicle with jack.Do n ot d is engage parki n g brake w hil e t he vehi c le i s
raised. Be certain that the jack is always vertical
when in use, especially on hills. Always try to use
the jack on level surface. Be sure that the jack arm
end is fully seated in the jack take-up bracket.
Always lower the vehicle onto sufficient capacity
jackstands before working under the vehicle.
J_G463.book Seite 314 Mittwoch, 19. September 2001 8:06 08
Page 319 of 385
316 Tires, Wheels
Te ch n i c a l
data Instruments
and controlsOperation DrivingInstrument
cluster displayPractical hintsCar care Index
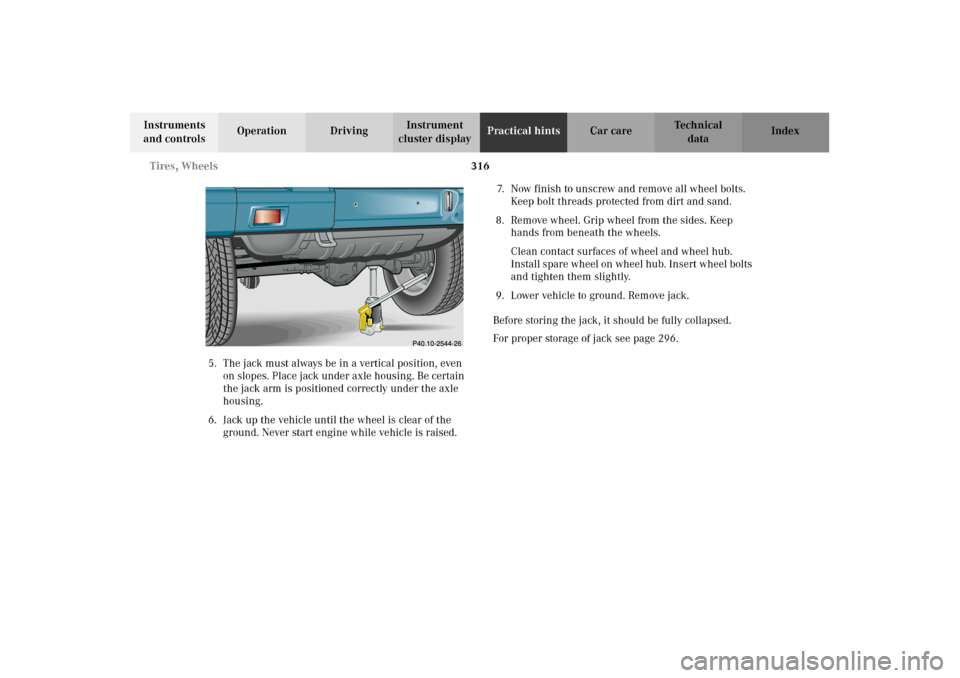
5. The jack must always be in a vertical position, even
on slopes. Place jack under axle housing. Be certain
the jack arm is positioned correctly under the axle
housing.
6. Jack up the vehicle until the wheel is clear of the
ground. Never start engine while vehicle is raised.7. Now finish to unscrew and remove all wheel bolts.
Keep bolt threads protected from dirt and sand.
8. Remove wheel. Grip wheel from the sides. Keep
hands from beneath the wheels.
Clean contact surfaces of wheel and wheel hub.
Install spare wheel on wheel hub. Insert wheel bolts
and tighten them slightly.
9. Lower vehicle to ground. Remove jack.
Before storing the jack, it should be fully collapsed.
For proper storage of jack see page 296.
J_G463.book Seite 316 Mittwoch, 19. September 2001 8:06 08
Page 375 of 385
372 Index
Te ch n i c a l
data Instruments
and controlsOperation DrivingInstrument
cluster displayPractical hints Car careIndex
Emission control ............................................................203
Emission control label .................................................. 357
Engine compartment .....................................................302
Engine oil additives ....................................................... 363
Engine oil consumption ................................................305
Engine oil level
Checking .................................................................... 304
Engine oil level indicator .............................................. 127
Engine oils ...................................................................... 363
Capacities ................................................................... 361
Enlarged cargo area ....................................................... 174
ESP (Electronic stability program) .............................. 243
Control switch ...........................................................245
Synchronizing ...........................................................244
ETR (Emergency tensioning retractor) ......................... 65
ETS (4-ETS) ..................................................................... 241
Exterior lamp switch ..................................................... 129
Daytime running lamp mode .................................. 131
Exterior lamps ................................................................ 328
Bulbs for low and high beam .................................. 331
Bulbs for parking and standing lamp .................... 331
Fog lamp, front ..........................................................332
Front and rear side marker lamps ......................... 337
Headlamp assembly ................................................. 329Headlamps .........................................................329, 352
High mounted stop lamp ......................................... 342
License plate lamps ................................................. 340
Rear fog lamp/Backup lamp .................................... 341
Replacing bulbs ........................................................ 328
Taillamp assemblies ................................................ 339
Turn signal lamp, front ........................................... 334
Turn signal lamp, side ............................................. 335
Exterior mirror adjustment ............................................80
Exterior mirror,
front passenger side, parking position .................... 82
Exterior rear view mirrors .............................................. 80
FFirst aid kit, vehicle tools and jack ............................ 296
Flexible service system (FSS) ...................................... 124
Floor mat ......................................................................... 170
Fog lamp, front .............................................................. 332
Folding backrest forward .............................................. 172
Folding seat bench ......................................................... 172
Four wheel electronic traction system (4-ETS) ......... 241
Front seat adjustment ..................................................... 45
Synchronizing head restraints and
seat adjustment fore, aft ....................................... 47
J_G463.book Seite 372 Mittwoch, 19. September 2001 8:06 08
Page 377 of 385
374 Index
Te ch n i c a l
data Instruments
and controlsOperation DrivingInstrument
cluster displayPractical hints Car careIndex
Individual settings ......................................................... 108
"CONVENIENCE" ...................................................... 120
"INSTRUMENT CLUSTER" .......................................110
"LIGHTING" ................................................................114
"VEHICLE"
(audio and central locking system) ....................118
Infant and child restraint system
Installation ................................................................... 75
Infant and child restraint systems ................................ 73
Child seat mounts - LATCH type .............................. 76
Information call
See Tele Aid ............................................................... 192
Instrument cluster ........................................................... 84
Indicator lamps ........................................................... 86
Malfunction and indicator lamps ...........................264
Instruments and controls ............................................... 18
Interior
General notes ............................................................. 162
Interior lighting ............................................................. 156
JJack ................................................................................... 296
Jump starting .................................................................. 321
KKeys, changing battery ................................................. 343
Keys, vehicle .....................................................................26LLamps, exterior .............................................................. 328
Bulbs for low and high beam .................................. 331
Bulbs for parking and standing lamp .................... 331
Fog lamp, front ......................................................... 332
Front and rear side marker lamps ........................ 337
Headlamp assembly ................................................. 329
Headlamps .........................................................329, 352
High mounted stop lamp ......................................... 342
License plate lamps ................................................. 340
Rear fog lamp/Backup lamp .................................... 341
Replacing bulbs ........................................................ 328
Taillamp assemblies ................................................ 339
Turn signal lamp, front ........................................... 334
Turn signal lamp, side ............................................. 335
Layout of poly-V-belt ..................................................... 358
Lighter ............................................................................. 170
Limp home mode
(Automatic transmission) ........................................ 214
Loading instructions ...................................................... 178
J_G463.book Seite 374 Mittwoch, 19. September 2001 8:06 08