check oil MERCEDES-BENZ G55AMG 2010 W463 Owner's Manual
[x] Cancel search | Manufacturer: MERCEDES-BENZ, Model Year: 2010, Model line: G55AMG, Model: MERCEDES-BENZ G55AMG 2010 W463Pages: 272, PDF Size: 7.04 MB
Page 9 of 272
Remote door unlock (Tele Aid) .......142
Unlocking (Mechanical key) ...........228
DOT (Department of
Transportation) .................................. 177
Drinking and driving ......................... 181
Driving
Abroad ........................................... 189
Hydroplaning ................................. 184
Instructions ............................. 85, 181
In winter ........................................ 180
Off-road ......................................... 184
Problems ......................................... 87
Safety systems ................................ 52
Systems ......................................... 115
Through standing water .................184
Driving and parking
Safety notes ..................................... 85
Driving off .................................... 86, 183
Driving safety systems ....................... 52
4-ETS ............................................... 54
ABS .................................................. 52
BAS .................................................. 53
EBB .................................................. 53
ESP ®
................................................ 54
Driving systems
All-wheel drive (4MATIC) ................ 117
Cruise control ................................ 115
Hill-start assist system ..................117
Rear Parking Assist system ...........118
Rear view camera .......................... 120
Driving tips, automatic
transmission ........................................ 91
E
Easy-entry/exit feature .............. 71, 112
EBB (Electronic Brake Booster) .......... 53
Electrical system
Improper work on or
modifications ................................... 21
Power outlets ................................. 136
Electrical system (Technical data)
see Vehicle specification
Electronic Stability Program
see ESP ®
Electronic Traction System
see 4-ETS
Emergency, in case of
First aid kit ..................................... 200
Flat tire .......................................... 239
Hazard warning flasher ....................78
Roadside Assistance ................ 19, 140
Towing the vehicle .........................246
Emergency calls
Tele Aid .......................................... 139
Emergency operations
Power tilt/sliding sunroof ..............231
Remote door unlock (Tele Aid) .......142
Emergency Tensioning Device
see ETD
Emission control ............................... 190
Information label ............................ 255
System warranties ...........................18
Engine
Break-in recommendations ............150
Cleaning ......................................... 193
Compartment ................................ 152
Malfunction indicator
lamp ........................................ 26, 225
Messages in the multifunction
display ........................................... 210
Number .......................................... 255
Starting ............................................ 85
Turning off ....................................... 89
Engine (Technical data)
see Vehicle specification
Engine coolant
see Coolant
Engine oil
Adding ........................................... 155
Additives ........................................ 262
Checking level ............................... 153
Consumption ................................. 153
Messages in the multifunction
display ........................................... 213
Oil dipstick ..................................... 154
Recommended engine oils and oil
filter ............................................... 261
ESP ®
(Electronic Stability
Program) .............................................. 54
4-ETS ............................................... 54
Messages in the multifunction
display ........................................... 204
Warning lamp ................................. 223Index7463_AKB; 3; 35, en-USd2ureepe,Version: 2.11.8.12009-07-16T20:59:56+02:00 - Seite 7
Page 13 of 272
Memory function ................................. 73
Menus see Control system menus
Mirrors .................................................. 72
Auto-dimming rear view mirrors ....... 73
Exterior rear view mirror parking
position ............................................ 73
Exterior rear view mirrors ................72
Interior rear view mirror ...................72
Memory function .............................. 73
Vanity mirror .................................. 135
MON (Motor Octane Number) .......... 263
Motor Octane Number see MON
Multicontour seat ................................ 68
Multifunction display ........................ 101
Symbol messages ..........................208
Text messages ............................... 204
Vehicle status messages ...............203
Multifunction display messages
ABS ................................................ 204
Advanced TPMS ..................... 206, 218
Alternator ...................................... 212
Battery ........................................... 212
Brake fluid ..................................... 208
Brake pads ..................................... 208
Coolant .......................................... 210
Cruise control ................................ 205
Doors ............................................. 210
Engine oil ....................................... 213
ESP ®
.............................................. 204
Fog lamps .............................. 215, 217
Gas cap .......................................... 214
High-beam lamps ........................... 216
Hood .............................................. 210
License plate lamps .......................216
Light sensor ................................... 216
Low-beam lamps ............................ 216
Parking brake ................................ 208
Parking lamps ................................ 216
Reserve fuel ................................... 214
Reverse lamp ................................. 215
Side marker lamps .........................215
SmartKey ....................................... 210
SRS ................................................ 205
Tailgate .......................................... 210
Tail lamps ...................................... 217
Tele Aid .......................................... 209Tire inflation pressure ............206, 218
Tire pressure monitor ....................206
Tires ...................................... 206, 218
Transfer case ................................. 209
Turn signals ................................... 218
Washer fluid ................................... 210
Multifunction steering wheel
Adjustment ...................................... 70
Buttons ............................................ 99
Cleaning ......................................... 196
Easy-entry/exit feature ...........71, 112
Heating ............................................ 72
Memory function .............................. 73
Overview .......................................... 27
N
Navigation menu ............................... 105
Navigation system see Separate operating instructions
Net, parcel ......................................... 130
Night security illumination .............. 110
Normal occupant weight .................. 178
Number, vehicle identification
(VIN) ................................................... 255
O
Occupant distribution ....................... 178
Occupant safety
Air bags ........................................... 33
BabySmart™ .................................... 37
Children and air bags .......................33
Children in the vehicle .....................46
Child seat anchors – LATCH-type
(ISOFIX) ........................................... 49
Fastening the seat belts ................... 41
Front passenger front air bag off
indicator lamp .......................... 37, 227
Infant and child restraint systems .... 47
Introduction ..................................... 32
ISOFIX (Child seat anchors –
LATCH-type) ..................................... 49
Seat belts .................................. 34, 39
Odometer ........................................... 101
Off-road driving ................................. 184
Checklist ............................... 185, 189
Crossing obstacles ........................188
Index11463_AKB; 3; 35, en-USd2ureepe,Version: 2.11.8.12009-07-16T20:59:56+02:00 - Seite 11
Page 105 of 272
The following functions are available:
RChecking tire inflation pressure with the
Advanced TPMS (Y page 162)
RCalling up digital speedometer or outside
temperature (Y page 103)
RCalling up maintenance service indicator
display (Y page 191)
RChecking engine oil level (Y page 154)
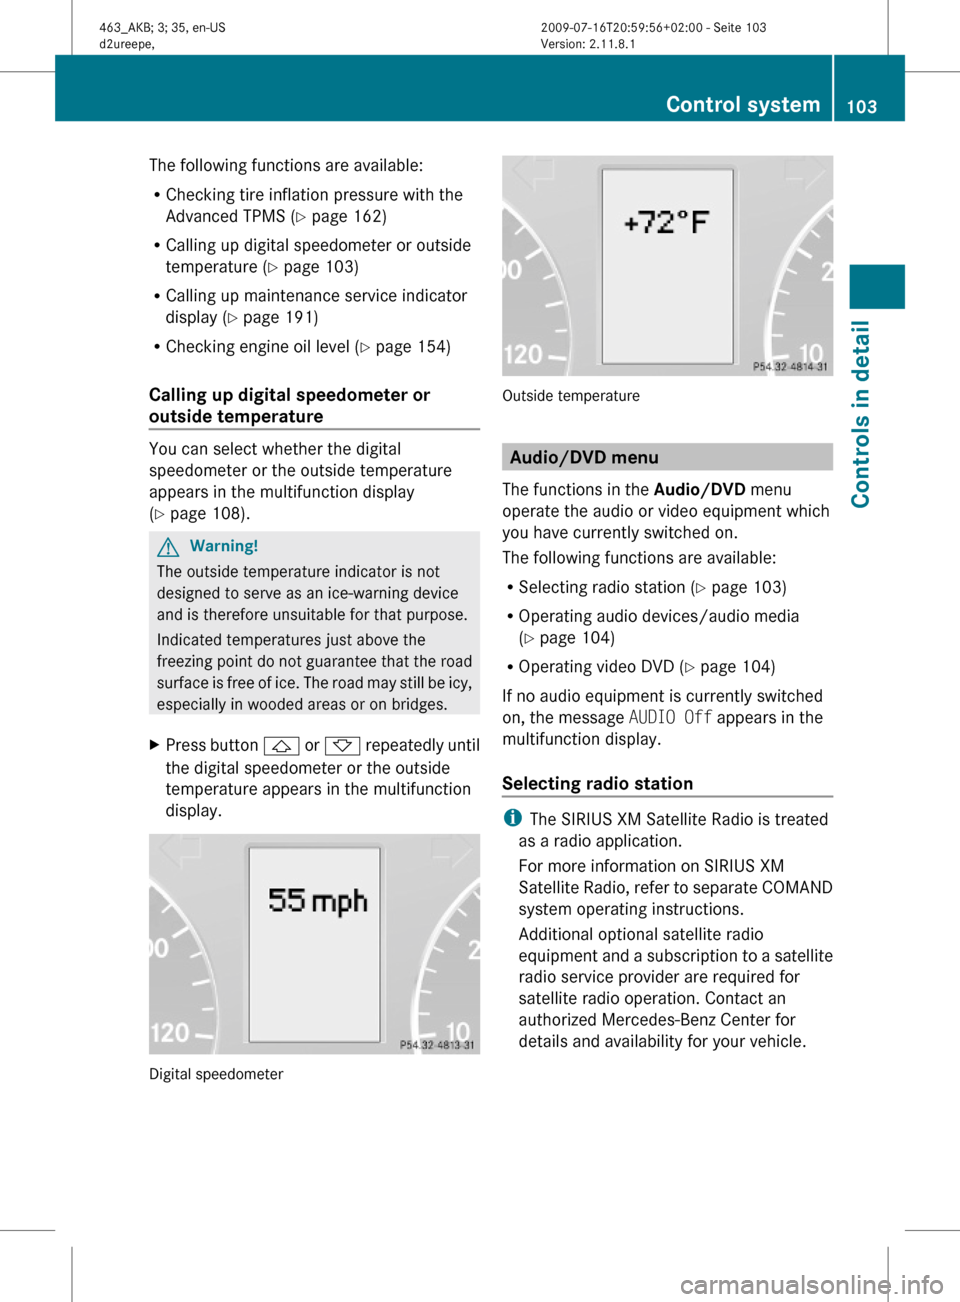
Calling up digital speedometer or
outside temperature
You can select whether the digital
speedometer or the outside temperature
appears in the multifunction display
(Y page 108).
GWarning!
The outside temperature indicator is not
designed to serve as an ice-warning device
and is therefore unsuitable for that purpose.
Indicated temperatures just above the
freezing point do not guarantee that the road
surface is free of ice. The road may still be icy,
especially in wooded areas or on bridges.
XPress button & or * repeatedly until
the digital speedometer or the outside
temperature appears in the multifunction
display.
Digital speedometer
Outside temperature
Audio/DVD menu
The functions in the Audio/DVD menu
operate the audio or video equipment which
you have currently switched on.
The following functions are available:
RSelecting radio station (Y page 103)
ROperating audio devices/audio media
(Y page 104)
ROperating video DVD (Y page 104)
If no audio equipment is currently switched
on, the message AUDIO Off appears in the
multifunction display.
Selecting radio station
iThe SIRIUS XM Satellite Radio is treated
as a radio application.
For more information on SIRIUS XM
Satellite Radio, refer to separate COMAND
system operating instructions.
Additional optional satellite radio
equipment and a subscription to a satellite
radio service provider are required for
satellite radio operation. Contact an
authorized Mercedes-Benz Center for
details and availability for your vehicle.
Control system103Controls in detail463_AKB; 3; 35, en-USd2ureepe,Version: 2.11.8.12009-07-16T20:59:56+02:00 - Seite 103Z
Page 154 of 272
XClosing: Turn fuel filler cap ; clockwise
until it audibly engages.
iClose the fuel filler flap before locking the
vehicle. Otherwise the flap locking pin will
prevent closing the fuel filler flap.
XClose fuel filler flap :.
Check regularly and before a long trip
For information on quantities and
requirements of operating agents, see “Fuels,
coolants, lubricants, etc.” (Y page 260).
Check the following:
REngine oil level (Y page 153)
RTire inflation pressure (Y page 161)
RCoolant level (Y page 156)
RVehicle lighting (Y page 233)
RWasher system and headlamp cleaning
system (Y page 157)
RBrake fluid (Y page 157)
Engine compartment
Hood
GWarning!
Do not pull the release lever while the vehicle
is in motion. Otherwise the hood could be
forced open by passing air flow.
This could cause the hood to come loose and
injure you and/or others.
Opening
GWarning!
Do not open the hood when the engine is
overheated. You could be seriously injured.
Observe the coolant temperature gauge to
determine whether the engine may be
overheated. If you see flames or smoke
coming from the engine compartment, move
away from the vehicle. Wait until the engine
has cooled. If necessary, call the fire
department.
GWarning!
You could be injured when the hood is open –
even when the engine is turned off.
Parts of the engine can become very hot. To
prevent burns, let the engine cool completely
before touching any components on the
vehicle. Comply with all relevant safety
precautions.
GWarning!
To help prevent personal injury, stay clear of
moving parts when the hood is open and the
engine is running.
The radiator fan may continue to run for
approximately 30 seconds or may even
restart after the engine has been turned off.
Stay clear of fan blades.
GWarning!
The engine is equipped with a transistorized
ignition system. Because of the high voltage
it is dangerous to touch any components
(ignition coils, spark plug sockets, diagnostic
socket) of the ignition system
Rwith the engine running
Rwhile starting the engine
Rwhen the ignition is switched on and the
engine is turned manually
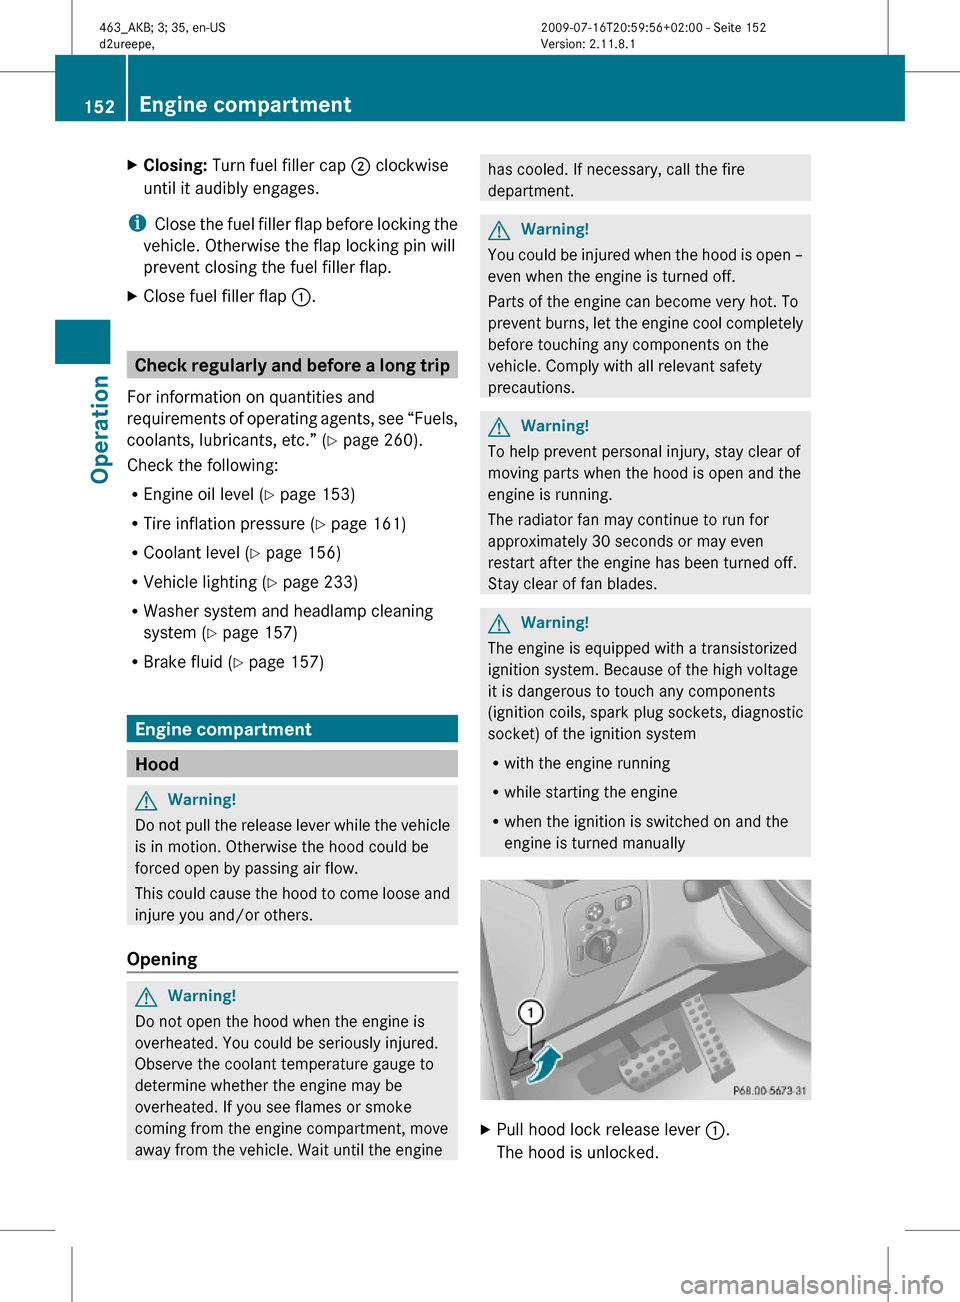
XPull hood lock release lever :.
The hood is unlocked.
152Engine compartmentOperation
463_AKB; 3; 35, en-USd2ureepe,Version: 2.11.8.12009-07-16T20:59:56+02:00 - Seite 152
Page 155 of 272
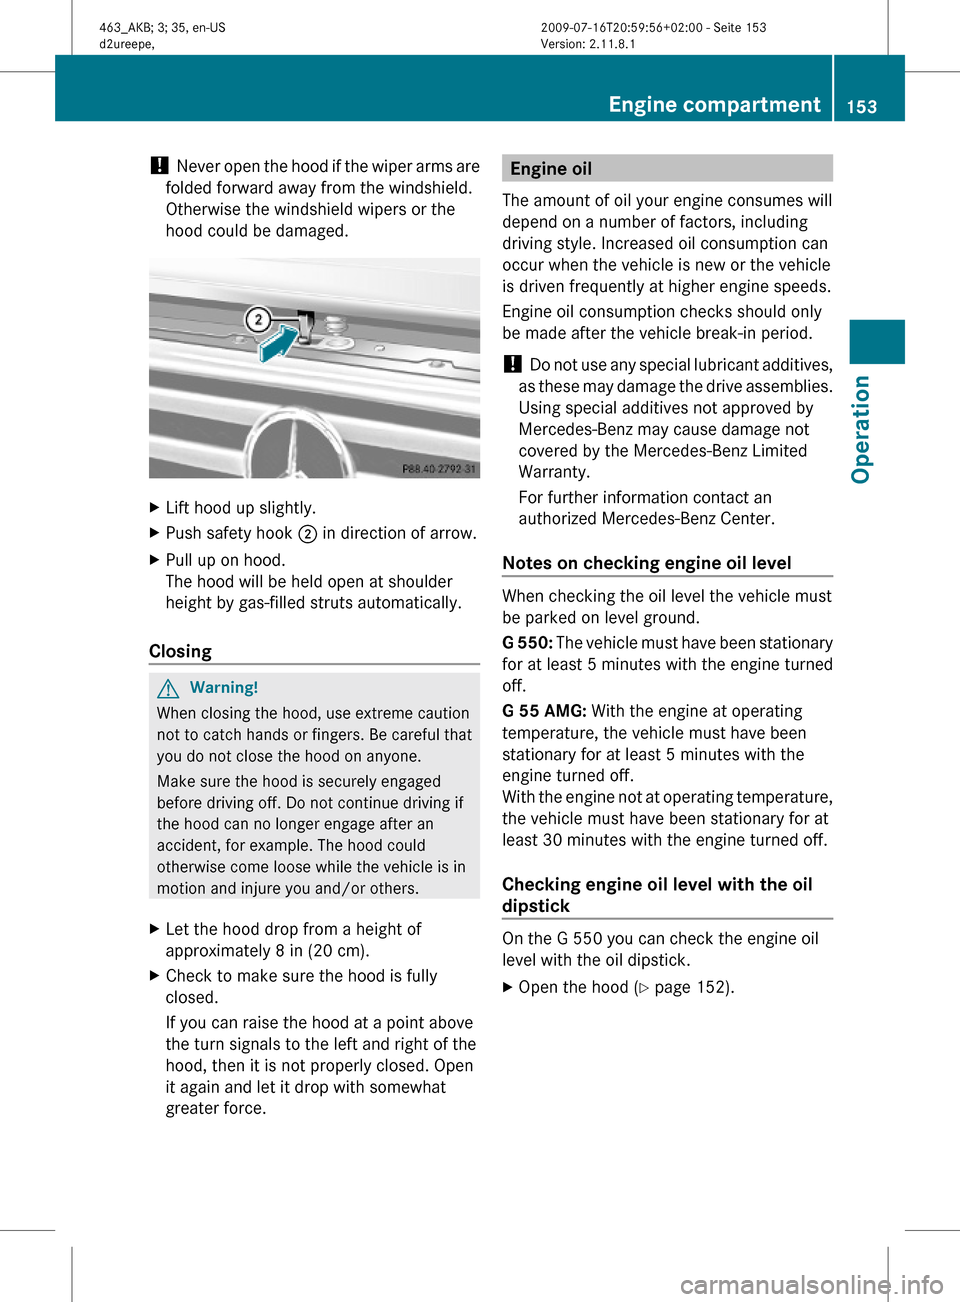
! Never open the hood if the wiper arms are
folded forward away from the windshield.
Otherwise the windshield wipers or the
hood could be damaged.
XLift hood up slightly.XPush safety hook ; in direction of arrow.XPull up on hood.
The hood will be held open at shoulder
height by gas-filled struts automatically.
Closing
GWarning!
When closing the hood, use extreme caution
not to catch hands or fingers. Be careful that
you do not close the hood on anyone.
Make sure the hood is securely engaged
before driving off. Do not continue driving if
the hood can no longer engage after an
accident, for example. The hood could
otherwise come loose while the vehicle is in
motion and injure you and/or others.
XLet the hood drop from a height of
approximately 8 in (20 cm).
XCheck to make sure the hood is fully
closed.
If you can raise the hood at a point above
the turn signals to the left and right of the
hood, then it is not properly closed. Open
it again and let it drop with somewhat
greater force.
Engine oil
The amount of oil your engine consumes will
depend on a number of factors, including
driving style. Increased oil consumption can
occur when the vehicle is new or the vehicle
is driven frequently at higher engine speeds.
Engine oil consumption checks should only
be made after the vehicle break-in period.
! Do not use any special lubricant additives,
as these may damage the drive assemblies.
Using special additives not approved by
Mercedes-Benz may cause damage not
covered by the Mercedes-Benz Limited
Warranty.
For further information contact an
authorized Mercedes-Benz Center.
Notes on checking engine oil level
When checking the oil level the vehicle must
be parked on level ground.
G 550: The vehicle must have been stationary
for at least 5 minutes with the engine turned
off.
G 55 AMG: With the engine at operating
temperature, the vehicle must have been
stationary for at least 5 minutes with the
engine turned off.
With the engine not at operating temperature,
the vehicle must have been stationary for at
least 30 minutes with the engine turned off.
Checking engine oil level with the oil
dipstick
On the G 550 you can check the engine oil
level with the oil dipstick.
XOpen the hood (Y page 152).Engine compartment153Operation463_AKB; 3; 35, en-USd2ureepe,Version: 2.11.8.12009-07-16T20:59:56+02:00 - Seite 153Z
Page 156 of 272
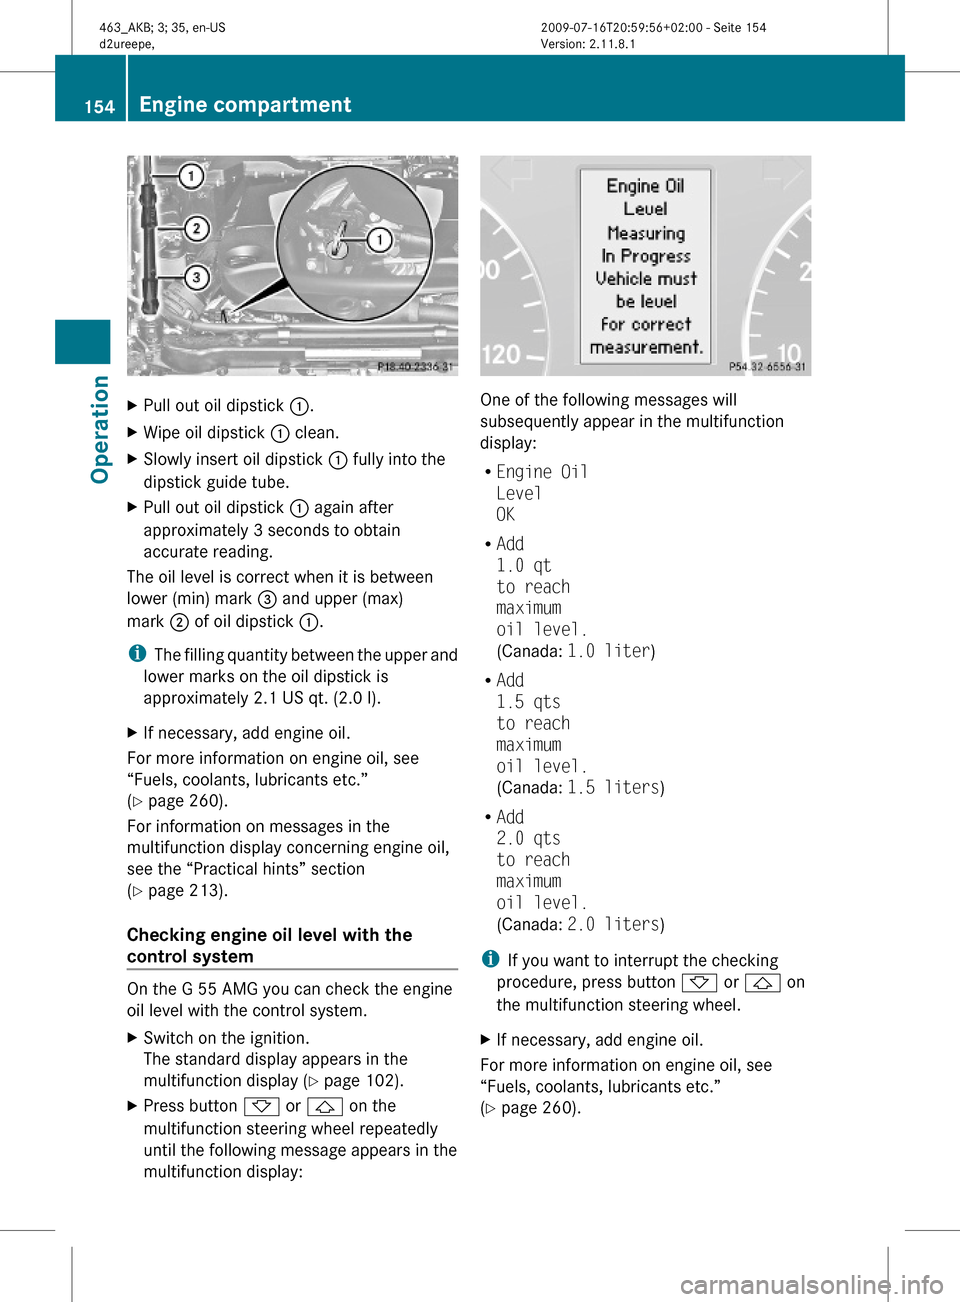
XPull out oil dipstick :.XWipe oil dipstick : clean.XSlowly insert oil dipstick : fully into the
dipstick guide tube.
XPull out oil dipstick : again after
approximately 3 seconds to obtain
accurate reading.
The oil level is correct when it is between
lower (min) mark = and upper (max)
mark ; of oil dipstick :.
iThe filling quantity between the upper and
lower marks on the oil dipstick is
approximately 2.1 US qt. (2.0 l).
XIf necessary, add engine oil.
For more information on engine oil, see
“Fuels, coolants, lubricants etc.”
(Y page 260).
For information on messages in the
multifunction display concerning engine oil,
see the “Practical hints” section
(Y page 213).
Checking engine oil level with the
control system
On the G 55 AMG you can check the engine
oil level with the control system.
XSwitch on the ignition.
The standard display appears in the
multifunction display (Y page 102).
XPress button * or & on the
multifunction steering wheel repeatedly
until the following message appears in the
multifunction display:
One of the following messages will
subsequently appear in the multifunction
display:
REngine Oil
Level
OK
RAdd
1.0 qt
to reach
maximum
oil level.
(Canada: 1.0 liter)
RAdd
1.5 qts
to reach
maximum
oil level.
(Canada: 1.5 liters)
RAdd
2.0 qts
to reach
maximum
oil level.
(Canada: 2.0 liters)
iIf you want to interrupt the checking
procedure, press button * or & on
the multifunction steering wheel.
XIf necessary, add engine oil.
For more information on engine oil, see
“Fuels, coolants, lubricants etc.”
(Y page 260).
154Engine compartmentOperation
463_AKB; 3; 35, en-USd2ureepe,Version: 2.11.8.12009-07-16T20:59:56+02:00 - Seite 154
Page 157 of 272
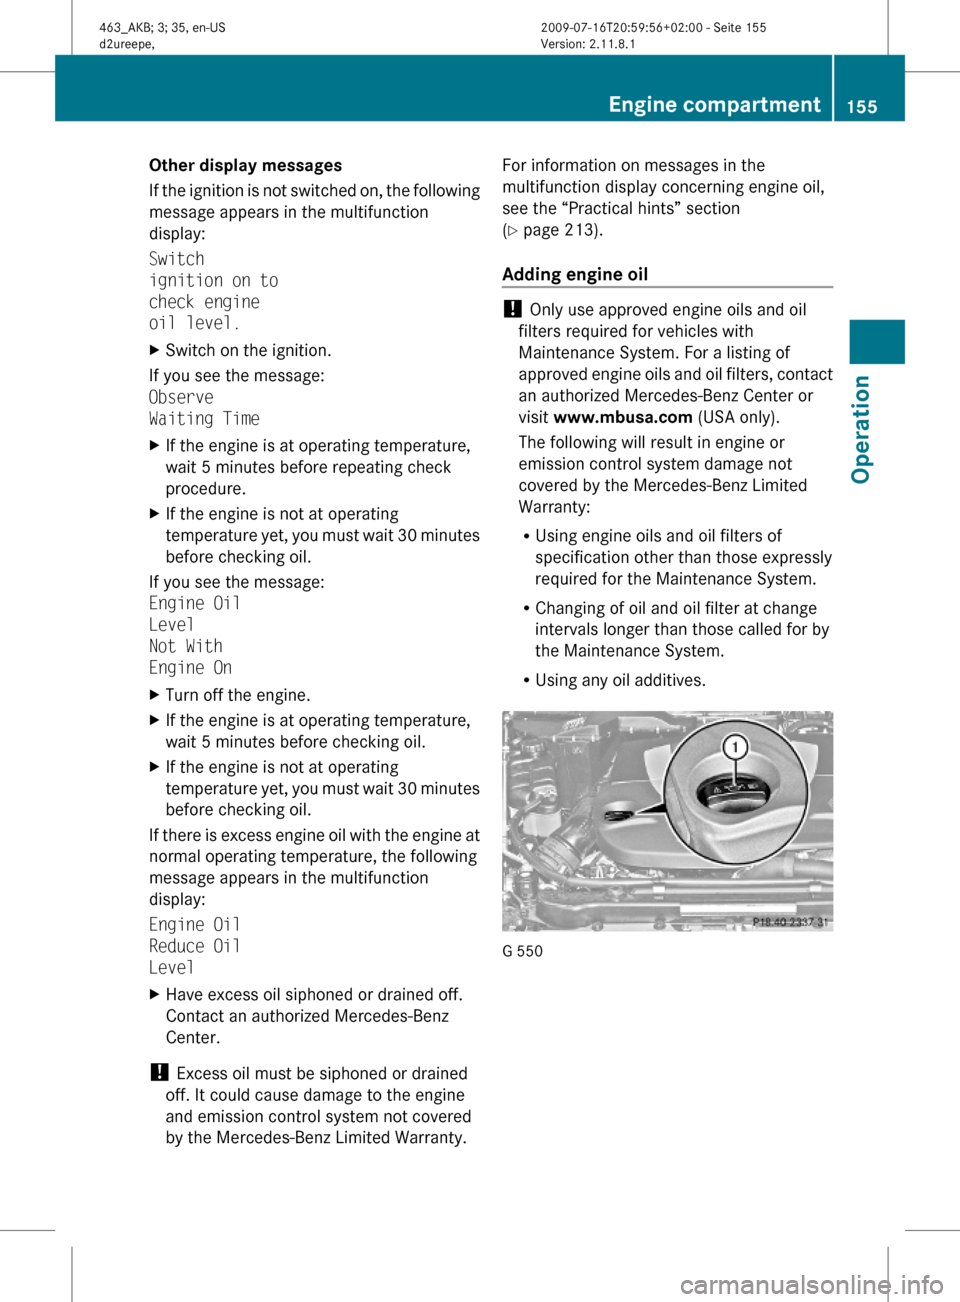
Other display messages
If the ignition is not switched on, the following
message appears in the multifunction
display:
Switch
ignition on to
check engine
oil level.
XSwitch on the ignition.
If you see the message:
Observe
Waiting Time
XIf the engine is at operating temperature,
wait 5 minutes before repeating check
procedure.
XIf the engine is not at operating
temperature yet, you must wait 30 minutes
before checking oil.
If you see the message:
Engine Oil
Level
Not With
Engine On
XTurn off the engine.XIf the engine is at operating temperature,
wait 5 minutes before checking oil.
XIf the engine is not at operating
temperature yet, you must wait 30 minutes
before checking oil.
If there is excess engine oil with the engine at
normal operating temperature, the following
message appears in the multifunction
display:
Engine Oil
Reduce Oil
Level
XHave excess oil siphoned or drained off.
Contact an authorized Mercedes-Benz
Center.
! Excess oil must be siphoned or drained
off. It could cause damage to the engine
and emission control system not covered
by the Mercedes-Benz Limited Warranty.
For information on messages in the
multifunction display concerning engine oil,
see the “Practical hints” section
(Y page 213).
Adding engine oil
! Only use approved engine oils and oil
filters required for vehicles with
Maintenance System. For a listing of
approved engine oils and oil filters, contact
an authorized Mercedes-Benz Center or
visit www.mbusa.com (USA only).
The following will result in engine or
emission control system damage not
covered by the Mercedes-Benz Limited
Warranty:
RUsing engine oils and oil filters of
specification other than those expressly
required for the Maintenance System.
RChanging of oil and oil filter at change
intervals longer than those called for by
the Maintenance System.
RUsing any oil additives.
G 550
Engine compartment155Operation463_AKB; 3; 35, en-USd2ureepe,Version: 2.11.8.12009-07-16T20:59:56+02:00 - Seite 155Z
Page 158 of 272
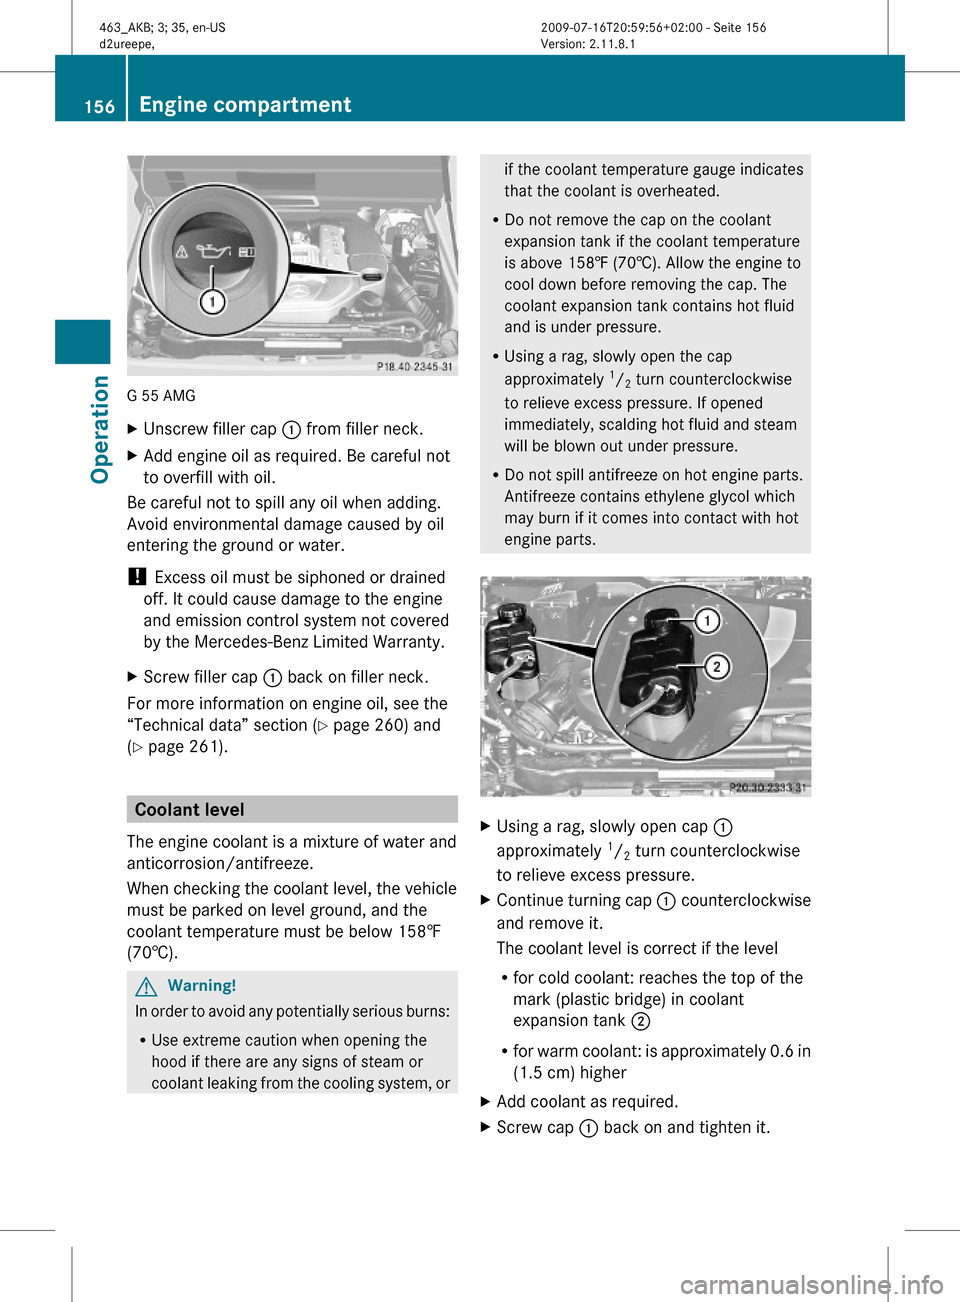
G 55 AMG
XUnscrew filler cap : from filler neck.XAdd engine oil as required. Be careful not
to overfill with oil.
Be careful not to spill any oil when adding.
Avoid environmental damage caused by oil
entering the ground or water.
! Excess oil must be siphoned or drained
off. It could cause damage to the engine
and emission control system not covered
by the Mercedes-Benz Limited Warranty.
XScrew filler cap : back on filler neck.
For more information on engine oil, see the
“Technical data” section (Y page 260) and
(Y page 261).
Coolant level
The engine coolant is a mixture of water and
anticorrosion/antifreeze.
When checking the coolant level, the vehicle
must be parked on level ground, and the
coolant temperature must be below 158‡
(70†).
GWarning!
In order to avoid any potentially serious burns:
RUse extreme caution when opening the
hood if there are any signs of steam or
coolant leaking from the cooling system, or
if the coolant temperature gauge indicates
that the coolant is overheated.
RDo not remove the cap on the coolant
expansion tank if the coolant temperature
is above 158‡ (70†). Allow the engine to
cool down before removing the cap. The
coolant expansion tank contains hot fluid
and is under pressure.
RUsing a rag, slowly open the cap
approximately 1/2 turn counterclockwise
to relieve excess pressure. If opened
immediately, scalding hot fluid and steam
will be blown out under pressure.
RDo not spill antifreeze on hot engine parts.
Antifreeze contains ethylene glycol which
may burn if it comes into contact with hot
engine parts.
XUsing a rag, slowly open cap :
approximately 1/2 turn counterclockwise
to relieve excess pressure.
XContinue turning cap : counterclockwise
and remove it.
The coolant level is correct if the level
Rfor cold coolant: reaches the top of the
mark (plastic bridge) in coolant
expansion tank ;
Rfor warm coolant: is approximately 0.6 in
(1.5 cm) higher
XAdd coolant as required.XScrew cap : back on and tighten it.156Engine compartmentOperation
463_AKB; 3; 35, en-USd2ureepe,Version: 2.11.8.12009-07-16T20:59:56+02:00 - Seite 156
Page 187 of 272
Off-road driving rules
REngage the transfer case in position LOW
before driving under off-road conditions
( Y page 93).
R If necessary, activate differential locks
( Y page 95).
The ABS, BAS and ESP ®
are switched off
automatically when the differential locks
are activated.
R Fasten items being carried as securely as
possible ( Y page 129).
! Observe the following during off-road
driving:
R Keep doors, tailgate, windows, and tilt/
sliding sunroof closed whenever driving
off-road.
R Switch the cruise control off.
R Adjust vehicle speed to condition of
terrain. The more uneven, rutty and
steeper the terrain, the lower the speed
should be. Drive through water slowly at
an even speed, avoiding a bow wave.
R Be especially careful when driving in
unknown territory. It may be necessary
to get out of the vehicle and scout the
path you intend to take.
R Watch out for obstacles, such as rocks,
holes, tree stumps and ruts.
R Avoid excessive engine speeds – drive at
moderate engine speeds (max. 3 000
rpm).
R Before driving through water, determine
its depth.
R Do not stop vehicle while immersed in
water, and do not shut off the engine.
R In sandy soil, drive at a steady speed as
allowed by conditions. This helps
overcome the vehicle rolling resistance
and reduces the likelihood of the vehicle
sinking into the ground.
R Do not initiate jumps with the vehicle. It
interrupts the forward momentum of the
vehicle.
R Always drive onto slopes with the engine
running and the vehicle in gear.
R Do not shift automatic transmission into
neutral position N.
R Inspect the vehicle for possible damage
after each off-road trip.GWarning!
Do not reduce the tire inflation pressure
before driving through sand. However, if you
do so, remember to correct the tire inflation
pressure before continuing your trip. Driving
with reduced tire inflation pressure increases
the risk of losing control of the vehicle and
rolling over.
Checklist before off-road driving
Engine oil level
R Check the engine oil level ( Y page 153).
Only with a proper oil level can the vehicle
obtain a trouble-free oil supply, even on
steep gradients.
! If an engine oil level warning message
appears in the multifunction display while
driving, stop the vehicle in a safe location
or as soon at is safe to do so. Check the
engine oil level.
The engine oil level warning messages
should not be ignored. Extended driving
with the message displayed could result in
serious engine damage that is not covered
by the Mercedes-Benz Limited Warranty.
Tires
R Check the tread depth and maintain
specified tire inflation pressure. A placard
with the recommended tire inflation
Driving instructions185Operation463_AKB; 3; 35, en-USd2ureepe,Version: 2.11.8.12009-07-16T20:59:56+02:00 - Seite 185Z
Page 188 of 272
pressures is located on the driver’s door B-
pillar (Y page 166).
RCheck tires for possible damage and
remove foreign objects.
RReplace missing valve caps.
Rims
RDented or bent rims can cause tire inflation
pressure loss and damage the tire beads.
For this reason, check and, if necessary,
change rims before driving off-road.
Vehicle tool kit
RCheck if the jack (Y page 201) is
functional.
RAlways take the vehicle tool kit, a strong
tow rope, a shovel and a small plank (to put
under the jack on sandy soil) with you.
Driving in steep terrain
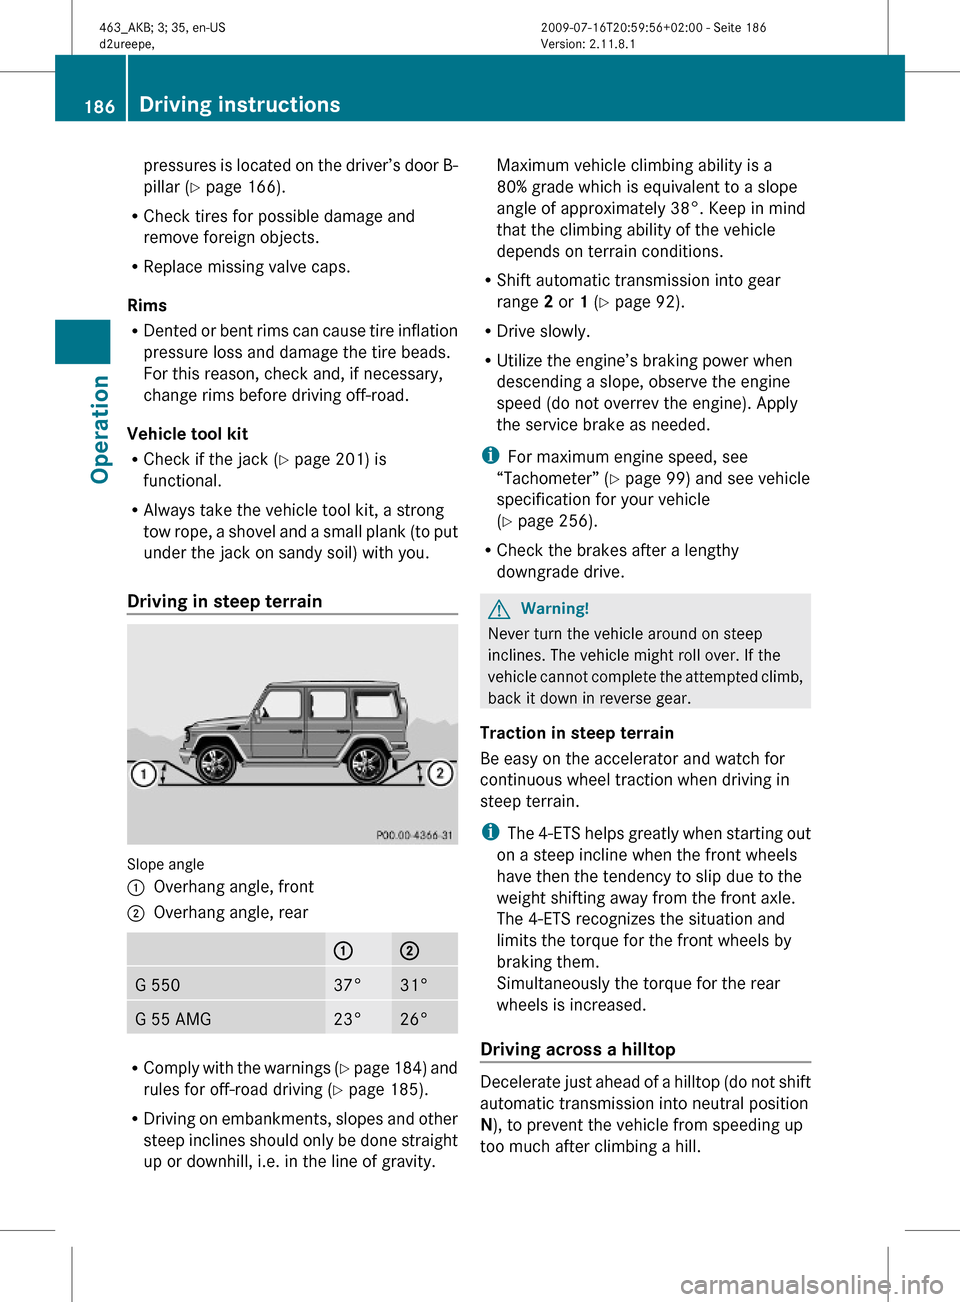
Slope angle
:Overhang angle, front;Overhang angle, rear:;G 55037°31°G 55 AMG23°26°
RComply with the warnings (Y page 184) and
rules for off-road driving (Y page 185).
RDriving on embankments, slopes and other
steep inclines should only be done straight
up or downhill, i.e. in the line of gravity.
Maximum vehicle climbing ability is a
80% grade which is equivalent to a slope
angle of approximately 38°. Keep in mind
that the climbing ability of the vehicle
depends on terrain conditions.
RShift automatic transmission into gear
range 2 or 1 (Y page 92).
RDrive slowly.
RUtilize the engine’s braking power when
descending a slope, observe the engine
speed (do not overrev the engine). Apply
the service brake as needed.
iFor maximum engine speed, see
“Tachometer” (Y page 99) and see vehicle
specification for your vehicle
(Y page 256).
RCheck the brakes after a lengthy
downgrade drive.
GWarning!
Never turn the vehicle around on steep
inclines. The vehicle might roll over. If the
vehicle cannot complete the attempted climb,
back it down in reverse gear.
Traction in steep terrain
Be easy on the accelerator and watch for
continuous wheel traction when driving in
steep terrain.
iThe 4-ETS helps greatly when starting out
on a steep incline when the front wheels
have then the tendency to slip due to the
weight shifting away from the front axle.
The 4-ETS recognizes the situation and
limits the torque for the front wheels by
braking them.
Simultaneously the torque for the rear
wheels is increased.
Driving across a hilltop
Decelerate just ahead of a hilltop (do not shift
automatic transmission into neutral position
N), to prevent the vehicle from speeding up
too much after climbing a hill.
186Driving instructionsOperation
463_AKB; 3; 35, en-USd2ureepe,Version: 2.11.8.12009-07-16T20:59:56+02:00 - Seite 186