comand MERCEDES-BENZ G55AMG 2010 W463 Owner's Manual
[x] Cancel search | Manufacturer: MERCEDES-BENZ, Model Year: 2010, Model line: G55AMG, Model: MERCEDES-BENZ G55AMG 2010 W463Pages: 272, PDF Size: 7.04 MB
Page 7 of 272
Batteries, SmartKey
Checking condition ..........................61
Replacing ....................................... 232
Battery, Vehicle ................................. 243
Charging ........................................ 244
Jump starting ................................. 244
Messages in the multifunction
display ........................................... 212
Bead (tire) .......................................... 177
Beverage holders see Cup holders
Brake Assist System
see BAS
Brake fluid
Checking level ............................... 157
Messages in the multifunction
display ........................................... 208
Brake lamps
Cleaning lenses ............................. 194
Brake pads
Messages in the multifunction
display ........................................... 208
Brakes ................................................ 182
Parking brake ................................... 88
Warning lamp ................................. 220
Break-in period .................................. 150
Brush guard ....................................... 232
Bulbs see Replacing bulbs
C
CAC (Customer Assistance Center) ... 21
California retail buyers and
lessees, important notice for ............. 19
Calls (phone) ...................................... 113
Can holders see Cup holders
Capacities and recommended
fuel/lubricants .................................. 260
Cargo compartment
Cargo volume, expanding ..............130
Cover blind .................................... 132
Tie-down rings ............................... 130
Cargo compartment cover blind ...... 132
Cargo tie-down rings ......................... 130
Carpets, cleaning .............................. 196
Central locking
Automatic ................................ 62, 111
Locking/unlocking from inside ........63
SmartKey ......................................... 60
Central locking/unlocking switch ..... 63
Certification label .............................. 254
Children in the vehicle
Air bags ........................................... 33
BabySmart™ air bag deactivation
system ............................................. 37
Child safety locks (rear doors) .........50
Child seat anchors – LATCH-type
(ISOFIX) ........................................... 49
Indicator lamp, front passenger
front air bag off ................................ 37
Infant and child restraint systems .... 47
ISOFIX (Child seat anchors –
LATCH-type) ..................................... 49
Override switch ................................ 50
Safety notes ..................................... 46
Tether anchorage points ..................48
Top tether ........................................ 48
Child safety
see Children in the vehicle
Child seat anchors – LATCH-type
(ISOFIX) see Children in the vehicle
Chrome-plated exhaust tip,
cleaning .............................................. 197
Cigarette lighter ................................ 136
Climate control system
Air conditioning ............................. 123
Air conditioning refrigerant ............262
Air distribution ............................... 125
Air recirculation mode ...................126
Air volume ..................................... 125
Automatic mode ............................ 123
Deactivating system ......................123
Front defroster .............................. 125
Residual heat and ventilation .........126
Temperature .................................. 124
Cockpit ................................................. 25
Cold tire inflation pressure .............. 177
COMAND system see separate COMAND system
operating instructions
Combination switch ............................ 77Index5463_AKB; 3; 35, en-USd2ureepe,Version: 2.11.8.12009-07-16T20:59:56+02:00 - Seite 5
Page 31 of 272
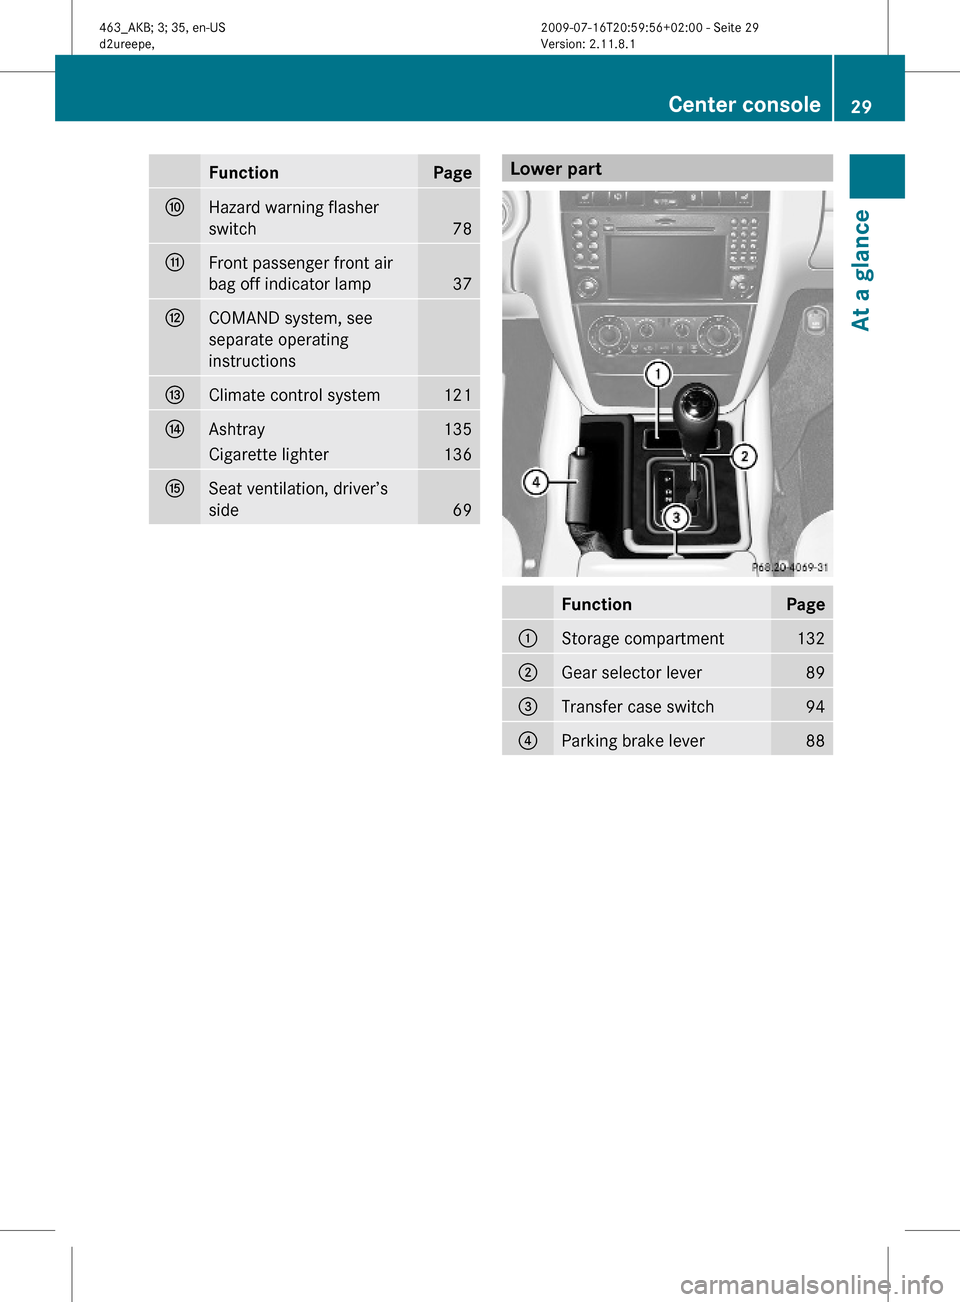
FunctionPageFHazard warning flasher
switch78
GFront passenger front air
bag off indicator lamp37
HCOMAND system, see
separate operating
instructions
IClimate control system121JAshtray135Cigarette lighter136KSeat ventilation, driver’s
side69Lower partFunctionPage:Storage compartment132;Gear selector lever89=Transfer case switch94?Parking brake lever88Center console29At a glance463_AKB; 3; 35, en-USd2ureepe,Version: 2.11.8.12009-07-16T20:59:56+02:00 - Seite 29Z
Page 105 of 272
The following functions are available:
RChecking tire inflation pressure with the
Advanced TPMS (Y page 162)
RCalling up digital speedometer or outside
temperature (Y page 103)
RCalling up maintenance service indicator
display (Y page 191)
RChecking engine oil level (Y page 154)
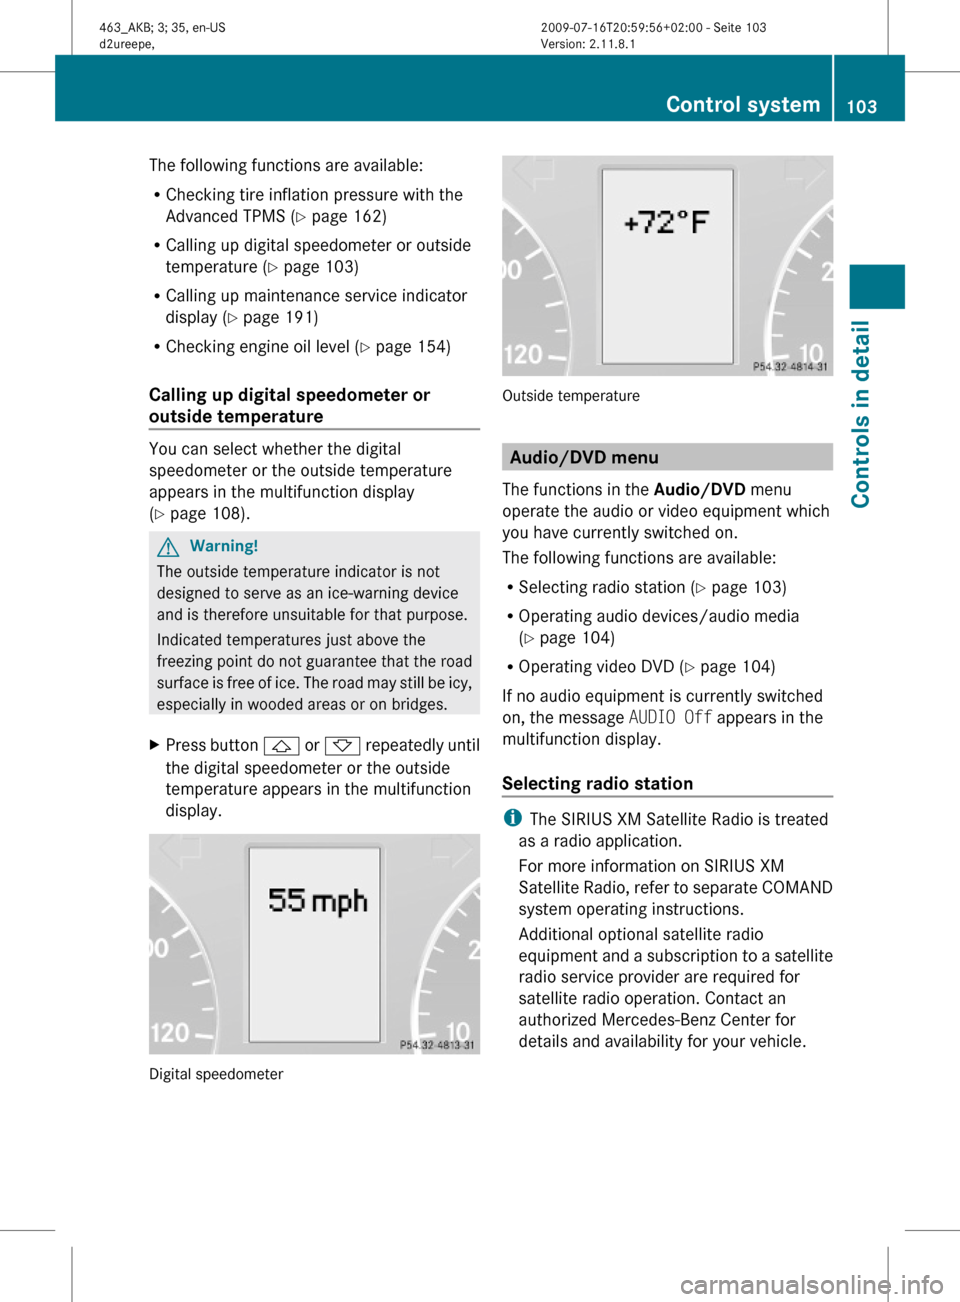
Calling up digital speedometer or
outside temperature
You can select whether the digital
speedometer or the outside temperature
appears in the multifunction display
(Y page 108).
GWarning!
The outside temperature indicator is not
designed to serve as an ice-warning device
and is therefore unsuitable for that purpose.
Indicated temperatures just above the
freezing point do not guarantee that the road
surface is free of ice. The road may still be icy,
especially in wooded areas or on bridges.
XPress button & or * repeatedly until
the digital speedometer or the outside
temperature appears in the multifunction
display.
Digital speedometer
Outside temperature
Audio/DVD menu
The functions in the Audio/DVD menu
operate the audio or video equipment which
you have currently switched on.
The following functions are available:
RSelecting radio station (Y page 103)
ROperating audio devices/audio media
(Y page 104)
ROperating video DVD (Y page 104)
If no audio equipment is currently switched
on, the message AUDIO Off appears in the
multifunction display.
Selecting radio station
iThe SIRIUS XM Satellite Radio is treated
as a radio application.
For more information on SIRIUS XM
Satellite Radio, refer to separate COMAND
system operating instructions.
Additional optional satellite radio
equipment and a subscription to a satellite
radio service provider are required for
satellite radio operation. Contact an
authorized Mercedes-Benz Center for
details and availability for your vehicle.
Control system103Controls in detail463_AKB; 3; 35, en-USd2ureepe,Version: 2.11.8.12009-07-16T20:59:56+02:00 - Seite 103Z
Page 106 of 272
XSwitch on the COMAND system and select
radio. Refer to separate COMAND system
operating instructions.
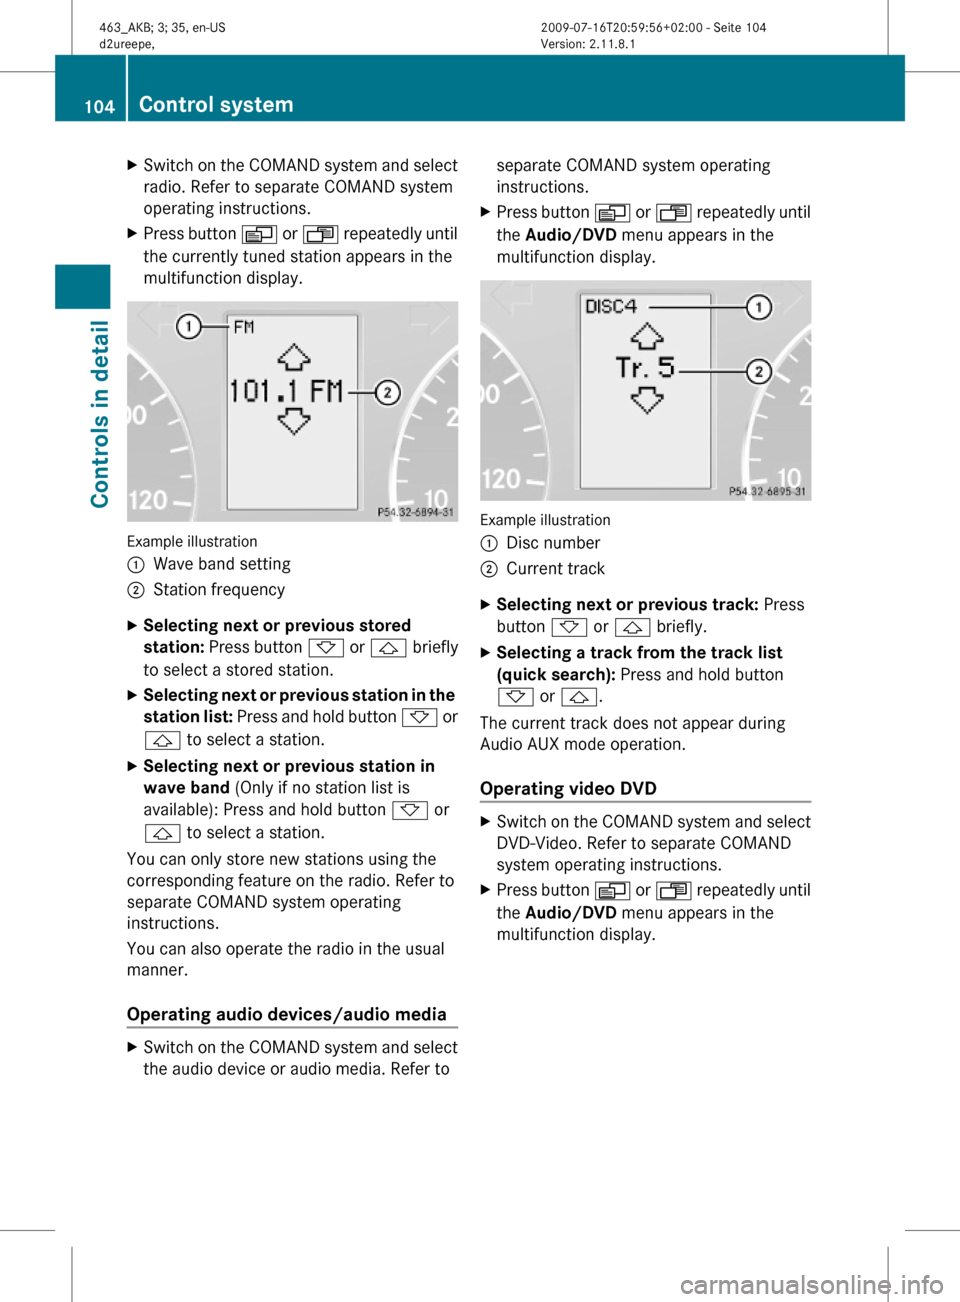
XPress button V or U repeatedly until
the currently tuned station appears in the
multifunction display.
Example illustration
:Wave band setting;Station frequencyXSelecting next or previous stored
station: Press button * or & briefly
to select a stored station.
XSelecting next or previous station in the
station list: Press and hold button * or
& to select a station.
XSelecting next or previous station in
wave band (Only if no station list is
available): Press and hold button * or
& to select a station.
You can only store new stations using the
corresponding feature on the radio. Refer to
separate COMAND system operating
instructions.
You can also operate the radio in the usual
manner.
Operating audio devices/audio media
XSwitch on the COMAND system and select
the audio device or audio media. Refer to
separate COMAND system operating
instructions.
XPress button V or U repeatedly until
the Audio/DVD menu appears in the
multifunction display.
Example illustration
:Disc number;Current trackXSelecting next or previous track: Press
button * or & briefly.
XSelecting a track from the track list
(quick search): Press and hold button
* or &.
The current track does not appear during
Audio AUX mode operation.
Operating video DVD
XSwitch on the COMAND system and select
DVD-Video. Refer to separate COMAND
system operating instructions.
XPress button V or U repeatedly until
the Audio/DVD menu appears in the
multifunction display.
104Control systemControls in detail
463_AKB; 3; 35, en-USd2ureepe,Version: 2.11.8.12009-07-16T20:59:56+02:00 - Seite 104
Page 107 of 272
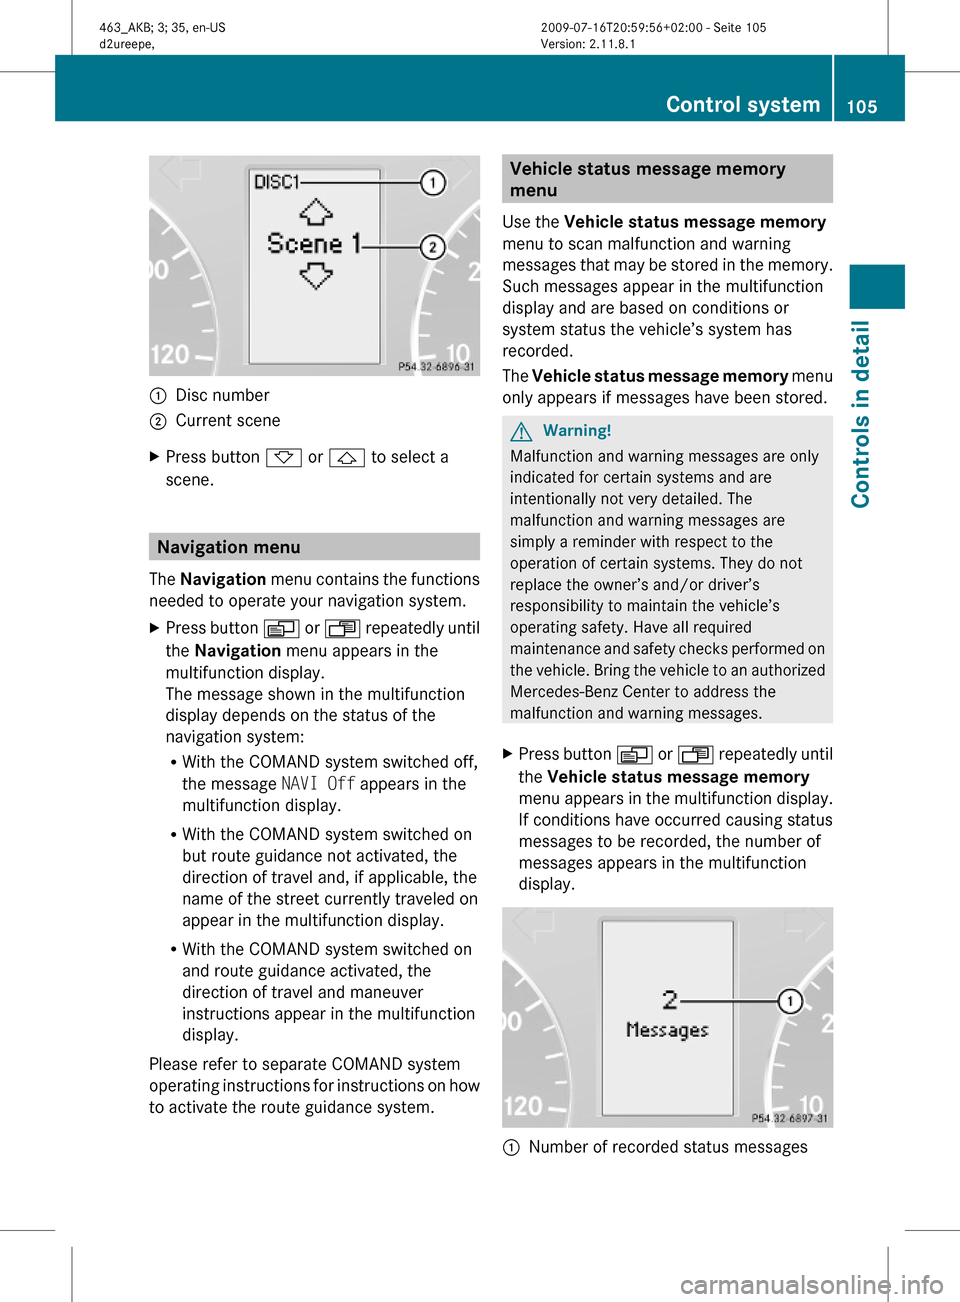
:Disc number;Current sceneXPress button * or & to select a
scene.
Navigation menu
The Navigation menu contains the functions
needed to operate your navigation system.
XPress button V or U repeatedly until
the Navigation menu appears in the
multifunction display.
The message shown in the multifunction
display depends on the status of the
navigation system:
RWith the COMAND system switched off,
the message NAVI Off appears in the
multifunction display.
RWith the COMAND system switched on
but route guidance not activated, the
direction of travel and, if applicable, the
name of the street currently traveled on
appear in the multifunction display.
RWith the COMAND system switched on
and route guidance activated, the
direction of travel and maneuver
instructions appear in the multifunction
display.
Please refer to separate COMAND system
operating instructions for instructions on how
to activate the route guidance system.
Vehicle status message memory
menu
Use the Vehicle status message memory
menu to scan malfunction and warning
messages that may be stored in the memory.
Such messages appear in the multifunction
display and are based on conditions or
system status the vehicle’s system has
recorded.
The Vehicle status message memory menu
only appears if messages have been stored.
GWarning!
Malfunction and warning messages are only
indicated for certain systems and are
intentionally not very detailed. The
malfunction and warning messages are
simply a reminder with respect to the
operation of certain systems. They do not
replace the owner’s and/or driver’s
responsibility to maintain the vehicle’s
operating safety. Have all required
maintenance and safety checks performed on
the vehicle. Bring the vehicle to an authorized
Mercedes-Benz Center to address the
malfunction and warning messages.
XPress button V or U repeatedly until
the Vehicle status message memory
menu appears in the multifunction display.
If conditions have occurred causing status
messages to be recorded, the number of
messages appears in the multifunction
display.
:Number of recorded status messagesControl system105Controls in detail463_AKB; 3; 35, en-USd2ureepe,Version: 2.11.8.12009-07-16T20:59:56+02:00 - Seite 105Z
Page 116 of 272
You can connect your telephone to the
COMAND system via Bluetooth®, see
separate COMAND system operating
instructions.
XSwitch on the COMAND system.
Refer to separate COMAND system
operating instructions.
XPress button U or V repeatedly until
the message TEL appears in the
multifunction display.
One of the following messages will appear
in the multifunction display:
RNo Service: No network is available.
RBluetooth Ready: The telephone has
not been connected to the COMAND
system via Bluetooth® yet.
XConnect the telephone to the
COMAND system via Bluetooth®.
RReady or name of the network provider
(if available): The telephone has found a
network and is ready for use. You can
operate it using the control system.
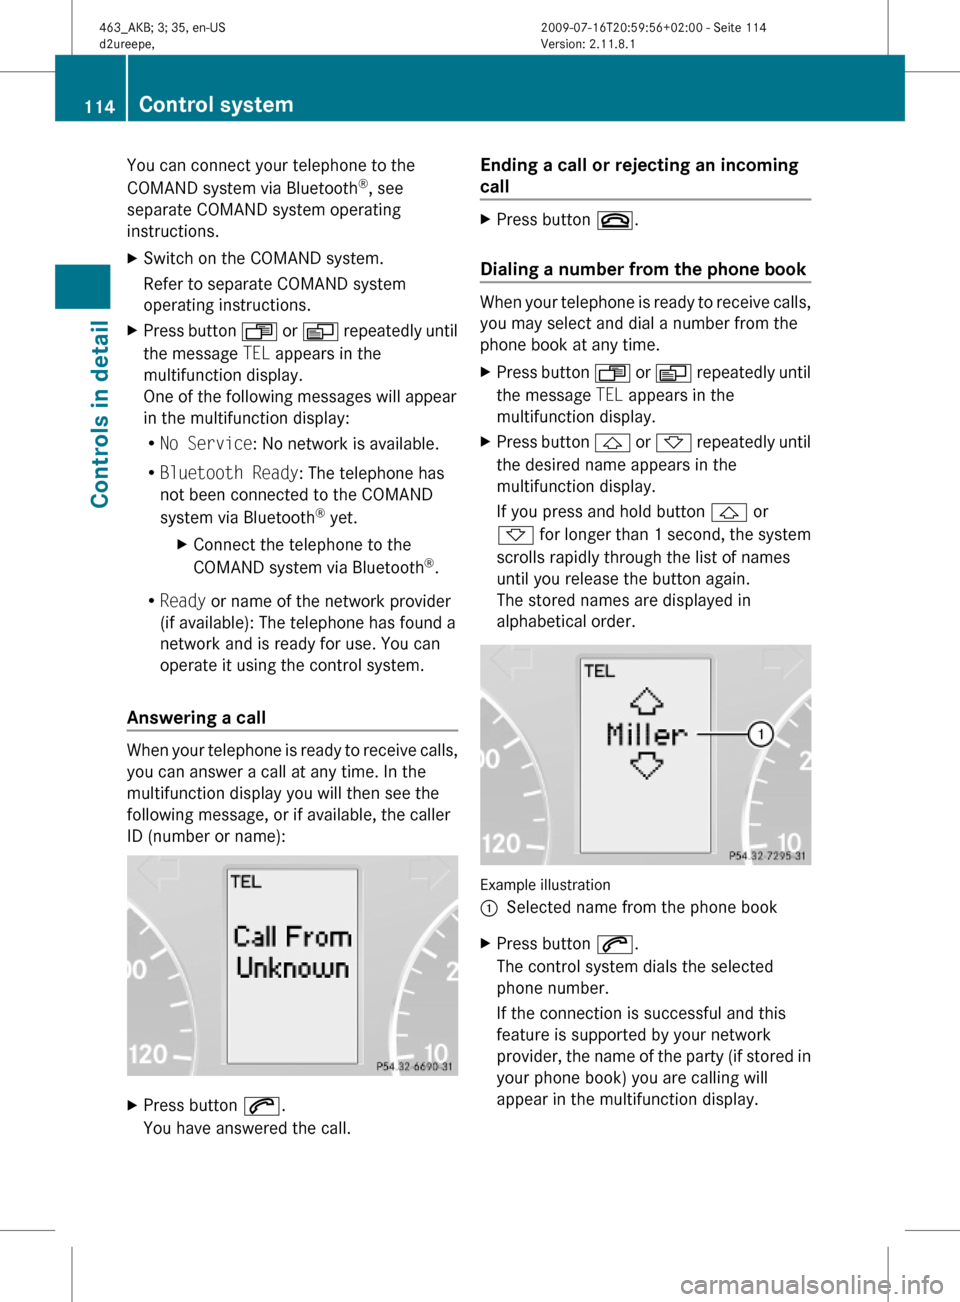
Answering a call
When your telephone is ready to receive calls,
you can answer a call at any time. In the
multifunction display you will then see the
following message, or if available, the caller
ID (number or name):
XPress button 6.
You have answered the call.
Ending a call or rejecting an incoming
call
XPress button ~.
Dialing a number from the phone book
When your telephone is ready to receive calls,
you may select and dial a number from the
phone book at any time.
XPress button U or V repeatedly until
the message TEL appears in the
multifunction display.
XPress button & or * repeatedly until
the desired name appears in the
multifunction display.
If you press and hold button & or
* for longer than 1 second, the system
scrolls rapidly through the list of names
until you release the button again.
The stored names are displayed in
alphabetical order.
Example illustration
:Selected name from the phone bookXPress button 6.
The control system dials the selected
phone number.
If the connection is successful and this
feature is supported by your network
provider, the name of the party (if stored in
your phone book) you are calling will
appear in the multifunction display.
114Control systemControls in detail
463_AKB; 3; 35, en-USd2ureepe,Version: 2.11.8.12009-07-16T20:59:56+02:00 - Seite 114
Page 122 of 272
Rear Parking Assist system
malfunction
If no distance segments illuminate and no
acoustic warning sounds, there is a
malfunction in the Rear Parking Assist
system.
XHave the Rear Parking Assist system
checked at an authorized Mercedes-Benz
Center as soon as possible.
Rear view camera
The rear view camera is an optical parking aid.
The area behind the vehicle appears in the
COMAND system display as a mirror image,
like in the rear view mirror.
GWarning!
Make sure no persons or animals are in or
near the area in which you are parking/
maneuvering. Otherwise, they could be
injured.
GWarning!
The rear view camera is only an aid and may
display obstacles
Rfrom a distorted perspective
Rinaccurately
Rmay not display obstacles at all
The rear view camera does not relieve you of
the responsibility to be cautious. Take care
and pay careful attention. The rear view
camera may not show objects which are
Rvery close to the rear bumper
Runder the rear bumper
Runder the spare wheel
Rnearby behind the spare wheel
You are responsible for safety at all times and
must continue to pay attention to the
immediate surroundings when parking and
maneuvering. This includes the area behind,
in front of, and beside the vehicle. Otherwise
you could endanger yourself and/or others.
GWarning!
The rear view camera either will not function
or will not function to its full capability if
Rthe tailgate is open
Rit is raining very hard, snowing or foggy
Rit is night or you are parking/maneuvering
your vehicle in an area where it is very dark
Rthe camera is exposed to a very bright white
light
Rthe immediate surroundings are
illuminated with fluorescent light (the
display may flicker)
Rthere is a sudden change in temperature,
e.g. if you drive into a heated garage from
the cold (lens condensation)
Rthe camera lens is dirty or covered
Rthe rear of your vehicle is damaged
In this case, have the position and setting
of the camera checked by a qualified
specialist workshop. Mercedes-Benz
recommends that you contact a Mercedes-
Benz Center for this purpose.
Do not use the rear view camera in these
situations. Otherwise you could injure
yourself or others and/or damage property
including your vehicle while parking/
maneuvering.
120Driving systemsControls in detail
463_AKB; 3; 35, en-USd2ureepe,Version: 2.11.8.12009-07-16T20:59:56+02:00 - Seite 120
Page 123 of 272
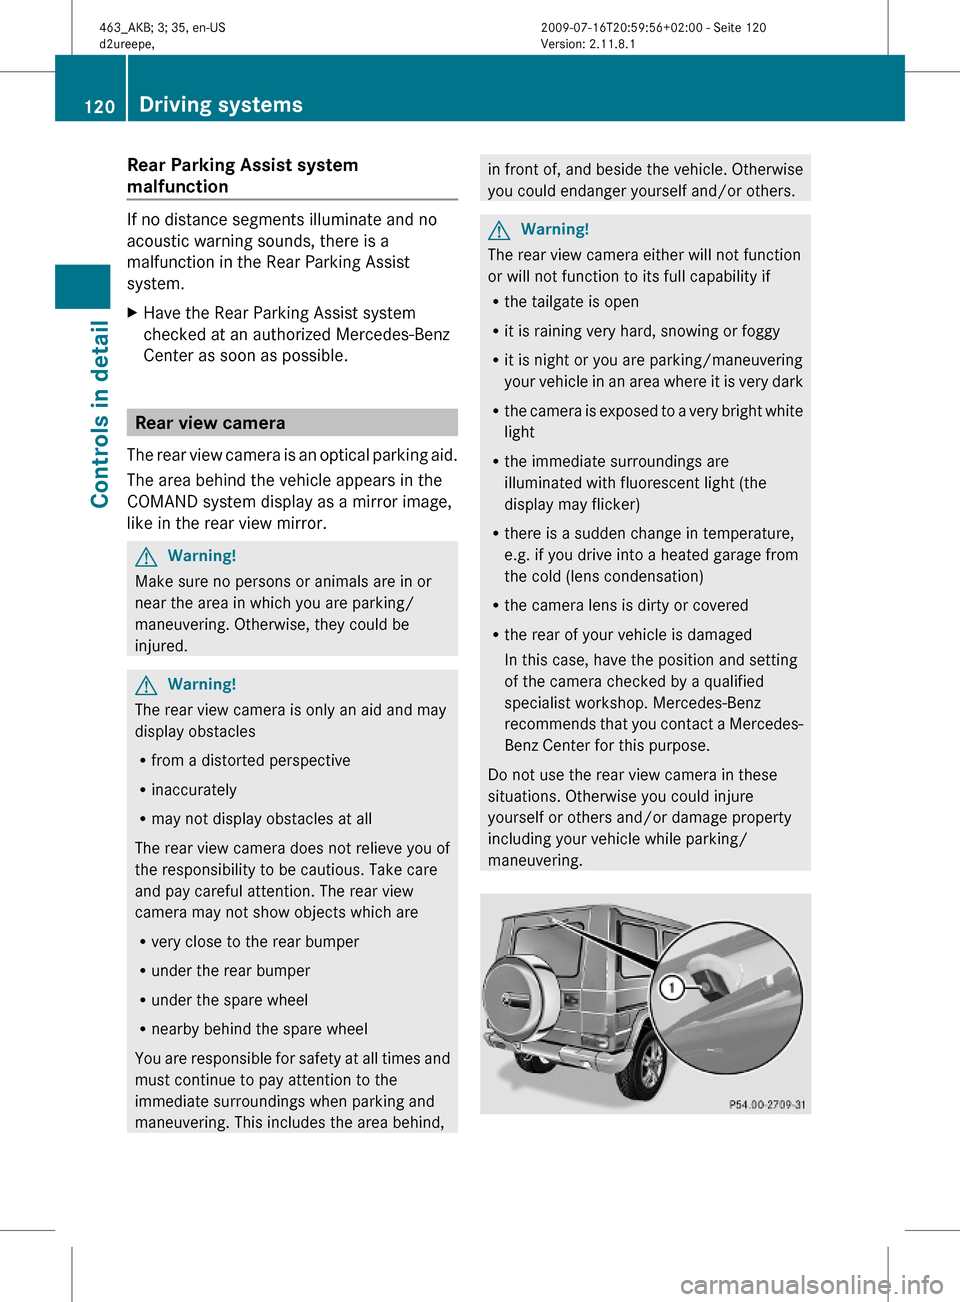
Camera lens : must be free of dirt, ice,
snow, and slush to function properly. Clean
the camera lens regularly. Being careful not
to scratch or damage the camera lens, see
“Cleaning the rear view camera lens”
(Y page 195).
Switching on or off
XSwitching on: Switch on the ignition.XSwitch on the COMAND system.XShift the automatic transmission to reverse
gear R.
The area behind the vehicle appears in the
COMAND system display.
iThe image from the rear view camera will
no longer be displayed if you select another
function on the COMAND system while
reverse gear R is engaged. To display the
image again, disengage and reengage
reverse gear R.
XSwitching off: Shift the automatic
transmission into park position P, neutral
position N, or drive position D.
or
XSelect another function on the COMAND
system.
Climate control system
Control panel
Climate control
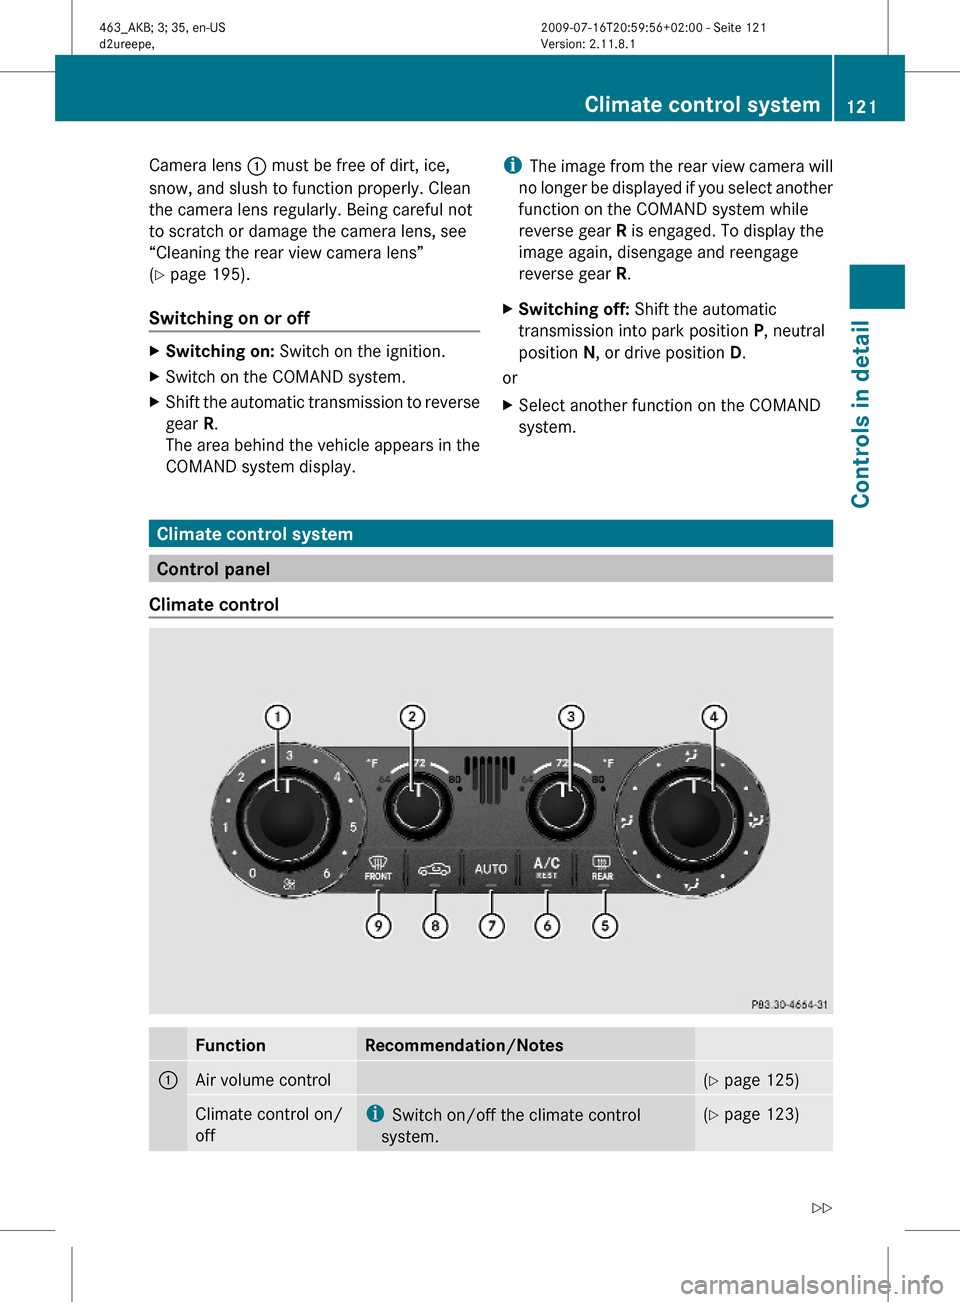
FunctionRecommendation/Notes1Air volume control(Y page 125)Climate control on/
off
iSwitch on/off the climate control
system.
(Y page 123)Climate control system121Controls in detail463_AKB; 3; 35, en-USd2ureepe,Version: 2.11.8.12009-07-16T20:59:56+02:00 - Seite 121Z
Page 134 of 272
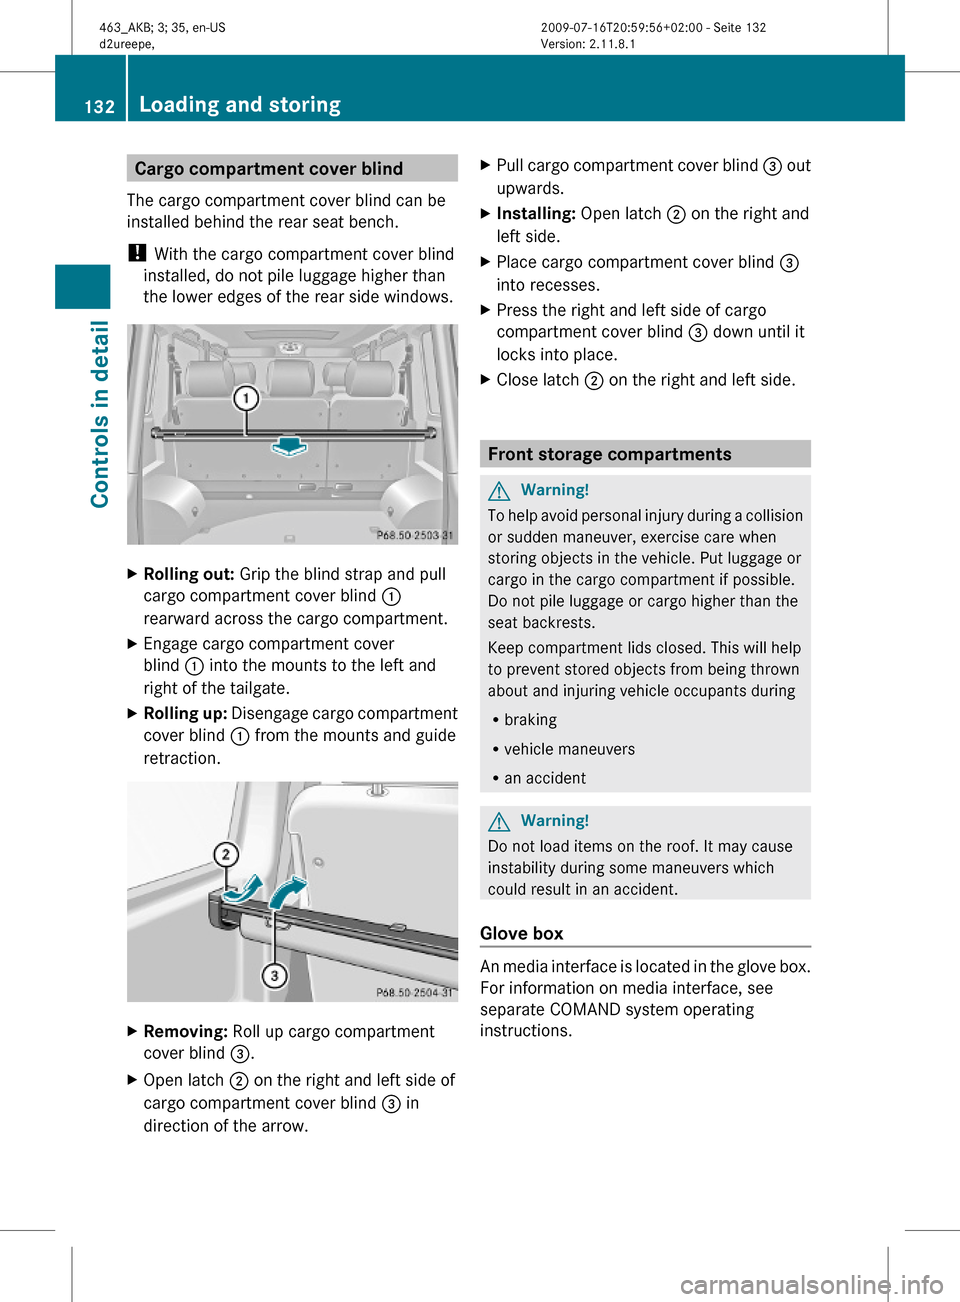
Cargo compartment cover blind
The cargo compartment cover blind can be
installed behind the rear seat bench.
! With the cargo compartment cover blind
installed, do not pile luggage higher than
the lower edges of the rear side windows.
XRolling out: Grip the blind strap and pull
cargo compartment cover blind :
rearward across the cargo compartment.
XEngage cargo compartment cover
blind : into the mounts to the left and
right of the tailgate.
XRolling up: Disengage cargo compartment
cover blind : from the mounts and guide
retraction.
XRemoving: Roll up cargo compartment
cover blind =.
XOpen latch ; on the right and left side of
cargo compartment cover blind = in
direction of the arrow.
XPull cargo compartment cover blind = out
upwards.
XInstalling: Open latch ; on the right and
left side.
XPlace cargo compartment cover blind =
into recesses.
XPress the right and left side of cargo
compartment cover blind = down until it
locks into place.
XClose latch ; on the right and left side.
Front storage compartments
GWarning!
To help avoid personal injury during a collision
or sudden maneuver, exercise care when
storing objects in the vehicle. Put luggage or
cargo in the cargo compartment if possible.
Do not pile luggage or cargo higher than the
seat backrests.
Keep compartment lids closed. This will help
to prevent stored objects from being thrown
about and injuring vehicle occupants during
Rbraking
Rvehicle maneuvers
Ran accident
GWarning!
Do not load items on the roof. It may cause
instability during some maneuvers which
could result in an accident.
Glove box
An media interface is located in the glove box.
For information on media interface, see
separate COMAND system operating
instructions.
132Loading and storingControls in detail
463_AKB; 3; 35, en-USd2ureepe,Version: 2.11.8.12009-07-16T20:59:56+02:00 - Seite 132
Page 141 of 272
The Tele Aid system consists of three types
of response:
R Automatic and manual emergency
R Roadside Assistance
R Information
To adjust the speaker volume during a Tele
Aid call do the following:XPress button W or X on the
multifunction steering wheel.
or
XUse the adjustment button on your
COMAND system.
Be sure to check “Owner’s Online” at
www.mbusa.com (USA only) for more
information and a description of all available
features.
System self-test
The system performs a self-test after you
have switched on the ignition.
GWarning!
A malfunction in the system has been
detected if any or all of the following
conditions occur:
R The indicator lamp in the SOS button does
not come on during the system self-test.
R The indicator lamp in Roadside Assistance
button º does not come on during the
system self-test.
R The indicator lamp in Information button
E does not come on during the system
self-test.
R The indicator lamp in the SOS button,
Roadside Assistance button º, or
Information button E remains
illuminated constantly in red after the
system self-test.
R The message Tele Aid Inoperative or
Tele Aid Not Activated appears in the
multifunction display after the system self-
test
If a malfunction is indicated as outlined above,
the system may not operate as expected. In
case of an emergency, help will have to be
summoned by other means.
Have the system checked at the nearest
Mercedes-Benz Center or contact the
Customer Assistance Center at
1-800-FOR-MERCedes (1-800-367-6372)
(USA only) or 1-888-923-8367 (Canada only)
as soon as possible.
Emergency calls
! In order to activate the Tele Aid system, a
subscriber agreement must be completed.
To ensure your system is activated and
operational, please press Information
button E to perform the acquaintance
call. Failure to complete either of these
steps may result in a system that is not
activated.
If you have any questions regarding
activation, please call the Customer
Assistance Center at
1-800-FOR-MERCedes (1-800-367-6372)
(USA only) or 1-888-923-8367 (Canada
only).
An emergency call is initiated automatically
following an accident in which the Emergency
Tensioning Devices (ETDs) or air bags have
deployed.
i An automatically initiated Tele Aid
emergency call cannot be canceled.
An emergency call can also be initiated
manually ( Y page 140).
Once the emergency call is in progress, the
indicator lamp in the SOS button will begin to
flash. The message Connecting Call
appears in the multifunction display and the
COMAND system is muted. When the
connection is established, the message
Call Connected appears in the
multifunction display.
All information relevant to the emergency,
such as the location of the vehicle
Useful features139Controls in detail463_AKB; 3; 35, en-USd2ureepe,Version: 2.11.8.12009-07-16T20:59:56+02:00 - Seite 139Z