fuel consumption MERCEDES-BENZ GL 2010 Owners Manual
[x] Cancel search | Manufacturer: MERCEDES-BENZ, Model Year: 2010, Model line: GL, Model: MERCEDES-BENZ GL 2010Pages: 380, PDF Size: 9.81 MB
Page 11 of 380
ETD (Emergency Tensioning
Device) ................................................. 52
Safety guidelines ............................. 39
Express operation
Power windows .............................. 105
Tilt/sliding sunroof ........................192
Exterior lamp switch ........................... 97
Exterior rear view mirrors .................. 94
Fold-in function ........................ 95, 140
Parking position ............................... 95
Power-folding ................................... 95
Exterior view of vehicle ...................... 26
F
Fastening the seat belts ..................... 50
First aid kit ......................................... 284
Flat tire ............................................... 336
Lowering the vehicle ......................344
Mounting the spare wheel .............340
Preparing the vehicle .....................336
Spare wheel ........................... 336, 368
TIREFIT (tire repair kit) ...................337
Floormats ........................................... 223
Fluids
AdBlue ®
......................................... 369
Automatic transmission fluid .........369
Brake fluid ..................................... 369
Capacities ...................................... 368
Engine coolant ............................... 369
Engine oil ....................................... 369
Power steering fluid .......................369
Washer and headlamp cleaning
system ........................................... 370
Fog lamps ............................................. 99
Messages in the multifunction
display ................................... 310, 312
Fold-in function for exterior rear
view mirrors ................................ 95, 140
Four-wheel drive see All-wheel drive (4MATIC)
Front air bags
see Air bags
Front axle oil ...................................... 369
Front lamps see Headlamps
Front passenger front air bag ............ 40
Messages in the multifunction
display ........................................... 291
Front passenger front air bag off
indicator lamp (Canada only) ..... 46, 322
Front passenger front air bag off
indicator lamp (USA only) .......... 42, 322
Front seat head restraints see Head restraints
Fuel ..................................................... 226
Additives ........................................ 372
Capacity, fuel tank .........................369
Diesel fuel ............................. 369, 372
Drive sensibly–safe fuel .................259
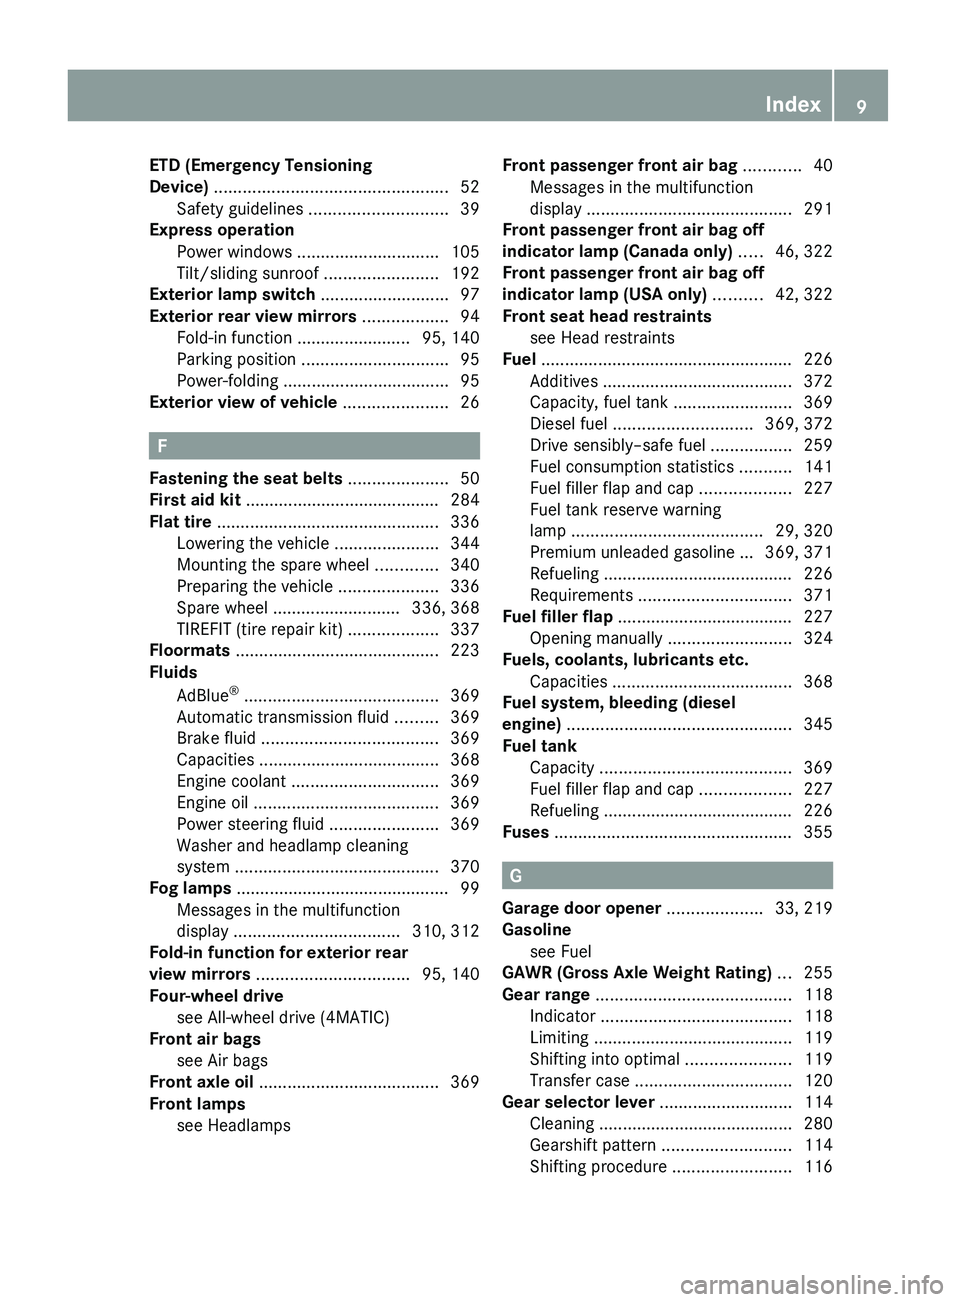
Fuel consumption statistics ...........141
Fuel filler flap and cap ...................227
Fuel tank reserve warning
lamp ........................................ 29, 320
Premium unleaded gasoline ... 369, 371
Refueling ........................................ 226
Requirements ................................ 371
Fuel filler flap ..................................... 227
Opening manually ..........................324
Fuels, coolants, lubricants etc.
Capacities ...................................... 368
Fuel system, bleeding (diesel
engine) ............................................... 345
Fuel tank
Capacity ........................................ 369
Fuel filler flap and cap ...................227
Refueling ........................................ 226
Fuses .................................................. 355
G
Garage door opener .................... 33, 219
Gasoline see Fuel
GAWR (Gross Axle Weight Rating) ... 255
Gear range ......................................... 118
Indicator ........................................ 118
Limiting .......................................... 119
Shifting into optimal ......................119
Transfer case ................................. 120
Gear selector lever ............................ 114
Cleaning ......................................... 280
Gearshift pattern ........................... 114
Shifting procedure .........................116
Index9X164_AKB; 5; 31, en-USd2ureepe,Version: 2.11.8.12009-09-11T12:30:16+02:00 - Seite 9
Page 143 of 380
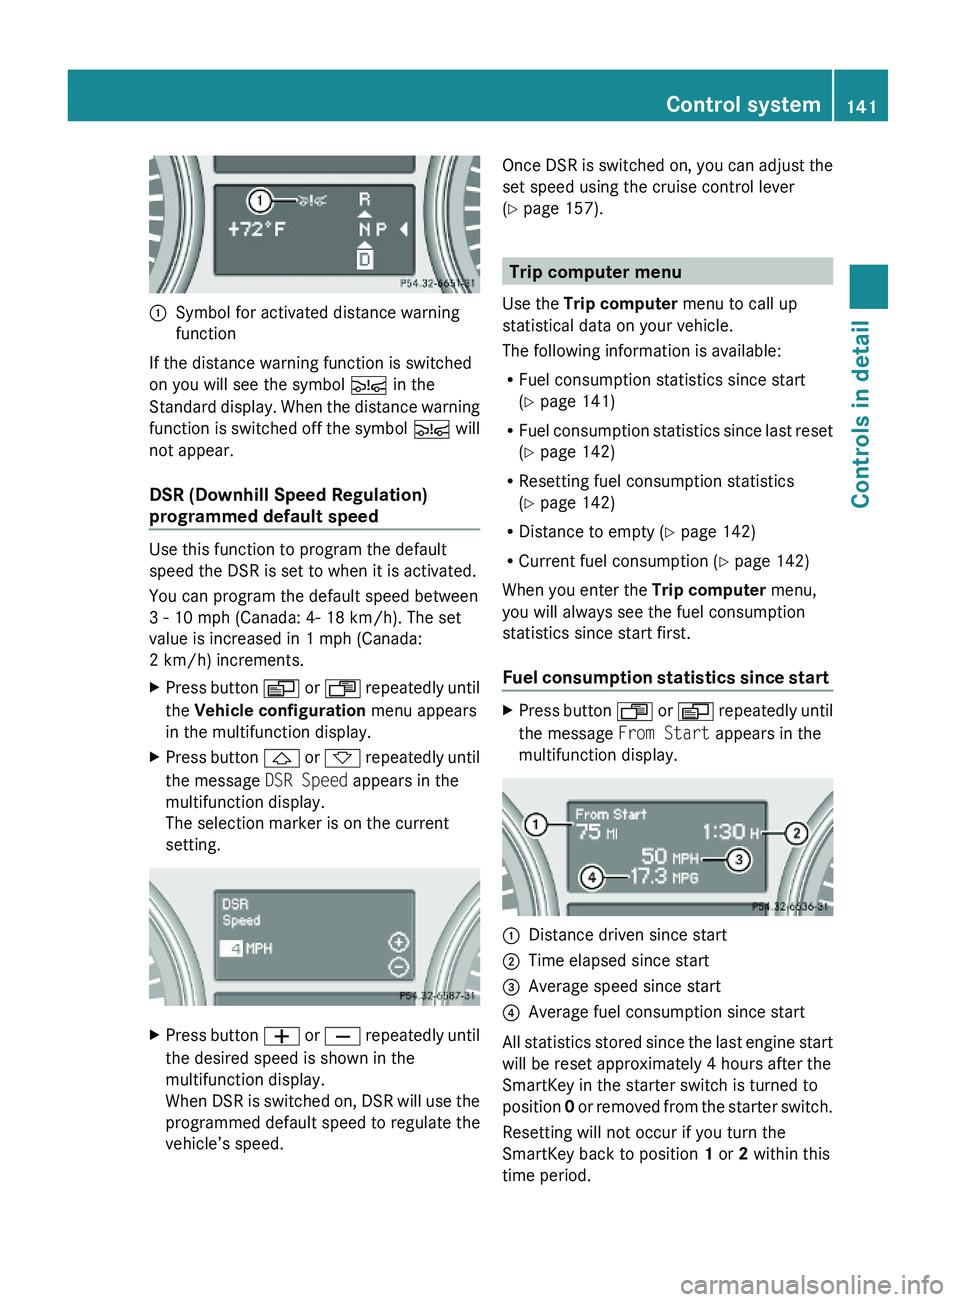
:Symbol for activated distance warning
function
If the distance warning function is switched
on you will see the symbol Ä in the
Standard display. When the distance warning
function is switched off the symbol Ä will
not appear.
DSR (Downhill Speed Regulation)
programmed default speed
Use this function to program the default
speed the DSR is set to when it is activated.
You can program the default speed between
3 - 10 mph (Canada: 4- 18 km/h). The set
value is increased in 1 mph (Canada:
2 km/h) increments.
XPress button V or U repeatedly until
the Vehicle configuration menu appears
in the multifunction display.
XPress button & or * repeatedly until
the message DSR Speed appears in the
multifunction display.
The selection marker is on the current
setting.
XPress button W or X repeatedly until
the desired speed is shown in the
multifunction display.
When DSR is switched on, DSR will use the
programmed default speed to regulate the
vehicle’s speed.
Once DSR is switched on, you can adjust the
set speed using the cruise control lever
(Y page 157).
Trip computer menu
Use the Trip computer menu to call up
statistical data on your vehicle.
The following information is available:
RFuel consumption statistics since start
(Y page 141)
RFuel consumption statistics since last reset
(Y page 142)
RResetting fuel consumption statistics
(Y page 142)
RDistance to empty (Y page 142)
RCurrent fuel consumption (Y page 142)
When you enter the Trip computer menu,
you will always see the fuel consumption
statistics since start first.
Fuel consumption statistics since start
XPress button U or V repeatedly until
the message From Start appears in the
multifunction display.
:Distance driven since start;Time elapsed since start=Average speed since start?Average fuel consumption since start
All statistics stored since the last engine start
will be reset approximately 4 hours after the
SmartKey in the starter switch is turned to
position 0 or removed from the starter switch.
Resetting will not occur if you turn the
SmartKey back to position 1 or 2 within this
time period.
Control system141Controls in detailX164_AKB; 5; 31, en-USd2ureepe,Version: 2.11.8.12009-09-11T12:30:16+02:00 - Seite 141Z
Page 144 of 380
Fuel consumption statistics since last
reset
XPress button U or V repeatedly until
the message From Start appears in the
multifunction display.
XPress button & or * repeatedly until
the message From Reset appears in the
multifunction display.
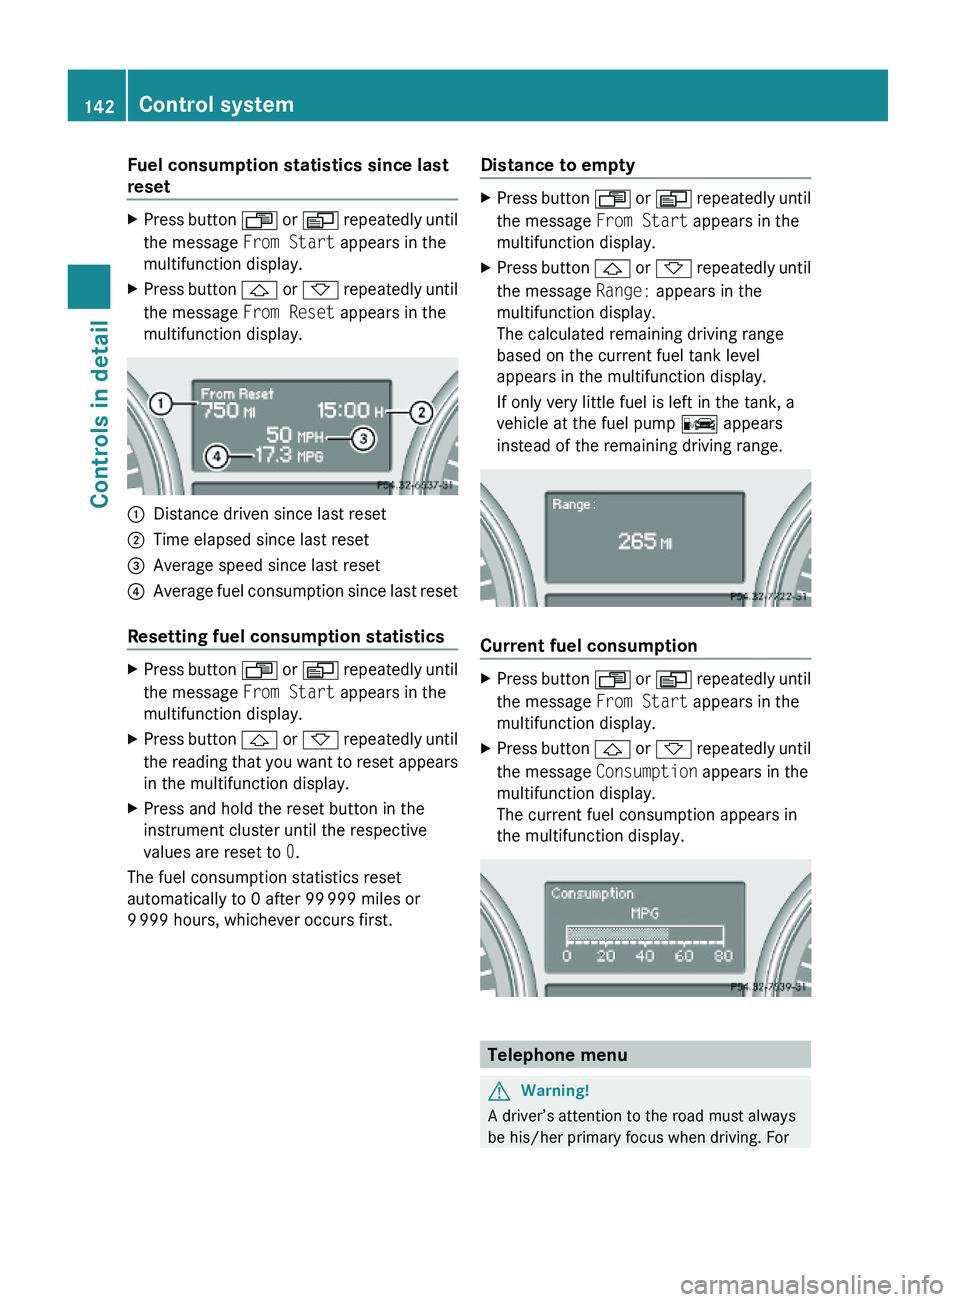
:Distance driven since last reset;Time elapsed since last reset=Average speed since last reset?Average fuel consumption since last reset
Resetting fuel consumption statistics
XPress button U or V repeatedly until
the message From Start appears in the
multifunction display.
XPress button & or * repeatedly until
the reading that you want to reset appears
in the multifunction display.
XPress and hold the reset button in the
instrument cluster until the respective
values are reset to 0.
The fuel consumption statistics reset
automatically to 0 after 99 999 miles or
9 999 hours, whichever occurs first.
Distance to emptyXPress button U or V repeatedly until
the message From Start appears in the
multifunction display.
XPress button & or * repeatedly until
the message Range: appears in the
multifunction display.
The calculated remaining driving range
based on the current fuel tank level
appears in the multifunction display.
If only very little fuel is left in the tank, a
vehicle at the fuel pump C appears
instead of the remaining driving range.
Current fuel consumption
XPress button U or V repeatedly until
the message From Start appears in the
multifunction display.
XPress button & or * repeatedly until
the message Consumption appears in the
multifunction display.
The current fuel consumption appears in
the multifunction display.
Telephone menu
GWarning!
A driver’s attention to the road must always
be his/her primary focus when driving. For
142Control systemControls in detail
X164_AKB; 5; 31, en-USd2ureepe,Version: 2.11.8.12009-09-11T12:30:16+02:00 - Seite 142
Page 161 of 380
XSwitching off: Press switch : again.
Indicator lamp ; goes out. The symbol
Ç disappears.
Air suspension program
The system lets you select the chassis and
suspension setup. The chassis and
suspension setup adjusts the damping
behavior and the ride height for your vehicle.
The system consists of two components. The
Adaptive Damping System (ADS)
(Y page 159) and the vehicle level control
(Y page 159).
Adaptive Damping System (ADS)
The Adaptive Damping System (ADS) is
controlled electronically and operates
continuously. It adjusts the damping
characteristics to the current operating and
driving conditions. The damping is adjusted
individually for each wheel. Driving safety and
tire comfort are increased.
The fine tuning of the damping is dependent
on:
Ryour driving style
Rroad surface conditions
Ryour personal settings
Vehicles without enhanced off-road package
Vehicles with enhanced off-road package
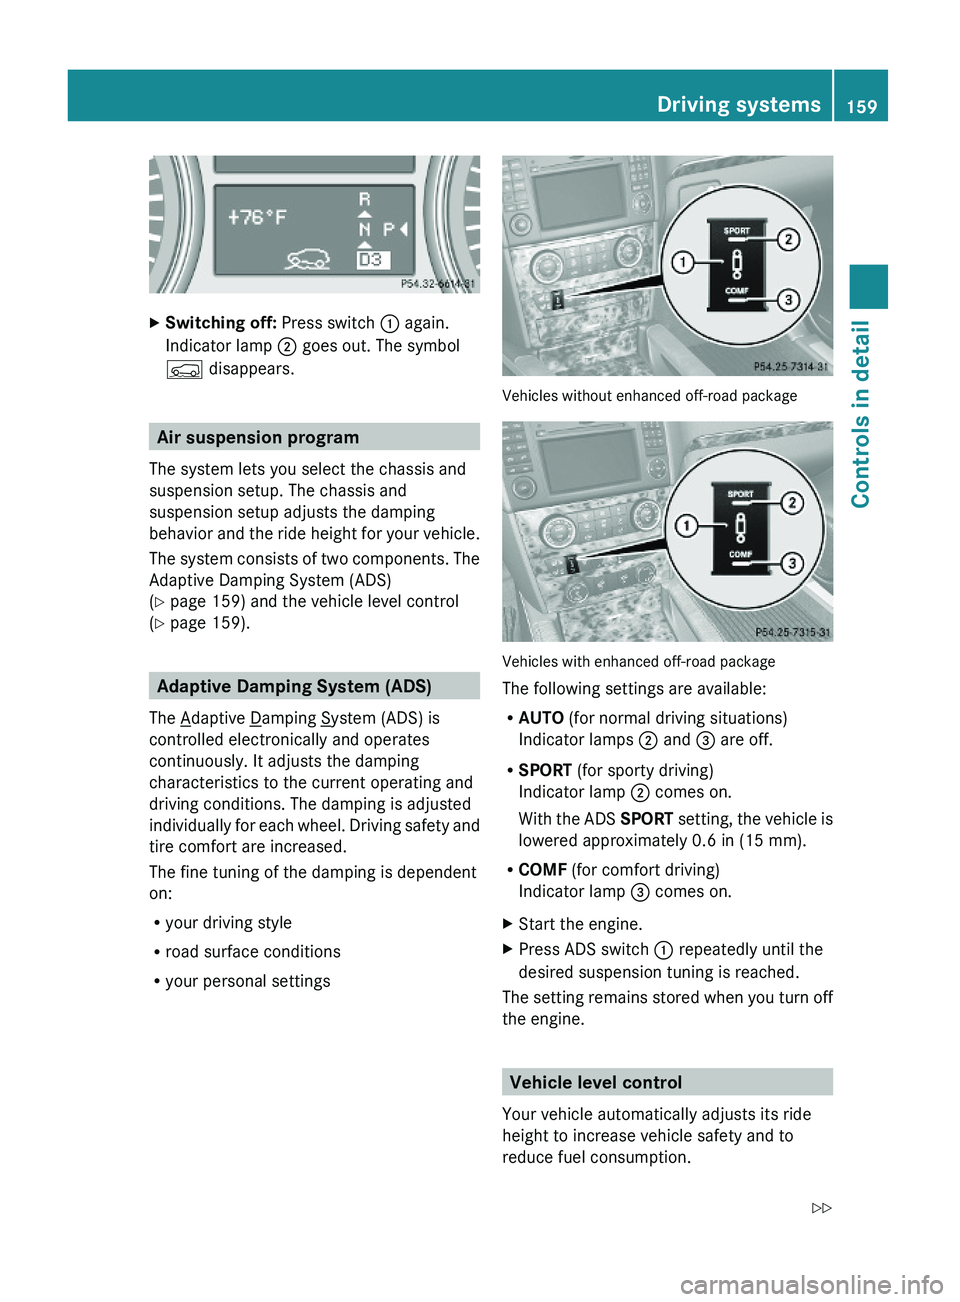
The following settings are available:
RAUTO (for normal driving situations)
Indicator lamps ; and = are off.
RSPORT (for sporty driving)
Indicator lamp ; comes on.
With the ADS SPORT setting, the vehicle is
lowered approximately 0.6 in (15 mm).
RCOMF (for comfort driving)
Indicator lamp = comes on.
XStart the engine.XPress ADS switch : repeatedly until the
desired suspension tuning is reached.
The setting remains stored when you turn off
the engine.
Vehicle level control
Your vehicle automatically adjusts its ride
height to increase vehicle safety and to
reduce fuel consumption.
Driving systems159Controls in detailX164_AKB; 5; 31, en-USd2ureepe,Version: 2.11.8.12009-09-11T12:30:16+02:00 - Seite 159Z
Page 163 of 380
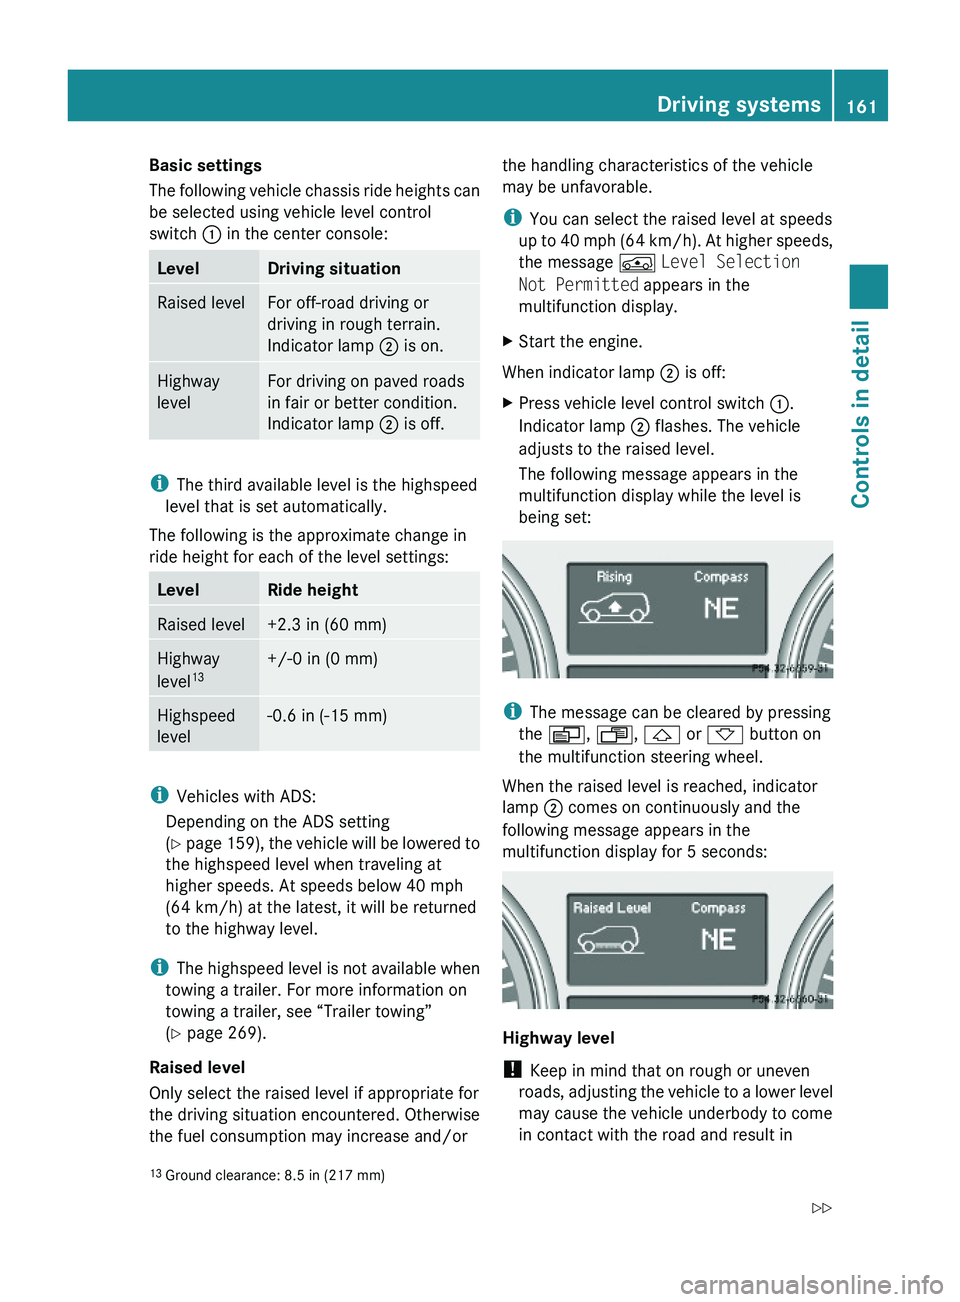
Basic settings
The following vehicle chassis ride heights can
be selected using vehicle level control
switch : in the center console:
LevelDriving situationRaised levelFor off-road driving or
driving in rough terrain.
Indicator lamp ; is on.
Highway
level
For driving on paved roads
in fair or better condition.
Indicator lamp ; is off.
iThe third available level is the highspeed
level that is set automatically.
The following is the approximate change in
ride height for each of the level settings:
LevelRide heightRaised level+2.3 in (60 mm)Highway
level13+/-0 in (0 mm)Highspeed
level
-0.6 in (-15 mm)
iVehicles with ADS:
Depending on the ADS setting
(Y page 159), the vehicle will be lowered to
the highspeed level when traveling at
higher speeds. At speeds below 40 mph
(64 km/h) at the latest, it will be returned
to the highway level.
iThe highspeed level is not available when
towing a trailer. For more information on
towing a trailer, see “Trailer towing”
(Y page 269).
Raised level
Only select the raised level if appropriate for
the driving situation encountered. Otherwise
the fuel consumption may increase and/or
the handling characteristics of the vehicle
may be unfavorable.
iYou can select the raised level at speeds
up to 40 mph (64 km/h). At higher speeds,
the message Á Level Selection
Not Permitted appears in the
multifunction display.
XStart the engine.
When indicator lamp ; is off:
XPress vehicle level control switch :.
Indicator lamp ; flashes. The vehicle
adjusts to the raised level.
The following message appears in the
multifunction display while the level is
being set:
iThe message can be cleared by pressing
the V, U, & or * button on
the multifunction steering wheel.
When the raised level is reached, indicator
lamp ; comes on continuously and the
following message appears in the
multifunction display for 5 seconds:
Highway level
! Keep in mind that on rough or uneven
roads, adjusting the vehicle to a lower level
may cause the vehicle underbody to come
in contact with the road and result in
13Ground clearance: 8.5 in (217 mm)Driving systems161Controls in detailX164_AKB; 5; 31, en-USd2ureepe,Version: 2.11.8.12009-09-11T12:30:16+02:00 - Seite 161Z
Page 165 of 380
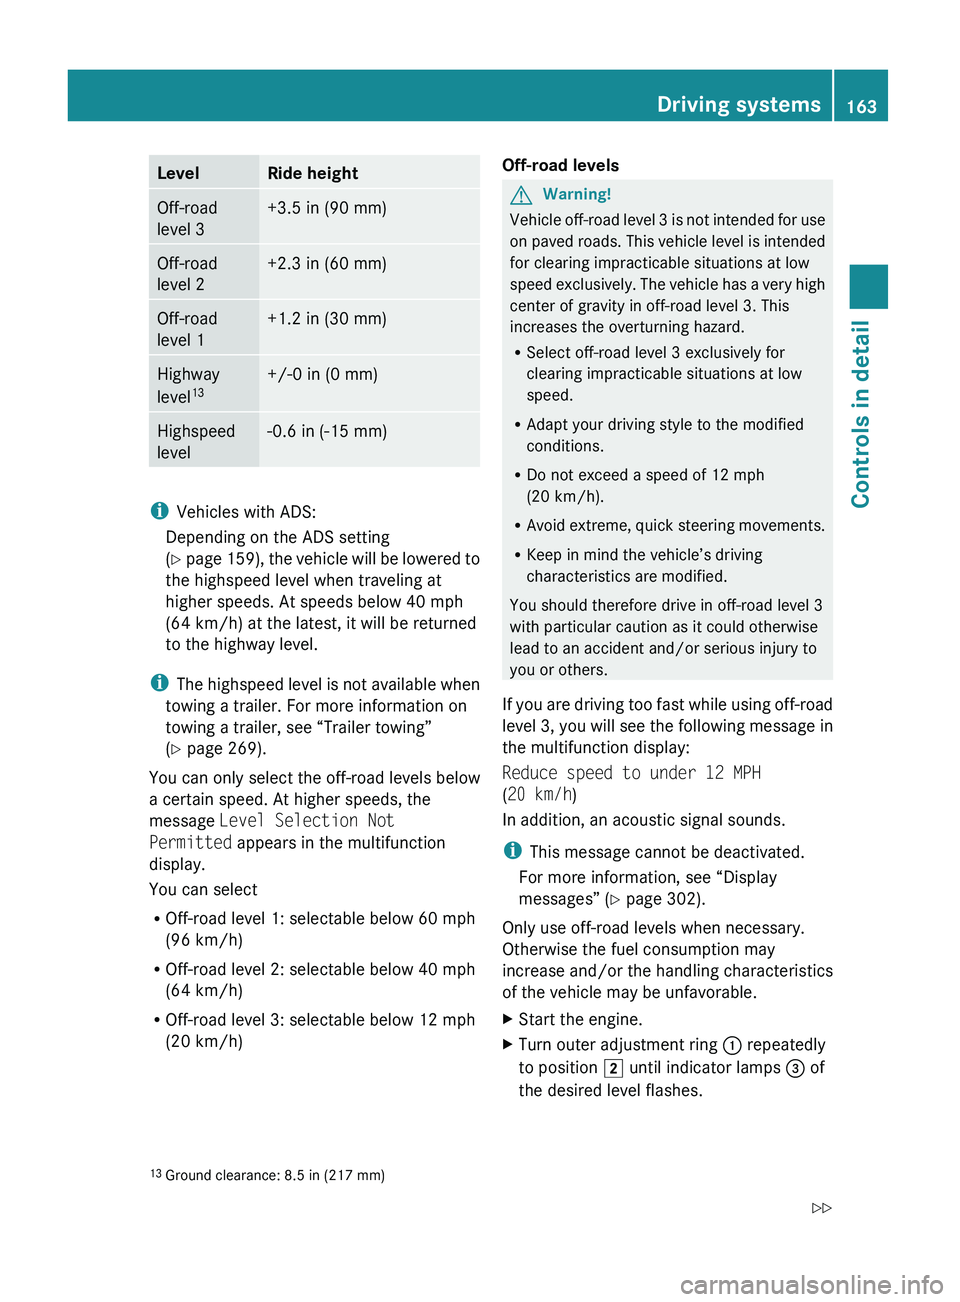
LevelRide heightOff-road
level 3+3.5 in (90 mm)Off-road
level 2+2.3 in (60 mm)Off-road
level 1+1.2 in (30 mm)Highway
level 13+/-0 in (0 mm)Highspeed
level-0.6 in (-15 mm)
i Vehicles with ADS:
Depending on the ADS setting
( Y page 159), the vehicle will be lowered to
the highspeed level when traveling at
higher speeds. At speeds below 40 mph
(64 km/h) at the latest, it will be returned
to the highway level.
i The highspeed level is not available when
towing a trailer. For more information on
towing a trailer, see “Trailer towing”
( Y page 269).
You can only select the off-road levels below
a certain speed. At higher speeds, the
message Level Selection Not
Permitted appears in the multifunction
display.
You can select
R Off-road level 1: selectable below 60 mph
(96 km/h)
R Off-road level 2: selectable below 40 mph
(64 km/h)
R Off-road level 3: selectable below 12 mph
(20 km/h)
Off-road levelsGWarning!
Vehicle off-road level 3 is not intended for use
on paved roads. This vehicle level is intended
for clearing impracticable situations at low
speed exclusively. The vehicle has a very high
center of gravity in off-road level 3. This
increases the overturning hazard.
R Select off-road level 3 exclusively for
clearing impracticable situations at low
speed.
R Adapt your driving style to the modified
conditions.
R Do not exceed a speed of 12 mph
(20 km/h).
R Avoid extreme, quick steering movements.
R Keep in mind the vehicle’s driving
characteristics are modified.
You should therefore drive in off-road level 3
with particular caution as it could otherwise
lead to an accident and/or serious injury to
you or others.
If you are driving too fast while using off-road
level 3, you will see the following message in
the multifunction display:
Reduce speed to under 12 MPH
( 20 km/h )
In addition, an acoustic signal sounds.
i This message cannot be deactivated.
For more information, see “Display
messages” ( Y page 302).
Only use off-road levels when necessary.
Otherwise the fuel consumption may
increase and/or the handling characteristics
of the vehicle may be unfavorable.
XStart the engine.XTurn outer adjustment ring : repeatedly
to position 2 until indicator lamps = of
the desired level flashes.13 Ground clearance: 8.5 in (217 mm)Driving systems163Controls in detailX164_AKB; 5; 31, en-USd2ureepe,Version: 2.11.8.12009-09-11T12:30:16+02:00 - Seite 163Z
Page 261 of 380
maneuvers. Do not use the cruise control
system under such conditions.
When the vehicle is in danger of skidding, shift
the automatic transmission to neutral
position N. Try to keep the vehicle under
control by corrective steering action.
i For information on driving with snow
chains, see “Snow chains” ( Y page 258).
Road salts and chemicals can adversely
affect braking efficiency. Increased pedal
force may become necessary to produce the
normal brake effect.
Depressing the brake pedal periodically when
traveling at length on salt-strewn roads can
bring road-salt-impaired braking efficiency
back to normal.
If the vehicle is parked after being driven on
salt-treated roads, the braking efficiency
should be tested as soon as possible after
driving is resumed.GWarning!
Make sure not to endanger any other road
users when carrying out these braking
maneuvers.
Driving instructions
Drive sensibly – save fuel
To save fuel you should:
R Keep tires at the recommended inflation
pressures.
R Remove unnecessary loads.
R Remove carriers when not in use.
R Remove the crossbars when not in use.
R Allow engine to warm up under low load
use.
R Avoid frequent acceleration and
deceleration.
R Have all maintenance work performed at
the intervals specified in the Maintenance
Booklet and as required by the
Maintenance system. Contact an
authorized Mercedes-Benz Center.
Fuel consumption is also increased by driving
in cold weather, in stop-and-go traffic, on
short trips and in mountainous areas.
Drinking and driving
GWarning!
Drinking and driving and/or taking drugs and
driving are very dangerous combinations.
Even a small amount of alcohol or drugs can
affect your reflexes, perceptions and
judgment.
The possibility of a serious or even fatal
accident are greatly increased when you drink
or take drugs and drive.
Do not drink or take drugs and drive or allow
anyone to drive who has been drinking or
taking drugs.
Pedals
GWarning!
Make sure absolutely no objects are
obstructing the pedals’ range of movement.
Keep the driver’s footwell clear of all
obstacles. If there are any floormats or
carpets in the footwell, make sure that the
pedals still have sufficient clearance.
During sudden driving or braking maneuvers,
the objects could get caught between the
pedals. You could then no longer brake or
accelerate. This could lead to accidents and
injury.
Power assistance
GWarning!
There is no power assistance for the steering
and the brake when the engine is not running.
Driving instructions259OperationX164_AKB; 5; 31, en-USd2ureepe,Version: 2.11.8.12009-09-11T12:30:16+02:00 - Seite 259Z
Page 367 of 380
Rims and tires
Notes
! Only use tires which have been tested and
approved by Mercedes-Benz. Tires
approved by Mercedes-Benz are developed
to provide best possible performance in
conjunction with the driving safety systems
on your vehicle such as the ABS or the
ESP ®
. Tires specially developed for your
vehicle and tested and approved by
Mercedes-Benz can be identified by finding
the following on the tire’s sidewall:
R MO =
Mercedes-Benz Original
equipment tires
R MOE =
Mercedes-Benz Original Extended
(tires with limited run-flat
characteristics) original equipment tires
Using tires other than those approved by
Mercedes-Benz may result in damage that
is not covered by the Mercedes-Benz
Limited Warranty.
For information on driving with MOExtended
tires, see the “Practical hints” section
( Y page 345).
i Vehicles with MOExtended system are
not factory-equipped with a TIREFIT kit.
When retrofitting with tires that do not have
run-flat characteristics, you should also
equip your vehicle with a TIREFIT kit.
TIREFIT kits are available at any authorized
Mercedes-Benz Center.
! Using tires other than those approved by
Mercedes-Benz can have detrimental
effects, such as
R poor handling characteristics
R increased noise
R increased fuel consumption
Moreover, tires and rims not approved by
Mercedes-Benz may, under load, exhibit
dimensional variations and different tire
deformation characteristics that could
cause them to come into contact with the
vehicle body or axle parts. Damage to the
tires or the vehicle may be the result.
i Further information on tires and rims is
available at any authorized Mercedes-Benz
Center. The Tire and Loading Information
placard with the recommended tire
inflation pressures for cold tires is located
on the driver’s door B-pillar. Supplemental
tire inflation pressure information for
driving at high speeds or for vehicle loads
less than the maximum loaded vehicle
condition can be found on the tire inflation
pressure label. The tire inflation pressure
label is located on the inside of the fuel filler
flap. The tire inflation pressure should be
checked regularly and should only be
adjusted on cold tires. Follow tire
manufacturer’s maintenance
recommendation included with the vehicle.
For information on recommended tire
inflation pressure and supplemental tire
inflation pressure information for special
driving situations, see ( Y page 234).
i Please keep in mind that the vehicle must
be equipped
R with wheels of identical dimensions on
each axle (left and right)
R with tires of identical characteristics all
around, i.e. summer tires, winter tires,
all-season tires, or MOExtended tires etc.
i The following pages also list the approved
rim and tire sizes for equipping your vehicle
with winter tires. Winter tires are not
available as standard or optional factory
equipment, but can be purchased from an
authorized Mercedes-Benz Center.
Equipping your vehicle with winter tires
approved for your vehicle model may
require the purchase of rims of the
recommended size for use with these
winter tires. This depends on vehicle model
and the standard or optional factory-
equipped wheel rim/tire configuration onRims and tires365Technical dataX164_AKB; 5; 31, en-USd2ureepe,Version: 2.11.8.12009-09-11T12:30:16+02:00 - Seite 365Z