radio MERCEDES-BENZ GL-Class 2013 X166 User Guide
[x] Cancel search | Manufacturer: MERCEDES-BENZ, Model Year: 2013, Model line: GL-Class, Model: MERCEDES-BENZ GL-Class 2013 X166Pages: 454, PDF Size: 6.31 MB
Page 313 of 454
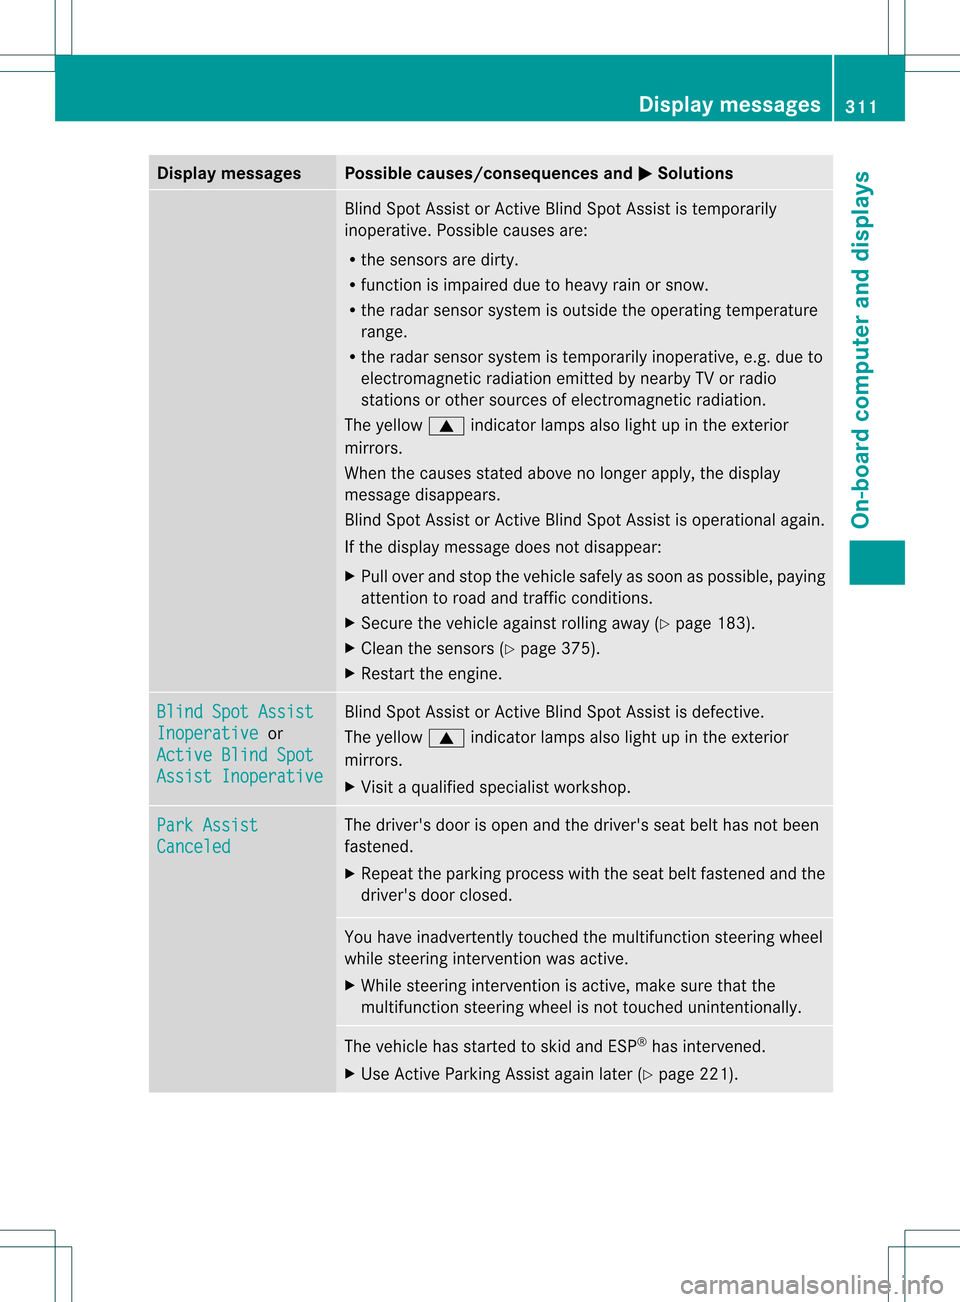
Display messages Possible causes/consequences and
0001 Solutions
Blind Spot Assist or Active Blind Spot Assist is temporarily
inoperative. Possible causes are:
R
the sensors are dirty.
R function is impaired due to heavy rain or snow.
R the rada rsensor system is outside the operating temperature
range.
R the radar sensor system is temporarily inoperative, e.g. due to
electromagnetic radiation emitted by nearby TV or radio
stations or other sources of electromagnetic radiation.
The yellow 0003indicator lamps also light up in the exterior
mirrors.
When the causes stated above no longer apply, the display
message disappears.
Blind Spot Assist or Active Blind Spot Assist is operational again.
If the display message does not disappear:
X Pull over and stop the vehicle safely as soon as possible, paying
attention to road and traffic conditions.
X Secure the vehicle against rolling away (Y page 183).
X Clean the sensors (Y page 375).
X Restart the engine. Blind Spot Assist
Inoperative or
Active Blind Spot Assist Inoperative Blind Spot Assist or Active Blind Spot Assist is defective.
The yellow
0003indicator lamps also light up in the exterior
mirrors.
X Visit a qualified specialist workshop. Park Assist
Canceled The driver's door is open and the driver's seat belt has not been
fastened.
X
Repeat the parking process with the seat belt fastened and the
driver's door closed. You have inadvertently touched the multifunction steering wheel
while steering intervention was active.
X
While steering intervention is active, make sure that the
multifunction steering wheel is not touched unintentionally. The vehicle has started to skid and ESP
®
has intervened.
X Use Active Parking Assist again later (Y page 221). Display messages
311On-board computer and displays Z
Page 314 of 454
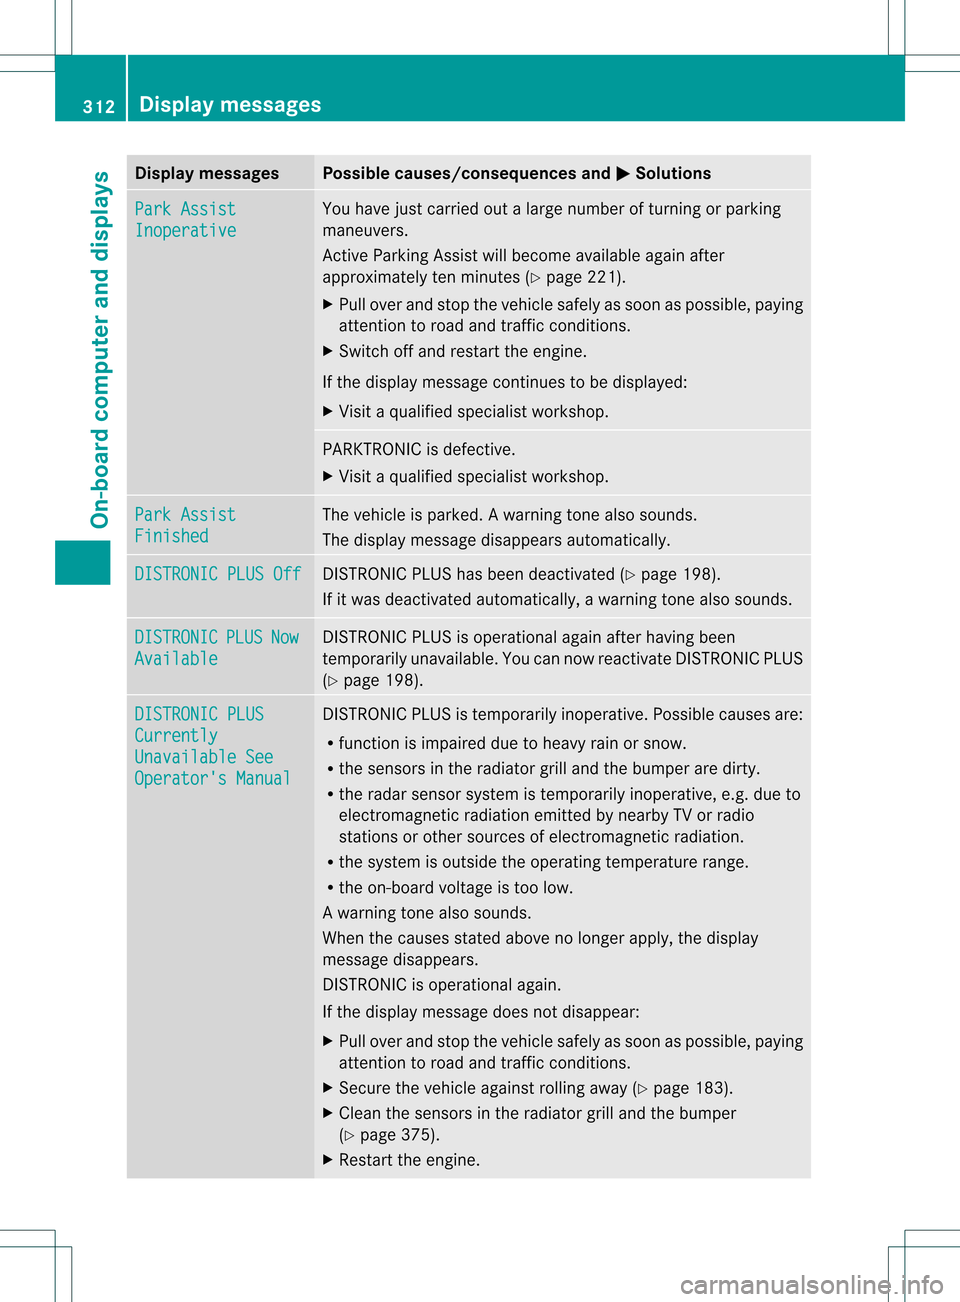
Display messages Possible causes/consequences and
0001 Solutions
Park Assist
Inoperative You have just carried out a large number of turning or parking
maneuvers.
Active Parking Assis
twill become available again after
approximately ten minutes (Y page 221).
X Pull over and stop the vehicle safely as soon as possible, paying
attention to road and traffic conditions.
X Switch off and restart the engine.
If the display message continues to be displayed:
X Visit a qualified specialist workshop. PARKTRONIC is defective.
X
Visit a qualified specialist workshop. Park Assist
Finished The vehicle is parked.
Awarning tone also sounds.
The display message disappears automatically. DISTRONIC PLUS Off DISTRONIC PLU
Shas been deactivated (Y page 198).
If it was deactivated automatically, a warning tone also sounds. DISTRONIC PLUS Now
Available DISTRONIC PLU
Sis operational againa fter having been
temporarily unavailable .You can now reactivate DISTRONIC PLUS
(Y page 198). DISTRONIC PLUS
Currently
Unavailable See
Operator's Manual DISTRONIC PLUS is temporarily inoperative. Possible causes are:
R
function is impaired due to heavy rain or snow.
R the sensors in the radiator grill and the bumper are dirty.
R the radar sensor system is temporarily inoperative, e.g. due to
electromagnetic radiation emitted by nearby TV or radio
stations or other sources of electromagnetic radiation.
R the system is outside the operating temperature range.
R the on-board voltage is too low.
Aw arning tone also sounds.
When the causes stated above no longer apply, the display
message disappears.
DISTRONIC is operational again.
If the display message does no tdisappear:
X Pull over and stop the vehicle safely as soon as possible, paying
attention to road and traffic conditions.
X Secure the vehicle against rolling away (Y page 183).
X Clean the sensors in the radiator grill and the bumper
(Y page 375).
X Restar tthe engine. 312
Display messagesOn-board computer and displays
Page 321 of 454
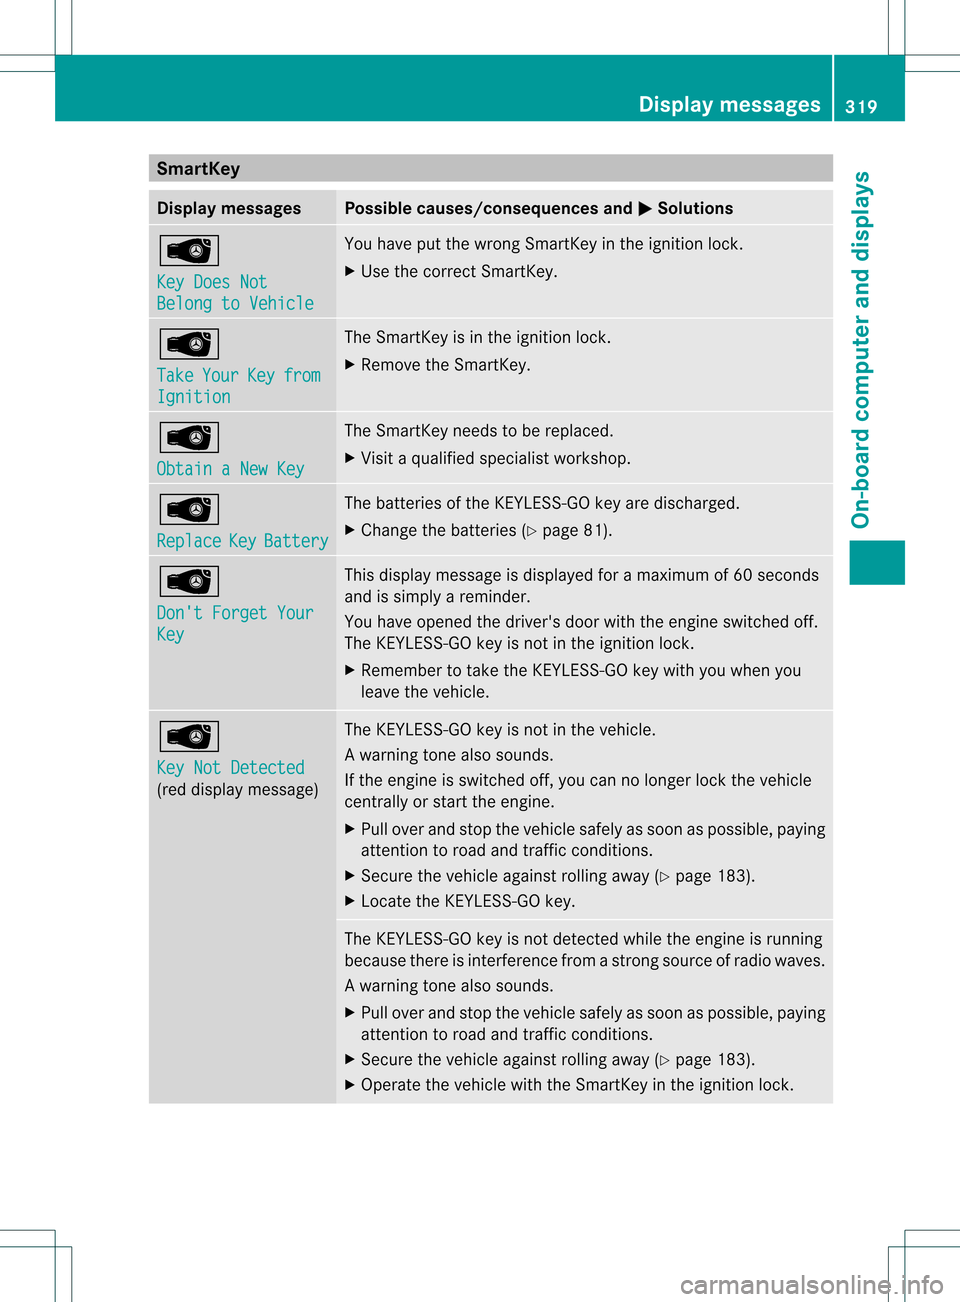
SmartKey
Display messages Possible causes/consequences and
0001 Solutions
0002
Key Does Not
Belong to Vehicle You have put the wrong SmartKey in the ignition lock.
X
Use the correct SmartKey. 0002
Take
Your Key from
Ignition The SmartKey is in the ignition lock.
X
Remove the SmartKey. 0002
Obtain a New Key The SmartKey needs to be replaced.
X
Visit a qualified specialist workshop. 0002
Replace
Key Battery The batteries of the KEYLESS-GO key are discharged.
X
Change the batteries (Y page 81).0002
Don't Forget Your
Key This display message is displayed for a maximum of 60 seconds
and is simply a reminder.
You have opened the driver's door with the engine switched off.
The KEYLESS-GO key is not in the ignition lock.
X Remember to take the KEYLESS-GO key with you when you
leave the vehicle. 0002
Key Not Detected
(red display message) The KEYLESS-GO key is not in the vehicle.
Aw
arning tone also sounds.
If the engine is switched off, you can no longer loc kthe vehicle
centrally or start the engine.
X Pull over and stop the vehicle safely as soon as possible, paying
attention to road and traffic conditions.
X Secure the vehicle against rolling away (Y page 183).
X Locate the KEYLESS-GO key. The KEYLESS-GO key is not detected while the engine is running
because there is interference from a strong source of radio waves.
Aw
arning tone also sounds.
X Pull ove rand stop the vehicle safely as soo nas possible, paying
attention to road and traffic conditions.
X Secure the vehicle against rolling away (Y page 183).
X Operate the vehicle with the SmartKey in the ignition lock. Display messages
319On-board computer and displays Z
Page 363 of 454
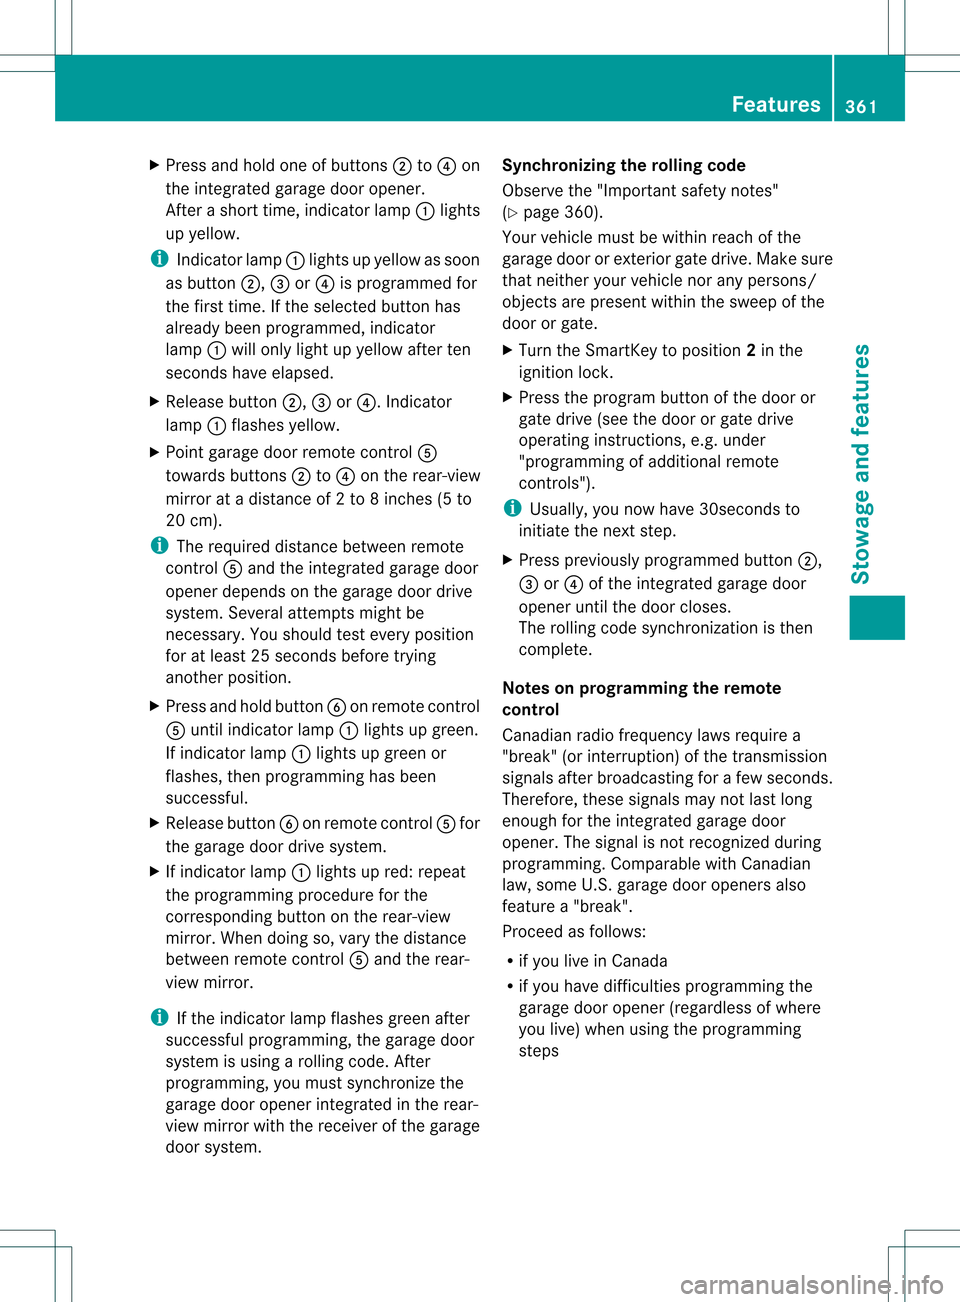
X
Press and hold one of buttons 0003to0020 on
the integrated garage door opener.
After a short time, indicator lamp 0002lights
up yellow.
i Indicator lamp 0002lights up yellow as soon
as button 0003,0021or0020 is programmed for
the first time. If the selected button has
already been programmed, indicator
lamp 0002will only light up yellow after ten
seconds have elapsed.
X Release button 0003,0021or0020. Indicator
lamp 0002flashes yellow.
X Point garage door remote control 001E
towards buttons 0003to0020 on the rear-view
mirror at a distance of 2 to 8 inches (5 to
20 cm).
i The required distance between remote
control 001Eand the integrated garage door
opener depends on the garage door drive
system. Several attempts might be
necessary. You should test every position
for at least 25 seconds before trying
another position.
X Press and hold button 001Fon remot econtrol
001E until indicator lamp 0002lights up green.
If indicator lamp 0002lights up green or
flashes, then programming has been
successful.
X Release button 001Fon remote control 001Efor
the garage door drive system.
X If indicator lamp 0002lights up red: repeat
the programming procedure for the
corresponding button on the rear-view
mirror. When doing so, vary the distance
between remote control 001Eand the rear-
view mirror.
i If the indicator lamp flashes green after
successful programming, the garage door
system is using a rolling code. After
programming, you must synchronize the
garage door opener integrated in the rear-
view mirror with the receiver of the garage
door system. Synchronizing the rolling code
Observe the "Important safety notes"
(Y
page 360).
Your vehicle must be within reach of the
garage door or exterior gate drive. Make sure
that neither your vehicle nor any persons/
objects are present within the sweep of the
door or gate.
X Turn the SmartKey to position 2in the
ignition lock.
X Press the program button of the door or
gate drive (see the door or gate drive
operating instructions, e.g. under
"programming of additional remote
controls").
i Usually, you now have 30seconds to
initiate the next step.
X Press previously programmed button 0003,
0021 or0020 of the integrated garage door
opener until the door closes.
The rolling code synchronization is then
complete.
Notes on programming the remote
control
Canadia nradio frequency laws require a
"break" (or interruption) of the transmission
signals after broadcasting for a few seconds.
Therefore, these signals may no tlast long
enough for the integrated garage door
opener. The signal is no trecognized during
programming. Comparable with Canadian
law, some U.S.g arage door openers also
feature a "break".
Proceed as follows:
R if you live in Canada
R if you have difficulties programming the
garage door opener (regardless of where
you live) when using the programming
steps Features
361Stowage and features Z
Page 365 of 454
i
Make sure that you clear the memory of
the integrated garage door opener before
selling the vehicle. Compass
Calling up the compass Information on operating the compass can be
found in the separate COMAND Operating
Instructions. Floormats
G
WARNING
Objects in the driver's footwell can restrict the
pedal travel or obstruct adepressed pedal.
The operating and road safety of the vehicle
is jeopardized. There is a risk of an accident.
Make sure that all objects in the vehicle are
stowed correctly, and that they cannot enter
the driver's footwell. Install the floormats
securely and as specified in order to ensure
sufficien tclearance for the pedals. Do not use
loose floormats. Floormat on the driver's side (example)
X
Driver's seat/front-passenger seat:
slide the respective seat back.
X Rear seats: slide the respective seat
forwards.
X To install: place the floormat in the
footwell.
X Press studs 0002onto retainers 0003. X
To remove: pull the floormat from
retainers 0003.
X Remove the floormat. Infrared reflective windshield
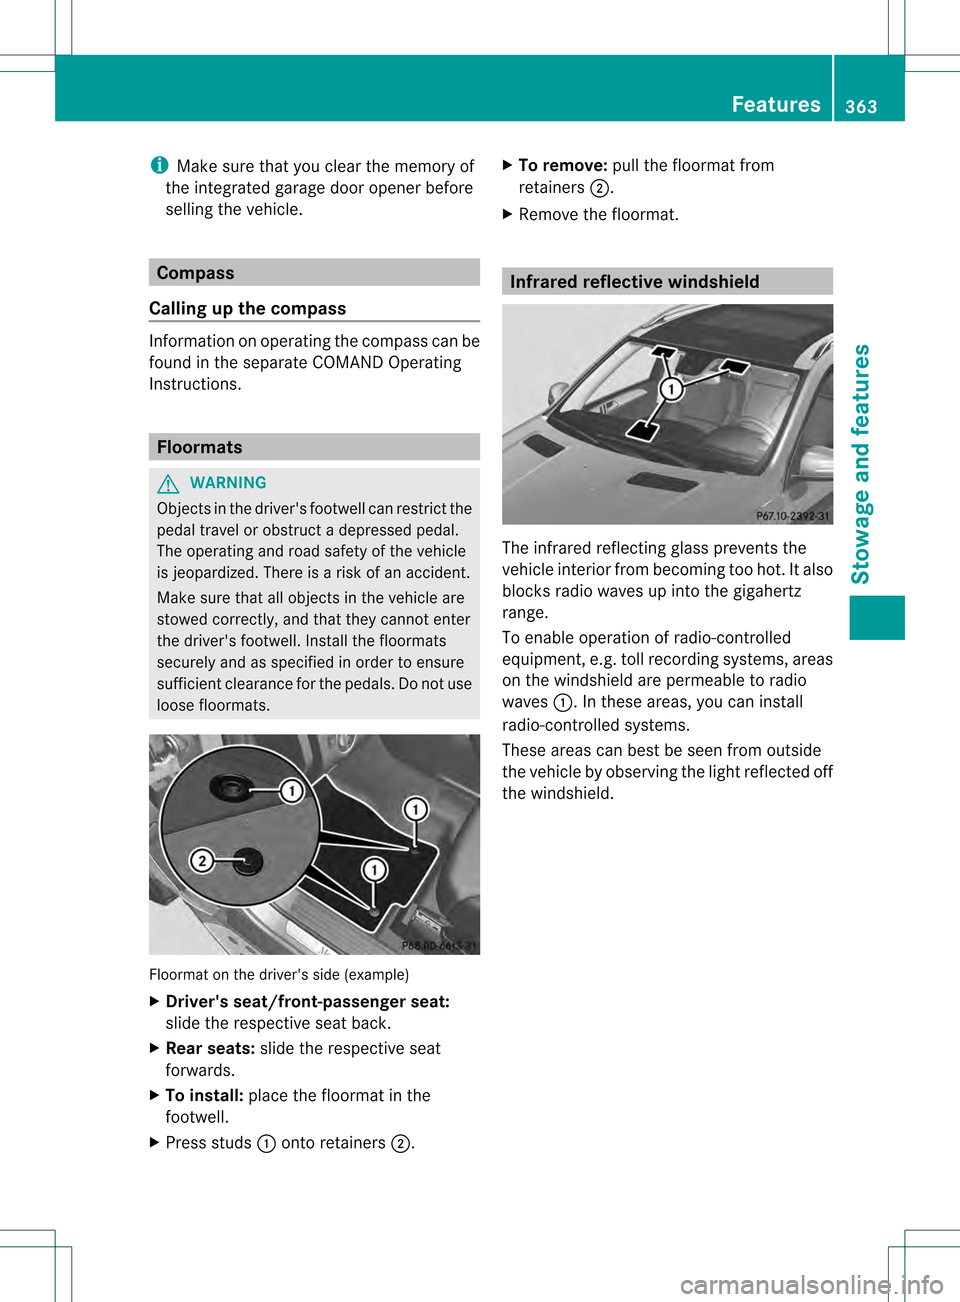
The infrared reflecting glass prevents the
vehicle interior fro
mbecoming too hot. It also
blocks radio waves up into the gigahertz
range.
To enable operation of radio-controlled
equipment, e.g. toll recording systems, areas
on the windshield are permeable to radio
waves 0002.Int hese areas, you can install
radio-controlled systems.
These areas can best be seen from outside
the vehicle by observing the light reflected off
the windshield. Features
363Stowage and features Z
Page 394 of 454

Do not start the vehicl
eusing a rapid charging device. If your vehicle's battery is discharged,
the engine can be jump-started from another vehicle or from a second battery using jumper
cables. Observe the following points:
R The battery is not accessible in all vehicles. If the other vehicle's battery is not accessible,
jump-start the vehicle using a second battery or ajump-starting device.
R You may only jump-start the vehicle when the engine and exhaust system are cold.
R Do not start the engine if the battery is frozen. Let the battery thaw first.
R Only jump-start from batteries with a 12 V voltage rating.
R Only use jumper cables which have a sufficien tcross-section and insulated terminal clamps.
R If the battery is fully discharged, leave the battery that is being used to jump-start connected
for a few minutes before attempting to start. This charges the battery slightly.
R Make sure that the two vehicles do not touch.
Make sure that:
R the jumper cables are not damaged.
R when the jumper cables are connected to the battery, uninsulated sections of the terminal
clamp do not come into contact with other metal sections.
R the jumper cables cannot come into contact with parts such as the V-belt pulley or the fan.
These parts move when the engine is started and while it is running.
X Secure the vehicle by applying the electric parking brake.
X Shift the transmission to position P.
X Turn the SmartKey to position 0in the ignitio nlock and remove it (Y page 163). On vehicles
with KEYLESS-GO, make sure the ignition is switched off (Y page 163). All indicator lamps
in the instrument cluster must be off.
X Switch off all electrical consumers (e.g. radio, blower, etc.).
X Open the hood (Y page 366).Position number
001Fidentifies the charged battery of the other vehicle or an equivalent jump-
starting device. 392
Jump-startingBreakdown assistance
Page 412 of 454
vehicle to a haltb
y braking carefully. Avoid
abrupt steering maneuvers.
The tire pressure monitor has a yellow
warning lamp in the instrument cluster for
indicating pressure loss/malfunctions (USA)
or pressure loss (Canada). Whether the
warning lamp flashes or lights up indicates
whether a tire pressure is too low or the tire
pressure monitor is malfunctioning:
R if the warning lamp is lit continuously, the
tire pressure on one or more tires is
significantly too low. The tire pressure
monitor is not malfunctioning.
R US Ao nly:ift he warning lamp flashes for
around a minute and then remains lit
constantly, the tire pressure monitor is
malfunctioning.
USA only: if there is a malfunction with the
tire pressure monitor it can take more than
ten minutes until the malfunction is shown by
the tire pressure warning lamp flashing for
approximately one minute and then lighting
up continuously.W hen the malfunction has
been rectified, the tire pressure warning lamp
goes out after a few minutes of driving.
The tire pressure values indicated by the on-
board computer may differ from those
measured at a gas station with a pressure
gauge. The tire pressures shown by the on-
board computer refer to those measured at
sea level. At high altitudes, the tire pressure
values indicated by a pressure gauge are
higher than those shown by the on-board
computer. In this case, do not reduce the tire
pressures.
The operation of the tire pressure monitor can
be affected by interference from radio
transmitting equipment (e.g. radio
headphones, two-way radios) that may be
being operated in or near the vehicle. Checking the tire pressure
electronically X
Make sure that the SmartKey is in position
2 in the ignition lock (Y page 163).
X Press the 0002or0005 button on the
steering wheel to select the Service menu.
X Press the 0003or0004 button to select
Tire Pressure .
X Press the 000Bbutton.
The current tire pressure of each tire is
shown in the multifunction display.
If the vehicle has been parked for longer than
20 minutes, the Tire pressure will be displayed after driving a few
minutes message appears.
After a teach-in process, the tire pressure
monitor automatically detects new wheels or
new sensors. As long as a clear allocation of
the tire pressure value to the individual
wheels is not possible, the Tire Pressure Monitor Active display message is shown
instead of the tire pressure display. The tire
pressures are already being monitored.
i If an emergency spare wheel is mounted,
the system may continue to show the tire
pressure of the wheel that has been
removed for a few minutes. If this occurs,
note that the value displayed for the
position where the spare wheel is mounted
is not the same as the current tire pressure
of the emergency spare wheel. 410
CheckWheels and tires