jump start MERCEDES-BENZ GL-Class 2016 X166 Owner's Manual
[x] Cancel search | Manufacturer: MERCEDES-BENZ, Model Year: 2016, Model line: GL-Class, Model: MERCEDES-BENZ GL-Class 2016 X166Pages: 462, PDF Size: 10.44 MB
Page 8 of 462
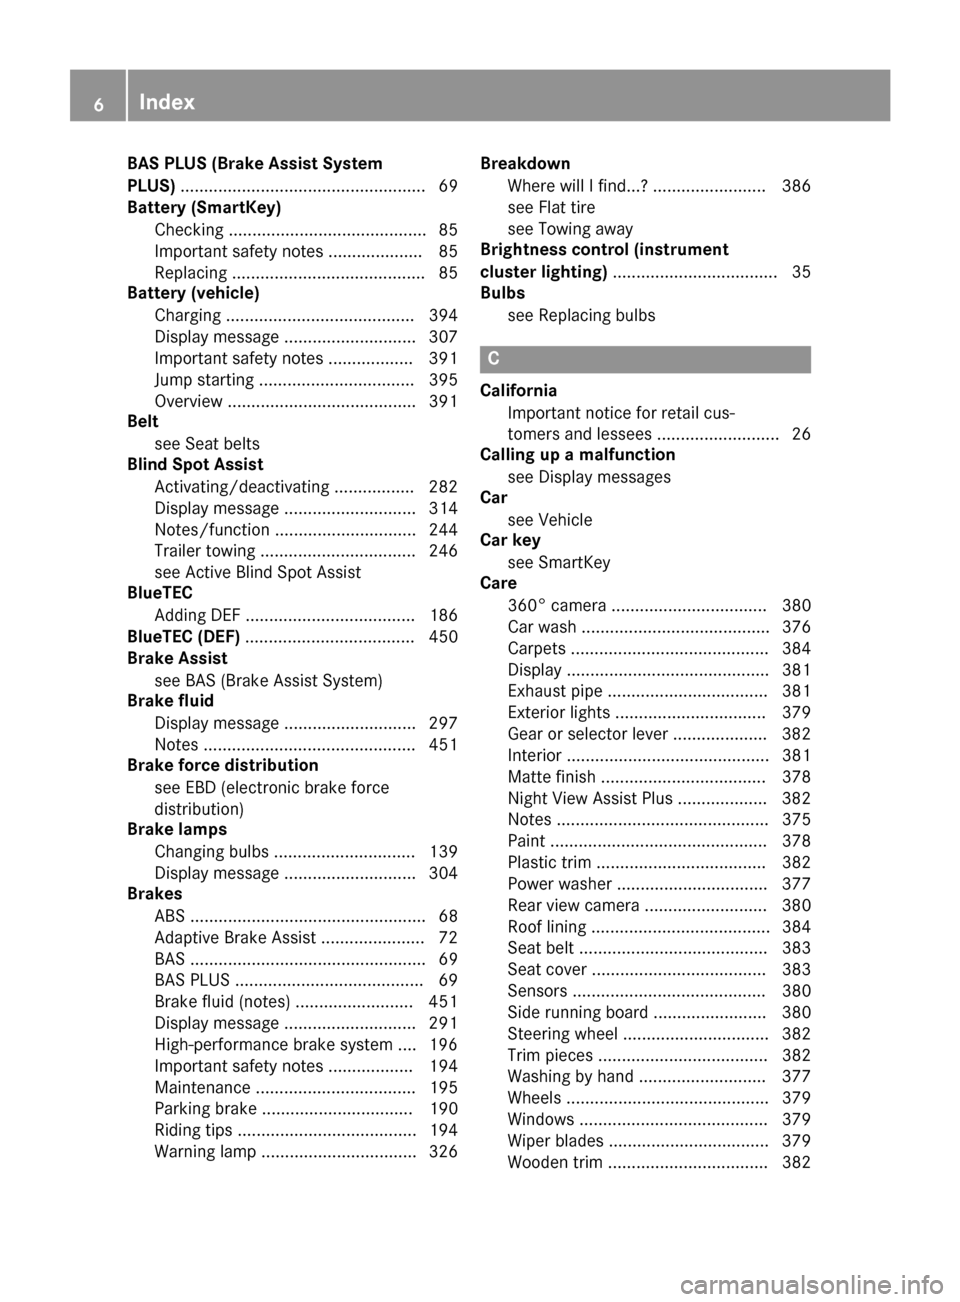
BAS PLUS (Brake Assist System
PLUS).................................................... 69
Battery (SmartKey)
Checking .......................................... 85
Important safety notes .................... 85
Replacing ......................................... 85
Battery (vehicle)
Charging ........................................ 394
Display message ............................ 307
Important safety notes .................. 391
Jump starting ................................. 395
Overview ........................................ 391
Belt
see Seat belts
Blind Spot Assist
Activating/deactivating ................. 282
Display message ............................ 314
Notes/function .............................. 244
Trailer towing ................................. 246
see Active Blind Spot Assist
BlueTEC
Adding DEF .................................... 186
BlueTEC (DEF) .................................... 450
Brake Assist
see BAS (Brake Assist System)
Brake fluid
Display message ............................ 297
Notes ............................................. 451
Brake force distribution
see EBD (electronic brake force
distribution)
Brake lamps
Changing bulbs .............................. 139
Display message ............................ 304
Brakes
ABS .................................................. 68
Adaptive Brake Assist ...................... 72
BAS .................................................. 69
BAS PLUS ........................................ 69
Brake fluid (notes) ......................... 451
Display message ............................ 291
High-performance brake system .... 196
Important safety notes .................. 194
Maintenance .................................. 195
Parking brake ................................ 190
Riding tips ...................................... 194
Warning lamp ................................. 326 Breakdown
Where will I find...? ........................ 386
see Flat tire
see Towing away
Brightness control (instrument
cluster lighting) ................................... 35
Bulbs
see Replacing bulbs
C
CaliforniaImportant notice for retail cus-
tomers and lessees .......................... 26
Calling up a malfunction
see Display messages
Car
see Vehicle
Car key
see SmartKey
Care
360° camera ................................. 380
Car wash ........................................ 376
Carpets .......................................... 384
Display ........................................... 381
Exhaust pipe .................................. 381
Exterior lights ................................ 379
Gear or selector lever .................... 382
Interior ........................................... 381
Matte finish ................................... 378
Night View Assist Plus ................... 382
Notes ............................................. 375
Paint .............................................. 378
Plastic trim .................................... 382
Power washer ................................ 377
Rear view camera .......................... 380
Roof lining ...................................... 384
Seat belt ........................................ 383
Seat cover ..................................... 383
Sensors ......................................... 380
Side running board ........................ 380
Steering wheel ............................... 382
Trim pieces .................................... 382
Washing by hand ........................... 377
Wheels ........................................... 379
Windows ........................................ 379
Wiper blades .................................. 379
Wooden trim .................................. 382
6Index
Page 12 of 462
Driving in winter ............................. 197
Driving on flooded roads ................ 196
Driving on sand .............................. 200
Driving on wet roads ...................... 196
Driving over obstacles ................... 201
Exhaust check ............................... 193
Fuel ................................................ 193
General .......................................... 192
Hydroplaning ................................. 196
Icy road surfaces ........................... 197
Limited braking efficiency on sal-
ted roads ....................................... 195
Off-road driving .............................. 199
Off-road fording ............................. 197
Snow chains .................................. 407
Tire ruts ......................................... 201
Towing a trailer .............................. 264
Traveling uphill ............................... 201
Wet road surface ........................... 195
DSR (Downhill Speed Regulation)
Display message ............................ 313
Function/notes ............................. 257
DVD video
Operating (on-board computer) ..... 279
E
EASY-ENTRY featureActivating/deactivating ................. 285
Function/notes ............................. 123
EASY-EXIT feature
Crash-responsive ........................... 124
Function/notes ............................. 123
Switching on/off ........................... 285
EBD (electronic brake force distri-
bution)
Display message ............................ 293
Function/notes ................................ 75
ECO display
Function/notes ............................. 193
On-board computer ....................... 276
ECO start/stop function
Automatic engine start .................. 170
Automatic engine switch-off .......... 169
Deactivating/activating ................. 170
General information ....................... 169
Important safety notes .................. 169
Introduction ................................... 169 Electronic Stability Program
see ESP
®(Electronic Stability Program)
Emergency
Automatic measures after an acci-
dent ................................................. 60
Emergency release
Driver's door .................................... 92
Vehicle ............................................. 92
Emergency spare wheel
General notes ................................ 438
Important safety notes .................. 438
Removing ....................................... 439
Storage location ............................ 439
Technical data ............................... 441
Emergency Tensioning Devices
Activation ......................................... 58
Emergency unlocking
Tailgate ............................................ 97
Emissions control
Service and warranty information .... 25
Engine
Check Engine warning lamp ........... 334
Display message ............................ 306
ECO start/stop function ................ 169
Engine number ............................... 447
Irregular running ............................ 172
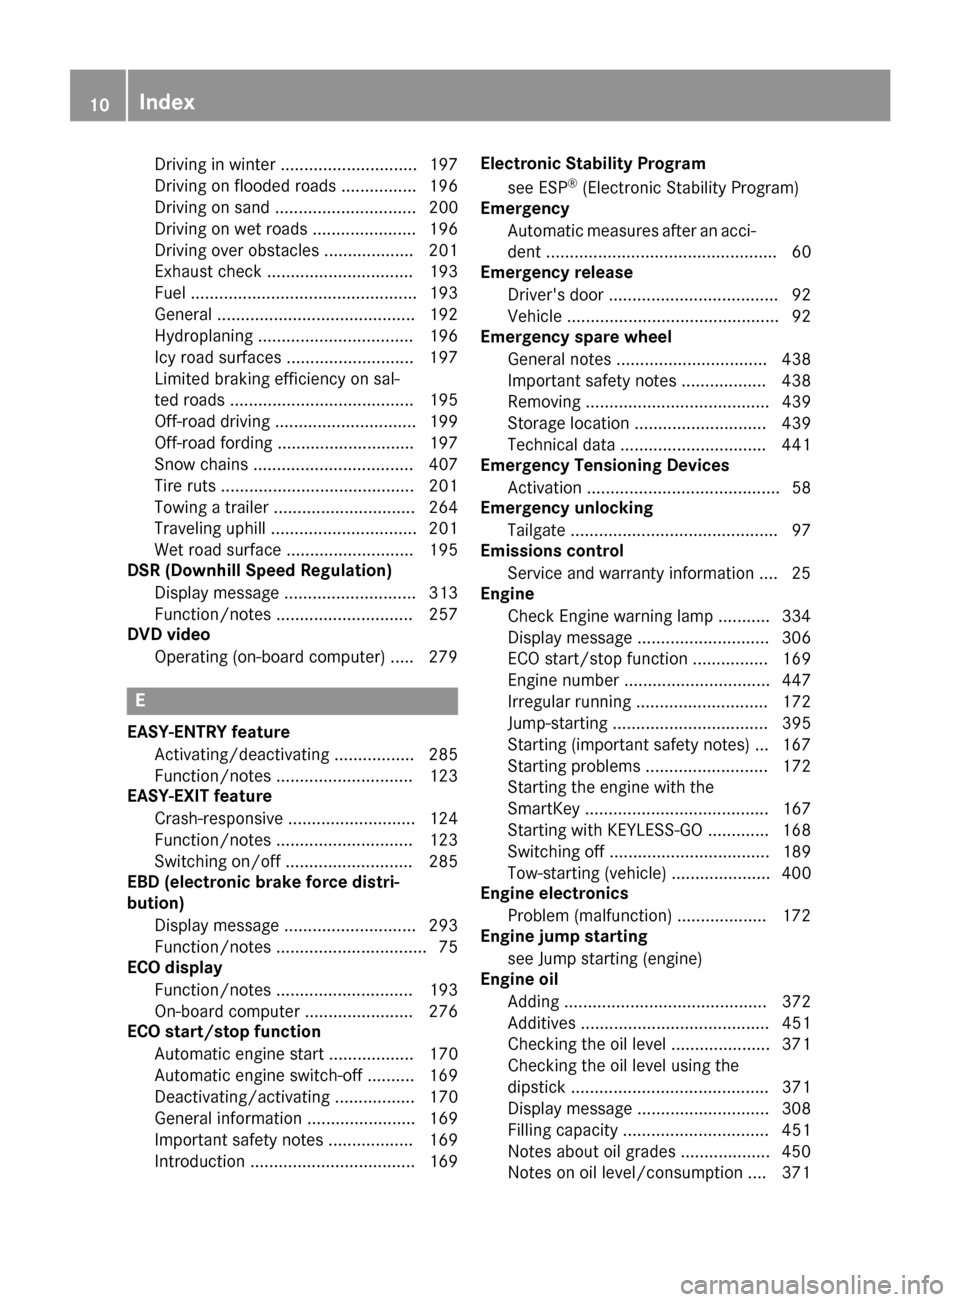
Jump-starting ................................. 395
Starting (important safety notes) ... 167
Starting problems .......................... 172
Starting the engine with the
SmartKey ....................................... 167
Starting with KEYLESS-GO ............. 168
Switching off .................................. 189
Tow-starting (vehicle) ..................... 400
Engine electronics
Problem (malfunction) ................... 172
E
ngine jump starting
see Jump starting (engine)
Engine oil
Adding ........................................... 372
Additives ........................................ 451
Checking the oil level ..................... 371
Checking the oil level using the
dipstick .......................................... 371
Display message ............................ 308
Filling capacity ............................... 451
Notes about oil grades ................... 450
Notes on oil level/consumption .... 371
10Index
Page 14 of 462
Synchronizing the rolling code ....... 366
Gear indicator (on-board com-
puter, Mercedes-AMG vehicles) ....... 287
Genuine parts ...................................... 24
Glove box ........................................... 341
GTW (Gross Trailer Weight) (defini-
tion) .................................................... 425
H
Handbrake
see Parking brake
Hazard warning lamps ...................... 133
Head restraints
Adjusting ....................................... 110
Adjusting (electrically) ................... 111
Adjusting (manually) ...................... 111
Adjusting (rear) .............................. 112
Installing/removing (rear) .............. 112
Luxury ............................................ 112
Headlamps
Fogging up ..................................... 135
see Automatic headlamp mode
Heating
see Climate control
High-beam headlamps
Adaptive Highbeam Assist ............. 134
Changing bulbs .............................. 138
Display message ............................ 304
Switching on/off ........................... 132
Hill start assist .................................. 168
HOLD function
Deactivating ................................... 218
Display message ............................ 313
Function/notes ............................. 217
Hood
Closing ........................................... 371
Display message ............................ 322
Important safety notes .................. 370
Opening ......................................... 370
Horn ...................................................... 34
Hydroplaning ..................................... 196
I
Ignition lock
see Key positions
Immobilizer .......................................... 78 Indicator lamps
see Warning and indicator lamps
Indicators
see Turn signals
Insect protection on the radiator .... 371
Instrument cluster
Overview .......................................... 35
Warning and indicator lamps ........... 36
Instrument cluster lighting .............. 272
Interior lighting
Automatic control .......................... 136
Delayed switch-off (on-board
computer) ...................................... 285
Emergency lighting ........................ 136
Manual control ............................... 136
Overview ........................................ 135
Reading lamp ................................. 135
Setting the brightness of the
ambient lighting (on-board com-
puter) ............................................. 284
Setting the color of the ambient
lighting (on-board computer) ......... 284
J
JackStorage location ............................ 386
Using ............................................. 429
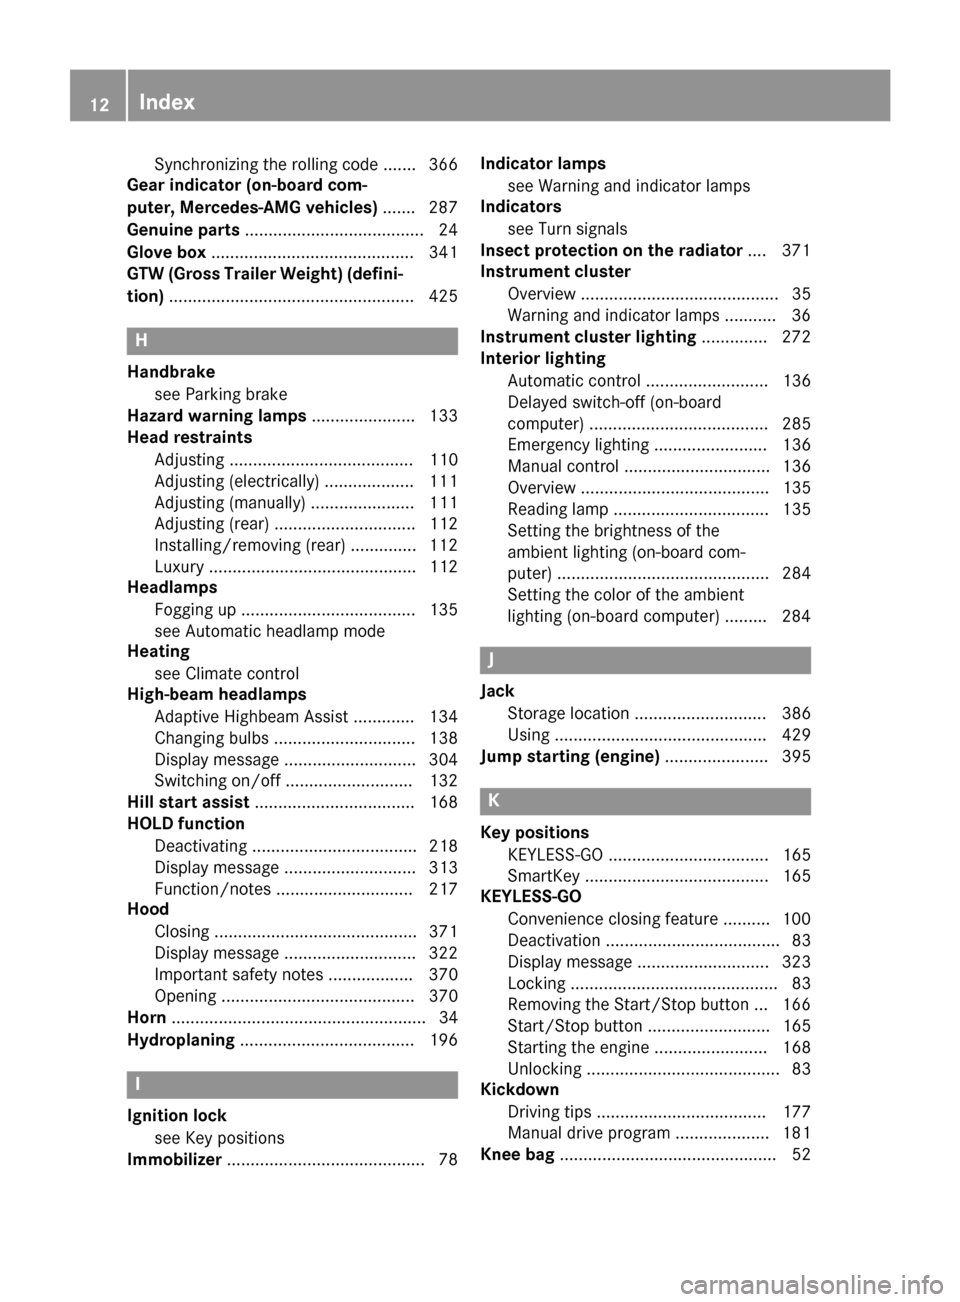
Jump starting (engine) ...................... 395
K
Key positions
KEYLESS-GO .................................. 165
SmartKey ....................................... 165
KEYLESS-GO
Convenience closing feature .......... 100
Deactivation ..................................... 83
Display message ............................ 323
Locking ............................................ 83
Removing the Start/Stop button ... 166
Start/Stop button .......................... 165
Starting the engine ........................ 168
Unlocking ......................................... 83
Kickdown
Driving tips .................................... 177
Manual drive program .................... 181
Knee bag .............................................. 52
12Index
Page 90 of 462
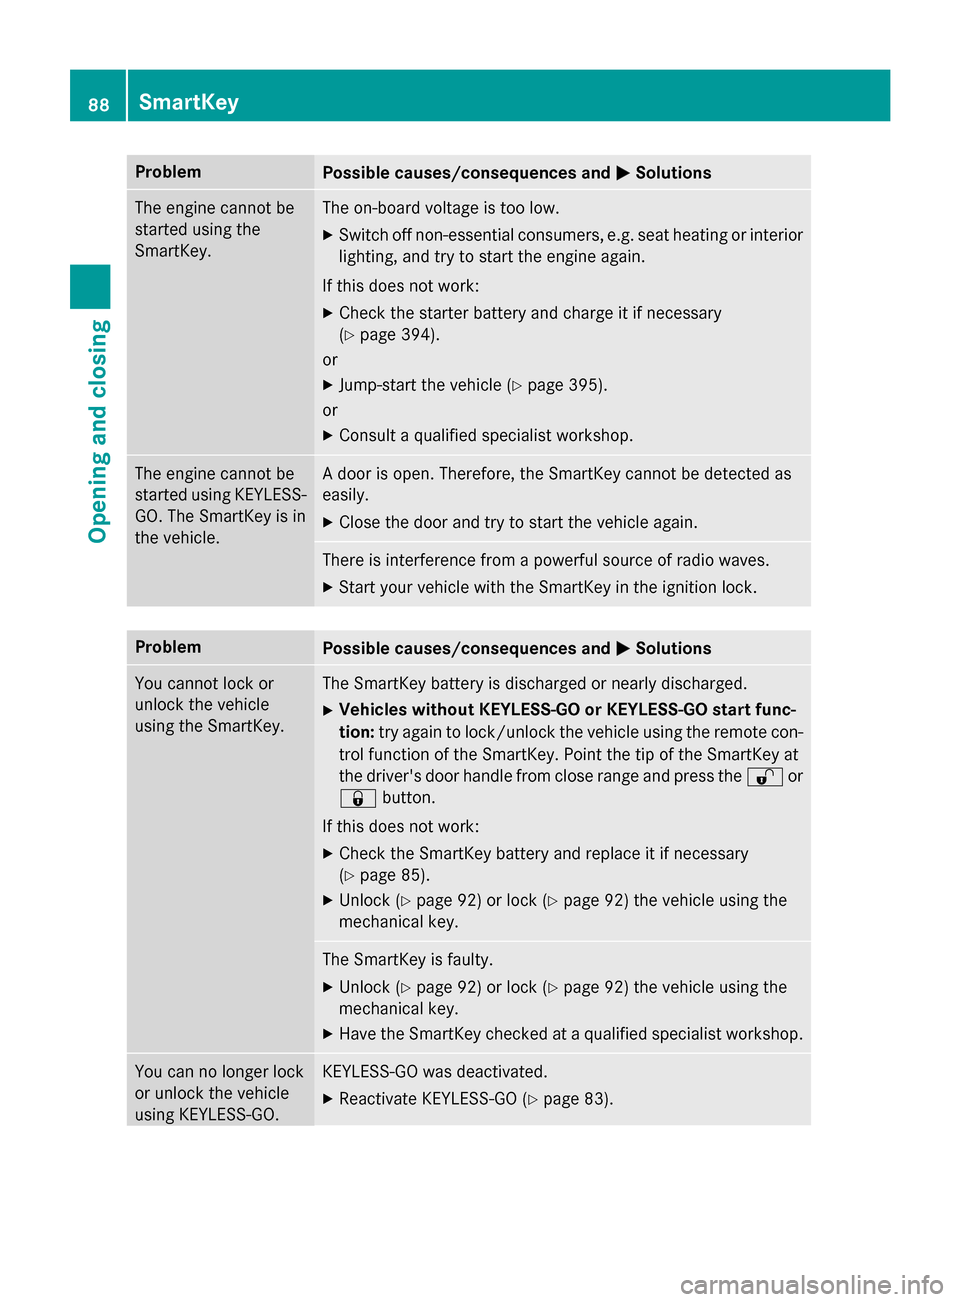
ProblemPossible causes/consequences andMSolutions
The engine cannot be
started using the
SmartKey.The on-board voltage is too low.
XSwitch off non-essential consumers, e.g. seat heating or interior
lighting, and try to start the engine again.
If this does not work:
XCheck the starter battery and charge it if necessary
(
Ypage 394).
or
XJump-start the vehicle (Ypage 395).
or
XConsult a qualified specialist workshop.
The engine cannot be
started using KEYLESS-
GO. The SmartKey is in
the vehicle.A door is open. Therefore, the SmartKey cannot be detected as
easily.
XClose the door and try to start the vehicle again.
There is interference from a powerful source of radio waves.
XStart your vehicle with the SmartKey in the ignition lock.
ProblemPossible causes/consequences and MSolutions
You cannot lock or
unlock the vehicle
using the SmartKey.The SmartKey battery is discharged or nearly discharged.
XVehicles without KEYLESS-GO or KEYLESS-GO start func-
tion:try again to lock/unlock the vehicle using the remote con-
trol function of the SmartKey. Point the tip of the SmartKey at
the driver's door handle from close range and press the %or
& button.
If this does not work:
XCheck the SmartKey battery and replace it if necessary
(
Ypage 85).
XUnlock (Ypage 92) or lock (Ypage 92) the vehicle using the
mechanical key.
The SmartKey is faulty.
XUnlock (Ypage 92) or lock (Ypage 92) the vehicle using the
mechanical key.
XHave the SmartKey checked at a qualified specialist workshop.
You can no longer lock
or unlock the vehicle
using KEYLESS-GO.KEYLESS-GO was deactivated.
XReactivate KEYLESS-GO (Ypage 83).
88SmartKey
Opening and closing
Page 91 of 462
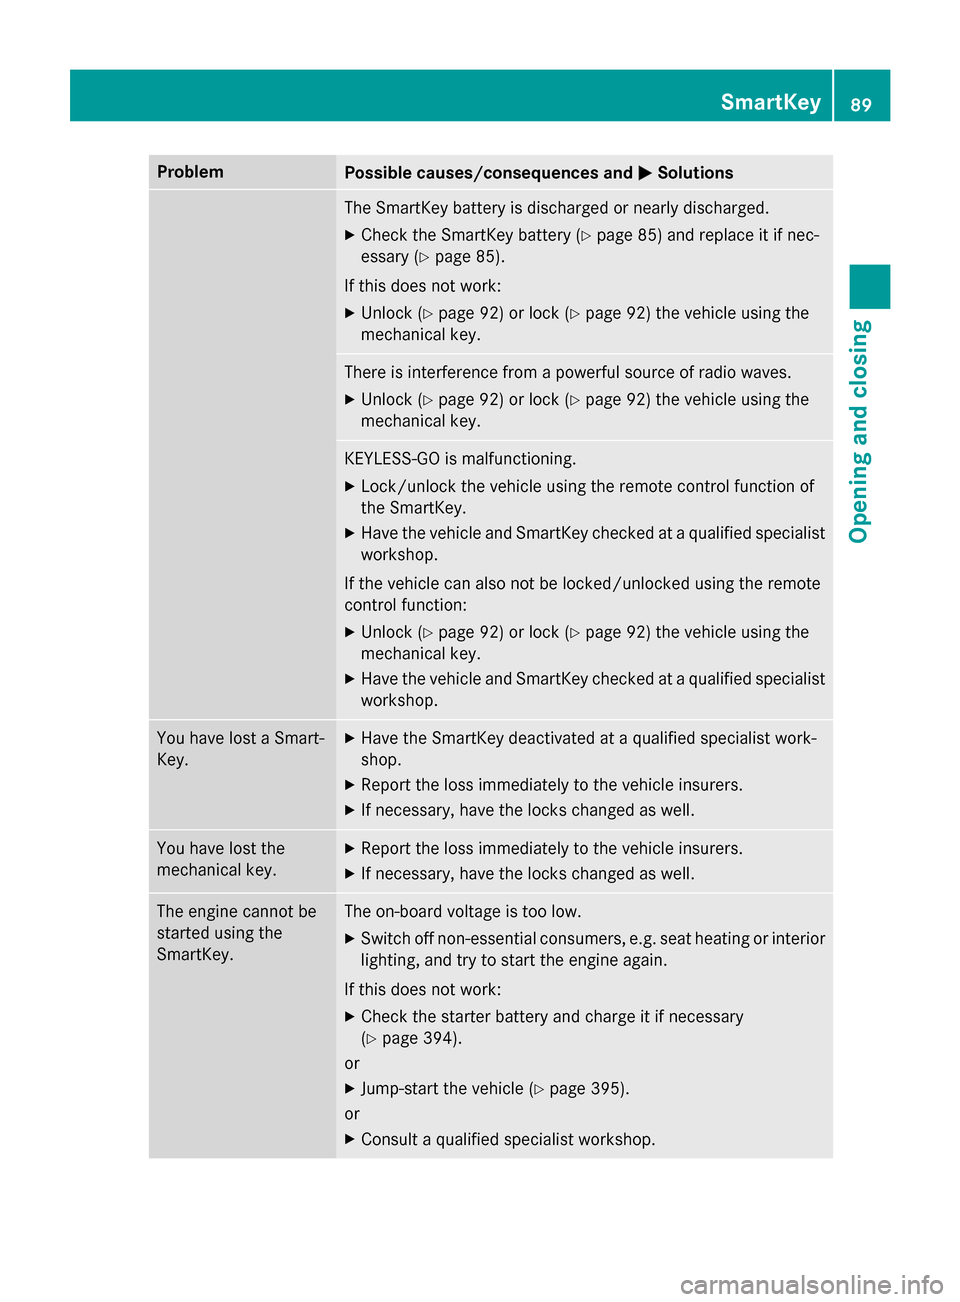
ProblemPossible causes/consequences andMSolutions
The SmartKey battery is discharged or nearly discharged.
XCheck the SmartKey battery (Ypage 85) and replace it if nec-
essary (
Ypage 85).
If this does not work:
XUnlock (Ypage 92) or lock (Ypage 92) the vehicle using the
mechanical key.
There is interference from a powerful source of radio waves.
XUnlock (Ypage 92) or lock (Ypage 92) the vehicle using the
mechanical key.
KEYLESS-GO is malfunctioning.
XLock/unlock the vehicle using the remote control function of
the SmartKey.
XHave the vehicle and SmartKey checked at a qualified specialist
workshop.
If the vehicle can also not be locked/unlocked using the remote
control function:
XUnlock (Ypage 92) or lock (Ypage 92) the vehicle using the
mechanical key.
XHave the vehicle and SmartKey checked at a qualified specialist
workshop.
You have lost a Smart-
Key.XHave the SmartKey deactivated at a qualified specialist work-
shop.
XReport the loss immediately to the vehicle insurers.
XIf necessary, have the locks changed as well.
You have lost the
mechanical key.XReport the loss immediately to the vehicle insurers.
XIf necessary, have the locks changed as well.
The engine cannot be
started using the
SmartKey.The on-board voltage is too low.
XSwitch off non-essential consumers, e.g. seat heating or interior
lighting, and try to start the engine again.
If this does not work:
XCheck the starter battery and charge it if necessary
(
Ypage 394).
or
XJump-start the vehicle (Ypage 395).
or
XConsult a qualified specialist workshop.
SmartKey89
Opening and closing
Z
Page 174 of 462
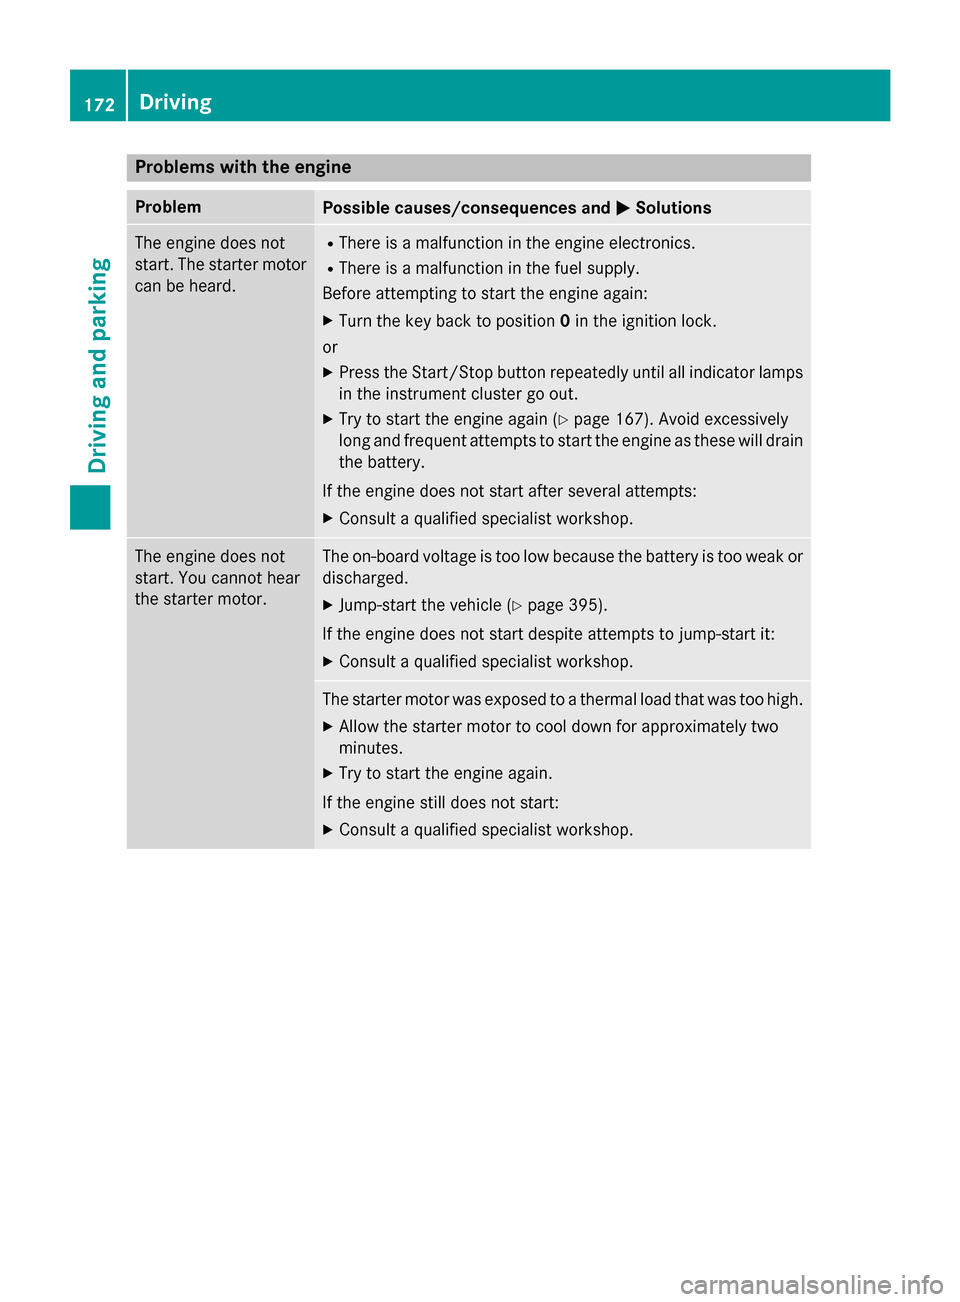
Problems with the engine
ProblemPossible causes/consequences andMSolutions
The engine does not
start. The starter motor
can be heard.RThere is a malfunction in the engine electronics.
RThere is a malfunction in the fuel supply.
Before attempting to start the engine again:
XTurn the key back to position 0in the ignition lock.
or
XPress the Start/Stop button repeatedly until all indicator lamps in the instrument cluster go out.
XTry to start the engine again (Ypage 167). Avoid excessively
long and frequent attempts to start the engine as these will drain
the battery.
If the engine does not start after several attempts:
XConsult a qualified specialist workshop.
The engine does not
start. You cannot hear
the starter motor.The on-board voltage is too low because the battery is too weak or
discharged.
XJump-start the vehicle (Ypage 395).
If the engine does not start despite attempts to jump-start it:
XConsult a qualified specialist workshop.
The starter motor was exposed to a thermal load that was too high.
XAllow the starter motor to cool down for approximately two
minutes.
XTry to start the engine again.
If the engine still does not start:
XConsult a qualified specialist workshop.
172Driving
Driving and parking
Page 201 of 462
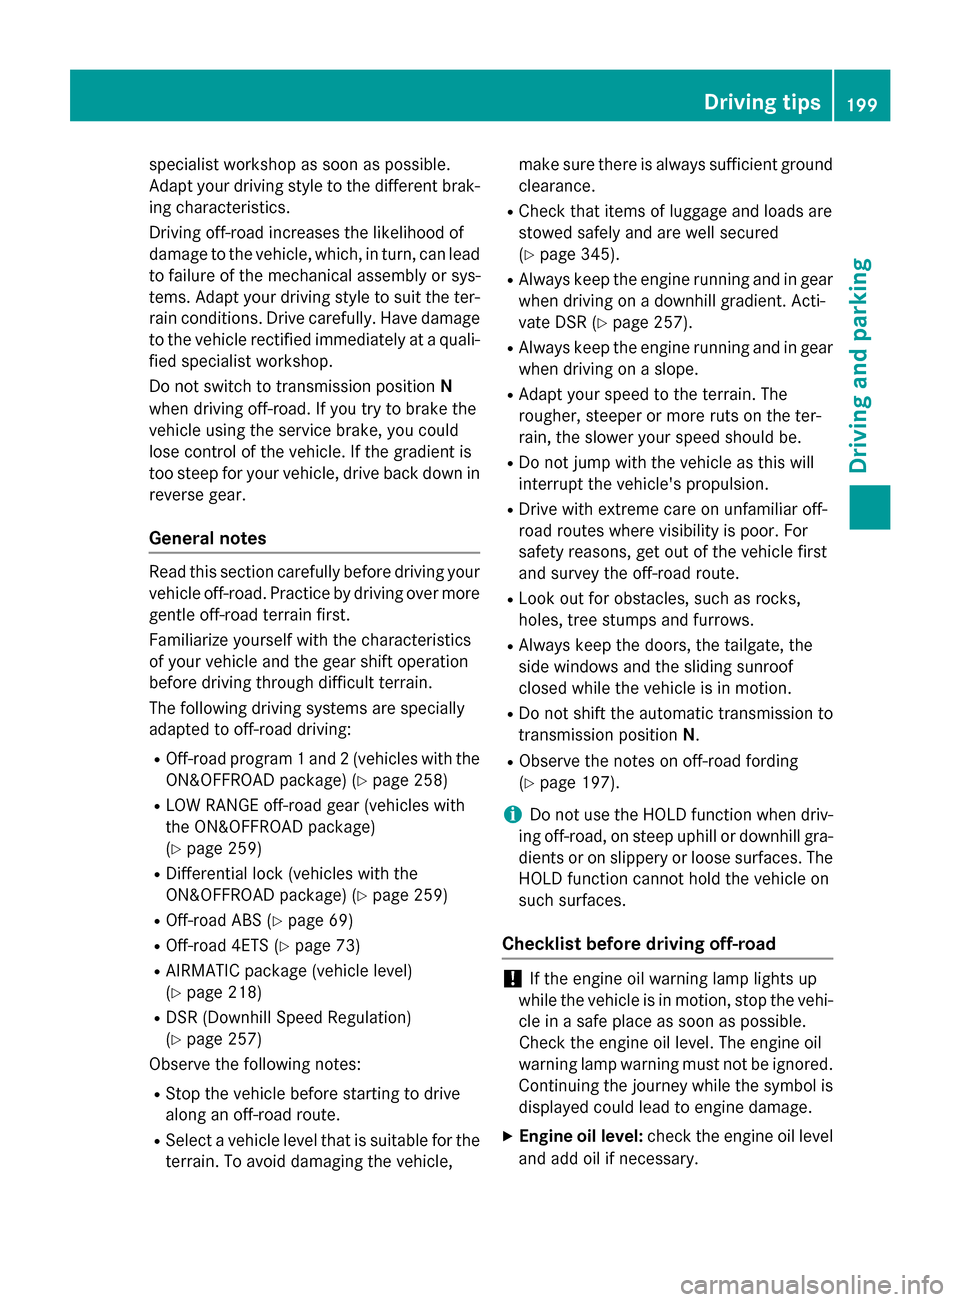
specialist workshop as soon as possible.
Adapt your driving style to the different brak-
ing characteristics.
Driving off-road increases the likelihood of
damage to the vehicle, which, in turn, can lead
to failure of the mechanical assembly or sys-
tems. Adapt your driving style to suit the ter-
rain conditions. Drive carefully. Have damage
to the vehicle rectified immediately at a quali-
fied specialist workshop.
Do not switch to transmission positionN
when driving off-road. If you try to brake the
vehicle using the service brake, you could
lose control of the vehicle. If the gradient is
too steep for your vehicle, drive back down in
reverse gear.
General notes
Read this section carefully before driving your
vehicle off-road. Practice by driving over more
gentle off-road terrain first.
Familiarize yourself with the characteristics
of your vehicle and the gear shift operation
before driving through difficult terrain.
The following driving systems are specially
adapted to off-road driving:
ROff-road program 1 and 2 (vehicles with the
ON&OFFROAD package) (
Ypage 258)
RLOW RANGE off-road gear (vehicles with
the ON&OFFROAD package)
(
Ypage 259)
RDifferential lock (vehicles with the
ON&OFFROAD package) (
Ypage 259)
ROff-road ABS (Ypage 69)
ROff-road 4ETS (Ypage 73)
RAIRMATIC package (vehicle level)
(
Ypage 218)
RDSR (Downhill Speed Regulation)
(
Ypage 257)
Observe the following notes:
RStop the vehicle before starting to drive
along an off-road route.
RSelect a vehicle level that is suitable for the
terrain. To avoid damaging the vehicle, make sure there is always sufficient ground
clearance.
RCheck that items of luggage and loads are
stowed safely and are well secured
(
Ypage 345).
RAlways keep the engine running and in gear
when driving on a downhill gradient. Acti-
vate DSR (
Ypage 257).
RAlways keep the engine running and in gear
when driving on a slope.
RAdapt your speed to the terrain. The
rougher, steeper or more ruts on the ter-
rain, the slower your speed should be.
RDo not jump with the vehicle as this will
interrupt the vehicle's propulsion.
RDrive with extreme care on unfamiliar off-
road routes where visibility is poor. For
safety reasons, get out of the vehicle first
and survey the off-road route.
RLook out for obstacles, such as rocks,
holes, tree stumps and furrows.
RAlways keep the doors, the tailgate, the
side windows and the sliding sunroof
closed while the vehicle is in motion.
RDo not shift the automatic transmission to
transmission position N.
RObserve the notes on off-road fording
(
Ypage 197).
iDo not use the HOLD function when driv-
ing off-road, on steep uphill or downhill gra-
dients or on slippery or loose surfaces. The
HOLD function cannot hold the vehicle on
such surfaces.
Checklist before driving off-road
!If the engine oil warning lamp lights up
while the vehicle is in motion, stop the vehi- cle in a safe place as soon as possible.
Check the engine oil level. The engine oil
warning lamp warning must not be ignored.
Continuing the journey while the symbol is
displayed could lead to engine damage.
XEngine oil level: check the engine oil level
and add oil if necessary.
Driving tips199
Driving and parking
Z
Page 387 of 462
Useful information............................386
Where will I find...? ...........................386
Flat tire .............................................. 387
Battery (vehicle) ................................ 391
Jump-starting .................................... 395
Towing and tow-starting ..................397
Fuses .................................................. 400
385
Breakdown assistance
Page 394 of 462
fore have all work involving the battery car-
ried out at a qualified specialist workshop.
GWARNING
Work carried out incorrectly on the battery
can lead, for example, to a short circuit and
thus damage the vehicle electronics. This can
lead to function restrictions applying to
safety-relevant systems, e.g the lighting sys-
tem, the ABS (anti-lock braking system) or the
ESP
®(Electronic Stability Program). The oper-
ating safety of your vehicle may be restricted.
You could lose control of the vehicle, for
example:
Rwhen braking
Rin the event of abrupt steering maneuvers
and/or when the vehicle's speed is not
adapted to the road conditions
There is a risk of an accident.
In the event of a short circuit or a similar inci-
dent, contact a qualified specialist workshop
immediately. Do not drive any further. You
should have all work involving the battery car- ried out at a qualified specialist workshop.
iFor further information about ABS and
ESP®, see (Ypage 68) and (Ypage 73).
GWARNING
Electrostatic build-up can lead to the creation of sparks, which could ignite the highly explo-
sive gases of a battery. There is a risk of an
explosion.
Before handling the battery, touch the vehicle
body to remove any existing electrostatic
build-up.
The highly flammable gas mixture forms when
charging the battery as well as when jump-
starting. Always make sure that neither you nor the
battery is electrostatically charged. A build-
up of electrostatic charge can be caused, for
example:
Rby wearing clothing made from synthetic
fibers
Rdue to friction between clothing and seats
Rif you push or pull the battery across the
carpet or other synthetic materials
Rif you wipe the battery with a cloth
GWARNING
During the charging process, a battery produ-
ces hydrogen gas. If a short circuit occurs or
sparks are created, the hydrogen gas can
ignite. There is a risk of an explosion.
RMake sure that the positive terminal of a
connected battery does not come into con- tact with vehicle parts.
RNever place metal objects or tools on a bat-
tery.
RIt is important that you observe the descri-
bed order of the battery terminals when
connecting and disconnecting a battery.
RWhen jump-starting, make sure that the
battery poles with identical polarity are
connected.
RIt is particularly important to observe the
described order when connecting and dis-
connecting the jumper cables.
RNever connect or disconnect the battery
terminals while the engine is running.
GWARNING
Battery acid is caustic. There is a risk of injury.
Avoid contact with skin, eyes or clothing. Do
not inhale any battery gases. Do not lean over
the battery. Keep children away from batter-
ies. Wash away battery acid immediately with
plenty of clean water and seek medical atten-
tion.
392Battery (vehicle)
Breakdown assistance
Page 396 of 462
qualified specialist workshop for further infor-
mation.
Have the battery condition of charge checked
more frequently if you use the vehicle mainly
for short trips or if you leave it standing idle
for a lengthy period. Consult a qualified spe-
cialist workshop if you wish to leave your
vehicle parked for a long period of time.
Remove the SmartKey if you park the vehicle
and do not require any electrical consumers.
The vehicle will then use very little energy,
thus conserving battery power.
iIf the power supply has been interrupted,
e.g. if you reconnect the battery, you will
have to:
Rset the clock. Information on setting the
clock can be found in the Digital Opera-
tor's Manual.
On vehicles with COMAND and a naviga-
tion system, the clock is set automati-
cally.
Rreset the function for folding the exterior mirrors in/out automatically, by folding
the mirrors out once (
Ypage 125).
Charging the battery
GWARNING
During charging and jump-starting, explosive
gases can escape from the battery. There is a risk of an explosion.
Particularly avoid fire, open flames, creating
sparks and smoking. Ensure there is sufficient
ventilation while charging and jump-starting.
Do not lean over a battery.
GWARNING
Battery acid is caustic. There is a risk of injury.
Avoid contact with skin, eyes or clothing. Do
not inhale any battery gases. Do not lean over
the battery. Keep children away from batter-
ies. Wash away battery acid immediately with
plenty of clean water and seek medical atten-
tion.
GWARNING
A discharged battery can freeze at tempera-
tures below freezing point. When jump-start-
ing the vehicle or charging the battery, gases can escape from the battery. There is a risk of
an explosion.
Allow the frozen battery to thaw out before
charging it or jump-starting.
!Only use battery chargers with a maxi-
mum charging voltage of 14.8 V.
!Only charge the battery using the jump-
starting connection point.
If, at low temperatures, the indicator lamps/
warning lamps in the instrument cluster do
not light up, it is highly likely that the dis-
charged battery has frozen. In this case you
may neither jump-start the vehicle nor charge
the battery. The service life of a thawed-out
battery may be shorter. The starting charac-
teristics can be impaired, particularly at low
temperatures. Have the thawed-out battery
checked at a qualified specialist workshop.
Never charge the battery if it is still installed in
the vehicle, unless you use a battery charger
which has been tested and approved by
Mercedes-Benz. A battery charger unit spe-
cially adapted for Mercedes-Benz vehicles
and tested and approved by Mercedes-Benz
is available as an accessory. It permits the
charging of the battery in its installed posi-
tion. Contact an authorized Mercedes-Benz
Center for further information and availabil-
ity. Charge the battery in accordance with the
separate instructions for the battery charger.
The jump-starting connection point is in the
engine compartment (
Ypage 395).
Read the battery charger's operating instruc-
tions before charging the battery.
XOpen the hood.
XConnect the battery charger to the positive terminal and ground point in the same
order as when connecting the donor bat-
tery in the jump-starting procedure
(
Ypage 395).
394Battery (vehicle)
Breakdown assistance