check oil MERCEDES-BENZ GL SUV 2012 Owners Manual
[x] Cancel search | Manufacturer: MERCEDES-BENZ, Model Year: 2012, Model line: GL SUV, Model: MERCEDES-BENZ GL SUV 2012Pages: 441, PDF Size: 10.66 MB
Page 14 of 441
Removin
g....................................... 415
Storage locatio n............................ 415
Techn ical data ............................... 417
Emergency unl ocking
Ta ilgate ............................................ 88
Veh icle ............................................ .84
Engine
Display message ............................ 304
ECO start/stop function ................163
Engine numb er............................... 423
Jump-starting ................................. 386
Runnin girregularl y......................... 166
Starting pro blems .......................... 166
Starting the engine wit hthe key ....161
Starting with KEYLESS GO .............161
Stopp ing. ....................................... 182
To w-st arting (vehicle )..................... 391
Warning lamp (eng ined iagnos-
tics) ............................................... 333
En gine electronics
Notes ............................................. 421
Pro blem (fault) ............................... 166
En gine oil
Additives ........................................ 429
Checking the oil level ...... ............... 362
Checking the oil leve lusing the
dipstick .......................................... 362
Display message ............................ 305
Fil ling capacity ............................... 428
Note sabout oil grades ...... ............. 428
Notes on oil level/cons umption.... 362
Temperat ure( on-board computer) .286
Topping up ..................................... 362
Viscosity ........................................ 429
En vironmental protection
Returning an end-of-life vehicle .......23
ESP ®
(Electronic Stability Pro-
gram) 4ETS ................................................ 66
AMG menu (on-bo ardc omputer )... 287
Deactivating/activating ...................67
Display message ............................ 291
Function/notes ................................ 66
Important safety gu idelines ............. 66
Traile rstabilisatio n.......................... 67
Warn ingl am p................................. 329
Exhaus tpipe (cleaning instruc-
tions) .................................................. 371Exterio
rlighting
see Lights
Exterior mirrors
Adjustin g....................................... 112
Anti-dazzle mod e(automatic) ........114
Fol ding in/ou t(automatically )....... 113
Fol ding in/ou t(electrically) ...........113
Fol ding in whe nlocki ng(on-board
computer) ...................................... 285
Ou tofp osition (troubleshooting) ...113
Parking positio n............................. 114
Resetting ....................................... 113
Storing settings (memory func-
tion) ............................................... 115 F
Faul tmessage
see Display messages
Filler cap
see Fuel filler flap
Fire extinguisher ............................... 377
First-aid kit ......................................... 376
Fittin gawheel
Removin gawheel .......................... 407
Fitting wheels
Fittin gaw heel............................... 408
Lowering the veh icle ...................... 409
Rais ingt he vehicle ......................... 406
Securing the veh icle against roll-
ing away ........................................ 405
Flat tyre
MOExtende dtyres ......................... 378
Pre paring th evehicle ..................... 378
TIREFIT kit ...................................... 379
Floormat ............................................ .358
Foglamps (extende drang e).............. 124
Foldin gthe rear be nchs eat for-
wards/back ....................................... 341
Fording Off-road ......................................... 186
On flo oded roads ........................... 186
Frequencies
Garage door op ener ....................... 354
Mobile phone ................................. 421
Tw o-way radio ................................ 421 Index
11
Page 18 of 441
Notes/placing in th
ebracke t........ .351
Transmissio noutput (maximum ).... 421
Modifying the programming (key) .....78
MOExtende dtyres ............................. 378
Motor waym ode ................................ 124
MP3 Operating ...................................... .274
se eS eparate operating instructions
Multifunction display
Function/notes ............................. 270
Permanen tdispla y......................... 280
Multifuncti onsteering wheel
Operating the on-board computer .269
Overview .......................................... 33N
Navigation Menu (on-bo ardc omputer )............ 272
se es eparat eoperating instructions
Nigh tView Assist Plus
Activating/deactivating .................235
Clean ing. ........................................ 371
Problem (fault) ............................... 238
Note sonr unnin ginan ew vehicle ..158 O
Occupant safety Children in the vehicle .....................50
Important safety notes ....................40
Odometer
seeT otal distance recorder
see Trip meter
Off-road driving
Checklist after driving off-road ......190
Ch ecklis tbefore driv ingo ff-roa d.... 189
General information .......................188
Important safety notes ..................188
Travelling uphill .............................. 191
Off-road li ghts ................................... .124
Off-road program (v ehicle without
the ON&OFFROA Dpackage)
Function/notes ............................. 252
Off-road program (v ehicle with the
ON&OFFROA Dpackage)
Off-road program 1........................ 253
Off-road program 2........................ 254Off-road programme
s(vehicles
with th eON&OFFROA Dpackage)
Display sinthe COMAND displa y... 256
Off-road programs (v ehicles with
the ON&OFFROA Dpackage)
Function/notes ............................. 253
Off-road system
4MATIC .......................................... 250
DSR ............................................... 251
LOW RANG Eoff-roa dgear ............. 254
Off-road 4ETS .................................. 66
Off-road ABS .................................... 61
Off-road ESP ®
.................................. 67
Off-road program (ve hicle without
the ON&OFFR OADp ackage) ..........252
Off-road programs (ve hicle with
the ON&OFFR OADp ackage) ..........253
Oil
seeE ngine oil
On and Offroad menu (on-board
computer) .......................................... 286
On-board computer AMG menu ..................................... 286
Assistance menu ........................... 277
Aud iomen u................................... 274
Convenience su bmenu .................. 285
Displaying aserv icem essage ........365
Display message s.......................... 290
DISTRONI CPLUS ........................... 205
Factory settin gsubmenu ............... 286
Heating su bmenu ...... ..................... 284
Important safety note s.................. 266
Instrumen tcluster submenu ..........280
Lig ht subm enu............................... 280
Menu overview .............................. 271
Mess agem emor y.......................... 290
Navigation menu ............................ 272
On and Offro admen u.................... 286
Operating the TV ............................ 275
Operating vid eoDVD ..................... 275
Operatio n....................................... 269
RACETIMER ................................... 287
Service menu ................................. 279
Setting smenu ............................... 279
Standard di splay. ........................... 271
Te lephon emenu ............................ 275
Tri pm enu ...................................... 271
Veh icle submenu ........................... 283 Index
15
Page 177 of 441
Problems wit
hthe transmission Problem Possible causes/consequences and
M Solutions
Th
et rans mission has
problem sshifting gear. The transmission is losing oil.
X
Hav ethe transmission chec kedataq ualified specialist work-
sho pimmediately. Th
ea cceleratio nability
is deteriorating.
The transmission no
longer changes gear. The transmission is in emergency mode.
It is only possible to shift into
secondgear and reverse gear.
X Stop.
X Shift the transmission to position P.
X Switch off the engine.
X Wait at least ten seconds befor erestar tingthe engine.
X Shift the transmission to position Dor R.
If D is selected, the transmission shifts into secondgear; ifRis
selected, the transmission shifts into reverse gear.
X Have the transmission checked at aqualified specialist work-
sho pimmediately. Refuelling
Important safety notes
G
WARNING
Fue lish ighly flammable. If you handle fuel
incorrectly, there is arisk of fire and explo-
sion.
You must avoid fire, naked flames, creating
sparks and smoking. Switch off the engine
and, if applicable, the auxiliary heating before
refuelling. G
WARNING
Fuels are poisonous and hazardous to health.
There is adanger of injury.
Do not swallow fuel or let it come into contact
with skin, eyes or clothing. Do not inhale fuel
vapours. Keep fuels out of the reach of chil-
dren. If you or others come into contact with fuel,
observe the following:
R Wash the fuel off any affected areas of skin
with water and soap immediately.
R If you get fuel in your eyes, rinse them thor-
oughly with clean water immediately. Seek
immediate medical attention.
R If fuel is swallowed, seek immediate medi-
cal attention. Do not induce vomiting.
R Change any clothing that has come into
contact with fuel immediately. G
WARNING
Vehicles with adiesel engine:
If you mix diesel fuel with petrol, the flash
point of this fuel mixture is lower than that of
pure diesel fuel. When the engine is running,
components in the exhaust system may over-
heat unnoticed. There is arisk of fire.
Never refuel with petrol. Never add petrol to
diesel fuel. 174
RefuellingDriving and parking
Page 191 of 441
At the onse
tofwinter, have your vehicle win-
terproofed at aqualified specialist workshop.
Vehicles with th eON&OFFROAD pack-
age: if drivin ginsnow or with snow chains,
select the snow program (Y page 249)with
the off- road program selector wheel in the
centre console.
Observe the notes in the "Winter operation"
section (Y page 398).
Driving with summer tyres Observe the notes in the "Winter operation"
section (Y
page 398).
Slippery road surfaces G
WARNING
If you shift down on aslippery road surfac ein
an attempt to increase the engine's braking
effect ,the drive wheels coul dlose their grip.
This increases the risk of skiddin gand having
an accident.
Do not shift down for additional engine brak-
ing on aslippery road surface.
If the vehicle threaten stoskid or cannot be
stopped whe nmovin gatl ow speed:
X Move the transmission to position N.
X Try to bring the vehicle under con trolby
using corrective steering.
i For more information on driving with
snow chains, see (Y page 399).
You should drive particularly carefully on slip-
pery road surfaces. Avoid sudde naccelera-
tion, steering and brakin gmanoeuvres. Off-road driving
Important safety notes G
WARNING
If you drive up asteep incline at an angle or
turn on asteep incline, the vehicle could slip sideways, tip and overturn. There is
arisk of
an accident.
When drivin gupanincline, drive into the line
of fall (upw ards or downwards in astraight
line) and do not turn. G
WARNING
If the vehicle level is high, the vehicle centre
of gravity is raised .This coul dcause the vehi-
cle to tip over more easily on uphill or downhill
gradients. There is arisk of an accident.
Select the lowest possible vehicle level.
When drivin goff-road, sand, mud and water,
possibly mixe dwith oil, for example, could get
into the brakes. This could result in areduced
braking effect or in total brak efailure and also
in increased wear and tear. The braking char-
acteristic schange depending on the material
ingressing the brakes. Clean the brakes after
driving off-road. If you detec tareduce dbrak-
ing effect or grinding noises, have th ebrake
system checked in aqualified specialist work-
sho pass oon as possible. Adapt your driving
style to the differen tbraking characteristics.
Driving off- road increases the likelihood of
damage to the vehicle, which, in turn, can lead
to failure of the mechanical assembly or sys-
tems. Adapt your driving style to suit the ter-
rain conditions. Drive carefully. Have damage
to the vehicle rectified immediately at aquali-
fied specialist workshop.
Do not switch to transmission position N
when driving off-road. You could lose control
of the vehicle if you attempt to brake using
the service brake. If the gradient is too steep,
drive backwards in reverse gear.
General notes H
Environmental note
Protection of the environment is of primary
importance. Treat nature with respect.
Observe all prohibiting signs. 188
Driving tipsDrivin
gand pa rking
Page 192 of 441
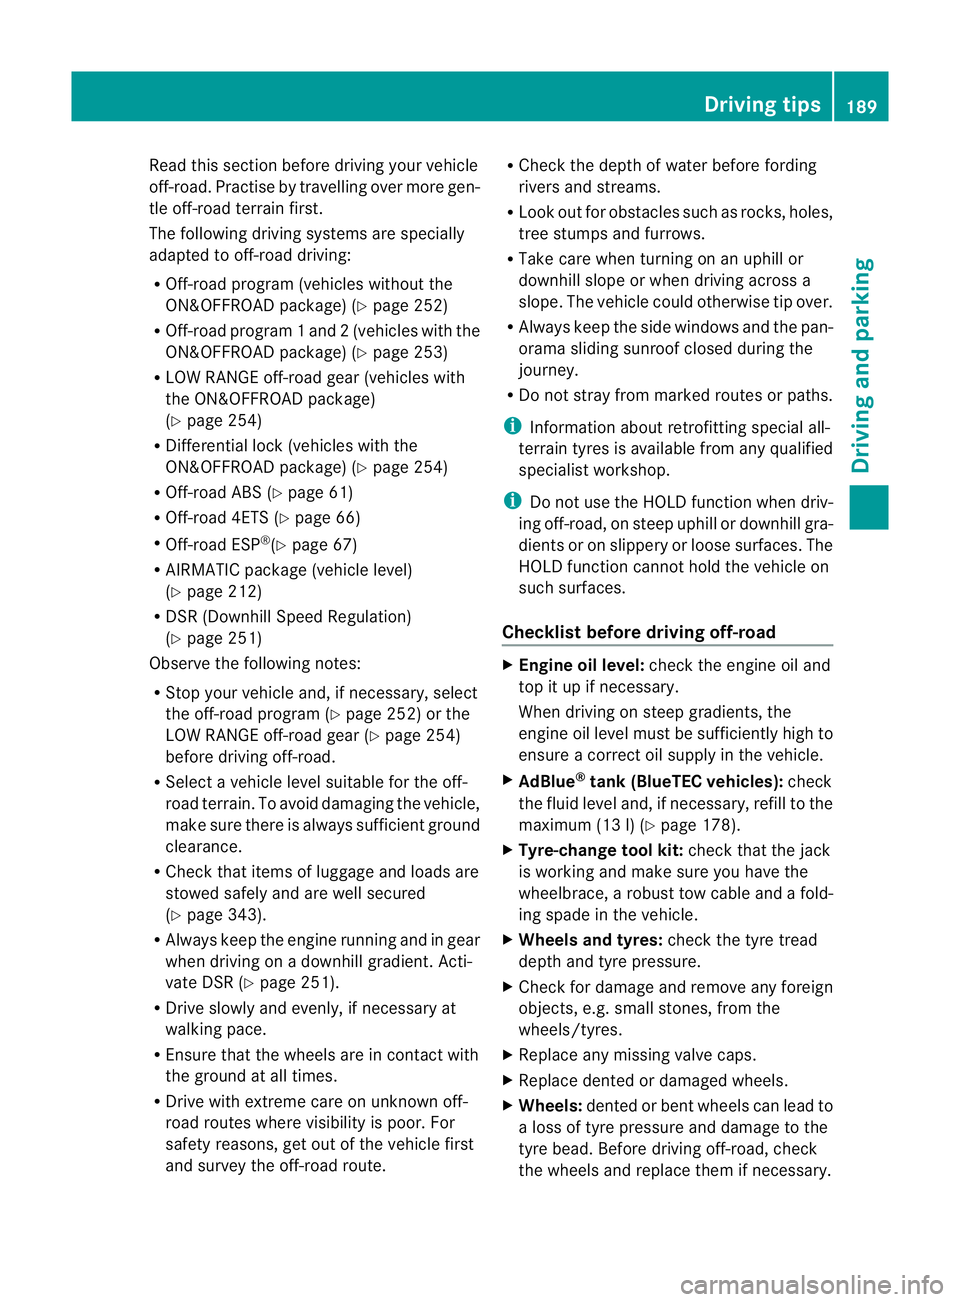
Read this section before drivin
gyour vehicle
off-road. Pra ctisebyt ravelling over more gen-
tle off-road terrain first.
The following driving systems are specially
adapted to off-road driving:
R Off-road program (vehicles without the
ON&OFFROAD package) (Y page 252)
R Off-road program 1and 2(vehicles wit hthe
ON&OFFROAD package) (Y page 253)
R LOW RANGE off-road gear (vehicles with
the ON&OFFROAD package)
(Y page 254)
R Differential lock (vehicles with the
ON&OFFROAD package) (Y page 254)
R Off-road AB S(Ypage 61)
R Off-road 4ETS (Y page 66)
R Off-road ESP ®
(Y page 67)
R AIRMATI Cpackag e(veh icle level)
(Y pag e212)
R DSR (Downh illS peed Regulation)
(Y page 251)
Observe the following notes:
R Stop your vehicle and, if necessary, select
the off-road program (Y page 252)orthe
LOW RANGE off -road gear (Y page 254)
befor edriving off-road.
R Select avehicle level suitable for the off-
road ter rain. To avoid damaging the vehicle,
make sure ther eisalways sufficien tground
cle arance.
R Check that items of luggage and loads are
stowed safel yand are wel lsecur ed
( Y page 343).
R Always keep the engine running and in gear
when driv ingonad ownhill gradient. Acti-
vate DSR (Y page 251).
R Drive slowly and evenly, if necessary at
walking pace.
R Ensure that the wheels ar einc ontact with
the ground at all times.
R Drive with extreme car eonu nknown off-
road routes where visibility is poor. For
safety reasons, get out of the vehicl efirst
and survey the off-road route. R
Check the depth of water before fording
rivers and streams.
R Look out for obstacles such as rocks, holes,
tree stumps and furrows.
R Take care when turning on an uphill or
downhill slop eorwhen driving across a
slope. The vehicle could otherwise tip over.
R Always keep the side windows and the pan-
orama sliding sunroof closed dur ingt he
journey.
R Do not stray from marked routes or paths.
i Information about retrofitting special all-
terrain tyres is available from any qualified
specialist workshop.
i Do not use the HOL Dfunction when driv-
ing off-road, on steep uphill or downhill gra-
dients or on slippery or loos esurfaces. The
HOLD function cannot hold the vehicl eon
suc hsurfaces.
Checklis tbefor edriving off-road X
Engine oil level: check theengine oil and
top it up if necessary.
Whe ndriving on stee pgradients, the
engin eoil level must be sufficiently high to
ensure acorrec toil supply in the vehicle.
X AdBlue ®
tank (BlueTEC vehicles): check
the fluid level and, if necessary, refill to the
maximum (13 l) (Y page 178).
X Tyre-ch ange tool kit: checkthat the jack
is wor king and mak esure you have the
wheelbrace, arobust tow cabl eand afold-
ing spade in the vehicle.
X Wheels and ty res: chec kthe tyr etread
depth and tyre pressure.
X Check for damage and remove any foreign
objects, e.g. small stones, fro mthe
wheels/tyres.
X Replace any missing valv ecaps.
X Replace dented or damaged wheels.
X Wheels: dented or bent wheel scan lead to
al oss of tyr epressure and damag etot he
tyr eb ead. Before driving off-road, check
the wheels and replace them if necessary. Driving tips
189Driving and parking Z
Page 308 of 441
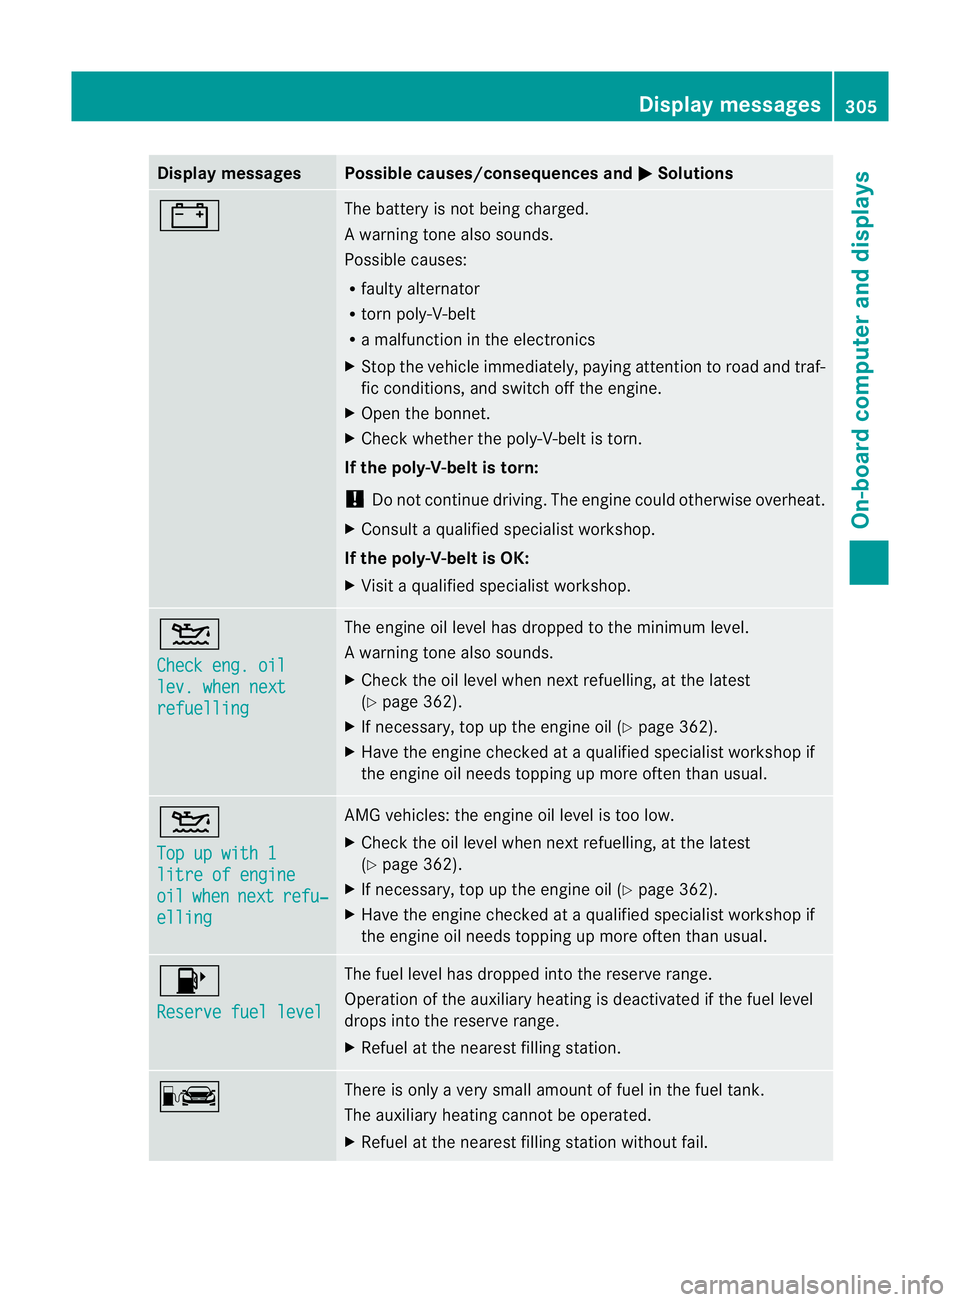
Displa
ymessages Possible causes/consequences and
M Solutions
# The battery is no
tbeing charged.
Aw arning ton ealso sounds.
Possible causes:
R fault yalternator
R torn poly-V-belt
R am alfunction in the elect ronics
X Stop the vehicle immediately, paying attention to road and traf-
fic conditions, and switch off the engine.
X Open the bonnet.
X Check whether the poly-V-belt is torn.
If the poly-V-belt is torn:
! Do not continue driving. The engine could otherwise overheat.
X Consult aqualified specialist workshop.
If the poly-V-belt is OK:
X Visit aqualified specialist workshop. 4
Chec
keng. oil lev. when next
refuelling Th
ee ngine oil level has dropped to the minimum level.
Aw arning ton ealso sounds.
X Chec kthe oil level when nex trefuelling, at the latest
(Y page 362).
X If necessary, top up the engine oil (Y page 362).
X Hav ethe engin echecked at aqualified specialist worksho pif
the engine oil needs topping up more often than usual. 4
Top up wit
h1 litre of engine
oil when next refu‐
elling AM
Gvehicles: the engine oil level is too low.
X Check the oil level when next refuelling, at the latest
(Y page 362).
X If necessary, top up the engine oil (Y page 362).
X Hav ethe engin echecked at aqualified specialist worksho pif
the engine oil needs topping up more often than usual. 8
Reserv
efuel level Th
ef uel level has dropped into the reserve range.
Operation of the auxiliary heating is deactivated if the fuel level
drops into the reserve range.
X Refuel at the nearest filling station. C There is only
avery small amount of fuel in the fuel tank.
The auxiliary heatin gcannot be operated.
X Refuel at the nearest filling station without fail. Display messages
305On-board computer and displays Z
Page 365 of 441
X
Lower th ebonnet and let it fal lfrom a
heig ht of approx imately 20 cm.
X Check that the bonnet has engaged prop-
erly.
If the bonnet can be raised slightly, it is not
properly engaged. Open it again and close
it with alittle more force. Radiator
Vehicles with adiesel engine: do not cover
the radiator .Donot use therma lmats, insect
protection covers or anything similar. Doing
so can cause the Onboard Diagnostics Sys-
tem to display inaccurat evalues. Some of
these values are legally required and must
always be correct. Engin
eoil
Genera lnotes Dependin
gonyour drivin gstyle, the vehicle
consumes up to 0.8 lofoil per 1,00 0km. The
oi lc onsumption ma ybehigher than this when
the vehicle is new or if you frequently drive at
high engine speeds.
Dependin gonthe engine, the oil dipstick may
be installed at adifferent location.
When checking the oil level:
R park the vehicle on alevel surface.
R the engine should be switched off for
approximately fiv eminutes if the engine is
at normal operating tempera ture.
R if the engine is not at normal operating
tempera ture,e.g. if the engine was only
started briefly, wait about 30 minutes
before carrying out the measurement. Checkin
gthe oi llevel using the oil dip-
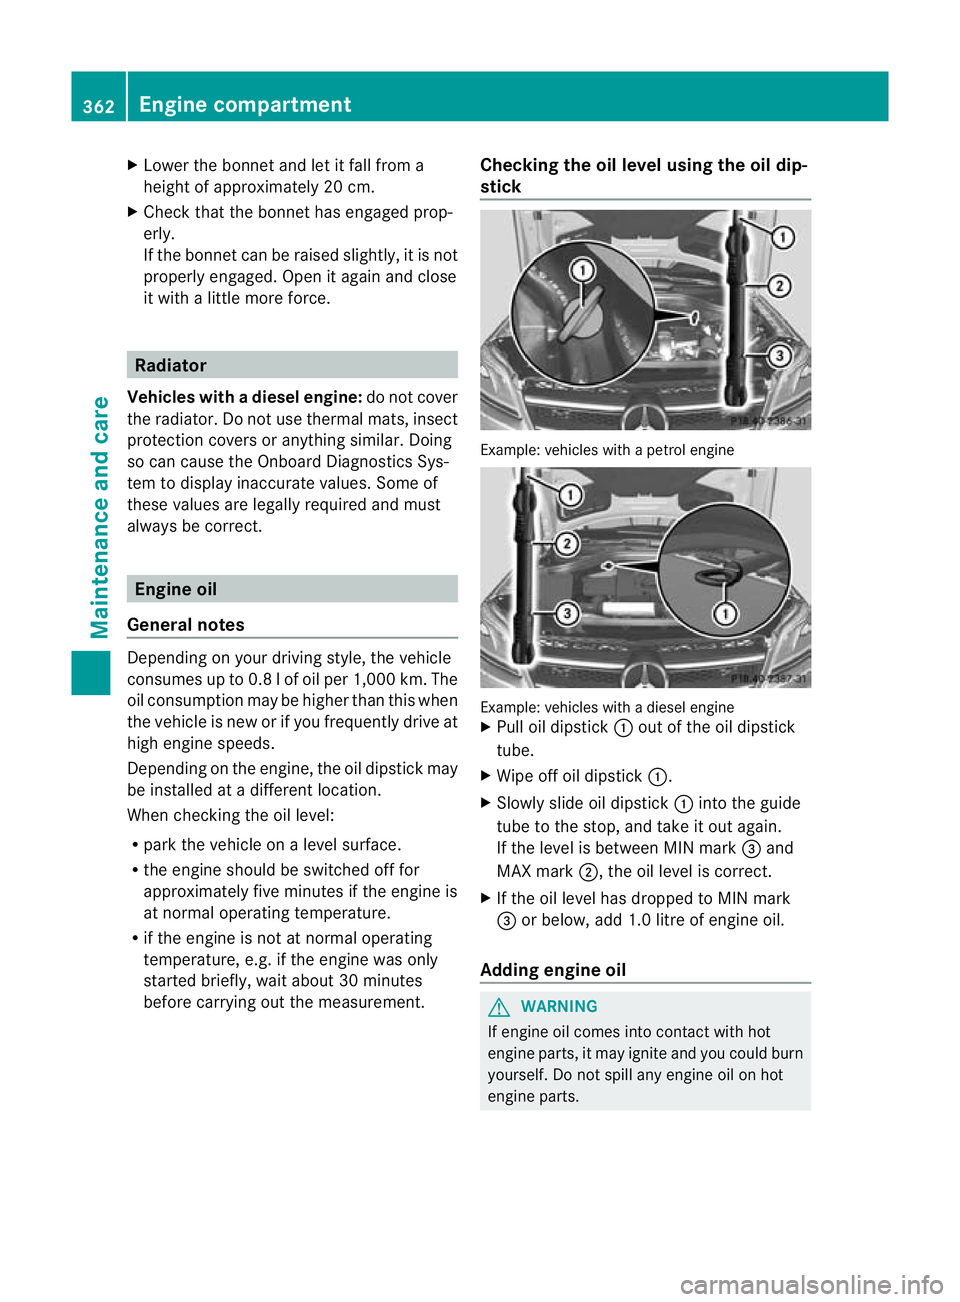
stick Example: vehicles with
apetrol engine Example: vehicles with
adiesel engine
X Pull oil dipstick :out of the oil dipstick
tube.
X Wipe off oil dipstick :.
X Slowly slide oil dipstick :into the guide
tube to the stop, and take it out again.
If the level is between MIN mark =and
MAX mark ;,the oil level is correct.
X If the oil level has dropped to MIN mark
= or below, add 1. 0litre of engine oil.
Adding engine oil G
WARNING
If engine oil comes into contact with hot
engine parts, it may ignite and you could burn
yourself .Donot spill any engin eoil on hot
engine parts. 362
Engine compartmentMaintenance and care
Page 366 of 441
H
Environmenta
lnote
When toppin guptheoil, tak ecaren ot to spill
any .Ifo il enters th esoil or waterways, it is
harmful to th eenvironment.
! Only use engine oil sand oil filters that
have bee napproved for vehicles with a
servic esystem. You can obtain alist of the
engine oils and oil filters tested and
approved in accordance with the
Mercedes-Ben zSpecification sfor Service
Product satany Mercedes-Ben zService
Centre.
Damage to th eengine or exhaust sys temis
caused by the following:
R using engine oil sand oil filters that have
not bee nspecifically approved for the
servic esystem
R changing the engine oil and oil filter after
missing the change interval required by
the servic esystem
R using engine oil additives
! Do not add too muc hoil. Toppin gupwith
to om uche ngine oil can resul tindamage
to the engine or to the catalytic converter.
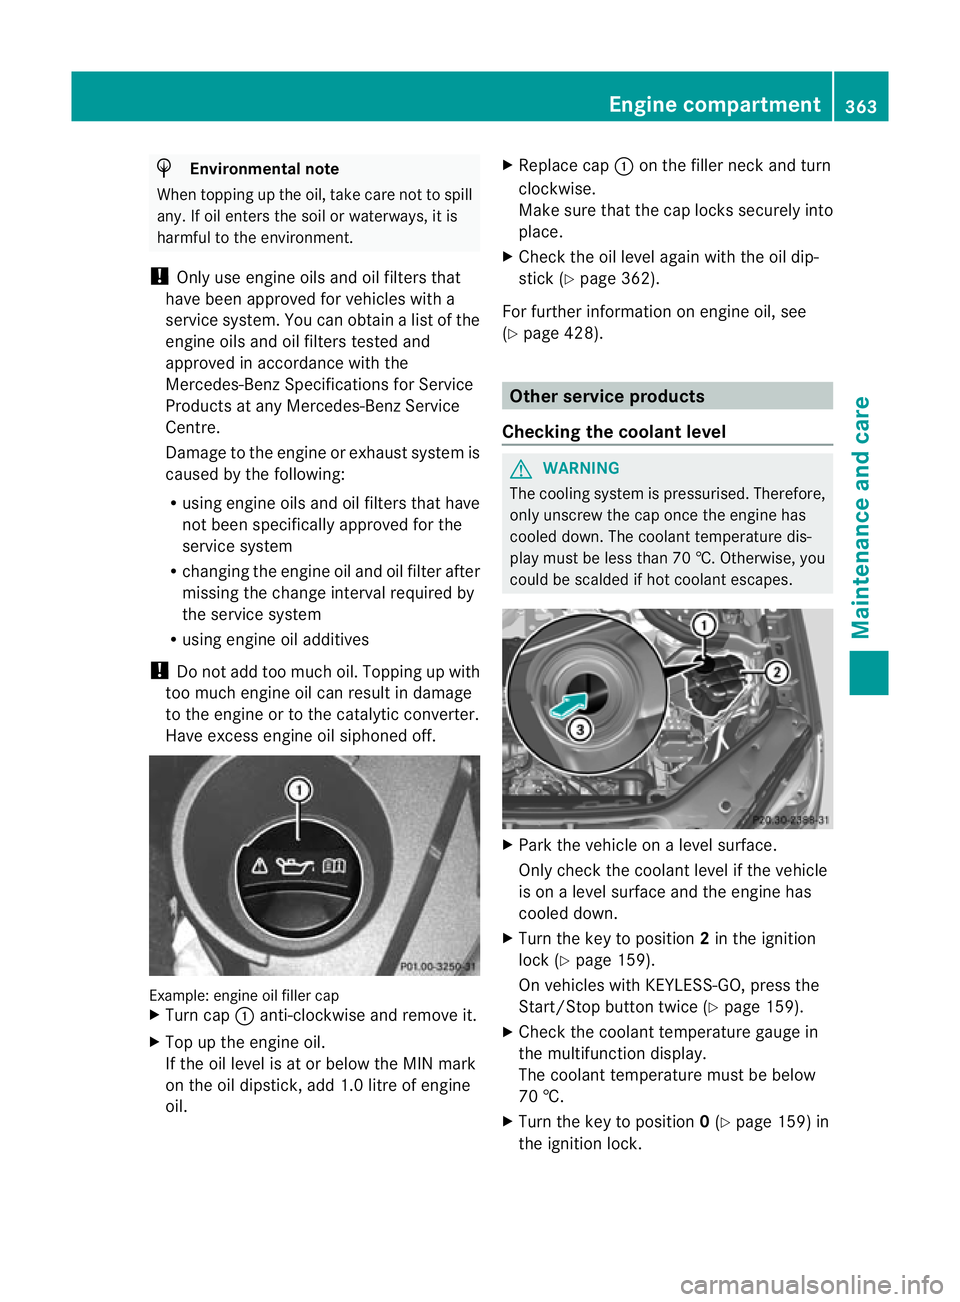
Hav eexcess engine oil siphoned off. Example: engine oil filler cap
X
Turn cap :anti-clockwis eand remove it.
X Top up the engine oil.
If the oil level is at or below the MIN mark
on the oil dipstick ,add 1. 0litreo fengine
oil. X
Replace cap :on the filler nec kand turn
clockwise.
Make sure that the cap locks securely into
place.
X Check the oil level agai nwith the oil dip-
stic k(Ypage 36 2).
For furthe rinformation on engine oil ,see
(Y page 42 8). Other service products
Checking th ecoolant level G
WARNING
The coolin gsystem is pressurised. Therefore,
only unscrew the cap onc ethe engine has
coole ddown. The coolan ttemperatur edis-
play must be less than 70 †. Otherwise, you
could be scalded if hot coolant escapes. X
Park the vehicle on alevel surface.
Only chec kthe coolant level if the vehicle
is on alevel surface and the engine has
cooled down.
X Turn the key to position 2in the ignition
lock (Y page 159).
On vehicles with KEYLESS-GO, press the
Start/Stop button twic e(Ypage 159).
X Check the coolant temperatur egauge in
the multifunction displ ay.
Th ec oolant temperatur emust be below
70 †.
X Turn the key to position 0(Y page 159 )in
the ignition lock. Eng
inecompartment
363Maintenance and care Z
Page 368 of 441
i
The ASSYST PLU Sservice interval display
does not show any information on the
engine oil level. Observ ethe notes on the
engin eoil level (Y page 362).
The multifunction display shows aservice
message for afew seconds, e.g.:
Next servic eAin .. days Service
Adue Service
Aoverdue by ... days Th
eletter indicates which service is due. Astands for
aminor servic eand B for
am ajor
service. Anumber or another letter may be
displayed after the letter. This figure indicates
any necessary additional maintenanc ework
to be performed.
If you notify aqualified specialist worksho pof
this display, you will receive astatement on
the associated costs.
The ASSYST PLUS service interval display
doe snot tak einto account any periods of
tim eduring which the battery is disconnec-
ted.
Maintaining the time-dependent service
schedule:
X Note down the service du edated isplayed
in the multifunction displa ybefor ediscon-
nectin gthe battery.
or
X After reconnecting the battery ,subtract
the battery disconnection periods fro mthe
service date shown on the display.
Hiding aservice message X
Pres sthe % ora button on th esteer-
ing wheel. Displaying service messages X
Switch th eignitio non.
X Press the =or; button on the steer-
ing whee ltoselect the Serv. men
u.
X Press the 9or: button to select the
ASSYS TPLUS submenu and confirm by
press ingt he a button.
The service due date appears in the multi-
function display.
Informatio nabout Service Resetting th
eASSYST PLUS service inte r-
val display
! If the ASSYS TPLUS service interva ldis-
play has been inadvertently reset ,this set-
tin gc an be corrected at aqualified special-
ist workshop.
Have service work carried out as described
in the Servic eBooklet. This ma yotherwise
lead to increased wear and damage to the
major assemblies or the vehicle.
Aq ualified specialist workshop, e.g. a
Mercedes-Ben zService Cent re,w ill reset the
ASSYST PLU Sservic einterval display after
the service work has bee ncarried out. You
can also obtain further information on main-
tenance work, for example.
Special service requirements
Arduous operating conditions or increased
loads on the vehicle will require some service
work to be performed more often than for a
vehicle in normal use. Such arduous condi-
tions include regular city driving with frequent
intermediate stops and use in mountainous
terrain or on poor road surfaces.
For example, if the vehicle is used under ardu-
ous operating conditions, have air filters,
engine oil and oil filters changed frequently
and check the wheels often .Further informa-
tion can be obtaine dataqualified specialist
workshop, e.g. aMercedes-Ben zService
Cent re. Service
365Maintenance and care Z
Page 374 of 441
X
Select Open camera cover and press
W
to confirm.
Th ec over of the 360° cam erao pens.
X To clean the 360° cam era: clean camera
lens :with clean water and asoft cloth.
i If you ar etravelling faster th an30 km/h
or if the key is in po sition 0or 1in the igni-
tion lock, the cove rofthe 360° cam era
close sautomatically.
Cleaning th eexhaust pipe !
Do not clean the exh aust pipe with acidic
cleaning agents, such as sanitar yorwheel
clea ners.
Impurities combined wit hthe effect sofroad
grit and corrosiv eenvironmental factors may
cause flash rust to for monthe surface. You
can restore the original shine of the exhaust
pip ebyc leaning it regularly ,especiall yinw in-
ter and after washing.
X Clean the exhaust pipe with achrome care
produc ttested and approved by Mercedes-
Benz.
Cleaning the trailer tow hitch H
Environmental note
Dispose of oily and greasy clot hs in an envi-
ronmentally-re sponsible manner.
! Do not clea nthe ball couplin gwithahigh-
pressure cleaner. Do not use solvents.
! Observe the not eoncare provided by the
trailer manufac turer. Th
eb all coupling must be cleaned if it
becomes dirty or corroded.
X Remove rust on the ball of the ball coupling,
e.g. with awire brush.
X Remove dirt with aclean, lint-free clot hor
ab rush.
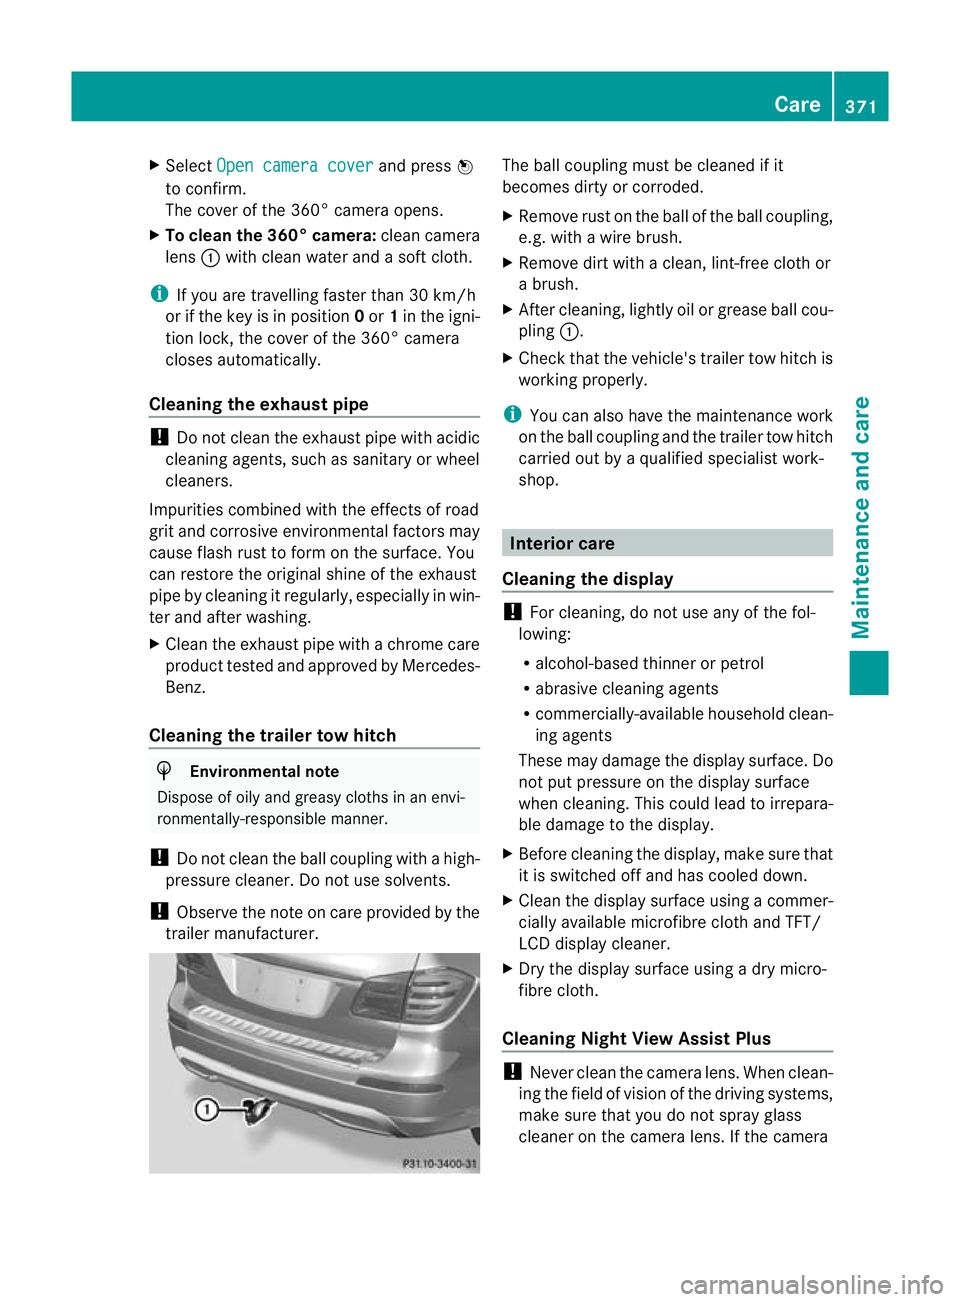
X After cleaning, lightly oi lorg rease ball cou-
pling :.
X Check that th evehicle' strailer to whitchis
workin gproperly.
i Youc an also have the maintenanc ework
on the ball coupling and the trailer tow hitch
carried out by aqualified specialist work-
shop. Interior care
Cleaning the display !
For cleaning, do not use any of the fol-
lowing:
R alcohol-based thinner or petrol
R abrasive cleaning agents
R commercially-available househol dclean-
ing agents
These may damage the display surface. Do
not put pressure on the display surface
when cleaning. This could lead to irrepara-
ble damage to the display.
X Befor ecleanin gthe display, make sur ethat
it is switc hed offand has cooled down.
X Clean the display surface using acommer-
cially available microfibre clot hand TFT/
LCD display cleaner.
X Dry the display surface using adry micro-
fibre cloth.
Cleanin gNight View Assist Plus !
Never clean the camera lens. When clean-
ing the field of vision of the driving systems,
mak esure that you do not spray glass
cleaner on the camera lens. If the camera Care
371Maintenance and care Z