fuse box MERCEDES-BENZ GL SUV 2012 Owners Manual
[x] Cancel search | Manufacturer: MERCEDES-BENZ, Model Year: 2012, Model line: GL SUV, Model: MERCEDES-BENZ GL SUV 2012Pages: 441, PDF Size: 10.66 MB
Page 15 of 441

Fuel
Additives ........................................ 425
Consumption information ..............427
Consumption statist ics. ................. 271
Displaying the curren tconsum p-
tion ................................................ 272
Displaying the rang e...................... 272
Driving tip s.................................... 184
Fue lgauge ............................... 30, 267
Grade (p etrol )................................ 424
Important safety notes ..................423
Note sfor AMG vehicles .................425
Pro blem (malfunction) ................... 177
Qualit y(diesel )............................... 426
Refuellin g....................................... 174
Tank content/reserve fuel .............424
Fue lfiller flap
Opening/closing ............................ 175
Fue lfilter (white display mess age) .3 06
Fue llevel
Calling up the range (on-board
computer) ...................................... 272
Gaug e...................................... 30, 267
Fue lreserve
see Fuel
Fuel tank
Capacity ........................................ 424
Pro blem (malfunction) ................... 177
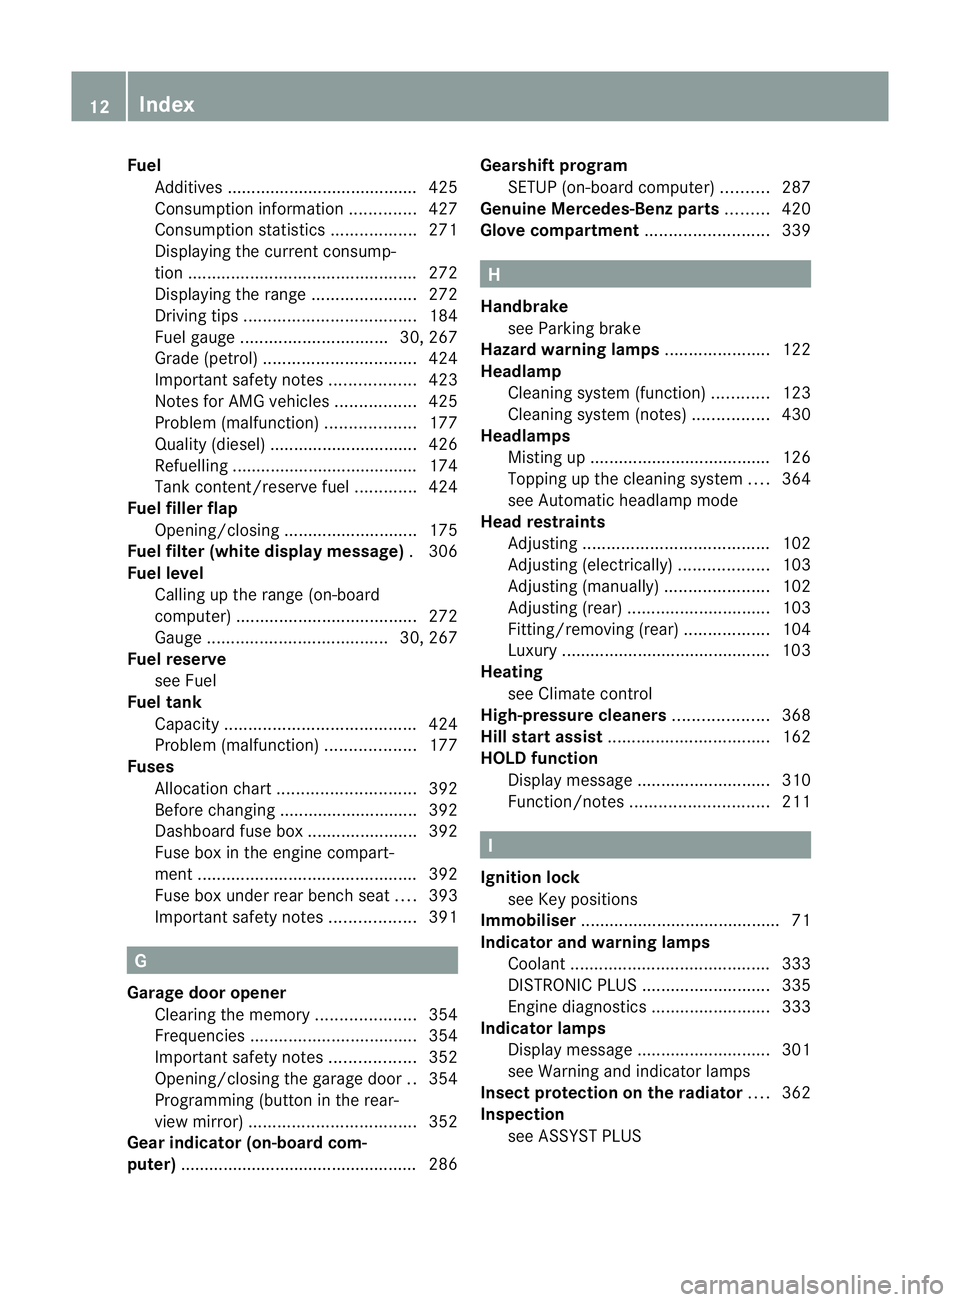
Fuses
Allocation chart ............................. 392
Before changing ............................. 392
Dashboard fus ebox....................... 392
Fus ebox in the engin ecompart-
men t.............................................. 392
Fus ebox under rear bench seat ....393
Important safety notes ..................391 G
Garage door opener Clearing the memory .....................354
Freq uencies ................................... 354
Important safety notes ..................352
Opening/closing the garage door ..354
Programming (b utton in the rear-
view mirror) ................................... 352
Gear indicator (on-b oard com-
puter) ................................................. .286 Gearshift program
SETUP (on-bo ardc omputer ).......... 287
Genuine Mercedes-Benz parts .........420
Glove compartment ..........................339 H
Handbrake seeP arking brake
Hazard warning lamps ......................122
Headlamp Clean ings ystem (function) ............123
Clean ings ystem (notes )................ 430
Headlamps
Mist ingup. ..................................... 126
Topping up the cle aning system ....364
se eA utomatic headlamp mode
Head restraints
Adjusting ....................................... 102
Adjusting (e lectrically )................... 103
Adjusting (manually )...................... 102
Adjusting (re ar).............................. 103
Fitting/removing (re ar).................. 104
Luxury ............................................ 103
Heati ng
see Climate control
High-pressure cleaners ....................368
Hill star tassist .................................. 162
HOLD function Display message ............................ 310
Function/notes ............................. 211 I
Igniti onlock
see Key positions
Immobiliser .......................................... 71
Indicator and warning lamps Coolant .......................................... 333
DISTRONI CPLUS ........................... 335
Engine di agnostics ......................... 333
Ind icator lamps
Display message ............................ 301
se eW arning and indicator lamps
Insec tprotection on the radiator ....362
Inspect ion
se eA SSYST PLUS 12
Index
Page 394 of 441

switch, the hazard warnin
glamps start
flashing again. Transporting the vehicle
! Only lash the vehicle down by the wheels
or wheel rims, not by parts of the vehicle
such as axle or steering components. Oth-
erwise, the vehicle could be damaged.
The towing eyes or trailer tow hitch can be
used to pull the vehicle onto atrailer or trans-
porter if yo uwish to transport it.
X Turn the key to position 2in the ignition
lock.
X Shift the automatic transmission to posi-
tion N.
As soon as the vehicle is loaded:
X Prevent the vehicle from rolling away by
applying the electric parkin gbrake.
X Shift th eautomatic transmission to posi-
tion P.
X Turn the key to position 0in the ignition
lock and remove it.
X Secure the vehicle. Information for 4MATIC vehicles
! Vehicles with 4MATIC must not be towed
with the front or rear axle raised; otherwise,
the transmission may be damaged.
If the vehicle has transmission damage or
damage to the front or rear axle, have it trans-
ported on atransporter or trailer.
In the even tofdamage to the ele ctrical
system
If the battery is defective, the automatic
transmission will be locked in position P.To
shif tthe automatic transmission to position
N,y ou must provide power to the vehicle's
electrical system in the same way as when
jump-starting (Y page 386).
Hav ethe vehicle transported on atransporter
or trailer. Recov
ering avehicle that ha sbecome
stuck
! When recovering atrapped vehicle ,donot
je rk the vehicle or pull it at an angle. If the
tractive powe rist oo high, th evehicles
could be damaged.
If th edrive wheels ge ttrapped on loose or
muddy ground, recover th evehicle with the
utmost care, especially so if the vehicle is
laden.
Never attempt to recover avehicle with a
trailer atta ched.
Pull out the vehicle backwards, if possible,
using the tracks it made when it became
stuck. Tow-starting (emergency engine
starting)
! Vehicles with automatic transmission
must not be tow-star ted. Otherwise, you
could damage the automatic tra nsmission.
You ca nfind information on "Jump-starting"
at (Y page 386). Electrical fuses
Important safet
ynotes G
WARNING
Only use fuses that have been approved for
Mercedes-Benz vehicles and which have the
correct fuse ratin gfor the system scon-
cer ned. Do not attempt to repair or bridge
faulty fuses. Usin gfuses which have not been
approved or attempting to repair or bridge
faulty fuses could cause the fuse to be over-
loaded and result in afire. Have the cause
traced and rectified at aqualified specialist
workshop.
! Only use fuses marked with an "S" for the
fuse box in the engine compartment and
under the rear bench seat. Components or
systems could othe rwise be damaged. Electrical fuses
391Breakdown assistance Z
Page 395 of 441

The fuses in your vehicle serv
etoclose down
faulty circuits .Ifafuse blows, all the compo-
nen tson th ecircuit and their function sstop
operating.
Blown fuse smust be replaced with fuses of
the same rating, which you can recognise by
the colour and fuse rating. The fuse ratings
are listed in the fuse allocation chart.
If the newly inser tedf use also blows ,have the
cause traced and rectified at aqualified spe-
cialist workshop, e.g. aMercedes-Benz
Servic eCentre. Befor
ereplacing afuse
X Secure th evehicle against rollin gaway
(Y page 181).
X Switch off all electrical consumers.
X Turn the key to position 0in the ignition
lock and remove it (Y page 159). On vehi-
cles with KEYLESS-GO, mak esure the igni-
tion is switched off (Y page 159).
All indicator lamps in the instrumen tcluster
must be off.
The fuses are located in various fuse boxes:
R fuse box on the fron t-passenger side of the
dashboard
R fuse box in the engine compartmen tonthe
right-hand side of the vehicle, when viewed
in the direction of travel
R fuse box under the rea rbench seat
The fuse allocation char tisl ocated in the fuse
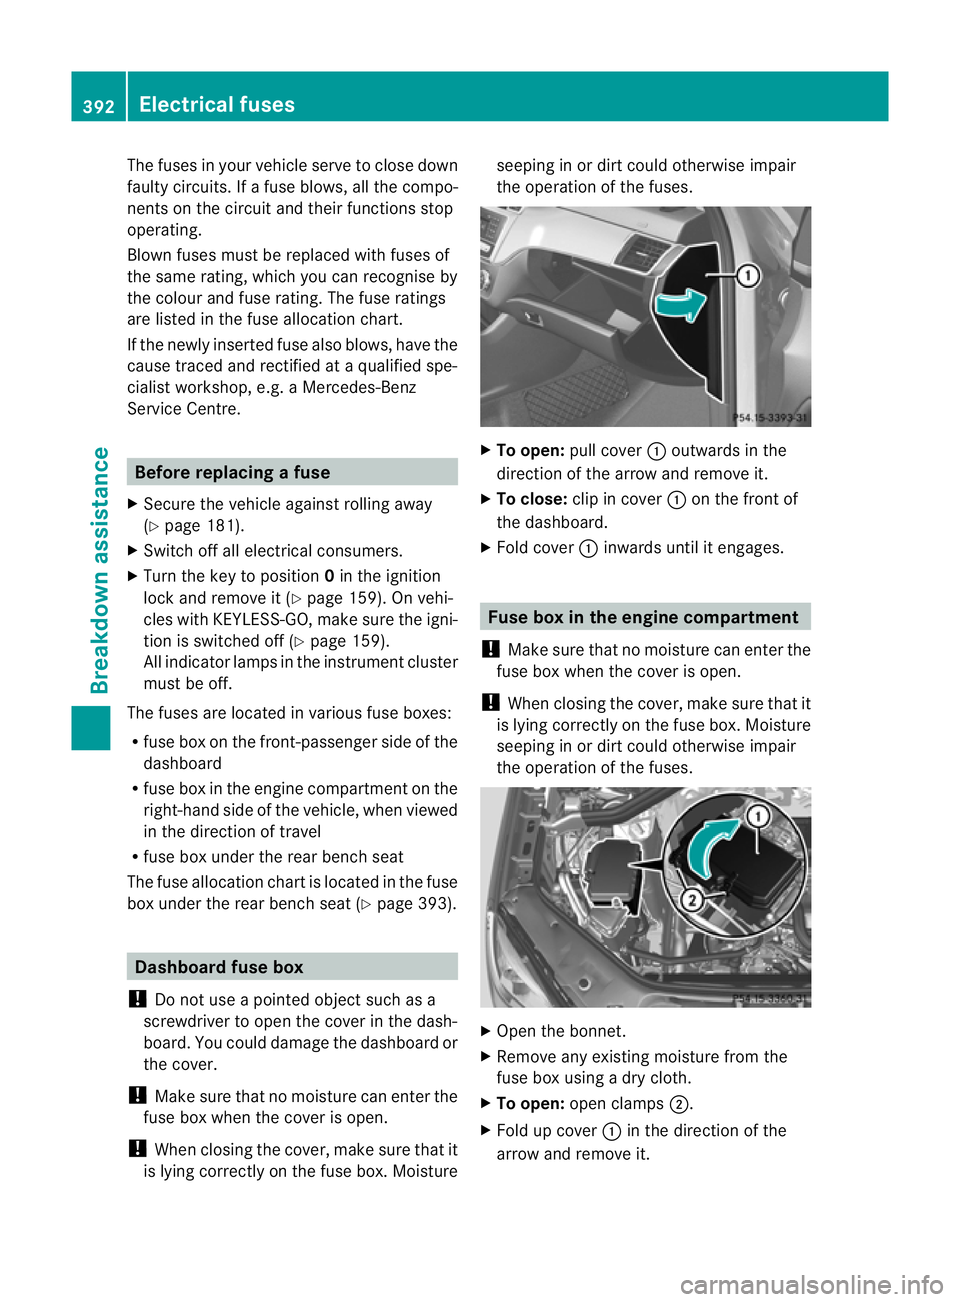
box under the rea rbench seat (Y page 393). Dashboar
dfuse box
! Do not us eapointed objec tsuch as a
screwdriver to open the cover in the dash-
board. You could damage the dashboard or
the cover.
! Make sure that no moisture can enter the
fuse box when the cover is open.
! When closing the cover, make sure that it
is lying correctly on the fuse box. Moisture seeping in or dirt could otherwis
eimpair
th eo peration of the fuses. X
To open: pull cover :outwards in the
direction of the arrow and remove it.
X To close: clip in cover :on the front of
the dashboard.
X Fold cover :inwards unti litengages. Fuse box in the engine compartment
! Make sure that no moisture can enter the
fuse box whe nthe cover is open.
! When closing the cover, make sur ethat it
is lyin gcorrectly on the fuse box. Moisture
seeping in or dir tcould otherwise impair
the operation of the fuses. X
Open the bonnet.
X Remove any existing moistur efrom the
fus eb ox using adry cloth.
X To open: open clamps ;.
X Fol dupc over:in the direction of the
arrow and remove it. 392
Electrical fusesBreakdown assistance
Page 396 of 441

X
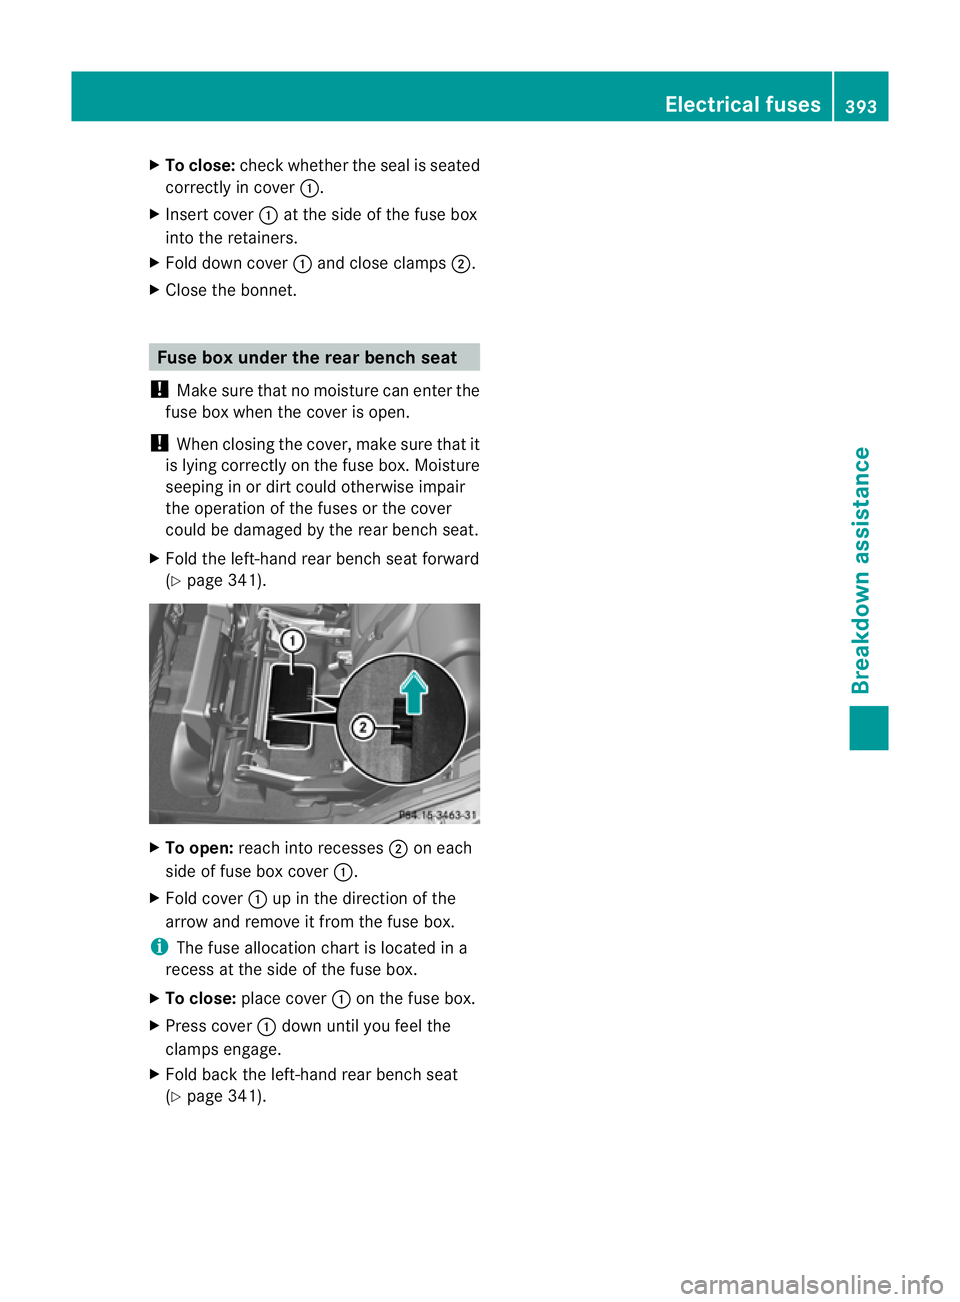
To close: check whethe rthe seal is seated
correc tlyinc over:.
X Insert cover :at the side of the fuse box
int ot he retainers.
X Fold down cover :and close clamps ;.
X Close the bonnet. Fuse box under th
erear bench seat
! Make sure that no moisture can enter the
fuse box when the cover is open.
! When closing the cover, make sure that it
is lying correctly on the fuse box. Moisture
seeping in or dirt could otherwise impair
the operation of the fuses or the cover
could be damaged by the rear bench seat.
X Fold the left-hand rear bench seat forward
(Y page 341). X
To open: reach into recesses ;on each
side of fuse box cover :.
X Fold cover :up in the direction of the
arrow and remov eitfrom th efuse box.
i The fuse allocation chart is located in a
recess at the side of the fuse box.
X To close: place cover :on the fuse box.
X Press cover :down until you feel the
clamps engage.
X Fold back the left-hand rear bench seat
(Y page 341). Electrical fuses
393Breakdown assistance Z