hood MERCEDES-BENZ GL450 2010 X164 Owner's Manual
[x] Cancel search | Manufacturer: MERCEDES-BENZ, Model Year: 2010, Model line: GL450, Model: MERCEDES-BENZ GL450 2010 X164Pages: 380, PDF Size: 9.81 MB
Page 12 of 380
Transmission position indicator .....116
Transmission positions ..................116
Generator
see Alternator
Global locking/unlocking
see Key, SmartKey
Glove box ........................................... 207
Gross Axle Weight Rating see GAWR
Gross Trailer Weight
see GTW
Gross Vehicle Weight
see GVW
Gross Vehicle Weight Rating
see GVWR
GTW (Gross Trailer Weight) .............. 255
GVW (Gross Vehicle Weight) ............ 255
GVWR (Gross Vehicle Weight
Rating) ................................................ 255
H
Halogen headlamps see Headlamps
Hard plastic trim items, cleaning .... 279
Hazard warning flasher .................... 101
Headlamp cleaning system .............. 101
Headlamps
Active Bi-Xenon headlamps .............97
Adjusting aim ................................. 333
Automatic headlamp mode ..............98
Bi-Xenon .................................. 97, 329
Cleaning lenses ............................. 277
Cleaning system ............................ 101
Daytime running lamp mode ............99
Delayed shut-off ............................ 137
Halogen ......................................... 329
High-beam flasher .........................101
High-beam headlamps ...................100
Low-beam headlamps ......................98
Replacing bulbs ............................. 328
Switch .............................................. 97
Headliner, cleaning and care of ....... 280
Head restraints .................................... 82
Adjustment ................................ 82, 84
Comfort head restraint ....................84
NECK-PRO active front head
restraints ......................................... 53
NECK-PRO active front head
restraints, resetting .......................325
Heated steering wheel ........................ 93
Height adjustment
Seat belt outlet ................................ 51
Seats ............................................... 82
Vehicle level control ......................159
High-beam flasher ............................. 101
High-beam headlamps .............. 100, 329
Indicator lamp .................................. 29
Hill-start assist system ..................... 155
Hinged quarter windows .................. 106
Hood ................................................... 228
Messages in the multifunction
display ........................................... 304
Hooks ................................................. 201
Horn ...................................................... 27
HVAC see Climate control system
Hydroplaning ..................................... 262
I
Identification labels .......................... 360
Identification number, vehicle
(VIN) ................................................... 361
Ignition ......................................... 80, 109
Immobilizer .......................................... 66
Indicator lamps see Lamps, indicator and warning
Infant and child restraint systems
see Children in the vehicle
Inflation pressure
see Tires, Inflation pressure
Infrared reflecting windshield ......... 223
Inside door handle .............................. 74
Instrument cluster ............................ 124
Illumination .................................... 124
Lamps ............................................ 314
Multifunction display .....................127
Instrument lighting
see Instrument cluster, Illumination
Instrument panel
see Instrument cluster
Instruments and controls
see Cockpit
10IndexX164_AKB; 5; 31, en-USd2ureepe,Version: 2.11.8.12009-09-11T12:30:16+02:00 - Seite 10
Page 15 of 380
Brake pads ..................................... 299
Coolant .......................................... 306
Cruise control ................................ 294
Differential locks ...................123, 302
Distronic ........................................ 294
Doors ............................................. 304
Downhill Speed Regulation (DSR) ..303
EBP ................................................ 300
Engine oil ....................................... 308
ESP ®
...................................... 289, 300
Fog lamps .............................. 310, 312
Front passenger front air bag ........291
Gas cap .......................................... 309
High-beam lamps ........................... 311
Hood .............................................. 304
License plate lamps .......................311
Light sensor ................................... 311
Low-beam lamps ............................ 312
LOW RANGE mode ......................... 303
Parking brake ................................ 300
Parking lamps ................................ 311
PRE-SAFE ®
.................................... 290
Reserve fuel ................................... 309
Reverse lamp ................................. 310
Side marker lamps .........................311
SmartKey ....................................... 304
SmartKey with KEYLESS-GO ..........304
SRS ................................................ 301
Tailgate .......................................... 304
Tail lamps ...................................... 312
Tele Aid .......................................... 301
Tire inflation pressure ............297, 313
Tire pressure monitor ....................297
Tires ...................................... 297, 313
Trailer brake lamps ........................312
Trailer tail lamps ............................ 312
Trailer turn signal lamps ................312
Turn signals ................................... 313
Washer fluid ................................... 305
Multifunction steering wheel
Adjustment ...................................... 91
Buttons .......................................... 125
Cleaning ......................................... 280
Easy-entry/exit feature ...........92, 139
Gearshift control ............................ 118
Heating ............................................ 93
Memory function .............................. 96
Overview .......................................... 30N
Navigation menu ............................... 130
Navigation system see Separate operating instructions
NECK-PRO active front head
restraints ............................................. 53
Resetting ....................................... 325
Nets, parcel ....................................... 200
Night security illumination .............. 137
Normal occupant weight .................. 256
Number, vehicle identification
(VIN) ................................................... 361
O
Occupant Classification System see OCS (Occupant Classification
System)
Occupant distribution ....................... 256
Occupant safety
Air bags ........................................... 37
BabySmart™ .................................... 46
Children and air bags .......................37
Children in the vehicle .....................55
Child seat anchors – LATCH-type ....59
Fastening the seat belts ................... 50
Front passenger front air bag off
indicator lamp (Canada
only) ........................................ 46, 322
Front passenger front air bag off
indicator lamp (USA only) ........42, 322
Infant and child restraint systems .... 56
Introduction ..................................... 36
OCS (Occupant Classification
System) ........................................... 42
PRE-SAFE ®
....................................... 52
Seat belts .................................. 39, 48
OCS (Occupant Classification
System) ................................................ 42
Self-test ........................................... 45
Odometer ........................................... 127
Off-road driving ................................. 262
Checklist ............................... 264, 268
Crossing obstacles ........................267
Driving instructions ........................ 262
Driving on sand .............................. 267
Driving through water ....................266
Index13X164_AKB; 5; 31, en-USd2ureepe,Version: 2.11.8.12009-09-11T12:30:16+02:00 - Seite 13
Page 28 of 380
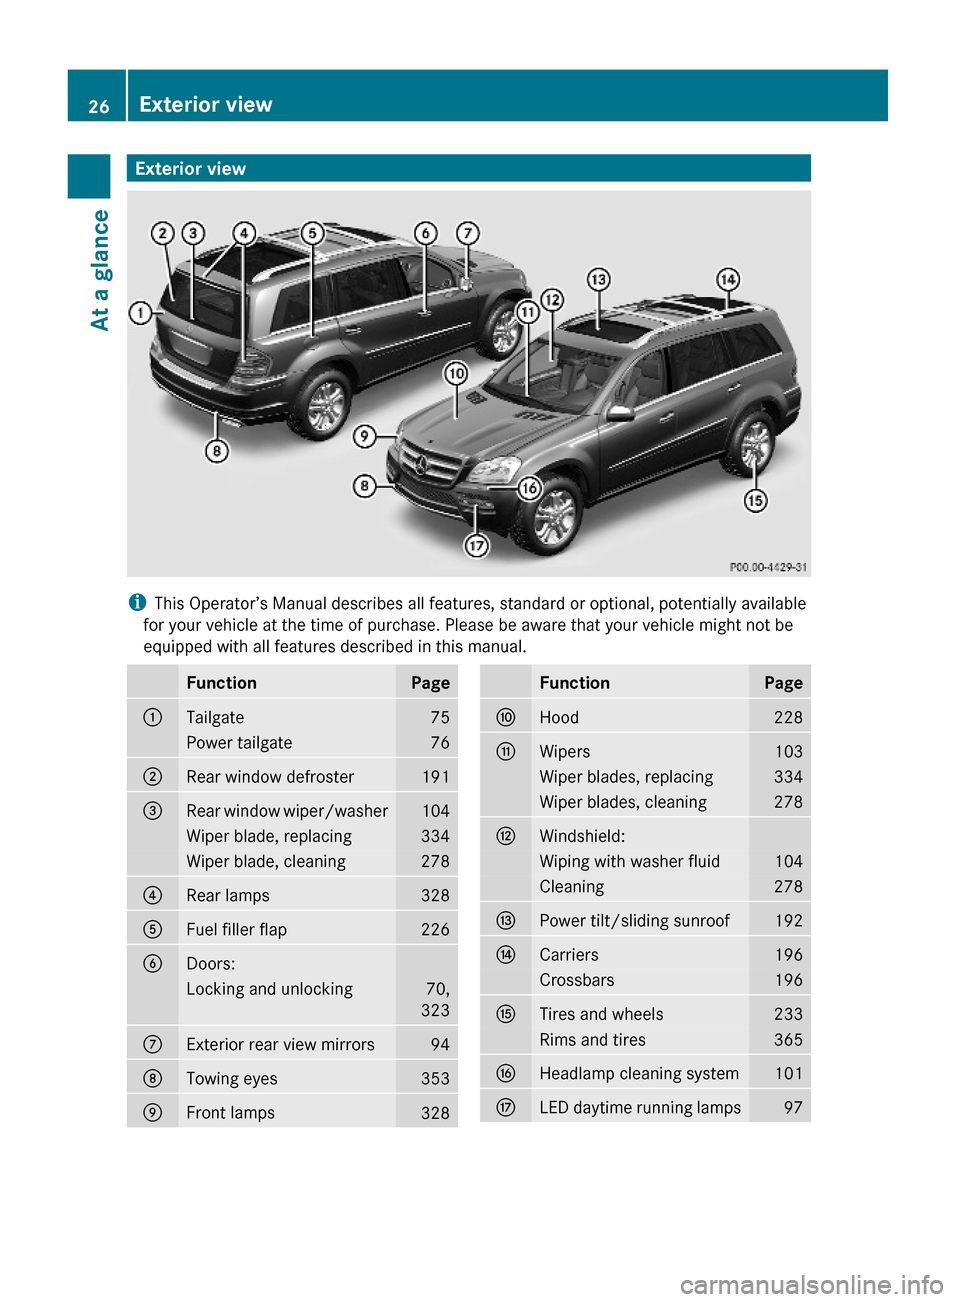
Exterior view
iThis Operator’s Manual describes all features, standard or optional, potentially available
for your vehicle at the time of purchase. Please be aware that your vehicle might not be
equipped with all features described in this manual.
FunctionPage:Tailgate75Power tailgate76;Rear window defroster191=Rear window wiper/washer104Wiper blade, replacing334Wiper blade, cleaning278?Rear lamps328AFuel filler flap226BDoors:Locking and unlocking70,
323
CExterior rear view mirrors94DTowing eyes353EFront lamps328FunctionPageFHood228GWipers103Wiper blades, replacing334Wiper blades, cleaning278HWindshield:Wiping with washer fluid104Cleaning278IPower tilt/sliding sunroof192JCarriers196Crossbars196KTires and wheels233Rims and tires365LHeadlamp cleaning system101MLED daytime running lamps9726Exterior viewAt a glance
X164_AKB; 5; 31, en-USd2ureepe,Version: 2.11.8.12009-09-11T12:30:16+02:00 - Seite 26
Page 29 of 380
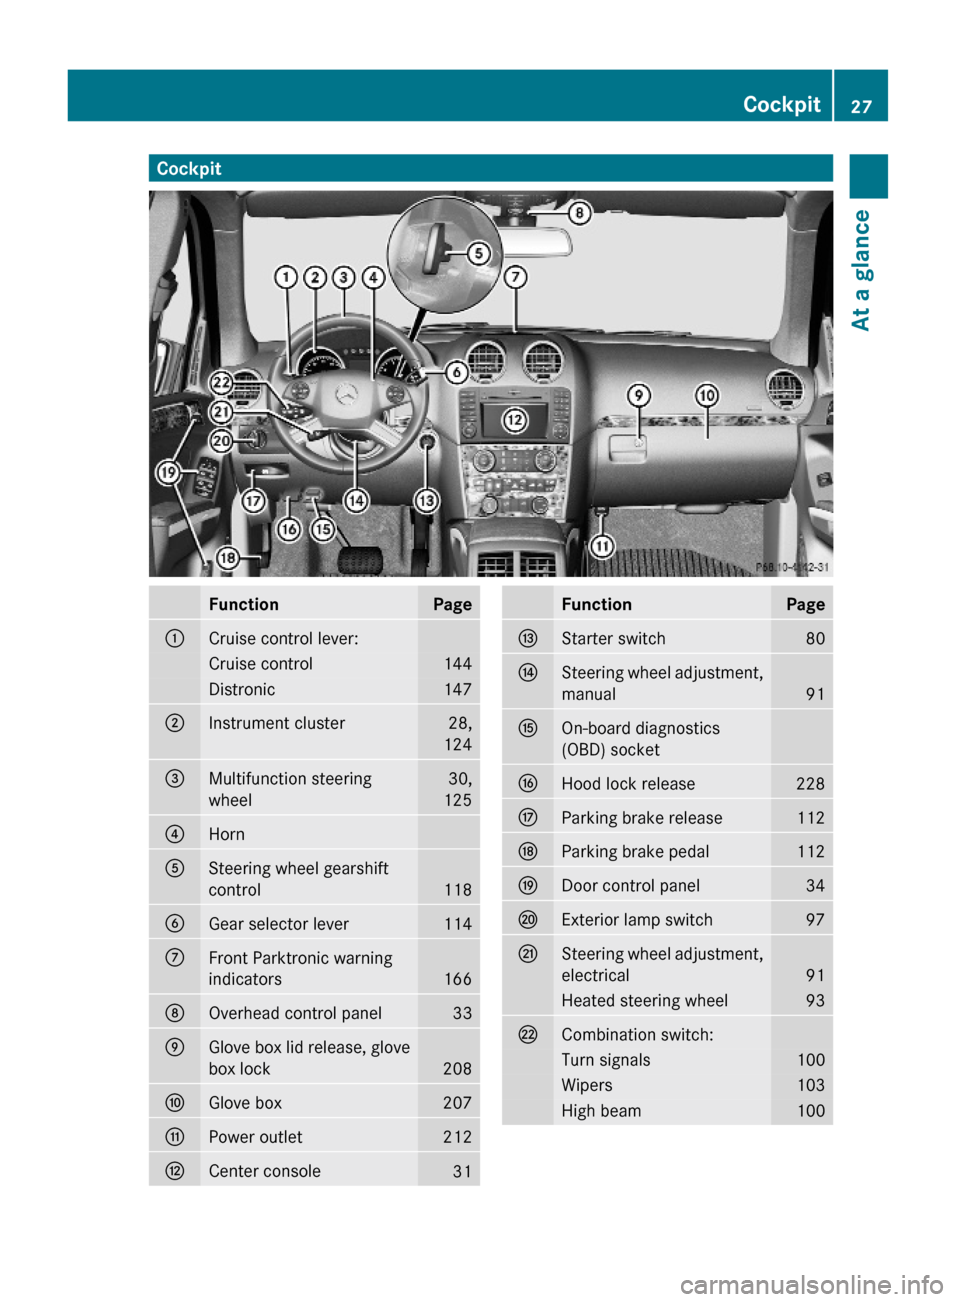
CockpitFunctionPage:Cruise control lever:Cruise control144Distronic147;Instrument cluster28,
124
=Multifunction steering
wheel
30,
125
?Horn ASteering wheel gearshift
control118
BGear selector lever114CFront Parktronic warning
indicators 166
DOverhead control panel33EGlove box lid release, glove
box lock208
FGlove box207GPower outlet212HCenter console31FunctionPageIStarter switch80JSteering wheel adjustment,
manual91
KOn-board diagnostics
(OBD) socket
LHood lock release228MParking brake release112NParking brake pedal112ODoor control panel34PExterior lamp switch97QSteering wheel adjustment,
electrical91
Heated steering wheel93RCombination switch:Turn signals100Wipers103High beam100Cockpit27At a glanceX164_AKB; 5; 31, en-USd2ureepe,Version: 2.11.8.12009-09-11T12:30:16+02:00 - Seite 27Z
Page 51 of 380
Have all work carried out only by qualified
technicians. Contact an authorized
Mercedes-Benz Center.
Proper use of seat beltsGWarning!
USE SEAT BELTS PROPERLY
R Seat belts can only protect when used
properly. Never wear seat belts in any other
way than as described in this section, as
that could result in serious injuries in case
of an accident.
R Each occupant should wear their seat belt
at all times, because seat belts help reduce
the likelihood of and potential severity of
injuries in accidents, including rollovers.
The integrated restraint system includes
SRS (driver front air bag, driver side knee
bag, front passenger front air bag, side
impact air bags, window curtain air bags for
door windows), Emergency Tensioning
Devices (ETDs), seat belt force limiters, and
front seat knee bolsters.
The system is designed to enhance the
protection offered to properly belted
occupants in certain frontal (front air bags,
driver side knee bag and ETDs) and side
(side impact air bags, window curtain air
bags, and ETDs) impacts which exceed
preset deployment thresholds and in
certain rollovers (window curtain air bags
and ETDs).
R Never wear the shoulder belt under your
arm, against your neck or off your shoulder.
In a frontal crash, your body would move
too far forward. That would increase the
chance of head and neck injuries. The seat
belt would also apply too much force to the
ribs or abdomen, which could severely
injure internal organs such as your liver or
spleen.
Adjust the seat belt so that the shoulder
section is located as close as possible to
the middle of the shoulder. It should not
touch the neck. Never pass the shoulder
portion of the seat belt under your arm. For
this purpose, you can adjust the height of
the seat belt outlet.
R Position the lap belt as low as possible on
your hips and not across the abdomen. If
the lap belt is positioned across your
abdomen, it could cause serious injuries in
a crash.
R Never wear seat belts over rigid or
breakable objects in or on your clothing,
such as eyeglasses, pens, keys etc., as
these might cause injuries.
R Make sure the seat belt is always fitted
snugly. Take special care of this when
wearing loose clothing.
R Never use a seat belt for more than one
person at a time. Do not fasten a seat belt
around a person and another person or
other objects at the same time.
R Seat belts should not be worn twisted. In a
crash, you would not have the full width of
the seat belt to distribute impact forces.
The twisted seat belt against your body
could cause injuries.
R Pregnant women should also always use a
lap/shoulder belt. The lap belt portion
should be positioned as low as possible on
the hips to avoid any possible pressure on
the abdomen.
R Place the seat backrest in a position that is
as upright as possible.
R Check your seat belt during travel to make
sure it is properly positioned.
R Never place your feet on the instrument
panel, dashboard, or on the seat. Always
keep both feet on the floor in front of the
seat.
R When using a seat belt to secure infant
restraints, toddler restraints, or children in
booster seats, always follow the child seat
manufacturer’s instructions.Occupant safety49Safety and securityX164_AKB; 5; 31, en-USd2ureepe,Version: 2.11.8.12009-09-11T12:30:16+02:00 - Seite 49Z
Page 68 of 380
allows the vehicle-trailer combination to
stabilize.
The ESP ®
trailer stabilization is functional at
vehicle speeds above approximately 40 mph
(65 km/h) when the ESP ®
is switched on.GWarning!
The system will not be able to assist when the
trailer jackknifes
R if the ESP ®
has switched off due to a
malfunction
R on wet or icy roads
R on roads with slippery surface
R in sand or gravel
Trailers with a high center of gravity may tip
over before the system recognizes swaying of
the trailer.
Anti-theft systems
Immobilizer
The immobilizer prevents unauthorized
persons from starting your vehicle.
When leaving the vehicle, always take the
SmartKey with you and lock the vehicle. The
engine can be started by anyone with a valid
SmartKey that is left inside the vehicle.
Activating
XWith SmartKey: Remove the SmartKey
from the starter switch.XWith KEYLESS-GO: Turn off the engine and
open the driver’s door.
Deactivating
XSwitch on the ignition.
i Starting the engine will also deactivate
the immobilizer.
In the event that the engine cannot be
started (yet the vehicle’s battery is
charged), the system is not operational.
Contact an authorized Mercedes-Benz
Center or call 1-800-FOR-MERCedes (in the
USA) or 1-800-387-0100 (in Canada).
Anti-theft alarm system
Once the alarm system has been armed, a
visual and audible alarm is triggered when
someone opens
R a door
R the tailgate
R the hood
The alarm will stay on even if the activating
element, a door, for example, is closed
immediately.
The alarm system will also be triggered when
R the vehicle is opened with the mechanical
key
R a door is opened from the inside
To cancel the alarm after it has been
triggered, see “Canceling the alarm”
( Y page 67).
i If the alarm stays on for more than
30 seconds, the Tele Aid system initiates a
call to the Response Center automatically.
The Tele Aid system will initiate the call
provided that
R you have subscribed to the Tele Aid
service
R the Tele Aid service has been activated
properly
R the necessary mobile phone, power
supply and GPS coverage are available
66Anti-theft systemsSafety and security
X164_AKB; 5; 31, en-USd2ureepe,Version: 2.11.8.12009-09-11T12:30:16+02:00 - Seite 66
Page 130 of 380
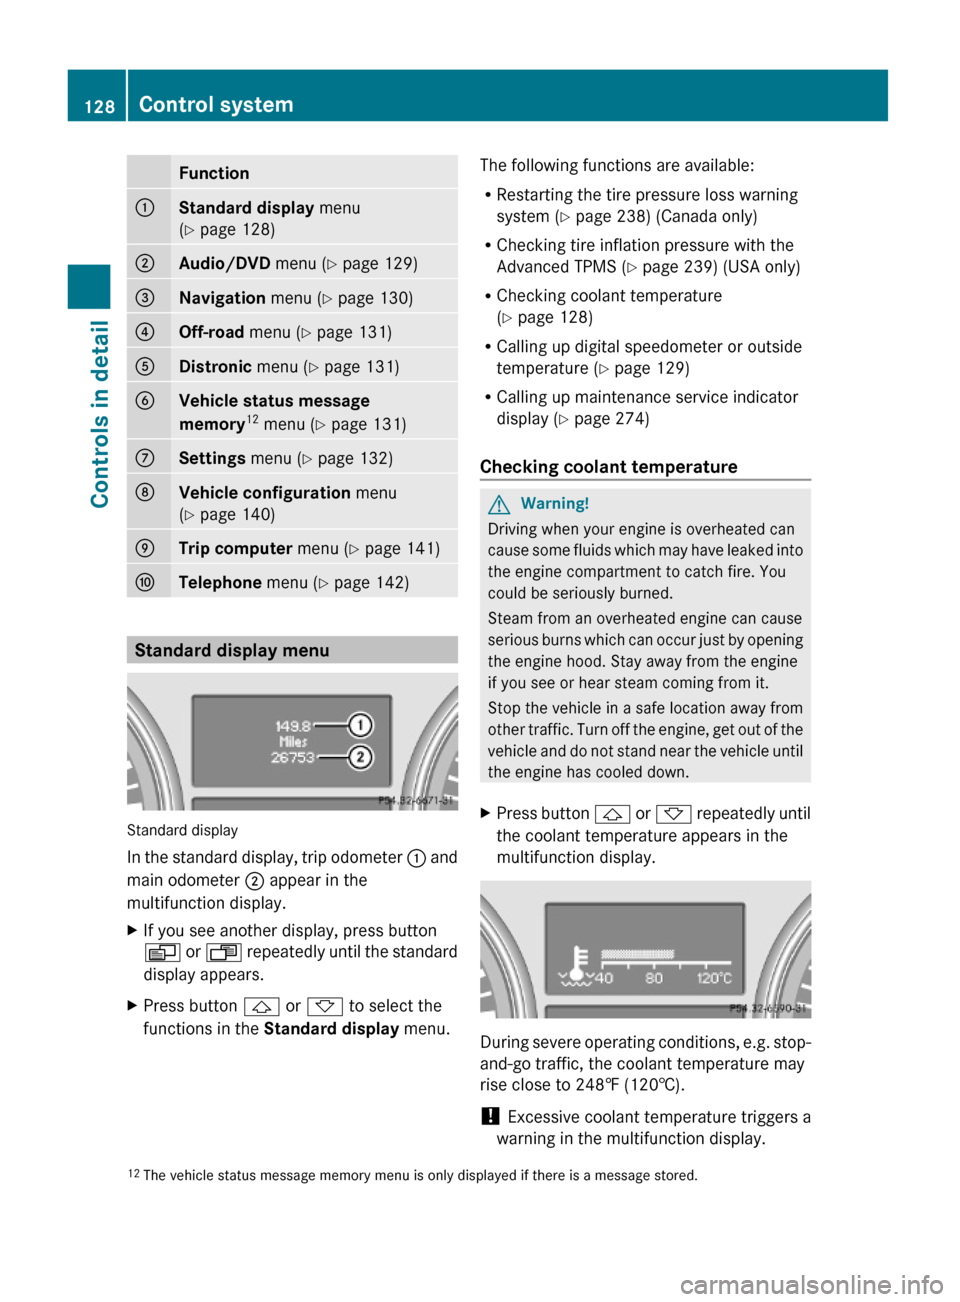
Function:Standard display menu
(Y page 128)
;Audio/DVD menu (Y page 129)=Navigation menu (Y page 130)?Off-road menu (Y page 131)ADistronic menu (Y page 131)BVehicle status message
memory12 menu (Y page 131)
CSettings menu (Y page 132)DVehicle configuration menu
(Y page 140)
ETrip computer menu (Y page 141)FTelephone menu (Y page 142)
Standard display menu
Standard display
In the standard display, trip odometer : and
main odometer ; appear in the
multifunction display.
XIf you see another display, press button
V or U repeatedly until the standard
display appears.
XPress button & or * to select the
functions in the Standard display menu.
The following functions are available:
RRestarting the tire pressure loss warning
system (Y page 238) (Canada only)
RChecking tire inflation pressure with the
Advanced TPMS (Y page 239) (USA only)
RChecking coolant temperature
(Y page 128)
RCalling up digital speedometer or outside
temperature (Y page 129)
RCalling up maintenance service indicator
display (Y page 274)
Checking coolant temperature
GWarning!
Driving when your engine is overheated can
cause some fluids which may have leaked into
the engine compartment to catch fire. You
could be seriously burned.
Steam from an overheated engine can cause
serious burns which can occur just by opening
the engine hood. Stay away from the engine
if you see or hear steam coming from it.
Stop the vehicle in a safe location away from
other traffic. Turn off the engine, get out of the
vehicle and do not stand near the vehicle until
the engine has cooled down.
XPress button & or * repeatedly until
the coolant temperature appears in the
multifunction display.
During severe operating conditions, e.g. stop-
and-go traffic, the coolant temperature may
rise close to 248‡ (120†).
! Excessive coolant temperature triggers a
warning in the multifunction display.
12The vehicle status message memory menu is only displayed if there is a message stored.128Control systemControls in detail
X164_AKB; 5; 31, en-USd2ureepe,Version: 2.11.8.12009-09-11T12:30:16+02:00 - Seite 128
Page 156 of 380
The Distronic regulates only the distance
between your vehicle and those directly
ahead of it, but does not register stationary
objects in the road, e.g.:
Ra stopped vehicle in a traffic jam
Ra disabled vehicle
Ran oncoming vehicle
The driver must always be alert, observe all
traffic and intercede as required by means of
steering or braking the vehicle.
GWarning!
The Distronic should not be used in snowy or
icy road conditions.
The most likely cause for a malfunctioning
system is a dirty Distronic system sensor
cover (located in the hood grille), especially
at times of snow and ice or heavy rain.
In such a case, the Distronic will switch off,
and the message DISTRONIC Currently
Unavailable – See Operator’s Manual
appears in the multifunction display.
For cleaning and care of the Distronic system
sensor cover, see (Y page 278).
iIf the message DISTRONIC Available
Again appears during driving, the dirt (e.g.
slush) has dissolved; the Distronic works
again, if you reactivate it (Y page 151).
Turns and bends
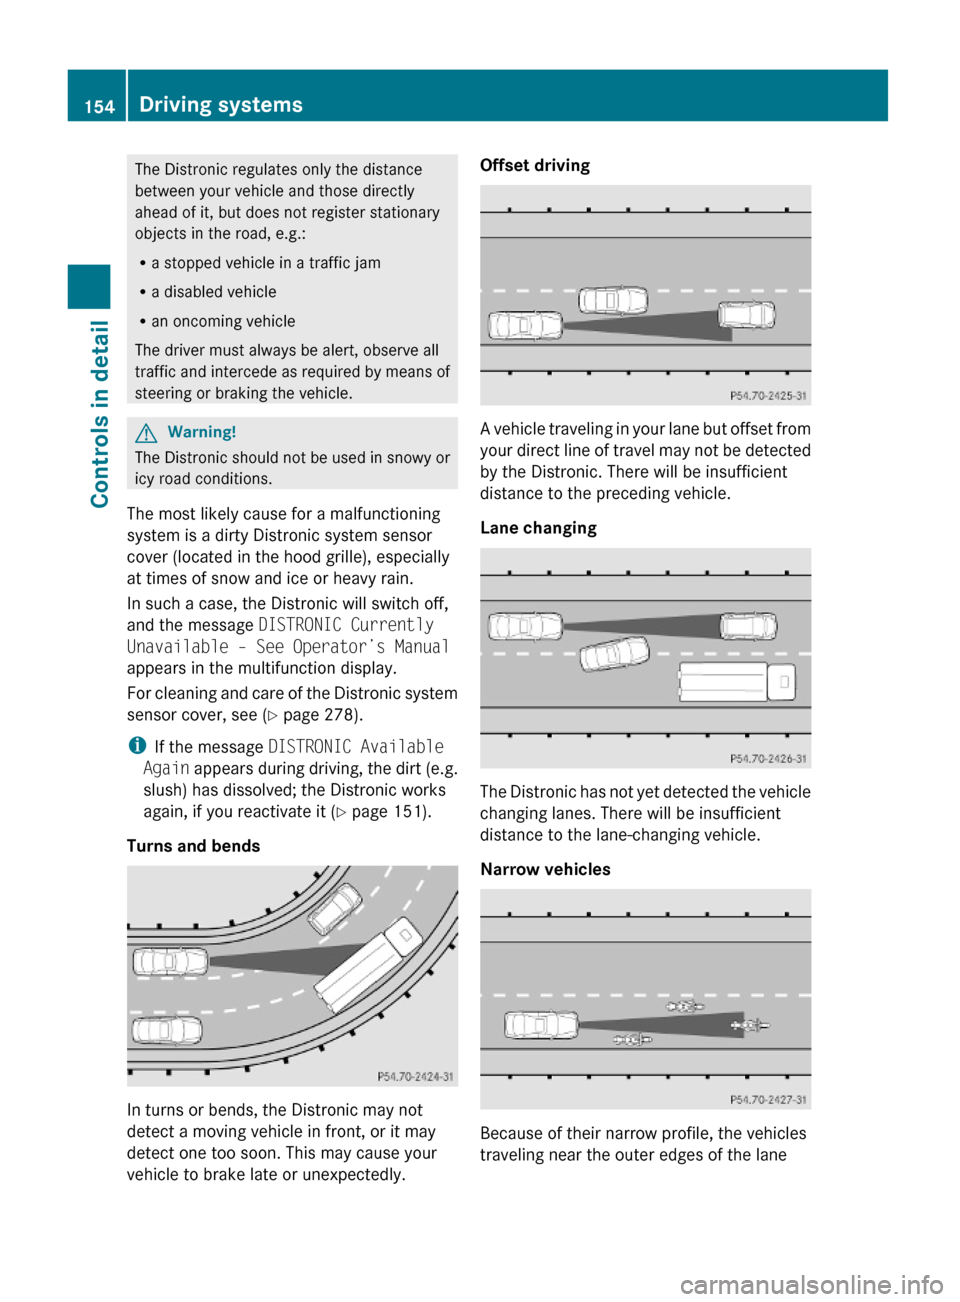
In turns or bends, the Distronic may not
detect a moving vehicle in front, or it may
detect one too soon. This may cause your
vehicle to brake late or unexpectedly.
Offset driving
A vehicle traveling in your lane but offset from
your direct line of travel may not be detected
by the Distronic. There will be insufficient
distance to the preceding vehicle.
Lane changing
The Distronic has not yet detected the vehicle
changing lanes. There will be insufficient
distance to the lane-changing vehicle.
Narrow vehicles
Because of their narrow profile, the vehicles
traveling near the outer edges of the lane
154Driving systemsControls in detail
X164_AKB; 5; 31, en-USd2ureepe,Version: 2.11.8.12009-09-11T12:30:16+02:00 - Seite 154
Page 224 of 380
Reprogramming a single signal
transmitter button
To program a device using a signal
transmitter button previously trained, follow
these steps:
XSwitch on the ignition.XPress and hold the desired signal
transmitter button ( ;, = or ?). Do not
release the button.
Indicator lamp : will begin to flash after
20 seconds.XWithout releasing the signal transmitter
button, proceed with programming starting
with step 3.
Operation of integrated remote control
XSwitch on the ignition.XSelect and press the appropriate
integrated signal transmitter button ( ;,
= or ?) to activate the remote controlled
device.
The integrated remote control transmitter
continues to send the signal as long as the
button is pressed – up to 20 seconds.
Erasing the integrated remote control
memory
i If you sell your vehicle, erase the codes of
all three channels.
XSwitch on the ignition.XSimultaneously press and hold outer signal
transmitter buttons ; and ?, for
approximately 20 seconds, until indicator
lamp : flashes rapidly. Do not hold for
longer than 30 seconds.
The codes of all three channels are erased.Programming tips
If you are having difficulty programming the
integrated remote control, here are some
helpful tips:
R Check the frequency of hand-held remote
control A (typically located on the reverse
side of the remote). The integrated remote
control is compatible with radio-frequency
devices operating between 280-390 MHz.
R Put a new battery in hand-held remote
control A. This will increase the likelihood
of the hand-held remote control sending a
stronger and more accurate signal to the
integrated remote control.
R While performing step 3, hold hand-held
remote control A at different lengths and
angles from the signal transmitter button
( ; , = or ?) you are programming.
Attempt varying angles at the distance of 2
to 12 inches (5 to 30 cm) away or the same
angle at varying distances.
R If another hand-held remote control is
available for the same device, try the
programming steps again using that other
hand-held remote control. Make sure new
batteries are in the hand-held remote
control before beginning the procedure.
R Straighten the antenna wire from the
garage door opener assembly. This may
help improve transmitting and/or receiving
signals.
i Certain types of garage door openers are
incompatible with the integrated remote
control. If you should experience further
difficulties with programming the
integrated remote control, contact an
authorized Mercedes-Benz Center, or call
the Mercedes-Benz Customer Assistance
Center (USA only) at
1-800-FOR-MERCedes (1-800-367-6372),
or the HomeLink ®
Hotline (USA only) at
1-800-355-3515, or the Customer Service
(Canada only) at 1-800-387-0100.
222Useful featuresControls in detail
X164_AKB; 5; 31, en-USd2ureepe,Version: 2.11.8.12009-09-11T12:30:16+02:00 - Seite 222
Page 230 of 380
iLeaving the engine running and the fuel
filler cap open can cause the yellow fuel
tank reserve warning lamp to flash and the
malfunction indicator lamp ! (USA
only) or ; (Canada only) to illuminate.
For more information, see also “Practical
hints” ( Y page 320).XRemove the SmartKey from the starter
switch.
KEYLESS-GO: Open the driver’s door. This
puts the starter switch in position 0, same
as with the SmartKey removed from the
starter switch. The driver’s door then can
be closed again.XOpening: Press fuel filler flap : at the
point indicated by the arrow.XTurn fuel filler cap ; counterclockwise.XTake off fuel filler cap ;.
!
The fuel filler cap is tethered to the fuel
filler neck. Do not drop the cap. It could
damage the vehicle paint finish.
XSet fuel filler cap ; on fuel filler flap :.XFully insert filler nozzle unit and refuel.XOnly fill your tank until the filler nozzle unit
cuts out – do not top off or overfill .XClosing: Turn fuel filler cap ; clockwise
until it audibly engages.
i Close the fuel filler flap before locking the
vehicle. Otherwise the flap locking pin will
prevent closing the fuel filler flap.
XClose fuel filler flap :.
Low outside temperatures (diesel
engine)
! Do not fill the tank with gasoline. Do not
blend diesel fuel with gasoline or kerosene.
The fuel system and engine will otherwise
be damaged, which is not covered by the
Mercedes-Benz Limited Warranty.
To prevent malfunctions, diesel fuel with
improved cold flow characteristics is offered
in the winter months. Check with your fuel
retailer.
Check regularly and before a long trip
For information on quantities and
requirements of operating agents, see “Fuels,
coolants, lubricants, etc.” ( Y page 368).
Check the following:
R Engine oil level ( Y page 230)
R Tire inflation pressure ( Y page 237)
R Coolant level ( Y page 231)
R Vehicle lighting ( Y page 328)
R Washer system and headlamp cleaning
system ( Y page 232)
R Brake fluid ( Y page 233)
Engine compartment
Hood
GWarning!
Do not pull the release lever while the vehicle
is in motion. Otherwise the hood could be
forced open by passing air flow.
This could cause the hood to come loose and
injure you and/or others.
Opening
GWarning!
Do not open the hood when the engine is
overheated. You could be seriously injured.
Observe the coolant temperature display to
determine whether the engine may be
overheated. If you see flames or smoke
coming from the engine compartment, move
away from the vehicle. Wait until the engine
has cooled. If necessary, call the fire
department.
228Engine compartmentOperation
X164_AKB; 5; 31, en-USd2ureepe,Version: 2.11.8.12009-09-11T12:30:16+02:00 - Seite 228