cigarette MERCEDES-BENZ GLA-Class 2015 X156 Owner's Manual
[x] Cancel search | Manufacturer: MERCEDES-BENZ, Model Year: 2015, Model line: GLA-Class, Model: MERCEDES-BENZ GLA-Class 2015 X156Pages: 374, PDF Size: 6.85 MB
Page 9 of 374

Children
In the vehicle .................................. .58
Restraint systems ............................ 59
Special seat belt retractor .............. .59
Child seat
Forward-facing restraint system ...... 62
LATCH-type (ISOFIX) child seat
anchors ............................................ 60
On the front-passenger seat ............ 62
Rearward-facing restraint system .... 62
Top Tether ...................................... .61
Cigarette lighter ................................ 276
Cleaning Mirror turn signal .......................... .301
Climate control
Air-conditioning system ................. 127
Automatic climate control (dual-
zone) .............................................. 129
Controlling automatically .............. .133
Cooling with air dehumidification .. 131
Defrosting the windows ................. 135
Defrosting the windshield .............. 135
General notes ................................ 126
Indicator lamp ................................ 133
Information about using auto-
matic climate control ..................... 130
Maximum cooling .......................... 135
Notes on using the air-condition-
ing system ..................................... 128
Overview of systems ..................... .126
Problems with cooling with air
dehumidification ............................ 133
Problem with the rear window
defroster ........................................ 137
Refrigerant ..................................... 367
Refrigerant filling capacity ............. 367
Setting the air distribution ............. 134
Setting the airflow ......................... 134
Setting the air vents ..................... .138
Setting the temperature ................ 133
Switching air-recirculation mode
on/off ............................................ 137
Switching on/off ........................... 131
Switching residual heat on/off ...... 137 Switching the rear window
defroster on/off ............................ 136
Switching the ZONE function on/
off .................................................
.134
Climate control system
Automatic engine start .................. 146
Automatic engine switch-off .......... 145
Deactivating/activating ................. 146
General information ....................... 145
Important safety notes .................. 145
Introduction ................................... 145
Cockpit
Overview .......................................... 32
see Instrument cluster
Coffee cup symbol
see ATTENTION ASSIST
COLLISION PREVENTION ASSIST
Display message ............................ 222
COLLISION PREVENTION ASSIST
PLUS
Activating/deactivating ................. 214
Display message ............................ 229
Operation/notes .............................. 66
COMAND
see separate operating instructions
Combination switch .......................... 112
Compass Calibrating ..................................... 290
Calling up ....................................... 289
Setting .......................................... .289
Consumption statistics (on-board
computer) .......................................... 207
Convenience closing feature .............. 88
Convenience opening feature ............ 88
Coolant (engine) Checking the level ......................... 295
Display message ............................ 238
Filling capacity ............................... 366
Important safety notes .................. 365
Temperature (on-board computer, AMG vehicles) ................................ 218
Temperature gauge ........................ 204
Warning lamp ................................. 260
Cooling
see Climate control
Copyright ............................................. 30 Index
7
Page 39 of 374

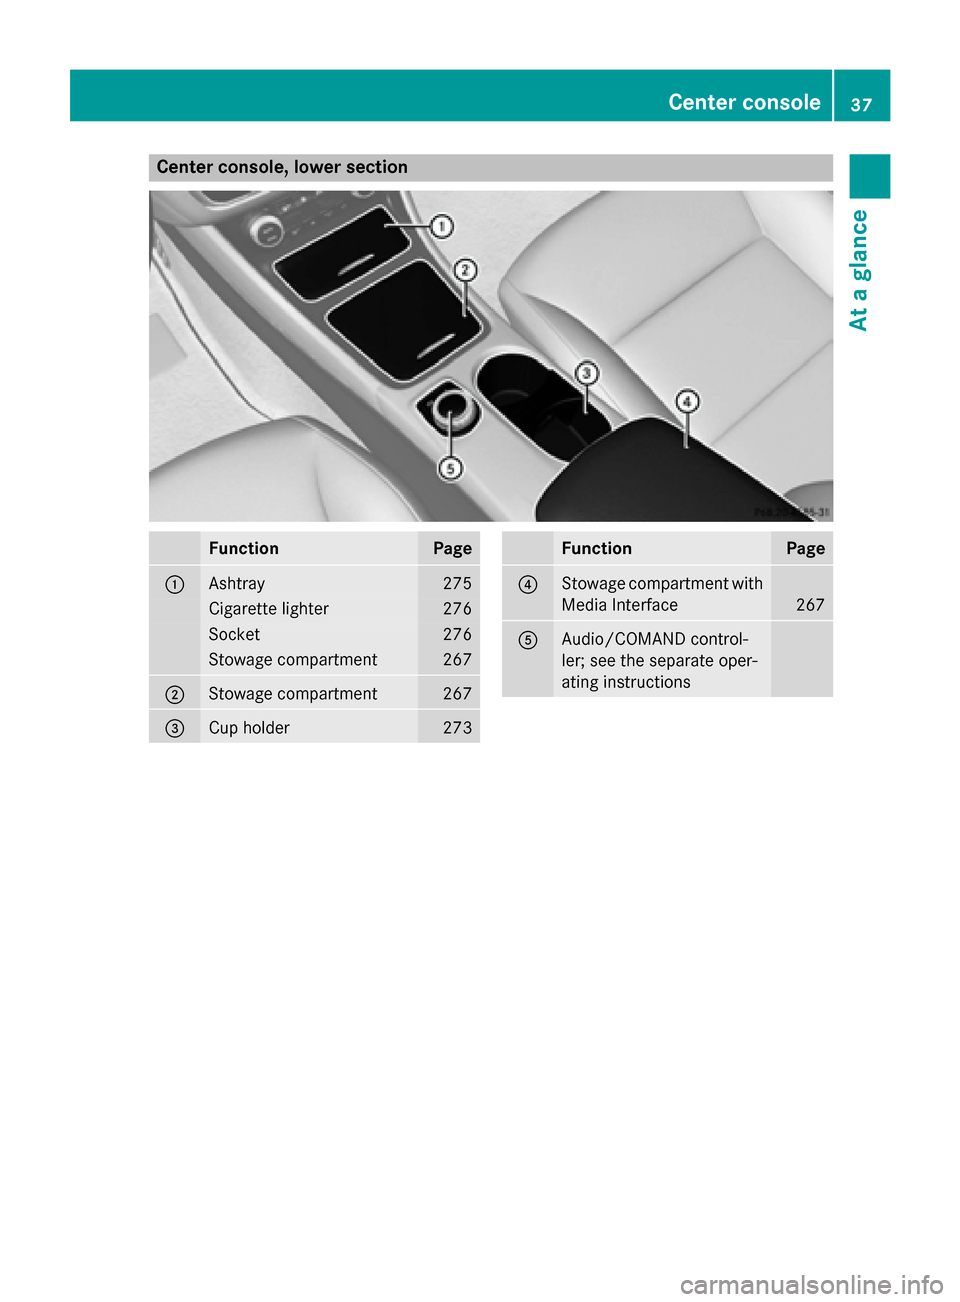
Center console, lower section
Function Page
0043
Ashtray 275
Cigarette lighter 276
Socket 276
Stowage compartment 267
0044
Stowage compartment 267
0087
Cup holder 273 Function Page
0085
Stowage compartment with
Media Interface 267
0083
Audio/COMAND control-
ler; see the separate oper-
ating instructions Center console
37At a glance
Page 278 of 374

X
To open: pull cover 0087out by its top edge.
X To remove: pull insert0044by recess 0043in
the direction of arrow 0085until it audibly
releases.
X Lift insert 0044up and out.
X To install the insert: install insert0044from
above into the holder and press down until it engages. Cigarette lighter
G
WARNING
You can burn yourself if you touch the hot
heating element or the socket of the cigarette lighter.
In addition, flammable materials can ignite if:
R the hot cigarette lighter falls
R a child holds the hot cigarette lighter to
objects, for example
There is a risk of fire and injury.
Always hold the cigarette lighter by the knob.
Always make sure that the cigarette lighter is
out of reach of children. Never leave children unsupervised in the vehicle.
Your attention must always be focused on the traffic conditions. Only use the cigarette
lighter when road and traffic conditions per-
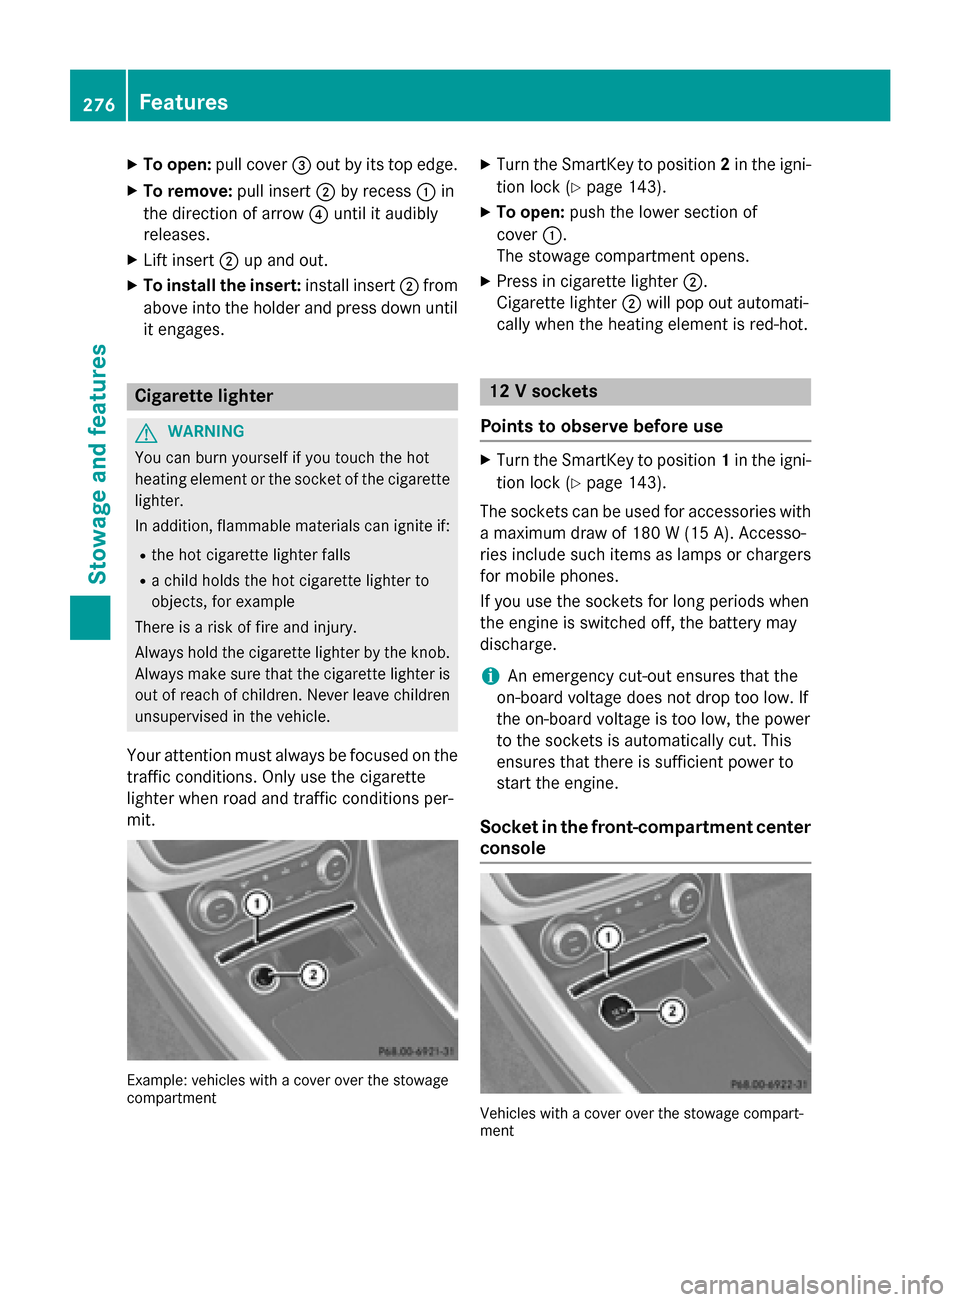
mit. Example: vehicles with a cover over the stowage
compartment X
Turn the SmartKey to position 2in the igni-
tion lock (Y page 143).
X To open: push the lower section of
cover 0043.
The stowage compartment opens.
X Press in cigarette lighter 0044.
Cigarette lighter 0044will pop out automati-
cally when the heating element is red-hot. 12 V sockets
Points to observe before use X
Turn the SmartKey to position 1in the igni-
tion lock (Y page 143).
The sockets can be used for accessories with
a maximum draw of 180 W (15 A). Accesso-
ries include such items as lamps or chargers
for mobile phones.
If you use the sockets for long periods when
the engine is switched off, the battery may
discharge.
i An emergency cut-out ensures that the
on-board voltage does not drop too low. If
the on-board voltage is too low, the power
to the sockets is automatically cut. This
ensures that there is sufficient power to
start the engine.
Socket in the front-compartment center
console Vehicles with a cover over the stowage compart-
ment 276
FeaturesSto
wage an d features
Page 311 of 374

Using the TIREFIT kit
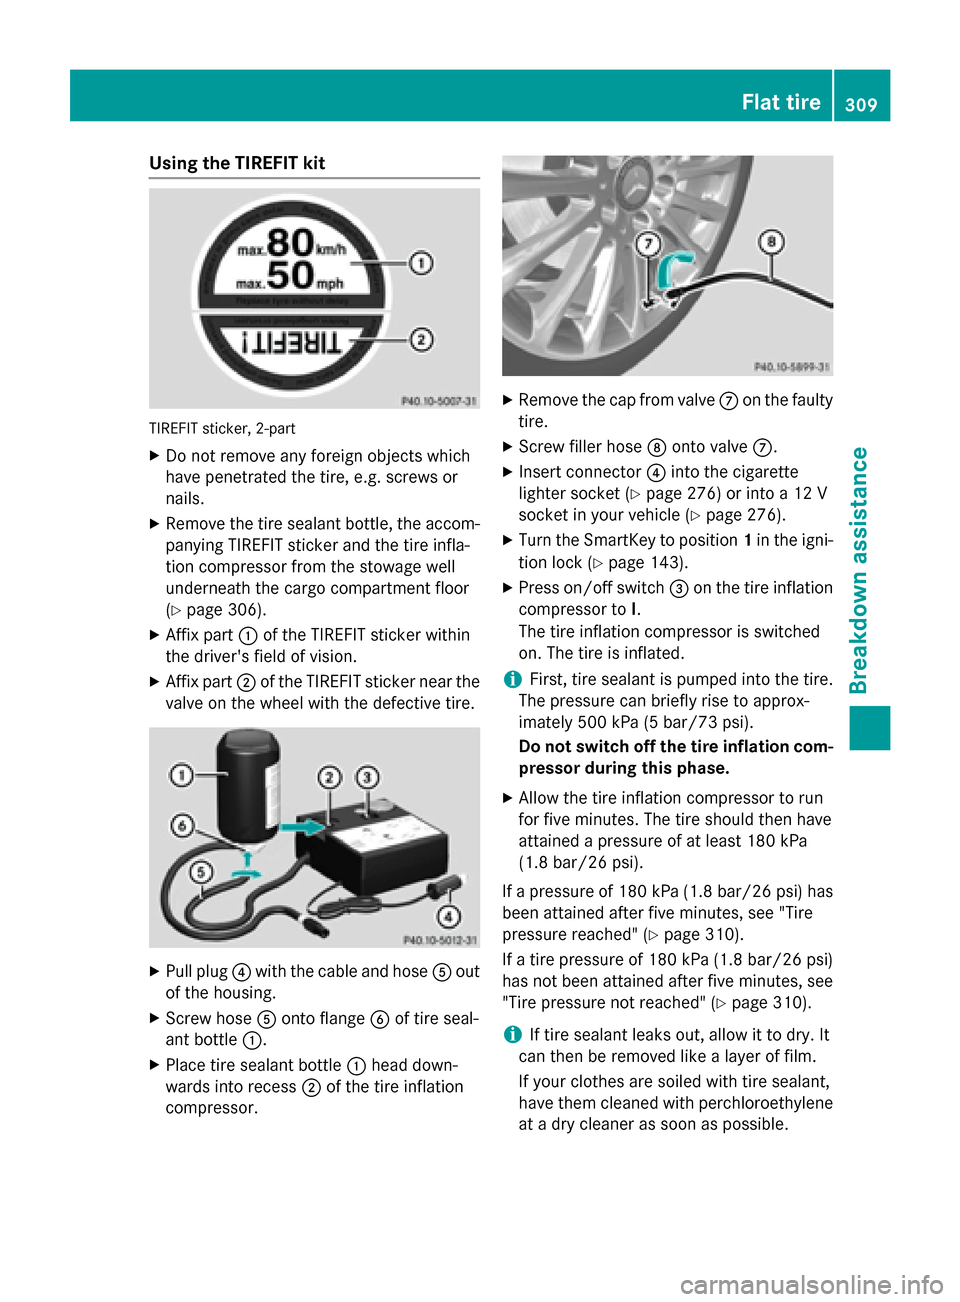
TIREFIT sticker, 2-part
X Do not remove any foreign objects which
have penetrated the tire, e.g. screws or
nails.
X Remove the tire sealant bottle, the accom-
panying TIREFIT sticker and the tire infla-
tion compressor from the stowage well
underneath the cargo compartment floor
(Y page 306).
X Affix part 0043of the TIREFIT sticker within
the driver's field of vision.
X Affix part 0044of the TIREFIT sticker near the
valve on the wheel with the defective tire. X
Pull plug 0085with the cable and hose 0083out
of the housing.
X Screw hose 0083onto flange 0084of tire seal-
ant bottle 0043.
X Place tire sealant bottle 0043head down-
wards into recess 0044of the tire inflation
compressor. X
Remove the cap from valve 006Bon the faulty
tire.
X Screw filler hose 006Conto valve 006B.
X Insert connector 0085into the cigarette
lighter socket (Y page 276) or into a 12 V
socket in your vehicle (Y page 276).
X Turn the SmartKey to position 1in the igni-
tion lock (Y page 143).
X Press on/off switch 0087on the tire inflation
compressor to I.
The tire inflation compressor is switched
on. The tire is inflated.
i First, tire sealant is pumped into the tire.
The pressure can briefly rise to approx-
imately 500 kPa (5 bar/73 psi).
Do not switch off the tire inflation com-
pressor during this phase.
X Allow the tire inflation compressor to run
for five minutes. The tire should then have
attained a pressure of at least 180 kPa
(1.8 bar/26 psi).
If a pressure of 180 kPa (1.8 bar/26 psi) has been attained after five minutes, see "Tire
pressure reached" (Y page 310).
If a tire pressure of 180 kPa (1.8 bar/26 psi) has not been attained after five minutes, see"Tire pressure not reached" (Y page 310).
i If tire sealant leaks out, allow it to dry. It
can then be removed like a layer of film.
If your clothes are soiled with tire sealant,
have them cleaned with perchloroethylene
at a dry cleaner as soon as possible. Flat tire
309Breakdown assistance Z