dimensions MERCEDES-BENZ GLA-Class 2015 X156 Owner's Manual
[x] Cancel search | Manufacturer: MERCEDES-BENZ, Model Year: 2015, Model line: GLA-Class, Model: MERCEDES-BENZ GLA-Class 2015 X156Pages: 374, PDF Size: 6.85 MB
Page 20 of 374

Sockets
Center console .............................. 276
Luggage compartment ...................2 77
Points to observe before use ......... 276
Rear compartment ......................... 277
Specialist workshop ............................ 28
Special seat belt retractor .................. 59
Speed, controlling see Cruise control
Speed Limit Assist
General notes ................................ 198
Speedometer
Activating/deactivating the addi-
tional speedometer ........................ 215
Digital ............................................ 208
In the Instrument cluster ................. 33
Segments ...................................... 205
Selecting the unit of measure-
ment .............................................. 215
SPORT handling mode
Activating/deactivating (AMG
vehicles) .......................................... 70
Warning lamp ................................. 257
Standing lamps
Display message ............................ 236
Switching on/off ........................... 112
Start/stop function
see ECO start/stop function
Starting (engine) ................................ 143
STEER CONTROL .................................. 72
Steering (display message) .............. 251
Steering assistant STEER CON-
TROL
see STEER CONTROL
Steering wheel
Adjusting (manually) ...................... 102
Button overview ............................... 35
Buttons (on-board computer) ......... 205
Cleaning ......................................... 303
Important safety notes .................. 102
Paddle shifters ............................... 153
Steering wheel paddle shifters ........ 153
Stopwatch (RACETIMER) ................... 219
Stowage Center console (front) .................... 267
Stowage areas ................................... 267 Stowage compartments
Armrest (front) ............................... 268
Armrest (under) ............................. 268
Center console (rear) ..................... 269
Cup holders ................................... 273
Eyeglasses compartment ............... 267
Glove box ....................................... 267
Important safety information ......... 267
Parcel net ...................................... 269
Under driver's seat/front-
passenger sea t.............................. 268
Summer opening
see Convenience opening feature
Summer tires ..................................... 326
Sun visor ............................................ 275
Surround lighting (on-board com-
puter) .................................................. 216
SUV (Sport Utility Vehicle) ....................... 26
Switching air-recirculation mode
on/off ................................................. 137 T
Tachometer ........................................ 205
Tailgate Display message ............................ 250
Emergency unlocking ....................... 86
Important safety notes .................... 83
Limiting the opening angle ............... 86
Obstruction detectio n...................... 84
Opening/closing (from outside) ....... 84
Opening/closing automatically
from inside ....................................... 85
Opening/closing automatically
from outside .................................... 85
Opening dimensions ...................... 368
Tail lamps
Display message ............................ 235
see Lights
Tank
see Fuel tank
Tank content
Fuel gauge ....................................... 33
Technical data
Information .................................... 360
Tires/wheels ................................. 352
Vehicle data ................................... 368 18
Index
Page 23 of 374

Display message ............................ 235
Switching on/off ........................... 112
Type identification plate
see Vehicle identification plate U
Unlocking Emergency unlocking ....................... 83
From inside the vehicle (central
unlocking button) ............................. 82 V
Vanity mirror (in the sun visor) ........ 275
Vehicle Correct use ...................................... 28
Data acquisition ............................... 29
Equipment ....................................... 24
Individual settings .......................... 215
Limited Warranty ............................. 29
Loading .......................................... 335
Locking (in an emergency )............... 83
Locking (SmartKey ).......................... 76
Lowering ........................................ 351
Maintenance .................................... 25
Parking for a long period ................ 162
Pulling away ................................... 144
Raising ........................................... 349
Reporting problems ......................... 28
Securing from rolling away ............ 349
Towing away .................................. 317
Tow-starting ................................... 317
Transporting .................................. 320
Unlocking (in an emergency) ........... 83
Unlocking (SmartKey )...................... 76
Vehicle data ................................... 368
Vehicle battery
see Battery (vehicle)
Vehicle data
Roof load (maximum) ..................... 368
Vehicle data (off-road driving)
Approach/departure angle ............ 369
Maximum gradient climbing abil-
ity .................................................. 369
Maximum water depth ................... 369
Vehicle dimensions ........................... 368
Vehicle emergency locking ................ 83Vehicle identification number
see VIN
Vehicle identification plate .............. 360
Vehicle maintenance see ASSYST PLUS
Vehicle tool kit .................................. 306
Ventilation see Climate control
Video (DVD) ........................................ 211
VIN Seat ............................................... 361
Type plate ...................................... 360 W
Warning and indicator lamps ABS ................................................ 254
Brakes ........................................... 254
Check Engine ................................. 260
Coolant .......................................... 260
Distance warning ........................... 262
DISTRONIC PLUS ........................... 262
ESP ®
.............................................. 256
ESP ®
OFF ....................................... 257
Fuel tank ........................................ 260
Overview .......................................... 34
Reserve fue l................................... 260
Restraint system ............................ 259
Seat belt ........................................ 252
SPORT handling mod e................... 257
Tire pressure monitor .................... 263
Warranty .............................................. 24
Washer fluid Display message ............................ 251
Wheel and tire combination
see Tires
Wheel bolt tightening torque ........... 351
Wheel chock ...................................... 349
see Wheel chock
Wheels
Changing a whee l.......................... 347
Checking ........................................ 325
Cleaning ......................................... 300
Cleaning (warning) ......................... 348
General notes ................................ 352
Important safety notes .................. 324
Information on driving .................... 324 Index
21
Page 86 of 374

i
The opening dimensions of the tailgate
can be found in the "Vehicle data" section
(Y page 368).
You should preferably place luggage or loads
in the cargo compartment. Observe the load-
ing guidelines (Y page 266).
Do not leave the SmartKey in the cargo com-
partment. You could otherwise lock yourself
out.
The tailgate can be:
R opened and closed manually from outside
R opened/closed automatically from outside
R opened/closed automatically from inside
R unlocked from inside with the mechanical
key Tailgate obstruction detection with
reversing feature
On vehicles with tailgate remote closing fea-
ture, the tailgate is equipped with automatic
obstacle recognition with a reversing feature. If a solid object blocks or restricts the tailgate
when automatically opening or closing, this
procedure is stopped. If the tailgate is stop-
ped during the closing process, the tailgate
automatically opens again slightly. The auto-
matic obstacle recognition with reversing
function is only an aid. It is not a substitute for your attentiveness when opening and closingthe tailgate. G
WARNING
The reversing feature does not react:
R to soft, light and thin objects, e.g. small fin-
gers
R over the last 1/3 in (8 mm) of the closing
movement
This means that the reversing feature cannot
prevent someone being trapped in these sit-
uations. There is a risk of injury.
Make sure that no body parts are in close
proximity during the closing procedure. If somebody becomes trapped:
R press the 0054button on the SmartKey, or
R press the remote operating switch on the
driver’s door, or
R press the closing button/STOP button on
the trunk lid or
R pull on the trunk lid handle Opening/closing from outside
Opening X
Press the 0036button on the SmartKey. X
Pull handle 0043.
X Raise the tailgate.
Closing X
Pull the tailgate down using handle 0043.
X Allow the tailgate to drop into the lock.
X If necessary, lock the vehicle with the 0037
button on the SmartKey. 84
Cargo compartmentOpening and closing
Page 87 of 374

Opening/closing automatically from
outside
Important safety notes G
WARNING
Parts of the body could become trapped dur-
ing automatic closing of the tailgate. More-
over, people, e.g. children, may be standing in the closing area or may enter the closing area
during the closing process. There is a risk of
injury.
Make sure that nobody is in the vicinity of the closing area during the closing process.
Use one of the following options to stop the
closing process:
R press the 0054button on the SmartKey.
R press the remote operating switch on the
driver’s door.
R press the close button or STOP button on
the tailgate.
R pull the handle on the tailgate. G
WARNING
Combustion engines emit poisonous exhaust
gases such as carbon monoxide. If the tailgate is open when the engine is running, particu-
larly if the vehicle is moving, exhaust fumes
could enter the passenger compartment.
There is a risk of poisoning.
Turn off the engine before opening the tail-
gate. Never drive with the tailgate open.
! The tailgate swings upwards and to the
rear when opened. Therefore, make sure
that there is sufficient clearance above and behind the tailgate.
i The opening dimensions of the tailgate
can be found in the "Vehicle data" section
(Y page 368).
Opening the tailgate automatically You can open the tailgate automatically with
the SmartKey or the handle in the tailgate. X
Press the 0054button on the SmartKey
until the tailgate opens.
or X If the tailgate is unlocked, pull the handle
and let it go again immediately.
Closing the tailgate automatically X
To close: press closing button 0044on the
tailgate.
X To stop the closing process: press STOP
button 0043on the tailgate.
or
X Pull the handle in the tailgate.
or
X Press the 0054button on the SmartKey
until the tailgate opens again.
or X Press the remote operating switch in the
driver's door. Opening/closing automatically from
inside
Important safety notes G
WARNING
Combustion engines emit poisonous exhaust
gases such as carbon monoxide. If the tailgate is open when the engine is running, particu-
larly if the vehicle is moving, exhaust fumes
could enter the passenger compartment.
There is a risk of poisoning. Cargo compartment
85Opening and closing
Z
Page 88 of 374

Turn off the engine before opening the tail-
gate. Never drive with the tailgate open.
! The tailgate swings upwards and to the
rear when opened. Therefore, make sure
that there is sufficient clearance above and behind the tailgate.
i The opening dimensions of the tailgate
can be found in the "Vehicle data" section
(Y page 368).
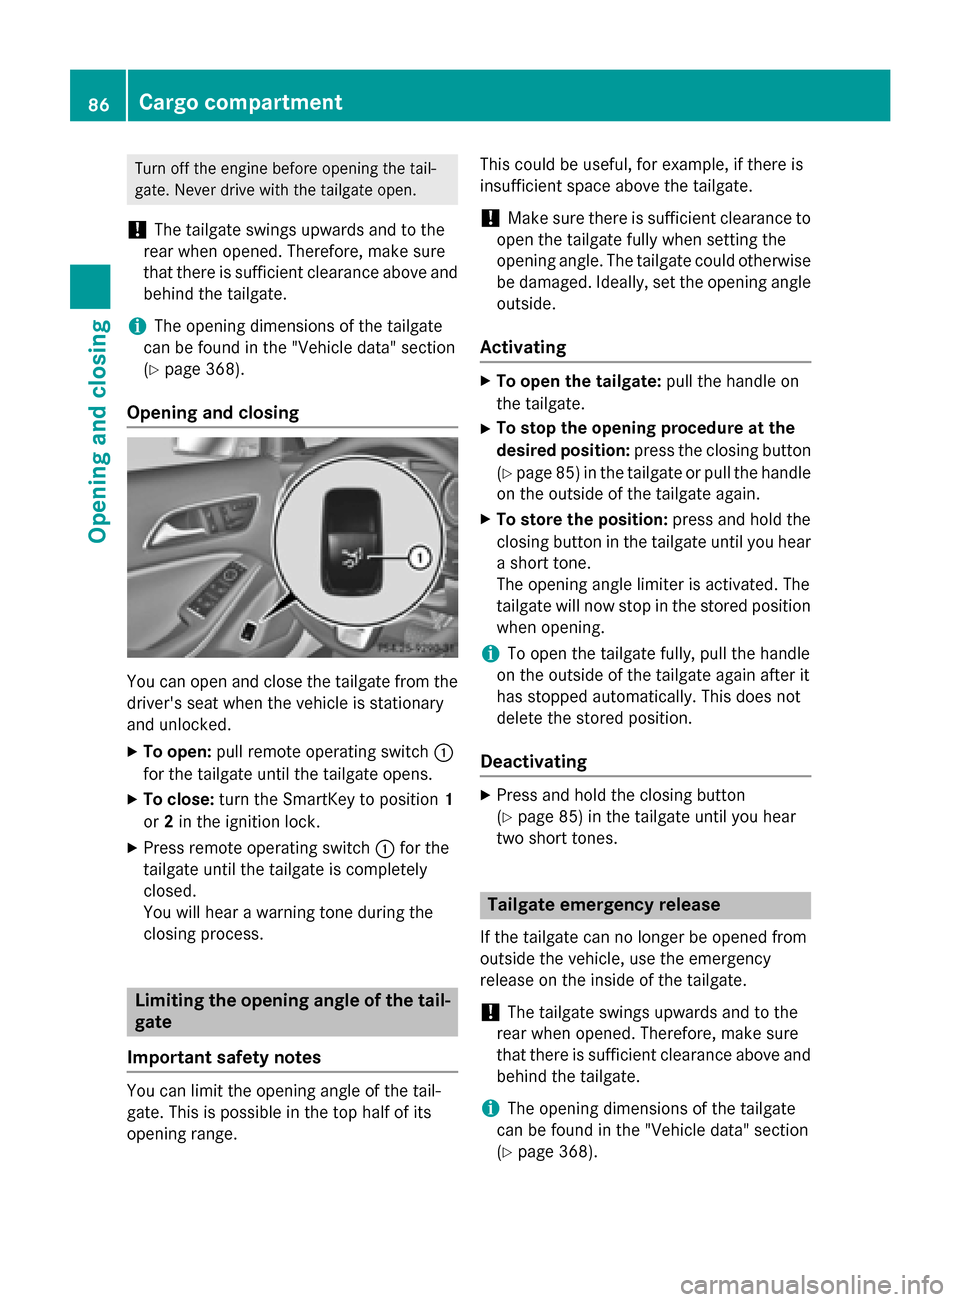
Opening and closing You can open and close the tailgate from the
driver's seat when the vehicle is stationary
and unlocked.
X To open: pull remote operating switch 0043
for the tailgate until the tailgate opens.
X To close: turn the SmartKey to position 1
or 2in the ignition lock.
X Press remote operating switch 0043for the
tailgate until the tailgate is completely
closed.
You will hear a warning tone during the
closing process. Limiting the opening angle of the tail-
gate
Important safety notes You can limit the opening angle of the tail-
gate. This is possible in the top half of its
opening range. This could be useful, for example, if there is
insufficient space above the tailgate.
! Make sure there is sufficient clearance to
open the tailgate fully when setting the
opening angle. The tailgate could otherwise be damaged. Ideally, set the opening angleoutside.
Activating X
To open the tailgate: pull the handle on
the tailgate.
X To stop the opening procedure at the
desired position: press the closing button
(Y page 85) in the tailgate or pull the handle
on the outside of the tailgate again.
X To store the position: press and hold the
closing button in the tailgate until you hear a short tone.
The opening angle limiter is activated. The
tailgate will now stop in the stored positionwhen opening.
i To open the tailgate fully, pull the handle
on the outside of the tailgate again after it
has stopped automatically. This does not
delete the stored position.
Deactivating X
Press and hold the closing button
(Y page 85) in the tailgate until you hear
two short tones. Tailgate emergency release
If the tailgate can no longer be opened from
outside the vehicle, use the emergency
release on the inside of the tailgate.
! The tailgate swings upwards and to the
rear when opened. Therefore, make sure
that there is sufficient clearance above and
behind the tailgate.
i The opening dimensions of the tailgate
can be found in the "Vehicle data" section
(Y page 368). 86
Cargo compartmentOpening and closing
Page 326 of 374

Useful information
i This Operator's Manual describes all
models and all standard and optional equip- ment of your vehicle available at the time of
publication of the Operator's Manual.
Country-specific differences are possible.
Please note that your vehicle may not be
equipped with all features described. This
also applies to safety-related systems and
functions.
i Read the information on qualified special-
ist workshops (Y page 28). Important safety notes
G
WARNING
If wheels and tires of the wrong size are used, the wheel brakes or suspension components
may be damaged. There is a risk of an acci-
dent.
Always replace wheels and tires with those
that fulfill the specifications of the original
part.
When replacing wheels, make sure to use the
correct:
R designation
R model
When replacing tires, make sure to use the
correct:
R designation
R manufacturer
R model G
WARNING
A flat tire severely impairs the driving, steer-
ing and braking characteristics of the vehicle.
There is a risk of accident.
Tires without run-flat characteristics:
R do not drive with a flat tire.
R immediately replace the flat tire with your
emergency spare wheel or spare wheel, or
consult a qualified specialist workshop. Tires with run-flat characteristics:
R pay attention to the information and warn-
ing notices on MOExtended tires (tires with
run-flat characteristics).
Accessories that are not approved for your
vehicle by Mercedes-Benz or that are not
being used correctly can impair operating
safety.
Before purchasing and using non-approved
accessories, visit a qualified specialist work-
shop and inquire about:
R suitability
R legal stipulations
R factory recommendations
Information on dimensions and types of
wheels and tires for your vehicle can be found (Y page 352).
Information on air pressure for the tires on
your vehicle can be found:
R on the vehicle's Tire and Loading Informa-
tion placard on the B-pillar
R on the tire pressure label on the fuel filler
flap (Y page 158)
R under "Tire pressure" (Y page 328)
i Further information on wheels and tires
can be obtained at any qualified specialist
workshop. Operation
Information on driving
R If the vehicle is heavily loaded, check the
tire pressures and correct them if neces-
sary.
R While driving, pay attention to vibrations,
noises and unusual handling characteris-
tics, e.g. pulling to one side. This may indi- cate that the wheels or tires are damaged.If you suspect that a tire is defective,
reduce your speed immediately. Stop the
vehicle as soon as possible to check the
wheels and tires for damage. Hidden tire
damage could also be causing the unusual 324
OperationWheels and tires
Page 331 of 374

Example: tire pressure table with tire dimensions
Some tire pressure tables show only the rim
diameters instead of the full tire size, e.g.
R18 . Rim diameter is part of the tire size and
can be found on the tire sidewall
(Y page 342). If the tire pressures have been set to the
lower values for lighter loads and/or lower
road speeds, the pressures should be reset to
the higher values:
R if you want to drive with an increased load
and/or
R if you want to drive at higher road speeds
i The tire pressures for increased loads
and/or higher road speeds, shown in the
tire pressure table, may have a negative
effect on driving comfort.
If the tire pressure is not set correctly, this
can lead to an excessive build up of heat and
a sudden loss of pressure.
For more information, contact a qualified spe- cialist workshop. Important notes on tire pressure
G
WARNING
If the tire pressure drops repeatedly, the
wheel, valve or tire may be damaged. Tire
pressure that is too low may result in a tire
blow-out. There is a risk of an accident. R Check the tire for foreign objects.
R Check whether the wheel is losing air or the
valve is leaking.
If you are unable to rectify the damage, con-
tact a qualified specialist workshop. G
WARNING
If you fit unsuitable accessories onto tire
valves, the tire valves may be overloaded and malfunction, which can cause tire pressure
loss. Due to their design, retrofitted tire pres- sure monitors keep the tire valve open. This
can also result in tire pressure loss. There is a
risk of an accident.
Only screw the standard valve cap or other
valve caps approved by Mercedes-Benz for
your vehicle onto the tire valve.
Use a suitable pressure gauge to check the
tire pressure. The outer appearance of a tire
does not permit any reliable conclusion about the tire pressure.
The tire temperature and pressure increase
when the vehicle is in motion. This is depend-
ent on the driving speed and the load.
Therefore, you should only correct tire pres-
sures when the tires are cold.
The tires are cold:
R if the vehicle has been parked without
direct sunlight on the tires for at least three
hours and
R if the vehicle has not been driven further
than 1 mile (1.6 km)
The tire temperature changes depending on
the outside temperature, the vehicle speed
and the tire load. If the tire temperature
changes by 18 ‡ (10 †), the tire pressure
changes by approximately 10 kPa (0.1 bar/
1.5 psi). Take this into account when check- Tire pressure
329Wheels and tires Z
Page 350 of 374

be found under "MOExtended tires (tires with
run-flat characteristics" (Y page 307).Rotating the wheels
G
WARNING
Interchanging the front and rear wheels may
severely impair the driving characteristics if
the wheels or tires have different dimensions. The wheel brakes or suspension components
may also be damaged. There is a risk of acci-
dent.
Rotate front and rear wheels only if the wheels and tires are of the same dimensions.
! On vehicles equipped with a tire pressure
monitor, electronic components are loca-
ted in the wheel.
Tire-mounting tools should not be used
near the valve. This could damage the elec- tronic components.
Only have tires changed at a qualified spe-cialist workshop.
Always pay attention to the instructions and
safety notes when changing a wheel
(Y page 347).
The wear patterns on the front and rear tires
differ, depending on the operating conditions.
Rotate the wheels before a clear wear pattern has formed on the tires. Front tires typically
wear more on the shoulders and the rear tires in the center.
If your vehicle's tire configuration allows, you can rotate the wheels according to the inter-
vals in the tire manufacturer's warranty book
in your vehicle documents. If no warranty
book is available, the tires should be rotated
every 3,000 to 6,000 miles (5,000 to
10,000 km), or earlier if tire wear requires. Do not change the direction of wheel rotation.
Clean the contact surfaces of the wheel and
the brake disc thoroughly every time a wheel
is rotated. Check the tire pressure and, if nec- essary, restart the tire pressure loss warning
system or the tire pressure monitor. Direction of rotation
Tires with a specified direction of rotation
have additional benefits, e.g. if there is a risk of hydroplaning. You will only gain these ben-
efits if the correct direction of rotation is
maintained.
An arrow on the sidewall of the tire indicates
its correct direction of rotation. Storing wheels
Store wheels that are not being used in a cool, dry and preferably dark place. Protect the
tires from oil, grease, gasoline and diesel. Cleaning the wheels
G
WARNING
The water jet from a circular jet nozzle (dirt
blasters) can cause invisible exterior damage to the tires or chassis components. Compo-
nents damaged in this way may fail unexpect-edly. There is a risk of an accident.
Do not use power washers with circular jet
nozzles to clean the vehicle. Have damaged
tires or chassis components replaced imme-
diately. Mounting a wheel
Preparing the vehicle X
Stop the vehicle on solid, non-slippery and
level ground.
X Apply the electric parking brake manually
(Y page 160).
X Bring the front wheels into the straight-
ahead position.
X Move the DIRECT SELECT lever to position
P.
X Switch off the engine. 348
Changing a wheelWheels and tires
Page 370 of 374

All other models Capacity
Refrigerant
22.9 ± 0.4 oz
(650 ± 10 g) PAG oil
4.2 oz
(120 g) Vehicle data
General notes
Please note that for the specified vehicle
data: R the heights specified may vary as a result
of:
- tires
- load
- condition of the suspension
- optional equipment
R optional equipment reduces the maximum
payload. Dimensions and weights Model
0043 0043
Maximum
headroom 0044
0044
Opening height GLA 250
73.6 in
(1876 mm) 80.5 in
(2045 mm) GLA 250
4MATIC
75.4 in
(1914 mm) 82.0 in
(2083 mm) AMG vehicles
73.5 in
(1866 mm) 79.5 in
(2019 mm) Missing values were not available at time of
going to print.
AMG vehicles
Vehicle length
175.0 in
(4445 mm) Vehicle width
including exterior
mirrors
79.6 in
(2022 mm) Vehicle height
58.2 in
(1479 mm) Wheelbase
106.3 in
(2699 mm) Turning radius
38.7 ft
(11.8 m) Maxi
mum roof
load 220.5 lb
(100 kg) All other models
Vehicle length
173.9 in
(4417 mm) Vehicle width
including exterior
mirrors
79.6 in
(2022 mm) 368
Vehicle dataTechnical data