reset MERCEDES-BENZ GLA-Class 2016 X156 Comand Manual
[x] Cancel search | Manufacturer: MERCEDES-BENZ, Model Year: 2016, Model line: GLA-Class, Model: MERCEDES-BENZ GLA-Class 2016 X156Pages: 246, PDF Size: 6.73 MB
Page 122 of 246
Using call lists
XTo call up the telephone menu: press the
%button.
XTo switch to the menu bar: slide 6the
controller.
XTo select Call Lists: turn and press the
controller.
XTo select Calls ReceivedorCalls
Dialed: turn and press the controller.
The relevant list is displayed.
XTo select an entry and make a call: turn and
press the controller.
Further information about ending a call
(
Ypage 123).
Using the phone book
XTo call up the telephone menu: press the
% button.
XTo select Namein the telephone menu: turn
and press the controller.
XSearch for and call a contact (Ypage 124).
Further information about ending a call
(
Ypage 123).
Using speed dial
Option 1
XTo call up the telephone menu: press the
% button.
XTo highlight a number from the character
bar: turn the controller.
XPress the controller for longer than two
seconds.
The telephone menu displays the selected
entry. The number is dialed.
Option 2
XTo call up the telephone menu: press the
% button.
XTo switch to the menu bar: slide 6the
controller.
XTo select Call Lists: turn and press the
controller.
XTo select Speed Dial Preset List: turn
and press the controller.
The speed dial list is displayed.
XTo select an entry and make a call: turn and
press the controller.
The telephone menu displays the selected
entry. The number is dialed.
Further information on setting up speed dial
(
Ypage 137).
Further information about ending a call
(
Ypage 123).
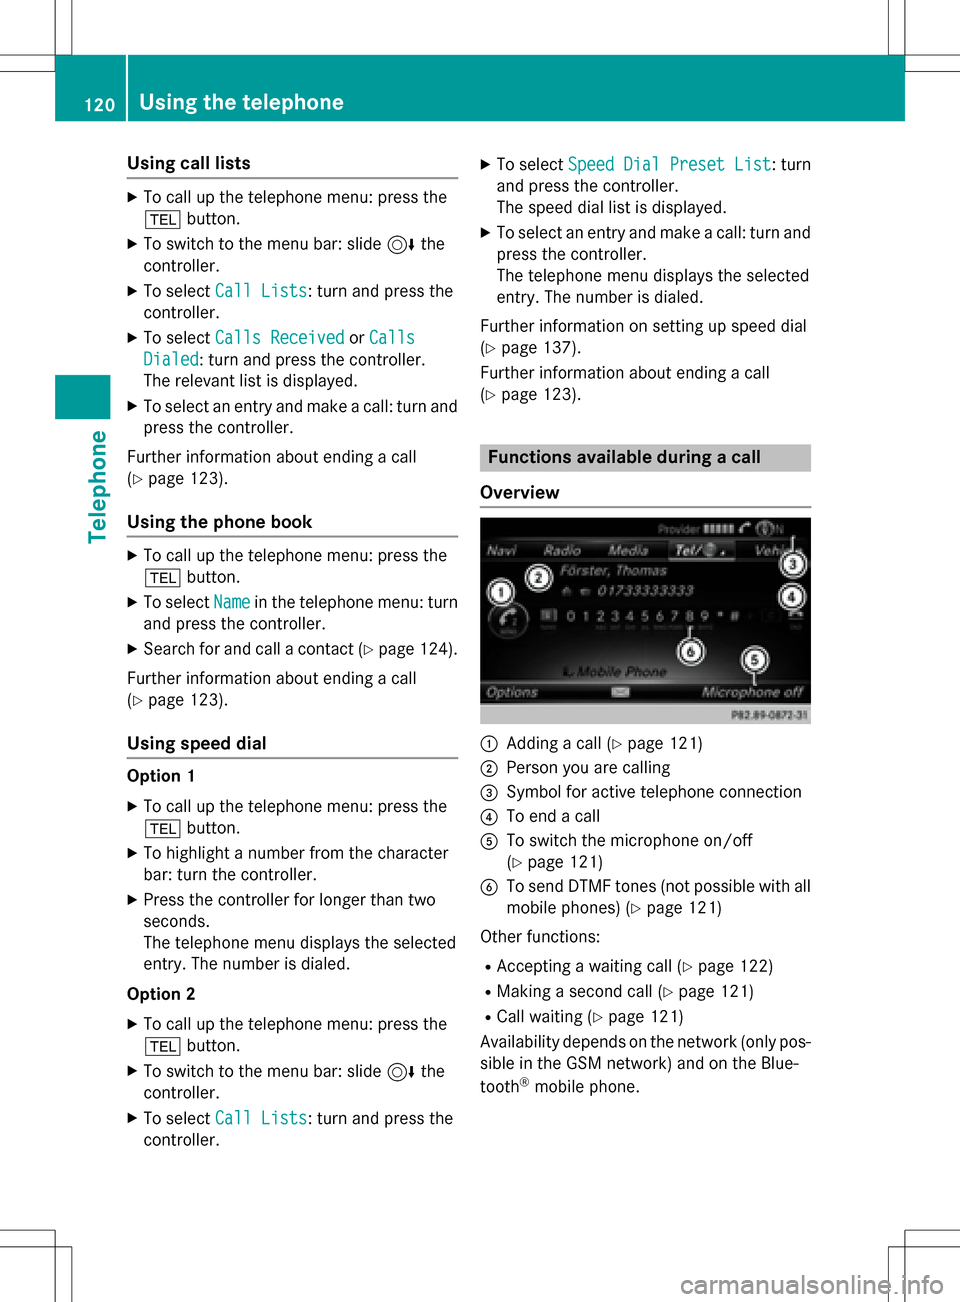
Functions available during a call
Overview
:Adding a call (Ypage 121)
;Person you are calling
=Symbol for active telephone connection
?To end a call
ATo switch the microphone on/off
(
Ypage 121)
BTo send DTMF tones (not possible with all
mobile phones) (
Ypage 121)
Other functions:
RAccepting a waiting call (Ypage 122)
RMaking a second call (Ypage 121)
RCall waiting (Ypage 121)
Availability depends on the network (only pos- sible in the GSM network) and on the Blue-
tooth
®mobile phone.
120Using the telephone
Telephone
Page 130 of 246
iBefore selling your vehicle, delete the
contacts saved in COMAND using the reset function (
Ypage 51).
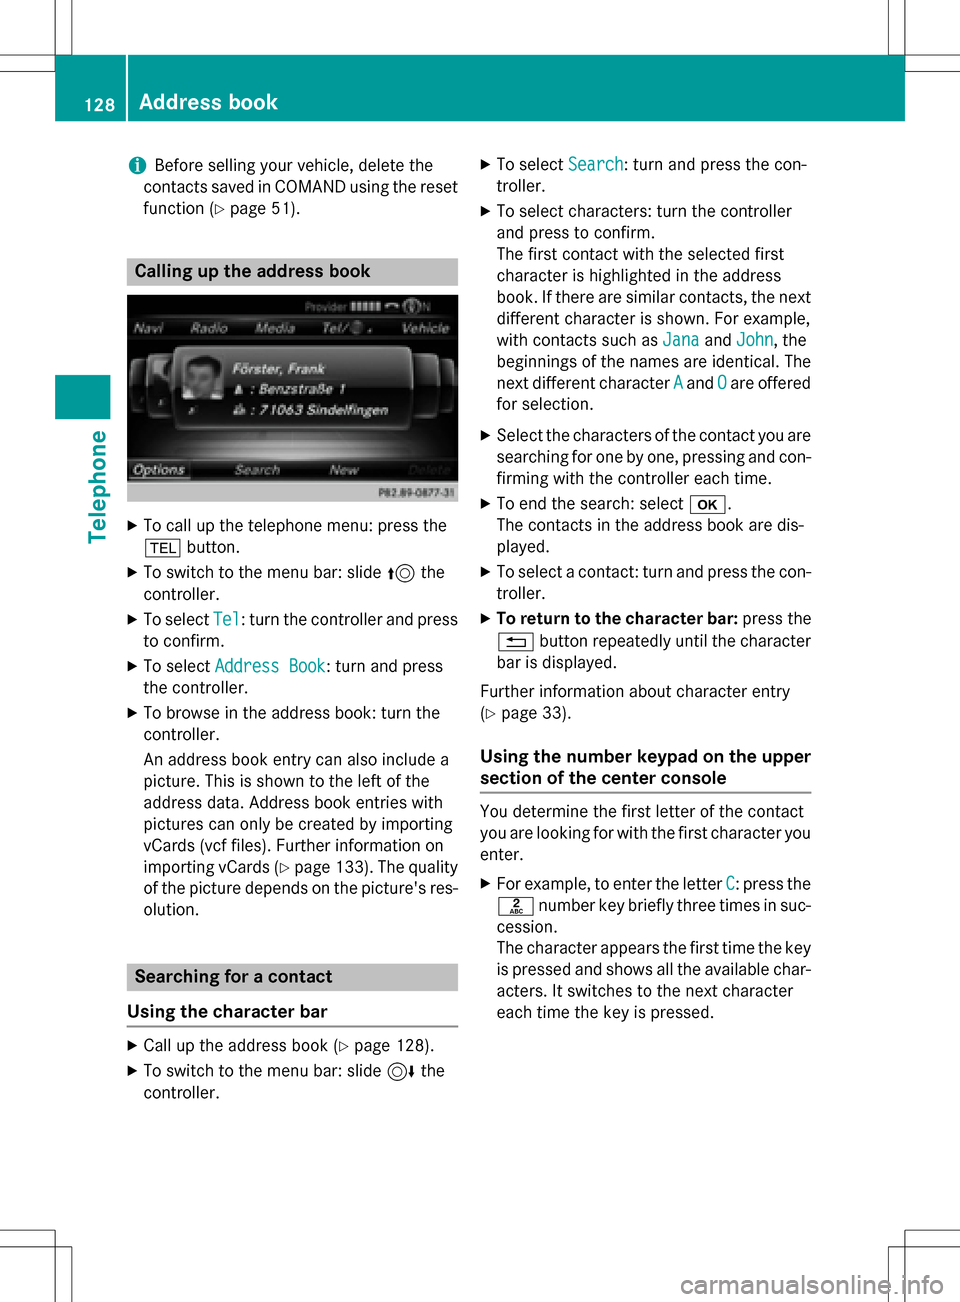
Calling up the address book
XTo call up the telephone menu: press the
% button.
XTo switch to the menu bar: slide 5the
controller.
XTo select Tel: turn the controller and press
to confirm.
XTo select Address Book: turn and press
the controller.
XTo browse in the address book: turn the
controller.
An address book entry can also include a
picture. This is shown to the left of the
address data. Address book entries with
pictures can only be created by importing
vCards (vcf files). Further information on
importing vCards (
Ypage 133). The quality
of the picture depends on the picture's res-
olution.
Searching for a contact
Using the character bar
XCall up the address book (Ypage 128).
XTo switch to the menu bar: slide 6the
controller.
XTo select Search: turn and press the con-
troller.
XTo select characters: turn the controller
and press to confirm.
The first contact with the selected first
character is highlighted in the address
book. If there are similar contacts, the next
different character is shown. For example,
with contacts such as Jana
andJohn, the
beginnings of the names are identical. The
next different character A
andOare offered
for selection.
XSelect the characters of the contact you are
searching for one by one, pressing and con- firming with the controller each time.
XTo end the search: select b.
The contacts in the address book are dis-
played.
XTo select a contact: turn and press the con-
troller.
XTo return to the character bar: press the
% button repeatedly until the character
bar is displayed.
Further information about character entry
(
Ypage 33).
Using the number keypad on the upper
section of the center console
You determine the first letter of the contact
you are looking for with the first character you
enter.
XFor example, to enter the letter C: press the
l number key briefly three times in suc-
cession.
The character appears the first time the key
is pressed and shows all the available char-
acters. It switches to the next character
each time the key is pressed.
128Address book
Telephone
Page 133 of 246
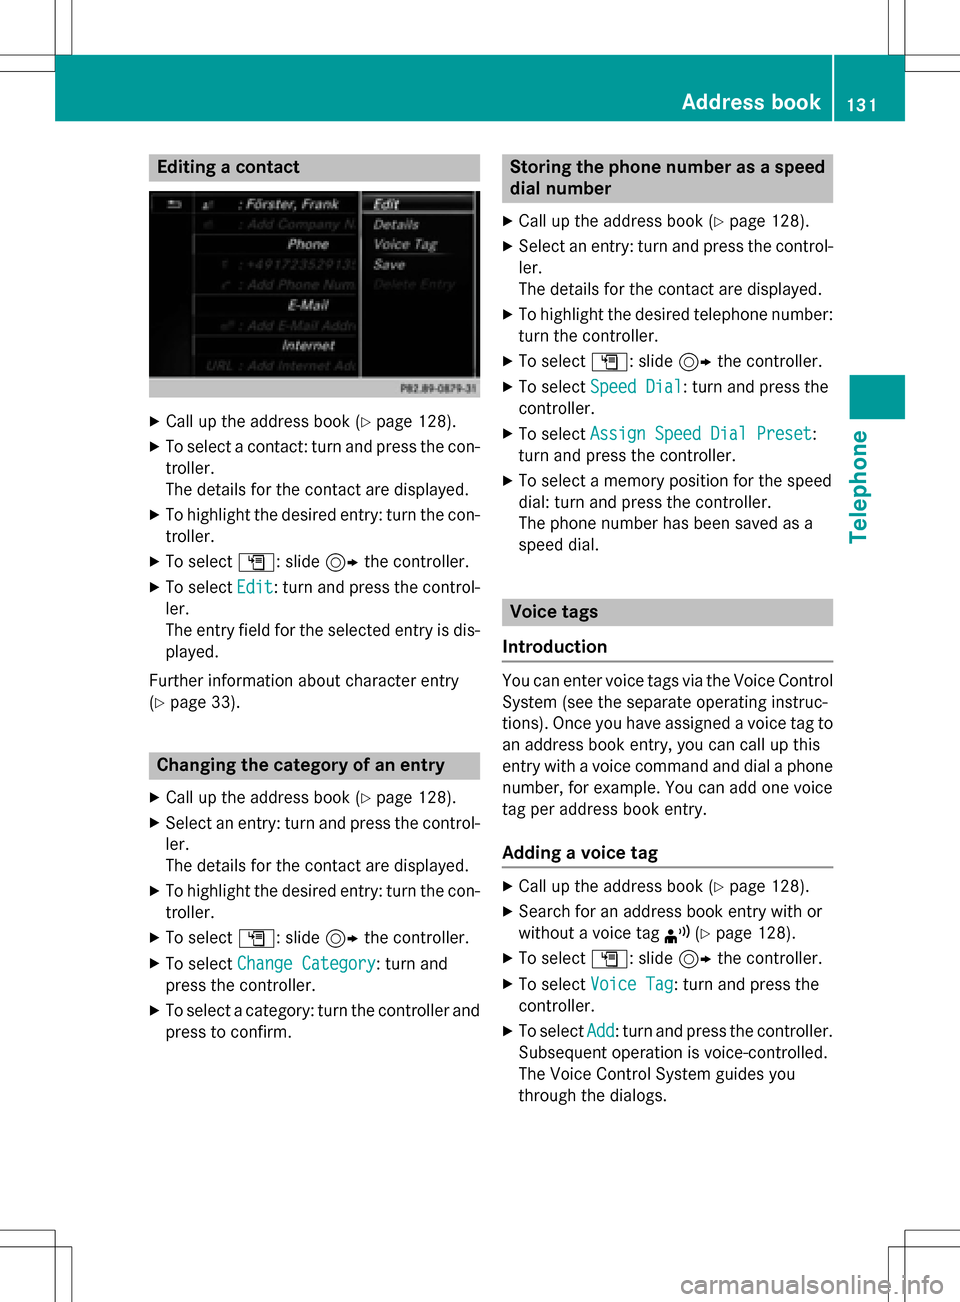
Editing a contact
XCall up the address book (Ypage 128).
XTo select a contact: turn and press the con-
troller.
The details for the contact are displayed.
XTo highlight the desired entry: turn the con-
troller.
XTo selectG: slide 9the controller.
XTo select Edit: turn and press the control-
ler.
The entry field for the selected entry is dis-
played.
Further information about character entry
(
Ypage 33).
Changing the category of an entry
XCall up the address book (Ypage 128).
XSelect an entry: turn and press the control-
ler.
The details for the contact are displayed.
XTo highlight the desired entry: turn the con-
troller.
XTo select G: slide 9the controller.
XTo select Change Category: turn and
press the controller.
XTo select a category: turn the controller and
press to confirm.
Storing the phone number as a speed
dial number
XCall up the address book (Ypage 128).
XSelect an entry: turn and press the control-
ler.
The details for the contact are displayed.
XTo highlight the desired telephone number:
turn the controller.
XTo select G: slide 9the controller.
XTo select Speed Dial: turn and press the
controller.
XTo select Assign Speed Dial Preset:
turn and press the controller.
XTo select a memory position for the speed
dial: turn and press the controller.
The phone number has been saved as a
speed dial.
Voice tags
Introduction
You can enter voice tags via the Voice Control
System (see the separate operating instruc-
tions). Once you have assigned a voice tag to
an address book entry, you can call up this
entry with a voice command and dial a phone
number, for example. You can add one voice
tag per address book entry.
Adding a voice tag
XCall up the address book (Ypage 128).
XSearch for an address book entry with or
without a voice tag ¦(
Ypage 128).
XTo select G: slide 9the controller.
XTo select Voice Tag: turn and press the
controller.
XTo select Add: turn and press the controller.
Subsequent operation is voice-controlled.
The Voice Control System guides you
through the dialogs.
Address book131
Telephone
Z
Page 139 of 246
If you do not wish to overwrite any of the
phone numbers:
XTo selectNo: turn and press the controller.
The process is canceled.
Speed dial lists
Setting up
XTo call up the telephone menu: press the
% button.
XTo call up the menu bar: slide 6the con-
troller.
XTo select Call Lists: turn and press the
controller.
XSelect Speed Dial Preset List.
The speed dial list is displayed.
XTo highlight a memory position for the
speed dial: turn the controller.
If you highlight an entry that already exists
in the speed dial list, this is overwritten with
the new entry.
XTo select G: slide 9the controller.
XSelect Assign Speed Dial Preset.
The phone book is displayed.
XSearch for a contact (Ypage 124).
XTo select a contact: turn and press the con-
troller.
The phone number has been saved as a
speed dial.
Deleting
Deleting a speed dial preset
XTo call up the telephone menu: press the
% button.
XTo call up the menu bar: slide 6the con-
troller.
XTo select Call Lists: turn and press the
controller.
XSelect Speed Dial Preset List.
The speed dial list is displayed.
XTo highlight the memory position you want
to delete: turn the controller.
XTo select G: slide 9the controller.
XTo select Delete Speed Dial Preset:
turn and press the controller.
XTo select Yes: turn and press the controller.
The speed dial preset has been deleted.
or
XTo select No: turn and press the controller.
The process is canceled.
Deleting all speed dial presets
XTo call up the telephone menu: press the
% button.
XTo call up the menu bar: slide 6the con-
troller.
XTo select Call Lists: turn and press the
controller.
XSelect Speed Dial Preset List.
The speed dial list is displayed.
XTo select G: slide 9the controller.
XTo select Delete All Speed Dial Pre‐
sets: turn and press the controller.
XTo selectYes: turn and press the controller.
All speed dials are deleted.
or
XTo select No: turn and press the controller.
The process is canceled.
Messages (text messages and e-
mails)
General notes
New messages are identified by an audible
signal and the /symbol in the COMAND
display. Once you have read all the messages,
the symbol is no longer displayed.
COMAND displays the 100 newest text mes-
sages and e-mails.
The ú symbol is displayed when the
mobile phone's message memory is full. The
symbol is no longer displayed if you delete
messages.
Messages (text messages and e-mails)137
Telephone
Z
Page 163 of 246
Closing Mercedes-Benz Apps
XPress the%button.
The Internet menu appears.
or
XPress the %button for longer than two
seconds.
The Mercedes-Benz Apps menu or the
Internet menu appears.
Resetting adjustments
This function resets all Mercedes-Benz Apps
settings to the factory settings.
XTo call up the telephone menu: press the
% button.
XTo switch to the main function bar: slide
5the controller.
XTo select Tel/®: press the controller.
XTo selectInternet: turn and press the
controller.
The menu with the Internet functions is dis-
played.
XTo select Mercedes-Benz Apps: turn and
press the controller.
The available Mercedes-Benz Apps
are
displayed.
XTo select G: slide 9the controller.
XTo select Reset: turn and press the con-
troller.
A prompt appears asking whether you
really wish to reset.
XTo select Yes: turn and press the controller.
The settings are reset.
or
XTo select No: turn and press the controller.
The process is canceled.
Web browser
Calling up a website
Function restrictions
Internet pages cannot be shown while the
vehicle is in motion.
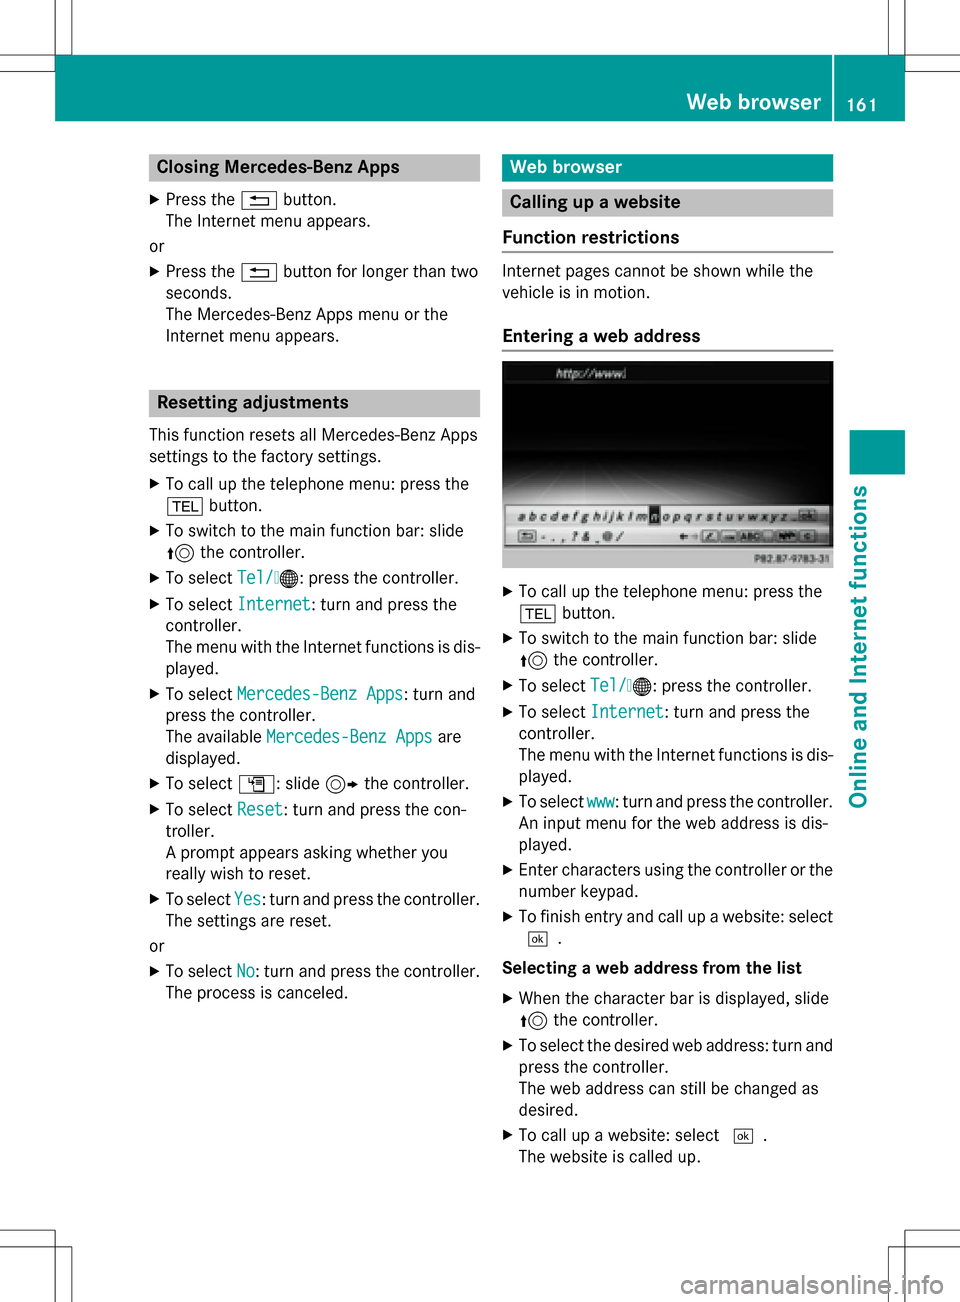
Entering a web address
XTo call up the telephone menu: press the
% button.
XTo switch to the main function bar: slide
5the controller.
XTo select Tel/®: press the controller.
XTo selectInternet: turn and press the
controller.
The menu with the Internet functions is dis-
played.
XTo select www: turn and press the controller.
An input menu for the web address is dis-
played.
XEnter characters using the controller or the
number keypad.
XTo finish entry and call up a website: select
¬.
Selecting a web address from the list
XWhen the character bar is displayed, slide
5 the controller.
XTo select the desired web address: turn and
press the controller.
The web address can still be changed as
desired.
XTo call up a website: select ¬.
The website is called up.
Web browser161
Online and Internet functions
Z
Page 170 of 246
Your COMANDequipment
These operatin ginstruction sdescribe all th e
standar dan doptional equipmen tof your
COMAN Dsystem, as available at th etime of
going to print .Country-specifi cdifference s
are possible. Bear in min dthat your vehicle
may no tfeature all function sdescribed here.
Thi salso applies to safety-relevan tsystems
an dfunctions.
Read th einformation on qualified specialis t
workshop sin th evehicle Operator's Manual.
Switchin gon th eradi o
XPress th e$ button.
The radio display appears .You will hear th e
last station playe don th elast waveban d
selected.
Switching HD Radi oon/of f
XIn radio mode: slid e6 thecontroller .
XSelectOption s.
XBy selecting Oorª in fron tof HDRadi o,
you determin ewhether HD radio is
switched on or off.
If HD radio is switched off, th esyste mdoe s
no tswitch to digita lradio an dit is no tpossible
to selec tan ysub-channels.
iHD Radio ™Technology Manufactured
Under License From iBiquit yDigital Corp.
U.S. an dForeign Patents .The HD an dHD
Radio logos are proprietary trademark sof
iBiquit yDigital Corp.
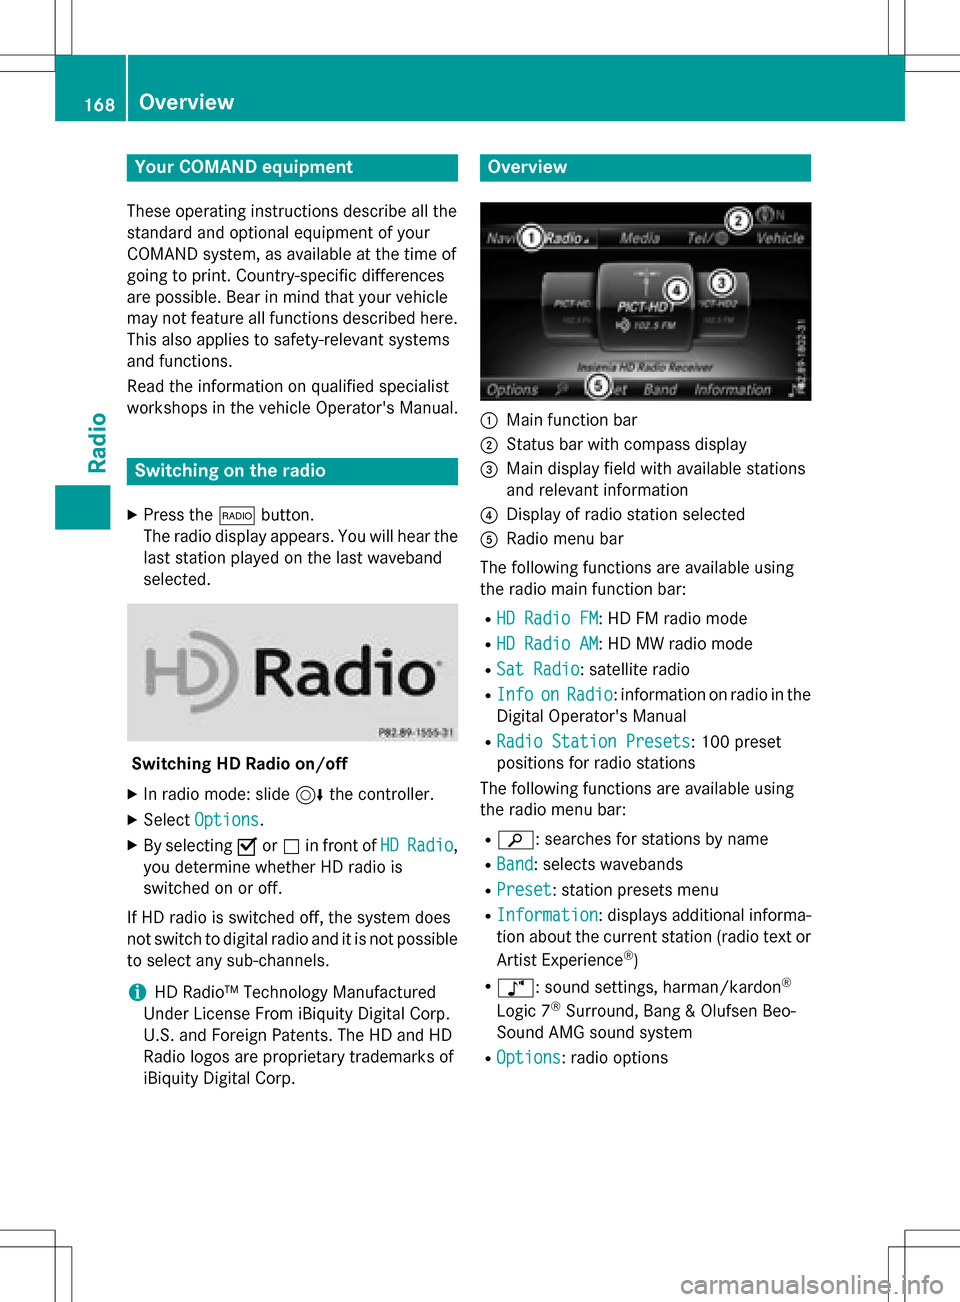
Overview
:Main function bar
;Status bar wit hcompass display
=Main display field wit havailable station s
an drelevant information
?Display of radio station selecte d
ARadio menubar
The followin gfunction sare available usin g
th eradio main function bar :
RHD RadioFM:HD FM radio mode
RHD Radi oAM:HD MW radio mode
RSa tRadi o:satellite radio
RInf oonRadi o:information on radio in th e
Digital Operator's Manual
RRadi oStatio nPreset s:10 0preset
position sfo rradio station s
The followin gfunction sare available usin g
th eradio men ubar :
Rè: searches fo rstation sby name
RBan d:selects wavebands
RPrese t:station preset smen u
RInformation:displays additional informa-
tion about th ecurren tstation (radio text or
Artist Experience
®)
Rà: sound settings, harman/kardon®
Logic 7®Surround, Bang & Olufsen Beo-
Sound AMG sound system
ROptions: radio options
168Overview
Radio
Page 172 of 246
Activating/deactivating the station
presets display
You can use this function to changeto th e
station preset sdisplay.
Activating
XIn radi omode: slide 6thecontroller .
XTo select Preset:tur nand press th econ-
troller .
XTo select StationPresetView:On:tur n
and press th econtroller .
The station preset display appears.
XTo switch between th estore dstations: tur n
th econtroller .
Deactivating
XIn radi omode: slide 6thecontroller .
XTo select Preset:tur nand press th econ-
troller .
XTo select StationPreset View: Off:
tur nand press th econtroller .
A vie wof th elast waveban dyou listened to
appears.
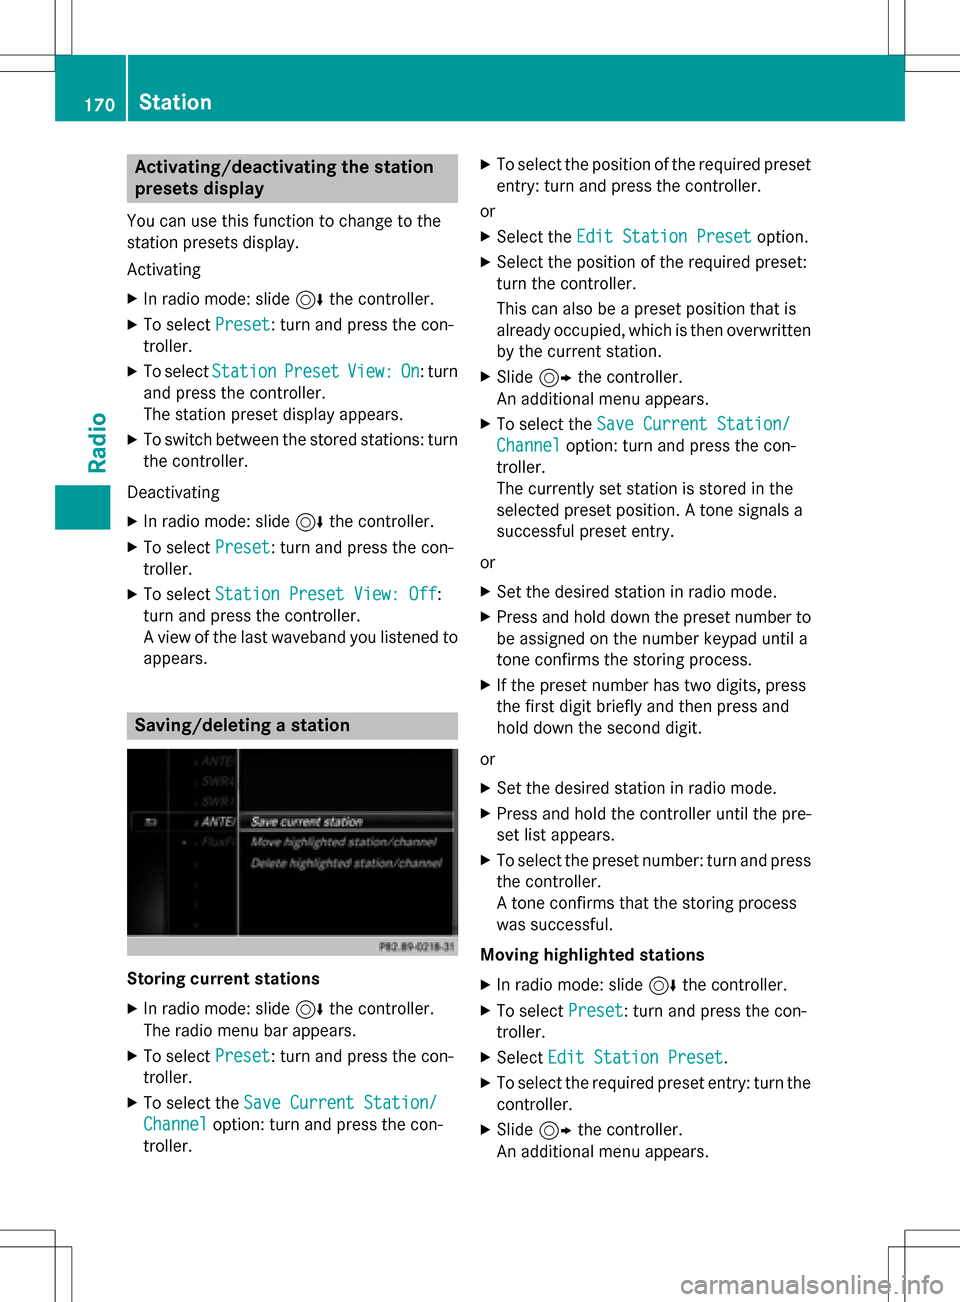
Saving/deleting a station
Storing curren tstations
XIn radi omode: slide 6thecontroller .
The radi omen ubar appears.
XTo select Preset:tur nand press th econ-
troller .
XTo select th eSav eCurren tStation/
Channe loption:tur nand press th econ-
troller .
XTo select th eposition of th erequire dpreset
entry: tur nand press th econtroller .
or
XSelec tth eEdi tStatio nPresetoption .
XSelectth eposition of th erequire dpre set:
tur nth econtroller .
This can also be apre set position that is
already occupied, whic his then overwritte n
by th ecurren tstation .
XSlide9thecontroller .
An additional men uappears.
XTo select th eSav eCurren tStation/
Channe loption:tur nand pre ssthecon-
troller .
The currentl yset station is storedin th e
selected preset position . Atone signals a
succe ssful pre setentry.
or
XSe tth edesired station in radi omode.
XPress and hold down th epre set number to
be assigned on th enumber keypad until a
tone confirm sth e storing proce ss.
XIf thepreset number has two digit s,pre ss
th efir st digit briefly and then pre ssand
hold down th e seconddigit .
or
XSe tth edesired station in radi omode.
XPre ssand hold th econtroller until th epre -
set list appears.
XTo select th epreset number :tur nand pre ss
th econtroller .
A tone confirm sthat th e storing proce ss
was succe ssful.
Moving highlighted stations
XIn radi omode: slide 6thecontroller .
XTo select Preset:tur nand press th econ-
troller .
XSelectEdi tStatio nPreset.
XTo select th erequire dpre set entry: tur nth e
controller .
XSlide9thecontroller .
An additional men uappears.
170Station
Radio
Page 173 of 246
XTo select theMove Highlighted Sta‐
tion/Channeloption: turn and press the
controller.
The list of stored stations appears again.
XTo move the highlighted station to the new position: turn the controller and press to
confirm.
Deleting highlighted stations
XIn radio mode: slide 6the controller.
XTo select Preset: turn and press the con-
troller.
XSelect Edit Station Preset.
XTo select the required preset entry: turn the
controller.
XSlide9the controller.
XTo select the Delete Highlighted Sta‐
tion/Channeloption in the additional
menu: turn and press the controller.
or
XPress the $button.
A prompt appears.
XTo select Yes: turn and press the controller.
The highlighted station is deleted.
or
XTo select No: press the controller.
The process is canceled.
iFrequencies are already stored in
COMAND. There are 100 preset positions
available.
Tagging music tracks
This function allows you to transfer the music
track currently playing to an Apple®device
and then purchase it in the iTunes store®.
XIn radio mode: slide 6the controller.
XTo select Options: turn and press the con-
troller.
XSelect Tag This Track.
A message appears in COMAND about stor-
ing the track information.
Displaying the artist and track
XIn radio mode: slide 6the controller.
XTo select Options: turn and press the con-
troller.
XWith Oorª in front of Show Station
Informationyou can determine whether
the station name should be displayed.
If the function is active, the artist and track
will also be displayed in the main display
field.
Calling up sound settings
XIn radio mode: slide 6the controller.
The radio menu bar appears.
XTo select à: turn and press the control-
ler.
The sound menu appears (
Ypage 208).
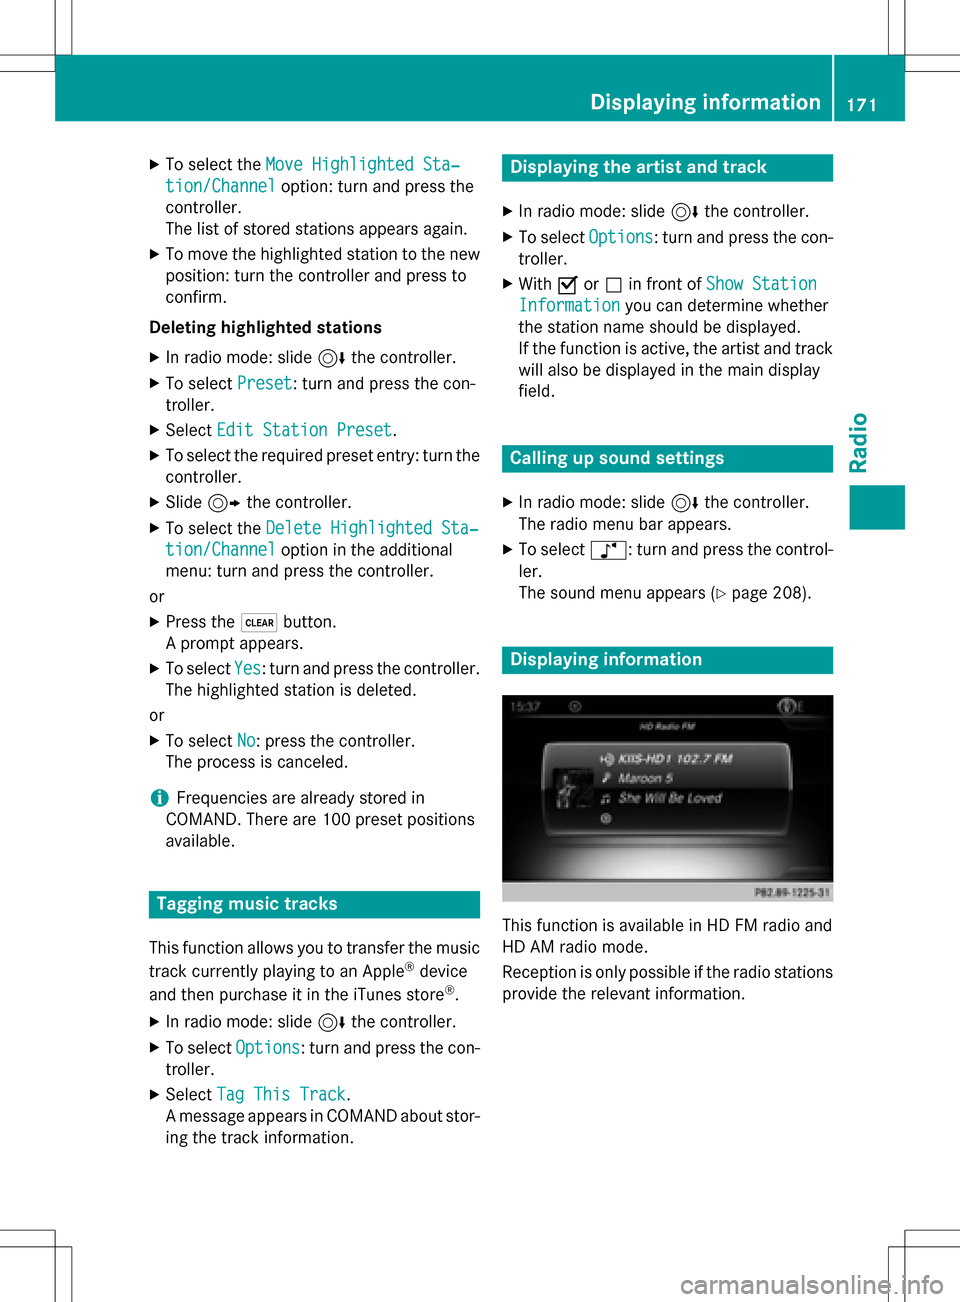
Displaying information
This function is available in HD FM radio and
HD AM radio mode.
Reception is only possible if the radio stations
provide the relevant information.
Displaying information171
Radio
Page 175 of 246
XTo selectOptionsin the radio menu bar:
turn and press the controller.
XTo select Service: turn and press the con-
troller.
The service information screen appears.
Once the telephone connection has been
established:
XFollow the instructions of the service staff.
The activation process may take up to
ten minutes. If the activation is completed
successfully, the Updating Channels...
message appears in the display, followed
by the satellite radio main menu.
iYou can also have the satellite service
activated online. To do so, visit the SIRIUS
XM Radio website at
http://www.siriusxm.com (USA) or
http://www.siriusxm.ca (Canada).
iIf registration is not included when pur-
chasing the system, your credit card details
will be required to activate your account.
If the satellite receiver is not installed cor-
rectly, the Device Unavailable
message
will appear.
Switching to satellite radio
XTo show the main function bar: slide 5
the controller.
XTo select Radio: turn and press the con-
troller.
The radio display appears. You will hear the
last station played on the last waveband
selected.
XTo select Radioin radio mode: slide 5
and press the controller.
The menu with the available radio modes
appears.
XTo select Sat Radio: turn and press the
controller.
The No Service
message appears if there is
no signal.
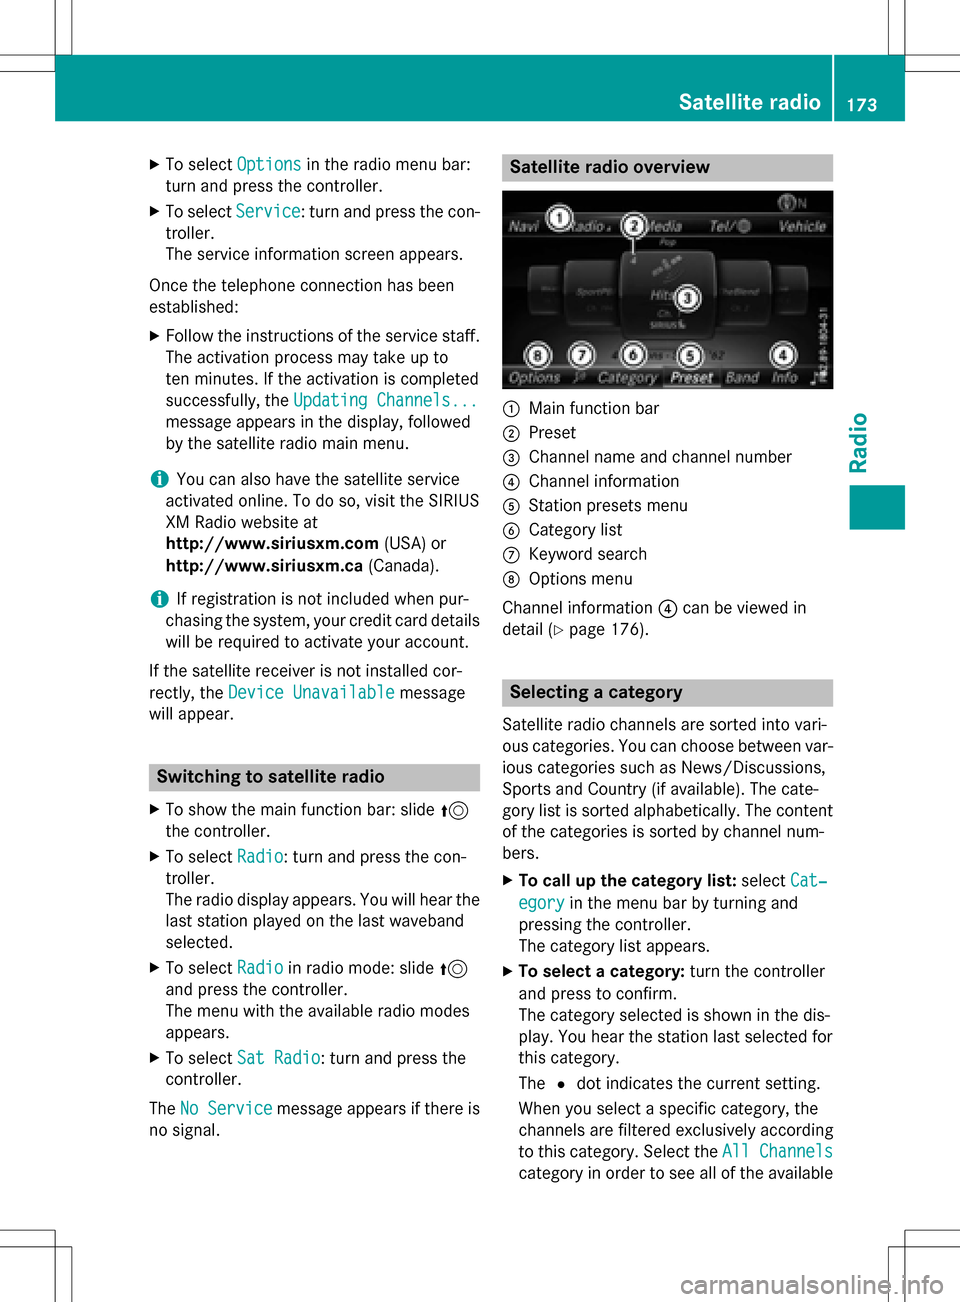
Satellite radio overview
:Main function bar
;Preset
=Channel name and channel number
?Channel information
AStation presets menu
BCategory list
CKeyword search
DOptions menu
Channel information ?can be viewed in
detail (
Ypage 176).
Selecting a category
Satellite radio channels are sorted into vari-
ous categories. You can choose between var-
ious categories such as News/Discussions,
Sports and Country (if available). The cate-
gory list is sorted alphabetically. The content
of the categories is sorted by channel num-
bers.
XTo call up the category list: selectCat‐
egoryin the menu bar by turning and
pressing the controller.
The category list appears.
XTo select a category: turn the controller
and press to confirm.
The category selected is shown in the dis-
play. You hear the station last selected for
this category.
The #dot indicates the current setting.
When you select a specific category, the
channels are filtered exclusively according
to this category. Select the All Channels
category in order to see all of the available
Satellite radio173
Radio
Page 177 of 246
Memory functions
i
There are 100 presets available.
XTo store a channel using the edit func-
tion: select Preset
in the radio menu bar
by turning and pressing the controller.
XTo select EditStationPreset: turn and
press the controller.
The list of saved channels appears.
XTo select the preset: turn the controller and
press for about 2 seconds.
The newly saved station overwrites the
existing preset.
or
XTo quick store: press and hold number key
2, for example.
The channel is saved to the second position
in the radio channel presets.
or
XSet the desired channel in satellite radio
mode.
XPress and hold the controller until the pre-
set list appears.
XTo select the preset number: turn and press
the controller.
A tone confirms that the storing process
was successful.
Deleting highlighted stations
XTo select Presetin the radio menu bar:
turn and press the controller.
XSelect Edit Station Preset.
XTo select the required preset entry: turn the
controller.
XSlide9the controller.
XTo select the Delete Highlighted Sta‐
tion/Channeloption in the additional
menu: turn and press the controller.
or
XPress the $button.
The prompt Do you want to delete
the preset?appears
XTo selectYes: turn and press the controller.
The highlighted station is deleted.
or
XTo select No: press the controller.
The process is canceled.
Activating/deactivating the station
presets display
You can use this function to change to the
station presets display.
Activating
XIn radio mode: slide 6the controller.
XTo select Preset: turn and press the con-
troller.
XTo select StationPresetView:On: turn
and press the controller.
The station preset display appears.
XTo switch between the stored stations: turn
the controller.
Deactivating
XIn radio mode: slide 6the controller.
XTo select Preset: turn and press the con-
troller.
XTo select Station Preset View: Off:
turn and press the controller.
A view of the last waveband you listened to
appears.
Music and sports alerts
General notes
This function makes it possible to store a pro-
gram alert for your favorite artists, tracks or
sporting events.
You can store up to 30 music and sports
alerts (favorites).
Music alerts can only be saved whilst a track
is being played. You can also specify sports
alerts via the menu option. The system then
continuously searches through all the chan-
nels. If a match is found with a saved mes-
Satellite radio175
Radio