tire type MERCEDES-BENZ GLA-Class 2016 X156 Owner's Manual
[x] Cancel search | Manufacturer: MERCEDES-BENZ, Model Year: 2016, Model line: GLA-Class, Model: MERCEDES-BENZ GLA-Class 2016 X156Pages: 390, PDF Size: 8.37 MB
Page 8 of 390
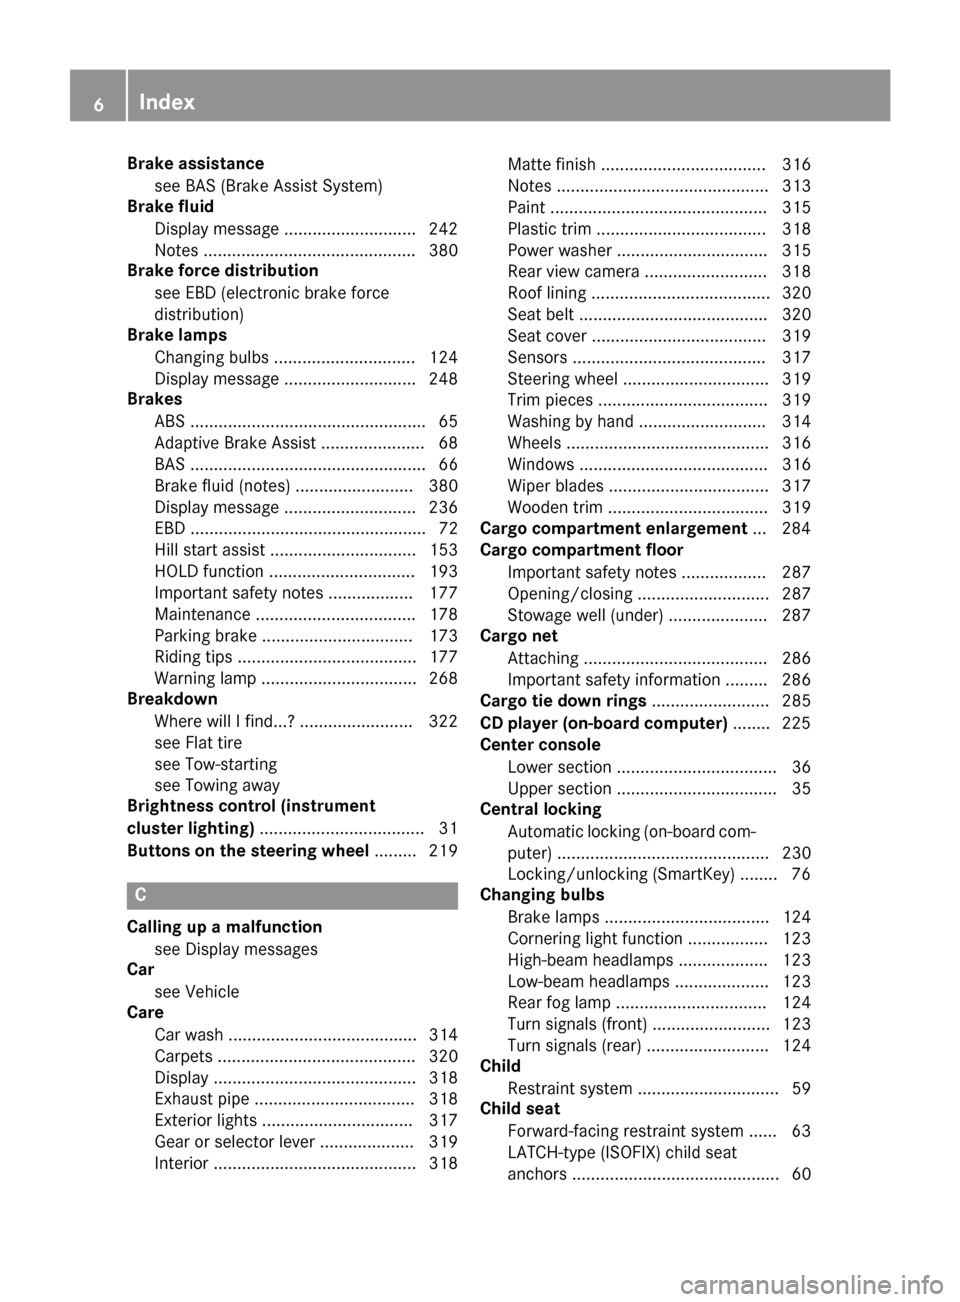
Brake assistancesee BAS (Brake Assist System)
Brake fluid
Display message ............................ 242
Notes ............................................. 380
Brake force distribution
see EBD (electronic brake force
distribution)
Brake lamps
Changing bulbs .............................. 124
Display message ............................ 248
Brakes
ABS .................................................. 65
Adaptive Brake Assist ...................... 68
BAS .................................................. 66
Brake fluid (notes) ......................... 380
Display message ............................ 236
EBD .................................................. 72
Hill start assist ............................... 153
HOLD function ............................... 193
Important safety notes .................. 177
Maintenance .................................. 178
Parking brake ................................ 173
Riding tips ...................................... 177
Warning lamp ................................. 268
Breakdown
Where will I find...? ........................ 322
see Flat tire
see Tow-starting
see Towing away
Brightness control (instrument
cluster lighting) ................................... 31
Buttons on the steering wheel ......... 219
C
Calling up a malfunction
see Display messages
Car
see Vehicle
Care
Car wash ........................................ 314
Carpets .......................................... 320
Display ........................................... 318
Exhaust pipe .................................. 318
Exterior lights ................................ 317
Gear or selector lever .................... 319
Interior ........................................... 318 Matte finish ................................... 316
Notes ............................................. 313
Paint .............................................. 315
Plastic trim .................................... 318
Power washer ................................ 315
Rear view camera .......................... 318
Roof lining ...................................... 320
Seat belt ........................................ 320
Seat cover ..................................... 319
Sensors ......................................... 317
Steering wheel ............................... 319
Trim pieces .................................... 319
Washing by hand ........................... 314
Wheels ........................................... 316
Windows ........................................ 316
Wiper blades .................................. 317
Wooden trim .................................. 319
Cargo compartment enlargement ... 284
Cargo compartment floor
Important safety notes .................. 287
Opening/closing ............................ 287
Stowage well (under) ..................... 287
Cargo net
Attaching ....................................... 286
Important safety information ......... 286
Cargo tie down rings ......................... 285
CD player (on-board computer) ........ 225
Center console
Lower section .................................. 36
Upper section .................................. 35
Central locking
Automatic locking (on-board com-puter) ............................................. 230
Locking/unlocking (SmartKey) ........ 76
Changing bulbs
Brake lamps ................................... 124
Cornering light function ................. 123
High-beam headlamps ................... 123
Low-beam headlamps .................... 123
Rear fog lamp ................................ 124
Turn signals (front) ......................... 123
Turn signals (rear) .......................... 124
Child
Restraint system .............................. 59
Child seat
Forward-facing restraint system ...... 63
LATCH-type (ISOFIX) child seat
anchors ............................................ 60
6Index
Page 21 of 390
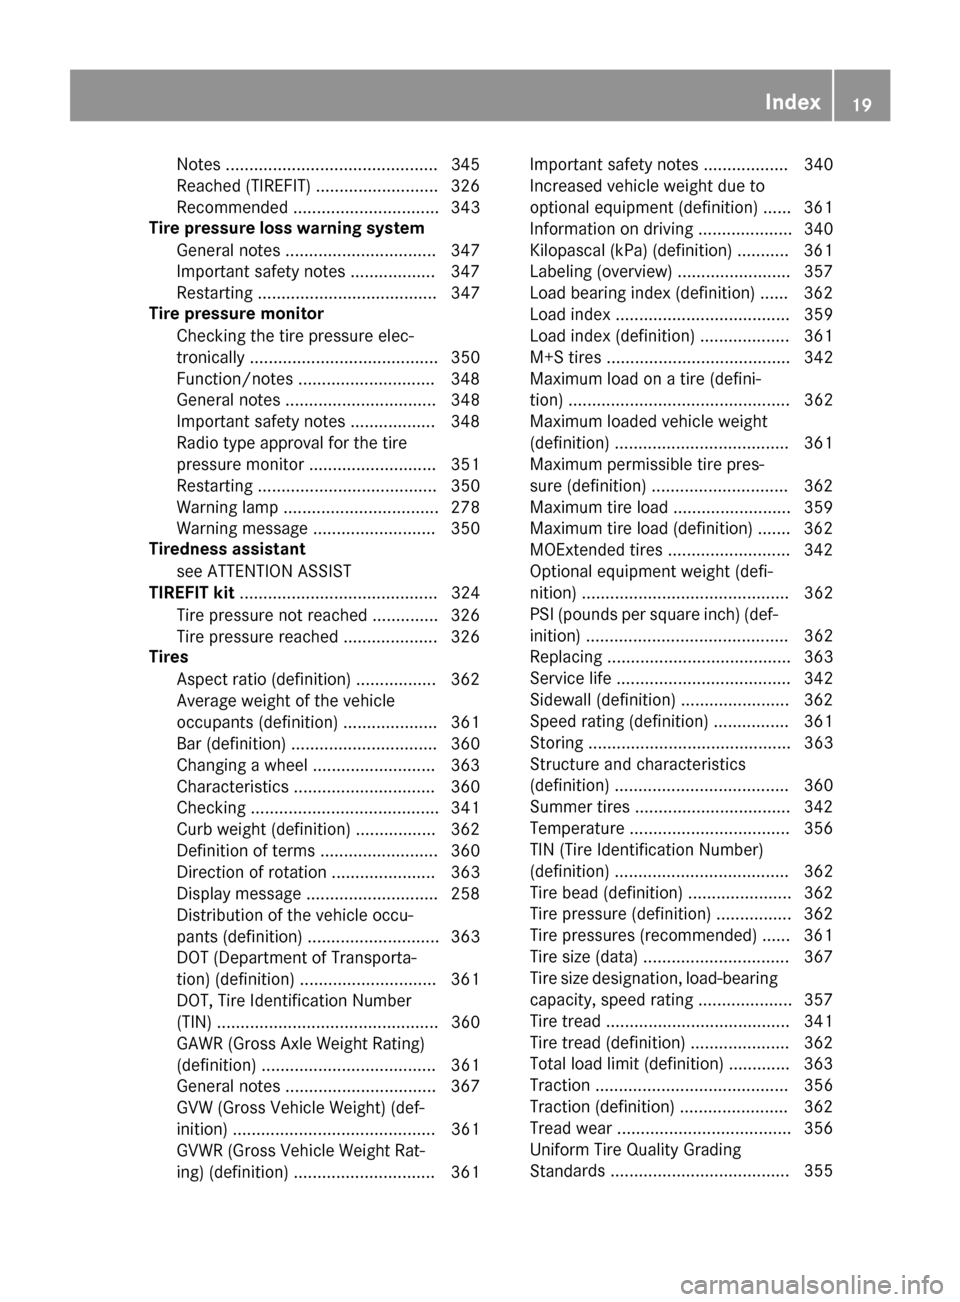
Notes .............................................345
Reached (TIREFIT) .......................... 326
Recommended ............................... 343
Tire pressure loss warning system
General notes ................................ 347
Important safety notes .................. 347
Restarting ...................................... 347
Tire pressure monitor
Checking the tire pressure elec-
tronically ........................................ 350
Function/notes .............................3 48
General notes ................................ 348
Important safety notes .................. 348
Radio type approval for the tire
pressure monitor ........................... 351
Restarting ...................................... 350
Warning lamp ................................. 278
Warning message .......................... 350
Tiredness assistant
see ATTENTION ASSIST
TIREFIT kit .......................................... 324
Tire pressure not reached .............. 326
Tire pressure reached .................... 326
Tires
Aspect ratio (definition) ................. 362
Average weight of the vehicle
occupants (definition) .................... 361
Bar (definition) ............................... 360
Changing a wheel .......................... 363
Characteristics .............................. 360
Checking ........................................ 341
Curb weight (definition) ................. 362
Definition of terms ......................... 360
Direction of rotation ...................... 363
Display message ............................ 258
Distribution of the vehicle occu-
pants (definition) ............................ 363
DOT (Department of Transporta-
tion) (definition) ............................. 361
DOT, Tire Identification Number
(TIN) ............................................... 360
GAWR (Gross Axle Weight Rating)
(definition) ..................................... 361
General notes ................................ 367
GVW (Gross Vehicle Weight) (def-
inition) ........................................... 361
GVWR (Gross Vehicle Weight Rat-ing) (definition) .............................. 361 Important sa
fety notes .................. 340
Increased vehicle weight due to
optional equipment (definition) ...... 361
Information on driving .................... 340
Kilopascal (kPa) (definition) ........... 361
Labeling (overview) ........................ 357
Load bearing index (definition) ...... 362
Load index ..................................... 359
Load index (definition) ................... 361
M+S tires ....................................... 342
Maximum load on a tire (defini-
tion) ............................................... 362
Maximum loaded vehicle weight
(definition) ..................................... 361
Maximum permissible tire pres-
sure (definition) ............................. 362
Maximum tire load ......................... 359
Maximum tire load (definition) ....... 362
MOExtended tires .......................... 342
Optional equipment weight (defi-
nition) ............................................ 362
PSI (pounds per square inch) (def-
inition) ........................................... 362
Replacing ....................................... 363
Service life ..................................... 342
Sidewall (definition) ....................... 362
Speed rating (definition) ................ 361
Storing ........................................... 363
Structure and characteristics
(definition) ..................................... 360
Summer tires ................................. 342
Temperature .................................. 356
TIN (Tire Identification Number)
(definition) ..................................... 362
Tire bead (definition) ...................... 362
Tire pressure (definition) ................ 362
Tire pressures (recommended) ...... 361
Tire size (data) ............................... 367
Tire size designation, load-bearing
capacity, speed rating .................... 357
Tire tread ....................................... 341
Tire tread (definition) ..................... 362
Total load limit (definition) ............. 363
Traction ......................................... 356
Traction (definition) ....................... 362
Tread wear ..................................... 356
Uniform Tire Quality Grading
Stand ards ...................................... 355
Index19
Page 22 of 390
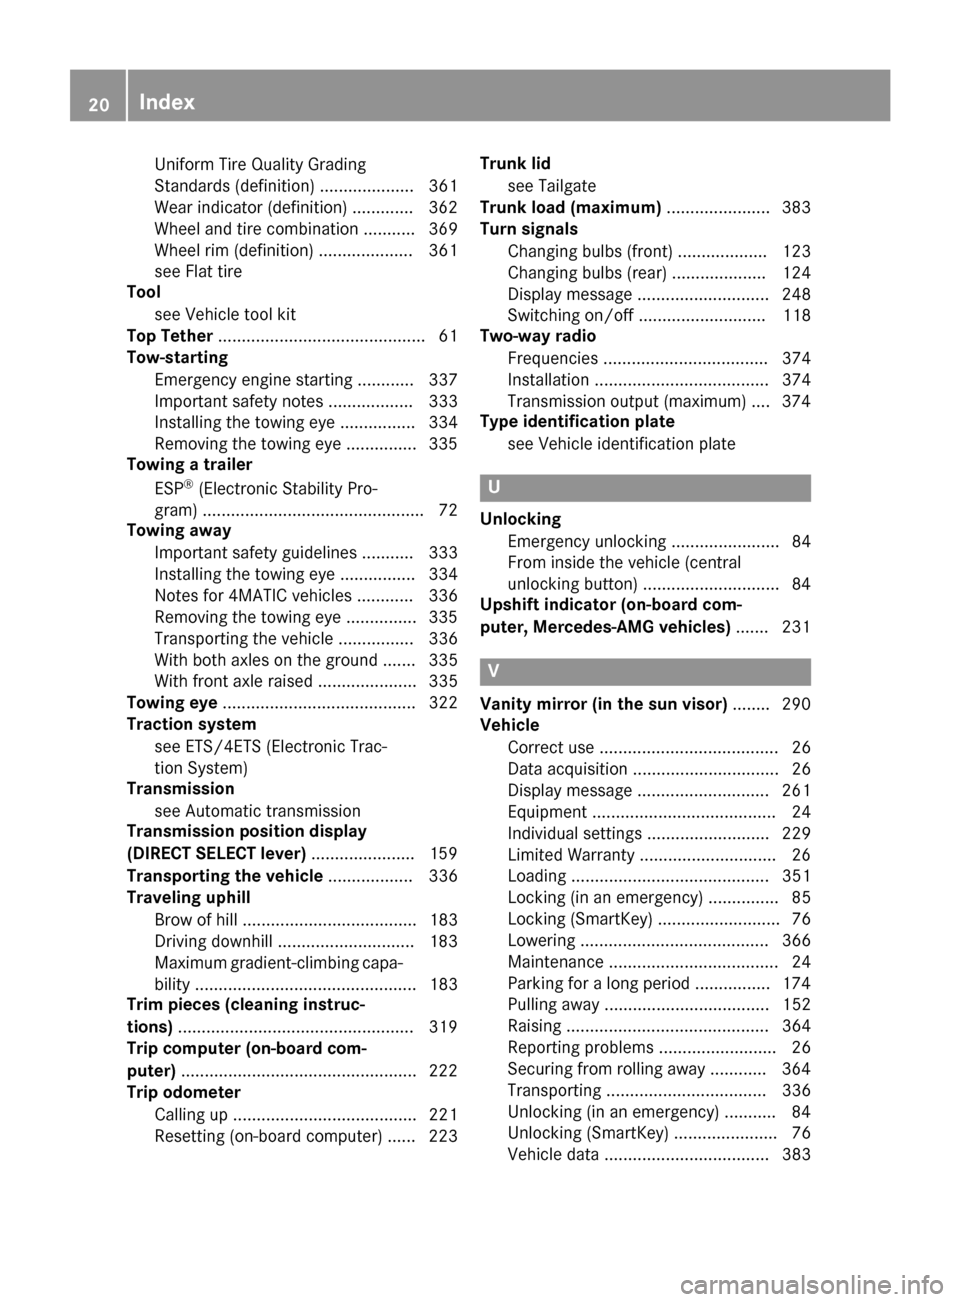
Uniform Tire Quality Grading
Standards (definition) .................... 361
Wear indicator (definition) .............362
Wheel and tire combination ........... 369
Wheel rim (definition) .................... 361
see Flat tire
Tool
see Vehicle tool kit
Top Tether ............................................ 61
Tow-starting
Emergency engine starting ............ 337
Important safety notes .................. 333
Installing the towing eye ................ 334
Removing the towing eye ...............3 35
Towing a trailer
ESP
®(Electronic Stability Pro-
gram) ............................................... 72
Towing away
Important safety guidelines ........... 333
Installing the towing eye ................ 334
Notes for 4MATIC vehicles ............ 336
Removing the towing eye ...............3 35
Transporting the vehicle ................ 336
With both axles on the ground ....... 335
With front axle raised ..................... 335
Towing eye ......................................... 322
Traction system
see ETS/4ETS (Electronic Trac-
tion System)
Transmission
see Automatic transmission
Transmission position display
(DIRECT SELECT lever) ......................159
Transporting the vehicle .................. 336
Traveling uphill
Brow of hill ..................................... 183
Driving downhill .............................1 83
Maximum gradient-climbing capa-
bility ............................................... 183
Trim pieces (cleaning instruc-
tions) ..................................................3 19
Trip computer (on-board com-
puter) ..................................................2 22
Trip odometer
Calling up ....................................... 221
Resetting (on-board computer) ...... 223 Trunk lid
see Tailgate
Trunk load (maximum) ......................383
Turn signals
Changing bulbs (front) ................... 123
Changing bulbs (rear) .................... 124
Display message ............................ 248
Switching on/off ........................... 118
Two-w ay radio
Frequenci
es ................................... 374
Installation ..................................... 374
Transmission output (maximum) .... 374
Type identification plate
see Vehicle identification plate
U
UnlockingEmergency unlocking ....................... 84
From inside the vehicle (central
unlocking button) .............................8 4
Upshift indicator (on-board com-
puter, Mercedes-AMG vehicles) .......231
V
Vanity mirror (in the sun visor) ........290
Vehicle
Correct use ...................................... 26
Data acquisition ............................... 26
Display message ............................ 261
Equipment ....................................... 24
Individual settings .......................... 229
Limited Warranty .............................2 6
Loading .......................................... 351
Locking (in an emergency) ............... 85
Locking (SmartKey) .......................... 76
Lowering ........................................ 366
Maintenance .................................... 24
Parking for a long period ................ 174
Pulling away ................................... 152
Raising ........................................... 364
Reporting problems ......................... 26
Securing from rolling away ............ 364
Transporting .................................. 336
Unlocking (in an emergency) ........... 84
Unlocking (SmartKey) ...................... 76
Vehicle data ................................... 383
20Index
Page 23 of 390
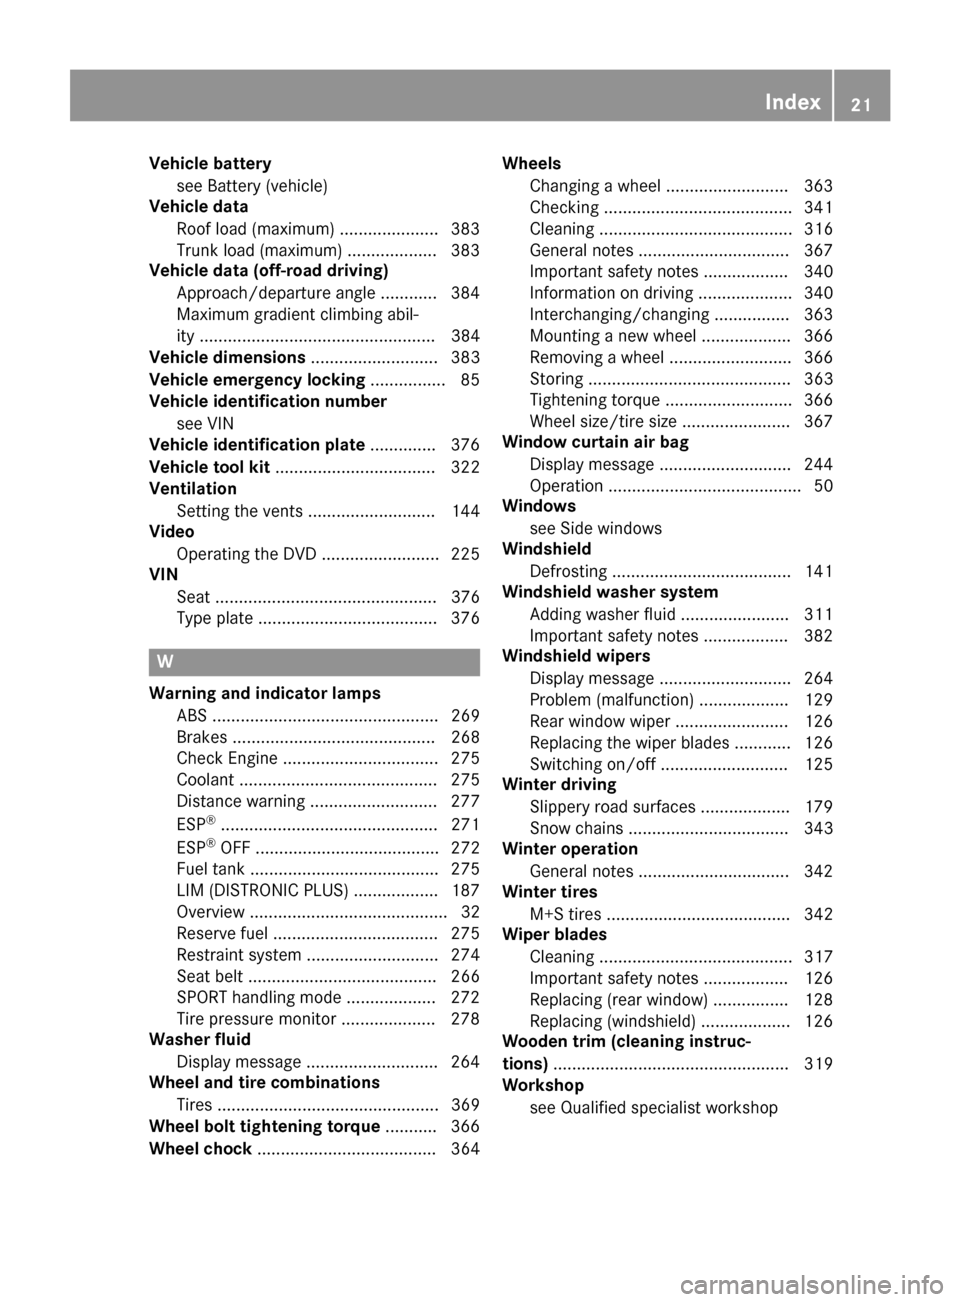
Vehicle batterysee Battery (vehicle)
Vehicle data
Roof load (maximum) ..................... 383
Trunk load (maximum) ................... 383
Vehicle data (off-road driving)
Approach/departure angle ............ 384
Maximum gradient climbing abil-
ity .................................................. 384
Vehicle dimensions ........................... 383
Vehicle emergency locking ................ 85
Vehicle identification number
see VIN
Vehicle identification plate .............. 376
Vehicle tool kit .................................. 322
Ventilation
Setting the vents ........................... 144
Video
Operating the DVD ......................... 225
VIN
Seat ............................................... 376
Type plate ...................................... 376
W
Warning and indicator lampsABS ................................................ 269
Brakes ........................................... 268
Check Engine ................................. 275
Coolant .......................................... 275
Distance warning ........................... 277
ESP
®.............................................. 271
ESP®OFF ....................................... 272
Fuel tank ........................................ 275
LIM (DISTRONIC PLUS) .................. 187
Overview .......................................... 32
Reserve fuel ................................... 275
Restraint system ............................ 274
Seat belt ........................................ 266
SPORT handling mode ................... 272
Tire pressure monitor .................... 278
Washer fluid
Display message ............................ 264
Wheel and tire combinations
Tires ............................................... 369
Wheel bolt tightening torque ........... 366
Wheel chock ...................................... 364 Wheels
Changing a wheel .......................... 363
Checking ........................................ 341
Cleaning ......................................... 316
General notes ................................ 367
Important safety notes .................. 340
Information on driving .................... 340
Interchanging/changing ................ 363
Mounting a new wheel ................... 366
Removing a wheel .......................... 366
Storing ........................................... 363
Tightening torque ........................... 366
Wheel size/tire size ....................... 367
Window curtain air bag
Display message ............................ 244
Operation ......................................... 50
Windows
see Side windows
Windshield
Defrosting ...................................... 141
Windshield washer system
Adding washer fluid ....................... 311
Important safety notes .................. 382
Windshield wipers
Display message ............................ 264
Problem (malfunction) ................... 129
Rear window wiper ........................ 126
Replacing the wiper blades ............ 126
Switching on/off ........................... 125
Winter driving
Slippery road surfaces ................... 179
Snow chains .................................. 343
Winter operation
General notes ................................ 342
Winter tires
M+S tires ....................................... 342
Wiper blades
Cleaning ......................................... 317
Important safety notes .................. 126
Replacing (re ar w
indow) ................ 128
Replacing (windshield) ................... 126
Wooden trim (cleaning instruc-
tions) .................................................. 319
Workshop
see Qualified specialist workshop
Index21
Page 172 of 390
!Overfilling the fuel tank could damage the
fuel system.
!Take care not to spill any fuel on painted
surfaces. You could otherwise damage the
paintwork.
!Use a filter when refueling from a fuel can.
Otherwise, the fuel lines and/or injection
system could be blocked by particles from
the fuel can.
Do not get into the vehicle again during the
refueling process. Otherwise, electrostatic
charge could build up again.
If you overfill the fuel tank, fuel could spray
out when the fuel pump nozzle is removed.
For further information on fuel and fuel quality (
Ypage 377).
Refueling
General information
The fuel filler flap is unlocked/locked auto-
matically when you unlock/lock the vehicle
with the SmartKey.
The position of the fuel filler cap is displayed
æ in the instrument cluster. The arrow on
the filling pump indicates the side of the vehi-
cle.
Opening the fuel filler flap
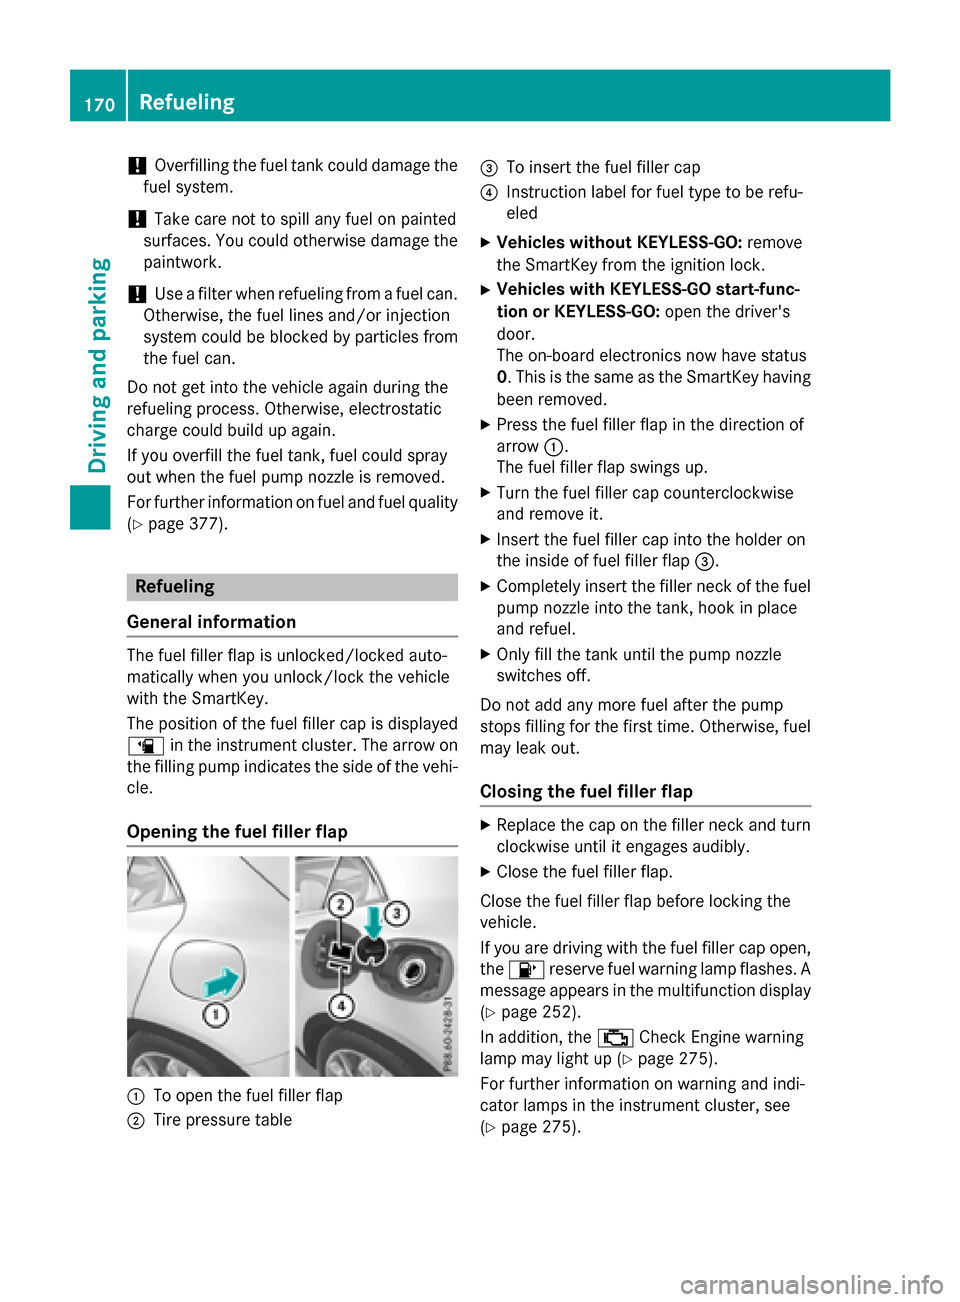
:To open the fuel filler flap
;Tire pressure table
=To insert the fuel filler cap
?Instruction label for fuel type to be refu-
eled
XVehicles without KEYLESS-GO: remove
the SmartKey from the ignition lock.
XVehicles with KEYLESS-GO start-func-
tion or KEYLESS-GO: open the driver's
door.
The on-board electronics now have status
0. This is the same as the SmartKey having
been removed.
XPress the fuel filler flap in the direction of
arrow :.
The fuel filler flap swings up.
XTurn the fuel filler cap counterclockwise
and remove it.
XInsert the fuel filler cap into the holder on
the inside of fuel filler flap =.
XCompletely insert the filler neck of the fuel
pump nozzle into the tank, hook in place
and refuel.
XOnly fill the tank until the pump nozzle
switches off.
Do not add any more fuel after the pump
stops filling for the first time. Otherwise, fuel
may leak out.
Closing the fuel filler flap
XReplace the cap on the filler neck and turn
clockwise until it engages audibly.
XClose the fuel filler flap.
Close the fuel filler flap before locking the
vehicle.
If you are driving with the fuel filler cap open,
the 8 reserve fuel warning lamp flashes. A
message appears in the multifunction display
(
Ypage 252).
In addition, the ;Check Engine warning
lamp may light up (
Ypage 275).
For further information on warning and indi-
cator lamps in the instrument cluster, see
(
Ypage 275).
170Refueling
Driving and parking
Page 322 of 390
Seat covers of other materials
!Observe the following when cleaning:
Rclean artificial leather covers with a cloth
moistened with a solution containing 1%
detergent (e.g. dish washing liquid).
Rclean cloth covers with a microfiber cloth
moistened with a solution containing 1%
detergent (e.g. dish washing liquid). Rub
carefully and always wipe entire seat sec-
tions to avoid leaving visible lines. Leave
the seat to dry afterwards. Cleaning
results depend on the type of dirt and
how long it has been there.
Rclean DINAMICA covers with a damp
cloth. Make sure that you wipe entire
seat sections to avoid leaving visible
lines.
Cleaning the seat belts
GWARNING
Seat belts can become severely weakened if
bleached or dyed. This could cause the seat
belts to tear or fail, for instance, in the event of an accident. This poses an increased risk of
injury or fatal injury.
Never bleach or dye the seat belts.
!Do not clean the seat belts using chemical
cleaning agents. Do not dry the seat belts
by heating at temperatures above 176 ‡
(80 †) or in direct sunlight.
XUse clean, lukewarm water and soap solu-
tion.
Cleaning the headliner and carpets
XHeadliner: if it is very dirty, use a soft brush
or dry shampoo.
XCarpets: use the carpet and textile clean-
ing agents recommended and approved by
Mercedes-Benz.
320Care
Maintenance and care
Page 326 of 390
You must not exceed a maximum speed of
50 mph (80 km/h).
When replacing one or all tires, please
observe the following specifications for your
vehicle's tires:
Rsize
Rtype and
Rthe "MOExtended" mark
If a tire has gone flat and cannot be replaced
with a MOExtended tire, a standard tire may
be used as a temporary measure. Make sure
that you use the proper size and type (sum-
mer or winter tire).
Vehicles equipped with MOExtended tires are
not equipped with a TIREFIT kit at the factory. It is therefore recommended that you addi-
tionally equip your vehicle with a TIREFIT kit if
you mount tires that do not feature run-flat
properties, e.g. winter tires. A TIREFIT kit may
be obtained from a qualified specialist work-
shop.
Important safety notes
GWARNING
When driving in emergency mode, the driving
characteristics deteriorate, e.g. when corner-
ing, accelerating quickly and when braking.
There is a risk of an accident.
Do not exceed the stated maximum speed.
Avoid abrupt steering and driving maneuvers,
and driving over obstacles (curbs, potholes,
off-road). This applies in particular to a laden
vehicle.
Stop driving in emergency mode if:
Ryou hear banging noises.
Rthe vehicle starts to shake.
Ryou see smoke and smell rubber.
RESP®is intervening constantly.
Rthere are tears in the sidewalls of the tire.
After driving in emergency mode, have the
wheel rims checked at a qualified specialist
workshop with regard to their further use. The
defective tire must be replaced in every case.
TIREFIT kit
Important safety notes
TIREFIT is a tire sealant.
You can use TIREFIT to seal punctures of up to
0.16 in (4 mm), particularly those in the tire
tread. You can use TIREFIT at outside tem-
peratures down to Ò4 ‡ (Ò20 †).
GWARNING
In the following situations, the tire sealant is
unable to provide sufficient breakdown assis-
tance, as it is unable to seal the tire properly:
Rthere are cuts or punctures in the tire larger
than those mentioned above.
Rthe wheel rim is damaged.
Ryou have driven at very low tire pressures or on a flat tire.
There is a risk of an accident.
Do not drive the vehicle. Contact a qualified
specialist workshop.
GWARNING
The tire sealant is harmful and causes irrita-
tion. It must not come into contact with your
skin, eyes or clothing or be swallowed. Do not inhale TIREFIT fumes. Keep tire sealant away
from children. There is a risk of injury.
If you come into contact with the tire sealant,
observe the following:
RRinse off the tire sealant from your skin
immediately with water.
RIf the tire sealant comes into contact with
your eyes, immediately rinse them thor-
oughly with clean water.
RIf tire sealant is swallowed, immediately
rinse your mouth out thoroughly and drink
plenty of water. Do not induce vomiting,
and seek medical attention immediately.
RImmediately change out of clothing which
has come into contact with tire sealant.
RIf an allergic reaction occurs, seek medical
attention immediately.
324Flat tire
Breakdown assistance
Page 336 of 390
!Make sure that the electric parking brake
is released. If the electric parking brake is
faulty, visit a qualified specialist workshop.
!Only secure the tow rope or tow bar at the
towing eyes. Otherwise, the vehicle could
be damaged.
!Do not use the towing eyes for recovery
purposes as this could damage the vehicle. If in doubt, recover the vehicle with a crane.
!When towing, pull away slowly and
smoothly. If the tractive power is too high,
the vehicles could be damaged.
!The vehicle can be towed a maximum of
30 miles (50km). The towing speed of
30 mph (50km/h) must not be exceeded.
If the vehicle has to be towed more than
30 miles (50km), the front axle must be
raised or the entire vehicle raised and
transported.
!Do not tow with sling-type equipment.
This could damage the vehicle.
!When towing vehicles with KEYLESS-GO,
use the key instead of the Start/Stop but-
ton. Otherwise, the automatic transmission
may shift to position Pwhen the driver's or
front-passenger door are opened, which
could lead to damage to the transmission.
!Vehicles with automatic transmission
must not be started by tow-starting. This
could otherwise damage the transmission.
It is better to have the vehicle transported
than to have it towed away.
If the vehicle can no longer be driven because of an accident or breakdown, you have the
following options:
RTransporting the vehicle
As a rule, you should have the vehicle trans-
ported.
RTowing the vehicle with a tow rope or tow
bar
Only tow the vehicle in exceptional cases. The battery must be connected and charged.
Otherwise, you:
Rcannot turn the SmartKey to position 2in
the ignition lock
Rcannot release the electric parking brake
Rcannot shift the transmission to position N
The function of the electric parking brake and the parking lock is dependent on the on-board
voltage.
If the on-board voltage is low or there is a
system malfunction, it is possible that:
Rthe electric parking brake may not be
applied in certain circumstances, or
Rthe transmission may not be shifted to P
Switch off non-essential consumers, e.g. the
radio.
Disarm the automatic locking feature before
the vehicle is towed (
Ypage 230). You could
otherwise be locked out when pushing or
towing the vehicle.
Installing/removing the towing eye
Installing the towing eye
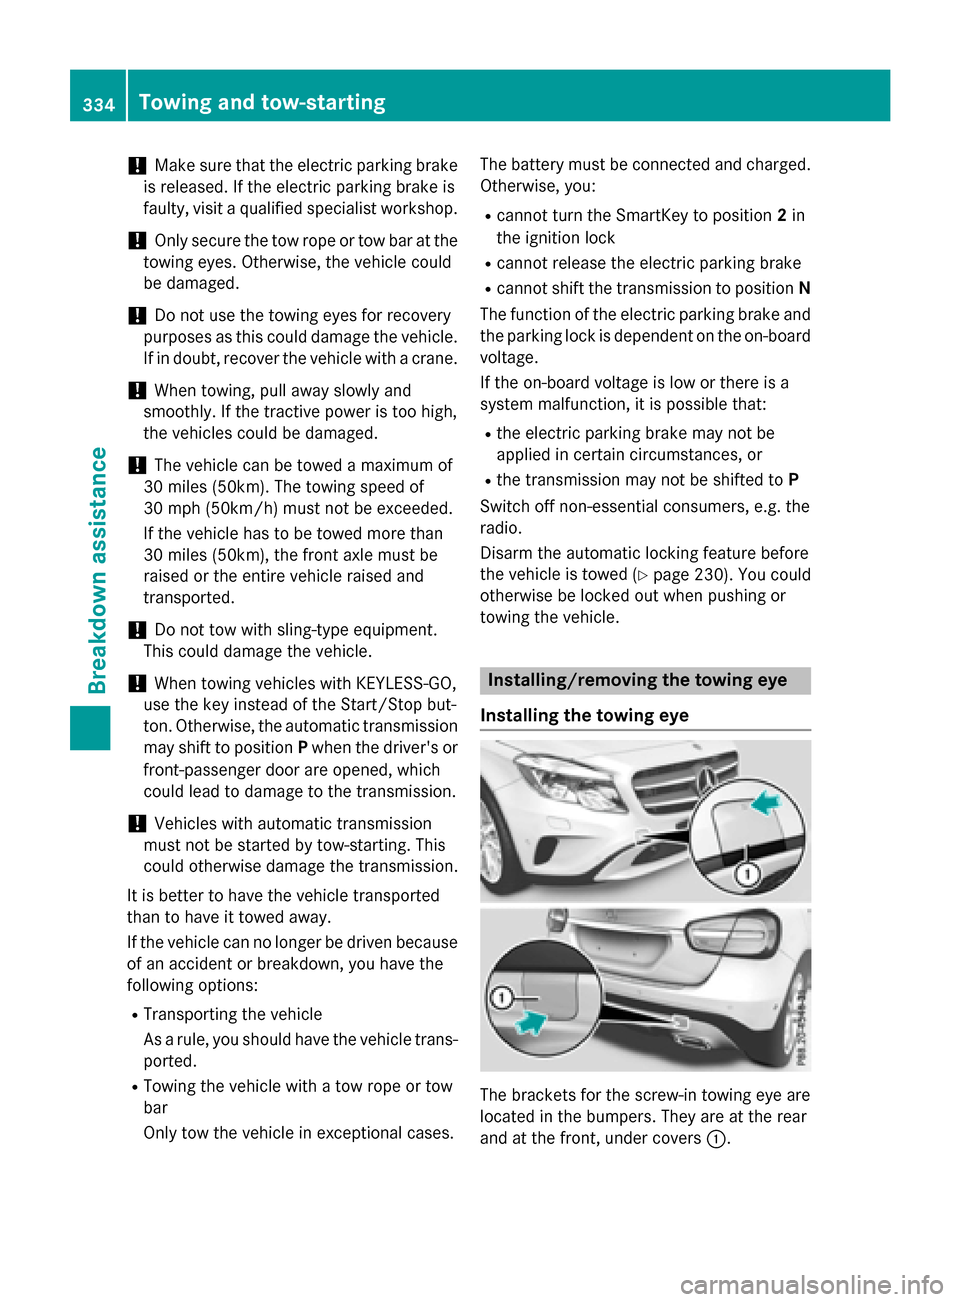
The brackets for the screw-in towing eye are
located in the bumpers. They are at the rear
and at the front, under covers :.
334Towing and tow-starting
Breakdown assistance
Page 342 of 390
Useful information
i
This Operator's Manual describes all
models and all standard and optional equip-
ment of your vehicle available at the time of
publication of the Operator's Manual.
Country-specific differences are possible.
Please note that your vehicle may not be
equipped with all features described. This
also applies to safety-related systems and
functions.
iRead the information on qualified special-
ist workshops (
Ypage 25).
Important safety notes
GWARNING
If wheels and tires of the wrong size are used, the wheel brakes or suspension components
may be damaged. There is a risk of an acci-
dent.
Always replace wheels and tires with those
that fulfill the specifications of the original
part.
When replacing wheels, make sure to use the
correct:
Rdesignation
Rmodel
When replacing tires, make sure to use the
correct:
Rdesignation
Rmanufacturer
Rmodel
GWARNING
A flat tire severely impairs the driving, steer-
ing and braking characteristics of the vehicle.
There is a risk of accident.
Tires without run-flat characteristics:
Rdo not drive with a flat tire.
Rimmediately replace the flat tire with your
emergency spare wheel or spare wheel, or
consult a qualified specialist workshop.
Tires with run-flat characteristics:
Rpay attention to the information and warn-
ing notices on MOExtended tires (tires with
run-flat characteristics).
Accessories that are not approved for your
vehicle by Mercedes-Benz or are not being
used correctly can impair the operating
safety.
Before purchasing and using non-approved
accessories, visit a qualified specialist work-
shop and inquire about:
Rsuitability
Rlegal stipulations
Rfactory recommendations
Information on the sizes and types of wheels
and tires for your vehicle can be found under "Wheel/tire combinations" (
Ypage 367).
Information on tire pressure can be found:
Ron the Tire and Loading Information placard
on the B-pillar on the driver's side
(
Ypage 351)
Rin the tire pressure table in the fuel filler flap
(
Ypage 170)
Runder "Tire pressure" (Ypage 343)
Operation
Information on driving
Check the tire pressure when the vehicle is
heavily laden and adjust prior to a trip.
While driving, pay attention to vibrations,
noises and unusual handling characteristics,
e.g. pulling to one side. This may indicate that
the wheels or tires are damaged. If you sus-
pect that a tire is defective, reduce your
speed immediately. Stop the vehicle as soon
as possible to check the wheels and tires for
damage. Hidden tire damage could also be
causing the unusual handling characteristics.
If you find no signs of damage, have the tires
and wheels checked at a qualified specialist
workshop.
340Operation
Wheels and tires
Page 344 of 390
approximatelyáin(1.6 mm )ha sbeen
re ached. If this is the case, the tire is so worn
that it must be replaced.
Selecting, mounting and replacing
tires
ROnly mount tires and wheels of the same
type and make.
Exception: it is permissible to install a dif-
ferent type or make in the event of a flat
tire. Observe here the "MOExtended tires
(tires with run-flat characteristics)" section
(
Ypage 323).
ROnly mount tires of the correct size onto
the wheels.
RBreak in new tires at moderate speeds for
the first 60 miles (100 km). They only reach their full performance after this distance.
RDo not drive with tires which have too little
tread depth, as this significantly reduces
the traction on wet roads (hydroplaning).
RReplace the tires after six years at the lat-
est, regardless of wear.
MOExtended tires (tires with run-flat
properties)
With MOExtended tires (tires with run flat
characteristics), you can continue to drive
your vehicle even if there is a total loss of
pressure in one or more tires.
MOExtended tires may only be used in con-
junction with an active tire pressure loss
warning system or with an active tire pressure
monitor and on wheels specifically tested by
Mercedes-Benz.
Notes on driving with MOExtended tires with
a flat tire (
Ypage 323).
Vehicles equipped with MOExtended tires are
not equipped with a TIREFIT kit at the factory.
It is therefore recommended that you addi-
tionally equip your vehicle with a TIREFIT kit if you mount tires that do not feature run-flat
properties, e.g. winter tires. A TIREFIT kit may be obtained from a qualified specialist work-
shop.
Winter operation
General notes
Have your vehicle winter-proofed at a quali-
fied specialist workshop at the onset of win-
ter.
Observe the notes in the "Changing a wheel"
section (
Ypage 363).
Driving with summer tires
At temperatures below 45
‡(+7 †), summer
tires lose elasticity and therefore traction and
braking power. Change the tires on your vehi-
cle to M+S tires. Using summer tires at very
cold temperatures could cause cracks to
form, thereby damaging the tires perma-
nently. Mercedes-Benz cannot accept
responsibility for this type of damage.
GWARNING
Damaged tires can cause tire inflation pres-
sure loss. As a result, you could lose control of
your vehicle. There is a risk of accident.
Check the tires regularly for signs of damage
and replace any damaged tires immediately.
M+S tires
GWARNING
M+S tires with a tire tread depth of less than
ã in (4 mm) are not suitable for use in winter
and do not provide sufficient traction. There is
a risk of an accident.
M+S tires with a tread depth of less than ãin
(4 mm) must be replaced immediately.
At temperatures below 45 ‡(+7 †), use win-
ter tires or all-season tires. Both types of tire
are identified by the M+S marking.
Only winter tires bearing the isnowflake
symbol in addition to the M+S marking pro-
342Winter operation
Wheels and tires