child lock MERCEDES-BENZ GLA SUV 2017 Owner's Manual
[x] Cancel search | Manufacturer: MERCEDES-BENZ, Model Year: 2017, Model line: GLA SUV, Model: MERCEDES-BENZ GLA SUV 2017Pages: 369, PDF Size: 7.56 MB
Page 118 of 369
Memory function
Important safety notes
G
WARNING
If you use the memory function on the driver's side while driving, the adjustments could
cause you to lose control of the vehicle. There
is a risk of an accident.
Only use the memory function on the driver's
side while the vehicle is stationary. G
WARNING
If the memory function adjusts the seat, you
and other vehicle occupants – particularly
children – could become trapped. There is a
risk of injury.
While the memory function is making adjust-
ments, make sure that no one has any part of their body within the sweep of the seat. If
someone becomes trapped, immediately
release the memory function position button.
The adjustment is stopped. G
WARNING
If children activate the memory function, they
could become trapped, especially if they are
unattended. There is a risk of injury.
When leaving the vehicle, always take the key with you and lock the vehicle. Never leave
children unattended in the vehicle.
The memory function can be used at any time,
e.g. even when the key is not in the ignition lock. Storing settings
Using the memory function, you can store up to three different settings, e.g. for three different
people.
The following settings are stored as a single
memory preset:
R seat and backrest position
R driver's side: position of the exterior mirrors
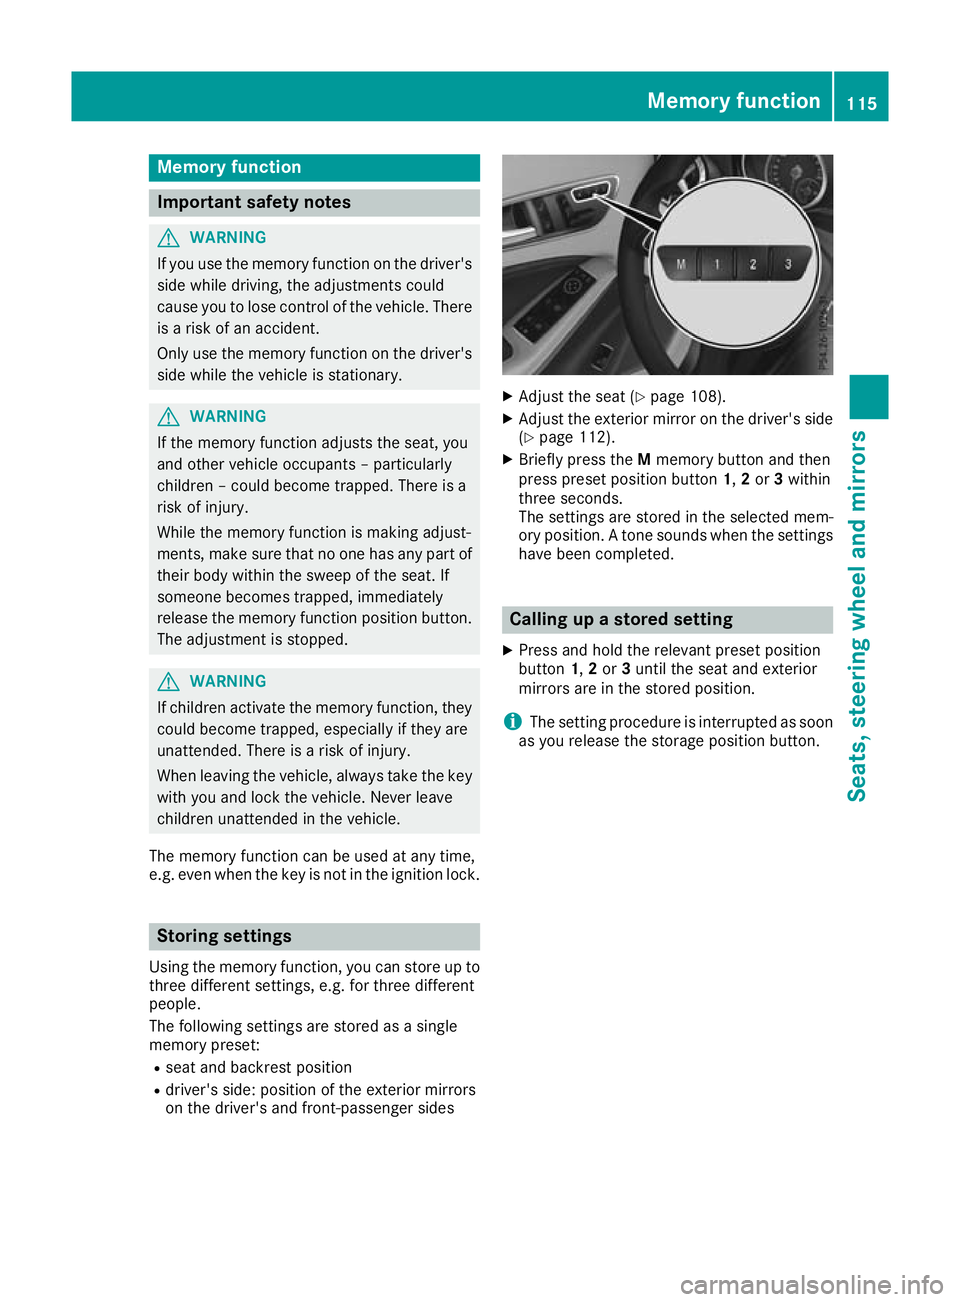
on the driver's and front-passenger sides X
Adjust the seat (Y page 108).
X Adjust the exterior mirror on the driver's side
(Y page 112).
X Briefly press the Mmemory button and then
press preset position button 1,2or 3within
three seconds.
The settings are stored in the selected mem-
ory position. A tone sounds when the settings
have been completed. Calling up a stored setting
X Press and hold the relevant preset position
button 1,2or 3until the seat and exterior
mirrors are in the stored position.
i The setting procedure is interrupted as soon
as you release the storage position button. Memory function
115Seats, steering wheel and mirrors Z
Page 141 of 369
Switch the auxiliary heating on regularly – once
a month – for about ten minutes.
The auxiliary heating timer function calculates
the switch-on time according to the outside
temperature so that the vehicle is preheated by the departure time. When the departure time is
reached, the auxiliary heating continues to heat for a further five minutes and then switches off.
The auxiliary heating heats the air in the vehicle interior to the set temperature. This occurs with-out using the heat of the running engine. The
auxiliary heating is operated directly using the
vehicle's fuel. For this reason, the fuel tank must
be at least Õfull to ensure that the auxiliary
heating functions.
The auxiliary heating/ventilation automatically
adjusts to changes in temperature and weather conditions. For this reason, the auxiliary heating
could switch from ventilation mode to heating
mode or from heating mode to ventilation mode.
The auxiliary heating switches off when the
engine is switched off. The auxiliary ventilation
switches off when you turn the key to key posi-
tion 2(Ypage 144).
The auxiliary heating switches off automatically
after 50 minutes.
You cannot use the auxiliary ventilation to cool
the vehicle interior to a temperature lower than
the outside temperature.
Before switching on X
Turn the key to position 2in the ignition lock
(Y page 144).
X Set the desired temperature.
Auxiliary heating or ventilation can also be
switched on if the manually set climate control is
activated. Optimum comfort is attained by set-
ting the system to automatic mode. Set the tem-
perature to 22 †.
The auxiliary heating or auxiliary ventilation can be switched on/off using the button on the
centre console or the remote control.
The on-board computer can be used to specify
up to three departure times, one of which may
be preselected (Y page 230). Switching the auxiliary heating/venti-
lation on or off using the button on the
centre console General notes
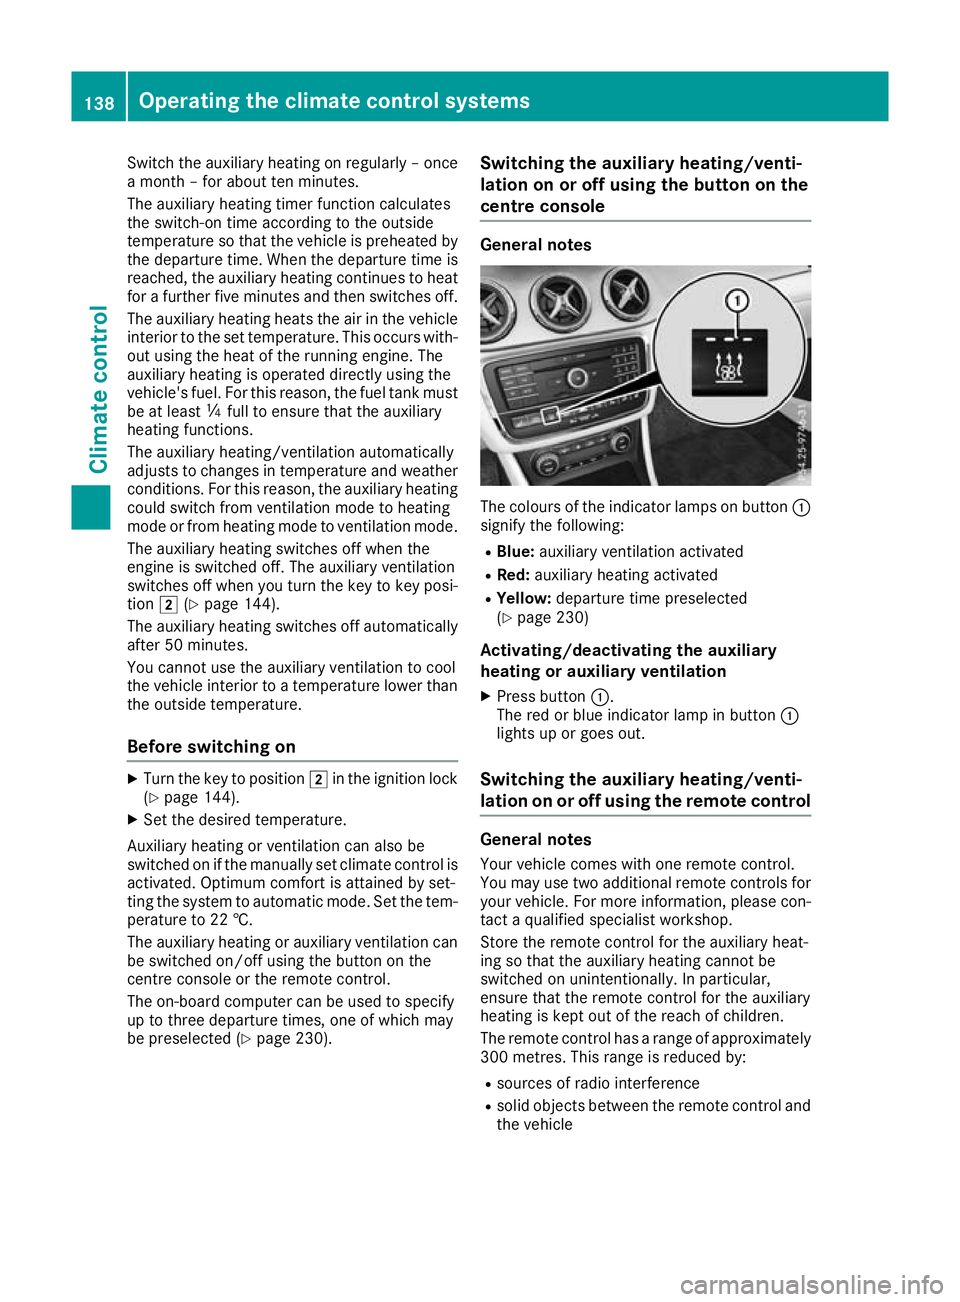
The colours of the indicator lamps on button
:
signify the following:
R Blue: auxiliary ventilation activated
R Red: auxiliary heating activated
R Yellow: departure time preselected
(Y page 230)
Activating/deactivating the auxiliary
heating or auxiliary ventilation
X Press button :.
The red or blue indicator lamp in button :
lights up or goes out.
Switching the auxiliary heating/venti-
lation on or off using the remote control General notes
Your vehicle comes with one remote control.
You may use two additional remote controls for
your vehicle. For more information, please con-
tact a qualified specialist workshop.
Store the remote control for the auxiliary heat-
ing so that the auxiliary heating cannot be
switched on unintentionally. In particular,
ensure that the remote control for the auxiliary
heating is kept out of the reach of children.
The remote control has a range of approximately
300 metre s. Thisrange is reduced by:
R sources of radio interference
R solid objects between the remote control and
the vehicle 138
Operating the climate control systemsClimate control
Page 148 of 369
If you lock the vehicle centrally using the button
on the front door (Y page 87), you can continue
to start the engine with the Start/Stop button.
You can switch off the engine while the vehicle is
in motion by pressing and holding the Start/
Stop button for around three seconds. This func-
tion operates independently of the ECO start/
stop automatic engine switch-off function.
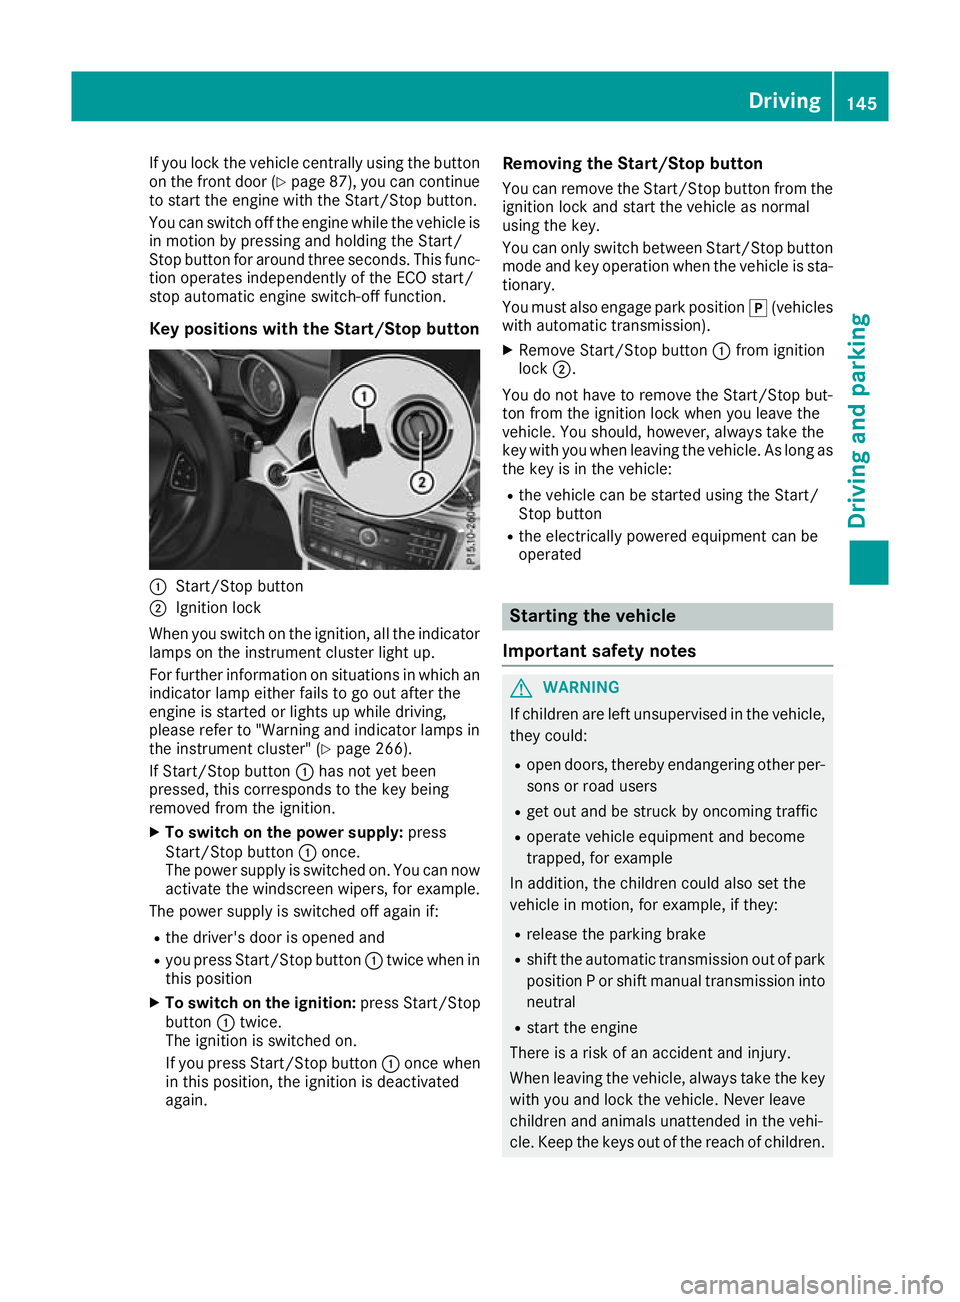
Key positions with the Start/Stop button :
Start/Stop button
; Ignition lock
When you switch on the ignition, all the indicator lamps on the instrument cluster light up.
For further information on situations in which an
indicator lamp either fails to go out after the
engine is started or lights up while driving,
please refer to "Warning and indicator lamps in
the instrument cluster" (Y page 266).
If Start/Stop button :has not yet been
pressed, this corresponds to the key being
removed from the ignition.
X To switch on the power supply: press
Start/Stop button :once.
The power supply is switched on. You can now activate the windscreen wipers, for example.
The power supply is switched off again if:
R the driver's door is opened and
R you press Start/Stop button :twice when in
this position
X To switch on the ignition: press Start/Stop
button :twice.
The ignition is switched on.
If you press Start/Stop button :once when
in this position, the ignition is deactivated
again. Removing the Start/Stop button
You can remove the Start/Stop button from the
ignition lock and start the vehicle as normal
using the key.
You can only switch between Start/Stop button
mode and key operation when the vehicle is sta- tionary.
You must also engage park position j(vehicles
with automatic transmission).
X Remove Start/Stop button :from ignition
lock ;.
You do not have to remove the Start/Stop but-
ton from the ignition lock when you leave the
vehicle. You should, however, always take the
key with you when leaving the vehicle. As long as the key is in the vehicle:
R the vehicle can be started using the Start/
Stop button
R the electrically powered equipment can be
operated Starting the vehicle
Important safety notes G
WARNING
If children are left unsupervised in the vehicle, they could:
R open doors, thereby endangering other per-
sons or road users
R get out and be struck by oncoming traffic
R operate vehicle equipment and become
trapped, for example
In addition, the children could also set the
vehicle in motion, for example, if they:
R release the parking brake
R shift the automatic transmission out of park
position P or shift manual transmission into
neutral
R start the engine
There is a risk of an accident and injury.
When leaving the vehicle, always take the key with you and lock the vehicle. Never leave
children and animals unattended in the vehi-
cle. Keep the keys out of the reach of children. Driving
145Driving and parking Z
Page 159 of 369
Engaging reverse gear R
!
Only move the automatic transmission to
k when the vehicle is stationary.
X Depress the brake pedal and keep it
depressed.
X Push the DIRECT SELECT lever up past the
first point of resistance.
The ECO start/stop function is not available
when reverse gear is engaged. For further infor- mation on the ECO start/stop function, see
(Y page 148).
Engaging neutral N G
WARNING
If children are left unsupervised in the vehicle, they can:
R open doors and endanger other persons or
road users
R climb out and be injured by the traffic
R operate vehicle equipment and, for exam-
ple, trap themselves.
Children could also set the vehicle in motion, for example by:
R releasing the parking brake
R shifting the automatic transmission out of
park position P
R starting the engine.
There is a risk of an accident and injury.
When leaving the vehicle, always take the key
with you and lock the vehicle. Never leave
children unattended in the vehicle. Always
keep the key out of reach of children.
X If the transmission is in position hork:
push the DIRECT SELECT lever up or down to the first point of resistance.
X If the transmission is in position j: depress
the brake pedal and push the DIRECT SELECT
lever up or down to the first point of resist-
ance.
If you switch the engine off with the transmis-
sion in position korh, the automatic trans-
mission shifts to iautomatically.
With the key: if you then open the driver's door
or the front-passenger door or remove the key from the ignition, the automatic transmission
shifts to jautomatically.
With the Start/Stop button: if you then open
the driver's door or the front-passenger door,
the automatic transmission shifts to jauto-
matically.
If you want the automatic transmission to
remain in neutral i, e.g. when having the vehi-
cle cleaned in an automatic car wash with a
towing system:
X Vehicles with the Start-Stop button:
remove the Start-Stop button from the igni-
tion lock.
X Insert the key into the ignition lock.
X All vehicles: switch the ignition on.
X Depress the brake pedal and keep it
depressed.
X Engage neutral i.
X Release the brake pedal.
X Release the electric parking brake.
X Switch off the ignition and leave the key in the
ignition lock.
Engaging drive position D X
If the transmission is in position kori:
push the DIRECT SELECT lever down past the first point of resistance.
X If the transmission is in position j: depress
the brake pedal and push the DIRECT SELECT lever down past the first point of resistance. Selector lever (Mercedes-AMG vehi-
cles)
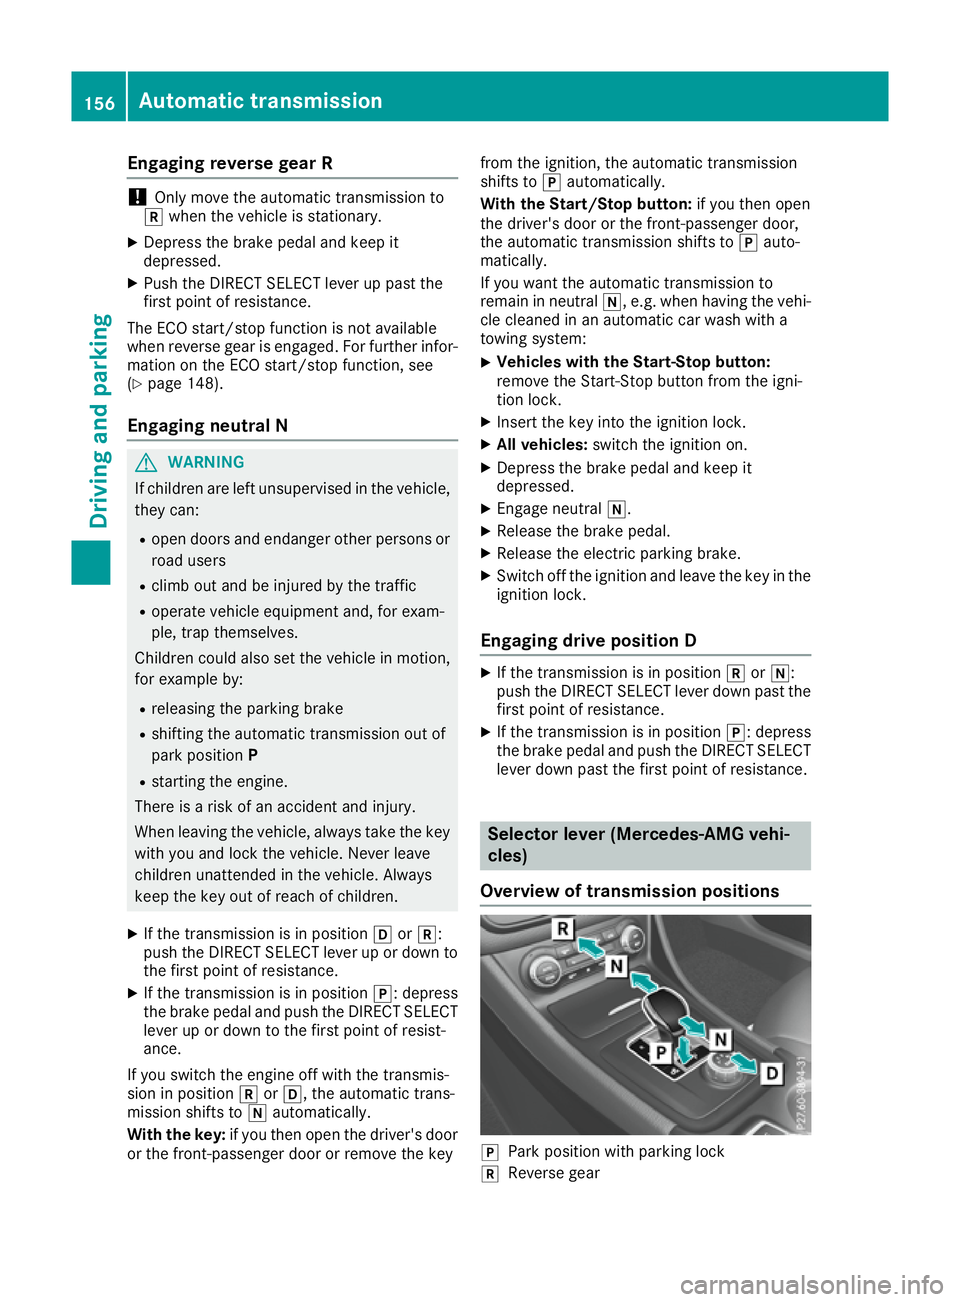
Overview of transmission positions j
Park position with parking lock
k Reverse gear 156
Automatic transmissionDriving and parking
Page 169 of 369
Problem
Possible causes/consequences and
M
MSolutions The key battery is weak or discharged.
X Unlock the vehicle using the emergency key element (Y page 88).The fuel filler flap is unlocked, but the opening mechanism is jammed.
X Consult a qualified specialist workshop. Parking
Important safety notes
G
WARNING
Flammable material such as leaves, grass or
twigs may ignite if they come into contact with hot parts of the exhaust system or exhaust
gas flow. There is a risk of fire.
Park the vehicle so that no flammable mate-
rial can come into contact with hot vehicle
components. In particular, do not park on dry grassland or harvested grain fields. G
WARNING
If you leave children unattended in the vehi-
cle, they may be able to set the vehicle in
motion if, for example, they:
R release the parking brake
R shift the automatic transmission out of park
position Por shift manual transmission into
neutral
R start the engine
In addition, they may operate vehicle equip-
ment and become trapped. There is a risk of
an accident and injury.
When leaving the vehicle, always take the key with you and lock the vehicle. Never leave
children unattended in the vehicle.
! Always secure the vehicle correctly against
rolling away. Otherwise, the vehicle or its driv-
etrain could be damaged.
To ensure that the vehicle is safeguarded
against rolling away unintentionally:
R the electric parking brake must be applied
R on vehicles with manual transmission, engage
first gear or reverse gear R
on vehicles with automatic transmission, the
transmission must be in position jand the
transmission position display must show j
in the multifunction display
R the key must be removed from the ignition
lock
R on uphill or downhill gradients, the front
wheels must be turned towards the kerb Switching off the engine
Important safety notes G
WARNING
The automatic transmission switches to neu-
tral position Nwhen you switch off the engine.
The vehicle may roll away. There is a risk of an
accident.
After switching off the engine, always switch
to parking position P. Prevent the parked vehi-
cle from rolling away by applying the parking
brake.
Manual transmission X
Shift to either first gear or reverse gear k.
X With the key: turn the key to position gin
the ignition lock and remove it.
The immobiliser is activated.
X With the Start/Stop button: press the
Start/Stop button (Y page 144).
The engine stops and all the indicator lamps
on the instrument cluster go out.
If the driver's door is closed, this is the same
as key position 1. If the driver's door is open,
this is the same as key position g, i.e. the
key having been removed.
X Apply the electric parking brake. 166
ParkingDriving and parking
Page 170 of 369
Automatic transmission
X
Apply the electric parking brake.
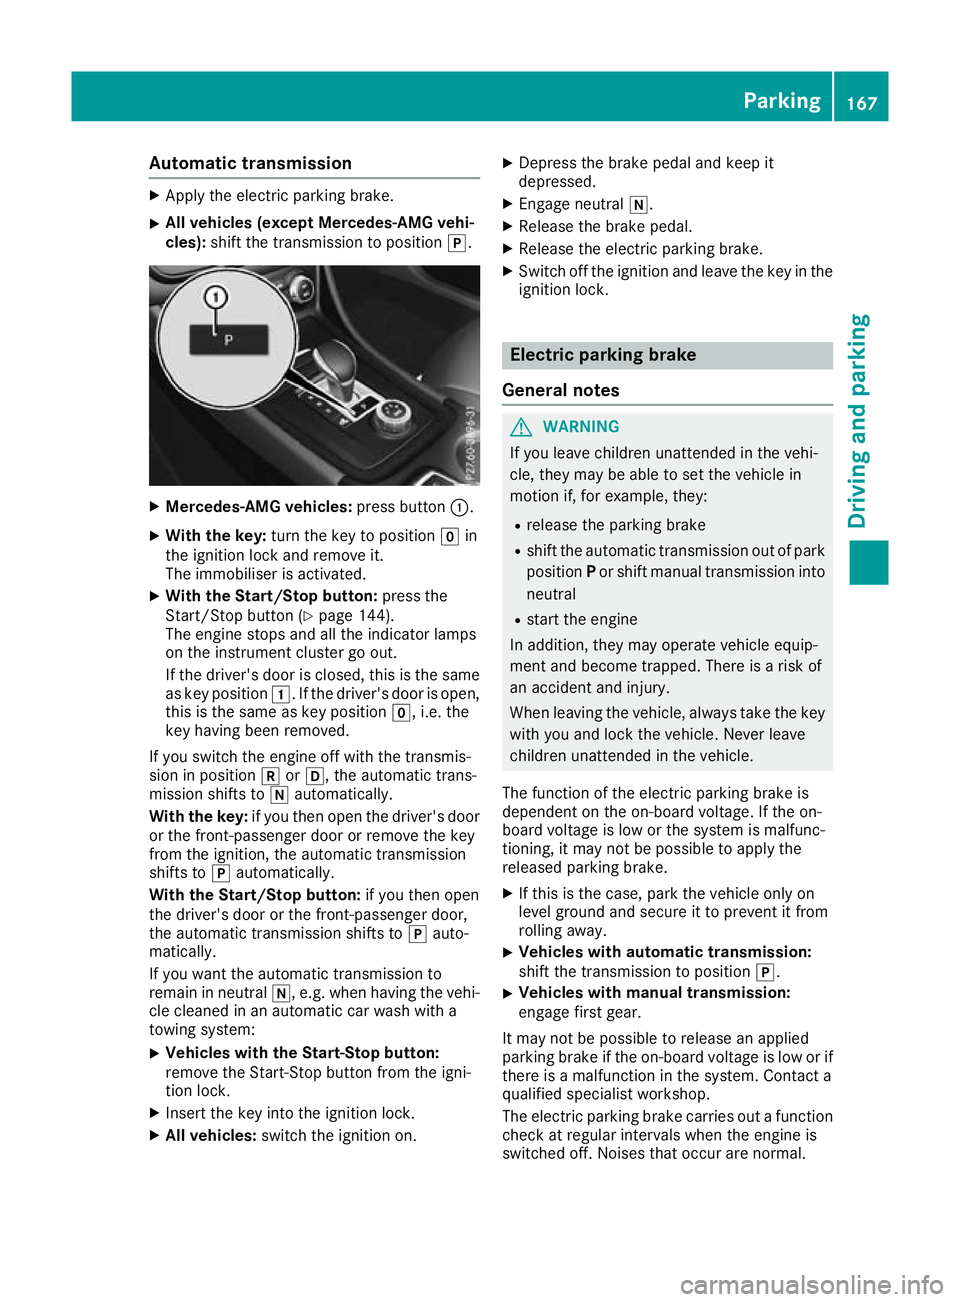
X All vehicles (except Mercedes-AMG vehi-
cles): shift the transmission to position j.X
Mercedes-AMG vehicles: press button:.
X With the key: turn the key to position gin
the ignition lock and remove it.
The immobiliser is activated.
X With the Start/Stop button: press the
Start/Stop button (Y page 144).
The engine stops and all the indicator lamps
on the instrument cluster go out.
If the driver's door is closed, this is the same
as key position 1. If the driver's door is open,
this is the same as key position g, i.e. the
key having been removed.
If you switch the engine off with the transmis-
sion in position korh, the automatic trans-
mission shifts to iautomatically.
With the key: if you then open the driver's door
or the front-passenger door or remove the key
from the ignition, the automatic transmission
shifts to jautomatically.
With the Start/Stop button: if you then open
the driver's door or the front-passenger door,
the automatic transmission shifts to jauto-
matically.
If you want the automatic transmission to
remain in neutral i, e.g. when having the vehi-
cle cleaned in an automatic car wash with a
towing system:
X Vehicles with the Start-Stop button:
remove the Start-Stop button from the igni-
tion lock.
X Insert the key into the ignition lock.
X All vehicles: switch the ignition on. X
Depress the brake pedal and keep it
depressed.
X Engage neutral i.
X Release the brake pedal.
X Release the electric parking brake.
X Switch off the ignition and leave the key in the
ignition lock. Electric parking brake
General notes G
WARNING
If you leave children unattended in the vehi-
cle, they may be able to set the vehicle in
motion if, for example, they:
R release the parking brake
R shift the automatic transmission out of park
position Por shift manual transmission into
neutral
R start the engine
In addition, they may operate vehicle equip-
ment and become trapped. There is a risk of
an accident and injury.
When leaving the vehicle, always take the key with you and lock the vehicle. Never leave
children unattended in the vehicle.
The function of the electric parking brake is
dependent on the on-board voltage. If the on-
board voltage is low or the system is malfunc-
tioning, it may not be possible to apply the
released parking brake. X If this is the case, park the vehicle only on
level ground and secure it to prevent it from
rolling away.
X Vehicles with automatic transmission:
shift the transmission to position
j.
X Vehicles with manual transmission:
engage first gear.
It may not be possible to release an applied
parking brake if the on-board voltage is low or if
there is a malfunction in the system. Contact a
qualified specialist workshop.
The electric parking brake carries out a function check at regular intervals when the engine is
switched off. Noises that occur are normal. Parking
167Driving and pa rking Z
Page 326 of 369
R
It is particularly important to observe the
described order when connecting and dis-
connecting the jump leads.
R Never connect or disconnect the battery
terminals while the engine is running. G
WARNING
Battery acid is caustic. There is a risk of injury. Avoid contact with the skin, eyes or clothing.
Do not breathe in any battery gases. Do not
lean over the battery. Keep the batteries out
of the reach of children. Immediately rinse off
battery acid thoroughly with plenty of clean
water and seek medical attention at once. H
Environmental note Batteries contain pollutants.
It is illegal to dispose of them with the household rubbish.
They must be collected sep-
arately and disposed of in anenvironmentally responsible
recycling system. Dispose of batteries in an
environmentally responsible
manner. Take discharged
batteries to a qualified spe-
cialist workshop or to a col-
lection point for used batter-
ies.
! Have the battery checked regularly at a
qualified specialist workshop.
Observe the service intervals in the Service
Booklet or contact a qualified specialist work- shop for more information.
! You should have all work involving the bat-
tery carried out at a qualified specialist work-
shop. In the exceptional case that it is neces-
sary for you to disconnect the battery your-
self, make sure that:
R you switch off the engine and remove the
key. On vehicles with KEYLESS-GO, ensure
that the ignition is switched off. Check that all the indicator lamps in the instrument
cluster are off. Otherwise, electronic com- ponents, such as the alternator, may be
damaged.
R you first remove the negative terminal
clamp and then the positive terminal
clamp. Never swap the terminal clamps.
Otherwise, the vehicle's electronic system
may be damaged.
R in vehicles with automatic transmission,
the transmission is locked in position P
after disconnecting the battery. The vehicle
is secured against rolling away. You can
then no longer move the vehicle.
The battery and the cover of the positive ter-
minal clamp must be fitted securely during
operation.
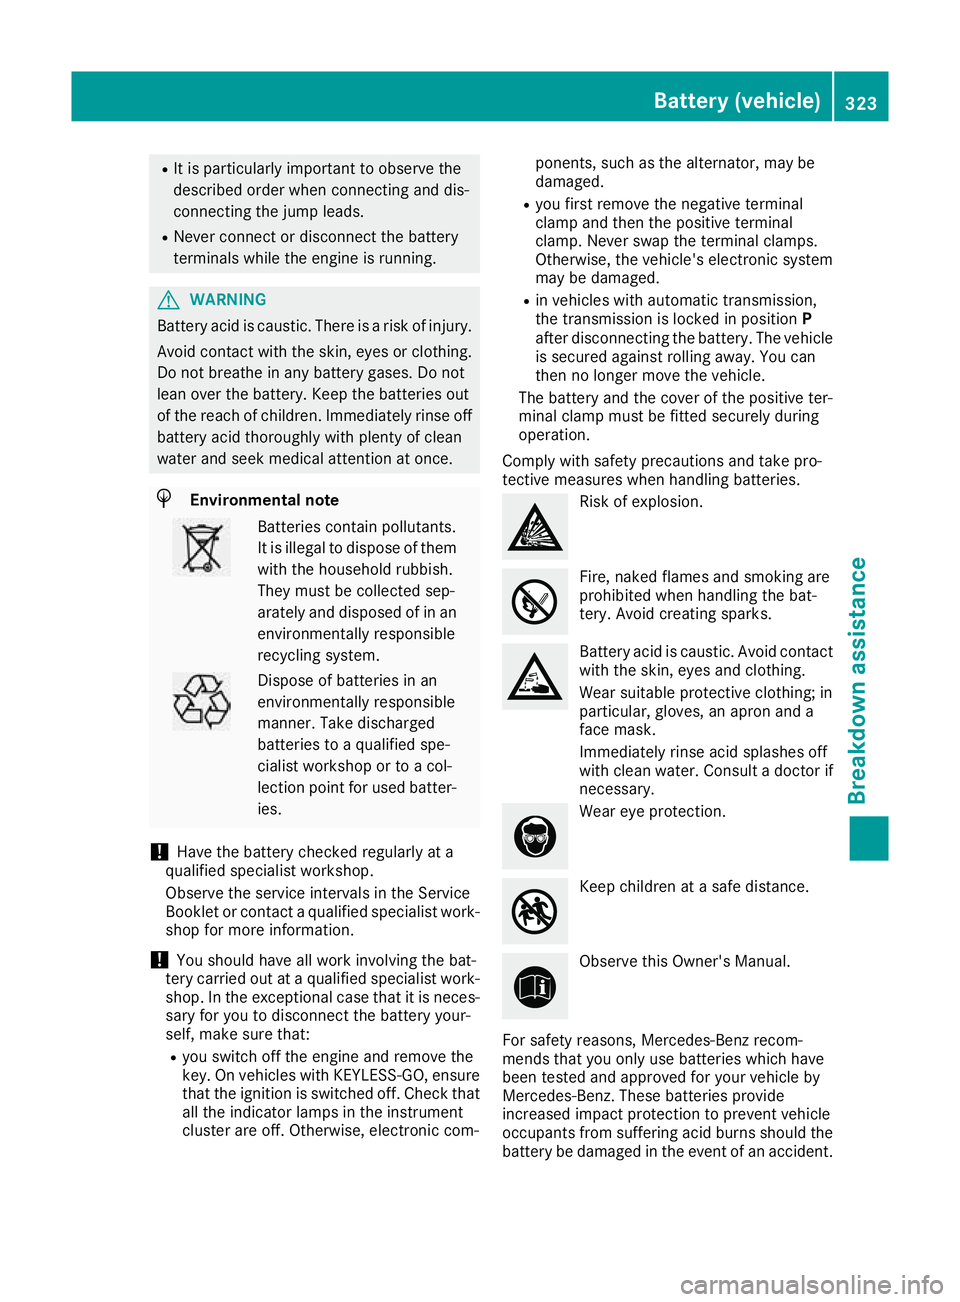
Comply with safety precautions and take pro-
tective measures when handling batteries. Risk of explosion.
Fire, naked flames and smoking are
prohibited when handling the bat-
tery. Avoid creating sparks. Battery acid is caustic. Avoid contact
with the skin, eyes and clothing.
Wear suitable protective clothing; in
particular, gloves, an apron and a
face mask.
Immediately rinse acid splashes off
with clean water. Consult a doctor if
necessary. Wear eye protection.
Keep children at a safe distance.
Observe this Owner's Manual.
For safety reasons, Mercedes-Benz recom-
mends that you only use batteries which have
been tested and approved for your vehicle by
Mercedes-Benz. These batteries provide
increased impact protection to prevent vehicle
occupants from suffering acid burns should the battery be damaged in the event of an accident. Battery (vehicle)
323Breakdown assistance Z
Page 327 of 369
In order for the battery to achieve the maximum
possible service life, it should always be suffi-
ciently charged.
Like other batteries, the vehicle battery may
discharge over time if you do not use the vehicle. In such cases, have the battery disconnected at
a qualified specialist workshop. However, you
can also charge the battery with a charger rec-
ommended by Mercedes-Benz. For more infor-
mation, please contact a qualified specialist
workshop.
Have the battery charge checked more fre-
quently if you use the vehicle mainly for short
trips or if you leave it standing idle for an exten- ded period. Consult a qualified specialist work-
shop if you wish to leave your vehicle parked up
for a long period of time.
When you park the vehicle, remove the key if you do not require any electrical consumers. The
vehicle will then use very little energy, thus con- serving battery power.
If the power supply has been interrupted, e.g. if
the battery was discharged, you will have to:
R set the clock using the multimedia system;
see the separate operating instructions
R reset the function for folding the exterior mir-
rors in/out automatically, by folding the mir-
rors out once (Y page 113) Charging the battery
G
WARNING
During charging and jump-starting, explosive
gases can escape from the battery. There is a risk of an explosion.
Particularly avoid fire, naked flames, creating
sparks and smoking. Ensure there is sufficient
ventilation while charging and jump-starting.
Do not lean over a battery. G
WARNING
Battery acid is caustic. There is a risk of injury. Avoid contact with the skin, eyes or clothing.
Do not breathe in any battery gases. Do not
lean over the battery. Keep the batteries out of the reach of children. Immediately rinse off
battery acid thoroughly with plenty of clean
water and seek medical attention at once. G
WARNING
A discharged battery can freeze at tempera-
tures below freezing point. When jump-start-
ing the vehicle or charging the battery, gases can escape from the battery. There is a risk of
an explosion.
Allow the frozen battery to thaw out before
charging it or jump-starting.
! Only use battery chargers with a maximum
charging voltage of 14.8 V.
! Only charge the battery using the jump-start
connection point.
The jump-starting connection point is in the
engine compartment (Y page 325).
X Open the bonnet.
X Connect the battery charger to the positive
terminal and earth point in the same order as
when connecting the donor battery in the
jump-starting procedure (Y page 325).
If the indicator/warning lamps do not light up in
the instrument cluster at low temperatures, it is very likely that the discharged battery has fro-
zen. In this case, you may neither jump-start the vehicle nor charge the battery. The service life of
a battery that has been thawed may be reduced. The starting characteristics may be impaired,
especially at low temperatures. Have the
thawed battery checked at a qualified specialistworkshop.
Only charge the installed battery with a battery
charger which has been tested and approved by Mercedes-Benz. A battery charger unit specially
adapted for Mercedes-Benz vehicles and tested and approved by Mercedes-Benz is available as
an accessory. This device permits charging of
the battery while it is installed. Contact a
Mercedes-Benz Service Centre for information
and availability. Read the battery charger's
operating instructions before charging the bat-
tery. 324
Battery (vehicle)Breakdown assistance