bluetooth MERCEDES-BENZ GLC-Class 2016 X253 Comand Manual
[x] Cancel search | Manufacturer: MERCEDES-BENZ, Model Year: 2016, Model line: GLC-Class, Model: MERCEDES-BENZ GLC-Class 2016 X253Pages: 222, PDF Size: 6.39 MB
Page 81 of 222
If the fuel tank reserve level is displayed, you
will see theReserve Fuel Would you
liketostartasearchforsurround‐
ing gas stations?message.
XTo selectYesorNo: turn and press the con-
troller.
If you select Yes
, the gas station search
starts. When the search is complete, a list
of the gas stations available along the route
or in the vicinity is displayed.
If you select No
, the search is canceled.
XSelect the gas station.
The address of the gas station is displayed.
XTo selectStart: press the controller.
The selected gas station is entered into
position 1 of the intermediate destinations
menu. Route guidance begins.
If the intermediate destinations menu
already contains four intermediate desti-
nations, a prompt will be displayed, asking
you whether you wish to enter the gas sta-
tion into position 1. If you select Yes
, the
gas station is transferred into the list and
intermediate destination 4 is deleted.
Entering a destination from
Mercedes-Benz Apps
Requirement (USA): mbrace is activated for
the Mercedes-Benz Apps (
Ypage 146).
Requirement (Canada): a mobile phone must be connected via Bluetooth
®(Ypage 112) or
USB (
Ypage 198) with COMAND.
XTo switch to navigation mode: press the
Ø button.
XTo show the menu: slide6the control-
ler.
XTo select Destination: turn and press the
controller.
XSelect From Mercedes-Benz Apps.
The list of Mercedes-Benz Apps appears
(
Ypage 155).
Using geo-coordinates
XTo switch to navigation mode: press the
ß button.
XTo show the menu: slide6the control-
ler.
XTo select Destination: turn and press the
controller.
XSelect Using Geo-Coordinates.
Geo-coordinates (longitude and latitude)
are entered in degrees, minutes and sec-
onds.
XTo enter geo-coordinates: turn the con-
troller.
The value for degree, minute or second
changes.
XTo move the selection within the line: slide
1 the controller.
XTo move the selection between lines: slide
4the controller.
XTo confirm the value: press the controller.
XTo store geo-coordinates: selectSaveby
turning and pressing the controller.
The destination with the geo-coordinates
can be stored as:
Ra home address in the address book
Ra navigable address book contact
For further information on the address
book, see (
Ypage 125).
Ra personal destination on the SD memory
card (
Ypage 95)
XTo start route calculation: selectStart
Route Guidanceby turning and pressing
the controller.
Personal POIs and routes
General notes
The use of personal POIs for displaying traffic surveillance equipment is not permitted in
every country. Please observe the country-
specific regulations and always drive at a suit-
able speed.
Personal POIs and routes79
Navigation
Z
Page 113 of 222
Call disconnection while the vehicle is
in motion
A call may be disconnected if:
Rthere is insufficient network coverage in
certain areas.
Ryou move from one transmitter/receiver
area (cell) into another and no channels are
free.
Ryou use a SIM card that is not compatible
with the network available.
Operating options
You can operate the telephone by:
Rusing the controller by turning, pressing,
sliding1 or4
Rusing the touchpad (Ypage 25)
Rusing the 6or~ button on the mul-
tifunction steering wheel
Rusing the Voice Control System (see the
separate operating instructions)
Unless stated otherwise, the descriptions and
illustrations in this section refer to COMAND.
Function restrictions
You may have to wait before using telephony via COMAND in the following situations:
Rwhen the mobile phone is switched off
Rif Bluetooth®is switched off on the mobile
phone
Rif the mobile phone has not logged on to a
mobile phone network
Rif the Bluetooth®function is switched off in
COMAND
The telephone automatically tries to log on to
a network. If no network is available, you may
not be able to make a " 911" emergency call.
If you attempt to make an outgoing call, the
No Service
message will appear for a short
while.
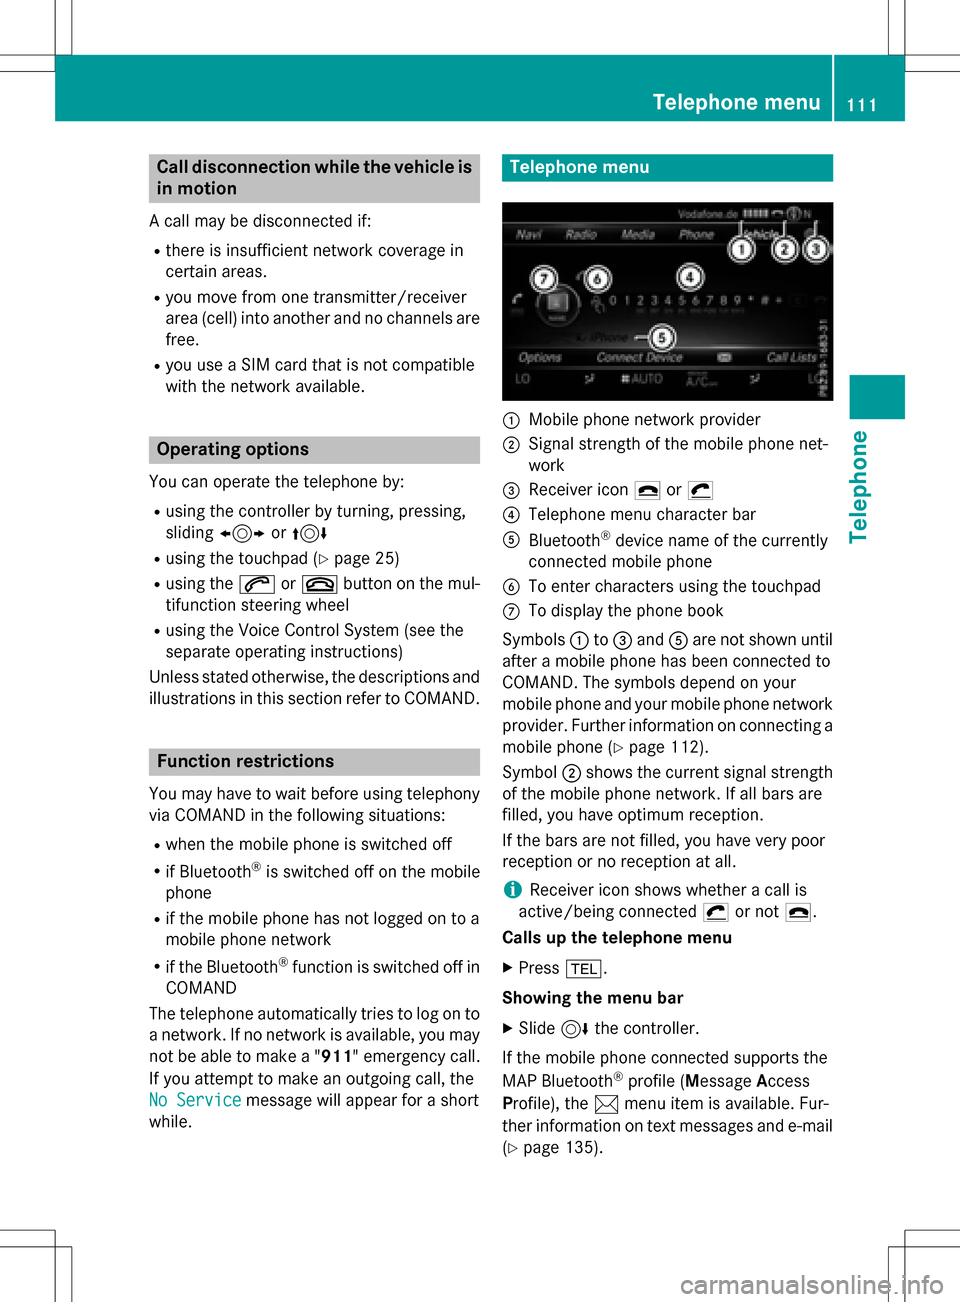
Telephone menu
:Mobile phone network provider
;Signal strength of the mobile phone net-
work
=Receiver icon ¢or¡
?Telephone menu character bar
ABluetooth®device name of the currently
connected mobile phone
BTo enter characters using the touchpad
CTo display the phone book
Symbols :to= and Aare not shown until
after a mobile phone has been connected to
COMAND. The symbols depend on your
mobile phone and your mobile phone network
provider. Further information on connecting a
mobile phone (
Ypage 112).
Symbol ;shows the current signal strength
of the mobile phone network. If all bars are
filled, you have optimum reception.
If the bars are not filled, you have very poor
reception or no reception at all.
iReceiver icon shows whether a call is
active/being connected ¡or not ¢.
Calls up the telephone menu
XPress %.
Showing the menu bar
XSlide 6the controller.
If the mobile phone connected supports the
MAP Bluetooth
®profile ( Message Access
P rofile), the 1menu item is available. Fur-
ther information on text messages and e-mail
(
Ypage 135).
Telephone menu111
Telephone
Z
Page 114 of 222
If you have an unread text message or e-mail,
the0 mail symbol is displayed at the top
in the status bar. The symbol disappears once
you have read the text message or e-mail. The
ú symbol is displayed as soon as the mes-
sage memory on the mobile phone or SIM
card is full. The symbol disappears once you
delete at least one message.
Connecting/disconnecting a mobile
phone
Prerequisites
For telephony via the Bluetooth®interface,
you require a Bluetooth®-capable mobile
phone. The mobile phone must support
Hands-Free Profile 1.0 or above.
On COMAND
XActivate Bluetooth®(Ypage 44).
On the mobile phone
XSwitch on the mobile phone and enter the
PIN when prompted to do so (see the man-
ufacturer's operating instructions).
XActivate Bluetooth®and, if necessary,
Bluetooth®visibility for other devices (see
the manufacturer's operating instructions).
This visibility is for restricted periods of
time on some mobile phones (see the man-
ufacturer's operating instructions).
XSet the Bluetooth®device name for the
mobile phone if necessary.
The Bluetooth
®device names for all of one
manufacturer's products might be identical.
To make it possible to clearly identify your
mobile phone, change the device name (see
the manufacturer's operating instructions).
The name can be freely selected. If the mobile phone supports the PBAP
(Phone
BookAccess Profile) and MAP
(Message Access Profile) Bluetooth
®pro-
files, the following information will be trans-
mitted after you connect:
RPhone book
RCall lists
RMessages
Further information on allowing or suppress-
ing the automatic download of the phone
book (
Ypage 130).
The battery of the mobile phone should
always be kept sufficiently charged in order to
prevent malfunctions.
iNot all mobile phones available on the
market are equally suitable. You can obtain
more detailed information about suitable
mobile phones and about the connection
between the mobile phone and COMAND
on the Internet at
www.mercedes-benz-mobile.com .
You can also obtain more information by
calling.
In the USA, you can get in touch with the
Mercedes-Benz Customer Assistance Cen-
ter on 1-800-FOR-MERCedes
(1-800-367-6372).
In Canada, you can get in touch with the
Customer Relations Center on
1-800-387-0100.
iSome displays (e.g. the signal strength)
depend on the su
pported version of the
Hands-Free Profile.
Procedure and general information
Searching for and authorizing (connect-
ing) a mobile phone
Before using your mobile phone with
COMAND for the first time, you will need to
search for the phone (
Ypage 113) and then
authorize it (
Ypage 114). Depending on the
mobile phone, authorization either takes
place by means of Secure Simple Pairing or by
112Connecting/disconnecting a mobile phone
Telephone
Page 115 of 222
entering a passkey. COMAND automatically
enables the procedure suited to your mobile
phone. You can recognize Secure Simple Pair-
ing by a code which is displayed in COMAND
and on the mobile phone. You can recognize
the passkey system by the fact that you haveto enter a code on the mobile phone and in
COMAND. The mobile phone is always con-
nected automatically after authorization.
If COMAND does not detect your mobile
phone, this may be due to particular security
settings on your mobile phone. You can also
start the search procedure and authorization
on the mobile phone (
Ypage 114).
Device-specific information on authorizing
and connecting Bluetooth
®-capable mobile
phones can be found on the Internet at
http://www.mercedes-benz.com/
connect.
You can authorize up to 15 mobile phones.
Only one mobile phone can be connected to
COMAND at any one time.
De-authorizing (disconnecting) a mobile
phone
The connection is terminated automatically if
you leave the receiver range of COMAND or
deactivate Bluetooth
®on your mobile phone.
If you no longer want the Bluetooth
®connec-
tion to be established automatically, the
mobile phone must be de-authorized (discon-
nected) (
Ypage 116).
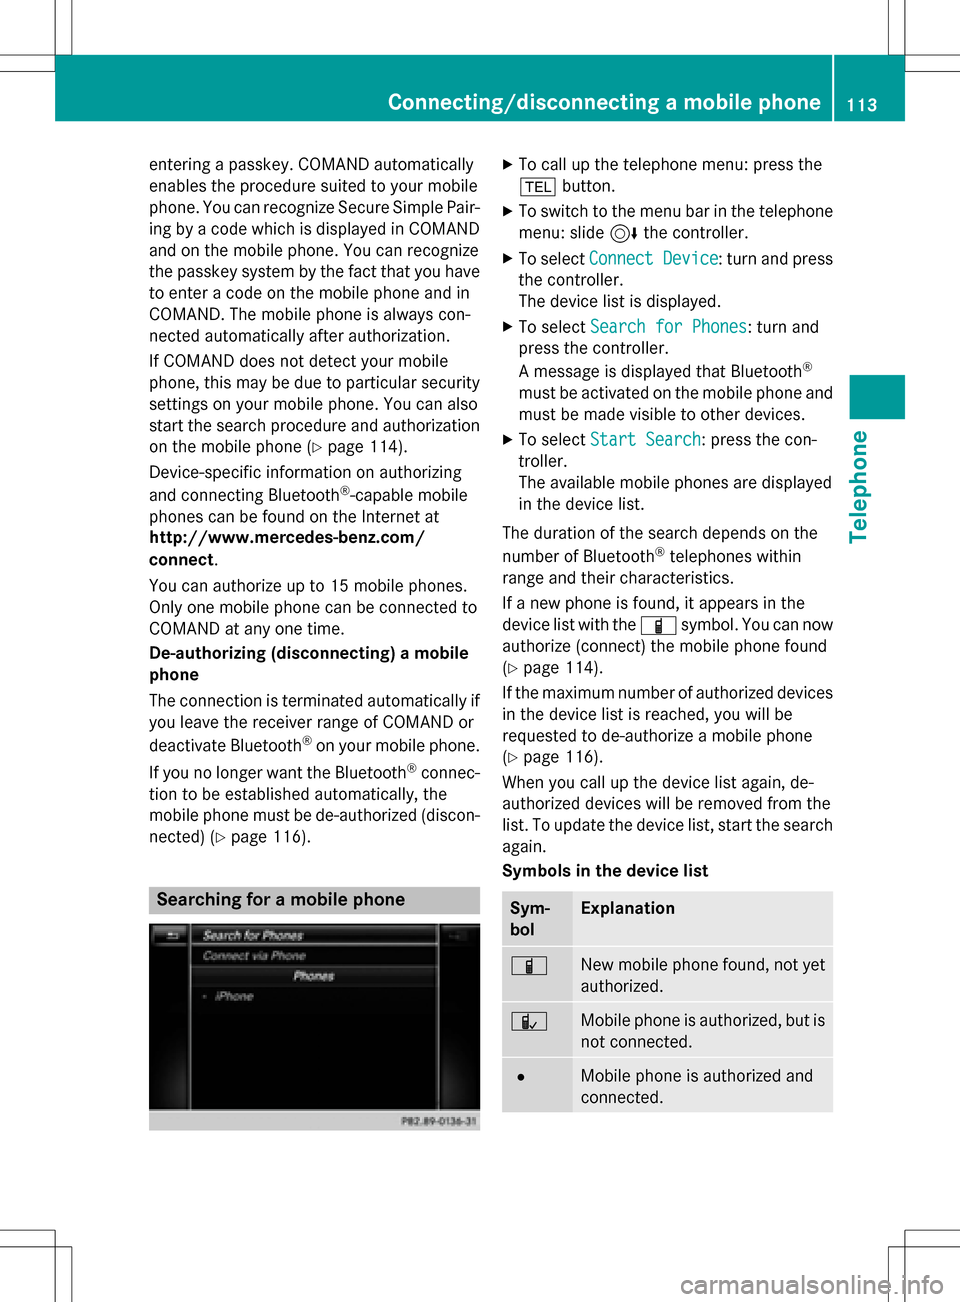
Searching for a mobile phone
XTo call up the telephone menu: press the
% button.
XTo switch to the menu bar in the telephone
menu: slide 6the controller.
XTo select Connect Device: turn and press
the controller.
The device list is displayed.
XTo select Search for Phones: turn and
press the controller.
A message is displayed that Bluetooth
®
must be activated on the mobile phone and
must be made visible to other devices.
XTo select Start Search: press the con-
troller.
The available mobile phones are displayed
in the device list.
The duration of the search depends on the
number of Bluetooth
®telephones within
range and their characteristics.
If a new phone is found, it appears in the
device list with the Ïsymbol. You can now
authorize (connect) the mobile phone found
(
Ypage 114).
If the maximum number of authorized devices
in the device list is reached, you will be
requested to de-authorize a mobile phone
(
Ypage 116).
When you call up the device list again, de-
authorized devices will be removed from the
list. To update the device list, start the search
again.
Symbols in the device list
Sym-
bolExplanation
ÏNew mobile phone found, not yet
authorized.
ÑMobile phone is authorized, but is
not connected.
#Mobile phone is authorized and
connected.
Connecting/disconnecting a mobile phone113
Telephone
Z
Page 116 of 222
Authorizing amobile phone (connect-
ing)
Authorizati onvia Secure Simple Pairing
If COMAND has foun dyour mobile phone ,you
can authorize (connect) it .
XTo selectamobile phone from th edevice
list :tur nth econtroller and press to con-
firm.
A code is displayed in COMAND and on th e
mobile phone.
Th ecode is th esam e
XCOMAND: selectYes.
XMobile phone: confirm thecode. Depend-
ing on th emobile phone used, you may
hav eto confirm th econnection to
COMAND and for th ePBAP and MA PBlue -
toot h
®profiles. The prompt to confirm may
tak eup to two minute sto be displayed. You
may also sav eth econfirmation on th e
mobile phon e(see th emanufacturer' s
operating instructions).
The mobile phone is no wauthorize dand
connecte dto COMAND .You can no w
spea kusin gth ehands-free system.
To ensur ean optimum language quality, you
can set th emobile phone's transmission and
reception volume (
Ypage 116).
Th ecode is dif ferent
XCOMAND: selectNo.
The process is canceled. Repeat th e
authorization .
Authorizationvia passkey entry (access
code)
If COMAND has foun dyour mobile phone ,you
can authorize (connect) it .
XTo select theBluetoot h®nameof th e
desired mobile phone in th edevice list :tur n
and press th econtroller .
The input men ufor th epasske yis dis-
played. The passke
yis aone- to sixteen-digit num -
ber combination whic hyou can choos e
yourself .
XCOMAN D:ente rth epasske yusin gth e
characte rbar.
XSelec t¬ once all th enumber shav e
been entered .
XMobile phone: enterth esam epasske y
and confirm your entry. Dependin gon th e
mobile phon eused, you may hav eto con-
fir m theconnection to COMAND and for th e
PBAP and MA PBluetoot h
®profiles.The
prompt to confirm may tak eup to two
minute sto be displayed. You may also sav e
th econfirmation on th emobile phon e(see
th emanufacturer' soperating instructions).
The mobile phon eis no wauthorize dand
connecte dto COMAND .You can no w
spea kusin gth ehan ds-free system.
To ensur ean optimum language quality, you
can setthemobile phone's transmission and
reception volume (
Ypage 116).
If th eAuthorizatio nFailed
message
appears, you may hav eentered adifferen t
passke yor exceeded th epre scribe dtime
limit. Repeat th eprocedure .
iSome mobile phones require apasske y
wit hfour or mor edigit s.
iIf you wish to re-authorize th emobile
phon eafter de-authorizing it ,you can
choos eanother passke yfor it .
Establishing the connection fr omthe
mob ile phone
The Bluetoot h®device nameof COMAND is
"MB Bluetooth".
XCOMAND: call up thetelephon emenu.
XTo switch to th emen ubar: slide 6the
controller .
XTo selectConnectDevice:tur nand press
th econtroller .
The device list is displayed.
114Connecting/disconnecting a mobile phone
Telephone
Page 117 of 222
XTo selectConnect via Phone: turn and
press the controller.
A message is displayed, stating that you
can start the search on your mobile phone.
XMobile phone: start the search for a Blue-
tooth®device (see manufacturer's operat-
ing instructions).
COMAND is displayed with the name "MB
Bluetooth" in the mobile phone's device
list.
XSelect "MB Bluetooth".
A prompt appears in the COMAND display
asking if the mobile phone should be
authorized.
XCOMAND: selectYes.
If No
is selected, the procedure is canceled.
If your mobile phone supports Secure Sim-
ple Pairing, a code is now displayed on both
devices.
The code is the same
XCOMAND: selectYes.
XMobile phone: confirm the code. Depend-
ing on the mobile phone used, you may
have to confirm the connection to
COMAND and for the PBAP and MAP Blue-
tooth
®profiles. The prompt to confirm may
take up to two minutes to be displayed. You
may also save the confirmation on the
mobile phone (see the manufacturer's
operating instructions).
The mobile phone is now authorized and
connected to COMAND. You can now
speak using the hands-free system.
To ensure an optimum language quality, you
can set the mobile phone's transmission and
reception volume (
Ypage 116).
The code is different
XCOMAND: selectNo.
The process is canceled. Repeat the pro-
cedure.
If your mobile phone does not support Secure
Simple Pairing, an input menu is displayed for
the passkey. The passkey is a one- to sixteen-
digit number combination which you can choose yourself. Enter the same passkey on
both COMAND and the mobile phone and
confirm. Depending on the mobile phone
used, you may have to confirm the connection
to COMAND and for the PBAP and MAP Blue-
tooth
®profiles.
Reconnecting automatically
COMAND always searches for the last con-
nected mobile phone.
If no connection can be made to the most
recently connected mobile phone, the system
searches for the mobile phone that was con-
nected before that one.
Switching between mobile phones
If you have authorized more than one mobile
phone, you can switch between the individual
phones.
XTo call up the telephone menu: press the
% button.
XTo show the menu bar: slide 6the con-
troller.
XTo select Connect Device: turn and press
the controller.
The device list is displayed.
XTo select the desired mobile phone: turn
and press the controller.
The selected mobile phone is searched for
and connected if it is within Bluetooth
®
range and if Bluetooth®is activated.
Only one mobile phone can be connected at
any one time. The currently connected mobile phone is indicated by the #dot in the device
list.
iYou can only switch to another authorized
mobile phone if you are not currently mak-
ing a call.
Connecting/disconnecting a mobile phone115
Telephone
Z
Page 118 of 222
De-authorizing (disconnecting)a
mobile phone
Mercedes-Ben zUSA, LL Crecommends de-
authorization in COMAN Dand on th emobile
phone .Subsequen tauthorization may other -
wise fail .
XTo callup th etelephon emenu: press th e
% button.
XTo sho wthemen ubar :slid e6 thecon-
troller.
XTo selec tConnec tDevice:turn and press
th econtroller .
XTo highlight th edesire dmobile phone in th e
devic elist :turn th econtroller .
XTo selectG: slide9 thecontroller .
XTo selectDeauthorize:turn and press th e
controller .
A prompt appears ,askin gwhether you
really wish to de-authoriz ethis device.
XTo selec tYes:turn and press th econtroller .
The mobile phone is de-authorized.
iBefore re-authorizin gth emobile phone ,
you should also delete th edevic enam eMB
Bluetoothfrom your mobile phone's Blue-
toot h®list.
Displaying connection detail s
XTo callup th etelephon emenu: press th e
% button.
XTo switch to th emen ubar in th etelephon e
menu: slid e6 thecontroller .
XTo selectConnec tDevice:turn and press
th econtroller .
XTo highlight th edesire dmobile phone in th e
devic elist :turn th econtroller .
XTo selectG: slide9 thecontroller .
XTo selectDetail s:turn and press th econ-
troller.
The following information concernin gth e
selecte dmobile phone is shown :
RBluetooth®devicenam e
RBluetoot h®address
RAvailabilit ystatus (shown after ane w
search )
RAuthorization status
XTo close th edetailed display :slid e8
th econtroller .
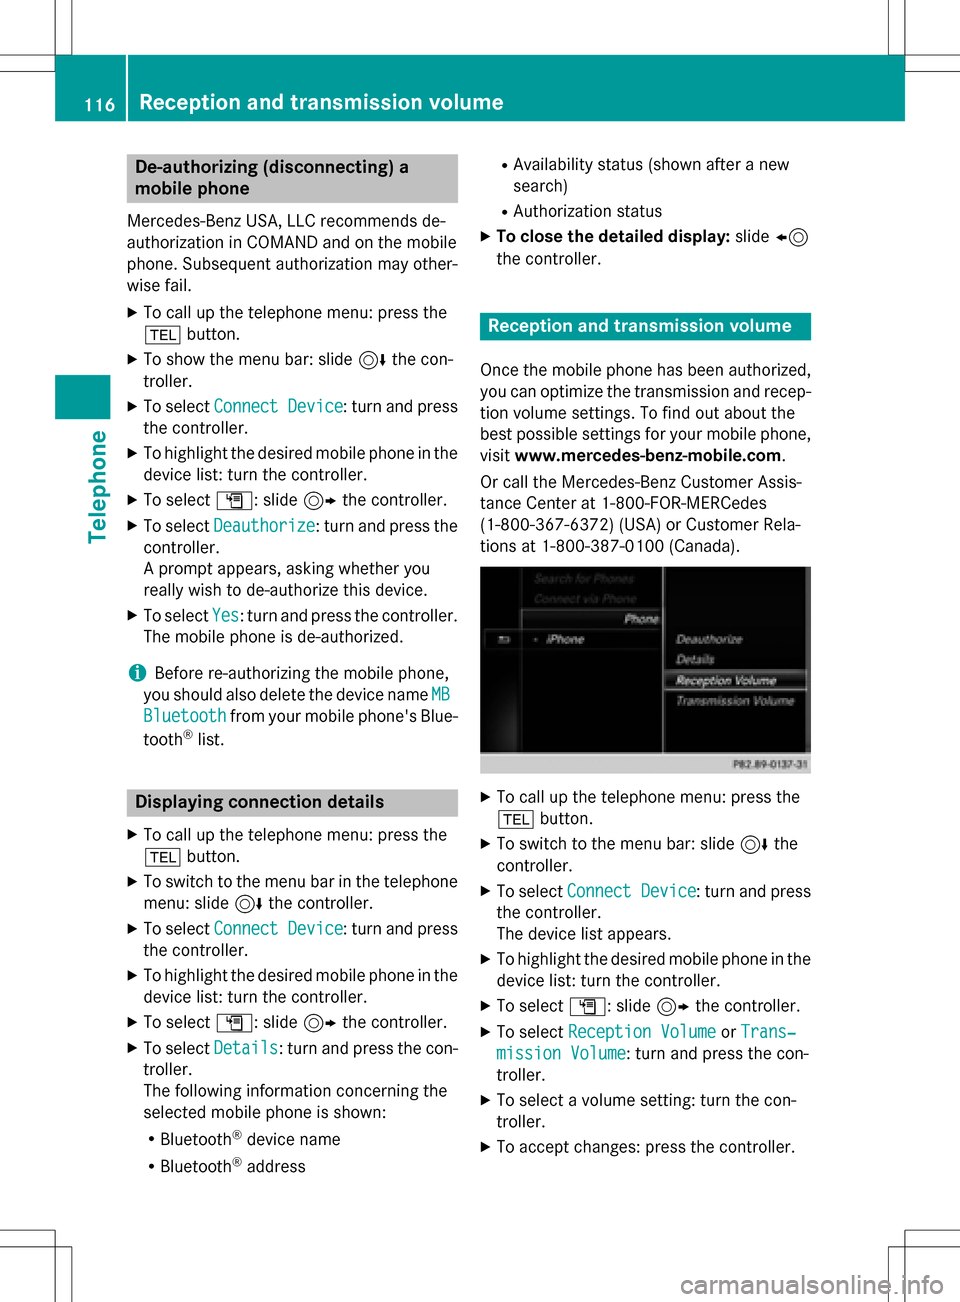
Reception an dtransmission volume
Once th emobile phone has been authorized,
you can optimize th etransmissio nand recep-
tion volume settings. To fin dout about th e
bes tpossible setting sfo ryour mobile phone ,
visit www.mercedes-benz-mobile.com .
Or cal lth eMercedes-Ben zCustomer Assis -
tanc eCente rat 1-800-FOR-MERCedes
(1-800-367-6372 ) (USA) or Customer Rela-
tions at 1-800-387-0100 (Canada).
XTo call up the telephone menu: press the
% button.
XTo switch to the menu bar: slide 6the
controller.
XTo select Connect Device: turn and press
the controller.
The device list appears.
XTo highlight the desired mobile phone in the
device list: turn the controller.
XTo select G: slide 9the controller.
XTo select Reception VolumeorTrans‐
mission Volume: turn and press the con-
troller.
XTo select a volume setting: turn the con-
troller.
XTo accept changes: press the controller.
116Reception and transmission volume
Telephone
Page 132 of 222
The contacts are sorted by surname and
displayed without a comma.
RFirst Name Last Name
The contacts are sorted by first name and
displayed without a comma.
XTo select the required option: turn and
press the controller.
The contacts are sorted and displayed
according to the selection.
Automatically importing contacts
from the phone
Depending on the mobile phone used, you
can set whether the contacts should be called
up automatically after the mobile phone is
connected to COMAND.
XConnect a mobile phone (Ypage 112).
XCall up the address book (Ypage 125).
XTo show the menu bar: slide6the con-
troller.
XTo select Options: turn and press the con-
troller.
XTo select Automatically Import Con‐
tacts from Phone: turn and press the
controller.
You can allow Oor suppress ªthe auto-
matic download.
Saving a contact
Saved contacts are indicated in the phone
book by different symbols (
Ypage 122).
XCall up the address book (Ypage 125).
XTo select a contact: turn and press the con-
troller.
The details for the contact are displayed.
XTo select G: slide 9the controller.
XTo select Save: turn and press the control-
ler.
The contact has now been saved.
iIf the saved address book entry contains a
phone number, the entry is also displayed
in the phone book.
Saving or editing the contact data on
COMAND does not change the contacts on
the mobile phone. If automatic download-
ing of phone contacts is activated,
COMAND displays the copy ¥with the
changed data. To add additional data, such
as additional phone numbers or e-mail
addresses, select this contact. In this way,
you avoid creating additional copies of the
mobile phone entry.
Deleting a name
XCall up the address book (Ypage 125).
XSearch for a contact (Ypage 126).
XTo select G: slide 9the controller.
XTo select Delete Entry: turn and press
the controller.
XTo select Yes: turn and press the controller.
The contact is deleted.
or
XTo select No: turn and press the controller.
The process is canceled.
Importing contacts
Information and requirements
Contacts can be imported as vCards (vcf
files). A vCard is an electronic business card.
A memory card, USB device or a Bluetooth
®
connection can be used for importing.
iUp to 2000 entries can be imported into
the address book. A message notifies you
when the maximum number is reached. In
order to be able to then import new con-
tacts, you have to delete existing contacts
(
Ypage 130).
130Address book
Telephone
Page 133 of 222
SourcePrerequisites
Memory cardThe SD memory card is
inserted. It contains
importable contact details.
USB deviceThe USB device is inserted
into the USB port. It con-
tains importable contact
details.
Bluetooth®
connection
If the sending of vCards is
supported via Bluetooth®,
vCards can be received on
mobile phones or net-
books, for example.
Bluetooth
®must be activa-
ted in COMAND and on the
respective device (see the
manufacturer's operating
instructions).
iIf automatic calling up of the contacts is
deactivated (
Ypage 130), the Import
from Phoneoption is available.
Importing from the memory card or USB
device
Contacts imported from the memory card or
from a USB device are identified by the ¯
symbol.
The following conditions must be fulfilled in
order to import vCards:
RvCards (vcf files) may be located in the main
directory or in folders. COMAND allows you
to select the relevant folders directly.
RvCards must have the file extension "vcf".
iCOMAND supports vCards in versions 2.1
and 3.0.
XTo switch to the menu bar in the telephone
menu or the address book: slide 6the
controller.
XTo select Options: turn and press the con-
troller.
XTo select Download Contacts: turn and
press the controller.
XTo select FromMemoryCardorFromUSB
device: turn and press the controller.
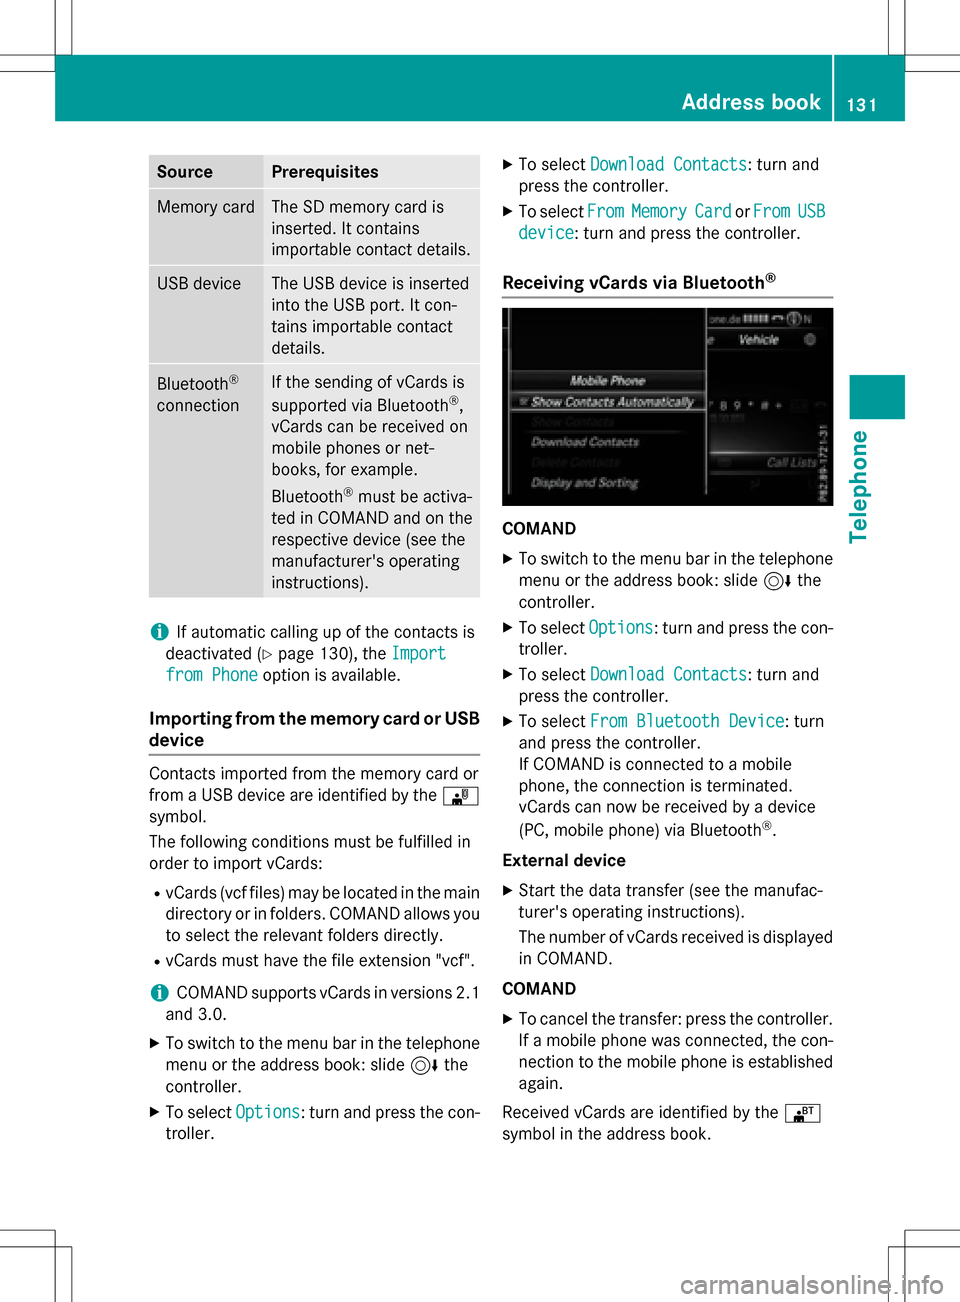
Receiving vCards via Bluetooth®
COMAND
XTo switch to the menu bar in the telephone
menu or the address book: slide 6the
controller.
XTo select Options: turn and press the con-
troller.
XTo select Download Contacts: turn and
press the controller.
XTo select From Bluetooth Device: turn
and press the controller.
If COMAND is connected to a mobile
phone, the connection is terminated.
vCards can now be received by a device
(PC, mobile phone) via Bluetooth
®.
External device
XStart the data transfer (see the manufac-
turer's operating instructions).
The number of vCards received is displayed in COMAND.
COMAND
XTo cancel the transfer: press the controller.
If a mobile phone was connected, the con-
nection to the mobile phone is established
again.
Received vCards are identified by the ®
symbol in the address book.
Address book131
Telephone
Z
Page 134 of 222
iIf you switch to another main function,
e.g. navigation, while receiving vCards, the reception of vCards will be terminated.
Deleting imported contacts
XTo change to the menu bar when in the
address book or the telephone menu: slide
6 the controller.
XTo select Options: turn and press the con-
troller.
XTo select Delete Contacts: turn and
press the controller.
XSelect one of the following options:
RInternal Contacts
RImported from Storage Device
RImported from Bluetooth Devices
RDownloaded from Phone
Turn and press the controller.
XTo select Yes: turn and press the controller.
The contacts are deleted.
or
XTo select No: turn and press the controller.
The process is canceled.
Closing the address book
XPress the %button one or more times.
Call lists
Introduction
If your mobile phone supports the PBAP Blue-
tooth®profile, the call lists from the mobile
phone are displayed in COMAND. When con- necting the mobile phone, you may have to
confirm the connection for the PBAP Blue-
tooth
®profile.
If your mobile phone does not support the
PBAP Bluetooth
®profile, COMAND generates
its own call lists. These are not the same as
the call lists in your mobile phone. The Call list option is not available unless a
mobile phone is connected to COMAND.
If the contact for an incoming call is not saved
in the address book, you can use the call list
to save the telephone number. You can save
this telephone number as a new contact in the
address book or add it to an existing contact
(
Ypage 133).
iIf you connect a different mobile phone to
COMAND, the call lists from the new mobile phone are displayed.
Opening the call list and selecting an
entry
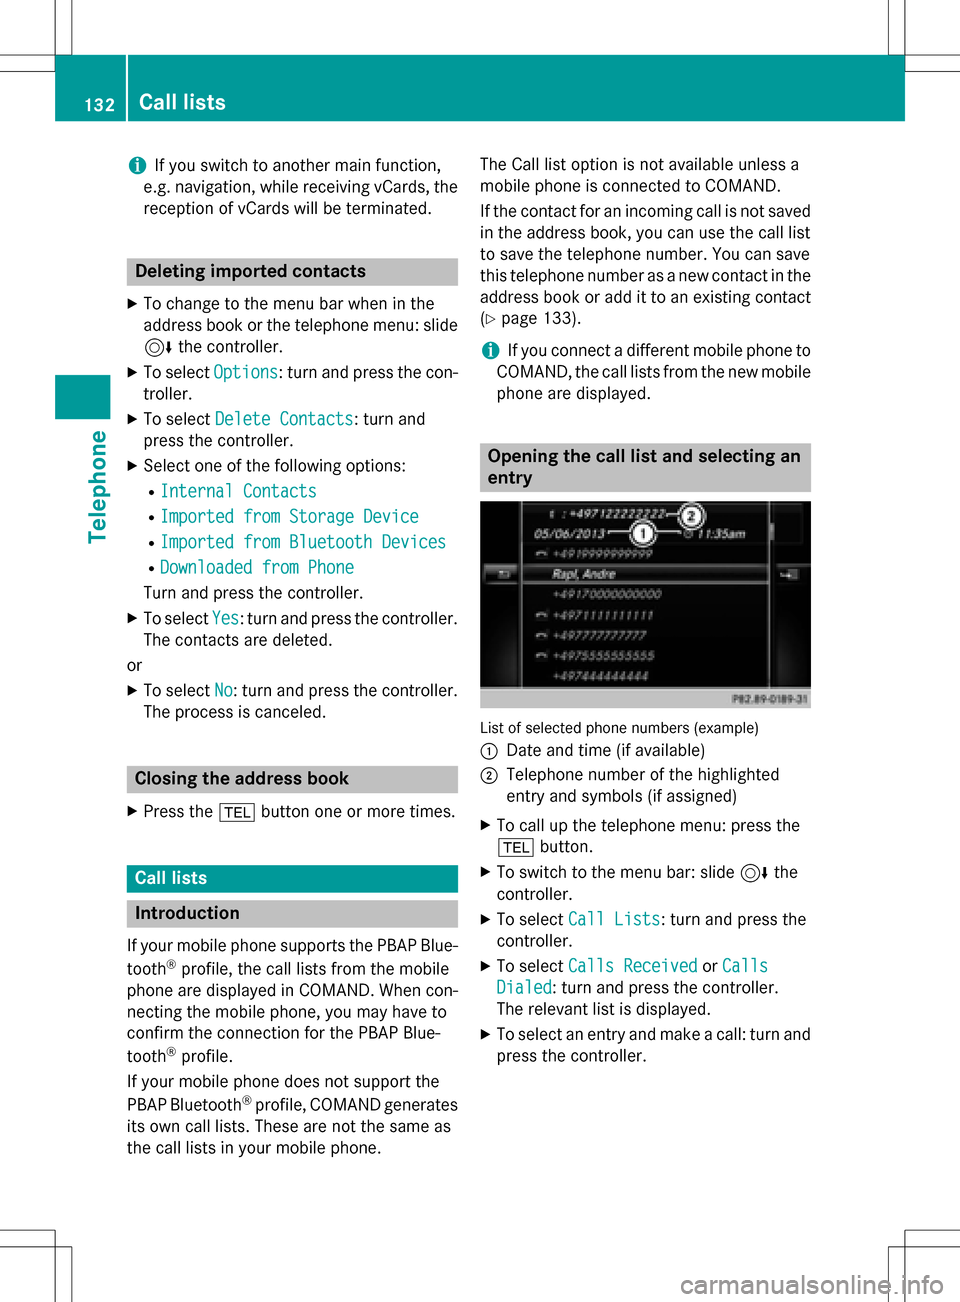
List of selected phone numbers (example)
:
Date and time (if available)
;Telephone number of the highlighted
entry and symbols (if assigned)
XTo call up the telephone menu: press the
% button.
XTo switch to the menu bar: slide 6the
controller.
XTo select Call Lists: turn and press the
controller.
XTo select Calls ReceivedorCalls
Dialed: turn and press the controller.
The relevant list is displayed.
XTo select an entry and make a call: turn and
press the controller.
132Call lists
Telephone