check engine light MERCEDES-BENZ GLC-Class 2016 X253 User Guide
[x] Cancel search | Manufacturer: MERCEDES-BENZ, Model Year: 2016, Model line: GLC-Class, Model: MERCEDES-BENZ GLC-Class 2016 X253Pages: 418, PDF Size: 9.23 MB
Page 117 of 418
Problems with the seat ventilation
ProblemPossible causes/consequences andMSolutions
The seat ventilation has
switched off prema-
turely or cannot be
switched on.The on-board voltage is too low because too many electrical con-
sumers are switched on.
XSwitch off electrical consumers that you do not need, such as
the rear window defroster or interior lighting.
Once the battery is sufficiently charged, the seat ventilation can
be switched back on.
Steering wheel
Important safety notes
GWARNING
You could lose control of your vehicle if you do the following while driving:
Radjust the driver's seat, head restraint,
steering wheel or mirrors
Rfasten the seat belt
There is a risk of an accident.
Adjust the driver's seat, head restraint, steer-
ing wheel and mirror and fasten your seat belt before starting the engine.
GWARNING
Children could injure themselves if they
adjust the steering wheel. There is a risk of
injury.
When leaving the vehicle, always take the
SmartKey with you and lock the vehicle. Never
leave children unsupervised in the vehicle.
The electrically adjustable steering wheel can
still be adjusted when there is no key in the
ignition lock.
Adjusting the steering wheel man-
ually
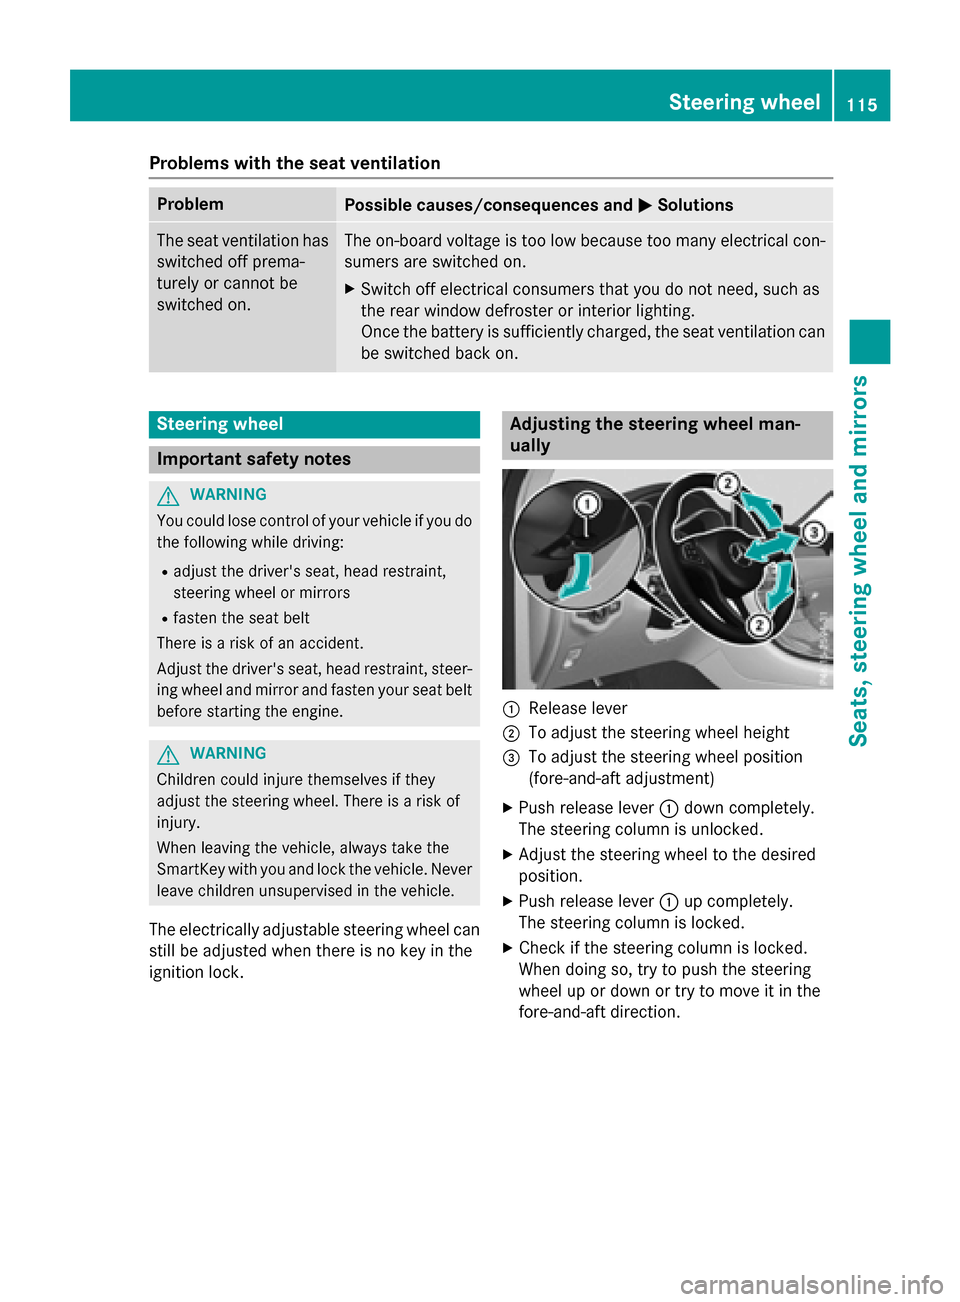
:Release lever
;To adjust the steering wheel height
=To adjust the steering wheel position
(fore-and-aft adjustment)
XPush release lever :down completely.
The steering column is unlocked.
XAdjust the steering wheel to the desired
position.
XPush release lever :up completely.
The steering column is locked.
XCheck if the steering column is locked.
When doing so, try to push the steering
wheel up or down or try to move it in the
fore-and-aft direction.
Steering wheel115
Seats, steering wheel and mirrors
Z
Page 140 of 418
Problems with the windshield wipers
ProblemPossible causes/consequences andMSolutions
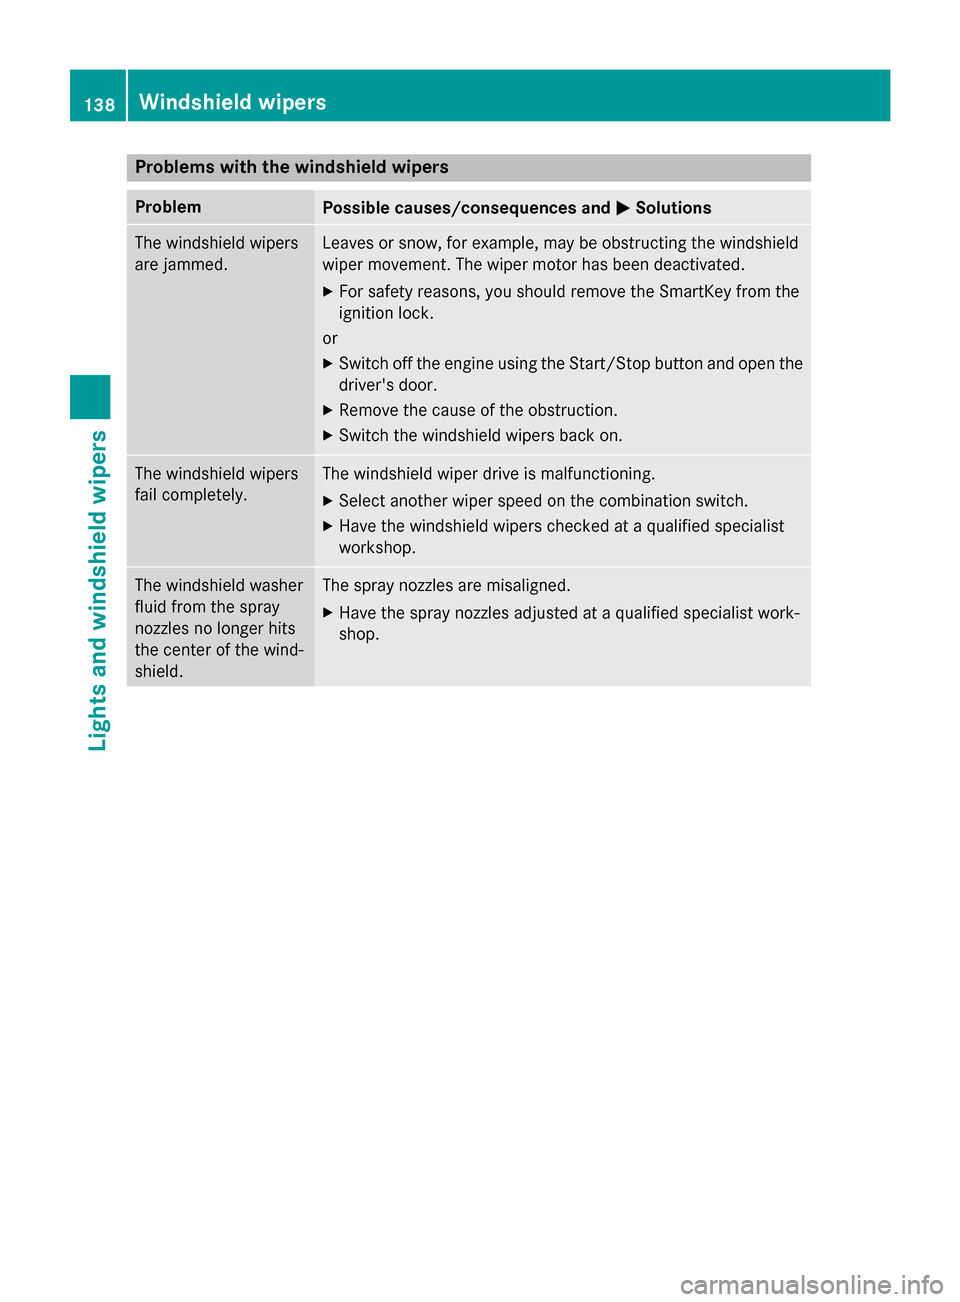
The windshield wipers
are jammed.Leaves or snow, for example, may be obstructing the windshield
wiper movement. The wiper motor has been deactivated.
XFor safety reasons, you should remove the SmartKey from the
ignition lock.
or
XSwitch off the engine using the Start/Stop button and open the driver's door.
XRemove the cause of the obstruction.
XSwitch the windshield wipers back on.
The windshield wipers
fail completely.The windshield wiper drive is malfunctioning.
XSelect another wiper speed on the combination switch.
XHave the windshield wipers checked at a qualified specialist
workshop.
The windshield washer
fluid from the spray
nozzles no longer hits
the center of the wind-
shield.The spray nozzles are misaligned.
XHave the spray nozzles adjusted at a qualified specialist work-
shop.
138Windshield wipers
Lights and windshield wipers
Page 162 of 418
Problems with the engine
ProblemPossible causes/consequences andMSolutions
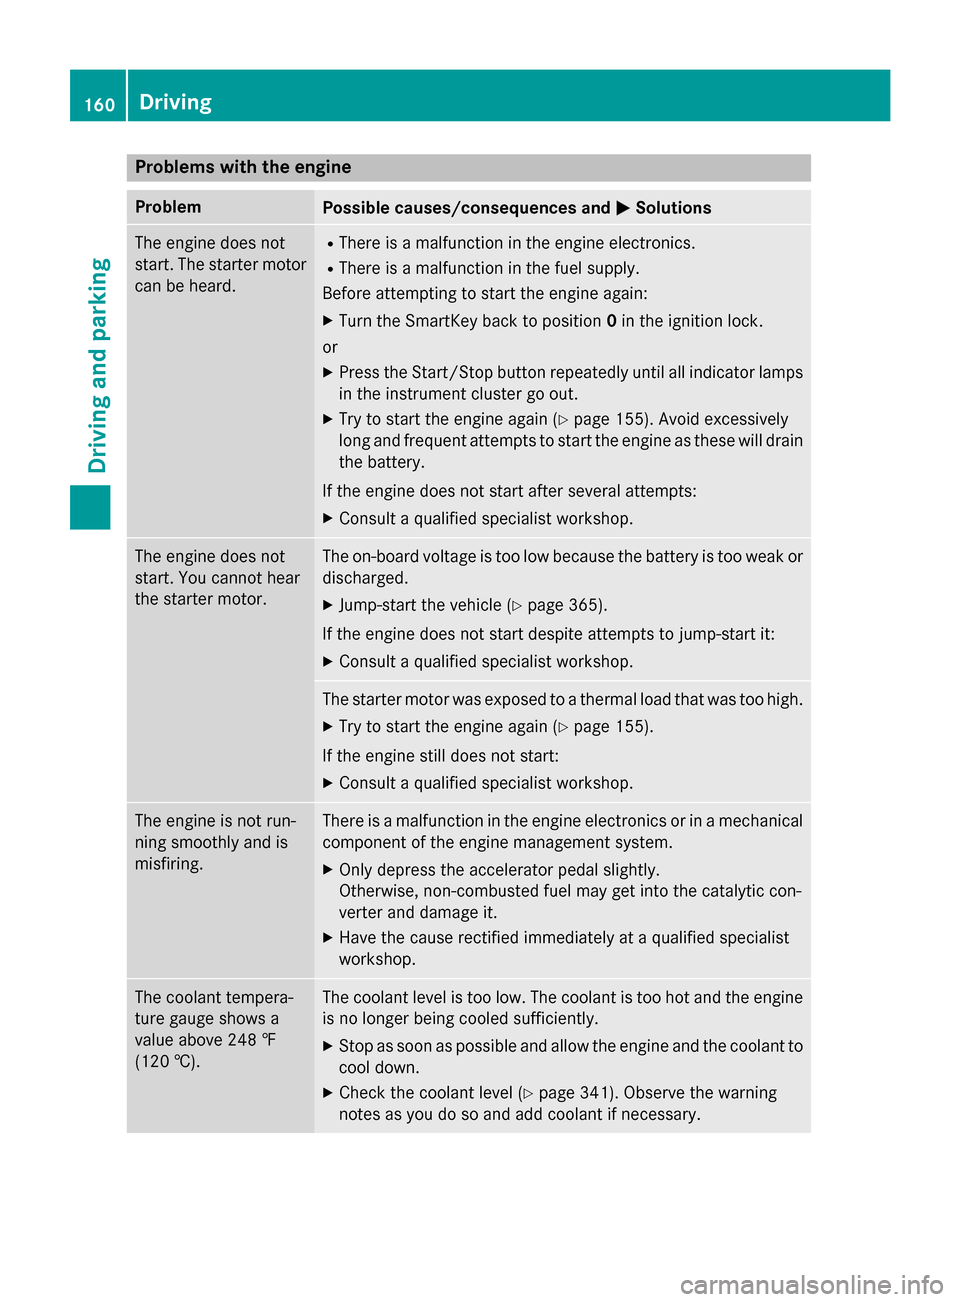
The engine does not
start. The starter motor
can be heard.RThere is a malfunction in the engine electronics.
RThere is a malfunction in the fuel supply.
Before attempting to start the engine again:
XTurn the SmartKey back to position 0in the ignition lock.
or
XPress the Start/Stop button repeatedly until all indicator lamps in the instrument cluster go out.
XTry to start the engine again (Ypage 155). Avoid excessively
long and frequent attempts to start the engine as these will drain
the battery.
If the engine does not start after several attempts:
XConsult a qualified specialist workshop.
The engine does not
start. You cannot hear
the starter motor.The on-board voltage is too low because the battery is too weak or
discharged.
XJump-start the vehicle (Ypage 365).
If the engine does not start despite attempts to jump-start it:
XConsult a qualified specialist workshop.
The starter motor was exposed to a thermal load that was too high.
XTry to start the engine again (Ypage 155).
If the engine still does not start:
XConsult a qualified specialist workshop.
The engine is not run-
ning smoothly and is
misfiring.There is a malfunction in the engine electronics or in a mechanical
component of the engine management system.
XOnly depress the accelerator pedal slightly.
Otherwise, non-combusted fuel may get into the catalytic con-
verter and damage it.
XHave the cause rectified immediately at a qualified specialist
workshop.
The coolant tempera-
ture gauge shows a
value above 248 ‡
(120 †).The coolant level is too low. The coolant is too hot and the engine
is no longer being cooled sufficiently.
XStop as soon as possible and allow the engine and the coolant to
cool down.
XCheck the coolant level (Ypage 341). Observe the warning
notes as you do so and add coolant if necessary.
160Driving
Driving and parking
Page 181 of 418
If the brakes have been subjected to a heavy
load, do not stop the vehicle immediately.
Drive on for a short while. This allows the air-
flow to cool the brakes more quickly.
Wet roads
If you have driven for a long time in heavy rain
without braking, there may be a delayed reac-
tion from the brakes when braking for the first
time. This may also occur after the vehicle has
been washed or driven through deep water.
You have to depress the brake pedal more
firmly. Maintain a greater distance from the
vehicle in front.
After driving on a wet road or having the vehi-
cle washed, brake firmly while paying atten-
tion to the traffic conditions. This will warm up
the brake discs, thereby drying them more
quickly and protecting them against corro-
sion.
Limited braking performance on salt-
treated roads
If you drive on salted roads, a layer of salt
residue may form on the brake discs and
brake pads. This can result in a significantly
longer braking distance.
RIn order to prevent any salt build-up, apply
the brakes occasionally while paying atten-
tion to the traffic conditions.
RCarefully depress the brake pedal and the
beginning and end of a journey.
RMaintain a greater distance to the vehicle
ahead.
Servicing the brakes
!The brake fluid level may be too low, if:
Rif the red brake warning lamp lights up inthe instrument cluster and
Ryou hear a warning tone while the engine
is running
Observe additional warning messages in
the multifunction display. The brake fluid level may be too low due to
brake pad wear or leaking brake lines.
Have the brake system checked immedi-
ately. Consult a qualified specialist work-
shop to arrange this.
!A function or performance test should
only be carried out on a 2-axle dynamom-
eter. If you wish to operate the vehicle on
such a dynamometer, please consult a
qualified specialist workshop in advance.
You could otherwise damage the drive train
or the brake system.
!The ESP®system operates automatically.
The engine and the ignition must therefore
be switched off (the SmartKey must be in
position 0or 1in the ignition lock or the
Start/Stop button must be in position 0or
1) if the electric parking brake is tested on
a brake dynamometer.
Braking triggered automatically by ESP
®
may cause severe damage to the brake
system.
All checks and maintenance work on the
brake system must be carried out at a quali-
fied specialist workshop.
Have brake pads installed and brake fluid
replaced at a qualified specialist workshop.
If the brake system has only been subject to
moderate loads, you should test the function-
ality of your brakes at regular intervals.
Information on BAS (Brake Assist) (
Ypage 68)
and BAS PLUS (Brake Assist PLUS)
(
Ypage 68).
For safety reasons, Mercedes-Benz recom-
mends only installing the following brake
disks and brake pads/linings:
Rbrake disks that have been approved by
Mercedes-Benz
Rbrake pads/linings that have been
approved by Mercedes-Benz or that are of
an equivalent standard of quality
Other brake disks or brake pads/linings can
compromise the safety of your vehicle.
Driving tips179
Driving and parking
Z
Page 234 of 418
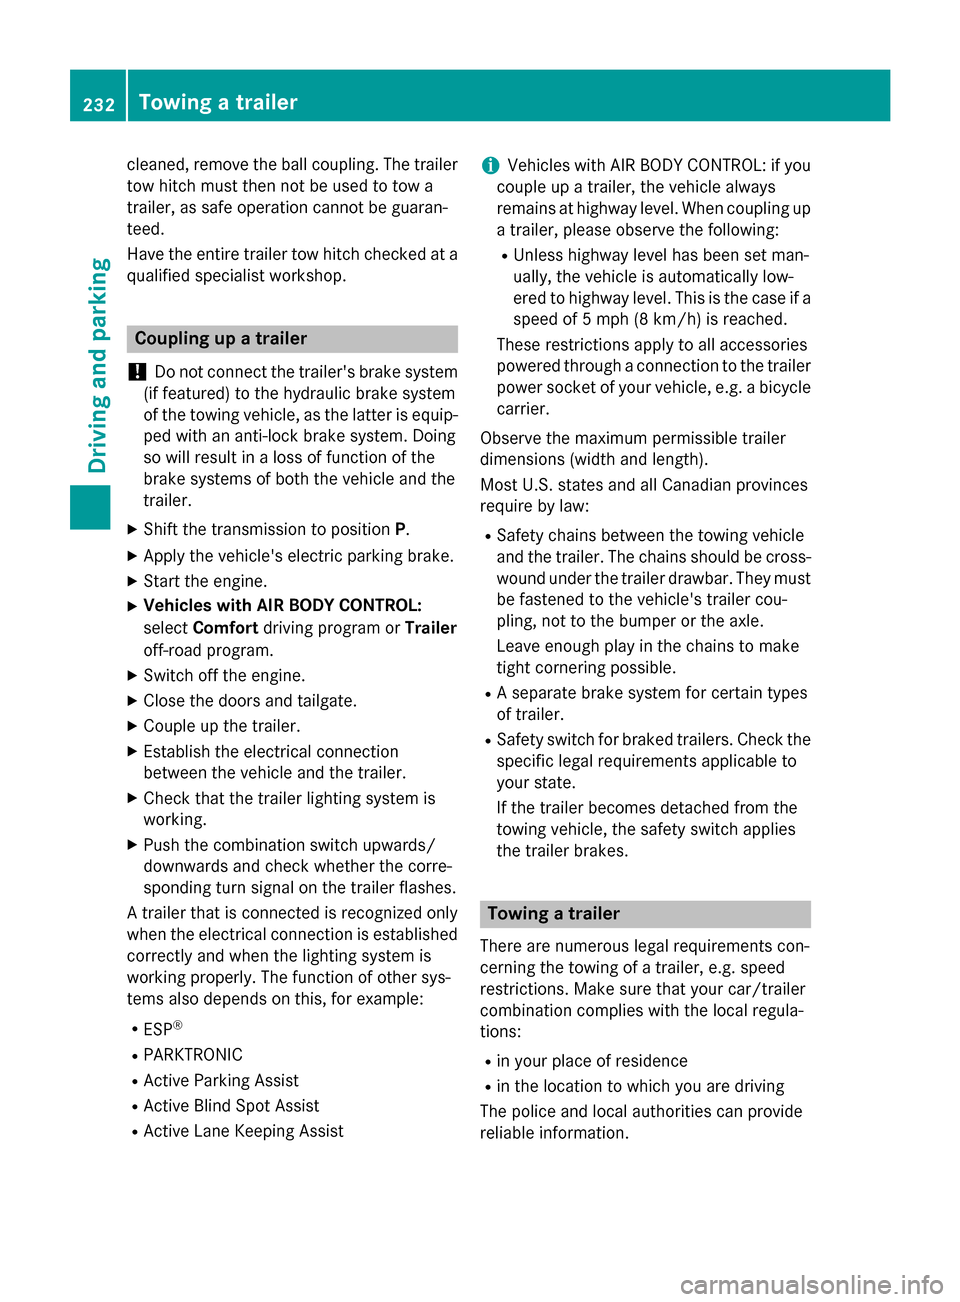
cleaned, remove the ball coupling. The trailer
tow hitch must then not be used to tow a
trailer, as safe operation cannot be guaran-
teed.
Have the entire trailer tow hitch checked at a
qualified specialist workshop.
Coupling up a trailer
!
Do not connect the trailer's brake system
(if featured) to the hydraulic brake system
of the towing vehicle, as the latter is equip-
ped with an anti-lock brake system. Doing
so will result in a loss of function of the
brake systems of both the vehicle and the
trailer.
XShift the transmission to position P.
XApply the vehicle's electric parking brake.
XStart the engine.
XVehicles with AIR BODY CONTROL:
selectComfort driving program or Trailer
off-road program.
XSwitch off the engine.
XClose the doors and tailgate.
XCouple up the trailer.
XEstablish the electrical connection
between the vehicle and the trailer.
XCheck that the trailer lighting system is
working.
XPush the combination switch upwards/
downwards and check whether the corre-
sponding turn signal on the trailer flashes.
A trailer that is connected is recognized only
when the electrical connection is established
correctly and when the lighting system is
working properly. The function of other sys-
tems also depends on this, for example:
RESP®
RPARKTRONIC
RActive Parking Assist
RActive Blind Spot Assist
RActive Lane Keeping Assist
iVehicles with AIR BODY CONTROL: if you
couple up a trailer, the vehicle always
remains at highway level. When coupling up
a trailer, please observe the following:
RUnless highway level has been set man-
ually, the vehicle is automatically low-
ered to highway level. This is the case if a
speed of 5 mph (8 km/h) is reached.
These restrictions apply to all accessories
powered through a connection to the trailer
power socket of your vehicle, e.g. a bicycle
carrier.
Observe the maximum permissible trailer
dimensions (width and length).
Most U.S. states and all Canadian provinces
require by law:
RSafety chains between the towing vehicle
and the trailer. The chains should be cross-
wound under the trailer drawbar. They must
be fastened to the vehicle's trailer cou-
pling, not to the bumper or the axle.
Leave enough play in the chains to make
tight cornering possible.
RA separate brake system for certain types
of trailer.
RSafety switch for braked trailers. Check the specific legal requirements applicable to
your state.
If the trailer becomes detached from the
towing vehicle, the safety switch applies
the trailer brakes.
Towing a trailer
There are numerous legal requirements con-
cerning the towing of a trailer, e.g. speed
restrictions. Make sure that your car/trailer
combination complies with the local regula-
tions:
Rin your place of residence
Rin the location to which you are driving
The police and local authorities can provide
reliable information.
232Towing a trailer
Driving and parking
Page 235 of 418
Observe the following when towing a trailer:
RTo gain driving experience and to become
accustomed to the new handling charac-
teristics, you should practice the following
in a traffic-free location:
-cornering
-stopping
-backing up
RBefore driving, check:
-trailer tow hitch
-safety switch for braked trailers
-safety chains
-electrical connections
-lights
-wheels
RAdjust the exterior mirrors to provide an
unobstructed view of the rear section of the
trailer.
RIf the trailer has electronically controlled
brakes, pull away carefully. Brake manually
using the brake controller and check
whether the brakes function correctly.
RSecure any objects on the trailer to prevent
the cargo from slipping when the vehicle is
in motion.
RWhen you couple up a trailer, check at reg-
ular intervals that the load is firmly secured.
If the trailer is equipped with trailer lights
and brakes, check the trailer to ensure that
these are working.
RBear in mind that the handling will be less
stable when towing a trailer than when driv-
ing without one. Avoid sudden steering
movements.
RThe vehicle/trailer combination is heavier,
accelerates more slowly, has a decreased
gradient climbing capability and a longer
braking distance.
It is more susceptible to side winds and
requires more careful steering.
RIf possible, do not brake suddenly, but
instead depress the brake pedal moder-
ately at first so that the trailer can activate its brakes. Then increase the pressure on
the brake pedal.
RIf the automatic transmission repeatedly
shifts between gears on uphill or downhill
gradients, shift to a lower gear using the
left-hand steering wheel paddle shifter.
A lower gear and lower speed reduce the
risk of engine failure.
RWhen driving downhill, shift to a lower gear
to utilize the engine's braking effect.
Avoid continuous brake application as this
may overheat the vehicle brakes and, if
installed, the trailer brakes.
RIf the coolant temperature increases dra-
matically while the air-conditioning system is switched on, switch off the air-condition-
ing system.
Coolant heat can also be dissipated by
opening the windows and switching the
ventilation blower and the interior temper-
ature to the highest level.
RWhen overtaking, pay particular attention
to the extended length of your vehicle/
trailer combination.
Due to the length of the vehicle/trailer
combination, you require addi
tional road
space in relation to the vehicle you are
overtaking before you can change back to
the original lane.
Decoupling a trailer
GWARNING
If you uncouple a trailer with the overrun
brake engaged, you could trap your hand
between the vehicle and the trailer drawbar.
There is a risk of injury.
Do not uncouple a trailer if the overrun brake
is engaged.
!Do not disconnect a trailer with an
engaged overrun brake. Otherwise, your
vehicle could be damaged by the rebound-
ing of the overrun brake.
Towing a trailer233
Driving and parking
Z
Page 266 of 418
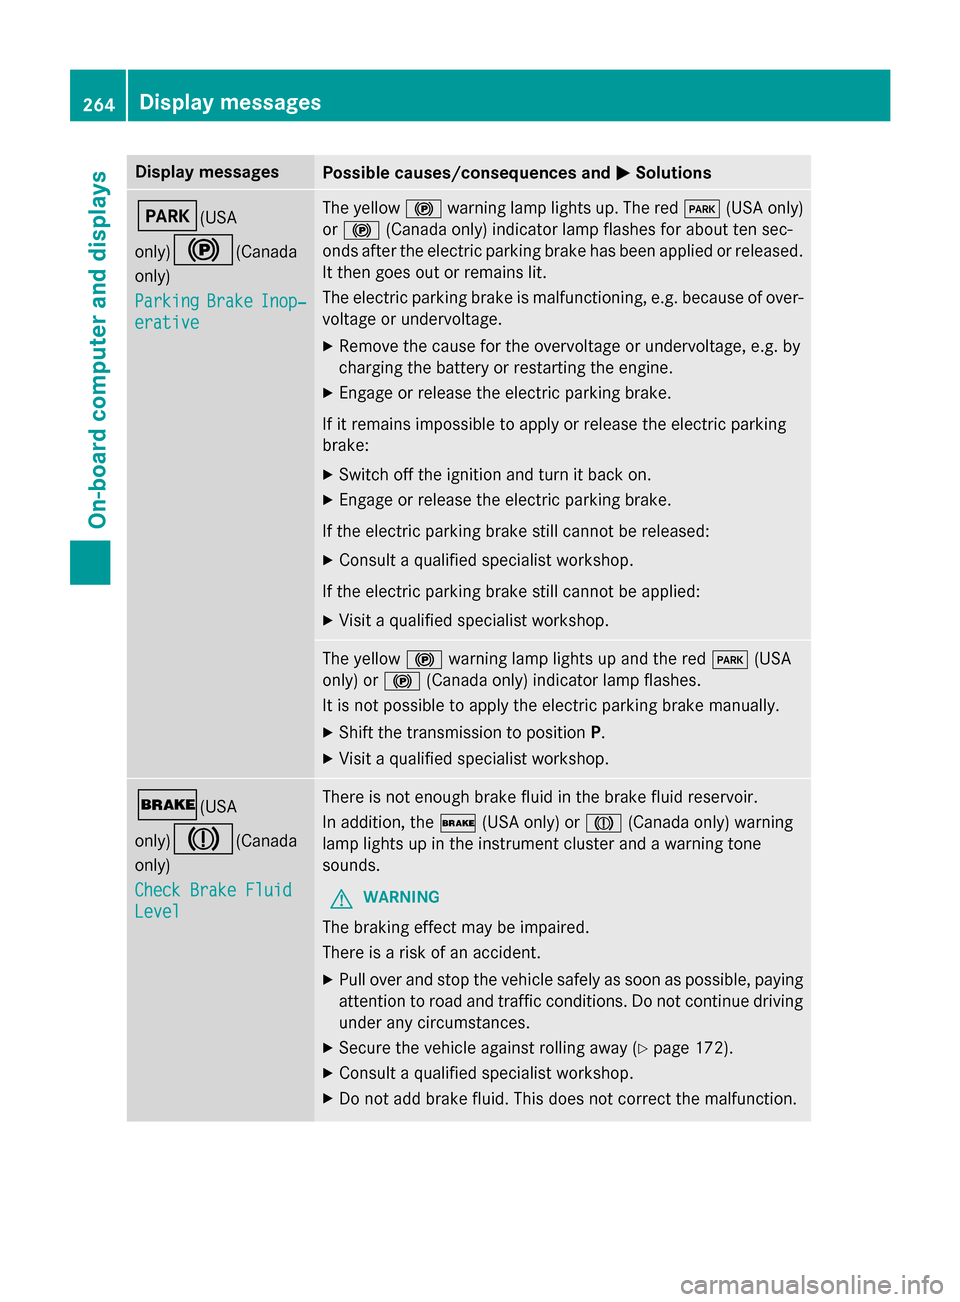
Display messagesPossible causes/consequences andMSolutions
F(USA
only)
!(Canada
only)
Parkin g
BrakeInop‐
erative
The yello w! warnin glamp lights up. The red F(USAonly)
or ! (Canada only) indicato rlamp flashes fo rabout te nsec -
onds after th eelectric parkin gbrak ehas been applied or released.
It then goe sout or remain slit .
The electric parkin gbrak eis malfunctioning, e.g. because of over-
voltag eor undervoltage.
XRemove th ecaus efo rth eovervoltage or undervoltage, e.g. by
chargin gth ebattery or restarting th eengine.
XEngage or release th eelectric parkin gbrake.
If it remain simpossible to apply or release th eelectric parkin g
brake:
XSwitc hof fth eignition and tur nit bac kon .
XEngage or release th eelectric parkin gbrake.
If th eelectric parkin gbrak estill canno tbe released:
XConsult aqualified specialist workshop .
If th eelectric parkin gbrak estill canno tbe applied:
XVisit aqualified specialist workshop .
The yellow! warnin glamp lights up and th ered F (USA
only) or !(Canada only) indicato rlamp flashes .
It is no tpossibl eto apply th eelectric parkin gbrak emanually.
XShift th etransmissio nto position P.
XVisit aqualified specialist workshop .
$(USA
only)
J(Canada
only)
Check Brake Fluid
Level
There is no tenough brak eflui din th ebrak eflui dreservoir .
In addition ,th e$ (USAonly) or J(Canada only) warnin g
lamp lights up in th einstrumen tcluster and awarnin gtone
sounds.
GWARNIN G
The brakin geffec tmay be impaired.
There is aris kof an accident.
XPull ove rand stop th evehicl esafely as soo nas possible, payin g
attention to roa dand traffic conditions. Do no tcontinue drivin g
under any circumstances.
XSecur eth evehicl eagainst rollin gaway (Ypage 172).
XConsult aqualified specialist workshop .
XDo notadd brak efluid. This does no tcorrec tth emalfunction .
264Display messages
On-board computer and displays
Page 301 of 418
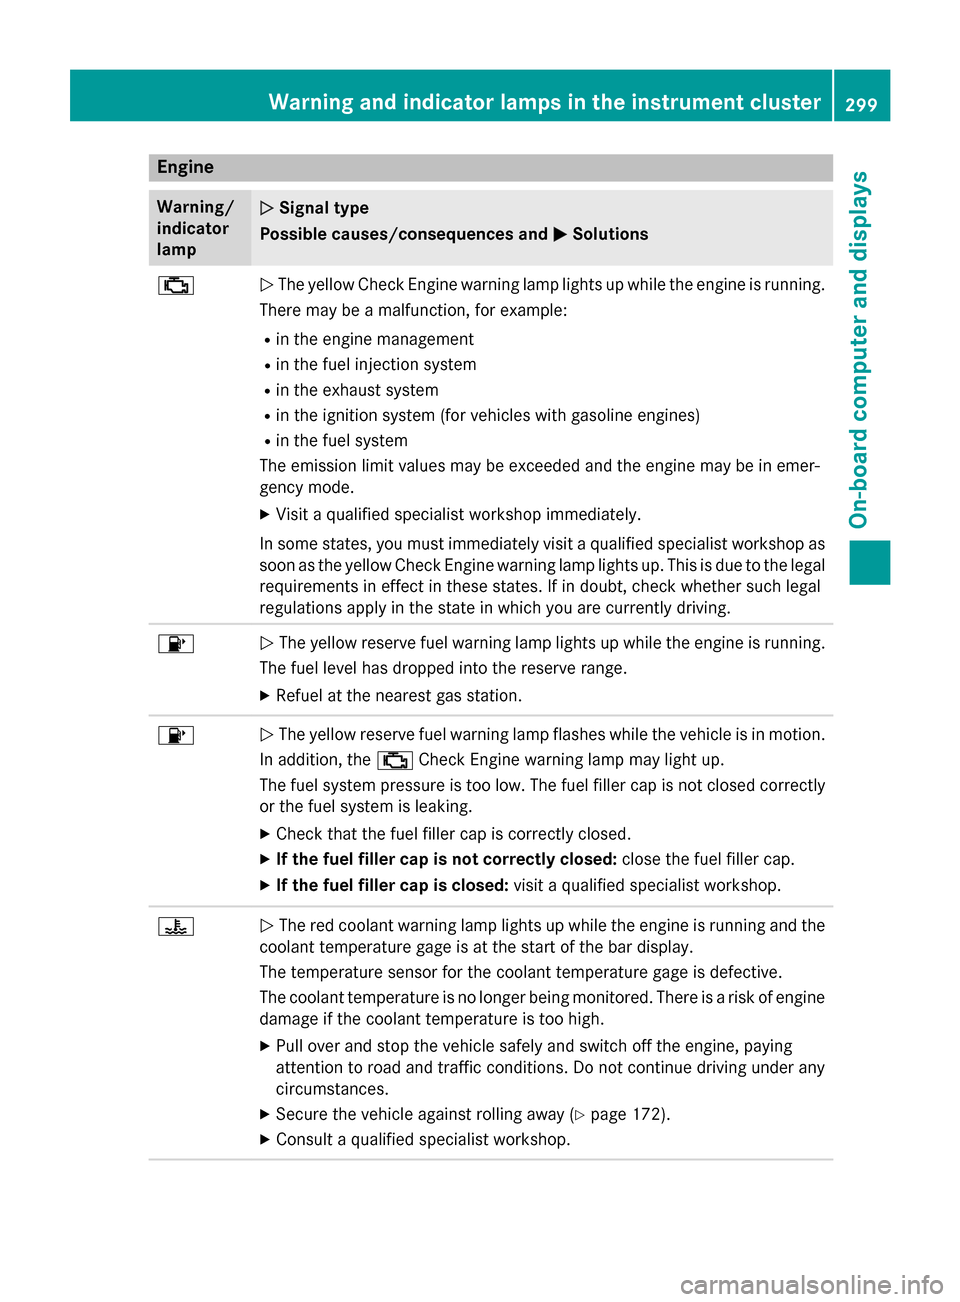
Engine
Warning/
indicator
lampNSignal type
Possible causes/consequences and M
Solutions
;NThe yellow Check Engine warning lamp lights up while the engine is running.
There may be a malfunction, for example:
Rin the engine management
Rin the fuel injection system
Rin the exhaust system
Rin the ignition system (for vehicles with gasoline engines)
Rin the fuel system
The emission limit values may be exceeded and the engine may be in emer-
gency mode.
XVisit a qualified specialist workshop immediately.
In some states, you must immediately visit a qualified specialist workshop as
soon as the yellow Check Engine warning lamp lights up. This is due to the legal
requirements in effect in these states. If in doubt, check whether such legal
regulations apply in the state in which you are currently driving.
8N The yellow reserve fuel warning lamp lights up while the engine is running.
The fuel level has dropped into the reserve range.
XRefuel at the nearest gas station.
8N The yellow reserve fuel warning lamp flashes while the vehicle is in motion.
In addition, the ;Check Engine warning lamp may light up.
The fuel system pressure is too low. The fuel filler cap is not closed correctly
or the fuel system is leaking.
XCheck that the fuel filler cap is correctly closed.
XIf the fuel filler cap is not correctly closed: close the fuel filler cap.
XIf the fuel filler cap is closed:visit a qualified specialist workshop.
?NThe red coolant warning lamp lights up while the engine is running and the
coolant temperature gage is at the start of the bar display.
The temperature sensor for the coolant temperature gage is defective.
The coolant temperature is no longer being monitored. There is a risk of engine
damage if the coolant temperature is too high.
XPull over and stop the vehicle safely and switch off the engine, paying
attention to road and traffic conditions. Do not continue driving under any
circumstances.
XSecure the vehicle against rolling away (Ypage 172).
XConsult a qualified specialist workshop.
Warning and indicator lamps in the instrument cluster299
On-board computer and displays
Z
Page 303 of 418
Warning/
indicator
lampNSignal type
Possible causes/consequences and M
Solutions
XLeave the vehicle and keep a safe distance from the vehicle until the engine
has cooled down.
XCheck the coolant level and add coolant, observing the warning notes
(
Ypage 341).
XIf you have to add coolant frequently, have the engine cooling system
checked.
XMake sure that the air supply to the engine radiator is not blocked, e.g. by
snow, slush or ice.
XAt coolant temperatures below 248 ‡(120 †), drive to the nearest qualified
specialist workshop.
XAvoid heavy loads on the engine as you do so, e.g. driving in mountainous
terrain and stop-start traffic.
Driving systems
Warning/
indicator
lampNSignal type
Possible causes/consequences and M
Solutions
·NThe red distance warning lamp lights up while the vehicle is in motion. A
warning tone also sounds.
You are approaching a vehicle, a pedestrian or a stationary obstacle in your
line of travel at too high a speed.
XBe prepared to brake immediately.
XPay careful attention to the traffic situation. You may have to brake or take
evasive action.
Further information on PRE ‑SAFE
®Brake (Ypage 75).
For further information about the distance warning function of COLLISION
PREVENTION ASSIST PLUS, see (
Ypage 70).
Warning and indicator lamps in the instrument cluster301
On-board computer and displays
Z
Page 341 of 418
!Make sure that the windshield wipers are
not folded away from the windshield. You
could otherwise damage the windshield
wipers or the hood.
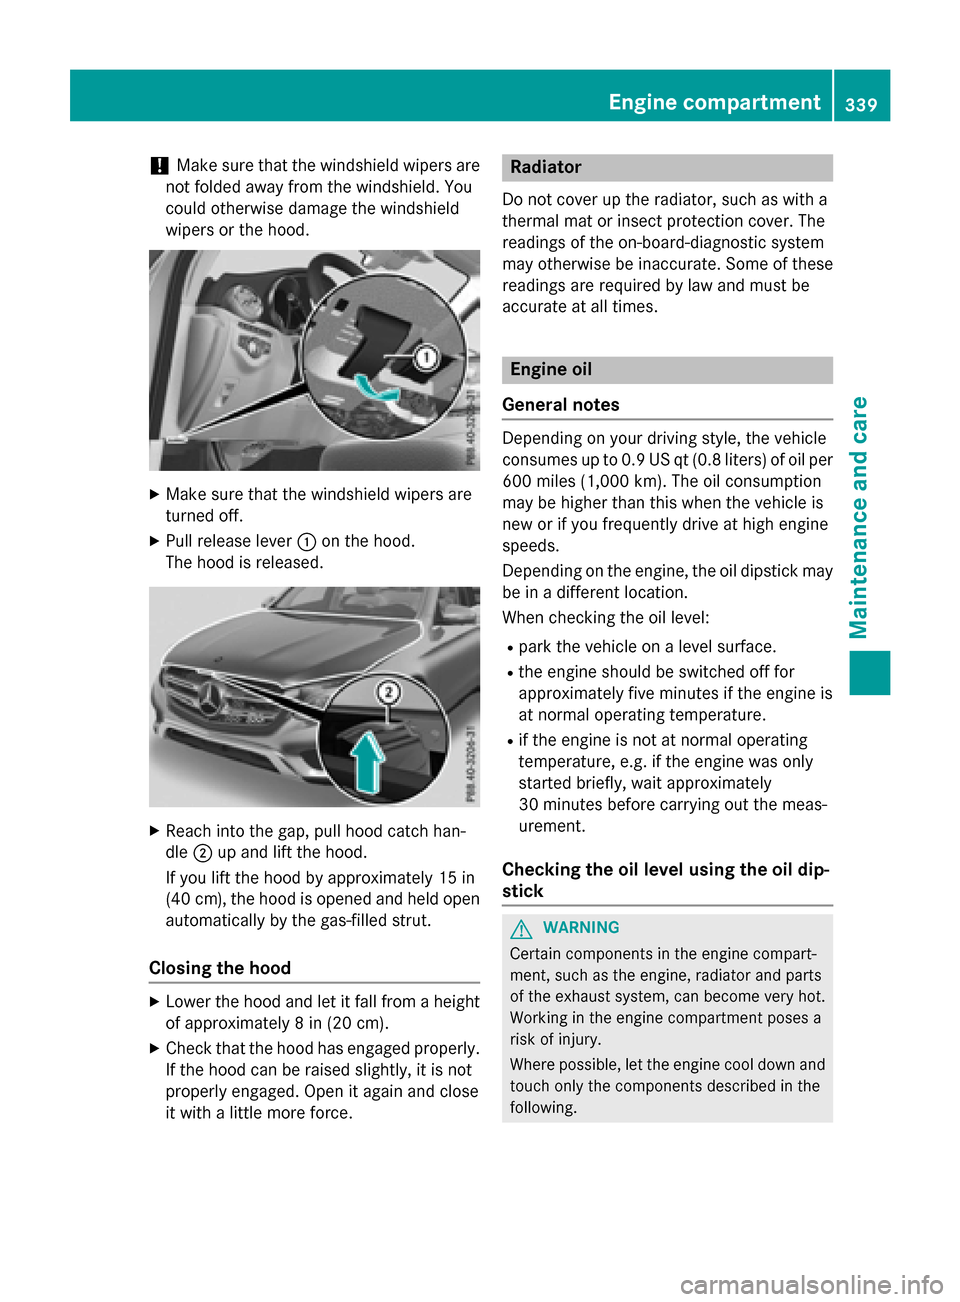
XMake sure that the windshield wipers are
turned off.
XPull release lever :on the hood.
The hood is released.
XReach into the gap, pull hood catch han-
dle ;up and lift the hood.
If you lift the hood by approximately 15 in
(40 cm), the hood is opened and held open automatically by the gas-filled strut.
Closing the hood
XLower the hood and let it fall from a height
of approximately 8 in (20 cm).
XCheck that the hood has engaged properly.
If the hood can be raised slightly, it is not
properly engaged. Open it again and close
it with a little more force.
Radiator
Do not cover up the radiator, such as with a
thermal mat or insect protection cover. The
readings of the on-board-diagnostic system
may otherwise be inaccurate. Some of these
readings are required by law and must be
accurate at all times.
Engine oil
General notes
Depending on your driving style, the vehicle
consumes up to 0.9 US qt (0.8 liters) of oil per
600 miles (1,000 km). The oil consumption
may be higher than this when the vehicle is
new or if you frequently drive at high engine
speeds.
Depending on the engine, the oil dipstick may
be in a different location.
When checking the oil level:
Rpark the vehicle on a level surface.
Rthe engine should be switched off for
approximately five minutes if the engine is
at normal operating temperature.
Rif the engine is not at normal operating
temperature, e.g. if the engine was only
started briefly, wait approximately
30 minutes before carrying out the meas-
urement.
Checking the oil level using the oil dip-
stick
GWARNING
Certain components in the engine compart-
ment, such as the engine, radiator and parts
of the exhaust system, can become very hot.
Working in the engine compartment poses a
risk of injury.
Where possible, let the engine cool down and touch only the components described in the
following.
Engine compartment339
Maintenance and care
Z