tire size MERCEDES-BENZ GLC-Class 2016 X253 Owner's Manual
[x] Cancel search | Manufacturer: MERCEDES-BENZ, Model Year: 2016, Model line: GLC-Class, Model: MERCEDES-BENZ GLC-Class 2016 X253Pages: 418, PDF Size: 9.23 MB
Page 21 of 418
Definition of terms ......................... 392
Direction of rotation ...................... 395
Display message ............................ 285
Distribution of the vehicle occu-
pants (definition) ............................ 395
DOT (Department of Transporta-
tion) (definition) ............................. 393
DOT, Tire Identification Number
(TIN) ............................................... 392
GAWR (Gross Axle Weight Rating)
(definition) ..................................... 393
General notes ................................ 399
GVW (Gross Vehicle Weight) (def-
inition) ........................................... 393
GVWR (Gross Vehicle Weight Rat-
ing) (definition) .............................. 393
Important safety notes .................. 374
Increased vehicle weight due to
optional equipment (definition) ...... 393
Information on driving .................... 374
Kilopascal (kPa) (definition) ........... 393
Labeling (overview) ........................ 389
Load bearing index (definition) ...... 394
Load index ..................................... 391
Load index (definition) ................... 393
Maximum load on a tire (defini-
tion) ............................................... 394
Maximum loaded vehicle weight
(definition) ..................................... 393
Maximum permissible tire pres-
sure (definition) ............................. 394
Maximum tire load ......................... 391
Maximum tire load (definition) ....... 394
MOExtended tires .......................... 376
Optional equipment weight (defi-
nition) ............................................ 394
PSI (pounds per square inch) (def-
inition) ........................................... 394
Replacing ....................................... 395
Service life ..................................... 376
Sidewall (definition) ....................... 394
Snow chains .................................. 377
Speed rating (definition) ................ 393
Storing ........................................... 395
Structure and characteristics
(definition) ..................................... 392
Summer tires in winter .................. 376
Temperature .................................. 388TIN (Tire Identification Number)
(definition) ..................................... 394
Tire bead (definition) ...................... 394
Tire pressure (definition) ................ 394
Tire pressures (recommended) ...... 393
Tire size (data) ............................... 399
Tire size designation, load-bearing
capacity, speed rating .................... 389
Tire tread ....................................... 375
Tire tread (definition) ..................... 394
Total load limit (definition) ............. 395
Traction ......................................... 388
Traction (definition) ....................... 394
Tread wear ..................................... 388
Uniform Tire Quality Grading
Standards ...................................... 387
Uniform Tire Quality Grading
Standards (definition) .................... 393
Wear indicator (definition) ............. 394
Wheel and tire combination ........... 401
Wheel rim (definition) .................... 393
see Flat tire
Top Tether ............................................ 63
Tow-starting
Emergency engine starting ............ 370
Important safety notes .................. 367
Towing a trailer
Axle load, permissible .................... 416
Cleaning the trailer tow hitch ......... 349
Coupling up a trailer ...................... 232
Decoupling a trailer ....................... 233
Driving tips .................................... 228
ESP
®(Electronic Stability Pro-
gram) ............................................... 75
Installing the ball coupling ............. 230
Lights display message .................. 272
Mounting dimensions .................... 415
Power supply ................................. 234
Pulling away with a trailer .............. 157
Removing the ball coupling ............ 234
Trailer loads ................................... 416
Towing away
Important safety guidelines ........... 367
Installing the towing eye ................ 368
Notes for 4MATIC vehicles ............ 370
Removing the towing eye ............... 369
T
ransporting the vehicle ................ 369
With both axles on the ground ....... 369
Index19
Page 23 of 418
W
Warning and indicator lampsABS ................................................ 294
Brakes ...........................................2 93
Check Engine ................................. 299
Coolant .......................................... 299
Distance warning ........................... 301
ESP
®.............................................. 296
ESP®OFF ....................................... 297
Fuel tank ........................................ 299
General notes ................................ 291
Overview .......................................... 34
Parking brake ................................ 298
PASSENGER AIR BAG ......................4 3
Reserv efuel .................................. .299
Restraint system ............................ 298
Seat belt ........................................ 292
Steering ......................................... 303
Tire pressure monitor .................... 302
Warranty .............................................. 23
Washer fluid
Display message ............................ 289
Wheel and tire combinations
Tires ............................................... 401
Wheel bolt tightening torque ........... 399
Wheel chock ...................................... 396
Wheels
Changing a wheel .......................... 395
Checking ........................................ 375
Cleaning ......................................... 347
General notes ................................ 399
Important safety notes .................. 374
Information on driving .................... 374
Interchanging/changing ................ 395
Mounting a new wheel ................... 398
Mounting a wheel .......................... 395
Removing a wheel .......................... 398
Snow chains .................................. 377
Storing ...........................................3 95
Tightening torque ........................... 399
Wheel size/tire size ....................... 399
Window curtain air bag
Display message ............................ 269
Operation ......................................... 51
Windows
see Side windows Windshield
Defrosting .............. ........................ 146
Wi
ndshield washer fluid
see Windshield washer system
Windshield washer system
Adding washer fluid ....................... 341
Important safety notes .................. 413
Windshield wipers
Problem (malfunction) ................... 138
Rear window wiper ........................ 135
Replacing the wiper blades ............ 135
Switching on/off ........................... 134
Winter driving
Important safety notes .................. 376
Slippery road surfaces ................... 180
Snow chains .................................. 377
Winter operation
Radiator cover ............................... 339
Summer tires ................................. 376
Winter tires
M+S tires ....................................... 376
Wiper blades
Cleaning ......................................... 347
Important safety notes .................. 135
Replacing ....................................... 135
Replacing (rear window) ................ 137
Replacing (windshield) ................... 135
Wooden trim (cleaning instruc-
tions) .................................................. 350
Index21
Page 75 of 418
Due to the nature of the system, particularly
complicated but non-critical driving condi-
tions may also cause Brake Assist to inter-
vene.
If adaptive Brake Assist is not available due to
a malfunction in the radar sensor system, the
brake system remains available with full
brake boosting effect and BAS.
ESP®(Electronic Stability Program)
General notes
iObserve the "Important safety notes" sec-
tion (
Ypage 67).
ESP
®monitors driving stability and traction,
i.e. power transmission between the tires and
the road surface.
If ESP
®detects that the vehicle is deviating
from the direction desired by the driver, one
or more wheels are braked to stabilize the
vehicle. The engine output is also modified to
keep the vehicle on the desired course within
physical limits. ESP
®assists the driver when
pulling away on wet or slippery roads. ESP®
can also stabilize the vehicle during braking.
ETS/4ETS (Electronic Traction System)
iObserve the "Important safety notes" sec-
tion (
Ypage 67).
ETS traction control is part of ESP
®. On vehi-
cles with 4MATIC, 4ETS is part of ESP®.
Traction control brakes the drive wheels indi-
vidually if they spin. This enables you to pull
away and accelerate on slippery surfaces, for
example if the road surface is slippery on one side. In addition, more drive torque is trans-
ferred to the wheel or wheels with traction.
Traction control remains active, even if you
deactivate ESP
®.
Important safety notes
iObserve the "Important safety notes" sec-
tion (
Ypage 67).
GWARNING
If ESP
®is malfunctioning, ESP®is unable to
stabilize the vehicle. Additionally, further driv-
ing safety systems are deactivated. This
increases the risk of skidding and an accident.
Drive on carefully. Have ESP
®checked at a
qualified specialist workshop.
If the å ESP®OFF warning lamp lights up
continuously, ESP®is deactivated.
If the ÷ ESP
®warning lamp lights up con-
tinuously, ESP®is not available due to a mal-
function.
Observe the information on warning lamps
(
Ypage 296) and display messages which
may be shown in the instrument cluster
(
Ypage 258).
Only use wheels with the recommended tire
sizes. Only then will ESP
®function properly.
Characteristics of ESP®
General information
If the ÷ ESP warning lamp goes out before
beginning the journey, ESP
®is automatically
active.
If ESP
®intervenes, the ÷ESP®warning
lamp flashes in the instrument cluster.
If ESP
®intervenes:
XDo not deactivate ESP®under any circum-
stances.
XOnly depress the accelerator pedal as far as
necessary when pulling away.
XAdapt your driving style to suit the prevail-
ing road and weather conditions.
ECO start/stop function
The ECO start/stop function switches the
engine off automatically when the vehicle
stops moving. The engine starts automati-
cally when the driver wants to pull away again.
Driving safet ysystem s73
Safety
Z
Page 359 of 418
MOExtended tires (tires with run-flat
properties)
General notes
With MOExtended tires (tires with run flat
characteristics), you can continue to drive
your vehicle even if there is a total loss of
pressure in one or more tires. The affected
tire must not show any clearly visible damage.
You can recognize MOExtended tires by the
MOExtended marking which appears on the
sidewall of the tire. You will find this marking next to the tire size designation, the load-
bearing capacity and the speed index
(
Ypage 389).
MOExtended tires may only be used in con-
junction with an active tire pressure monitor.
If a pressure loss warning message
appears in the multifunction display:
Robserve the instructions in the display mes-
sages (
Ypage 285).
Rcheck the tire for damage.
Rif driving on, observe the following notes.
The driving distance possible in run-flat mode
is approximately 50 miles (80 km) when the
vehicle is partially laden. When the vehicle is
fully laden it is approximately 19 miles
(30 km).
In addition to the vehicle load, the driving dis-
tance possible depends upon:
Rvehicle speed
Rroad condition
Routside temperature
The driving distance possible in run-flat mode
may be reduced by extreme driving condi-
tions or maneuvers, or it can be increased
through a moderate style of driving.
The driving distance possible in run-flat mode
is counted from the moment the tire pressure
loss warning appears in the multifunction dis-
play.
You must not exceed a maximum speed of
50 mph (80 km/h). When replacing one or all tires, please
observe the following specifications for your
vehicle's tires:
Rsize
Rthe type and
Rthe "MOExtended" mark
If a tire has gone flat and cannot be replaced
with a MOExtended tire, a standard tire may
be used as a temporary measure. Make sure
tha
t you use the proper size and type (sum-
mer or winter tire).
Vehicles equipped with MOExtended tires are
not equipped with a TIREFIT kit at the factory.
It is therefore recommended that you addi-
tionally equip your vehicle with a TIREFIT kit if you mount tires that do not feature run-flat
properties, e.g. winter tires. A TIREFIT kit may
be obtained from a qualified specialist work-
shop.
Important safety notes
GWARNING
When driving in emergency mode, the driving
characteristics deteriorate, e.g. when corner-
ing, accelerating quickly and when braking.
There is a risk of an accident.
Do not exceed the stated maximum speed.
Avoid abrupt steering and driving maneuvers,
and driving over obstacles (curbs, potholes,
off-road). This applies in particular to a laden
vehicle.
Stop driving in emergency mode if:
Ryou hear banging noises.
Rthe vehicle starts to shake.
Ryou see smoke and smell rubber.
RESP®is intervening constantly.
Rthere are tears in the sidewalls of the tire.
After driving in emergency mode, have the
wheel rims checked at a qualified specialist
workshop with regard to their further use. The
defective tire must be replaced in every case.
Flat tire357
Breakdown assistance
Z
Page 376 of 418
Useful information
i
This Operator's Manual describes all
models and all standard and optional equip-
ment of your vehicle available at the time of
publication of the Operator's Manual.
Country-specific differences are possible.
Please note that your vehicle may not be
equipped with all features described. This
also applies to safety-related systems and
functions.
iRead the information on qualified special-
ist workshops (
Ypage 27).
Important safety notes
GWARNING
If wheels and tires of the wrong size are used, the wheel brakes or suspension components
may be damaged. There is a risk of an acci-
dent.
Always replace wheels and tires with those
that fulfill the specifications of the original
part.
When replacing wheels, make sure to use the
correct:
Rdesignation
Rmodel
When replacing tires, make sure to use the
correct:
Rdesignation
Rmanufacturer
Rmodel
GWARNING
A flat tire severely impairs the driving, steer-
ing and braking characteristics of the vehicle.
There is a risk of accident.
Tires without run-flat characteristics:
Rdo not drive with a flat tire.
Rimmediately replace the flat tire with your
emergency spare wheel or spare wheel, or
consult a qualified specialist workshop.
Tires with run-flat characteristics:
Rpay attention to the information and warn-
ing notices on MOExtended tires (tires with
run-flat characteristics).
Accessories that are not approved for your
vehicle by Mercedes-Benz or are not being
used correctly can impair the operating
safety.
Before purchasing and using non-approved
accessories, visit a qualified specialist work-
shop and inquire about:
Rsuitability
Rlegal stipulations
Rfactory recommendations
Information on the sizes and types of wheels
and tires for your vehicle can be found under "Wheel/tire combinations" (
Ypage 399).
Information on tire pressure can be found:
Ron the Tire and Loading Information placard
on the B-pillar on the driver's side
(
Ypage 384)
Rin the tire pressure table in the fuel filler flap
(
Ypage 170)
Runder "Tire pressure" (Ypage 377)
Operation
Information on driving
Check the tire pressure when the vehicle is
heavily laden and adjust prior to a trip.
While driving, pay attention to vibrations,
noises and unusual handling characteristics,
e.g. pulling to one side. This may indicate that
the wheels or tires are damaged. If you sus-
pect that a tire is defective, reduce your
speed immediately. Stop the vehicle as soon
as possible to check the wheels and tires for
damage. Hidden tire damage could also be
causing the unusual handling characteristics.
If you find no signs of damage, have the tires
and wheels checked at a qualified specialist
workshop.
374Operation
Wheels and tires
Page 378 of 418
approximatelyáin(1.6 mm )ha sbeen
re ached. If this is the case, the tire is so worn
that it must be replaced.
Selecting, mounting and replacing
tires
ROnly mount tires and wheels of the same
type and make.
Exception: it is permissible to install a dif-
ferent type or make in the event of a flat
tire. Observe the "MOExtended tires (tires
with run-flat characteristics" section
(
Ypage 357).
ROnly mount tires of the correct size onto
the wheels.
RBreak in new tires at moderate speeds for
the first 60 miles (100 km). They only reach
their full performance after this distance.
RDo not drive with tires which have too little
tread depth, as this significantly reduces
the traction on wet roads (hydroplaning).
RReplace the tires after six years at the lat-
est, regardless of wear.
MOExtended tires (tires with run-flat
properties)
With MOExtended tires (tires with run flat
characteristics), you can continue to drive
your vehicle even if there is a total loss of
pressure in one or more tires.
MOExtended tires may only be used in con-
junction with an active tire pressure monitor
and only on wheels specifically tested by
Mercedes-Benz.
Notes on driving with MOExtended tires with
a flat tire (
Ypage 357).
Vehicles equipped with MOExtended tires are
not equipped with a TIREFIT kit at the factory.
It is therefore recommended that you addi-
tionally equip your vehicle with a TIREFIT kit if you mount tires that do not feature run-flat
properties, e.g. winter tires. A TIREFIT kit can be obtained from a qualified specialist work-
shop.
Winter operation
General notes
Have your vehicle winter-proofed at a quali-
fied specialist workshop at the onset of win-
ter.
Observe the notes in the "Changing a wheel"
section (
Ypage 395).
Driving with summer tires
At temperatures below 45
‡(+7 †), summer
tires lose elasticity and therefore traction and
braking power. Change the tires on your vehi-
cle to M+S tires. Using summer tires at very
cold temperatures could cause cracks to
form, thereby damaging the tires perma-
nently. Mercedes-Benz cannot accept
responsibility for this type of damage.
GWARNING
Damaged tires can cause tire inflation pres-
sure loss. As a result, you could lose control of
your vehicle. There is a risk of accident.
Check the tires regularly for signs of damage
and replace any damaged tires immediately.
M+S tires
GWARNING
M+S tires with a tire tread depth of less than
ã in (4 mm) are not suitable for use in winter
and do not provide sufficient traction. There is
a risk of an accident.
M+S tires with a tread depth of less than ãin
(4 mm) must be replaced immediately.
At temperatures below 45 ‡(+7 †), use win-
ter tires or all-season tires. Both types of tire
are identified by the M+S marking.
Only winter tires bearing the isnowflake
symbol in addition to the M+S marking pro-
376Winter operation
Wheels and tires
Page 380 of 418
There is a risk of an accident.
Follow recommended tire inflation pressures
and check the pressure of all the tires includ-
ing the spare wheel:
Rmonthly, at least
Rif the load changes
Rbefore beginning a long journey
Runder different operating conditions, e.g.
off-road driving
If necessary, correct the tire pressure.
The data on the Tire and Loading Information
placard and tire pressure table shown here
are examples. Tire pressure specifications
are vehicle-specific and may deviate from the data shown here. The tire pressure specifica-
tions that are valid for your vehicle can be
found on the Tire and Loading Information
placard and tire pressure table on the vehicle.
General notes
The recommended tire pressures for the tires
mounted at the factory can be found on the
labels described here.
Operation with a trailer: the applicable
value for the rear axle is the maximum tire
pressure value stated in the table inside the
fuel filler flap.
Further information on tire pressures can be
obtained at a qualified specialist workshop.
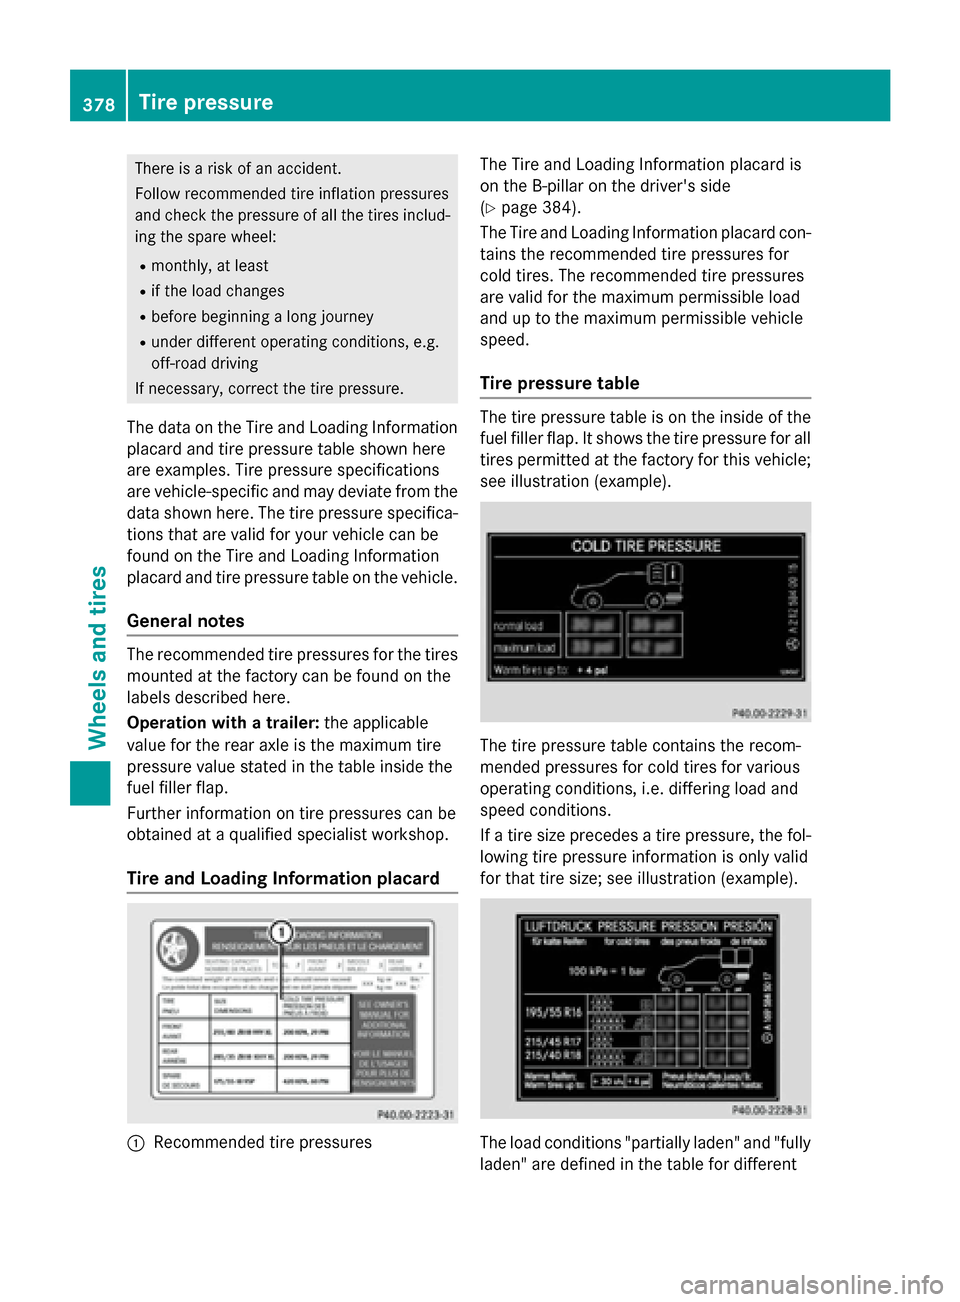
Tire and Loading Information placard
:Recommended tire pressures The Tire and Loading Information placard is
on the B-pillar on the driver's side
(
Ypage 384).
The Tire and Loading Information placard con-
tains the recommended tire pressures for
cold tires. The recommended tire pressures
are valid for the maximum permissible load
and up to the maximum permissible vehicle
speed.
Tire pressure table
The tire pressure table is on the inside of the
fuel filler flap. It shows the tire pressure for all
tires permitted at the factory for this vehicle; see illustration (example).
The tire pressure table contains the recom-
mended pressures for cold tires for various
operating conditions, i.e. differing load and
speed conditions.
If a tire size precedes a tire pressure, the fol-
lowing tire pressure information is only valid
for that tire size; see illustration (example).
The load conditions "partially laden" and "fully
laden" are defined in the table for different
378Tire pressure
Wheels and tires
Page 381 of 418
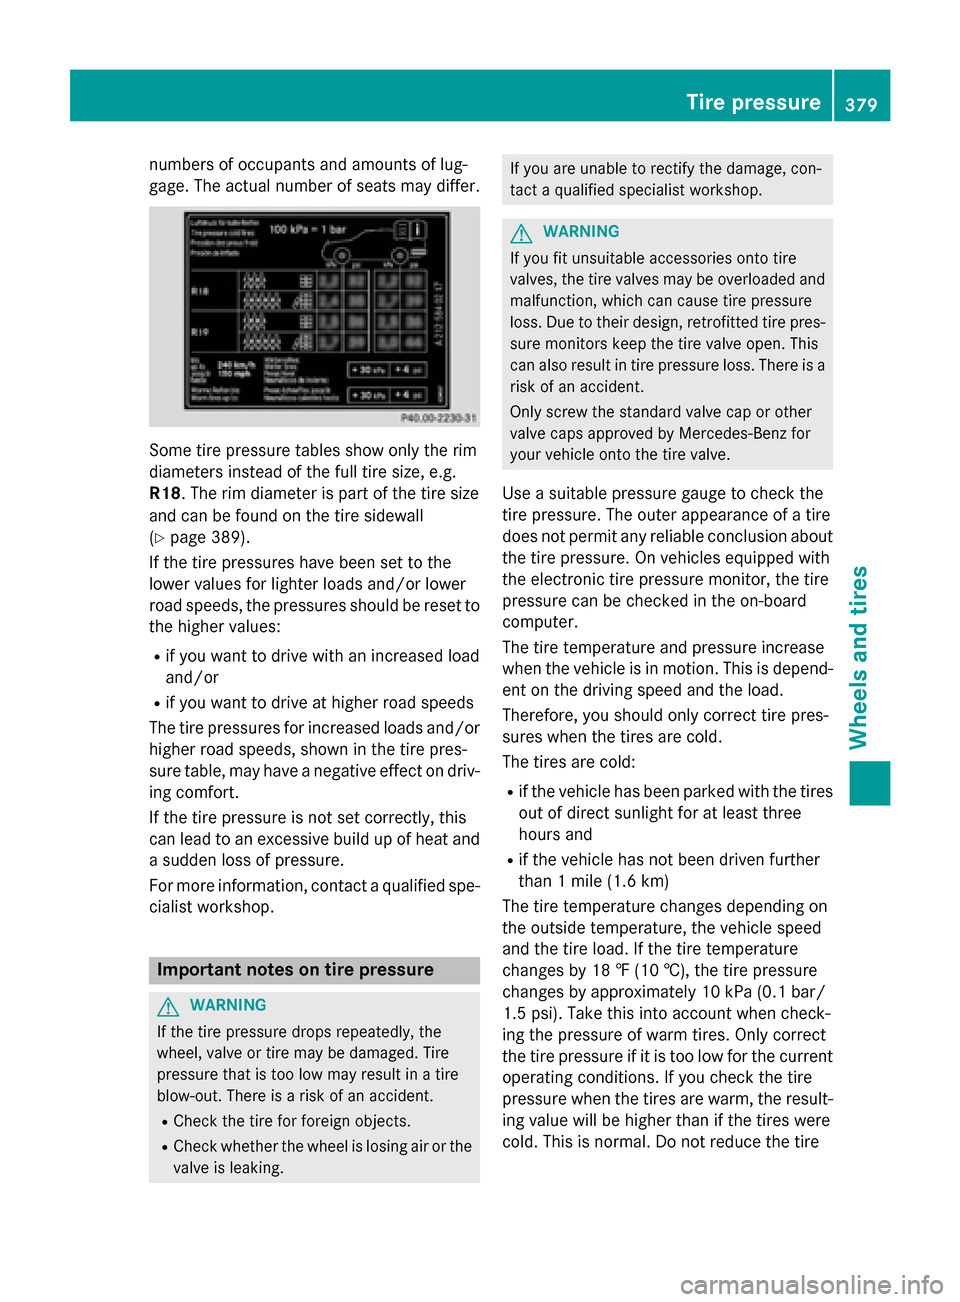
numbers of occupants and amounts of lug-
gage. The actual number of seats may differ.
Some tire pressure tables show only the rim
diameters instead of the full tire size, e.g.
R18. The rim diameter is part of the tire size
and can be found on the tire sidewall
(
Ypage 389).
If the tire pressures have been set to the
lower values for lighter loads and/or lower
road speeds, the pressures should be reset to the higher values:
Rif you want to drive with an increased load
and/or
Rif you want to drive at higher road speeds
The tire pressures for increased loads and/or
higher road speeds, shown in the tire pres-
sure table, may have a negative effect on driv- ing comfort.
If the tire pressure is not set correctly, this
can lead to an excessive build up of heat and
a sudden loss of pressure.
For more information, contact a qualified spe-
cialist workshop.
Important notes on tire pressure
GWARNING
If the tire pressure drops repeatedly, the
wheel, valve or tire may be damaged. Tire
pressure that is too low may result in a tire
blow-out. There is a risk of an accident.
RCheck the tire for foreign objects.
RCheck whether the wheel is losing air or the valve is leaking.
If you are unable to rectify the damage, con-
tact a qualified specialist workshop.
GWARNING
If you fit unsuitable accessories onto tire
valves, the tire valves may be overloaded and
malfunction, which can cause tire pressure
loss. Due to their design, retrofitted tire pres- sure monitors keep the tire valve open. This
can also result in tire pressure loss. There is a
risk of an accident.
Only screw the standard valve cap or other
valve caps approved by Mercedes-Benz for
your vehicle onto the tire valve.
Use a suitable pressure gauge to check the
tire pressure. The outer appearance of a tire
does not permit any reliable conclusion about
the tire pressure. On vehicles equipped with
the electronic tire pressure monitor, the tire
pressure can be checked in the on-board
computer.
The tire temperature and pressure increase
when the vehicle is in motion. This is depend-
ent on the driving speed and the load.
Therefore, you should only correct tire pres-
sures when the tires are cold.
The tires are cold:
Rif the vehicle has been parked with the tires
out of direct sunlight for at least three
hours and
Rif the vehicle has not been driven further
than 1 mile (1.6 km)
The tire temperature changes depending on
the outside temperature, the vehicle speed
and the tire load. If the tire tempera ture
cha
nges by 18 ‡ (10 †), the tire pressure
changes by approximately 10 kPa (0.1 bar/
1.5 psi). Take this into account when check-
ing the pressure of warm tires. Only correct
the tire pressure if it is too low for the current
operating conditions. If you check the tire
pressure when the tires are warm, the result-
ing value will be higher than if the tires were
cold. This is normal. Do not reduce the tire
Tire pressure379
Wheels and tires
Z
Page 383 of 418
Checking tire pressures manually
To determine and set the correct tire pres-
sure, proceed as follows:
XRemove the valve cap of the tire that is to
be checked.
XPress the tire pressure gauge securely onto
the valve.
XRead the tire pressure and compare it to
the recommended value on the Tire and
Loading Information placard or the tire
pressure table (
Ypage 377).
XIf the tire pressure is too low, increase the
tire pressure to the recommended value.
XIf the tire pressure is too high, release air.
To do so, press down the metal pin in the
valve, using the tip of a pen for example.
Then check the tire pressure again using
the tire pressure checker.
XScrew the valve cap onto the valve.
XRepeat these steps for the other tires.
Tire pressure monitor
General notes
If a tire pressure monitor is installed, the vehi-
cle's wheels have sensors that monitor the
tire pressures in all four tires. The tire pres-
sure monitor warns you if the pressure drops
in one or more of the tires. The tire pressure
monitor only functions if the corresponding
sensors are installed in all wheels.
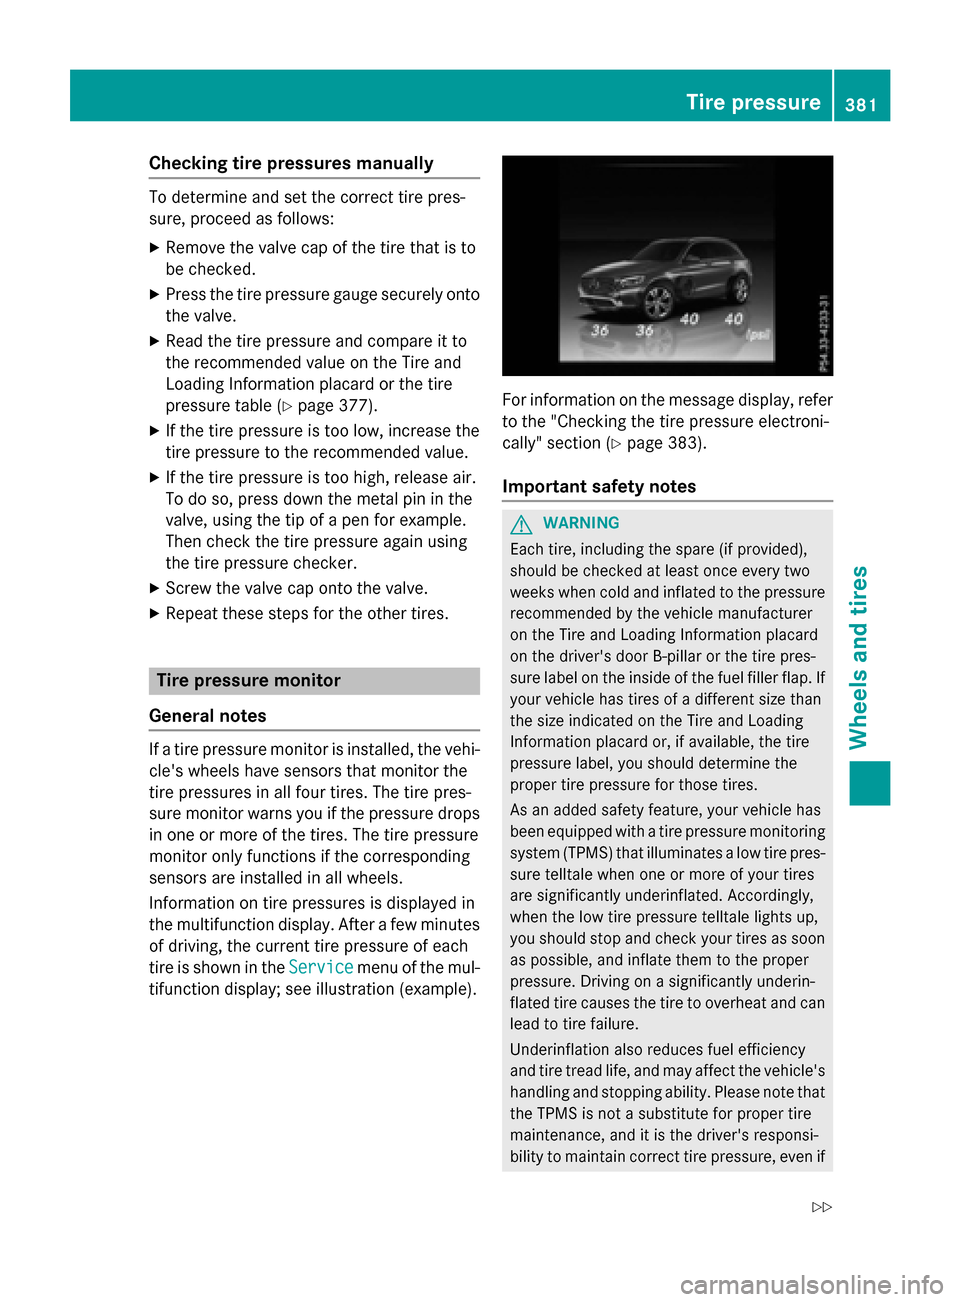
Information on tire pressures is displayed in
the multifunction display. After a few minutes
of driving, the current tire pressure of each
tire is shown in the Service
menu of the mul-
tifunction display; see illustration (example).
For information on the message display, refer
to the "Checking the tire pressure electroni-
cally" section (
Ypage 383).
Important safety notes
GWARNING
Each tire, including the spare (if provided),
should be checked at least once every two
weeks when cold and inflated to the pressure recommended by the vehicle manufacturer
on the Tire and Loading Information placard
on the driver's door B-pillar or the tire pres-
sure label on the inside of the fuel filler flap. If
your vehicle has tires of a different size than
the size indicated on the Tire and Loading
Information placard or, if available, the tire
pressure label, you should determine the
proper tire pressure for those tires.
As an added safety feature, your vehicle has
been equipped with a tire pressure monitoring
system (TPMS) that illuminates a low tire pres-
sure telltale when one or more of your tires
are significantly underinflated. Accordingly,
when the low tire pressure telltale lights up,
you should stop and check your tires as soon
as possible, and inflate them to the proper
pressure. Driving on a significantly underin-
flated tire causes the tire to overheat and can
lead to tire failure.
Underinflation also reduces fuel efficiency
and tire tread life, and may affect the vehicle's
handling and stopping ability. Please note thatthe TPMS is not a substitute for proper tire
maintenance, and it is the driver's responsi-
bility to maintain correct tire pressure, eve n if
Tire pressure381
Wheels and tires
Z
Page 386 of 418
XPress theabutton.
The current tire pressure for each wheel or
the Tire
pressurewillbedisplayed
afterdrivingafewminutesmessage
will be displayed in the multifunction dis-
play.
XPress the :button.
The Use Current Pressures as New
Reference Valuesmessage appears in
the multifunction display.
If you wish to confirm the restart:
XPress the abutton.
The Tire Press. Monitor Restarted
message appears in the multifunction dis-
play.
After driving for a few minutes, the system
checks whether the current tire pressures
are within the specified range. The new tire
pressures are then accepted as reference
values and monitored.
If you wish to cancel the restart:
XPress the %button.
The tire pressure values stored at the last
restart will continue to be monitored.
Radio type approval for the tire pres-
sure monitor
CountryRadio type approval number
USAFCC ID: MRXMW2433A
FCC ID: MRXGG4
FCC ID: MRXMC34MA4
CanadaIC: 2546A-MW2433A
IC: 2546A-GG4
IC: 2546A-MC34MA4
Loading the vehicle
Instruction labels for tires and loads
GWARNING
Overloaded tires can overheat, causing a
blowout. Overloaded tires can also impair the
steering and driving characteristics and lead
to brake failure. There is a risk of accident.
Observe the load rating of the tires. The load
rating must be at least half of the GAWR of
your vehicle. Never overload the tires by
exceeding the maximum load.
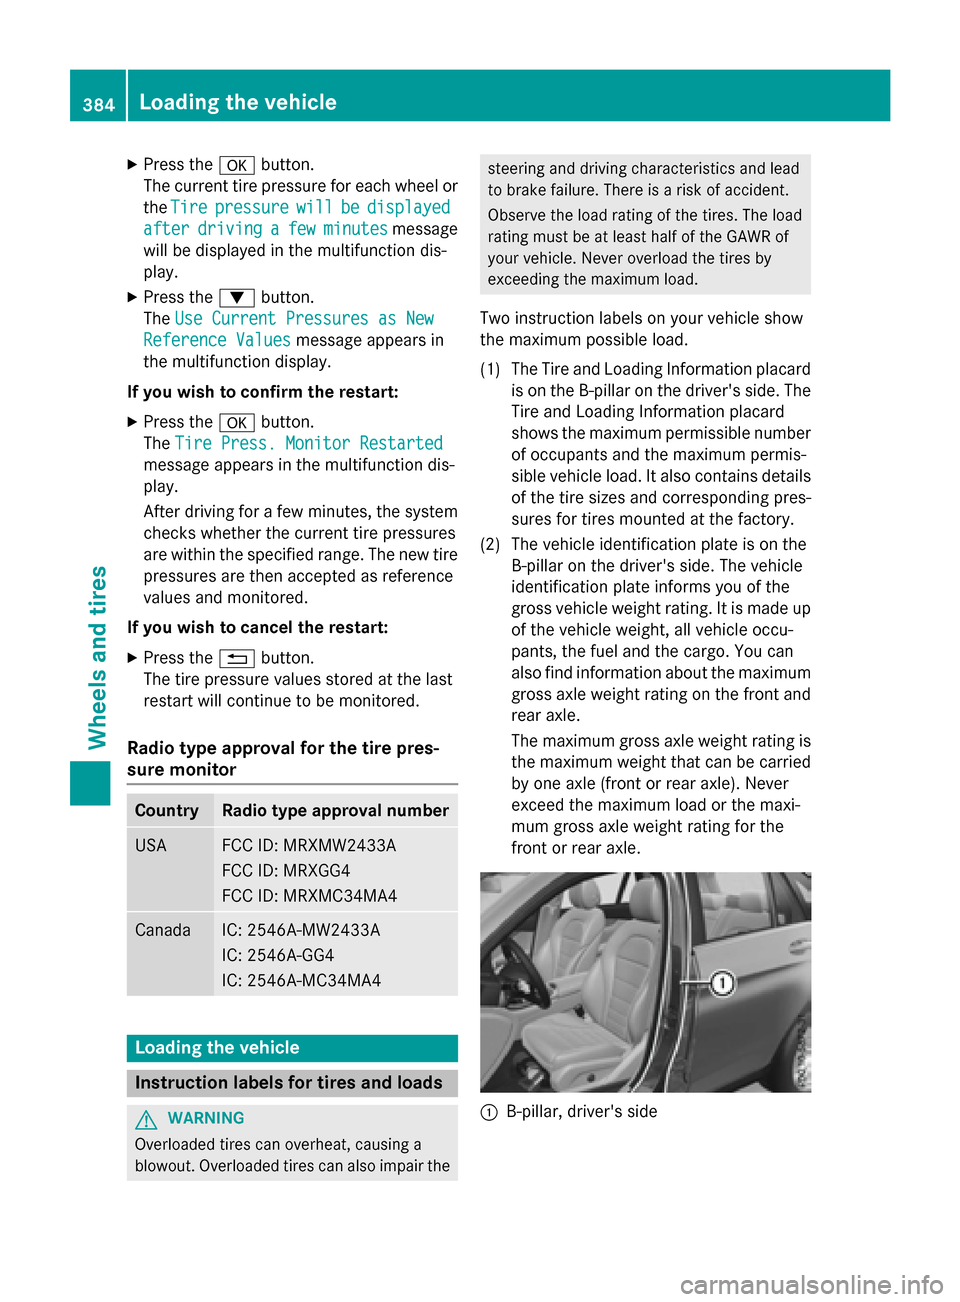
Two instruction labels on your vehicle show
the maximum possible load.
(1) The Tire and Loading Information placard is on the B-pillar on the driver's side. The
Tire and Loading Information placard
shows the maximum permissible numberof occupants and the maximum permis-
sible vehicle load. It also contains details
of the tire sizes and corresponding pres-
sures for tires mounted at the factory.
(2) The vehicle identification plate is on the B-pillar on the driver's side. The vehicle
identification plate informs you of the
gross vehicle weight rating. It is made up
of the vehicle weight, all vehicle occu-
pants, the fuel and the cargo. You can
also find information about the maximum
gross axle weight rating on the front and
rear axle.
The maximum gross axle weight rating is
the maximum weight that can be carried
by one axle (front or rear axle). Never
exceed the maximum load or the maxi-
mum gross axle weight rating for the
front or rear axle.
:B-pillar, driver's side
384Loading the vehicle
Wheels and tires