manual transmission MERCEDES-BENZ GLC SUV 2018 Owner's Guide
[x] Cancel search | Manufacturer: MERCEDES-BENZ, Model Year: 2018, Model line: GLC SUV, Model: MERCEDES-BENZ GLC SUV 2018Pages: 390, PDF Size: 6.54 MB
Page 247 of 390

Display messagesPossible causes/consequences andMSolutions
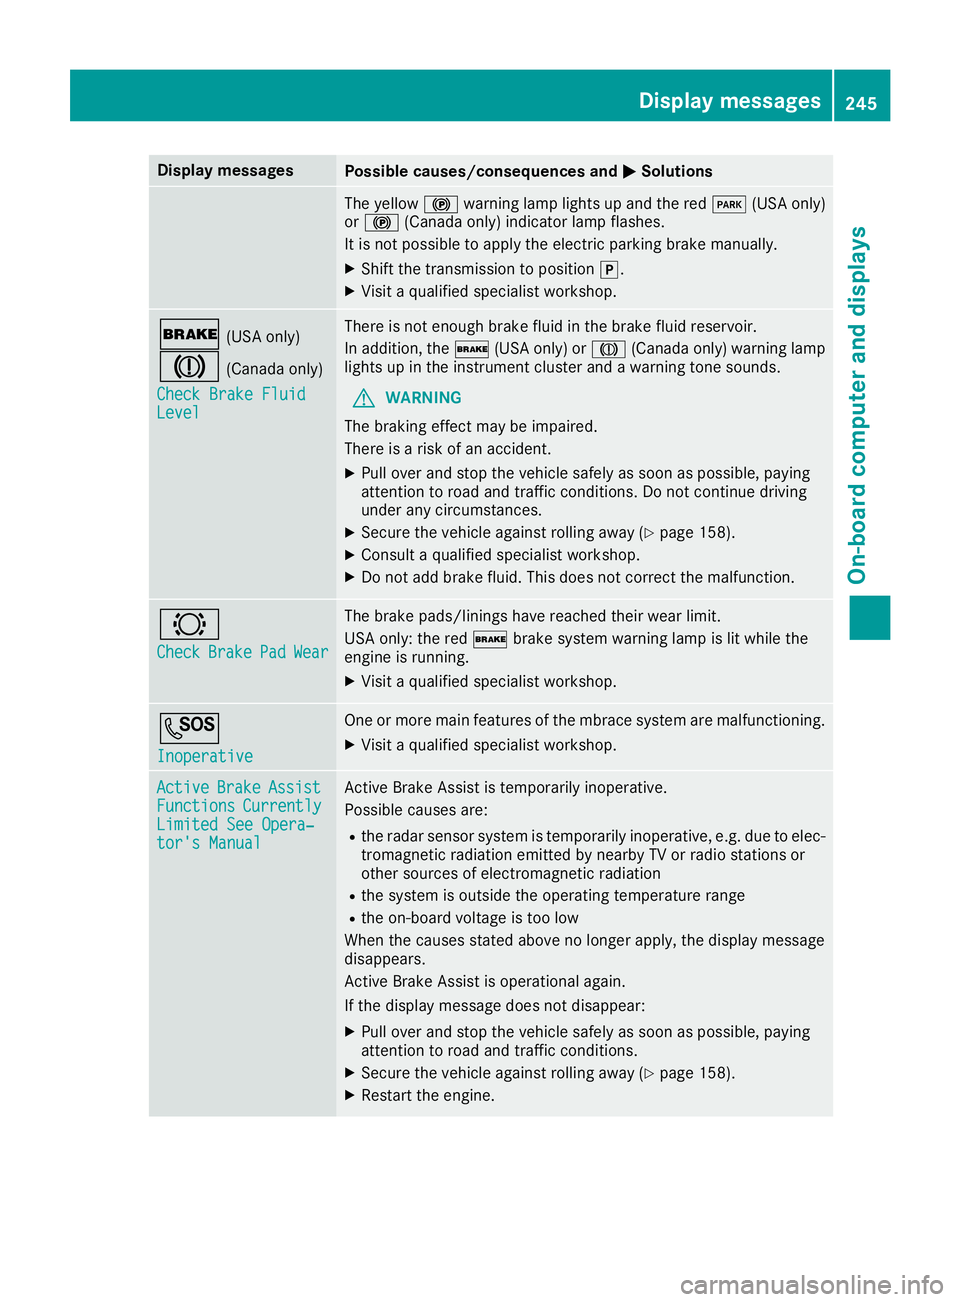
The yellow!warning lamp lights up and th ered F (USAonly)
or ! (Canada only) indicator lamp flashes .
It is no tpossibl eto apply th eelectric parking brak emanually.
XShift th etransmission to position j.
XVisitaqualified specialist workshop .
$(USAonly)
J(Canada only)
Check Brake Fluid
Level
There is no tenough brak eflui din th ebrak efluid reservoir .
In addition ,th e$ (USAonly) or J(Canada only) warning lamp
lights up in th einstrumen tcluste rand awarning tone sounds.
GWARNIN G
The braking effec tmay be impaired.
There is aris kof an accident.
XPull ove rand stop th evehicl esafely as soo nas possible, payin g
attention to roa dand traffic conditions. Do no tcontinu edrivin g
under any circumstances.
XSecur eth evehicl eagainst rollin gaway (Ypage 158).
XConsult aqualified specialist workshop .
XDo notadd brak efluid .This does no tcorrec tth emalfunction .
#
CheckBrakePadWear
The brak epads/linings hav ereached their wear limit.
US Aonly: th ered $ brakesystem warning lamp is lit while th e
engin eis running.
XVisit aqualified specialist workshop .
G
Inoperative
Oneor mor emain features of th embrace system are malfunctioning .
XVisitaqualified specialist workshop .
ActiveBrakeAssistFunctionsCurrentlyLimitedSee Opera‐tor's Manual
Active Brake Assis tis temporarily inoperative.
Possibl ecauses are:
Rth eradar sensor system is temporarily inoperative, e.g. due to elec -
tromagneti cradiation emitted by nearby TV or radi ostation sor
other source sof electromagneti cradiation
Rth esystem is outside th eoperating temperature range
Rth eon-boar dvoltag eis to olow
Whe nth ecauses state dabov eno longer apply, th edisplay message
disappears.
Active Brake Assis tis operational again .
If th edisplay message does no tdisappear :
XPull overand stop th evehicl esafely as soo nas possible, payin g
attention to roa dand traffic conditions.
XSecur eth evehicl eagainst rollin gaway (Ypage 158).
XRestart th eengine.
Display messages24 5
On-board computer and displays
Z
Page 341 of 390

sparks are created, the hydrogen gas can
ignite. There is a risk of an explosion.
RMake sure that the positive terminal of a
connected battery does not come into con-
tact with vehicle parts.
RNever place metal objects or tools on a bat-tery.
RIt is important that you observe the descri-
bed order of the battery terminals when
connecting and disconnecting a battery.
RWhen jump-starting, make sure that the
battery poles with identical polarity are
connected.
RIt is particularly important to observe the
described order when connecting and dis-
connecting the jumper cables.
RNever connect or disconnect the battery
terminals while the engine is running.
GWARNING
Battery acid is caustic. There is a risk of injury.
Avoid contact with skin, eyes or clothing. Do
not inhale any battery gases. Do not lean over
the battery. Keep children away from batter-
ies. Wash away battery acid immediately with
plenty of clean water and seek medical atten-
tion.
All vehicles:
HEnvironmental note
Batteries contain dangerous
substances. It is against the
law to dispose of them with
the household rubbish. They
must be collected separately and recycled to protect the
environment.
Dispose of batteries in an
environmentally friendly
manner. Take discharged
batteries to a qualified spe-
cialist workshop or a special
collection point for used bat-
teries.
!Have the battery regularly checked at a
qualified specialist workshop.
Comply with the service intervals in the Main- tenance Booklet, or contact a qualified spe-
cialist workshop for more information.
!Always have work on batteries carried out at
a qualified specialist workshop.
Should it, in exceptional circumstances, be
absolutely necessary to disconnect the 12-
volt battery yourself, please observe the fol-
lowing:
RSecure the vehicle to prevent it from rolling
away.
RSwitch off the ignition.
RDisconnect the negative terminal first and
then the positive terminal.
The transmission is locked in position j
after disconnecting the battery.
After the work has been done, install the bat- tery and replace the cover of the positive ter-
minal clamp firmly.
Comply with safety precautions and take pro-
tective measures when handling batteries.
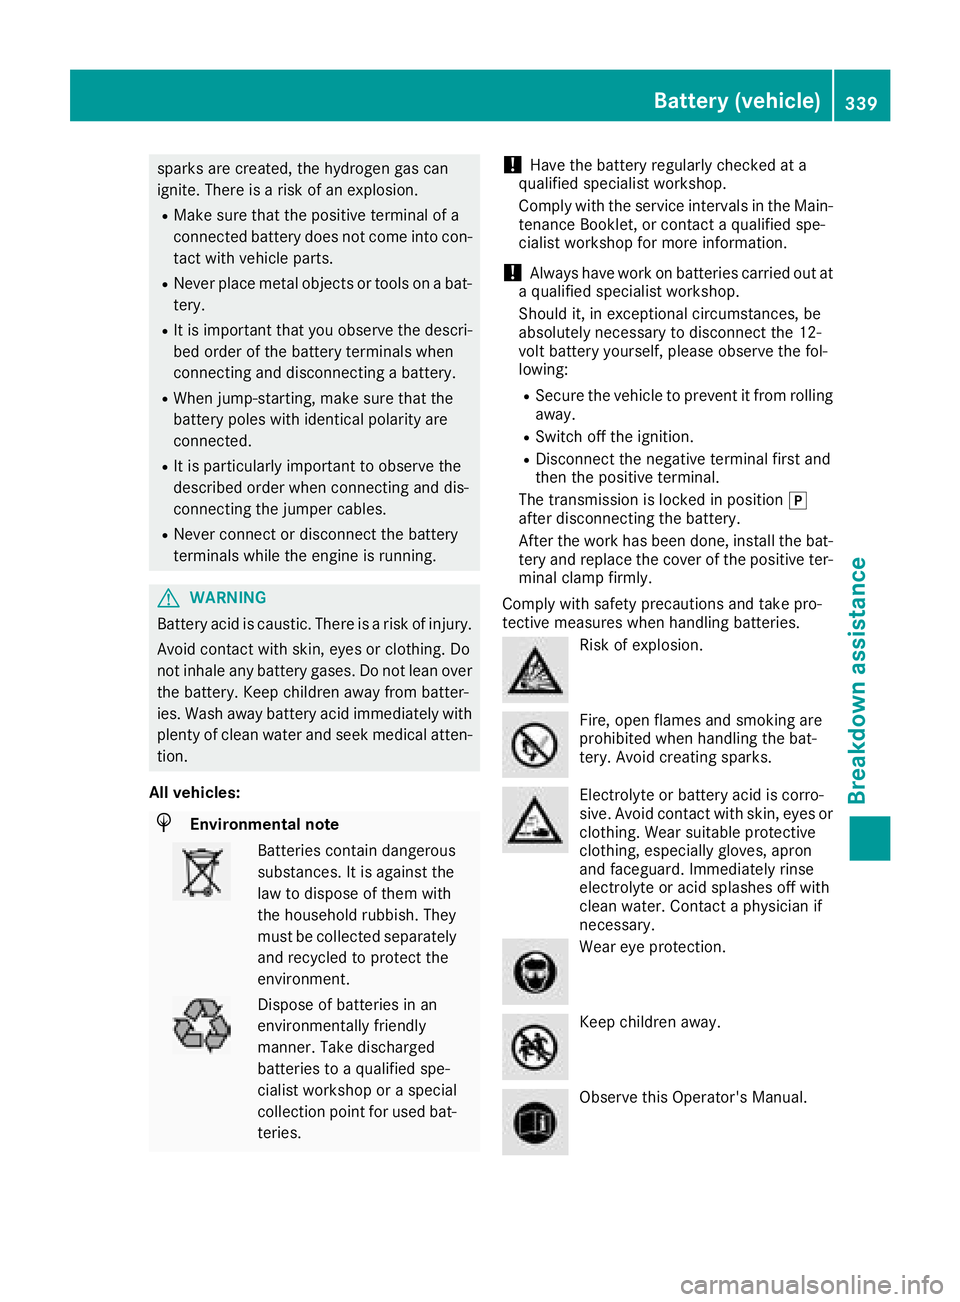
Risk of explosion.
Fire, open flames and smoking are
prohibited when handling the bat-
tery. Avoid creating sparks.
Electrolyte or battery acid is corro-
sive. Avoid contact with skin, eyes or
clothing. Wear suitable protective
clothing, especially gloves, apron
and faceguard. Immediately rinse
electrolyte or acid splashes off with
clean water. Contact a physician if
necessary.
Wear eye protection.
Keep children away.
Observe this Operator's Manual.
Battery (vehicle)339
Breakdown assistance
Z
Page 372 of 390

the tires are installed corresponding to the
direction of rotation.
An arrow on the sidewall of the tire indicates its
correct direction of rotation.
Storing wheels
Store wheels that are not being used in a cool,
dry and preferably dark place. Protect the tires
from oil, grease, gasoline and diesel.
Mounting a wheel
Preparing the vehicle
XStop the vehicle on solid, non-slippery and
level ground.
XApply the electric parking brake manually.
XBring the front wheels into the straight-ahead position.
XShift the transmission to position j.
XMake sure that the vehicle level is set to "Nor-
mal" on vehicles with AIR BODY CONTROL
(
Ypage 186).
XSwitch off the engine.
XVehicles without KEYLESS-GO:remove the
SmartKey from the ignition lock.
XVehicles with KEYLESS-GO start-function
or KEYLESS-GO: open the driver's door.
The vehicle electronics are now in key posi-
tion u. This is the same as the key having
been removed.
XVehicles with KEYLESS-GO start-function
or KEYLESS-GO: remove the Start/Stop but-
ton from the ignition lock (
Ypage 137).
XMake sure that the engine cannot be started
via your smartphone (Ypage 139).
XIf included in the vehicle equipment, remove
the tire-change tool kit from the vehicle.
XSafeguard the vehicle against rolling away.
Securing the vehicle to prevent it from
rolling away
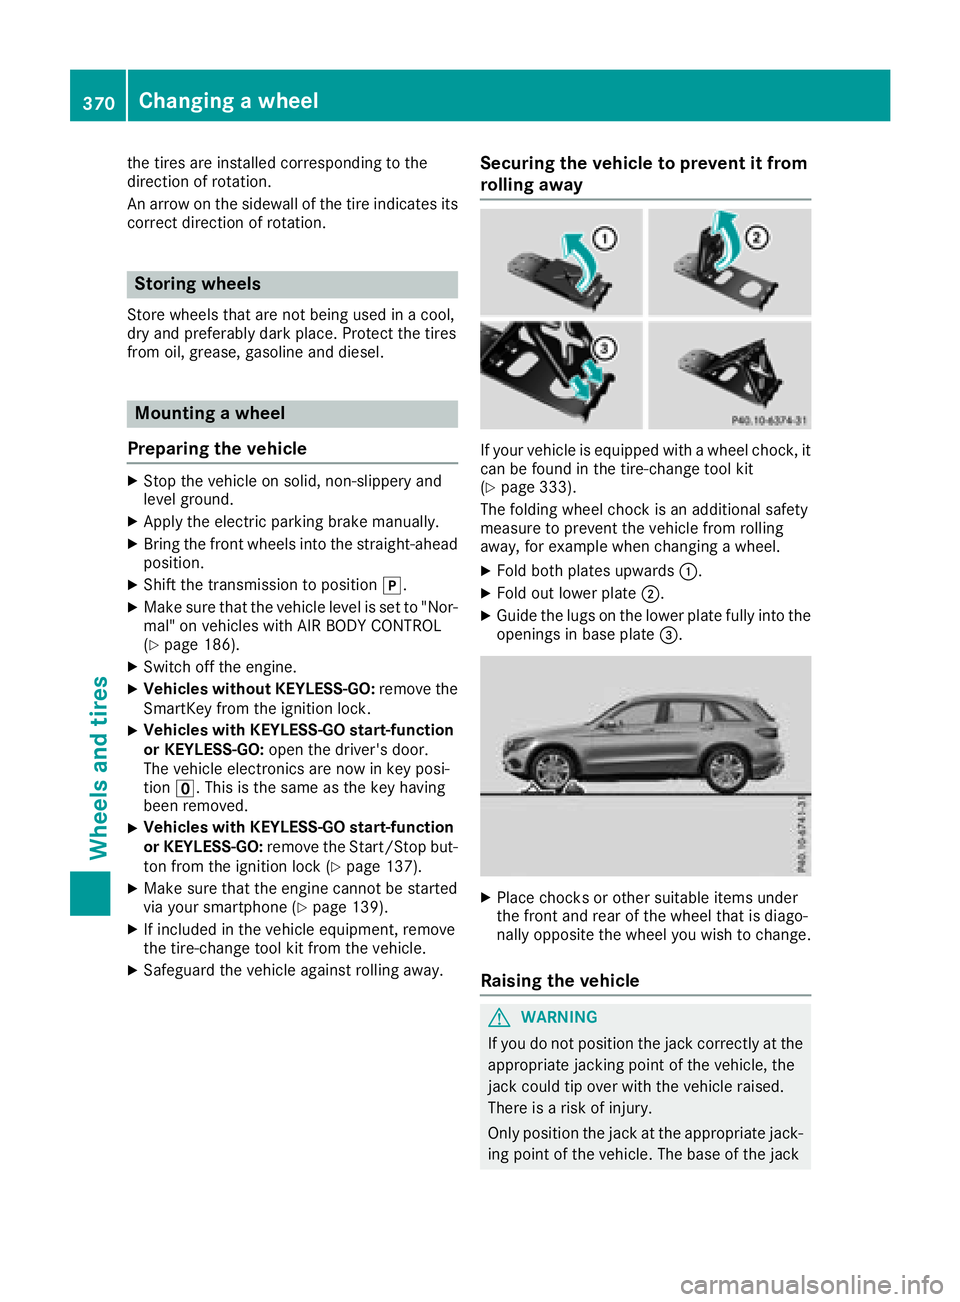
If your vehicle is equipped with a wheel chock, it
can be found in the tire-change tool kit
(
Ypage 333).
The folding wheel chock is an additional safety
measure to prevent the vehicle from rolling
away, for example when changing a wheel.
XFold both plates upwards :.
XFold out lower plate;.
XGuide the lugs on the lower plate fully into the
openings in base plate =.
XPlace chocks or other suitable items under
the front and rear of the wheel that is diago-
nally opposite the wheel you wish to change.
Raising the vehicle
GWARNING
If you do not position the jack correctly at the
appropriate jacking point of the vehicle, the
jack could tip over with the vehicle raised.
There is a risk of injury.
Only position the jack at the appropriate jack-
ing point of the vehicle. The base of the jack
370Changing a wheel
Wheels an d tires