sensor MERCEDES-BENZ GLC SUV 2021 User Guide
[x] Cancel search | Manufacturer: MERCEDES-BENZ, Model Year: 2021, Model line: GLC SUV, Model: MERCEDES-BENZ GLC SUV 2021Pages: 481, PDF Size: 9 MB
Page 98 of 481
Interior pr
otection is only primed when thefo l‐
lowing components are closed:
R doors
R tailgate
Interior pr otection is automatically deactivated:
R afte r pressing theÜ orp button on
th ekey
R afte r pressing thest art/ stop button with the
ke y in thestow age compartment
(/ page 154)
R afte r unlocking theve hicle using KEYLESS-
GO
R when using HANDS-FREE ACCESS
The following situations can lead toafa lse
alarm:
R moving objects such as masc ots in theve hi‐
cle interior
R when a side window is open
R when a sliding sunroof is open Priming/deactivating interior pr
otection Multimedia sy
stem:
4 © 5
Settings 5
Quick access #
Prime or deactivate Interior motion sensor.
Interior pr otection is primed again in thefo llow‐
ing cases:
R The vehicle is unloc ked again.
R A door is opened.
R The vehicle is loc ked again.
% Ifqu ick access is una vailable, select the
Vehicle menu under Settingstoprime or
deactivate interior pr otection. Opening and closing
95
Page 135 of 481
Ad
aptive Highbeam Assist Ad
aptive Highbeam Assist function &
WARNING Risk of accident despite
Ad aptive Highbeam Assist
Ad aptive Highbeam Assist does not react to:
R road users without lights, e.g. pedes‐
trians
R road users with poor lighting, e.g. cyclists
R road users whose lighting is obstructed,
e.g. bya bar rier
On very rare occasions, Adaptive Highbeam
Assist may failto recognise other road users
with their own lighting, or may recognise
th em too late.
In these, or in similar situations, the auto‐
matic high beam will not be deactivated or
will be activated despite the presence of
ot her road users. #
Alw ays obser vethero ad and traf fic
conditions carefully and switch off the
high beam in good time. Ad
aptive Highbeam Assist cannot take into
account road, weather or traf fic conditions.
De tection may be restricted in thefo llowing
cases:
R In poor visibilit y,e.g. fog, heavy rain or snow
R Ifth ere is dirt on the sensors or the sensors
are obscured
Ad aptive Highbeam Assist is on lyan aid. You are
re sponsible for adju sting theve hicle's lighting to
th e pr evailing light, visibility and traf fic condi‐
tions. Ad
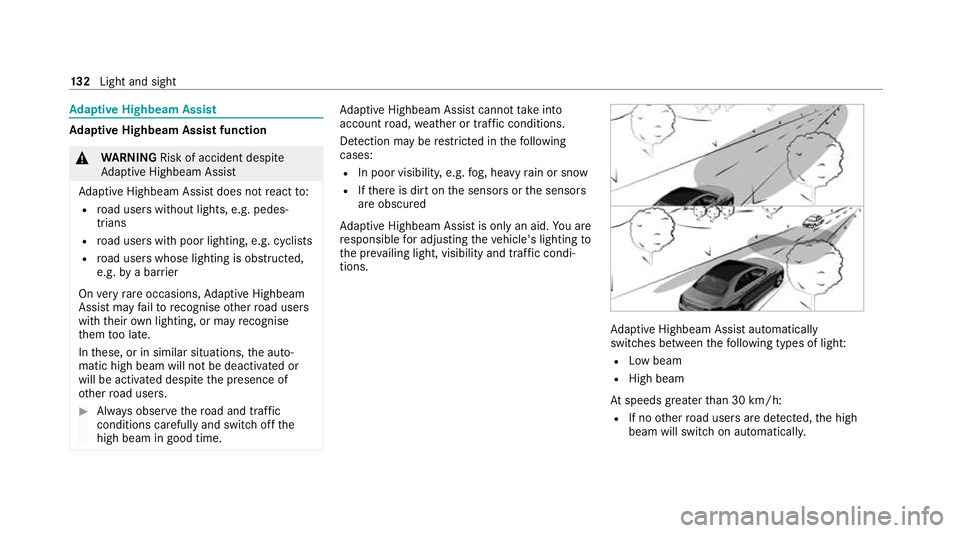
aptive Highbeam Assist automatically
swit ches between thefo llowing types of light:
R Low beam
R High beam
At speeds greater than 30 km/h:
R If no other road users are de tected, the high
beam will switch on automaticall y.13 2
Light and sight
Page 136 of 481
The high beam will switch off automatically in
th
efo llowing cases:
R Atspeeds below 25 km/h
R Ifot her road users are de tected
R Ifstre et lighting is suf ficient
% The sy stem's optical sensor is located
behind the windscreen near theove rhead
control panel.
Switching Adaptive Highbeam Assist on/off
Switching on #
Turn the light switch tothe à position. #
Switch on the high beam using the combina‐
tion switch.
If Ad aptive Highbeam Assist is activated,
th e_ indicator lamp will light up on the
multifunction displa y.
Switching off #
Switch off the high beam using the combina‐
tion switch. Ad
aptive Highbeam Assist Plus Ad
aptive Highbeam Assist Plus function &
WARNING Risk of accident despite
Ad aptive Highbeam Assist Plus
Ad aptive Highbeam Assist Plus does not
re act to:
R road users without lights, e.g. pedes‐
trians
R road users with poor lighting, e.g. cyclists
R road users whose lighting is obstructed,
e.g. bya bar rier
On very rare occasions, Adaptive Highbeam
Assist Plus may failto recognise other road
users with their own lighting, or may recog‐
nise them too late.
In these, or in similar situations, the auto‐
matic high beam will not be deactivated or
will be activated despite the presence of
ot her road users. #
Alw ays obser vethero ad and traf fic
conditions carefully and switch off the
high beam in good time. Ad
aptive Highbeam Assist Plus cannot take into
account road, weather or traf fic conditions.
De tection may be restricted in thefo llowing
cases:
R In poor visibilit y,e.g. fog, heavy rain or snow
R ifth ere is dirt on the sensors or the sensors
are obscured
Ad aptive Highbeam Assist Plus is on lyan aid.
Yo u are responsible for adju sting theve hicle's
lighting tothe pr evailing light, visibility and traf‐
fi c conditions. Light and sight
13 3
Page 137 of 481
Ad
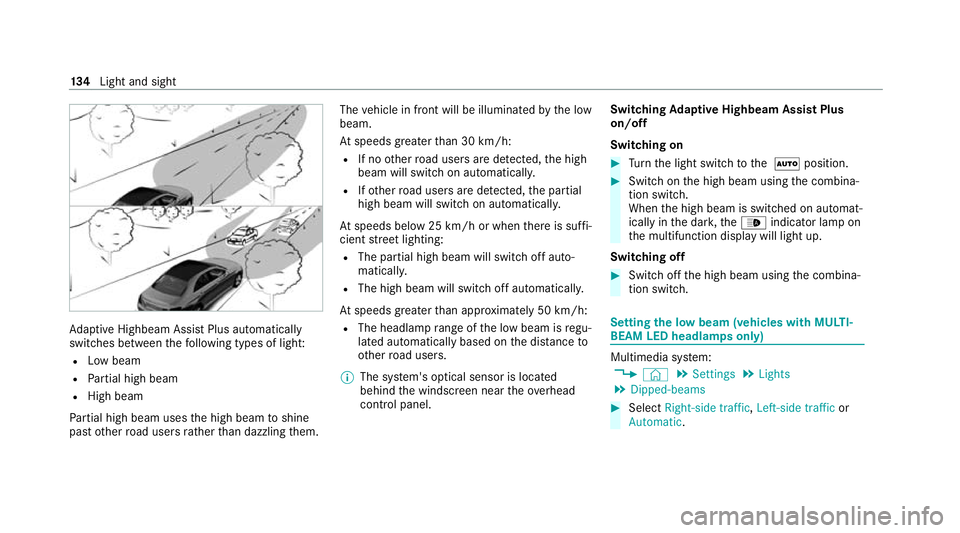
aptive Highbeam Assist Plus automatically
swit ches between thefo llowing types of light:
R Low beam
R Partial high beam
R High beam
Pa rtial high beam uses the high beam toshine
past other road users rath er than dazzling them. The
vehicle in front will be illuminated bythe low
beam.
At speeds greater than 30 km/h:
R If no other road users are de tected, the high
beam will switch on automaticall y.
R Ifot her road users are de tected, the partial
high beam will switch on automaticall y.
At speeds below 25 km/h or when there is suf fi‐
cient stre et lighting:
R The partial high beam will switch off auto‐
maticall y.
R The high beam will switch off automatically.
At speeds greater than appr oximately 50 km/h:
R The headlamp range of the low beam is regu‐
lated automatically based on the dis tance to
ot her road users.
% The sy stem's optical sensor is located
behind the windscreen near theove rhead
control panel. Switching
Adaptive Highbeam Assist Plus
on/off
Switching on #
Turn the light switch tothe à position. #
Switch on the high beam using the combina‐
tion switch.
When the high beam is switched on automat‐
ically in the dar k,the_ indicator lamp on
th e multifunction display will light up.
Switching off #
Switch off the high beam using the combina‐
tion switch. Setting
the low beam (vehicles with MULTI‐
BEAM LED headlamps only) Multimedia sy
stem:
4 © 5
Settings 5
Lights
5 Dipped-beams #
Select Right-side traffic, Left-side trafficor
Automatic. 134
Light and sight
Page 143 of 481
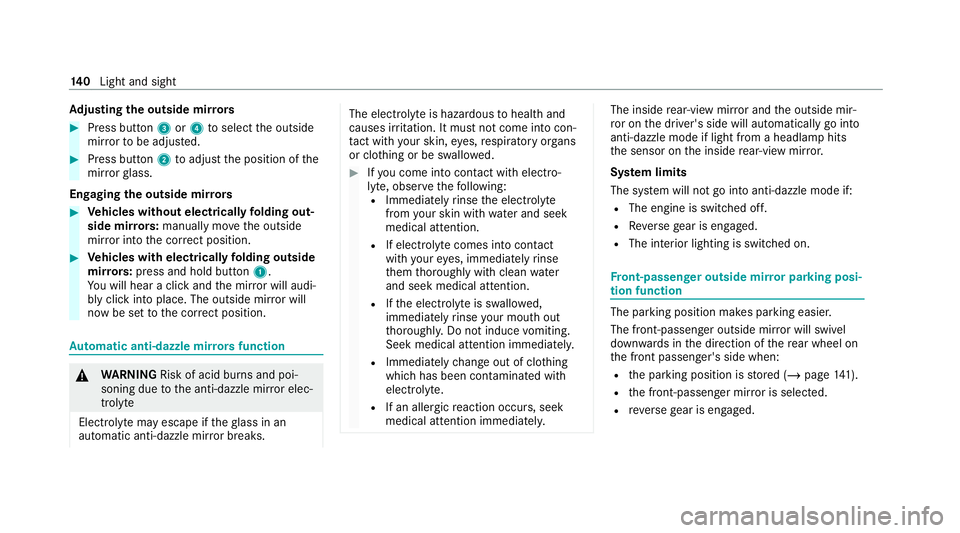
Ad
justing the outside mir rors #
Press button 3or4 toselect the outside
mir rorto be adjus ted. #
Press button 2toadjust the position of the
mir rorgl ass.
Engaging the outside mir rors #
Vehicles without electrically folding out‐
side mir rors: manually mo vethe outside
mir ror into the cor rect position. #
Vehicles with electrically folding outside
mir rors:press and hold button 1.
Yo u will hear a click and the mir ror will audi‐
bly click into place. The outside mir ror will
now be set tothe cor rect position. Au
tomatic anti-dazzle mir rors function &
WARNING Risk of acid burn s and poi‐
soning due tothe anti-dazzle mir ror elec‐
trolyte
Electrolyte may escape if theglass in an
automatic anti-dazzle mir ror breaks. The electrolyte is hazardous
tohealth and
causes ir rita tion. It mu stnot come into con‐
ta ct with your skin, eyes,respiratory or gans
or clo thing or be swallo wed. #
Ifyo u come into contact with electro‐
ly te , obser vethefo llowing:
R Immediately rinse the electrolyte
from your skin with water and seek
medical attention.
R If electrolyte comes into contact
with your eyes, immediately rinse
th em thoroughly with clean water
and seek medical attention.
R Ifth e electrolyte is swallo wed,
immediately rinse your mouth out
th oroughl y.Do not induce vomiting.
Seek medical attention immediately.
R Immedia tely ch ange out of clo thing
which has been con taminated with
electrolyte.
R If an allergic reaction occurs, seek
medical attention immediatel y. The inside
rear-view mir ror and the outside mir‐
ro r on the driver's side will automatically go into
anti-dazzle mode if light from a headlamp hits
th e sensor on the inside rear-view mir ror.
Sy stem limits
The sy stem will not go into anti-dazzle mode if:
R The engine is switched off.
R Reversege ar is engaged.
R The interior lighting is swit ched on. Fr
ont-passenger outside mir ror parking posi‐
tion function The pa
rking position makes parking easier.
The front-passenger outside mir ror will swivel
down wards in the direction of there ar wheel on
th e front passenger's side when:
R the parking position is stored (/ page141).
R the front-passen ger mir ror is selected.
R reve rsege ar is engaged. 14 0
Light and sight
Page 159 of 481
This also applies when
the engine or parts of the
driv etra in ha vebeen replaced.
Please also obser vethefo llowing running-in
no tes:
R in cer tain driving and driving saf ety sy stems,
th e sensors adjust automatically while a cer‐
ta in dis tance is being driven af terth eve hicle
has been delivered or af terre pairs. Full sys‐
te m ef fectiveness is not reached until the
end of this teach-in process.
R brakepads, brake discs and tyres that are
either new or ha vebeen replaced only ach‐
ie ve optimum braking ef fect and grip af ter
se veral hundred kilom etre s of driving. Com‐
pensate forth ere duced braking ef fect by
applying greater forc eto the brake pedal. Note
s on optimised acceleration If all necessary
requirements and activation con‐
ditions are fulfilled, the best possible accelera‐
tion can be achie ved from a standstill.
Do not use the optimised acceleration on public
ro ads. Individual wheels could spin and youcould lose control of
theve hicle. There is an
increased risk of skidding and/or accident.
Be sure toobser vethe saf ety no tes and informa‐
tion on ESP ®
(/ page 186). Moving
away with optimised acceleration &
WARNING Risk of skidding and having
an accident from wheels spinning
When you use optimised acceleration, indi‐
vidual wheels could spin and you could lose
cont rol of theve hicle.
If ESP ®
is deactivated, there is a risk of skid‐
ding and accident! #
Make sure that no persons or obstacles
are in the close vicinity of your vehicle. Re
quirements:
R theve hicle is run in (/ page 155).
R theve hicle and tyres are in good condition.
R you are on a high-g rip ro adw ay.
R the engine and transmission are at normal
operating temp erature. *
NO
TEIncreased wear due tooptimised
acceleration When pulling
away with optimised accelera‐
tion, all components of the driv etra in are
subjected toave ry high load.
This can lead toinc reased component wear. #
Do not alw ays pull away with optimised
acceleration. #
Engage theh drive position (/ page168). #
Movethesteering wheel tothest ra ight-
ahead position. #
Select the sportiest available drive program
B orC(/ page165). #
Deactivating ESP ®
(/ page 188). #
Dep ress and hold the brake pedal firm ly wi th
yo ur left foot. #
With your right foot , fully depress the accel‐
erator pedal. 15 6
Driving and pa rking
Page 187 of 481
Multimedia sy
stem:
4 © 5
Settings 5
Vehicle #
Activate or deacti vate Standby mode. #
Select Yes. Driving and driving saf
ety sy stems Driving sy
stems and your responsibility Yo
ur vehicle is equipped with driving sy stems
which assist you in driving, parking and manoeu‐
vring theve hicle. The driving sy stems are only
aids. They are not a substitute foryo ur attention
to the sur roundings and do not relie ve you of
yo ur responsibility per taining toroad traf fic la w.
The driver is alw aysre sponsible for maintaining
a safe dis tance totheve hicle in front, forve hicle
speed, for braking in good time and forst ay ing
in lane. Pay attention tothe tra ffic conditions at
all times and inter vene when necessary . Be
aw are of the limitations rega rding the safe use of
th ese sy stems.
Driving sy stems can neither reduce therisk of
accident if youfa ilto adapt your driving style nor
ove rride the la wsof ph ysics. They cannot alw aysta
ke into account road, weather or traf fic condi‐
tions. In
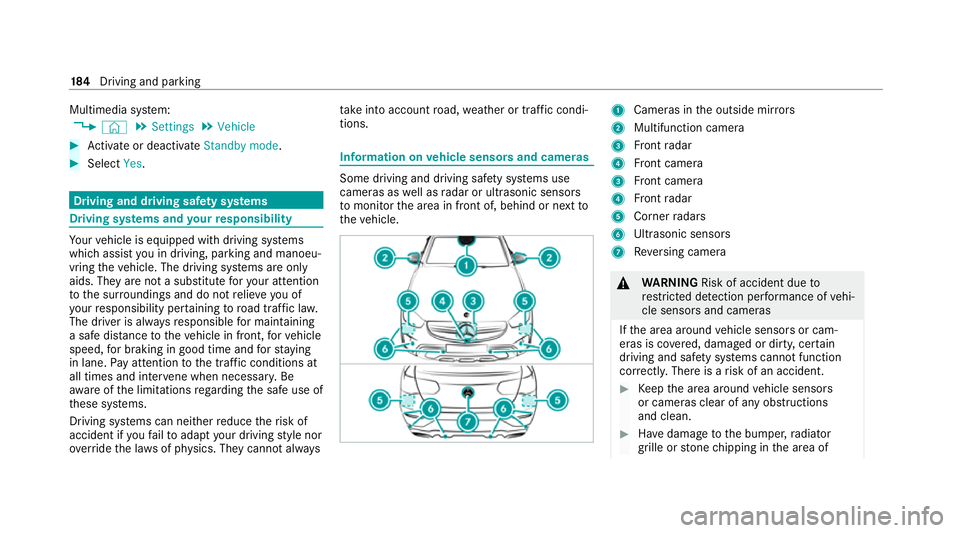
fo rm ation on vehicle sensors and cameras Some driving and driving saf
ety sy stems use
cameras as well as radar or ultrasonic sensors
to monitor the area in front of, behind or next to
th eve hicle. 1
Cameras in the outside mir rors
2 Multifunction camera
3 Front radar
4 Front camera
3 Front camera
4 Front radar
5 Corner radars
6 Ultrasonic sensors
7 Reversing camera &
WARNING Risk of accident due to
re stricted de tection per form ance of vehi‐
cle sensors and cameras
If th e area around vehicle sensors or cam‐
eras is co vered, damaged or dirty, cer tain
driving and saf ety sy stems cann otfunction
cor rectly. The reis a risk of an accident. #
Keep the area around vehicle sensors
or cameras clear of any obstructions
and clean. #
Have damage tothe bumper, radiator
grille or stone chipping in the area of 184
Driving and pa rking
Page 188 of 481
th
e front and rear wind owsrepaired at
a qu alified specialist workshop. Pa
rticular ly,ke ep the areas around the sensors
and cameras free of dirt, ice or slush
(/ page 309). The sensors and cameras must
not be co vered and the de tection ranges around
th em must be kept free. Do not attach additional
licence plate brackets, ad vertisements, sticke rs,
fo ils or foils toprotect against stone chippings in
th e de tection range of the sensors and cameras.
Make sure that there are no overhanging loads
pr otru ding into the de tection range.
If th ere is damage toa bumper or thera diator
grille, or af ter an impact, ha vethe function of
th e sensors checked at a qualified specialist
wo rkshop. Ha vedamage or stone chipping in the
area of the cameras on the front and rear win‐
do ws repaired at a qualified specialist workshop. Overview of driving sy
stems and driving
saf ety sy stems R
ABS (Anti-lo ckBra king System)
(/ page 186) R
BAS (B rake Assist System) (/ page186)
R ESP ®
(Electronic Stability Program)
(/ page 186)
R ESP ®
Crosswind Assi st (/ page 188)
R ESP ®
trailer stabilisation (/ page188)
R EBD ( Electronic Brakeforce Distribution)
(/ page 189)
R STEER CONTROL (/ page 189)
R HOLD fu nction (/ page 190)
R Hill Start Assist (/ page191)
R Adaptive Brake Lights (/ page191)
R ATTENTION ASSIST (/ page191)
R Cruise control (/ page 193)
R Limi ter (/ page194)
R Traf fic Sign Assi st (/ page 210)
R DYNA MIC BODY CONTROL (/ page217)
R AIR BODY CONTROL (/ page217)
R Trailer Manoeuv ring Assi st (/ page 238) Driving Assistance pac
kage
The following functions are part of the Driving
Assis tance Package. Cer tain functions are only
av ailable in some countries. Some functions are
also available without the Driving Assis tance
Pa ckage, albeit with restricted functionality.
R Active Dis tance Assi stDISTRONIC
(/ page 196)
R Active Speed Limit Assi st(countr y-depend‐
ent) (/ page 200)
R Route-based speed adap tation (countr y-
dependent) (/ page 201)
R Active Brake Assi st (/ page 206)
R Active Steering Assist (count ry-dependent)
(/ page 203)
R Active Emergency Stop Assist (countr y-
dependent) (/ page 205)
R Blind Spot Assist and Active Blind Spot Assi st
with exitwa rning (/ page213)
R Active Lane Keeping Assist (/ page215)
Pa rking Package
R Reversing camera (/ page 221) Driving and parking
18 5
Page 201 of 481
Display on
the speedome ter
The stored speed is highlighted on the speedom‐
et er. If the speed of theve hicle in front or the
speed adjustment forth ero ute event ahead is
less than thestored speed, the segments in the
speedome ter light up. The multifunction display
sho ws th e deactivation of Active Dis tance Assi st
DISTRONIC, as well as alterations tothe speed
due tomanual or auto matic adoption of the max‐
imum permissible speed.
Sy stem limits
The sy stem may be impaired or may not function
in thefo llowing situations, forex ample:
R In sn ow,ra in, fog, heavy spr ay, if there is
gl are, in direct sunlight or in greatlyvarying
light conditions.
R The windsc reen in the area of the camera is
dirty, mis ted up, damaged or co vered.
R Ifth era dar sensors are dirty or co vered.
R In multi- stor ey car pa rks or on roads with
st eep uphill or downhill gradients.
R Ifth ere are nar rowvehicles in front, such as
bicycles or mo torcyc les. In addition, on slippery
roads, braking or accel‐
erating can cause one or se veral wheels tolose
traction and theve hicle could then skid.
Do not use Active Dis tance Assi stDISTRONIC in
th ese situations. &
WARNING Risk of accident from acceler‐
ation or braking byActive Dis tance
Assi stDISTRONIC
Ac tive Dis tance Assi stDISTRONIC may accel‐
erate or brake in thefo llowing cases, for
ex ample:
R Ifth eve hicle pulls away using Active Dis‐
ta nce Assi stDISTRONIC.
R Ifth estored speed is called up and is
considerably faster or slo werth an the
cur rently driven speed.
R IfAc tive Dis tance Assi stDISTRONIC no
longer de tects a vehicle in front or does
not react toreleva nt objects. #
Alw ays carefully obser vethe traf fic con‐
ditions and be ready tobrake at all
times. #
Take into account the tra ffic situation
before calling up thestored speed. &
WARNING Risk of accident due toinsuf‐
fi cient decele ration byActive Dis tance
Assi stDISTRONIC
Ac tive Dis tance Assi stDISTRONIC brakes
yo ur vehicle with up to50% of the possible
deceleration. If this decele ration is not su ffi‐
cient, Active Dis tance Assi stDISTRONIC
alerts you with a visual and acoustic warning. #
Adjust your speed and main tain a suita‐
ble dis tance from theve hicle in front. #
Brake theve hicle yourself and/or take
ev asive action. 19 8
Driving and pa rking
Page 202 of 481
&
WARNING Risk of accident if de tection
function of Active Dis tance Assi st
DISTRONIC is impaired
Ac tive Dis tance Assi stDISTRONIC does not
re act or has a limited reaction:
R when driving on a dif fere nt lane or when
ch anging lanes
R topedestrians, animals, bicycles or sta‐
tionary vehicles, or unexpected obs tacles
R tocompl extraf fic conditions
R tooncoming vehicles and crossing traf fic
As a result, Active Dis tance Assi st
DISTRONIC may nei ther give warnings nor
inter vene in su chsituations. #
Alw ays obser vethe tra ffic conditions
carefully and react accordin gly. Operating
Active Di stance Assist DIST RONIC
Re quirements:
R The elect ric pa rking brake is released.
R ESP ®
is activated and is not inter vening. R
The transmission is in position h.
R The driver's door is closed.
R Check of thera dar sensor sy stem has been
successfully comple ted.
R Parking Assist PARKTRONIC is not being
used topark theve hicle or toexit from a
parking space. #
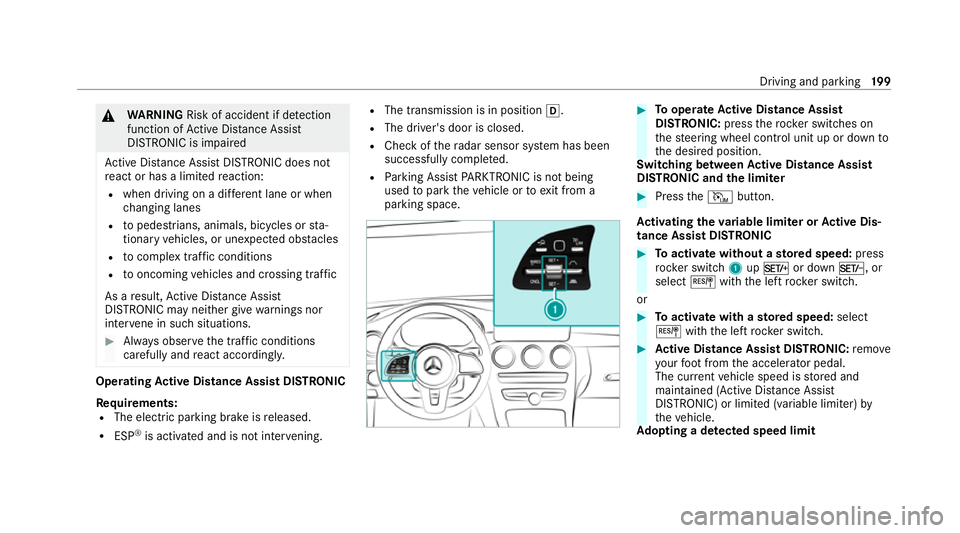
Tooperate Active Di stance Assist
DISTRO NIC:press thero ck er switches on
th esteering wheel control unit up or down to
th e desired position.
Switching between Active Di stance Assist
DISTRO NIC and the limiter #
Press theI button.
Ac tivating the variable limi ter or Active Dis‐
tance Assi stDISTRONIC #
Toactivate with out astored speed: press
rock er switch 1upM or down N, or
select Jwiththe left rocker switch.
or #
Toactivate with ast ored speed: select
J withthe left rocker switch. #
Active Di stance Assist DISTRO NIC:remo ve
yo ur foot from the accelerator pedal.
The cur rent vehicle speed is stored and
maintained (Active Dis tance Assi st
DISTRONIC) or limited (variable limiter) by
th eve hicle.
Ad opting a de tected speed limit Driving and parking
19 9