ground clearance MERCEDES-BENZ GLE 2016 Owners Manual
[x] Cancel search | Manufacturer: MERCEDES-BENZ, Model Year: 2016, Model line: GLE, Model: MERCEDES-BENZ GLE 2016Pages: 450, PDF Size: 12.92 MB
Page 191 of 450
X
Clean the wheels, wheel housings and the
veh icle undersi de wit h a water je t; check for
any foreign objects and damage. X
Check whether twigs or other parts of plan ts
have become tr apped. These increase the risk
of fire and can damage fuel pipes , brake
hoses or the rubber bellows of the axle jo ints
and pro peller shafts.X
After the tr ip, examine wit hout fail the entire
undercarriage, wheels, tires, brakes, body-
work structure, steering, chassis and exhaust
system for damage. X
After driv ing for extended per iods across
san d, mud, gravel, water or in sim ilarly dirt y
conditions, have the brake disc s, wheels,
brake pads/ lin ings and axle jo ints checked
and cleane d.X
If you detect strong vibr ations after off-road
travel, check for foreign objects in the wheels
and driv e train and remove them if necessary.
Foreign objects can dist urb the balance and
cause vibr ations.
Driving on sand Observe the foll owin g rules when driv ing on
san d: R
Select the Off roa d driv e program (veh icle s
wit h Off-Road Engineering package)
( Y
page 237). R
Select the Off roa d driv e program (veh icle s
wit hout Off-Road Engineering package)
( Y
page 237). R
Select a higher veh icle leve l.R
Avoid high engine speeds. R
Use the left-hand steering wheel paddle
shifter to shift to a lower gear appr opriate to
the terrain. R
Drive quic kly to overcome the rolling resist-
ance. Other wise the veh icle 's wheels could
become stuck in loose ground.R
Drive in the tracks of other veh icle s if poss i-
ble. Make sure that: -
the tire ruts are not too deep. -
the sand is suff icie nt ly firm.-
the ground clearance of the veh icle is suf-
ficient. Tire ruts and gravel roads
! Check that the ruts are not too deep and
that your vehicle has sufficient clearance.
Otherwise, your vehicle could be damaged or
bottom out and get stuck.
Observe the foll owin g rules when driving along
ruts in off-road terrain or on roads wit h loose
gravel: R
Select the Off roa d drive program (vehicles
wit h Off-Road Engineering package)
( Y
page 237). R
Select the Off roa d drive program (vehicles
wit hout Off-Road Engineering package)
( Y
page 237). R
Select a higher vehicle leve l.R
Avoid high engine speeds. R
Sh ift to a lower gear using the left-hand steer-
ing wheel paddle shifter. R
Drive slowly. R
Where ruts are too deep, drive wit h the
wheels of one side on the center grassy area,
if possible.
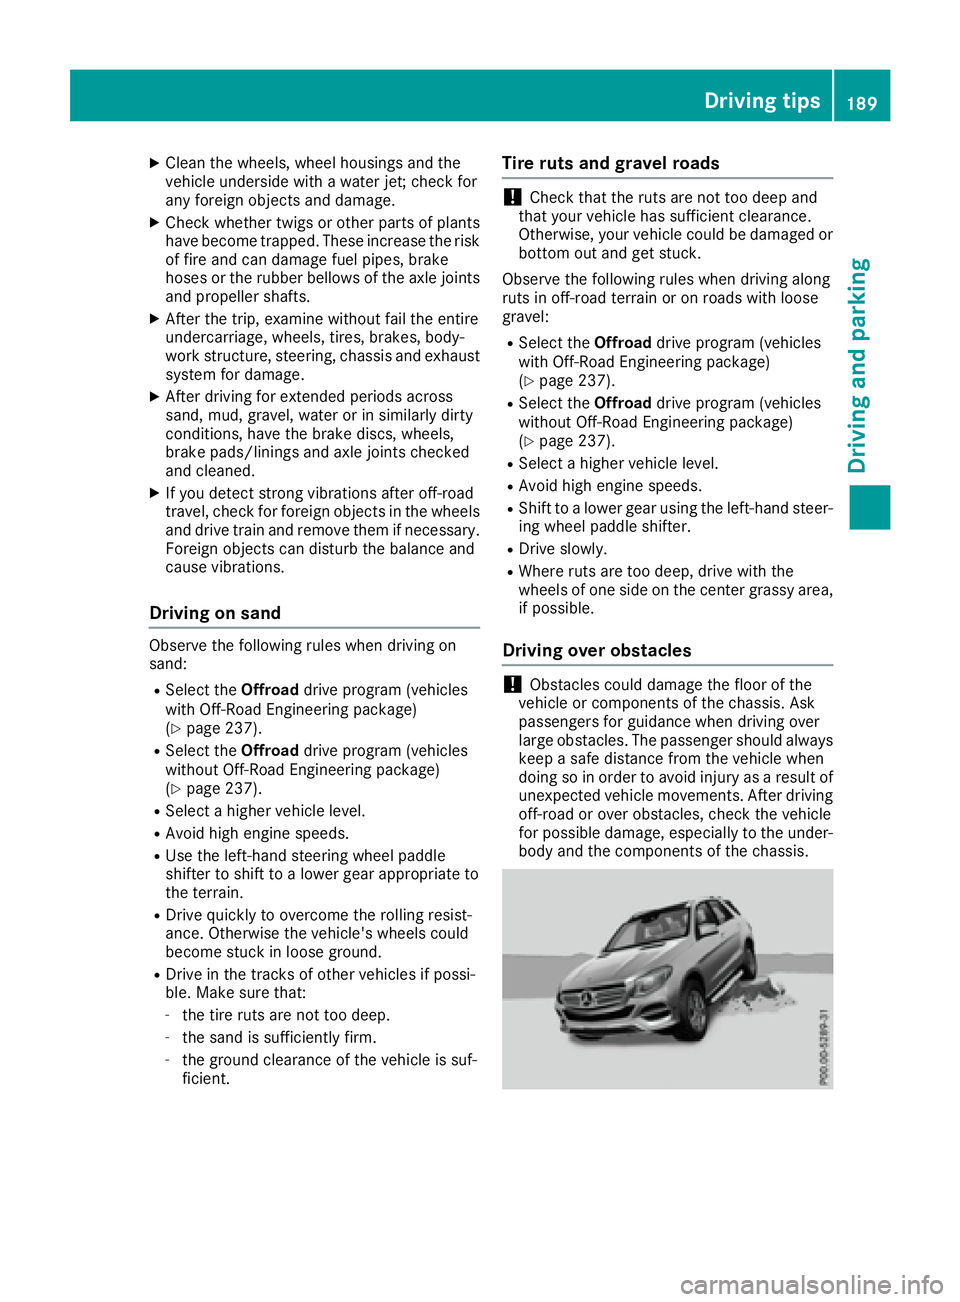
Driving over obstacles
! Obstacles could damage the floor of the
vehicle or components of the chassis. Ask
passengers for guidance when driving over
large obstacles. The passenger should always
keep a safe distance from the vehicle when
doing so in order to avoid injury as a result of
unexpected vehicle movements. After driving
off-road or over obstacles, check the vehicle
for possible damage, especially to the under-
body and the components of the chassis. Driving tips 189
Driving and parking Z
Page 204 of 450
R
Utility vehicles have a significantly higher roll-
over rate than other types of vehicles.
Failure to operate this vehicle safely may
result in an accident, rollover of the vehicle,
and severe or fatal injury. R
In a rollover crash, an unbelted person is sig-
nificantly more likely to die than a person
wearing a seat belt.
You and all vehicle occupants should always
wear your seat belts.
Basic settings The extent to which the vehicle is raised or low-
ered depends on the basic setting selected.
Select: R
the Comfort or Sport drive program for driv-
ing on normal roads R
the Offroad drive program for driving on eas-
ily negotiable off-road terrain R
the Offroad Plus drive program for off-road
driving R
offroad level 1 for driving on easily negotiable
off-road terrain R
offroad level 2 for driving on normal off-road
terrain R
offroad level 3 for freeing the vehicle in par-
ticularly rough terrain at low speeds only
The individual vehicle levels differ from the nor-
mal level as follows: R
–0.6 in (–15 mm) in the Sport drive programR
+/–0 in (+/–0 mm) in the Comfort drive pro-
gram R
+ 1.2 in (+ 30 mm) in the Offroad drive pro-
gram R
+ 2.4 in (+ 60 mm) in the Offroad Plus drive
program R
+ 1.2 in (+ 30 mm) in offroad level 1 R
+ 2.4 in (+ 60 mm) in offroad level 2 R
+ 3.5 in (+ 90 mm) in offroad level 3
Setting the vehicle level
! Make sure that there is enough ground
clearance when the vehicle is being lowered.
It could otherwise hit the ground, damaging
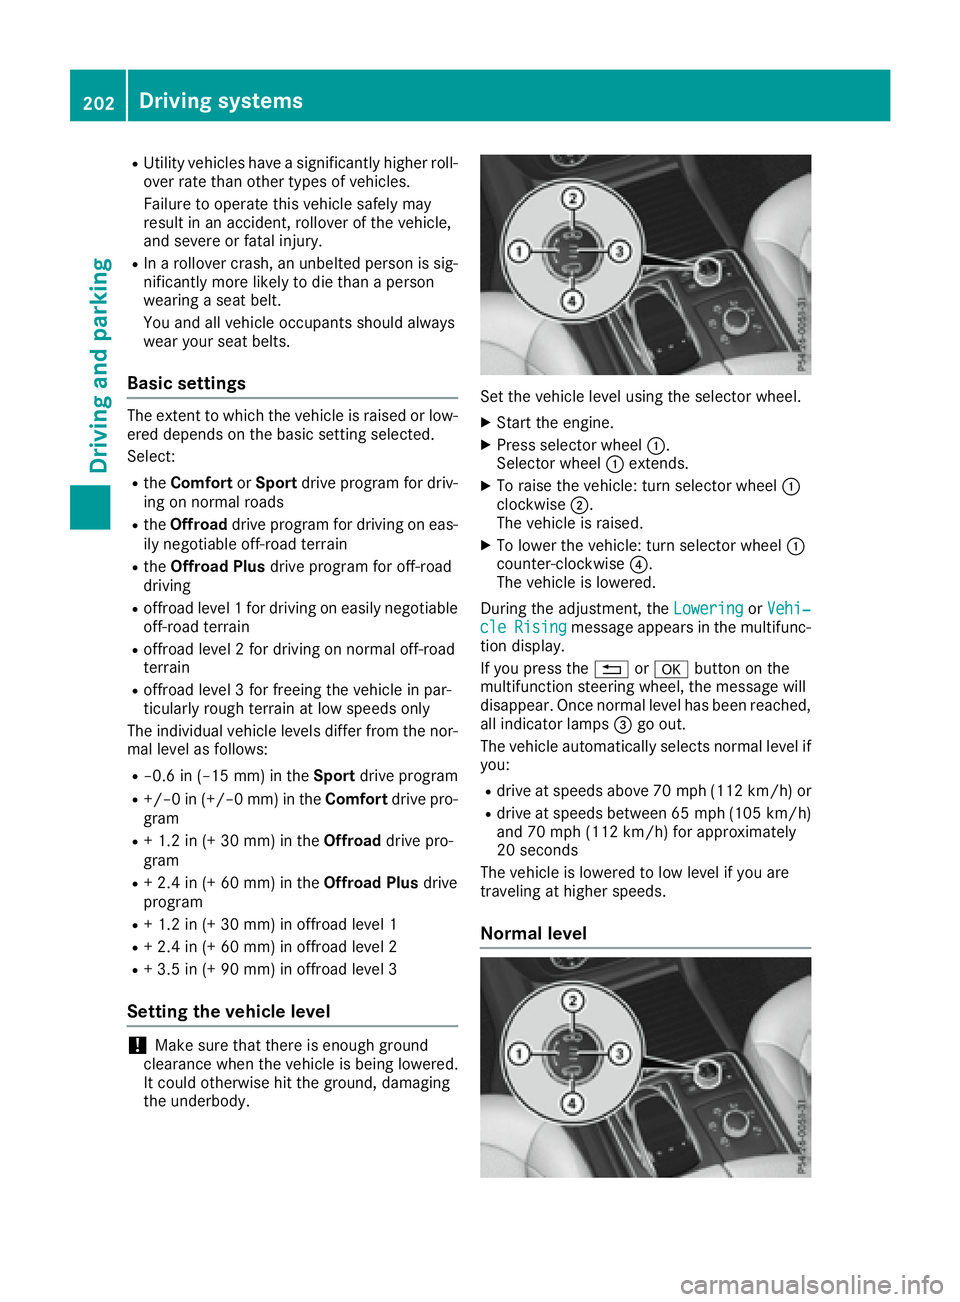
the underbody. Set the vehicle level using the selector wheel. X
Start the engine. X
Press selector wheel �C .
Selector wheel �C extends.X
To raise the vehicle: turn selector wheel �C
clockwise �D .
The vehicle is raised. X
To lower the vehicle: turn selector wheel �C
counter-clockwise �
Page 207 of 450
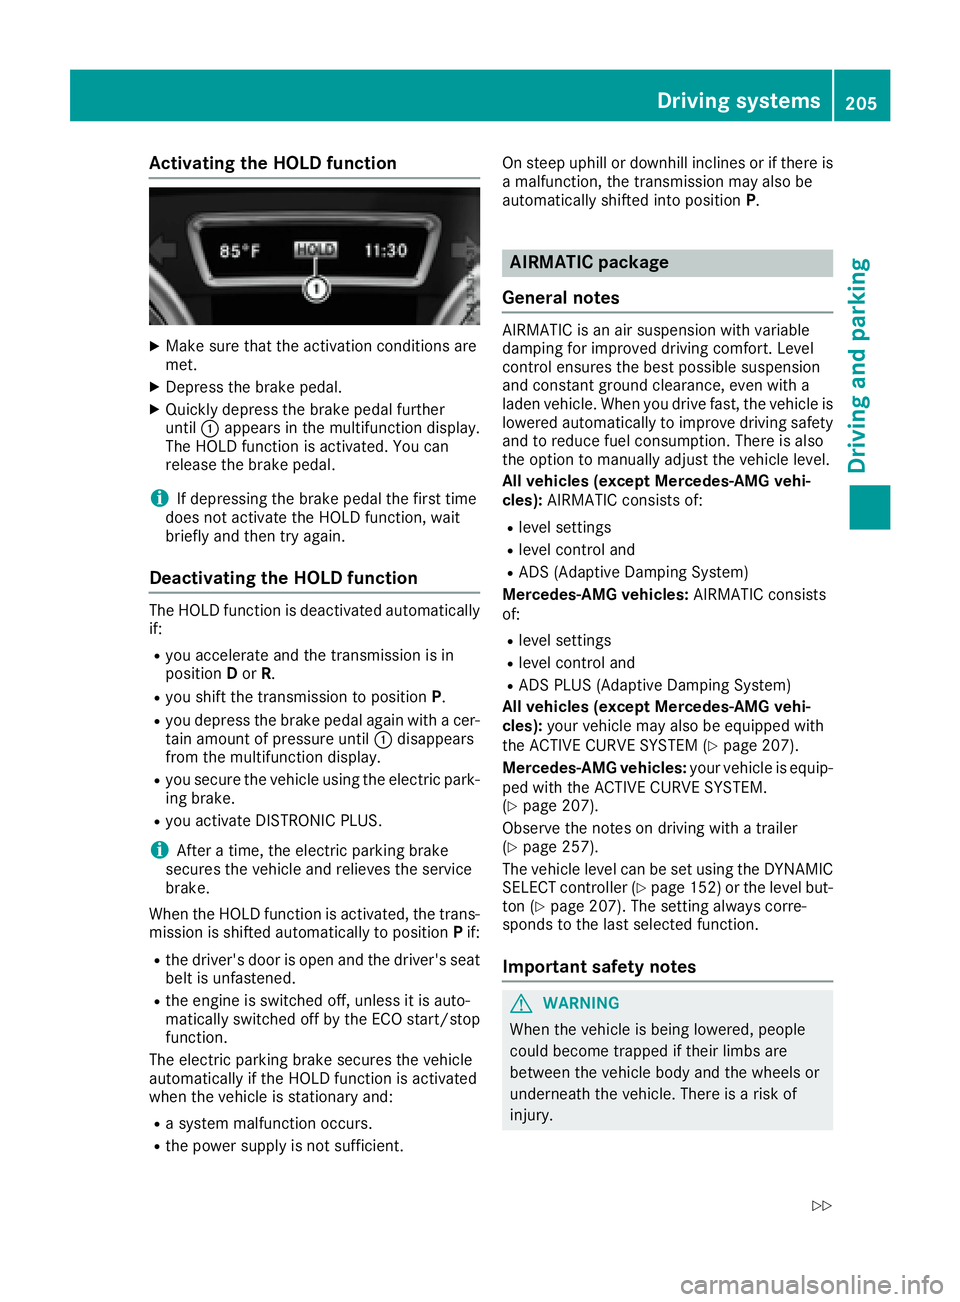
Activating the HOLD function X
Mak e sur e that th e activation condition s are
met .X
Depress th e brak e pedal .X
Quickl y depress th e brak e pedal further
until �C appear s in th e multifunction display.
The HOLD function is activated. You can
release th e brak e pedal .
i If depressing th e brak e pedal th e first time
does no t activat e th e HOLD function , wait
briefl y and then tr y again .
Deactivating the HOLD function The HOLD function is deactivated automatically
if: R
you accelerate and th e transmission is in
position D or R .R
you shif t th e transmission to position P .R
you depress th e brak e pedal again wit h a cer-
tai n amount of pressur e until �C disappear s
from th e multifunction display.R
you secure th e vehicl e usin g th e electric park -
ing brake. R
you activat e DISTRONI C PLUS.
i Afte r a time, th e electric parking brak e
secures th e vehicl e and relieves th e servic e
brake.
When th e HOLD function is activated, th e trans -
mission is shifte d automatically to position P if:R
th e driver's door is open and th e driver's seat
belt is unfastened. R
th e engin e is switched off , unless it is auto -
matically switched off by th e ECO start/sto p
function .
The electric parking brak e secures th e vehicl e
automatically if th e HOLD function is activated
when th e vehicl e is stationary and :R
a system malfunction occurs. R
th e powe r supply is no t sufficient. On steep uphil l or downhill inclines or if there is
a malfunction , th e transmission may also be
automatically shifte d int o position P .
AIRMATIC package
Gene ra l notesAIRMATIC is an air suspension wit h variable
damping for improve d drivin g comfort . Level
control ensures th e best possibl e suspension
and constan t ground clearance , eve n wit h a
laden vehicle. When you drive fast, th e vehicl e is
lowered automatically to improve drivin g safet y
and to reduce fuel consumption . There is also
th e option to manually adjust th e vehicl e level.
All vehicles (excep t Mercedes-AMG vehi-
cles): AIRMATIC consist s of:R
level setting s R
level control and R
AD S (Adaptive Dampin g System)
Mercedes-AMG vehicles: AIRMATIC consist s
of: R
level setting s R
level control and R
AD S PLU S (Adaptive Dampin g System)
All vehicles (excep t Mercedes-AMG vehi-
cles): your vehicl e may also be equipped wit h
th e ACTIVE CURVE SYSTE M ( Y
page 207).
Mercedes-AMG vehicles: your vehicl e is equip -
ped wit h th e ACTIVE CURVE SYSTEM.
( Y
page 207).
Observ e th e note s on drivin g wit h a trailer
( Y
page 257).
The vehicl e level can be set usin g th e DYNAMIC
SELECT controller ( Y
page 152) or th e level but -
to n ( Y
page 207). The setting always corre-
spond s to th e last selected function .
Import ant safety notes
G WARNIN G
When th e vehicl e is bein g lowered, people
could become trapped if their limb s are
between th e vehicl e body and th e wheels or
underneat h th e vehicle. There is a ris k of
injury.Driving systems 205
Driving and parking Z
Page 211 of 450
Setting the normal vehicle level
! Make sure that there is enough ground
clearance when the vehicle is being lowered.
It could otherwise hit the ground, damaging
the underbody.
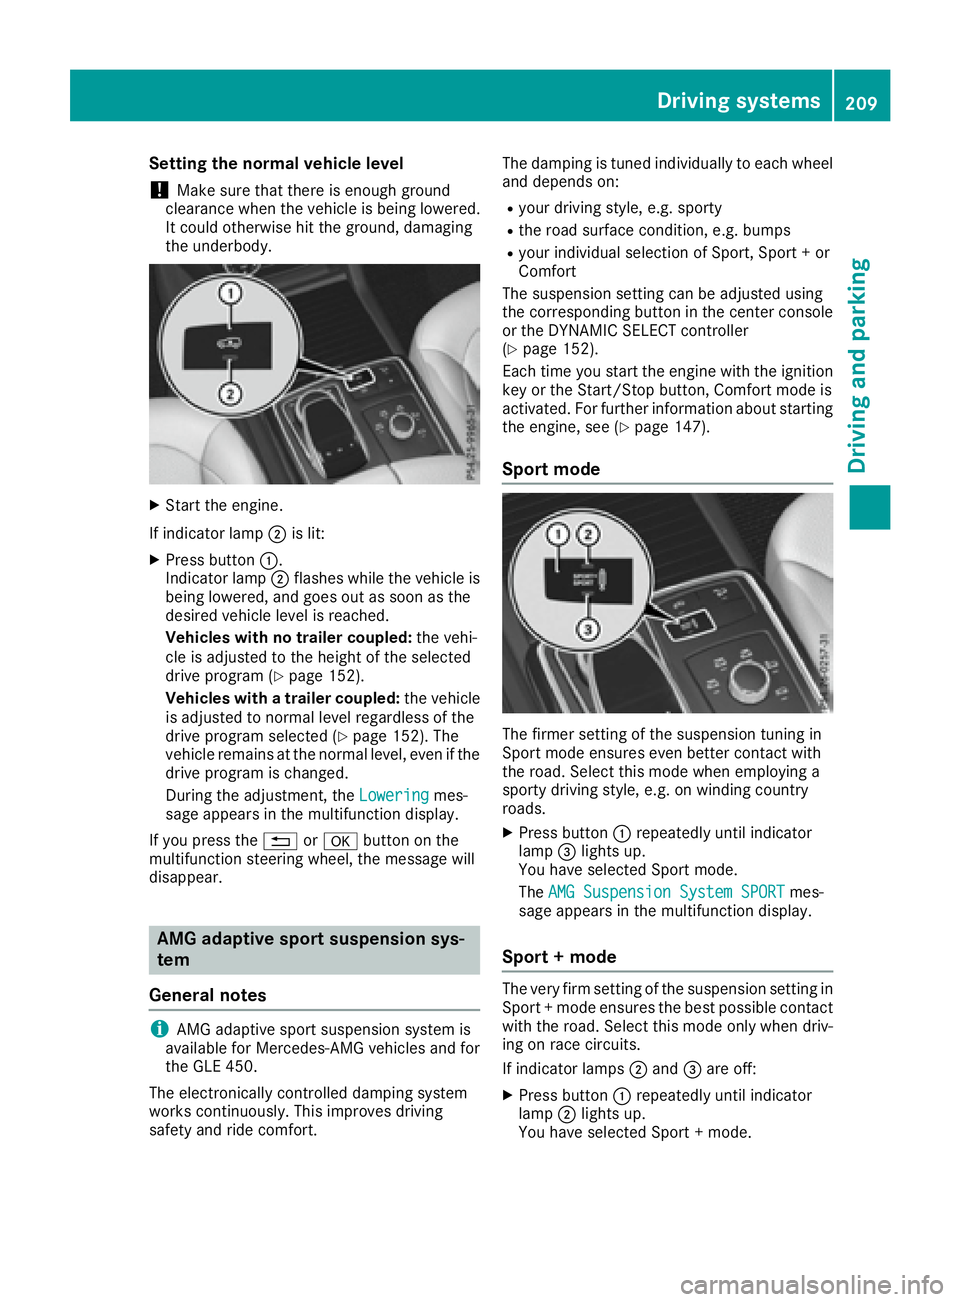
X
Start the engine.
If indicator lamp �D is lit:X
Press button �C .
Indicator lamp �D flashes while the vehicle is
being lowered, and goes out as soon as the
desired vehicle level is reached.
Vehicles with no trailer coupled: the vehi-
cle is adjusted to the height of the selected
drive program ( Y
page 152).
Vehicles with a trailer coupled: the vehicle
is adjusted to normal level regardless of the
drive program selected ( Y
page 152). The
vehicle remains at the normal level, even if the
drive program is changed.
During the adjustment, the Lowering mes-
sage appears in the multifunction display.
If you press the �8 or �v button on the
multifunction steering wheel, the message will
disappear.
AMG adaptive sport suspension sys-
tem
General notes
i AMG adaptive sport suspension system is
available for Mercedes-AMG vehicles and for
the GLE 450.
The electronically controlled damping system
works continuously. This improves driving
safety and ride comfort. The damping is tuned individually to each wheel
and depends on: R
your driving style, e.g. sporty R
the road surface condition, e.g. bumps R
your individual selection of Sport, Sport + or
Comfort
The suspension setting can be adjusted using
the corresponding button in the center console
or the DYNAMIC SELECT controller
( Y
page 152).
Each time you start the engine with the ignition
key or the Start/Stop button, Comfort mode is
activated. For further information about starting
the engine, see ( Y
page 147).
Sport mode
The firmer setting of the suspension tuning in
Sport mode ensures even better contact with
the road. Select this mode when employing a
sporty driving style, e.g. on winding country
roads. X
Press button �C repeatedly until indicator
lamp �
Page 364 of 450
! Before driving into an automatic car wash,
make sure that it is suitable for the dimen-
sions of the vehicle. In particular, make sure
that: R
there is enough ground clearance between
the vehicle underbody and the guide rails of
the automatic car wash. R
the clearance width of the automatic car
wash is sufficient, particularly the width of
the guide rails. R
you enter the automatic car wash straight
and in the center of the guide rails in order
to avoid damaging the tires or wheel rims.
Fold in the exterior mirrors before the vehicle
is washed. The exterior mirrors could other-
wise be damaged.
! If DISTRONIC PLUS or the HOLD function is
activated, the vehicle brakes automatically in
certain situations.
To prevent damage to the vehicle, deactivate
DISTRONIC PLUS and the HOLD function in
the following or other similar situations: R
when towing the vehicle R
in the car wash
! Never clean your vehicle in a Touchless
Automatic Car Wash as these use special
cleaning agents. These cleaning agents can
damage the paintwork or plastic parts.
! Make sure that: R
the side windows and the sliding sunroof
are fully closed. R
the ventilation/heating is switched off (the
OFF button has been pressed). R
the windshield wiper switch is in position 0 .
Otherwise, the vehicle might be damaged.
! In car washes with a towing mechanism,
make sure that the automatic transmission is
in transmission position N , otherwise the
vehicle could be damaged. R
Vehicles with a SmartKey:
Do not remove the SmartKey from the igni-
tion lock. Do not open the driver's door or
front-passenger door when the engine is
switched off. Otherwise, the automatic
transmission selects park position P auto-
matically and locks the wheels. You can
prevent this by shifting the automatic trans-
mission to N beforehand.R
Vehicles with KEYLESS-GO: Do not open the driver's door or front-
passenger door when the engine is
switched off. Otherwise, the automatic
transmission selects park position P auto-
matically and locks the wheels.
Observe the following to make sure that the
automatic transmission stays in position N :X
Make sure the vehicle is stationary and the
ignition is switched off. X
Turn the SmartKey to position 2 in the ignition
lock ( Y
page 145).
Use the SmartKey instead of the Start/ Stop
button on vehicles with KEYLESS-GO. X
Depress and hold the brake pedal. X
Shift the automatic transmission to position
N . X
Release the brake pedal. X
Release the electric parking brake. X
Switch off the ignition and leave the SmartKey
in the ignition lock.
You can wash the vehicle in an automatic car
wash from the very start.
If the vehicle is very dirty, pre-wash it before
cleaning it in an automatic car wash.
After using an automatic car wash, wipe off wax
from the windshield and the wiper blades. This
will prevent smears and reduce wiping noises
caused by residue on the windshield.
Washing by hand In some countries, washing by hand is only
allowed at specially equipped washing bays.
Observe the legal requirements in all countries
concerned. X
Do not use hot water and do not wash the
vehicle in direct sunlight. X
Use a soft sponge to clean. X
Use a mild cleaning agent, such as a car
shampoo approved by Mercedes-Benz. X
Thoroughly hose down the vehicle with a gen-
tle jet of water. X
Do not point the water jet directly towards the
air inlets. X
Use plenty of water and rinse out the sponge
frequently. X
Rinse the vehicle with clean water and dry
thoroughly with a chamois. X
Do not let the cleaning agent dry on the paint-
work.362
Care
Maintenance and care