spare tire MERCEDES-BENZ GLE 2018 Owners Manual
[x] Cancel search | Manufacturer: MERCEDES-BENZ, Model Year: 2018, Model line: GLE, Model: MERCEDES-BENZ GLE 2018Pages: 398, PDF Size: 9.25 MB
Page 5 of 398
Features .............................................. 304
Maintenance and care ...................... 321
Engine compartment ........................... 321
ASSYST PLUS ...................................... 325
Care ..................................................... 326
Breakdown assistance ..................... 334
Where will I find...? .............................. 334
Flat tire ................................................ 335
Battery (vehicle) .................................. 340
Jump-starting ....................................... 342
Towing and tow-starting ...................... 345
Fuses ................................................... 348
Wheels and tires ............................... 351
Important safety notes ........................ 351
Operation ............................................ 351
Winter operation .................................. 353
Tire pressure ....................................... 354
Loading the vehicle .............................. 361
All about wheels and tires ................... 364
Changing a wheel ................................ 371
Wheel and tire combinations ............... 376
Emergency spare wheel ....................... 376
Technical data ................................... 381
Information regarding technical data ... 381
Vehicle electronics .............................. 381
Identification plates ............................. 382
Service products and filling capaci-
ties ...................................................... 383
Vehicle data ......................................... 390
Vehicle data for off-road driving .......... 392
Trailer tow hitch ................................... 394 Contents 3
Page 12 of 398
Active Lane Keeping Assist ............ 210
ADS ............................................... 183
AMG adaptive sport suspension
system ........................................... 186
ATTENTION ASSIST ........................ 202
Blind Spot Assist ............................ 204
Cruise control ................................ 169
Display message ............................ 260
Driving Assistance Plus package ... 208
HOLD function ............................... 182
Lane Keeping Assist ...................... 206
Level control (vehicle with the Off-
Road Engineering package) ........... 179
Rear view camera .......................... 194
Traffic Sign Assist .......................... 203
Driving tips
Automatic transmission ................. 146
Brakes ........................................... 161
Break-in period .............................. 134
Distance Pilot DISTRONIC ............. 177
Downhill gradient ........................... 161
Drinking and driving ....................... 160
Driving in winter ............................. 164
Driving on flooded roads ................ 163
Driving on sand .............................. 167
Driving on wet roads ...................... 163
Driving over obstacles ................... 168
Exhaust check ............................... 160
Fuel ................................................ 159
General .......................................... 159
Hydroplaning ................................. 163
Icy road surfaces ........................... 164
Limited braking efficiency on sal-
ted roads ....................................... 162
Off-road driving .............................. 165
Off-road fording ............................. 164
Snow chains .................................. 353
The first 1000 miles (1500 km) ..... 134
Tire ruts ......................................... 167
Towing a trailer .............................. 220
Traveling uphill ............................... 168
Wet road surface ........................... 162
DSR (Downhill Speed Regulation)
Display message ............................ 262
Function/notes ............................. 213
DVD video
Operating (on-board computer) ..... 234 see also Digital Operator's Man-
ual .................................................. 287
DYNAMIC SELECT controller
Automatic transmission ................. 142
E EASY-ENTRY feature
Activating/deactivating ................. 239
Function/notes ............................. 104
EASY-EXIT feature
Crash-responsive ........................... 105
Function/notes ............................. 104
Switching on/off ........................... 239
EASY-PACK cargo compartment
management system ........................ 302
EBD (electronic brake force distri-
bution)
Display message ............................ 246
Function/notes ................................ 72
ECO display
Function/notes ............................. 160
On-board computer ....................... 232
ECO start/stop function
Automatic engine start .................. 140
Automatic engine switch-off .......... 139
Deactivating/activating ................. 140
General information ....................... 139
Important safety notes .................. 139
Introduction ................................... 139
Electronic Stability Program
see ESP ®
(Electronic Stability Program)
Emergency
Automatic measures after an acci-
dent ................................................. 59
Emergency release
Driver's door .................................... 84
Vehicle ............................................. 84
Emergency spare wheel
General notes ................................ 377
Important safety notes .................. 376
Removing ....................................... 377
Storage location ............................ 377
Stowing .......................................... 377
Emergency Tensioning Devices
Activation ......................................... 56
Emergency unlocking
Tailgate ............................................ 8810
Index
Page 13 of 398
Emissions control
Service and warranty information .... 28
Engine
Check Engine warning lamp .......... .2 83
Display message ............................ 256
ECO start/stop function ................ 139
Engine number ............................... 383
Irregular running ............................ 141
Jump-starting ................................. 342
Starting (important safety notes) ... 136
Starting problems .......................... 141
Starting the engine with the
SmartKey ....................................... 137
Starting via smartphone ................ 137
Starting with KEYLESS-GO ............. 137
Switching off .................................. 157
Tow-starting (vehicle) ..................... 348
Engine electronics
Problem (malfunction) ................... 141
Engine jump starting
see Jump starting (engine)
Engine oil
Adding .......................................... .3 23
Additives ........................................ 388
Checking the oil level ..................... 322
Checking the oil level using the
dipstick .......................................... 323
Display message ............................ 258
Filling capacity ............................... 387
Notes about oil grades ................... 387
Notes on oil level/consumption .... 322
Temperature (on-board computer,
Mercedes-AMG vehicles) .............. .2 40
Engine switch-off
see ECO start/stop function
Entering an address
see also Digital Operator's Man-
ual ................................................. .2 87
ESP ®
(Electronic Stability Pro-
gram)
AMG menu (on-board computer) ... 241
Characteristics ................................. 70
Deactivating/activating ................... 71
Display message ............................ 244
Function/notes ................................ 70
General notes .................................. 70
Important safety information ........... 70
Warning lamp ................................. 279 ETS/4ETS (Electronic Traction Sys-
tem) ...................................................... 70
Exhaust check ................................... 160
Exhaust pipe ( cl
eaning instruc-
tions) ................................................. .3 30
Exterior lighting
see Lights
Exterior mirrors
Adjusting ....................................... 105
Dipping (automatic) ....................... 107
Folding in when locking (on-board
computer) ...................................... 240
Folding in/out (automatically) ....... 106
Folding in/out (electrically) ........... 106
Out of position (troubleshooting) ... 107
Setting ........................................... 106
Storing settings (memory func-
tion) ............................................... 108
Storing the parking position .......... 107
Eyeglasses compartment ................. 297
F Favorites
Overview ........................................ 289
Filler cap
see Refueling
Flat tire
MOExtended tires .......................... 336
Preparing the vehicle ..................... 335
TIREFIT kit ...................................... 337
see Emergency spare wheel
Floormats ........................................... 319
Fog lamps (extended range) ............. 113
Folding the rear bench seat for-
wards/back ....................................... 298
Fording
Off-road ......................................... 164
On flooded roads ........................... 163
Frequencies
Mobile phone ................................. 381
Two-way radio ................................ 381
Fuel
Additives ........................................ 385
Consumption statistics .................. 231
Displaying the current consump-
tion ................................................ 232
Displaying the range ...................... 232 Index 11
Page 26 of 398
Vehicle battery
see Battery (vehicle)
Vehicle data ....................................... 390
Vehicle data (off-road driving)
Approach/departure angle ............ 393
Fording depth ................................ 392
Maximum gradient climbing abil-
ity .................................................. 393
Vehicle dimensions ........................... 390
Vehicle emergency locking ................ 84
Vehicle identification number
see VIN
Vehicle identification plate .............. 382
Vehicle level
AIRMATIC ...................................... 185
Vehicle level (display message) ....... 260
Vehicle tool kit .................................. 335
Video
Operating the DVD ......................... 234
see also Digital Operator's Man-
ual .................................................. 287
VIN ...................................................... 382
Seat ............................................... 383
Type plate ...................................... 382
W
Warning and indicator lamps
ABS ................................................ 277
Brakes ........................................... 276
Coolant .......................................... 283
Distance Pilot DISTRONIC ............. 285
Distance warning ........................... 285
Engine diagnostics ......................... 283
ESP ®
.............................................. 279
ESP ®
OFF ....................................... 280
Fuel tank ........................................ 283
Overview .......................................... 37
Parking brake ................................ 282
PASSENGER AIR BAG ...................... 45
Reserve fuel ................................... 283
Restraint system ............................ 282
Seat belt ........................................ 274
Tire pressure monitor .................... 286
Warranty .............................................. 28
Washer fluid
Display message ............................ 272 Weather display (COMAND)
see also Digital Operator's Man-
ual .................................................. 287
Wheel and tire combinations
Tires ............................................... 376
Wheel bolt tightening torque ........... 375
Wheel chock ...................................... 372
Wheels
Changing a wheel .......................... 371
Checking ........................................ 351
Cleaning ......................................... 329
Emergency spare wheel ................. 376
Important safety notes .................. 351
Information on driving .................... 351
Interchanging/changing ................ 371
Mounting a new wheel ................... 374
Mounting a wheel .......................... 372
Overview ........................................ 351
Removing a wheel .......................... 374
Snow chains .................................. 353
Storing ........................................... 372
Tightening torque ........................... 375
Wheel size/tire size ....................... 376
Window curtain air bag
Display message ............................ 252
Operation ......................................... 51
Windows
see Side windows
Windshield
Defrosting ...................................... 129
Infrared reflective .......................... 320
Windshield washer fluid
see Windshield washer system
Windshield washer system
Adding washer fluid ....................... 325
Important safety notes .................. 389
Windshield wipers
Problem (malfunction) ................... 121
Rear window wiper ........................ 118
Replacing the wiper blades ............ 118
Rep lacing the wiper blades
( MAGIC VISION CONTROL) ............ 119
Switching on/off ........................... 117
Winter driving
Slippery road surfaces ................... 164
Winter operation
Overview ........................................ 353
Radiator cover ............................... 32224
Index
Page 354 of 398
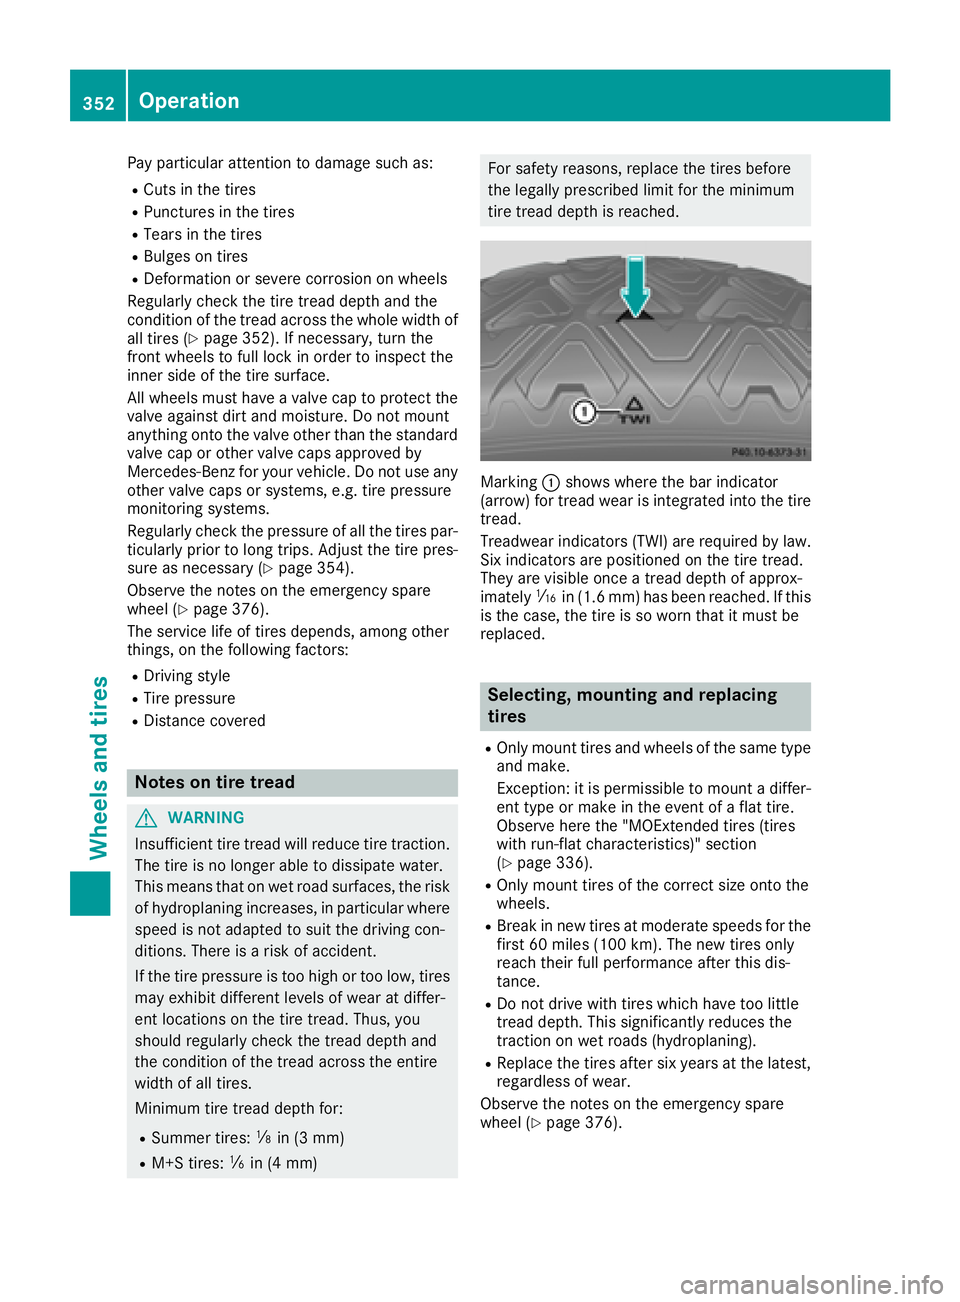
Pay particular attention to damage such as: R
Cuts in the tires R
Punctures in the tires R
Tears in the tires R
Bulges on tires R
Deformation or severe corrosion on wheels
Regularly check the tire tread depth and the
condition of the tread across the whole width of
all tires ( Y
page 352). If necessary, turn the
front wheels to full lock in order to inspect the
inner side of the tire surface.
All wheels must have a valve cap to protect the
valve against dirt and moisture. Do not mount
anything onto the valve other than the standard
valve cap or other valve caps approved by
Mercedes-Benz for your vehicle. Do not use any
other valve caps or systems, e.g. tire pressure
monitoring systems.
Regularly check the pressure of all the tires par-
ticularly prior to long trips. Adjust the tire pres-
sure as necessary ( Y
page 354).
Observe the notes on the emergency spare
wheel ( Y
page 376).
The service life of tires depends, among other
things, on the following factors: R
Driving style R
Tire pressure R
Distance covered
Notes on tire tread
G WARNING
Insufficient tire tread will reduce tire traction.
The tire is no longer able to dissipate water.
This means that on wet road surfaces, the risk
of hydroplaning increases, in particular where
speed is not adapted to suit the driving con-
ditions. There is a risk of accident.
If the tire pressure is too high or too low, tires
may exhibit different levels of wear at differ-
ent locations on the tire tread. Thus, you
should regularly check the tread depth and
the condition of the tread across the entire
width of all tires.
Minimum tire tread depth for: R
Summer tires: �
Page 356 of 398
To avoid hazardous situations: R
never install snow chains to the front
wheels R
always install snow chains in pairs to the
rear wheels.
! Check the snow chains for damage before
mounting them. Damaged or worn snow
chains may snap and damage the following
components: R
wheel R
wheel housing R
wheel suspension
For this reason, you must use only snow
chains that are free of defects. Observe the
manufacturer's mounting instructions.
! You must drive at raised vehicle level (height
1) if snow chains have been installed. The
vehicle may otherwise be damaged.
! Vehicles with ADS (Adaptive Damping
System): do not use the sport mode when
driving with snow chains mounted. The vehi-
cle may otherwise be damaged.
For safety reasons, Mercedes-Benz recom-
mends that you only use snow chains that have
been specially approved for your vehicle by
Mercedes-Benz, or are of a corresponding
standard of quality. For more information,
please contact a qualified specialist workshop.
Install the snow chains on all driven wheels for
maximum tractive power and driving stability. If
you own snow chains for two driven wheels only,
install the snow chains to the wheels on the rear
axle. The vehicle then remains more stable
under braking.
If you intend to mount snow chains, please bear
the following points in mind: R
Snow chains may not be mounted on all
wheel/tire combinations. Permissible
wheel/tire combinations ( Y
page 376).R
Only use snow chains when driving on roads
completely covered by snow. Remove the
snow chains as soon as possible when you
come to a road that is not snow-covered. R
Local regulations may restrict the use of snow
chains. Observe the appropriate regulations if
you wish to mount snow chains. R
Do not exceed the maximum permissible
speed of 30 mph (50 km/h). R
Never use Parking Pilot when snow chains are
installed ( Y
page 190).
You may wish to deactivate ESP ®
( Y
page 71)
when pulling away with snow chains mounted.
You can thereby allow the wheels to spin in a
controlled manner, achieving an increased driv-
ing force (cutting action).
Information about driving with an emergency
spare wheel ( Y
page 376).
Tire pressure
Tire pressure specifications
Important safety notes
G WARNING
Underinflated or overinflated tires pose the
following risks: R
the tires may burst, especially as the load
and vehicle speed increase. R
the tires may wear excessively and/or
unevenly, which may greatly impair tire
traction. R
the driving characteristics, as well as steer-
ing and braking, may be greatly impaired.
There is a risk of an accident.
Follow recommended tire inflation pressures
and check the pressure of all the tires includ-
ing the spare wheel: R
monthly, at least R
if the load changes R
before beginning a long journey R
under different operating conditions, e.g.
off-road driving
If necessary, correct the tire pressure.
Details on tire pressure can be found at the fol-
lowing positions in the vehicle: R
Tire and Loading Information placard on the
B-pillar on the driver's side R
table for tire pressure on the inside of the fuel
filler flap
The tire pressure monitor does not warn you of:354
Tire pressure
Wheels and tires
Page 357 of 398
R
incorrectly set tire pressure R
sudden loss of tire pressure, e.g. from a for-
eign object that has penetrated the tire
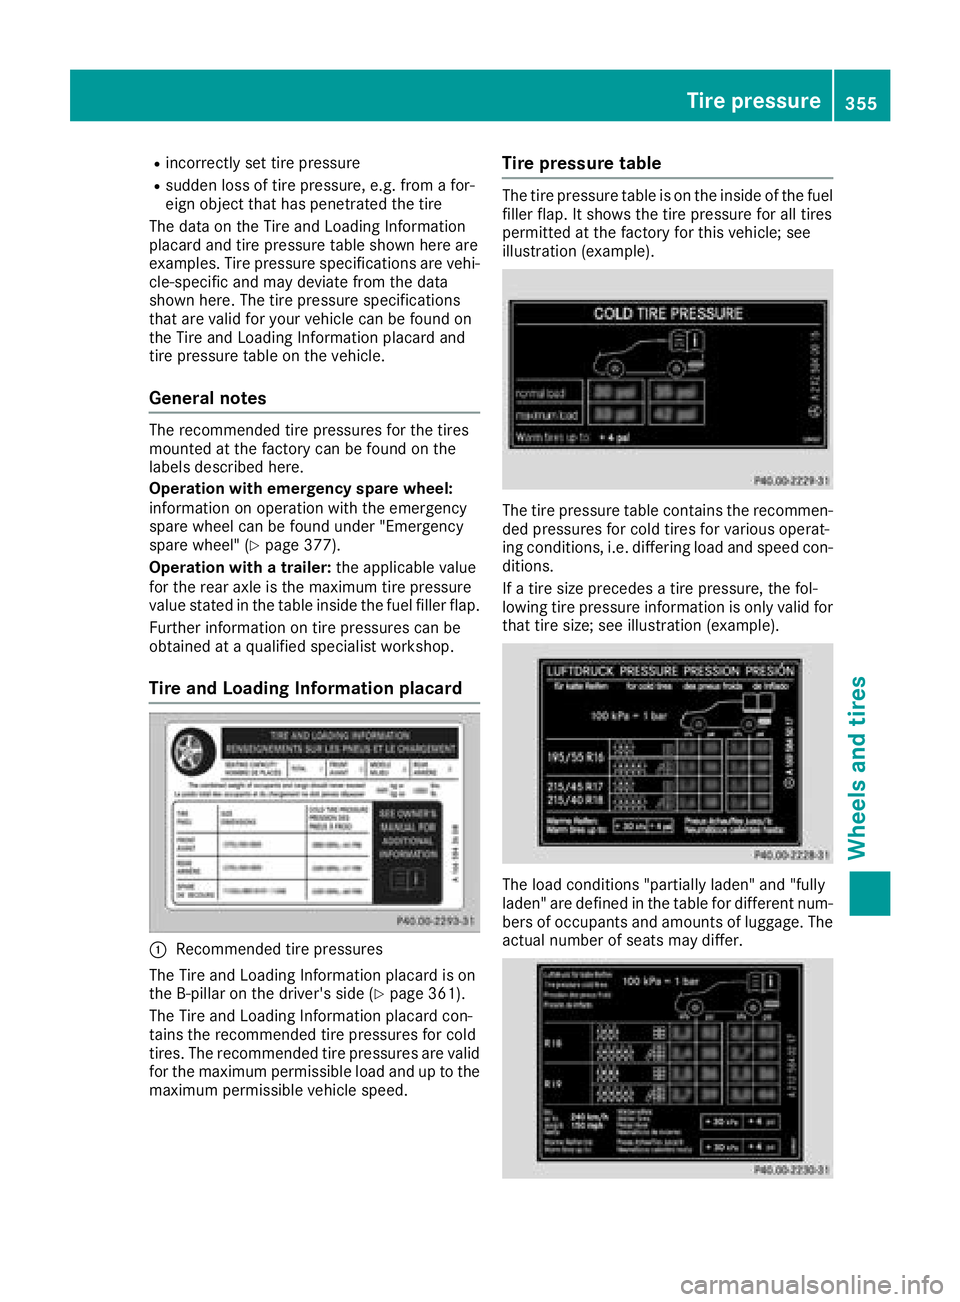
The data on the Tire and Loading Information
placard and tire pressure table shown here are
examples. Tire pressure specifications are vehi-
cle-specific and may deviate from the data
shown here. The tire pressure specifications
that are valid for your vehicle can be found on
the Tire and Loading Information placard and
tire pressure table on the vehicle.
General notes The recommended tire pressures for the tires
mounted at the factory can be found on the
labels described here.
Operation with emergency spare wheel:
information on operation with the emergency
spare wheel can be found under "Emergency
spare wheel" ( Y
page 377).
Operation with a trailer: the applicable value
for the rear axle is the maximum tire pressure
value stated in the table inside the fuel filler flap.
Further information on tire pressures can be
obtained at a qualified specialist workshop.
Tire and Loading Information placard
�C
Recommended tire pressures
The Tire and Loading Information placard is on
the B-pillar on the driver's side ( Y
page 361).
The Tire and Loading Information placard con-
tains the recommended tire pressures for cold
tires. The recommended tire pressures are valid
for the maximum permissible load and up to the
maximum permissible vehicle speed. Tire pressure table The tire pressure table is on the inside of the fuel
filler flap. It shows the tire pressure for all tires
permitted at the factory for this vehicle; see
illustration (example).
The tire pressure table contains the recommen-
ded pressures for cold tires for various operat-
ing conditions, i.e. differing load and speed con-
ditions.
If a tire size precedes a tire pressure, the fol-
lowing tire pressure information is only valid for
that tire size; see illustration (example).
The load conditions "partially laden" and "fully
laden" are defined in the table for different num-
bers of occupants and amounts of luggage. The
actual number of seats may differ. Tire pressure 355
Wheels and tires Z
Page 358 of 398
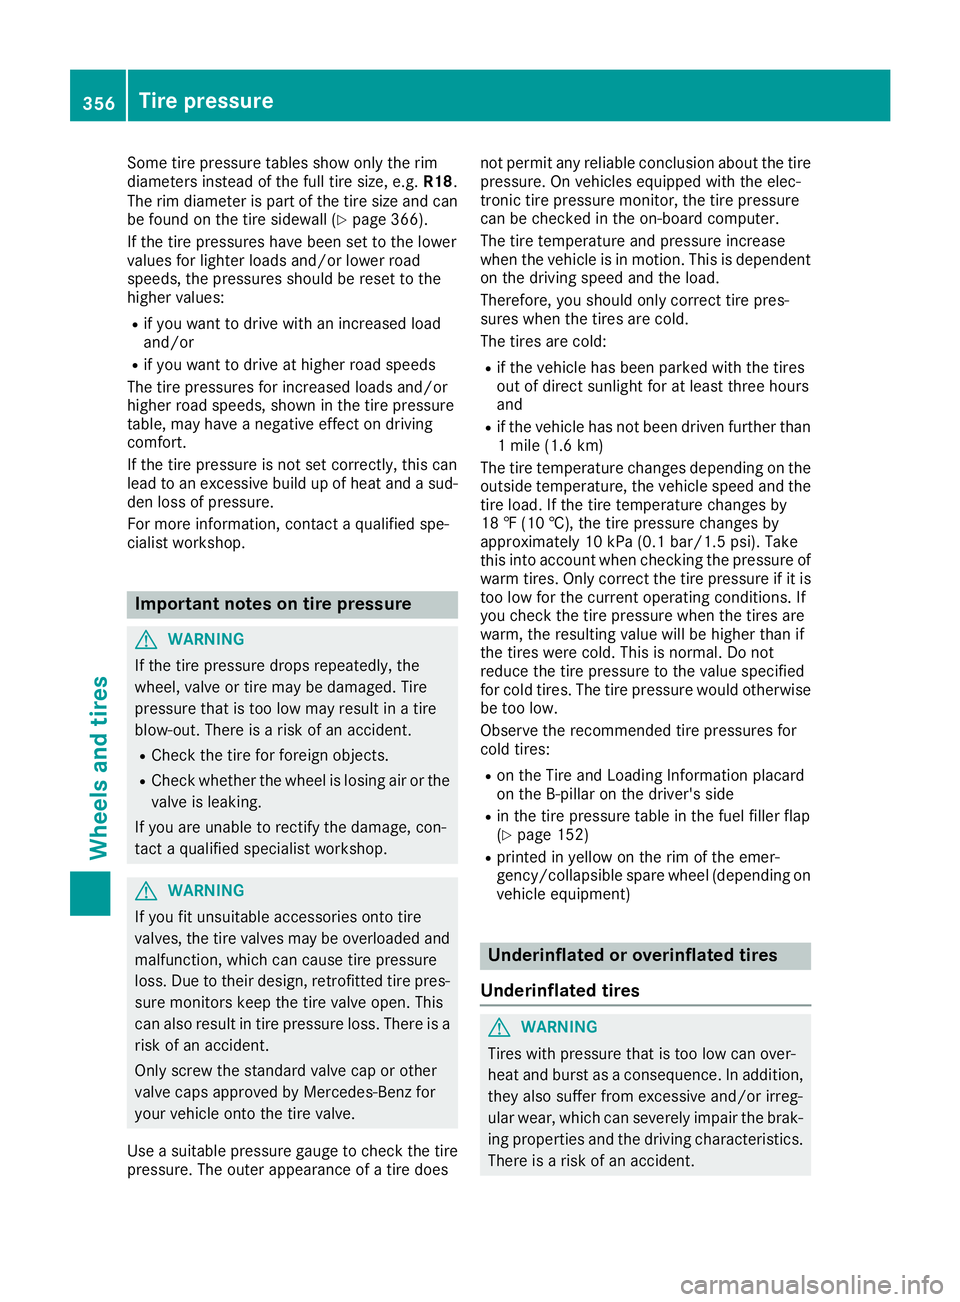
Some tire pressure tables show only the rim
diameters instead of the full tire size, e.g. R18 .
The rim diameter is part of the tire size and can
be found on the tire sidewall ( Y
page 366).
If the tire pressures have been set to the lower
values for lighter loads and/or lower road
speeds, the pressures should be reset to the
higher values: R
if you want to drive with an increased load
and/or R
if you want to drive at higher road speeds
The tire pressures for increased loads and/or
higher road speeds, shown in the tire pressure
table, may have a negative effect on driving
comfort.
If the tire pressure is not set correctly, this can
lead to an excessive build up of heat and a sud-
den loss of pressure.
For more information, contact a qualified spe-
cialist workshop.
Important notes on tire pressure
G WARNING
If the tire pressure drops repeatedly, the
wheel, valve or tire may be damaged. Tire
pressure that is too low may result in a tire
blow-out. There is a risk of an accident. R
Check the tire for foreign objects. R
Check whether the wheel is losing air or the
valve is leaking.
If you are unable to rectify the damage, con-
tact a qualified specialist workshop.
G WARNING
If you fit unsuitable accessories onto tire
valves, the tire valves may be overloaded and
malfunction, which can cause tire pressure
loss. Due to their design, retrofitted tire pres-
sure monitors keep the tire valve open. This
can also result in tire pressure loss. There is a
risk of an accident.
Only screw the standard valve cap or other
valve caps approved by Mercedes-Benz for
your vehicle onto the tire valve.
Use a suitable pressure gauge to check the tire
pressure. The outer appearance of a tire does not permit any reliable conclusion about the tire
pressure. On vehicles equipped with the elec-
tronic tire pressure monitor, the tire pressure
can be checked in the on-board computer.
The tire temperature and pressure increase
when the vehicle is in motion. This is dependent
on the driving speed and the load.
Therefore, you should only correct tire pres-
sures when the tires are cold.
The tires are cold: R
if the vehicle has been parked with the tires
out of direct sunlight for at least three hours
and R
if the vehicle has not been driven further than
1 mile (1.6 km)
The tire temperature changes depending on the
outside temperature, the vehicle speed and the
tire load. If the tire temperature changes by
18 ‡ (10 †), the tire pressure changes by
approximately 10 kPa (0.1 bar/1.5 psi) . Take
thi s into account when checking the pressure of
warm tires. Only correct the tire pressure if it is
too low for the current operating conditions. If
you check the tire pressure when the tires are
warm, the resulting value will be higher than if
the tires were cold. This is normal. Do not
reduce the tire pressure to the value specified
for cold tires. The tire pressure would otherwise
be too low.
Observe the recommended tire pressures for
cold tires: R
on the Tire and Loading Information placard
on the B-pillar on the driver's side R
in the tire pressure table in the fuel filler flap
( Y
page 152) R
printed in yellow on the rim of the emer-
gency/collapsible spare wheel (depending on
vehicle equipment)
Underinflated or overinflated tires
Underinflated tires
G WARNING
Tires with pressure that is too low can over-
heat and burst as a consequence. In addition,
they also suffer from excessive and/or irreg-
ular wear, which can severely impair the brak-
ing properties and the driving characteristics.
There is a risk of an accident.356
Tire pressure
Wheels and tires
Page 359 of 398
Avoid tire pressures that are too low in all the
tires, including the spare wheel.
Underinflated tires may: R
overheat, leading to tire defects R
adversely affect handling R
wear excessively and/or unevenly R
have an adverse effect on fuel consumption
Overinflated tires
G WARNING
Tires with excessively high pressure can burst
because they are damaged more easily by
road debris, potholes etc. In addition, they
also suffer from irregular wear, which can
severely impair the braking properties and the
driving characteristics. There is a risk of an
accident.
Avoid tire pressures that are too high in all the
tires, including the spare wheel.
Overinflated tires may: R
increase the braking distance R
adversely affect handling R
wear excessively and/or unevenly R
have an adverse effect on ride comfort R
be more susceptible to damage
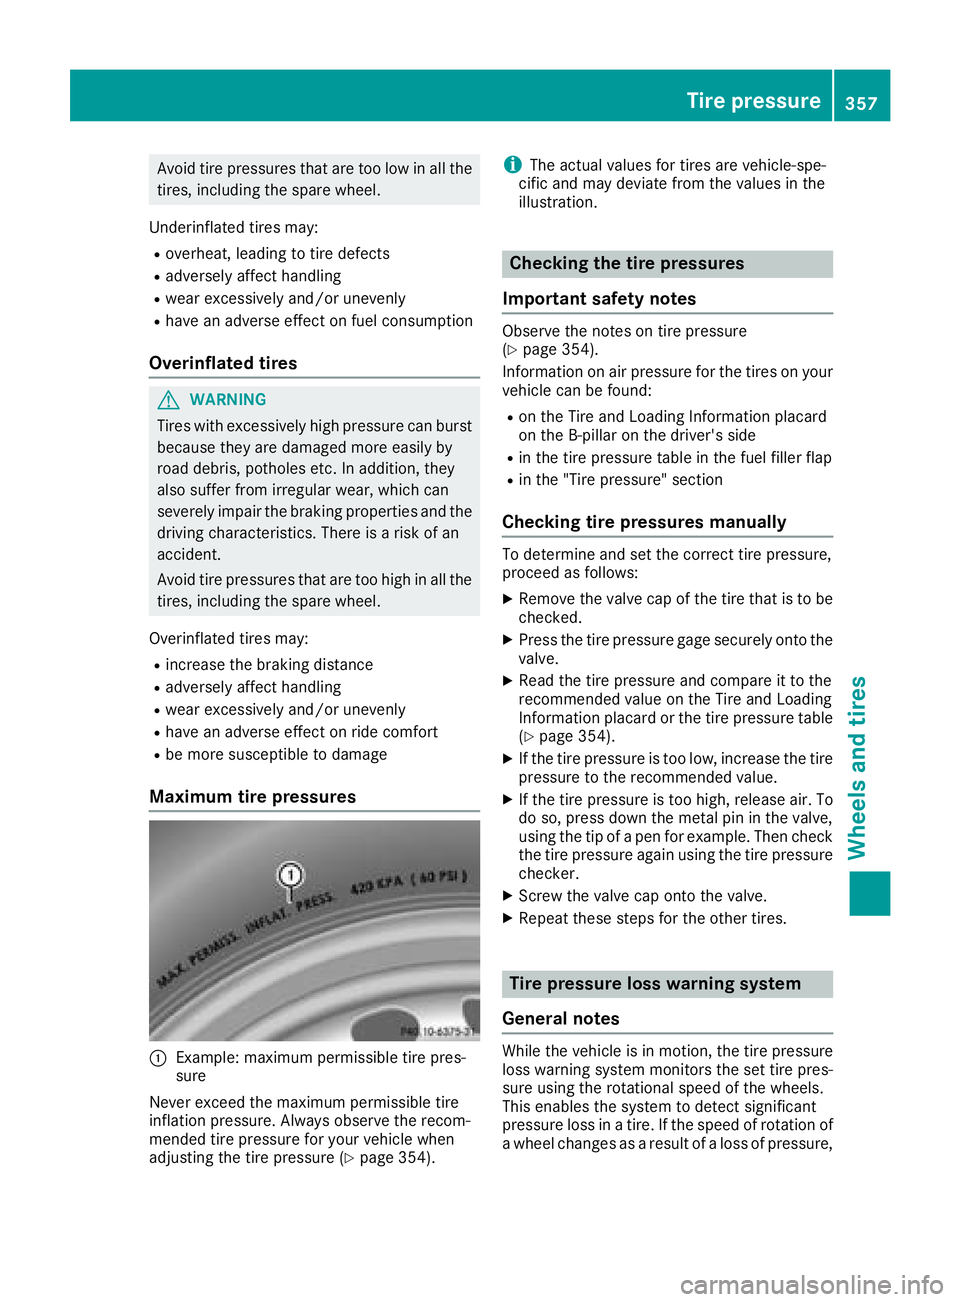
Maximum tire pressures
�C
Example: maximum permissible tire pres-
sure
Never exceed the maximum permissible tire
inflation pressure. Always observe the recom-
mended tire pressure for your vehicle when
adjusting the tire pressure ( Y
page 354). i The actual values for tires are vehicle-spe-
cific and may deviate from the values in the
illustration.
Checking the tire pressures
Important safety notes Observe the notes on tire pressure
( Y
page 354).
Information on air pressure for the tires on your
vehicle can be found: R
on the Tire and Loading Information placard
on the B-pillar on the driver's side R
in the tire pressure table in the fuel filler flap R
in the "Tire pressure" section
Checking tire pressures manually To determine and set the correct tire pressure,
proceed as follows: X
Remove the valve cap of the tire that is to be
checked. X
Press the tire pressure gage securely onto the
valve. X
Read the tire pressure and compare it to the
recommended value on the Tire and Loading
Information placard or the tire pressure table
( Y
page 354). X
If the tire pressure is too low, increase the tire
pressure to the recommended value. X
If the tire pressure is too high, release air. To
do so, press down the metal pin in the valve,
using the tip of a pen for example. Then check
the tire pressure again using the tire pressure
checker. X
Screw the valve cap onto the valve. X
Repeat these steps for the other tires.
Tire pressure loss warning system
General notes
While the vehicle is in motion, the tire pressure
loss warning system monitors the set tire pres-
sure using the rotational speed of the wheels.
This enables the system to detect significant
pressure loss in a tire. If the speed of rotation of
a wheel changes as a result of a loss of pressure, Tire pressure 357
Wheels and tires Z
Page 361 of 398
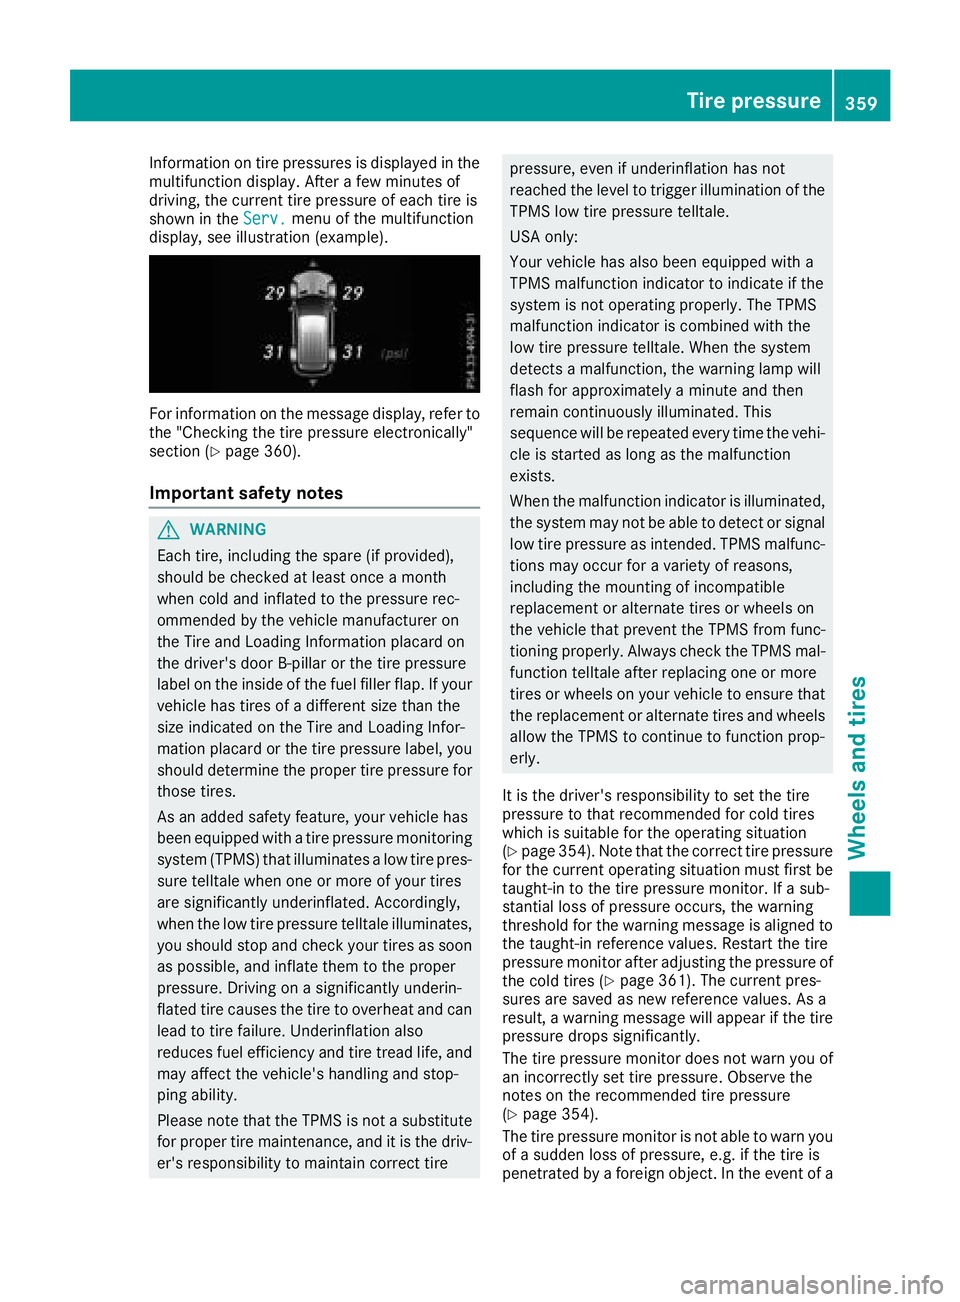
Information on tire pressures is displayed in the
multifunction display. After a few minutes of
driving, the current tire pressure of each tire is
shown in the Serv. menu of the multifunction
display, see illustration (example).
For information on the message display, refer to
the "Checking the tire pressure electronically"
section ( Y
page 360).
Important safety notes
G WARNING
Each tire, including the spare (if provided),
should be checked at least once a month
when cold and inflated to the pressure rec-
ommended by the vehicle manufacturer on
the Tire and Loading Information placard on
the driver's door B-pillar or the tire pressure
label on the inside of the fuel filler flap. If your
vehicle has tires of a different size than the
size indicated on the Tire and Loading Infor-
mation placard or the tire pressure label, you
should determine the proper tire pressure for
those tires.
As an added safety feature, your vehicle has
been equipped with a tire pressure monitoring
system (TPMS) that illuminates a low tire pres-
sure telltale when one or more of your tires
are significantly underinflated. Accordingly,
when the low tire pressure telltale illuminates,
you should stop and check your tires as soon
as possible, and inflate them to the proper
pressure. Driving on a significantly underin-
flated tire causes the tire to overheat and can
lead to tire failure. Underinflation also
reduces fuel efficiency and tire tread life, and
may affect the vehicle's handling and stop-
ping ability.
Please note that the TPMS is not a substitute
for proper tire maintenance, and it is the driv-
er's responsibility to maintain correct tire pressure, even if underinflation has not
reached the level to trigger illumination of the
TPMS low tire pressure telltale.
USA only:
Your vehicle has also been equipped with a
TPMS malfunction indicator to indicate if the
system is not operating properly. The TPMS
malfunction indicator is combined with the
low tire pressure telltale. When the system
detects a malfunction, the warning lamp will
flash for approximately a minute and then
remain continuously illuminated. This
sequence will be repeated every time the vehi-
cle is started as long as the malfunction
exists.
When the malfunction indicator is illuminated,
the system may not be able to detect or signal
low tire pressure as intended. TPMS malfunc-
tions may occur for a variety of reasons,
including the mounting of incompatible
replacement or alternate tires or wheels on
the vehicle that prevent the TPMS from func-
tioning properly. Always check the TPMS mal-
function telltale after replacing one or more
tires or wheels on your vehicle to ensure that
the replacement or alternate tires and wheels
allow the TPMS to continue to function prop-
erly.
It is the driver's responsibility to set the tire
pressure to that recommended for cold tires
which is suitable for the operating situation
( Y
page 354). Note that the correct tire pressure
for the current operating situation must first be
taught-in to the tire pressure monitor. If a sub-
stantial loss of pressure occurs, the warning
threshold for the warning message is aligned to
the taught-in reference values. Restart the tire
pressure monitor after adjusting the pressure of
the cold tires ( Y
page 361). The current pres-
sures are saved as new reference values. As a
result, a warning message will appear if the tire
pressure drops significantly.
The tire pressure monitor does not warn you of
an incorrectly set tire pressure. Observe the
notes on the recommended tire pressure
( Y
page 354).
The tire pressure monitor is not able to warn you
of a sudd en loss of pressure, e.g. if the tire is
penetra ted
by a foreign object. In the event of aTire pressure 359
Wheels and tires Z