turn signal MERCEDES-BENZ GLE-CLASS COUPE 2016 Owners Manual
[x] Cancel search | Manufacturer: MERCEDES-BENZ, Model Year: 2016, Model line: GLE-CLASS COUPE, Model: MERCEDES-BENZ GLE-CLASS COUPE 2016Pages: 382, PDF Size: 8.83 MB
Page 8 of 382
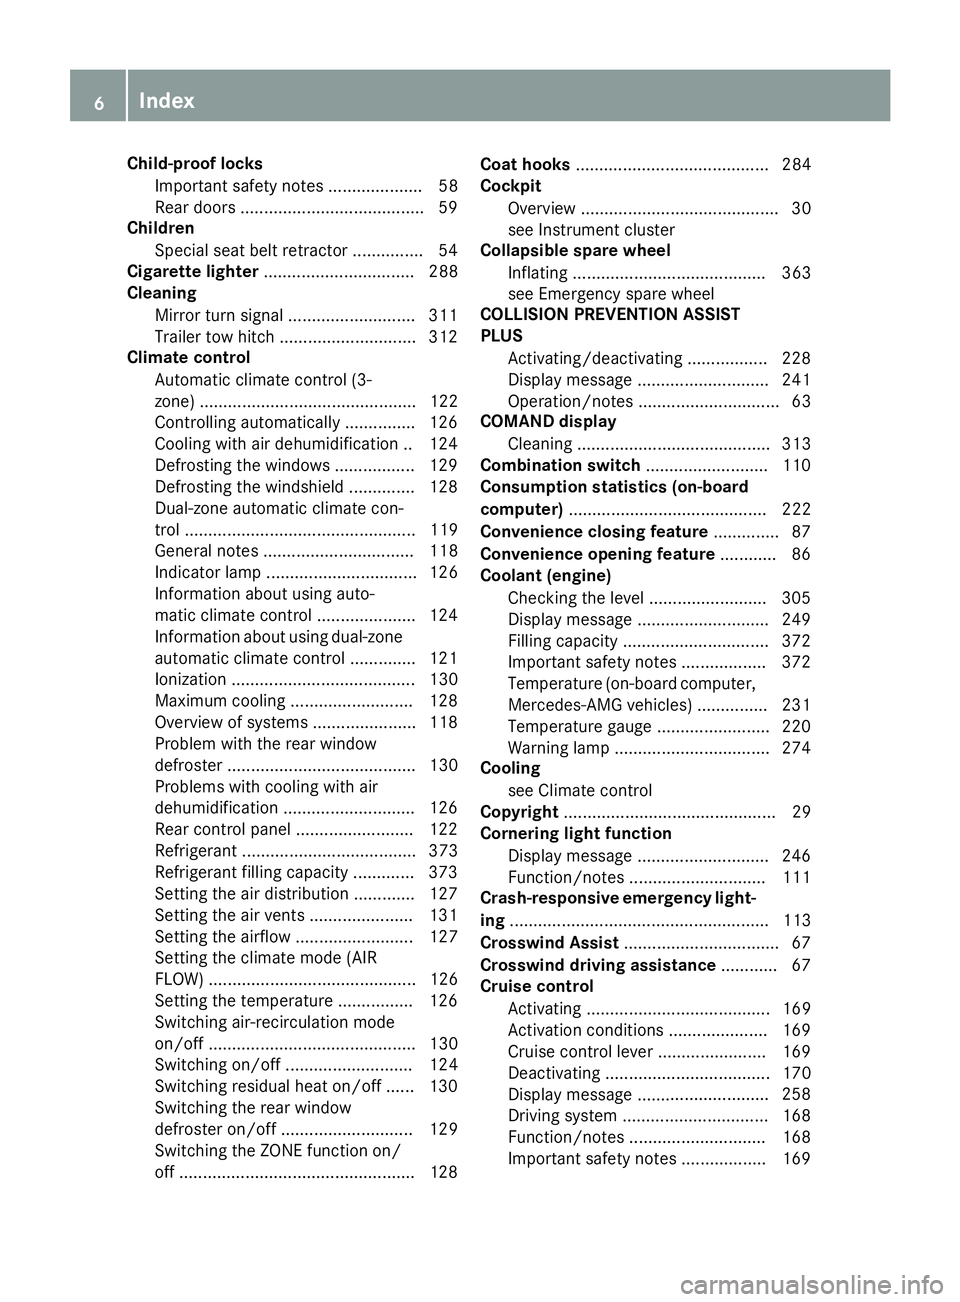
Child-proof locksImportant safety notes .................... 58
Rear doors ...................................... .59
Children
Special seat belt retractor .............. .54
Cigarette lighter ................................ 288
Cleaning
Mirror turn signal .......................... .311
Trailer tow hitch .............................3 12
Climate control
Automatic climate control (3-
zone) .............................................. 122
Controlling automatically ...............1 26
Cooling with air dehumidification .. 124
Defrosting the windows ................. 129
Defrosting the windshield .............. 128
Dual-zone automatic climate con-
trol ................................................. 119
General notes ................................ 118
Indicator lamp ................................ 126
Information about using auto-
matic climate control ..................... 124
Information about using dual-zone
automatic climate control .............. 121
Ionization ....................................... 130
Maximum cooling .......................... 128
Overview of systems ......................1 18
Problem with the rear window
defroster ........................................ 130
Problems with cooling with air
dehumidification ............................ 126
Rear control panel ......................... 122
Refrigerant ..................................... 373
Refrigerant filling capacity ............. 373
Setting the air distribution ............. 127
Setting the air vents ......................1 31
Setting the airflow ......................... 127
Setting the climate mode (AIR
FLOW) ............................................ 126
Setting the temperature ................ 126
Switching air-recirculation mode
on/off ....... ..................................... 130
Sw
itching on/off ........................... 124
Switching residual heat on/off ...... 130
Switching the rear window
defroster on/off ............................ 129
Switching the ZONE function on/
off ..................................................1 28Coat hooks
......................................... 284
Cockpit
Overview .......................................... 30
see Instrument cluster
Collapsible spare wheel
Inflating ......................................... 363
see Emergency spare wheel
COLLISION PREVENTION ASSIST
PLUS
Activating/deactivating ................. 228
Display message ............................ 241
Operation/notes .............................. 63
COMAND display
Cleaning ......................................... 313
Combination switch .......................... 110
Consumption statistics (on-board
computer) .......................................... 222
Convenience closing feature .............. 87
Convenience opening feature ............ 86
Coolant (engine)
Checking the level ......................... 305
Display message ............................ 249
Filling capacity ............................... 372
Important safety notes .................. 372
Temperature (on-board computer,
Mercedes-AMG vehicles) ...............2 31
Temperature gauge ........................ 220
Warning lamp ................................. 274
Cooling
see Climate control
Copyright ............................................. 29
Cornering light function
Display message ............................ 246
Function/notes .............................1 11
Crash-responsive emergency light-
ing ....................................................... 113
Crosswind Assist ................................. 67
Crosswind driving assistance ............ 67
Cruise control
Activating ....................................... 169
Activation conditions ..................... 169
Cruise control lever ....................... 169
Deactivating ................................... 170
Display message ....... ..................... 258
Dri
ving system ............................... 168
Function/notes .............................1 68
Important safety notes .................. 169
6Index
Page 13 of 382
Instrument clusterOverview .......................................... 31
Warning and indicator lamps .......... .32
Instrument cluster lighting .............. 219
Interior lighting
Automatic control .......................... 113
Emergency lighting ........................ 113
Manual control .............................. .113
Overview ........................................ 112
Reading lamp ................................. 112
J
Jack
Storage location ............................ 315
Using ............................................. 353
Jump starting (engine) ......................323
K
Key positions
SmartKey ....................................... 134
Start/Stop button .......................... 134
KEYLESS-GO
Convenience closing feature ............ 87
Deactivation ..................................... 73
Display message ............................ 264
Locking ............................................ 73
Start function ................................... 74
Starting the engine ........................ 136
Unlocking ......................................... 73
Kickdown
Driving tips ....................................1 46
Manual gearshifting ....................... 149
Knee bag .............................................. 44
L
Lamps
see Warning and indicator lamps
Lane Keeping Assist
Activating/deactivating ................. 228
Display message ............................ 255
Function/information .................... 205
see Active Lane Keeping Assist
Lap time (RACETIMER) ...................... 232
LATCH-type (ISOFIX) child seat
anchors ................................................ 56
Level control (display message) ...... 253License plate lamp (display mes-
sage)
................................................... 247
Light function, active
Display message ............................ 248
Light sensor (display message) ....... 248
Lights
Adaptive Highbeam Assist ............. 111
Automatic headlamp mode ............ 108
Cornering light function ................. 111
Hazard warning lamps ................... 110
High beam flasher .......................... 110
High-beam headlamps ................... 110
Light switch ................................... 108
Low-beam headlamps .................... 109
Parking lamps ................................ 109
Rear fog lamp ................................ 109
Standing lamps .............................. 109
Switching the daytime running
lamps on/off (on-board com-
puter) ............................................. 229
Turn signals ................................... 110
see Interior lighting
Loading guidelines ............................ 278
Locking
see Central locking
Locking (doors)
Automatic ........................................ 79
Emergency locking ........................... 80
From inside (central locking but-
ton) .................................................. 79
Locking centrally
see Central locking
Locking verification signal (on-
board computer) ............................... 230
Low-beam headlamps
Display message ............................ 246
Switching on/off ........................... 109
Lumbar support
Adjusting (on the seat) ..................... 98
Luxury head restraints ....................... 97
M
M+S tires............................................ 332
Malfunction message
see Display messages
Matte finish (cleaning instruc-
tions) .................................................. 309
Index11
Page 21 of 382
Uniform Tire Quality Grading
Standards (definition) .................... 349
Wear indicator (definition) .............351
Wheel and tire combination ........... 357
Wheel rim (definition) .................... 349
see Flat tire
Top Tether ............................................ 56
Tow-starting
Emergency engine starting ............ 327
Important safety notes .................. 325
Towing a trailer
Axle load, permissible .................... 376
Cleaning the trailer tow hitch ......... 312
Coupling up a trailer ......................2 15
Decoupling a trailer ....................... 216
Driving tips ....................................2 12
ESP
®(Electronic Stability Pro-
gram) ............................................... 67
Important safety notes .................. 212
Installing the ball coupling ............. 213
Lights display message .................. 246
Mounting dimensions .................... 376
Power supply ................................. 217
Pulling away with a trailer .............. 138
Removing the ball coupling ............ 217
Trailer loads ................................... 376
Towing away
Important safety guidelines ........... 325
Installing the towing eye ................ 326
Notes for 4MATIC vehicles ............ 327
Removing the towing eye ...............3 26
Transporting the vehicle ................ 327
With both axles on the ground ....... 326
Towing eye ......................................... 315
Traffic Sign Assist
Display message ............................ 254
Function/notes .............................2 02
Important safety notes .................. 202
Instrument cluster display ............. 202
Trailer coupling
see Towing a trailer
Trailer loads and drawbar nose-
weights ............................................... 217
Trailer towing
Active Blind Spot Assist ................. 209
Active Lane Keeping Assist ............ 211
Blind Spot Assist ............................ 205 PARKTRONIC ................................. 186
Permi
ssibl
e trailer loads and
drawbar noseweights ..................... 217
Transfer case ..................................... 150
Transmission
see Automatic transmission
Transmission position display ......... 143
Transmission position display
(DIRECT SELECT lever) ......................143
Transporting the vehicle .................. 327
Traveling uphill
Brow of hill ..................................... 168
Driving downhill .............................1 68
Maximum gradient-climbing capa-
bility ............................................... 168
Trim pieces (cleaning instruc-
tions) ..................................................3 13
Trip computer (on-board com-
puter) ..................................................2 22
Trip odometer
Calling up ....................................... 222
Resetting (on-board computer) ...... 223
Trunk
see Tailgate
Trunk load (maximum) ......................373
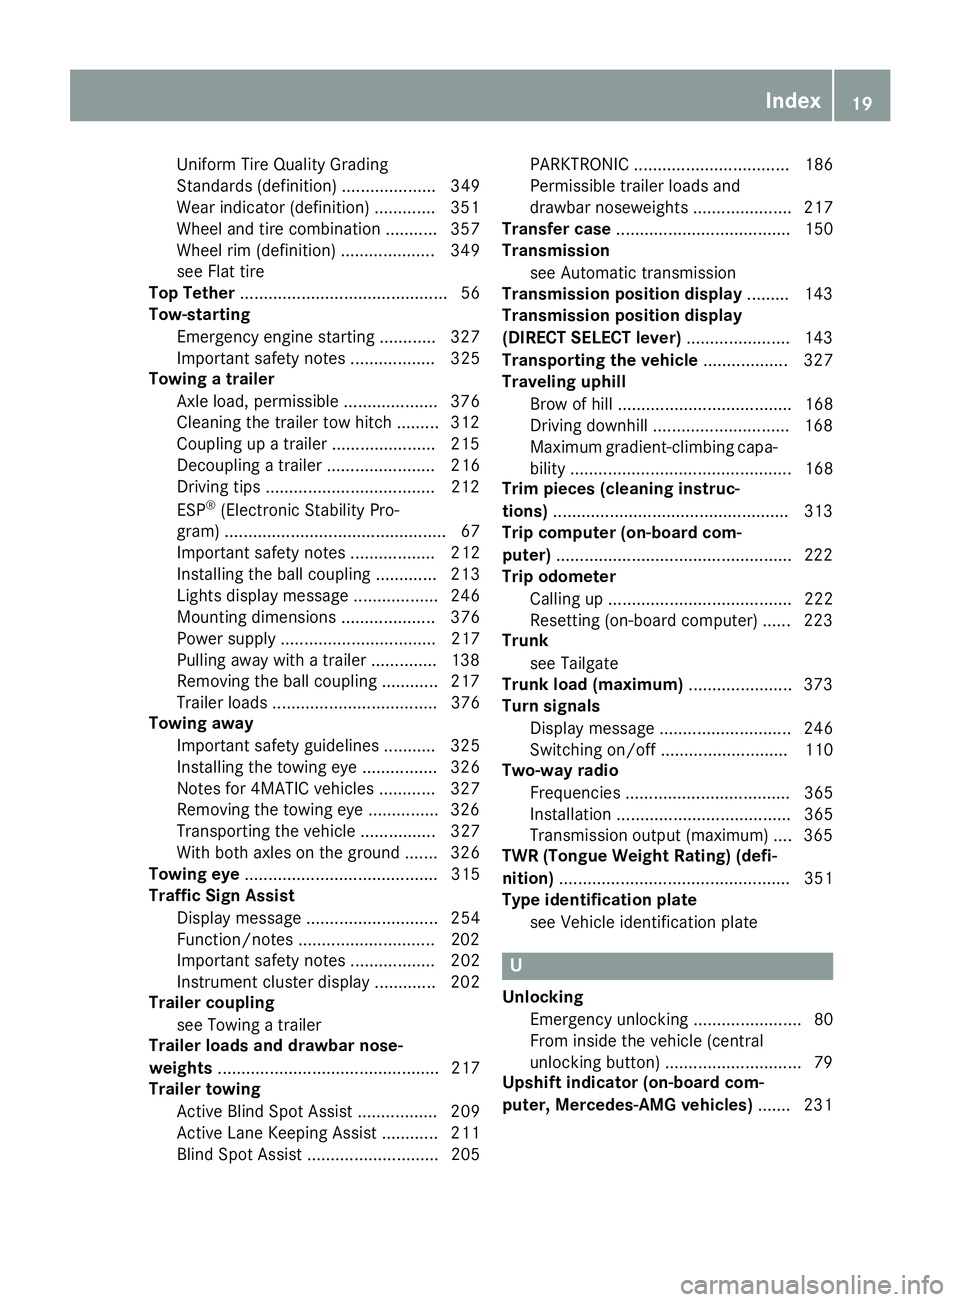
Turn signals
Display message ............................ 246
Switching on/off ........................... 110
Two-way radio
Frequencies ................................... 365
Installation ..................................... 365
Transmission output (maximum) .... 365
TWR (Tongue Weight Rating) (defi-
nition) ................................................. 351
Type identification plate
see Vehicle identification plate
U
UnlockingEmergency unlocking ....................... 80
From inside the vehicle (central
unlocking button) .............................7 9
Upshift indicator (on-board com-
puter, Mercedes-AMG vehicles) .......231
Index19
Page 34 of 382
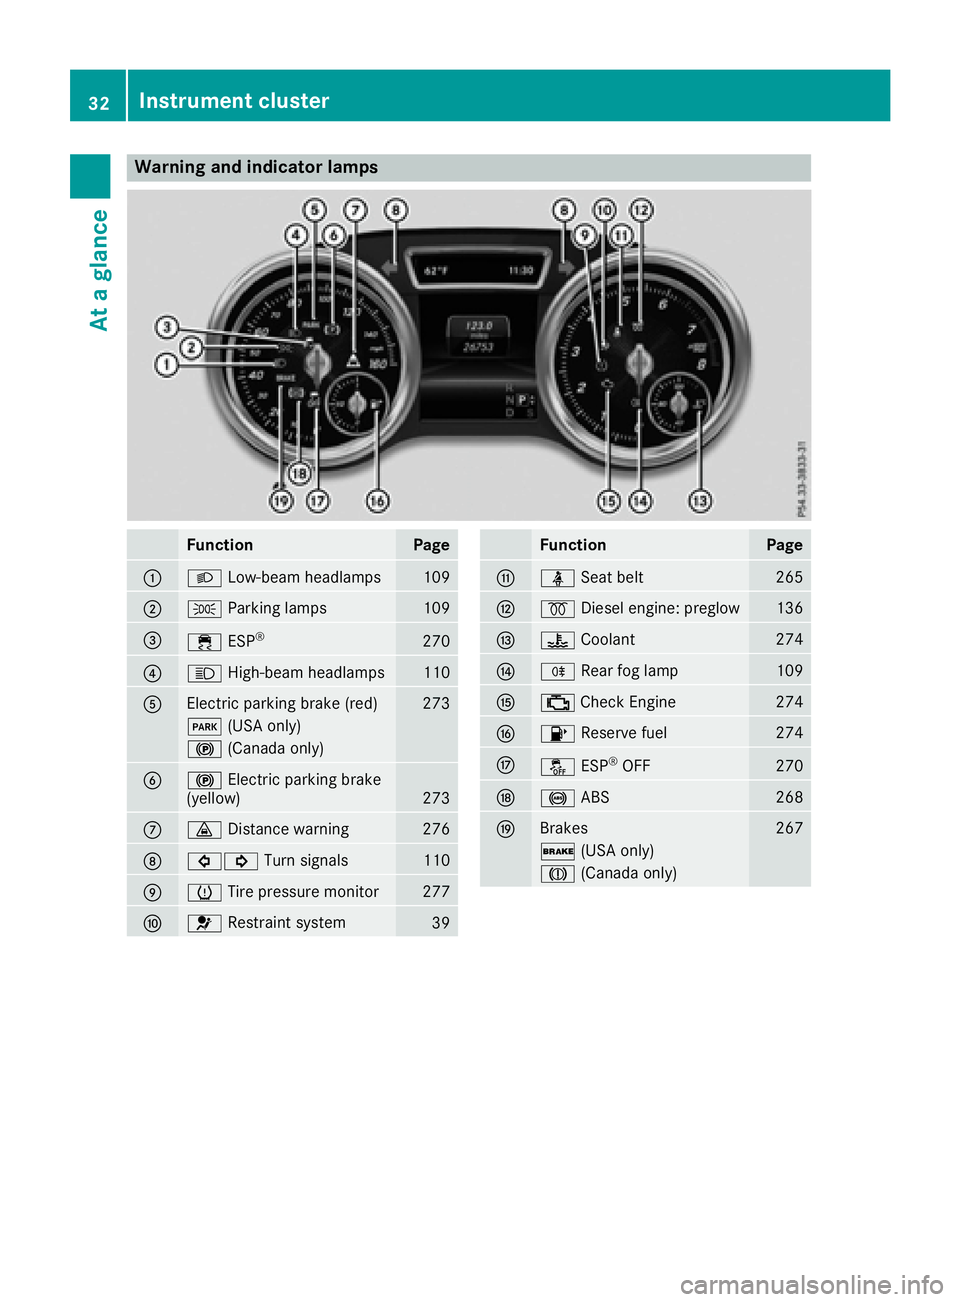
Warning and indicator lamps
FunctionPage
:LLow-beam headlamps109
;TParking lamps109
=÷ESP®270
?KHigh-beam headlamps110
AElectric parking brake (red)273
F(USA only)
!(Canada only)
B!Electric parking brake
(yellow)273
C· Distance warning276
D#! Turn signals110
EhTire pressure monitor277
F6Restraint system39
FunctionPage
GüSeat belt265
H%Diesel engine: preglow136
I?Coolant274
JRRear fog lamp109
K;Check Engine274
L8 Reserve fuel274
MåESP®OFF270
N!ABS268
OBrakes267
$(USA only)
J(Canada only)
32Instrument cluster
At a glance
Page 75 of 382
The SmartKey centrally locks and unlocks the
following components:
Rthe doors
Rthe tailgate
Rthe fuel filler flap
The turn signals flash once when unlocking and
three times when locking.
You can also set an audible signal to confirm
that the vehicle has been locked. The audible
signal can be activated and deactivated using
the on-board computer (
Ypage 230).
You will receive visual and acoustic locking con-
firmation if all components were able to be
locked.
If activated in COMAND or Audio 20, the locator
lighting also lights up in the dark (see separate
operating instructions).
XTo open the tailgate automatically from
outside the vehicle: press and hold theF
button until the tailgate opens.
Vehicles with KEYLESS-GO or KEYLESS-GO start function and EASY-PACK tailgate:
XTo close the tailgate automatically from
outside the vehicle: if the SmartKey is loca-
ted in the immediate vicinity of the vehicle,
press the Fbutton on the SmartKey.
When the tailgate closes you can then release
the button.
KEYLESS-GO
General notes
Bear in mind that the engine can be started by
any of the vehicle occupants if there is a KEY-
LESS-GO key in the vehicle (
Ypage 136).
Locking/unlocking centrally
You can start, lock or unlock the vehicle using
KEYLESS-GO. To do this, you only need carry the
SmartKey with you. You can combine the func-
tions of KEYLESS-GO with those of a conven-
tional SmartKey. Unlock the vehicle by using
KEYLESS-GO, for instance, and lock it using the
& button on the SmartKey.
The driver's door and the door at which the han-
dle is used, must both be closed. The SmartKey
must be outside the vehicle. When locking or
unlocking with KEYLESS-GO, the distance between the SmartKey and the corresponding
door handle must not be greater than 3 ft (1 m).
KEYLESS-GO checks whether a valid SmartKey
is in the vehicle by periodically establishing a
radio connection between the vehicle and the
SmartKey. This happens:
Rwhen starting the engine
Rwhile driving
Rwhen the external door handles are touched
Rduring convenience closing
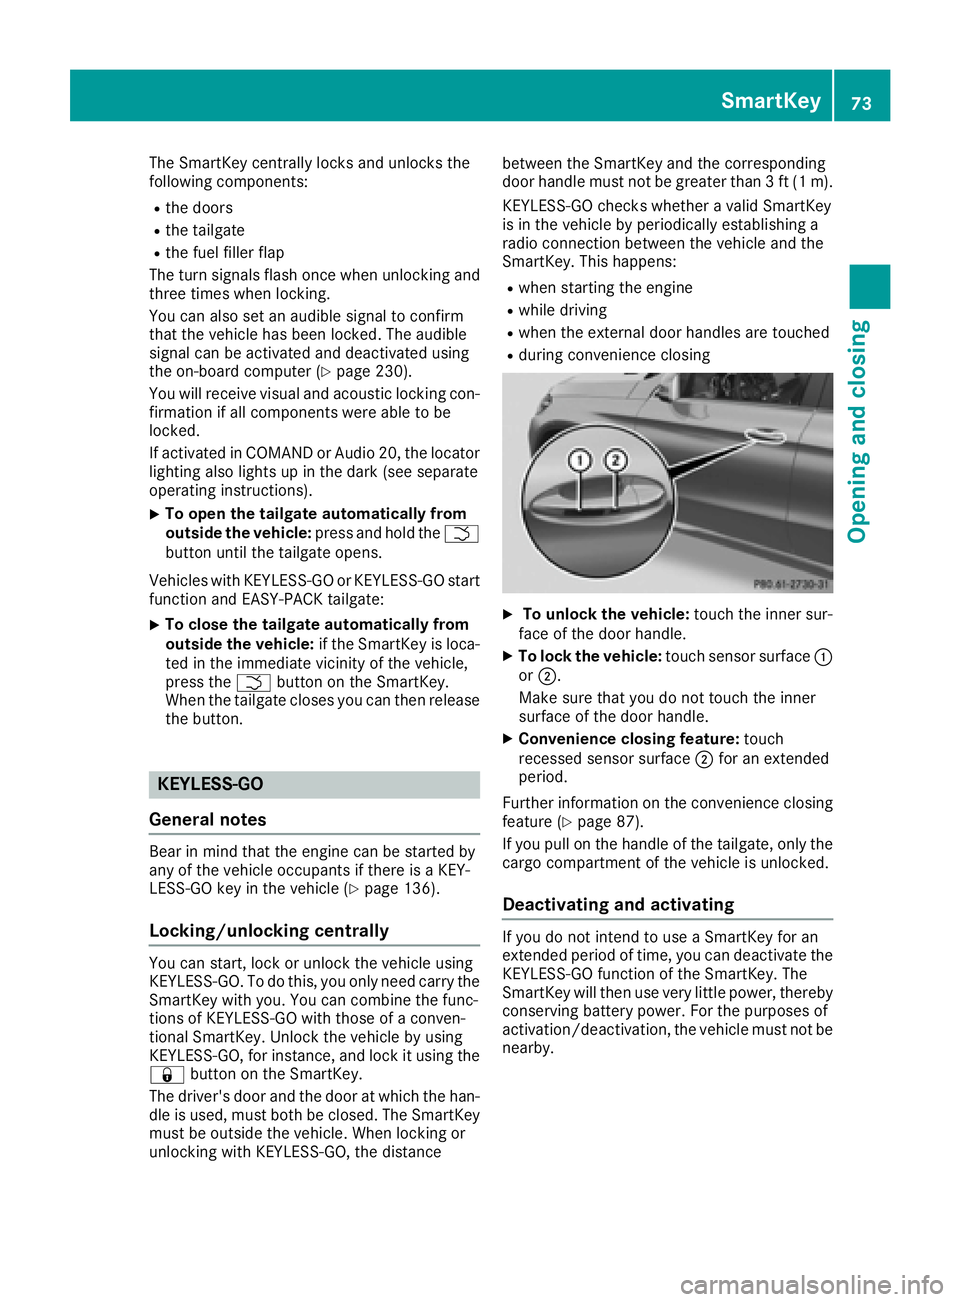
XTo unlock the vehicle:
touch the inner sur-
face of the door handle.
XTo lock the vehicle: touch sensor surface :
or ;.
Make sure that you do not touch the inner
surface of the door handle.
XConvenience closing feature: touch
recessed sensor surface ;for an extended
period.
Further information on the convenience closing
feature (
Ypage 87).
If you pull on the handle of the tailgate, only the cargo compartment of the vehicle is unlocked.
Deactivating and activating
If you do not intend to use a SmartKey for an
extended period of time, you can deactivate the
KEYLESS-GO function of the SmartKey. The
SmartKey will then use very little power, thereby
conserving battery power. For the purposes of
activation/deactivation, the vehicle must not be
nearby.
SmartKey73
Opening and closing
Z
Page 112 of 382
Combination switch
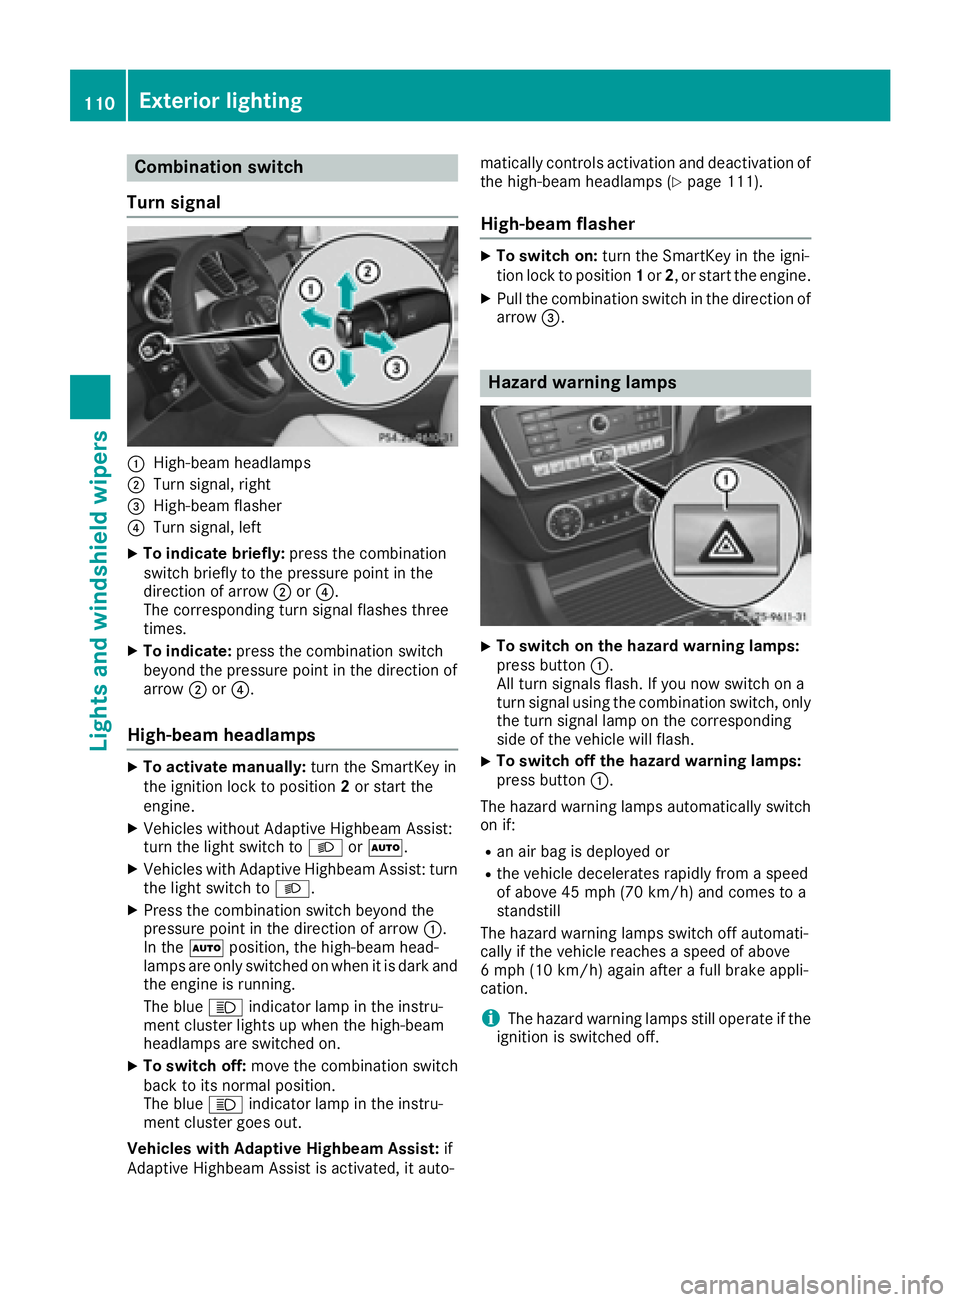
Turn signal
:High-beam headlamps
;Turn signal, right
=High-beam flasher
?Turn signal, left
XTo indicate briefly: press the combination
switch briefly to the pressure point in the
direction of arrow ;or?.
The corresponding turn signal flashes three
times.
XTo indicate: press the combination switch
beyond the pressure point in the direction of
arrow ;or?.
High-beam headlamps
XTo activate manually: turn the SmartKey in
the ignition lock to position 2or start the
engine.
XVehicles without Adaptive Highbeam Assist:
turn the light switch to LorÃ.
XVehicles with Adaptive Highbeam Assist: turn
the light switch to L.
XPress the combination switch beyond the
pressure point in the direction of arrow :.
In the Ãposition, the high-beam head-
lamps are only switched on when it is dark and the engine is running.
The blue Kindicator lamp in the instru-
ment cluster lights up when the high-beam
headlamps are switched on.
XTo switch off: move the combination switch
back to its normal position.
The blue Kindicator lamp in the instru-
ment cluster goes out.
Vehicles with Adaptive Highbeam Assist: if
Adaptive Highbeam Assist is activated, it auto- matically controls activation and deactivation of
the high-beam headlamps (
Ypage 111).
High-beam flasher
XTo switch on: turn the SmartKey in the igni-
tion lock to position 1or 2, or start the engine.
XPull the combination switch in the direction of
arrow =.
Hazard warning lamps
XTo switch on the hazard warning lamps:
press button :.
All turn signals flash. If you now switch on a
turn signal using the combination switch, only
the turn signal lamp on the corresponding
side of the vehicle will flash.
XTo switch off the hazard warning lamps:
press button :.
The hazard warning lamps automatically switch
on if:
Ran air bag is deployed or
Rthe vehicle decelerates rapidly from a speed
of above 45 mph (70 km/h) and comes to a
standstill
The hazard warning lamps switch off automati-
cally if the vehicle reaches a speed of above
6 mph (10 km/h) again after a full brake appli-
cation.
iThe hazard warning lamps still operate if the
ignition is switched off.
110Exterior lighting
Lights and windshield wipers
Page 113 of 382
Cornering light function
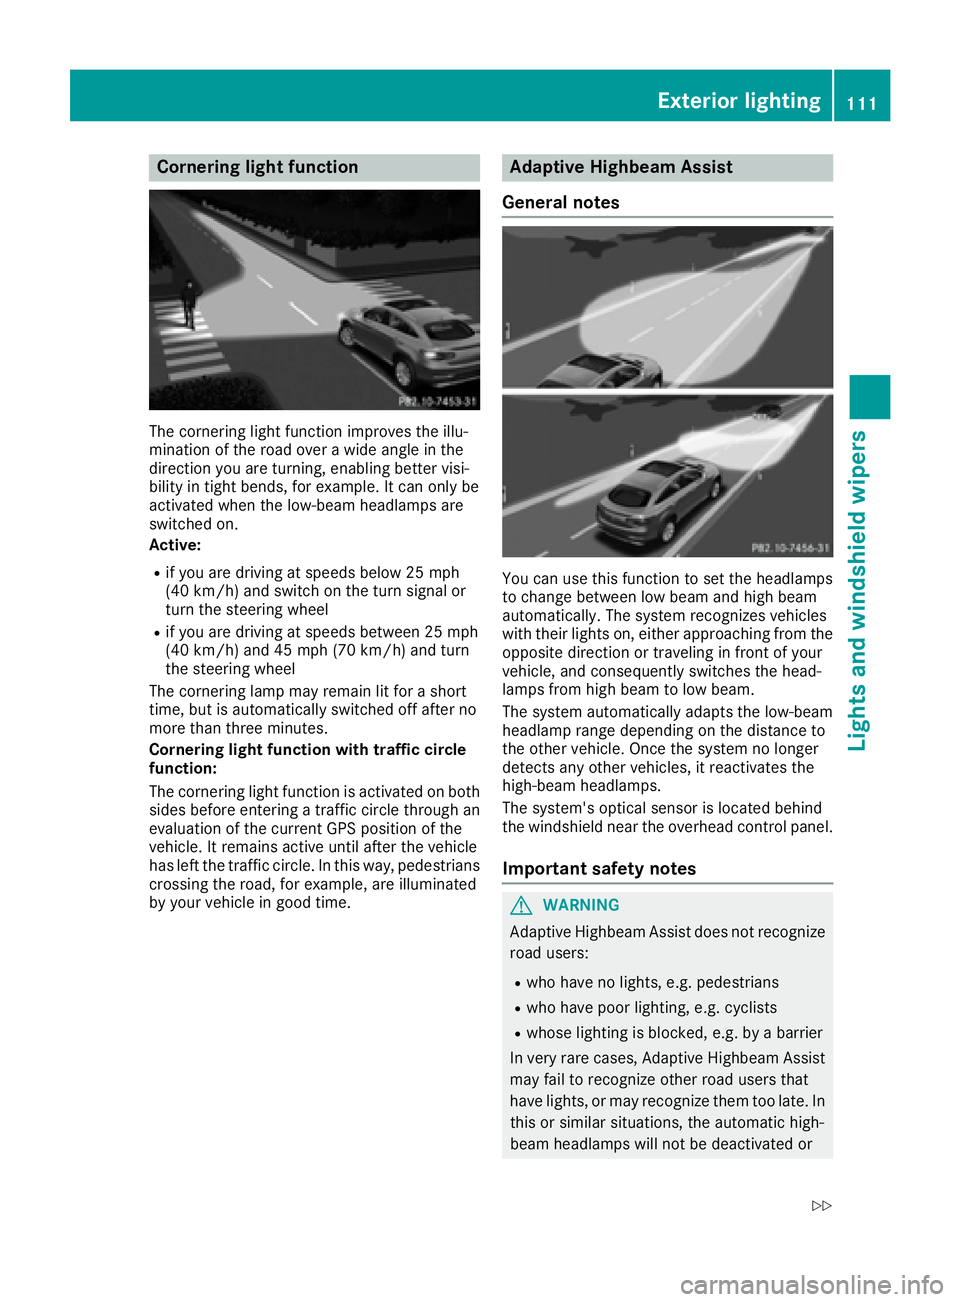
The cornering light function improves the illu-
mination of the road over a wide angle in the
direction you are turning, enabling better visi-
bility in tight bends, for example. It can only be
activated when the low-beam headlamps are
switched on.
Active:
Rif you are driving at speeds below 25 mph
(40 km/h) and switch on the turn signal or
turn the steering wheel
Rif you are driving at speeds between 25 mph
(40 km/h) and 45 mph (70 km/h) and turn
the steering wheel
The cornering lamp may remain lit for a short
time, but is automatically switched off after no
more than three minutes.
Cornering light function with traffic circle
function:
The cornering light function is activated on both
sides before entering a traffic circle through an
evaluation of the current GPS position of the
vehicle. It remains active until after the vehicle
has left the traffic circle. In this way, pedestrians
crossing the road, for example, are illuminated
by your vehicle in good time.
Adaptive Highbeam Assist
General notes
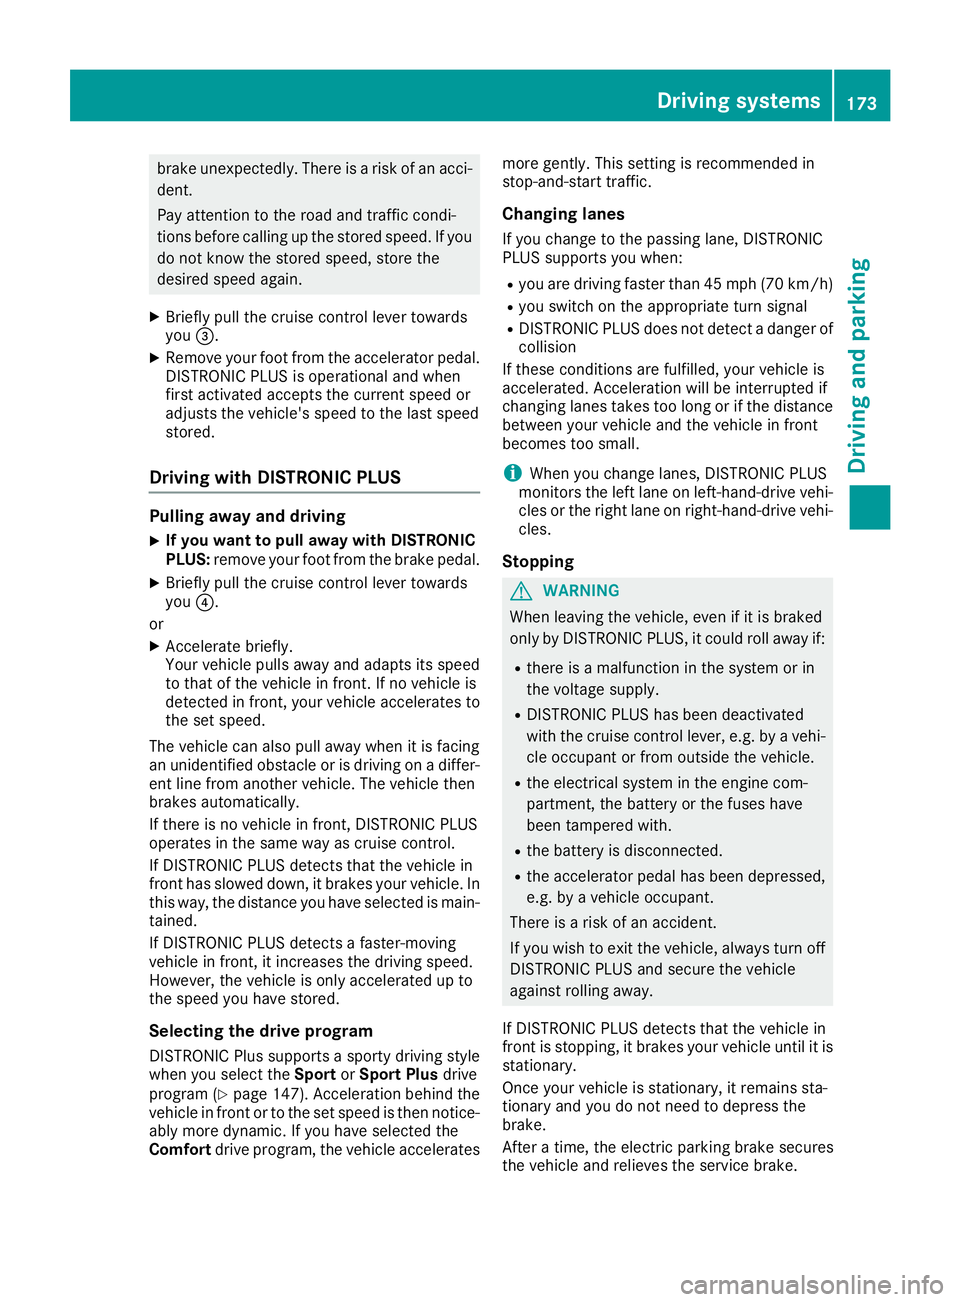
You can use this function to set the headlamps
to change between low beam and high beam
automatically. The system recognizes vehicles
with their lights on, either approaching from the
opposite direction or traveling in front of your
vehicle, and consequently switches the head-
lamps from high beam to low beam.
The system automatically adapts the low-beam
headlamp range depending on the distance to
the other vehicle. Once the system no longer
detects any other vehicles, it reactivates the
high-beam headlamps.
The system's optical sensor is located behind
the windshield near the overhead control panel.
Important safety notes
GWARNING
Adaptive Highbeam Assist does not recognize
road users:
Rwho have no lights, e.g. pedestrians
Rwho have poor lighting, e.g. cyclists
Rwhose lighting is blocked, e.g. by a barrier
In very rare cases, Adaptive Highbeam Assist
may fail to recognize other road users that
have lights, or may recognize them too late. In this or similar situations, the automatic high-
beam headlamps will not be deactivated or
Exterior lighting111
Lights and windshield wipers
Z
Page 175 of 382
brake unexpectedly. There is a risk of an acci-
dent.
Pay attention to the road and traffic condi-
tions before calling up the stored speed. If you
do not know the stored speed, store the
desired speed again.
XBriefly pull the cruise control lever towards
you=.
XRemove your foot from the accelerator pedal.
DISTRONIC PLUS is operational and when
first activated accepts the current speed or
adjusts the vehicle's speed to the last speed
stored.
Driving with DISTRONIC PLUS
Pulling away and driving
XIf you want to pull away with DISTRONIC
PLUS: remove your foot from the brake pedal.
XBriefly pull the cruise control lever towards
you?.
or
XAccelerate briefly.
Your vehicle pulls away and adapts its speed
to that of the vehicle in front. If no vehicle is
detected in front, your vehicle accelerates to the set speed.
The vehicle can also pull away when it is facing
an unidentified obstacle or is driving on a differ-
ent line from another vehicle. The vehicle then
brakes automatically.
If there is no vehicle in front, DISTRONIC PLUS
operates in the same way as cruise control.
If DISTRONIC PLUS detects that the vehicle in
front has slowed down, it brakes your vehicle. In
this way, the distance you have selected is main-
tained.
If DISTRONIC PLUS detects a faster-moving
vehicle in front, it increases the driving speed.
However, the vehicle is only accelerated up to
the speed you have stored.
Selecting the drive program
DISTRONIC Plus supports a sporty driving style
when you select the SportorSport Plus drive
program (
Ypage 147). Acceleration behind the
vehicle in front or to the set speed is then notice-
ably more dynamic. If you have selected the
Comfort drive program, the vehicle accelerates more gently. This setting is recommended in
stop-and-start traffic.
Changing lanes
If you change to the passing lane, DISTRONIC
PLUS supports you when:
Ryou are driving faster than 45 mph (70 km/h)
Ryou switch on the appropriate turn signal
RDISTRONIC PLUS does not detect a danger of
collision
If these conditions are fulfilled, your vehicle is
accelerated. Acceleration will be interrupted if
changing lanes takes too long or if the distance
between your vehicle and the vehicle in front
becomes too small.
iWhen you change lanes, DISTRONIC PLUS
monitors the left lane on left-hand-drive vehi-
cles or the right lane on right-hand-drive vehi-
cles.
Stopping
GWARNING
When leaving the vehicle, even if it is braked
only by DISTRONIC PLUS, it could roll away if:
Rthere is a malfunction in the system or in
the voltage supply.
RDISTRONIC PLUS has been deactivated
with the cruise control lever, e.g. by a vehi-
cle occupant or from outside the vehicle.
Rthe electrical system in the engine com-
partment, the battery or the fuses have
been tampered with.
Rthe battery is disconnected.
Rthe accelerator pedal has been depressed, e.g. by a vehicle occupant.
There is a risk of an accident.
If you wish to exit the vehicle, always turn off
DISTRONIC PLUS and secure the vehicle
against rolling away.
If DISTRONIC PLUS detects that the vehicle in
front is stopping, it brakes your vehicle until it is stationary.
Once your vehicle is stationary, it remains sta-
tionary and you do not need to depress the
brake.
After a time, the electric parking brake secures
the vehicle and relieves the service brake.
Driving systems173
Driving and parking
Z
Page 180 of 382
DISTRONIC PLUS with Steering Assist and
Stop&Go Pilot does not detect road and traffic
conditions. If you are following a vehicle which is
driving towards the edge of the road, your vehi-
cle could come into contact with the curb or
other road boundaries. Be particularly aware of
other road users, e.g. cyclists, that are directly
next to your vehicle.
Obstacles such as traffic pylons on the lane or
projecting out into the lane are not detected.
An inappropriate steering intervention, e.g. after
intentionally driving over a lane marking, can becorrected at any time if you steer slightly in the
opposite direction.
DISTRONIC PLUS with Steering Assist and
Stop&Go Pilot cannot continuously keep your
vehicle in lane. In some cases, the steering
intervention is not sufficient to bring the vehicle
back to the lane. In such cases, you must steer
the vehicle yourself to ensure that it does not
leave the lane.
The support provided by the system can be
impaired if:
Rthere is poor visibility, e.g. due to insufficient
illumination of the road, or due to snow, rain,
fog or spray
Rthere is glare, e.g. from oncoming traffic, the
sun or reflections (e.g. when the road surface
is wet)
Rthe windshield is dirty, fogged up, damaged or
covered, for instance by a sticker, in the vicin-
ity of the camera
Rthere are no, several or unclear lane markings
for a lane, e.g. in areas with road construction
work
Rthe lane markings are worn away, dark or cov-
ered up, e.g. by dirt or snow
Rthe distance to the vehicle in front is too small
and the lane markings thus cannot be detec-
ted
Rthe lane markings change quickly, e.g. lanes
branch off, cross one another or merge
Rthe road is narrow and winding
Rthere are strong shadows cast on the road
The system is switched to passive and no longer
assists you by performing steering interventions
if:
Ryou actively change lane
Ryou switch on the turn signal
Rtake your hands off the steering wheel or do
not steer for a prolonged period of time
iSteering Assist and Stop&Go Pilot are acti-
vated again automatically after a lane change
is completed.
Steering Assist and Stop&Go Pilot do not pro-
vide any support:
Ron very sharp corners
Rwhen a loss of tire pressure or a defective tire
has been detected and displayed
Pay attention also to the impo
rtant safety notes
for DISTRONIC PLUS (Ypage 171).
The steering interventions are carried out with a
limited steering moment. The system requires
the driver to keep his hands on the steering
wheel and to steer himself.
If you do not steer yourself or if you take your
hands off the steering wheel for a prolonged
period of time, the system will first alert you with
a visual warning. A steering wheel symbol
appears in the multifunction display. If you have
still not started to steer and have not taken hold
of the steering wheel after five seconds at the
latest, a warning tone also sounds to remind you
to take control of the vehicle. Steering Assist
and Stop&Go Pilot are switched to passive.
DISTRONIC PLUS remains active.
Activating Steering Assist and Stop&Go
Pilot
XActivate the DISTRONIC PLUS with Steering
Assist and Stop&Go Pilot function using the
on-board computer (
Ypage 227).
The DTR+: Steering Assistant Onmes-
sage appears in the multifunction display.
Steering Assist and Stop&Go Pilot are active.
Information in the multifunction display
If Steering Assist and Stop&Go Pilot are activa-
ted but not ready for a steering intervention,
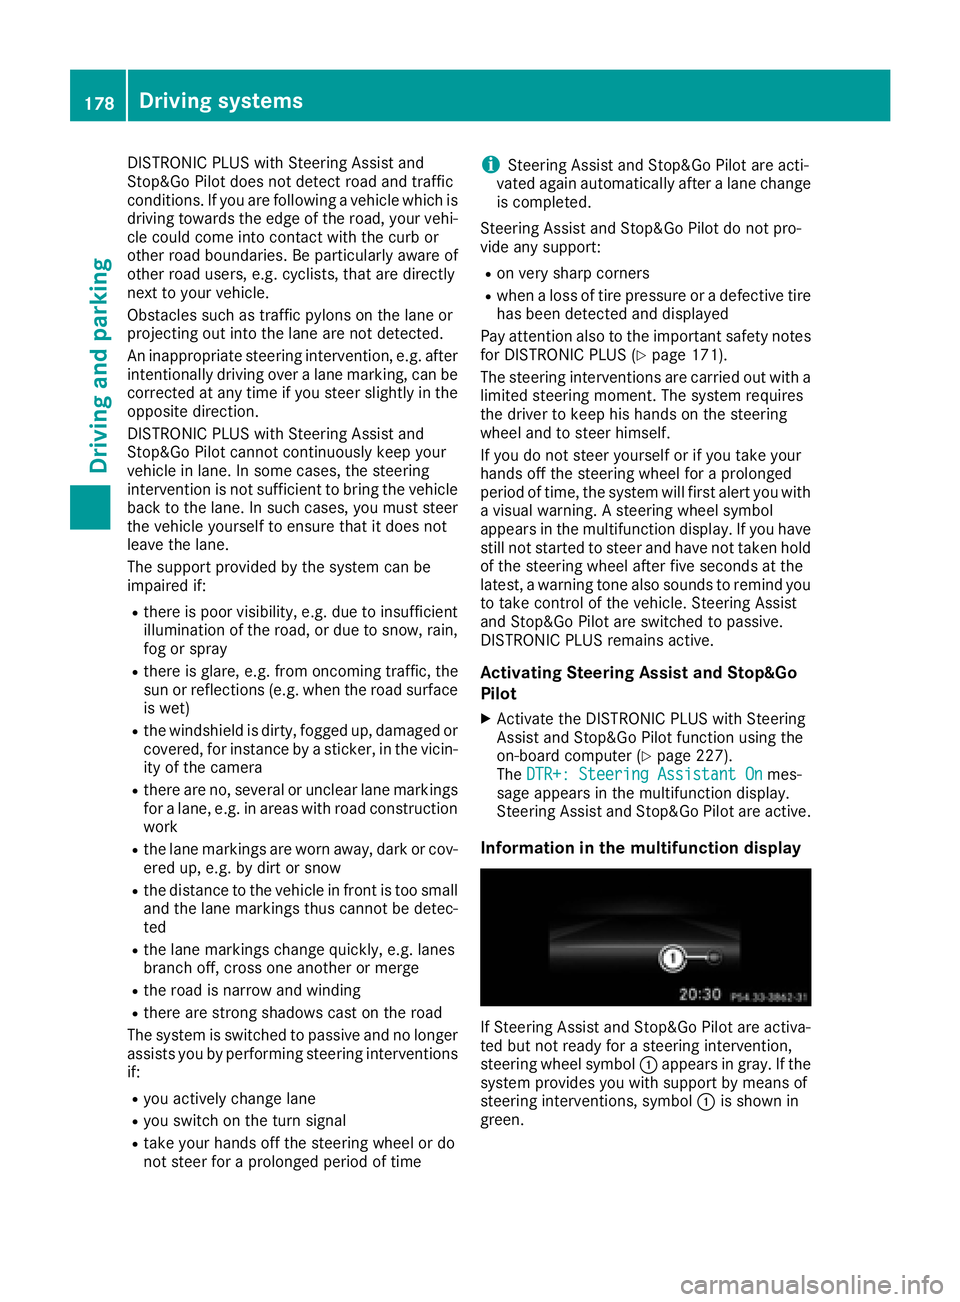
steering wheel symbol :appears in gray. If the
system provides you with support by means of
steering interventions, symbol :is shown in
green.
178Driving system s
Driving an d parking
Page 193 of 382
right angles to the direction of travel. You will
need to judge whether your vehicle will fit into
the parking space.
When driving at speeds below 19 mph
(30 km/h), you will see parking symbol ;as a
status indicator in the instrument cluster. When
a parking space has been detected, an arrow
towards the right or the left also appears. By
default, Active Parking Assist only displays park-
ing spaces on the front-passenger side. Parking
spaces on the driver's side are displayed as
soon as the turn signal on the driver's side is
activated. When parking on the driver's side,
this must remain activated until you confirm the use of Active Parking Assist by pressing the
a button on the multifunction steering
wheel. The system automatically determines
whether the parking space is parallel or at right
angles to the direction of travel.
A parking space is displayed while you are driv-
ing past it, and until you are approximately 50 ft
(15 m) away from it.
Parking
GWARNING
If you leave the vehicle when it is only being
braked by Active Parking Assist it could roll
away if:
Rthere is a malfunction in the system or in
the voltage supply.
Rthe electrical system in the engine com-
partment, the battery or the fuses have
been tampered with.
Rthe battery is disconnected.
Rthe accelerator pedal has been depressed,
e.g. by a vehicle occupant.
There is a risk of an accident.
Before leaving the vehicle, always secure it
against rolling away.
iWhen PARKTRONIC detects obstacles,
Active Parking Assist brakes automatically
during the parking process. You are respon-
sible for braking in good time.
XStop the vehicle when the parking space sym- bol shows the desired parking space in the
instrument cluster.
XShift the transmission to position R.
The Start Park Assist? Yes: OK No:
% message appears in the multifunction
display.
XTo cancel the procedure: press the%
button on the multifunction steering wheel or
pull away.
or
XTo park using Active Parking Assist: press
the a button on the multifunction steering
wheel.
The Park Assist Active Accelerate
and Brake Observe Surroundingsmes-
sage appears in the multifunction display.
XLet go of the multifunction steering wheel.
XBack up the vehicle, being ready to brake at all
times. When backing up, drive at a speed
below approximately 6 mph (10 km/h). Oth-
erwise Active Parking Assist will be canceled.
Active Parking Assist brakes the vehicle to a
standstill when the vehicle approaches the
rear border of the parking space.
Maneuvering may be required in tight parking spaces.
The Park Assist Active Select D
Observe Surroundingsmessage appears in
the multifunction display.
XShift the transmission to position Dwhile the
vehicle is stationary.
Active Parking Assist immediately steers in
the other direction.
The Park Assist Active Accelerate
and Brake Observe Surroundingsmes-
sage appears in the multifunction display.
iYou will achieve the best results by waiting
for the steering procedure to complete before
pulling away.
XDrive forwards and be ready to brake at all
times.
Active Parking Assist brakes the vehicle to a
standstill.
The Park Assist Active Select R
Observe Surroundingsmessage appears in
the multifunction display.
As soon as the parking procedure is complete,
the Park Assist Finished
message appears
in the multifunction display and a warning tone
sounds. The vehicle is now parked. The vehicle is
Driving systems191
Driving and parking
Z