ad blue MERCEDES-BENZ GLE COUPE 2019 Owner's Manual
[x] Cancel search | Manufacturer: MERCEDES-BENZ, Model Year: 2019, Model line: GLE COUPE, Model: MERCEDES-BENZ GLE COUPE 2019Pages: 370, PDF Size: 11.22 MB
Page 2 of 370
Publication details
Internet
Further information about Mercedes-Benz vehi-
cles and about Daimler AG can be found on the
following websites:
http://www.mbusa.com (USA only)
http://www.mercedes-benz.ca (Canada only) Editorial office
You are welcome to forward any queries or sug- gestions you may have regarding this Operator's
Manual to the technical documentation team at the following address:
Customer Assistance Center
Mercedes-Benz USA, LLC
One Mercedes-Benz
Sandy Springs, GA 30328 © Daimler AG: not to be reprinted, translated or
otherwise reproduced, in whole or in part, with-
out written permission from Daimler AG. Vehicle manufacturer
Daimler AG
Mercedesstraße 137
70327 Stuttgart
Germany
Symbols
Registered trademarks:
R Bluetooth ®
is a registered trademark of Blue-
tooth SIG Inc.
R DTS™ is a registered trademark of DTS, Inc.
R Dolby ®
and MLP™ are registered trademarks
of DOLBY Laboratories.
R BabySmart™, ESP ®
and PRE-SAFE ®
are reg-
istered trademarks of Daimler AG.
R HomeLink ®
is a registered trademark of John-
son Controls.
R iPod ®
and iTunes ®
are registered trademarks
of Apple Inc.
R Logic 7 ®
is a registered trademark of Harman
International Industries.
R Microsoft ®
and Windows media ®
are regis-
tered trademarks of Microsoft Corporation.
R SIRIUS ®
is a registered trademark of Sirius
XM Radio Inc.
R HD Radio™ is a registered trademark of iBiq-
uity Digital Corporation.
R Gracenote ®
is a registered trademark of
Gracenote, Inc.
R ZAGAT Survey ®
and related brands are regis-
tered trademarks of Zagat Survey, LLC.
In this Operator's Manual you will find the fol-
lowing symbols: G
WARNING
Warning notes make you aware of dangers
which could pose a threat to your health or
life, or to the health and life of others. H
Environmental note
Environmental notes provide you with infor-
mation on environmentally aware actions or
disposal.
! Notes on material damage alert you to dan-
gers that could lead to damage to your vehi-
cle.
i Practical tips or further information that
could be helpful to you.
X This symbol indicates an instruction
that must be followed.
X Several of these symbols in succession
indicate an instruction with several
steps. (Y
page)
This symbol tells you where you can find
more information about a topic.
YY This symbol indicates a warning or an
instruction that is continued on the next
page.
Dis‐ Dis‐
play play This text indicates a message on the
multifunction display/multimedia dis-
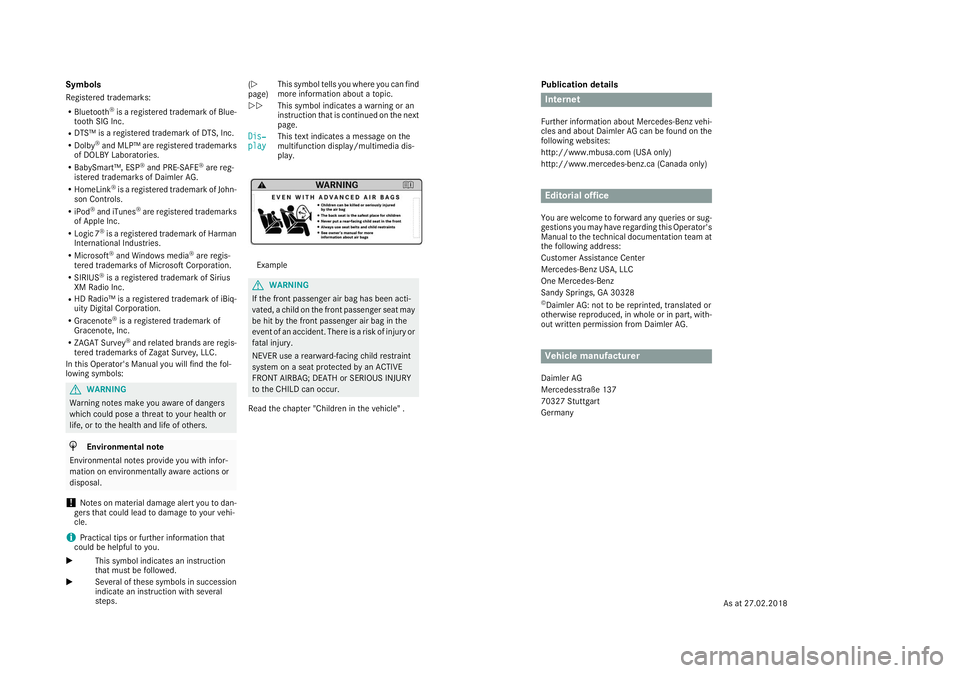
play. Example
G
WARNING
If the front passenger air bag has been acti-
vated, a child on the front passenger seat may be hit by the front passenger air bag in the
event of an accident. There is a risk of injury or
fatal injury.
NEVER use a rearward-facing child restraint
system on a seat protected by an ACTIVE
FRONT AIRBAG; DEATH or SERIOUS INJURY
to the CHILD can occur.
Read the chapter "Children in the vehicle" .
As at 27.02.2018
Page 8 of 370
Engaging reverse gear ................... 135
Engaging the park position ............ 135
Important safety note
s.................. 135
Kickdown ....................................... 138
Manual shifting .............................. 139
Oil temperature (on-board com-
puter, Mercedes-AMG vehicles) ..... 220
Overview ........................................ 135
Problem (malfunction) ................... 141
Pulling away ................................... 130
Starting the engine ........................ 129
Steering wheel paddle shifters ...... 139
Trailer towing ................................. 138
Transmission position display ........ 136
Transmission positions .................. 137
Automatic transmission emer-
gency mode ....................................... 141
AUX jacks
CD/DVD drive ............................... 271
Axle load, permissible (trailer tow-
ing) ...................................................... 367 B
Back button ....................................... 265
Bag hook ............................................ 277
Ball coupling
Installing ........................................ 201
Removing ....................................... 205
BAS (Brake Assist System) ................. 65
Battery (SmartKey)
Checking .......................................... 77
Important safety notes .................... 77
Replacing ......................................... 77
Battery (vehicle)
Charging ........................................ 317
Display message ............................ 237
Important safety notes .................. 315
Jump starting ................................. 318
Overview ........................................ 315
Replacing ....................................... 317
Belt warning ......................................... 46
Bicycle rack ....................................... 205
Blind Spot Assist
Activating/deactivating ................. 217
Display message ............................ 241
Notes/function .............................. 191
Trailer towing ................................. 193 see Active Blind Spot Assist
Bluetooth ®
Searching for a mobile phone ........ 268
Searching for a mobile phone
(device manager) ........................... 269
see also Digital Operator's Man-
ual .................................................. 264
Telephony ...................................... 268
Brake Assist System
see BAS (Brake Assist System)
Brake fluid
Display message ............................ 229
Notes ............................................. 362
Brake force distribution
see EBD (electronic brake force
distribution)
Brake lamps
Display message ............................ 235
Brake linings
Display message ............................ 229
Brakes
ABS .................................................. 64
BAS .................................................. 65
Brake fluid (notes) ......................... 362
Braking assistance appropriate to
the situation ..................................... 66
Display message ............................ 224
Hill start assist ............................... 130
Important safety notes .................. 149
Maintenance .................................. 150
Parking brake ................................ 145
Riding tips ...................................... 149
Warning lamp ................................. 253
Braking assistance appropriate to
the situation
Function/note s................................ 66
Breakdown assistance
Where will I find...? ........................ 309
see Flat tire
see Towing away
Brightness control (instrument
cluster lighting) ................................... 36 C
California Important notice for retail cus-
tomers and lessees .......................... 27 6
Index
Page 16 of 370
Downloading routes ....................... 291
Emergency call .............................. 286
General notes ................................ 285
Geo fencing ................................... 292
Info call button .............................. 288
Locating a stolen vehicle ............... 290
Remote fault diagnosis .................. 290
Remote vehicle locking .................. 290
Roadside assistance button ........... 287
Search & Send ............................... 289
Self-test ......................................... 286
Speed alert .................................... 291
System .......................................... 285
Triggering the vehicle alar m........... 292
Vehicle remote unlocking .............. 290
Mechanical key
Function/note s................................ 76
General notes .................................. 76
Inserting .......................................... 76
Locking vehicle ................................ 81
Removing ......................................... 76
Unlocking the driver's doo r.............. 81
Media Interface
USB port in the armrest of the
center console ............................... 273
see Digital Operator's Manual
Memory card (audio) ......................... 214
Memory function ............................... 105
Mercedes-Benz Intelligent Drive
360°camera .................................. 184
Active Blind Spot Assist ................. 194
Active Distance Assist
DISTRONIC .................................... 157
Active Distance Assist
DISTRONIC with Active Steering
Assist ............................................. 164
Active Lane Keeping Assist ............ 197
Active Parking Assist ..................... 176
ATTENTION ASSIST ........................ 189
Blind Spot Assist ............................ 191
General notes ................................ 156
Lane Keeping Assist ...................... 193
Parking Assist PARKTRONIC .......... 173
PRE-SAFE ®
PLUS (anticipatory
occupant protection PLUS) .............. 57
Rear view camera .......................... 180
Traffic Sign Assist .......................... 190 Message memory (on-board com-
puter)
.................................................. 223
Mirror
Vanity mirror (sun visor) ................ 281
Mirror turn signal
Cleaning ......................................... 305
Mirrors
see Exterior mirrors
see Rear-view mirror
see Vanity mirror (in the sun visor)
Mobile phone
Connecting (Bluetooth ®
inter-
face) .............................................. 268
Connecting (device manager) ........ 269
Frequencies ................................... 357
Installation ..................................... 357
Menu (on-board computer) ............ 214
Transmission output (maximum) .... 357
Modifying the programming
(SmartKey) ........................................... 76
MOExtended tires .............................. 311
Mounting wheels
Lowering the vehicle ...................... 351
Mounting a new wheel ................... 351
Preparing the vehicle ..................... 348
Raising the vehicle ......................... 349
Removing a whee l.......................... 350
Securing the vehicle against roll-
ing away ........................................ 349
MP3
Operation ....................................... 214
see also Digital Operator's Man-
ual .................................................. 264
Multifunction display
Function/note s............................. 210
Permanent display ......................... 218
Multifunction steering wheel
Operating the on-board compute r..2 09
Overview .......................................... 37
Multimedia system
Switching on and off ..................... .265
Music files
see also Digital Operator's Man-
ual ................................................. .264 14
Index
Page 101 of 370
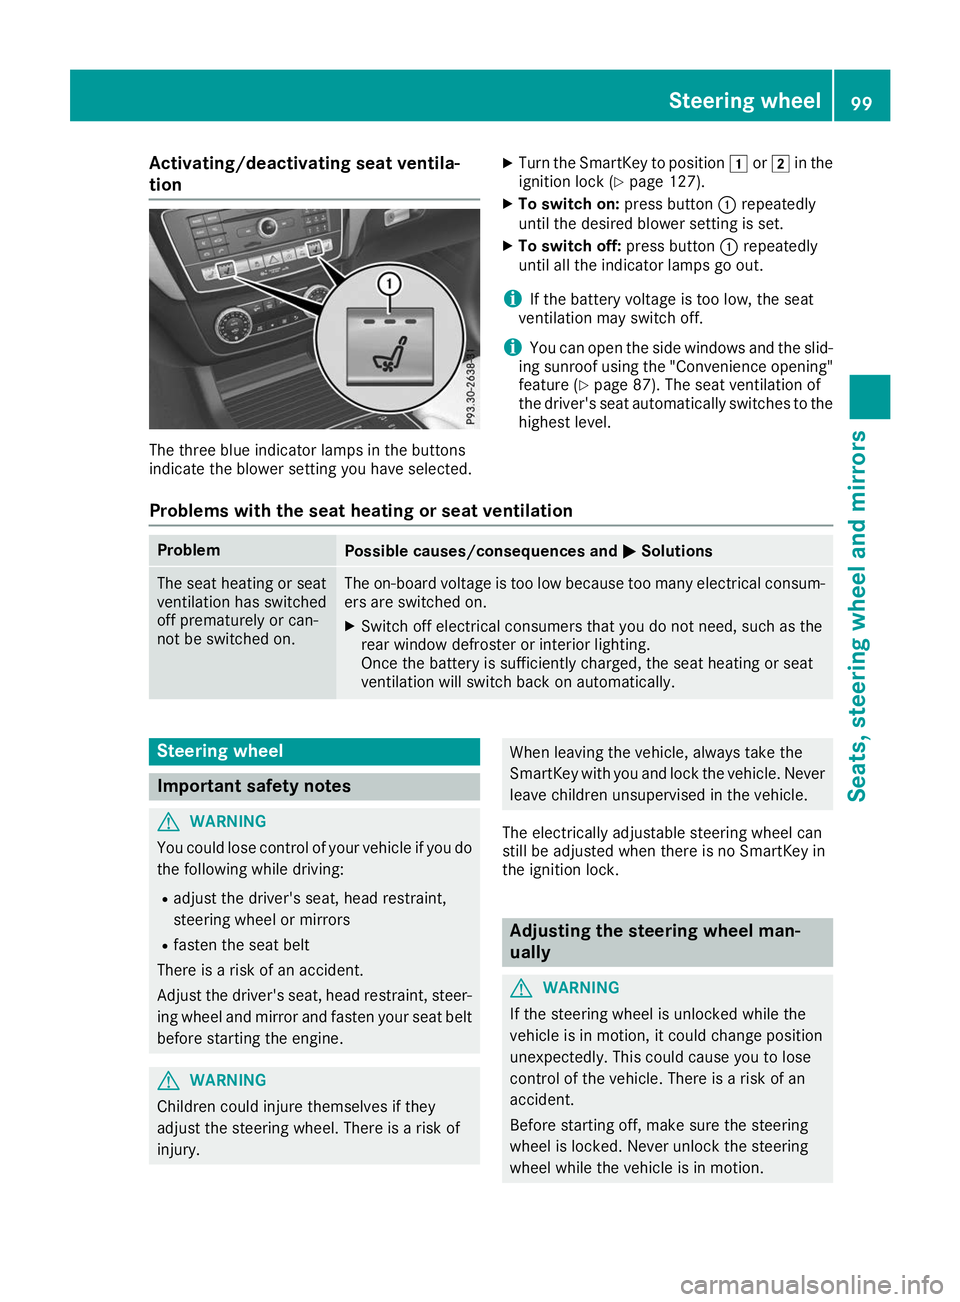
Activating/deactivating seat ventila-
tion The three blue indicator lamps in the buttons
indicate the blower setting you have selected. X
Turn the SmartKey to position 0047or0048 in the
ignition lock (Y page 127).
X To switch on: press button0043repeatedly
until the desired blower setting is set.
X To switch off: press button0043repeatedly
until all the indicator lamps go out.
i If the battery voltage is too low, the seat
ventilation may switch off.
i You can open the side windows and the slid-
ing sunroof using the "Convenience opening" feature (Y page 87). The seat ventilation of
the driver's seat automatically switches to the
highest level.
Problems with the seat heating or seat ventilation Problem
Possible causes/consequences and
0050
0050Solutions The seat heating or seat
ventilation has switched
off prematurely or can-
not be switched on. The on-board voltage is too low because too many electrical consum-
ers are switched on.
X Switch off electrical consumers that you do not need, such as the
rear window defroster or interior lighting.
Once the battery is sufficiently charged, the seat heating or seat
ventilation will switch back on automatically. Steering wheel
Important safety notes
G
WARNING
You could lose control of your vehicle if you do the following while driving:
R adjust the driver's seat, head restraint,
steering wheel or mirrors
R fasten the seat belt
There is a risk of an accident.
Adjust the driver's seat, head restraint, steer-
ing wheel and mirror and fasten your seat belt before starting the engine. G
WARNING
Children could injure themselves if they
adjust the steering wheel. There is a risk of
injury. When leaving the vehicle, always take the
SmartKey with you and lock the vehicle. Never
leave children unsupervised in the vehicle.
The electrically adjustable steering wheel can
still be adjusted when there is no SmartKey in
the ignition lock. Adjusting the steering wheel man-
ually
G
WARNING
If the steering wheel is unlocked while the
vehicle is in motion, it could change position
unexpectedly. This could cause you to lose
control of the vehicle. There is a risk of an
accident.
Before starting off, make sure the steering
wheel is locked. Never unlock the steering
wheel while the vehicle is in motion. Steering wheel
99Seats, steering wheel and mirrors Z
Page 110 of 370
The blue
0057indicator lamp in the instru-
ment cluster lights up when the high-beam
headlamps are switched on.
X To switch off the high-beam headlamps:
move the combination switch back to its nor- mal position.
The blue 0057indicator lamp in the instru-
ment cluster goes out.
Vehicles with Adaptive Highbeam Assist: if
Adaptive Highbeam Assist is activated, it auto-
matically controls activation and deactivation of
the high-beam headlamps (Y page 109).Hazard warning lamps
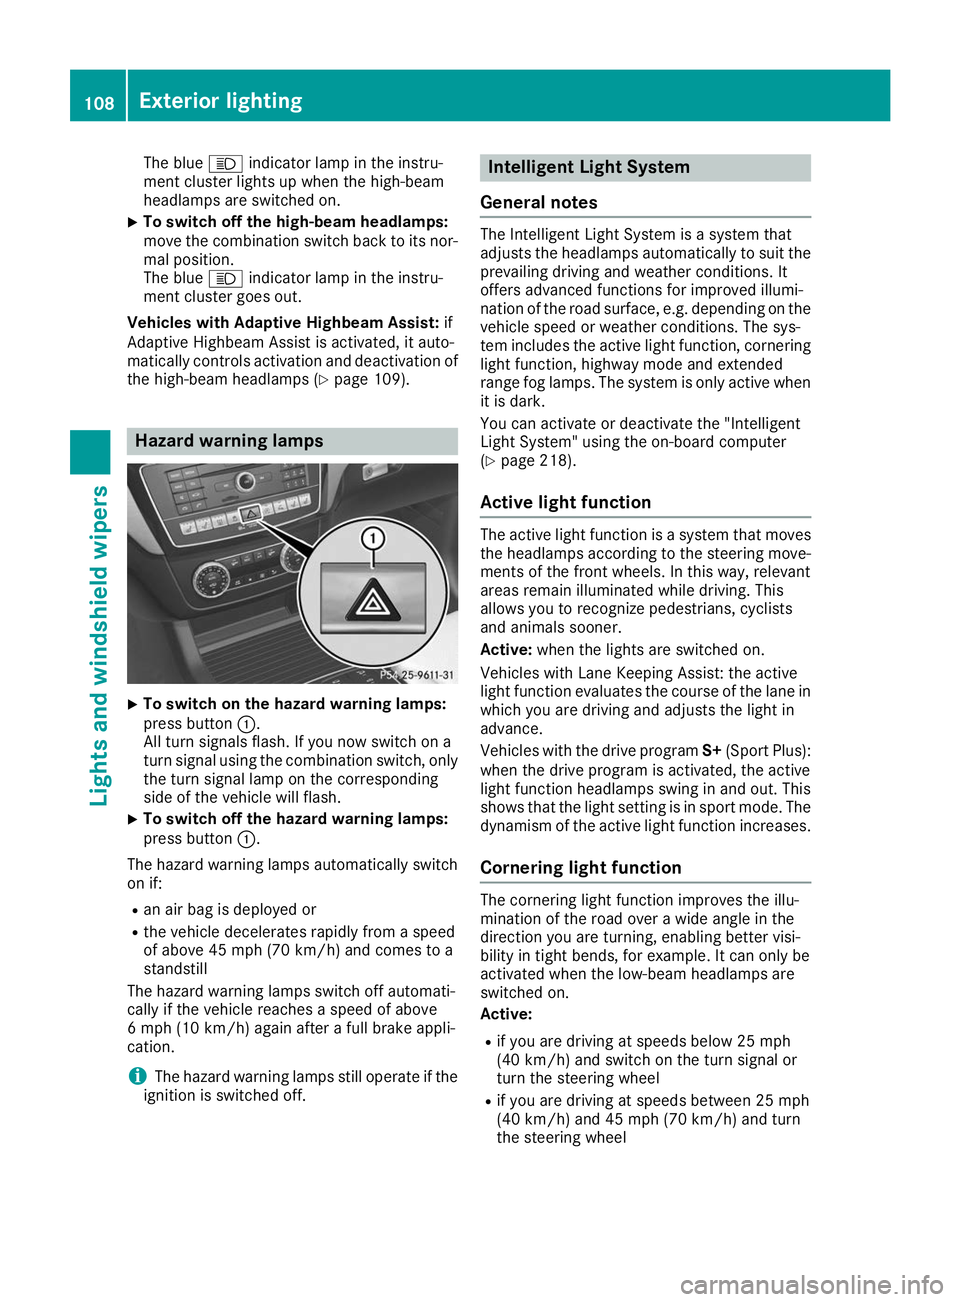
X
To switch on the hazard warning lamps:
press button
0043.
All turn signals flash. If you now switch on a
turn signal using the combination switch, only the turn signal lamp on the corresponding
side of the vehicle will flash.
X To switch off the hazard warning lamps:
press button
0043.
The hazard warning lamps automatically switch
on if:
R an air bag is deployed or
R the vehicle decelerates rapidly from a speed
of above 45 mph (70 km/h) and comes to a
standstill
The hazard warning lamps switch off automati-
cally if the vehicle reaches a speed of above
6 mph (10 km/h) again after a full brake appli-
cation.
i The hazard warning lamps still operate if the
ignition is switched off. Intelligent Light System
General notes The Intelligent Light System is a system that
adjusts the headlamps automatically to suit the
prevailing driving and weather conditions. It
offers advanced functions for improved illumi-
nation of the road surface, e.g. depending on the vehicle speed or weather conditions. The sys-
tem includes the active light function, corneringlight function, highway mode and extended
range fog lamps. The system is only active when it is dark.
You can activate or deactivate the "Intelligent
Light System" using the on-board computer
(Y page 218).
Active light function The active light function is a system that moves
the headlamps according to the steering move- ments of the front wheels. In this way, relevant
areas remain illuminated while driving. This
allows you to recognize pedestrians, cyclists
and animals sooner.
Active: when the lights are switched on.
Vehicles with Lane Keeping Assist: the active
light function evaluates the course of the lane in which you are driving and adjusts the light in
advance.
Vehicles with the drive program S+(Sport Plus):
when the drive program is activated, the active
light function headlamps swing in and out. This
shows that the light setting is in sport mode. The
dynamism of the active light function increases.
Cornering light function The cornering light function improves the illu-
mination of the road over a wide angle in the
direction you are turning, enabling better visi-
bility in tight bends, for example. It can only be
activated when the low-beam headlamps are
switched on.
Active:
R if you are driving at speeds below 25 mph
(40 km/h) and switch on the turn signal or
turn the steering wheel
R if you are driving at speeds between 25 mph
(40 km/h) and 45 mph (70 km/h) and turn
the steering wheel 108
Exterior lightingLights and windshield wipers
Page 217 of 370
cle when driving, you may be distracted from
the traffic situation. You could also lose con-
trol of the vehicle. There is a risk of an acci-
dent.
Only operate this equipment when the traffic
situation permits. If you are not sure that this is possible, park the vehicle paying attention
to traffic conditions and operate the equip-
ment when the vehicle is stationary.
When telephoning, you must observe the legal
requirements for the country in which you are
currently driving.
X Switch on the mobile phone (see the manu-
facturer’s operating instructions).
X Switch on the multimedia system (see the
Digital Operator's Manual)
X Establish a Bluetooth ®
connection to the mul-
timedia system (see the Digital Operator's
Manual).
X Press the 0059or0065 button on the steering
wheel to select the Tel
Tel menu.
You will see one of the following display mes-
sages in the multifunction display:
R Phone READY Phone READY or the name of the network
provider: the mobile phone has found a net-
work and is ready to receive.
R Phone No Service
Phone No Service: there is no network
available or the mobile phone is searching for
a network.
Accepting a call If someone calls you when you are in the
Tel Tel
menu, a display message appears in the multi-
function display.
You can accept a call at any time regardless of
the menu selected.
X Press the 0061button on the steering wheel
to accept an incoming call.
Rejecting or ending a call You can end or reject a call even if you are not in
the Tel
Tel menu.
X Press the 0076button on the steering wheel
to reject or end a call. Selecting an entry from the phone book X
Press the 0059or0065 button on the steering
wheel to select the Tel Telmenu.
X Press the 0063,0064or0076 button to
switch to the phone book.
X Authorize access to the phone book on the
phone.
X Press the 0063or0064 button to select the
desired name.
or
X To start rapid scrolling: press and hold the
0063 or0064 button for longer than one sec-
ond.
Rapid scrolling stops when you release the
button or reach the end of the list.
X If only one telephone number is stored for
a name: press the 0061or0076 button to
start dialing.
or X If there is more than one number for a
particular name: press the0061or0076
button to display the numbers.
X Press the 0063or0064 button to select the
number you want to dial.
X Press the 0061or0076 button to start dialing.
or
X To exit the telephone book: press the0076
or 0038 button.
Redialing The on-board computer saves the last names or
numbers dialed in the redial memory.
X Press the 0059or0065 button on the steering
wheel to select the Tel
Tel menu.
X Press the 0061button to switch to the redial
memory.
X Press the 0063or0064 button to select the
desired name or number.
X Press the 0061or0076 button to start dialing.
or
X To exit the redial memory: press the0076
or 0038 button. Menus and submenus
215On-board computer and displays Z
Page 222 of 370
X
Press the 0059or0065 button on the steering
wheel to select the Sett.
Sett. menu.
X Press the 0064or0063 button to select the
Convenience
Convenience submenu.
X Press 0076to confirm.
X Press the 0064or0063 button to select the
Auto. Mirror Folding
Auto. Mirror Folding function.
If the Auto. Mirror Folding
Auto. Mirror Folding function is
switched on, the multifunction display shows the exterior mirror in orange.
X Press the 0076button to save the setting. If you have switched the
Auto. Mirror Fold‐
Auto. Mirror Fold‐
ing
ing on and you fold the exterior mirrors in using
button 0043, they will not fold out automatically
(Y page 103).
You can then only fold out the exterior mirrors
using button 0043.
Restoring the factory settings X
Press the 0059or0065 button on the steering
wheel to select the Sett.
Sett. menu.
X Press the 0064or0063 button to select the
Factory Setting
Factory Setting submenu.
X Press 0076to confirm.
The Reset All Settings?
Reset All Settings? message
appears.
X Press the 0064or0063 button to select No
Noor
Yes
Yes.
X Press 0076to confirm the selection.
If you select Yes
Yes, the multifunction display
shows a confirmation message.
If you want to reset the Daytime Running
Daytime Running
Lights
Lights function in the Light
Light submenu, you
must turn the SmartKey to position 0047in the
ignition lock. AMG menu (Mercedes-AMG vehicles)
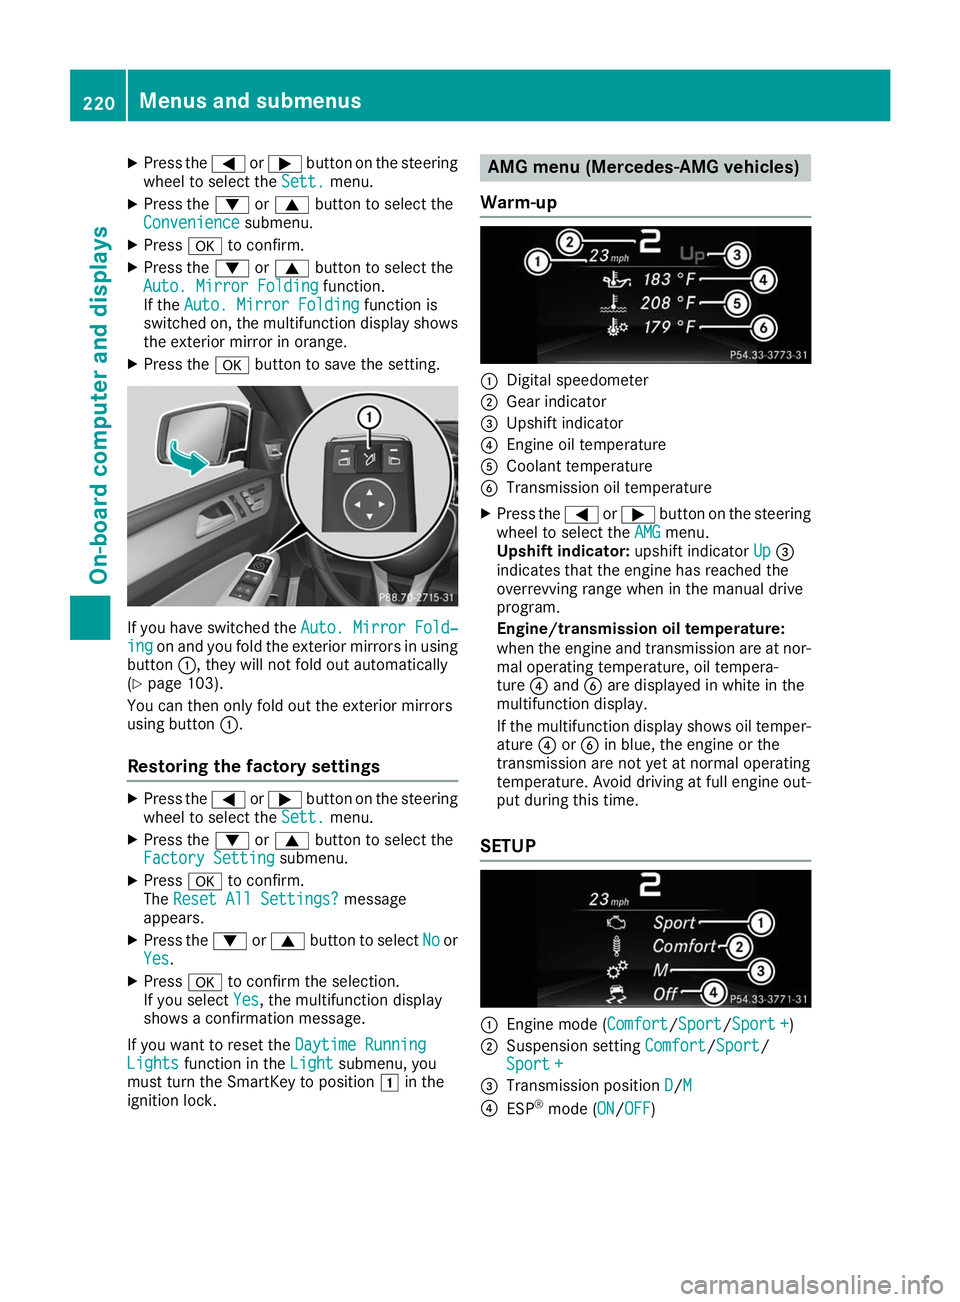
Warm-up 0043
Digital speedometer
0044 Gear indicator
0087 Upshift indicator
0085 Engine oil temperature
0083 Coolant temperature
0084 Transmission oil temperature
X Press the 0059or0065 button on the steering
wheel to select the AMG
AMGmenu.
Upshift indicator: upshift indicatorUp
Up0087
indicates that the engine has reached the
overrevving range when in the manual drive
program.
Engine/transmission oil temperature:
when the engine and transmission are at nor-
mal operating temperature, oil tempera-
ture 0085and 0084are displayed in white in the
multifunction display.
If the multifunction display shows oil temper- ature 0085or0084 in blue, the engine or the
transmission are not yet at normal operating
temperature. Avoid driving at full engine out-
put during this time.
SETUP 0043
Engine mode (Comfort Comfort/SportSport/Sport +Sport +)
0044 Suspension setting Comfort
Comfort/ Sport Sport/
Sport +
Sport +
0087 Transmission position D
D/MM
0085 ESP ®
mode (ON ON/OFFOFF) 220
Menus and submenusOn-board computer and displays
Page 270 of 370
Connecting a mobile phone
(COMAND)
Requirements For telephony via the Bluetooth
®
interface, you
require a Bluetooth ®
-capable mobile phone. The
mobile phone must support Hands-Free Profile
1.0 or above.
Multimedia system:
X Select Vehicle Vehicle007BSystem Set‐ System Set‐
tings
tings007B Activate Bluetooth
Activate Bluetooth .
X Activate Bluetooth ®
0073.
Mobile phone:
X Activate Bluetooth ®
and, if necessary, Blue-
tooth ®
visibility for other devices (see the
manufacturer's operating instructions).
The Bluetooth ®
device names for all of one man-
ufacturer's products might be identical. To
make it possible to clearly identify your mobile
phone, change the device name (see the man-
ufacturer's operating instructions).
If the mobile phone supports the PBAP (Phone
Book Access Profile) and MAP (Message
Access Profile) Bluetooth ®
profiles, the follow-
ing information will be transmitted after you
connect:
R Phone book
R Call lists
R Text messages and e-mail
i Further information on suitable mobile
phones can be found at: http://
www.mercedes-benz.com/connect
i In the USA, you can get in touch with the
Mercedes-Benz Customer Assistance Center
on 1-800-FOR-MERCedes (1-800-367-6372 ).
In Canada, you can get in touch with the Cus-
tomer Relations Center on 1-800-387-0100.
Searching for and authorizing (connect-
ing) a mobile phone Before using your mobile phone with the multi-
media system for the first time, you will need to
search for the phone and then authorize (con-
nect) it. Depending on the mobile phone, author- ization either takes place by means of Secure
Simple Pairing or by entering a passkey. The
multimedia system automatically makes the procedure that is relevant for your mobile phone
available. The mobile phone is always connec-
ted automatically after authorization. Further
information on using a mobile phone with the
multimedia system (see the Digital Operator's
Manual).
If the multimedia system does not detect your
mobile phone, this may be due to particular
security settings on your mobile phone (see the manufacturer's operating instructions).
Only one mobile phone can be connected to the
multimedia system at any one time.
Searching for a mobile phone
Multimedia system:
X Select Tel/ Tel/00A7007BConn. Conn.
Device
Device007BSearch for Phones Search for Phones007BStart Start
Search
Search.
The available mobile phones are displayed.
Symbols in the device list Sym-
bol Explanation
00D3
New mobile phone found, not yet
authorized.
00DC
Mobile phone is authorized, but is
not connected.
Connecting a mobile phone
Authorization using Secure Simple Pairing:
X Select mobile phone.
A code is displayed in the multimedia system
and on the mobile phone.
X If codes match: selectYes
Yes on the multimedia
system.
X Confirm code on the mobile phone. Depend-
ing on the mobile phone used, confirm the
connection to the multimedia system and for
the PBAP and MAP Bluetooth ®
profiles. The
prompt to confirm may take up to two
minutes to be displayed (see the manufactur-
er's operating instructions).
X If the codes are different: selectNo Noon the
multimedia system.
The process is canceled.
Repeat authorization. 268
Operating systemMultimedia system
Page 271 of 370

Authorization by entering a passkey (passcode):
X Select the Bluetooth ®
name of the mobile
phone.
The input menu for the passkey is displayed.
X Choose a one to sixteen-digit number combi-
nation as a passkey.
X Enter the passkey on the multimedia system.
X Press 0054to confirm.
X Enter and confirm the passkey on the mobile
phone. Depending on the mobile phone used,
confirm the connection to the multimedia sys-
tem and for the PBAP and MAP Bluetooth ®
profiles. The prompt to confirm may take up
to two minutes to be displayed (see the man- ufacturer's operating instructions). Connecting a mobile phone (Audio 20)
Requirements For telephony via the Bluetooth
®
interface, you
require at least one Bluetooth ®
-capable mobile
phone depending on use of one-telephone
mode ortwo-telephone mode. The mobile
phone must support Hands-Free Profile 1.0 or
above.
In two-telephone mode you can use all the
functions of the multimedia system with the
main telephone. With the additional tele-
phone , you can receive incoming calls.
Multimedia system:
X Select Vehicle
Vehicle007BSystem Set‐ System Set‐
tings tings007B Activate Bluetooth
Activate Bluetooth .
X Activate Bluetooth ®
0073.
Mobile phone:
X Activate Bluetooth ®
and, if necessary, Blue-
tooth ®
visibility for other devices (see the
manufacturer's operating instructions).
The Bluetooth ®
device names for all of one man-
ufacturer's products might be identical. To
make it possible to clearly identify your mobile
phone, change the device name (see the man-
ufacturer's operating instructions). If the mobile phone supports the PBAP (P
hone
Book Access Profile) and MAP (Message
Access Profile) Bluetooth ®
profiles, the follow-
ing information is transmitted after you connect
the main telephone:
R Phone book
R Call lists
R Text messages and e-mail
i Further information on suitable mobile
phones can be found at: http://
www.mercedes-benz.com/connect
i In the USA, you can get in touch with the
Mercedes-Benz Customer Assistance Center
on 1-800-FOR-MERCedes (1-800-367-6372).
In Canada, you can get in touch with the Cus-
tomer Relations Center on 1-800-387-010 0.
Searching for and authorizing (connect- ing) a mobile phone Before using your mobile phone with the multi-
media system for the first time, you will need to
search for the phone and then authorize (con-
nect) it. Depending on the mobile phone, author- ization either takes place by means of Secure
Simple Pairing or by entering a passkey. The
multimedia system automatically makes the
procedure that is relevant for your mobile phone
available. The mobile phone is always connec-
ted automatically after authorization. Further
information on using a mobile phone with the
multimedia system (see the Digital Operator's
Manual).
If the multimedia system does not detect your
mobile phone, this may be due to particular
security settings on your mobile phone (see the manufacturer's operating instructions).
Searching for a mobile phone
Multimedia system:
X Select Tel/ Tel/00A7007BConn. Device Conn. Device007BCon‐ Con‐
nect New Device
nect New Device.
X Select Connect via Vehicle
Connect via Vehicle.
X Select mobile phone.
Connecting a mobile phone X One-telephone mode: selectConnect as
Connect as
New Main Phone
New Main Phone.
X Two-telephone mode: selectConnect as
Connect as
Additional Phone
Additional Phone when a mobile phone is
already connected. Operating system
269Multimedia system Z
Page 272 of 370
X
Authorization using Secure Simple Pair-
ing:
A code is displayed in the multimedia system
and on the mobile phone.
X Confirm code on the mobile phone. Depend-
ing on the mobile phone used, confirm the
connection to the multimedia system and for
the PBAP and MAP Bluetooth ®
profiles. The
prompt to confirm may take up to two
minutes to be displayed (see the manufactur-
er's operating instructions).
X If the codes are different: select No
No on the
multimedia system.
The process is canceled.
Repeat authorization.
or X Authorization by entering a passkey
(passcode):
enter any one- to sixteen-digit
number sequence which you have chosen
yourself into the passkey input menu.
X Press 0054to confirm.
X Enter and confirm the passkey on the mobile
phone. Depending on the mobile phone used,
confirm the connection to the multimedia sys-
tem and for the PBAP and MAP Bluetooth ®
profiles. The prompt to confirm may take up
to two minutes to be displayed (see the man- ufacturer's operating instructions).
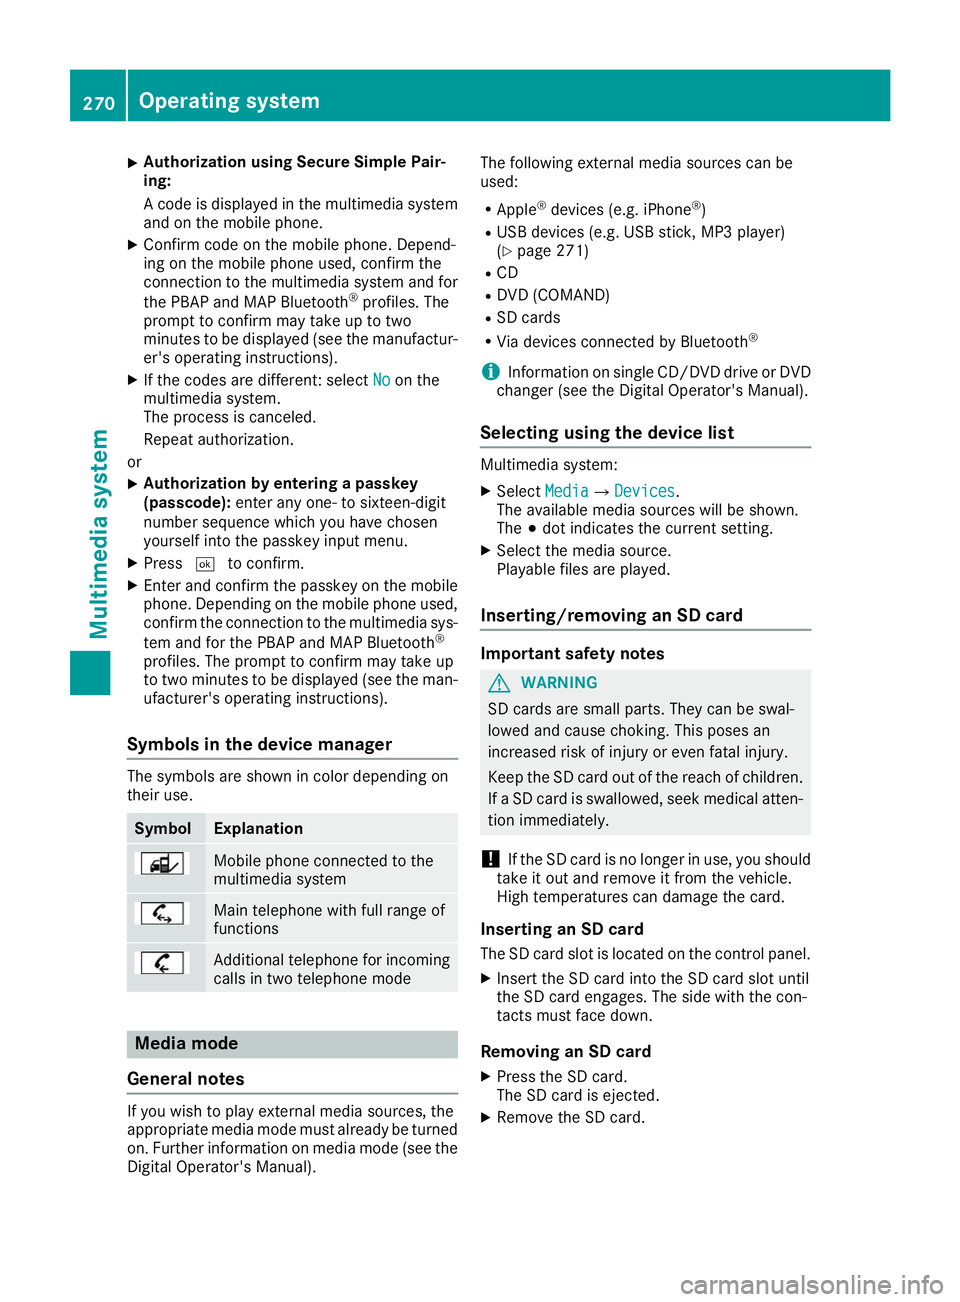
Symbols in the device manager The symbols are shown in color depending on
their use. Symbol Explanation
Mobile phone connected to the
multimedia system
Main telephone with full range of
functions
Additional telephone for incoming
calls in two telephone mode Media mode
General notes If you wish to play external media sources, the
appropriate media mode must already be turned
on. Further information on media mode (see the Digital Operator's Manual). The following external media sources can be
used:
R Apple ®
devices (e.g. iPhone ®
)
R USB devices (e.g. USB stick, MP3 player)
(Y page 271)
R CD
R DVD (COMAND)
R SD cards
R Via devices connected by Bluetooth ®
i Information on single CD/DVD drive or DVD
changer (see the Digital Operator's Manual).
Selecting using the device list Multimedia system:
X Select Media Media007B Devices
Devices.
The available media sources will be shown.
The 003Bdot indicates the current setting.
X Select the media source.
Playable files are played.
Inserting/removing an SD card Important safety notes
G
WARNING
SD cards are small parts. They can be swal-
lowed and cause choking. This poses an
increased risk of injury or even fatal injury.
Keep the SD card out of the reach of children. If a SD card is swallowed, seek medical atten-
tion immediately.
! If the SD card is no longer in use, you should
take it out and remove it from the vehicle.
High temperatures can damage the card.
Inserting an SD card
The SD card slot is located on the control panel. X Insert the SD card into the SD card slot until
the SD card engages. The side with the con-
tacts must face down.
Removing an SD card X Press the SD card.
The SD card is ejected.
X Remove the SD card. 270
Operating systemMultimedia system