change time MERCEDES-BENZ GLE SUV 2021 Owners Manual
[x] Cancel search | Manufacturer: MERCEDES-BENZ, Model Year: 2021, Model line: GLE SUV, Model: MERCEDES-BENZ GLE SUV 2021Pages: 545, PDF Size: 9.37 MB
Page 4 of 545
Thank
youfo r buying Me rcedes-Benz
Before youfirs t drive off, read this Owner's Man‐
ual carefully and familiarise yourself with your
ve hicle. Foryo ur ow n sa fety and a longer operat‐
ing li fespan of theve hicle, follow the instructions
and warning notices in this Owner's Manual. Dis‐
re ga rding them may lead todamage totheve hi‐
cle or injury topeople.
The standard equipment and product desc ript ion
of your vehicle may vary and depends on thefo l‐
lowing factors:
R Model
R Order
R National version
R Availability
The illustrations in this Owner's Manual show a
left-hand drive vehicle. On right-hand-drive vehi‐
cles, the la yout of car parts and cont rol ele‐
ments dif fers accordin gly.
Mercedes-Benz is cons tantly de veloping its vehi‐
cles fur ther. Mercedes-Benz
therefore reser vesth eright to
int roduce changes in thefo llowing areas:
R Design
R Equipment
R Tech nical features
The equipment in your vehicle may therefore dif‐
fe r from that shown in the descriptions and illus‐
trations.
The following documents are integ ral parts of
th eve hicle:
R Digital Owner's Manual
R Printed Owner's Manual
R Service booklet
R Equipment-dependent Supplements
Ke ep these documents in theve hicle at all
times. If you sell theve hicle, alw ays pass all of
th e documents on tothe new owner.
1675847019Z102
1675847019Z102
Page 6 of 545
Mir
rors ........................................................ 157
Area pe rmeable toradio wav es on the
windscreen ................................................ .160
Infrared-reflective windscreen function ...... 16 0Climate control
......................................... 161
Overview of climate contro l systems ........... 161
Operating the climate control sy stem ......... 16 2 Driving and pa
rking .................................. 17 3
Driving ........................................................ 173
DY NA MIC SELECT switch ........................... 188
Au tomatic transmission .............................. 19 2
Tr ans fer case .............................................. 19 6
Fu nction of the 4MATIC .............................. 19 8
Re fuelling .................................................... 19 8
Pa rking ...................................................... .205
Driving and driving saf ety sy stems .............. 211
Tr ailer hit ch................................................ 283
Bicycle rack function .................................. 289
Ve hicle towing instructions ........................ .291 Instrument display and on-board
compu
ter.................................................. 292
No tes on the instrument display and on-
board computer .......................................... 292
Instrument display overview ...................... .293
Overview of the buttons on thesteering
wheel ..........................................................2 94
Operating the on-board computer .............. 294
Overview of what is shown on the multi‐
function display .......................................... 296
Head-up display .......................................... 296 MBUX multimedia sy
stem ...................... 299
Overview and operation .............................. 299
Sy stem settings .......................................... 308
Na vigation ................................................... 312
Te lephone .................................................. .321
Mercedes me and apps .............................. 324
Mercedes-Benz emer gency call sy stem ...... 333
Ra dio, media & TV...................................... 341
Sound settings ............................................ 347 Main
tenance and care ............................. 349
ASS YST PLUS service inter val display ........ 349 Engine compartment .................................. 350
Cleaning and care ......................................
.356 Breakdown assi
stance ............................ 365
Emergency ................................................. .365
Flat tyre ...................................................... 367
Battery (vehicle) .......................................... 374
To w- starting or towing away ....................... 379
Electrical fuses ........................................... 384 Wheels and tyres
..................................... 387
No tes on noise or unusual handling char‐
acteristics .................................................. .387
No tes on regular lyinspecting wheels and
tyres .......................................................... .387
No tes on snow chains ................................ 387
Ty re pressure .............................................. 388
Wheel change ............................................ .391
Emergency spare wheel .............................. 401
Collapsible spare wheel .............................. 403 Te
ch nical data .......................................... 406
No tes on tech nical da ta.............................. 406 Contents
3
Page 25 of 545
Pr
otection of the environment
* NO
TEPlug-in hybrid #
Obser vethe no tes in the Supplement.
Yo u could otherwise failto recognise
dangers. +
ENVI
RONMENTAL NOTEEnvironmental
dama gedue tooperating conditions and
personal driving style The pollutant emission of
theve hicle is
directly related tothewa yyo u operate the
ve hicle.
Operate your vehicle in an environmentally
re sponsible manner tohelp pr otect the envi‐
ro nment. Please obser vethefo llowing rec‐
ommendations on ope rating conditions and
pe rsonal driving style.
Operating conditions: #
Make sure that the tyre pressure is cor‐
re ct. #
Do not car ryany unnecessary weight
(e.g. roof luggage rack s once you no
lon ger need them). #
Adhere tothe service inter vals.
A regularly serviced vehicle will contri b‐
ute toenvironmen tal pr otection. #
Alw ays ha vemaintenance workcar ried
out at a qualified specialist workshop.
Pe rsonal driving style: #
Do not depress the accelera tor pedal
when starting the engine. #
Do not warm upthe engine while the
ve hicle is stationar y. #
Drive carefully and maintain a suitable
dist ance from theve hicle in front. #
Avoid frequent, sudden acceleration
and braking. #
Change gear in good time and use each
ge ar on lyup to00C3 of its maximum
engine speed. #
Switch off the engine in stationary traf‐
fi c, e.g. byusing the ECO start/ stop
function. #
Drive in a fuel-ef ficient manne r.
Obser vethe ECO display for an eco‐
nomical driving style. Ta
ke -back of end-of-life vehicles
EU countries onl y:
Mercedes-Benz will take back your end-of-life
ve hicle for environment-friendly disposal in
accordance with the European Union(EU) End-
of-Life Vehicles Directive.
A network of vehicle take -ba ckpoints and dis‐
mantlers has been es tablished foryo uto return
yo ur vehicle. You can lea veit at any of these
points free of charge . This makes an impor tant
contribution toclosing there cycling circle and
conse rving resources.
Fo r fur ther information about there cycling and
disposal of end-of-life vehicles, and theta ke- 22
General no tes
Page 40 of 545
data can also be used
toexamine the cus tom‐
er's warranty and guarantee claims.
Fa ult memories in theve hicle can be reset by a
service outlet or at your requ est as part of repair
or maintenance work.
Con venience and inf otainment functions
Yo u can store con venience settings and individ‐
ual settings in theve hicle and change or reset
th em at any time.
Depending on theve hicle equipment, this
includes thefo llowing settings, forex ample:
R seat and steering wheel positions
R suspension and climate control settings
R individual settings, such as interior lighting
Depending on the selected equipment, you can
import data into vehicle inf otainment functions
yo urself.
Depending on theve hicle equipment, this
includes thefo llowing data, forex ample:
R multimedia data, such as music, films or pho‐
to sfo r playback in an integrated multimedia
sy stem R
address book data for use in connection with
an integrated hands-free sy stem or an inte‐
grated navigation sy stem
R entered navigation destinations
R data about the use of Internet services
These data for con venience and inf otainment
functions may be sa ved locally in theve hicle or
th ey may be located on a device which you ha ve
connected totheve hicle, such as a smartphone,
USB flash drive or MP3 pla yer.If yo u ha ve
entered these data yourself, you can dele tethem
at any time.
This data is transmit ted from theve hicle tothird
parties only at your requ est. This applies, in par‐
ticular, when you use online services in accord‐
ance with the settings that you ha veselected.
Smartphone integ ration (e.g. Android Autoor
Apple CarPlay ®
)
If yo ur vehicle is accordingly equipped, you can
connect your smartphone or ano ther mobile end
device totheve hicle. You can then control them
by means of the control elements integrated in
th eve hicle. Images and audio from the smart‐ phone can be output via
the multimedia sy stem.
Cer tain information is simultaneously transfer‐
re dto yo ur smartphone. Depending on the type
and integration, this includes position data, day/
night mode and other general vehicle statuses.
Fo r more information please consult the Owner's
Manual of theve hicle/inf otainment sy stem.
This integration allo wsthe use of selected
smartphone apps, such as navigation or music
pla yer apps. There is no fur ther interaction
between the smartphone and theve hicle; in par‐
ticular, vehicle data is not directly accessible.
The type of additional data processing is de ter‐
mined bythe pr ovider of the app being used.
Which settings you can make, if an y,depends on
th e specific app and the operating sy stem of
yo ur smartphone. Online services
Wi
reless network connection
If yo ur vehicle has a wireless network connec‐
tion, it enables data tobe exc hanged between
yo ur vehicle and additional sy stems. The wire‐
less network connection is made possible bythe Gene
ral no tes 37
Page 115 of 545
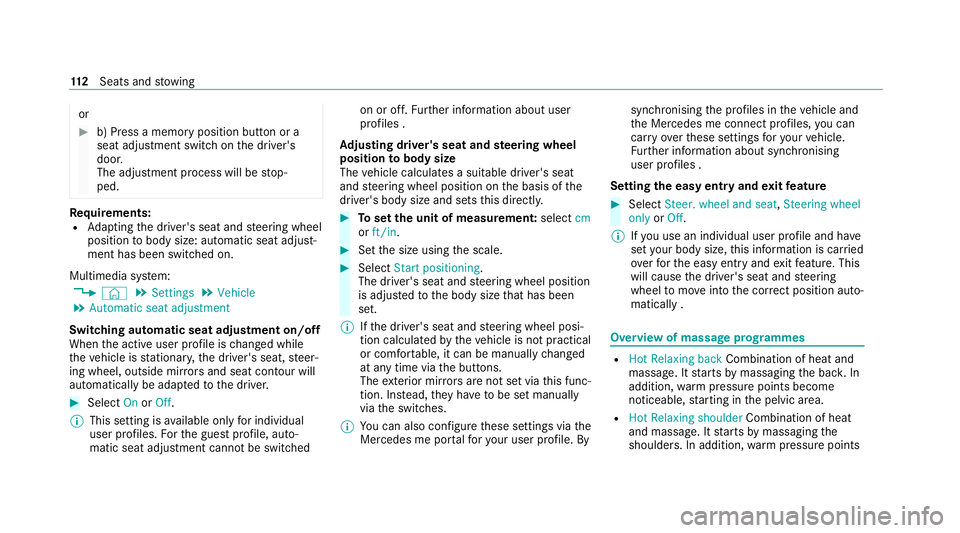
or
#
b) Press a memory position button or a
seat adjustment switch on the driver's
door.
The adjustment process will be stop‐
ped. Re
quirements:
R Adapting the driver's seat and steering wheel
position tobody size: automatic seat adjust‐
ment has been switched on.
Multimedia sy stem:
4 © 5
Settings 5
Vehicle
5 Automatic seat adjustment
Switching automatic seat adjustment on/off
When the active user profile is changed while
th eve hicle is stationar y,the driver's seat, steer‐
ing wheel, outside mir rors and seat con tour will
automatically be adap tedto the driver. #
Select OnorOff.
% This setting is available on lyfor individual
user profiles. Forth e guest profile, auto‐
matic seat adjustment cannot be switchedon or off.
Further information about user
profiles .
Ad justing driver's seat and steering wheel
position tobody size
The vehicle calculates a suitable driver's seat
and steering wheel position on the basis of the
driver's body size and sets this directly. #
Toset the unit of measurement: selectcm
or ft/in. #
Set the size using the scale. #
Select Start positioning.
The driver's seat and steering wheel position
is adjus tedto the body size that has been
set.
% Ifth e driver's seat and steering wheel posi‐
tion calculated bytheve hicle is not practical
or comfor table, it can be manually changed
at any time via the buttons.
The exterior mir rors are not set via this func‐
tion. Ins tead, they have tobe set manually
via the switches.
% You can also configure these settings via the
Mercedes me por talfo ryo ur user profile. By syn
chro nising the profiles in theve hicle and
th e Mercedes me connect profiles, you can
car ryove rth ese settings foryo ur vehicle.
Fu rther information about synchronising
user profiles .
Setting the easy entry and exitfeature #
Select Steer. wheel and seat, Steering wheel
only orOff.
% Ifyo u use an individual user profile and ha ve
set your body size, this information is car ried
ove rfo rth e easy entry andexitfeature. This
will cause the driver's seat and steering
wheel tomo veinto the cor rect position auto‐
matically . Overview of massage prog
rammes R
Hot Relaxing back Combination of heat and
massa ge. It starts bymassaging the bac k.In
addition, warm pressure points become
noticeable, starting in the pelvic area.
R Hot Relaxing shoulder Combination of heat
and massage. It starts bymassaging the
shoulders . In addition, warm pressure points 11 2
Seats and stowing
Page 149 of 545
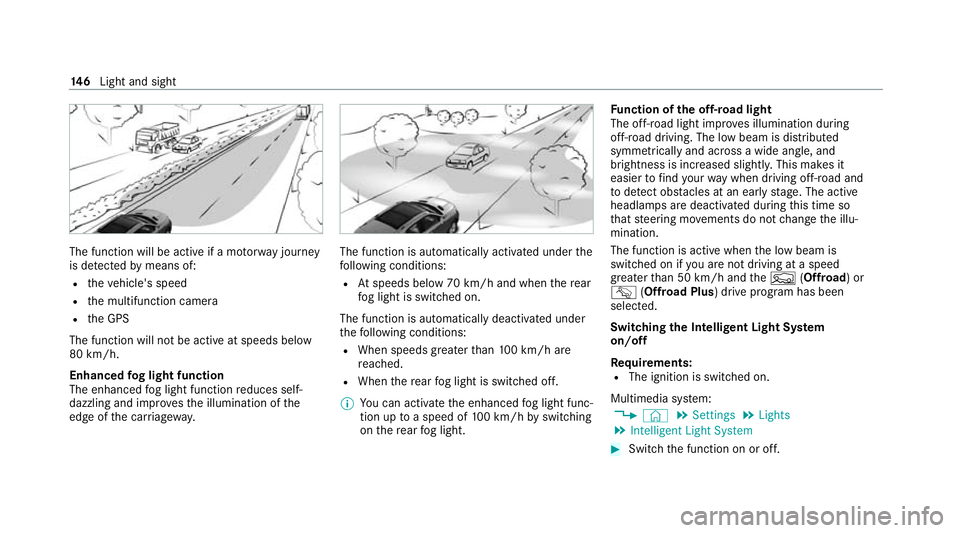
The function will be active if a mo
torw ay jou rney
is de tected bymeans of:
R theve hicle's speed
R the multifunction camera
R the GPS
The function will not be active at speeds below
80 km/h.
Enhanced fog light function
The enhanced fog light function reduces self-
dazzling and impr ovesth e illumination of the
edge of the car riag ewa y. The function is automatically activated under
the
fo llowing conditions:
R Atspeeds below 70 km/h and when there ar
fo g light is switched on.
The function is automatically deactivated under
th efo llowing conditions:
R When speeds greater than 100 km/h are
re ached.
R When there ar fog light is switched off.
% You can activate the enhanced fog light func‐
tion up toa speed of 100 km/h byswitching
on there ar fog light. Fu
nction of the off-road light
The off-ro ad light impr oves illumination during
off-road driving. The low beam is distributed
symmetrically and across a wide angle, and
brightness is increased slightl y.This makes it
easier tofind your wa y when driving off-ro ad and
to detect obs tacles at an earl yst age. The active
headlamps are deactivated during this time so
th at steering mo vements do not change the illu‐
mination.
The function is active when the low beam is
switched on if you are not driving at a speed
greater than 50 km/h and theF (Offroad) or
G (Offroad Plus) drive program has been
selected.
Switching the Intelligent Light Sy stem
on/off
Re quirements:
R The ignition is switched on.
Multimedia sy stem:
4 © 5
Settings 5
Lights
5 Intelligent Light System #
Switch the function on or off. 14 6
Light and sight
Page 154 of 545
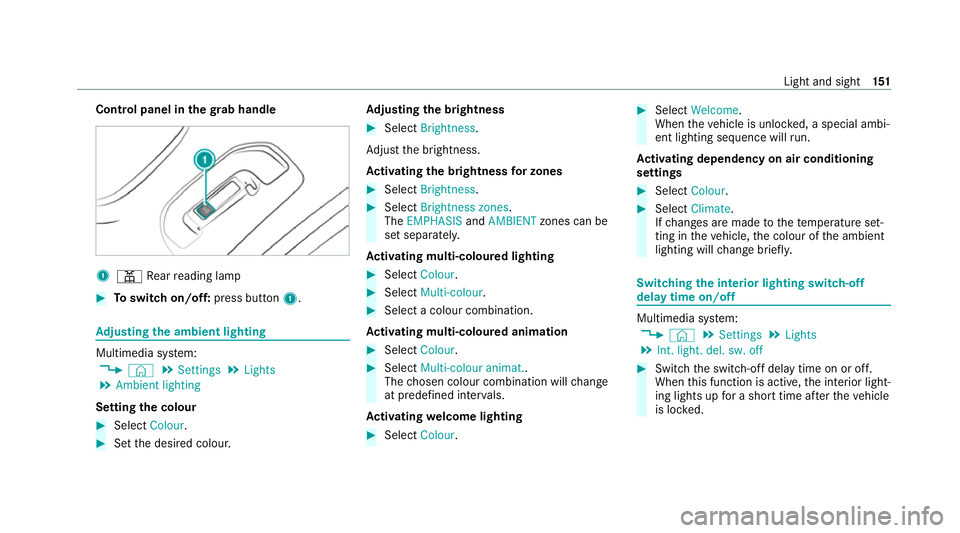
Control panel in
thegr ab handle 1
003D Rear reading lamp #
Toswitch on/off: press button1. Ad
justing the ambient lighting Multimedia sy
stem:
4 © 5
Settings 5
Lights
5 Ambient lighting
Setting the colour #
Select Colour. #
Set the desired colour. Ad
justing the brightness #
Select Brightness .
Ad just the brightness.
Ac tivating the brightness for zones #
Select Brightness . #
Select Brightness zones .
The EMPHASIS andAMBIENT zones can be
set separately.
Ac tivating multi-coloured lighting #
Select Colour. #
Select Multi-colour. #
Select a colour combination.
Ac tivating multi-coloured animation #
Select Colour. #
Select Multi-colour animat..
The chosen colour combination will change
at predefined inter vals.
Ac tivating welcome lighting #
Select Colour. #
Select Welcome.
When theve hicle is unloc ked, a special ambi‐
ent lighting sequence will run.
Ac tivating dependency on air conditioning
settings #
Select Colour. #
Select Climate.
If ch anges are made tothete mp erature set‐
ting in theve hicle, the colour of the ambient
lighting will change brief ly. Switching
the interior lighting switch-off
delay time on/off Multimedia sy
stem:
4 © 5
Settings 5
Lights
5 Int. light. del. sw. off #
Switch the switch-off delay time on or off.
When this function is active, the interior light‐
ing lights up for a short time af terth eve hicle
is loc ked. Light and sight
151
Page 167 of 545
Ac
tivating/deactivating the climate control
syn chro nisation function via the air condi‐
tioning control panel Climate control can be set centrally using
the
synchronisation function. The temp erature and
air distribution setting forth e driver's side will be
adop ted automatically for all clima tecontrol
zones. #
Press the0 button.
The synchronisation function will be deactivated
if th e settings for one of theot her climate zones
are changed. Ac
tivating/deactivating the climate control
syn chro nisation function via the multimedia
sy stem Climate control can be set centrally using
the
synchronisation function. The driver's settings
fo rte mp erature, air quantity and air distribution
are adop ted automatically for all clima tezones. #
Call up the air conditioning menu
(/ page 162). #
Select First row of seats. #
Select SYNC. Demisting
the windo ws Wi
ndo wsmis ted up on the inside #
Press the0058 button. #
Ifth e windo wscontinue tomist up: press the
0064 button.
Wi ndo wsmis ted up on the outside #
Switch on the windscreen wipers. #
Press the0058 button. Switching air-recirculation mode on/off
#
Press the0072 button.
The interior air will be recirculated.
Air-reci rculation mode automatically swit ches to
fresh air mode af ter some time.
% If air-recirculation mode is switched on, the
windo wsmay mist up more quickl y.Switch
on air- recirculation mode only brie fly. Switches
there sidual heat on/off Re
quirements:
R theve hicle is par ked.
It is possible tomake use of there sidual heat
from the engine tocontinue heating or ventilat‐
ing the front compartment of theve hicle for
appr oximately 30 minutes, depending on the
te mp erature set. #
Toactivate: press button 0056.
Re sidual heat will be switched off automaticall y. Switching
there sidual heat in there ar
on/off Re
quirements:
R The vehicle is par ked.
When there sidual heat of the engine is activated
in there ar compartment, you can heat or venti‐
la te there ar compartment for appro ximately
30 minutes. #
Press button 5(/ page 162). 16 4
Climate cont rol
Page 171 of 545
Setting
the departu retime #
Select the time TIME A: XX, TIME B: XXor
TIME C: XX. #
Select the pen beside the time. #
Set a time.
Setting thest ationary heater/ventilation via
re mo tecont rol
Re quirements:
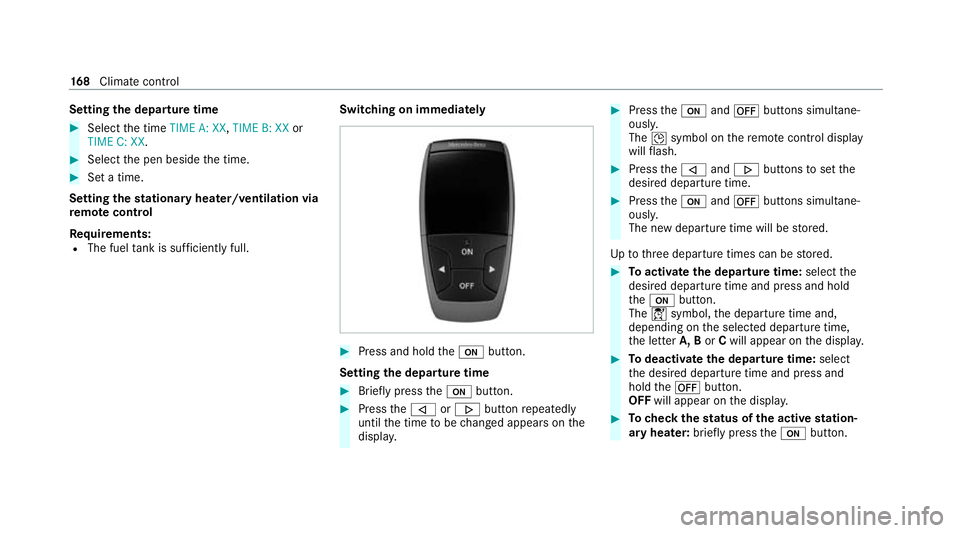
R The fuel tank is su fficiently full. Switching on immedia
tely #
Press and hold the008B button.
Setting the departu retime #
Brie fly press the008B button. #
Press the006A or0066 button repeatedly
until the time tobe changed appears on the
displa y. #
Press the008B and0078 buttons simultane‐
ousl y.
The 004Dsymbol on there mo tecontrol display
will flash. #
Press the006A and0066 buttons toset the
desired departure time. #
Press the008B and0078 buttons simultane‐
ousl y.
The new departure time will be stored.
Up tothre e departure times can be stored. #
Toactivate the departu retime: select the
desired departure time and press and hold
th e008B button.
The 004Csymbol, the departure time and,
depending on the selected departure time,
th e letter A, BorCwill appear on the displa y. #
Todeactivate the departure time: select
th e desired departure time and press and
hold the0078 button.
OFF will appear on the displa y. #
Tocheck thest atus of the active station‐
ary heater: briefly press the008B button. 16 8
Climate cont rol
Page 224 of 545
The
ATTENTION ASSIST dr owsiness or alertness
assessment is reset and restar ted when continu‐
ing the journey in thefo llowing situations:
R Ifyo u swit choff the engine.
R Ifyo u unfas tenyo ur seat belt and open the
driver's door (e.g. tochange drivers or take a
break).
Setting ATTENTION ASSI ST
Multimedia sy stem:
4 © 5
Settings 5
Assistance
5 Attention Assist
Setting options #
Select Standard, SensitiveorOff.
Suggesting a rest area #
Select Suggest rest area . #
Activate or deacti vate the function.
If AT TENTION ASSIST de tects fatigue or
increasing la ckof attention, it suggests a
re st area in the vicinit y. #
Select the sugges tedre st area.
Yo u are guided tothe selected rest area. Cruise cont
rol and limiter Fu
nction of cruise control
* NO
TEPlug-in hybrid #
Obser vethe no tes in the Supplement.
Yo u could otherwise failto recognise
dangers. Cruise control
regulates the speed totheva lue
selec tedby the driver.
If yo u accelerate toove rtake, forex ample, the
st ored speed is not dele ted. If youre mo veyour
fo ot from the accelerator pedal af terove rtaking,
cruise control will resume speed regulation back
to thestored speed.
Yo u can store any speed abo ve20 km/h up to
th e maximum design speed or up tothe set win‐
te r tyre limit.
Obser vethe no tes on driving sy stems and your
re sponsibility; you may otherwise failto recog‐
nise dangers (/ page 211).
Me rcedes‑AMG vehicles: cruise control is avail‐
able up toa maximum speed of 250 km/h. Displ
ays on the multifunction display
R h (gre y): cruise contro l is selected but
not yet acti vated.
R h (green): cruise control is active.
A stored speed appears along with theh dis‐
pla y.
% The segments extending from the cur rent
st ored speed tothe end of the scale, or to
th e set winter tyre limit, light up in the
speedome ter.
Sy stem limits
Cruise control may be unable tomaintain the
st ored speed on uphill gradients. The stored
speed is resumed when the gradient evens out.
Change into a lo werge ar in good time on long
and steep downhill gradients. Take particular
no te ofthis when driving a laden vehicle. By
doing so, you will make use of the engine's brak‐
ing ef fect. This relie vesth e load on the brake
sy stem and pr events the brakes from overheat‐
ing and wearing tooqu ickl y. Driving and pa
rking 221