parking brake MERCEDES-BENZ GLK-CLASS SUV 2015 Workshop Manual
[x] Cancel search | Manufacturer: MERCEDES-BENZ, Model Year: 2015, Model line: GLK-CLASS SUV, Model: MERCEDES-BENZ GLK-CLASS SUV 2015Pages: 386, PDF Size: 26 MB
Page 216 of 386
When towing a trailer, your vehicle's handling
characteristics will be different in comparison with when driving without a trailer.
Use the left-hand paddle shifter to shift into a
lower gear in good time on long and steep
downhill gradients.
iThis also applies if you have activated
cruise control.
This will use the braking effect of the engine,
so that less braking will be required to main-
tain the speed. This relieves the load on the
brake system and prevents the brakes from
overheating and wearing too quickly. If you
need additional braking, depress the brake
pedal repeatedly rather than continuously.
Driving tips
R Maintain a greater distance from the vehi-
cle in front than when driving without a
trailer.
R Avoid braking abruptly. If possible, brake
gently at first to allow the trailer to run on.
Then, increase the braking force rapidly.
R The values given for gradient-climbing
capabilities from a standstill refer to sea
level. When driving in mountainous areas,
note that the power output of the engine
and, consequently, the vehicle's gradient-
climbing capability, decreases with
increasing altitude.
If the trailer swings from side to side:
X Do not accelerate.
X Do not counter-steer.
X Brake if necessary.
Installing the ball coupling
GWARNING
If the ball coupling is not installed and secured
correctly the trailer may come loose. There is
a risk of an accident.
Install and secure the ball coupling as descri-
bed in the ball coupling installation instruc-
tions. Make sure that the ball coupling is
installed and secured correctly before every
journey.
! Mercedes-Benz recommends that you
only use ball couplings that have been tes- ted and approved by Mercedes-Benz. This
helps to avoid damage to the vehicle.
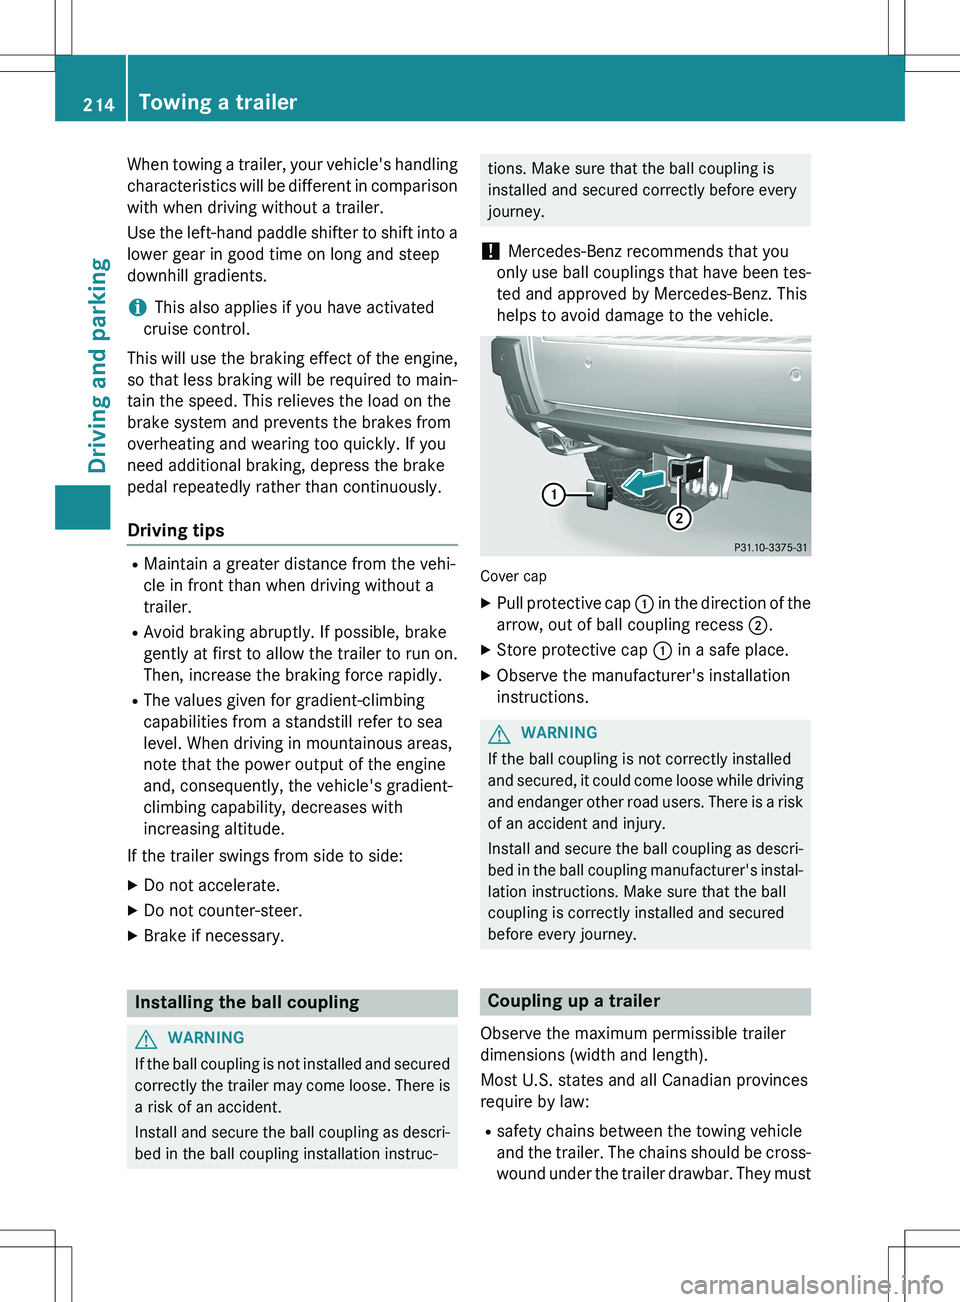
Cover cap
X Pull protective cap : in the direction of the
arrow, out of ball coupling recess ;.
X Store protective cap : in a safe place.
X Observe the manufacturer's installation
instructions.
GWARNING
If the ball coupling is not correctly installed
and secured, it could come loose while driving
and endanger other road users. There is a risk
of an accident and injury.
Install and secure the ball coupling as descri-
bed in the ball coupling manufacturer's instal- lation instructions. Make sure that the ball
coupling is correctly installed and secured
before every journey.
Coupling up a trailer
Observe the maximum permissible trailer
dimensions (width and length).
Most U.S. states and all Canadian provinces
require by law:
R safety chains between the towing vehicle
and the trailer. The chains should be cross-
wound under the trailer drawbar. They must
214Towing a trailer
Driving and parking
Page 217 of 386
be fastened to the vehicle's trailer cou-
pling, not to the bumper or the axle.
Leave enough play in the chains to make
tight cornering possible.
R a separate brake system for certain types
of trailer.
R a safety switch for braked trailers. Check
the specific legal requirements applicable
to your state.
If the trailer detaches from the towing vehi-
cle, the safety switch applies the trailer's
brakes.
! Do not connect the trailer's brake system
(if featured) to the hydraulic brake system
of the towing vehicle, as the latter is equip- ped with an anti-lock brake system. Doing
so will result in a loss of function of the
brake systems of both the vehicle and the
trailer.
iThe vehicle's wiring harness features a
connection to the brake indicator lamp.
X Make sure that the automatic transmission
is set to position P.
X Apply the vehicle's parking brake.
X Close all doors and the tailgate.
X Couple up the trailer.
X Establish all electrical connections.
Towing a trailer
There are numerous legal requirements con-
cerning the towing of a trailer, e.g. speed
restrictions. Make sure that your car/trailer
combination complies with the local regula-
tions:
R in your place of residence
R in the location to which you are driving
The police and local authorities can provide
reliable information.
Observe the following when towing a trailer:
R To gain driving experience and to become
accustomed to the new handling charac- teristics, you should practice the following
in a traffic-free location:
- cornering
- stopping
- backing up
R Before driving, check:
- the trailer tow hitch
- the safety switch for braked trailers
- the safety chains
- electrical connections
- the lights
- the wheels
R Adjust the exterior mirrors to provide an
unobstructed view of the rear section of the
trailer.
R If the trailer has electronically controlled
brakes, pull away carefully. Brake manually
using the brake controller and check
whether the brakes function correctly.
R Secure any objects on the trailer to prevent
the cargo from slipping when the vehicle is
in motion.
R When you couple up a trailer, check at reg-
ular intervals that the load is firmly secured. If the trailer is equipped with trailer lights
and brakes, check the trailer to ensure that
these are working.
R Bear in mind that the handling will be less
stable when towing a trailer than when driv-
ing without one. Avoid sudden steering
movements.
R The vehicle/trailer combination is heavier,
accelerates more slowly, has a decreased
gradient climbing capability and a longer
braking distance.
It is more susceptible to side winds and
requires more careful steering.
R If possible, avoid abrupt braking. Depress
the brake pedal moderately at first, so that
the trailer can activate its own brakes. Thenincrease the pressure on the brake pedal.
R If the automatic transmission repeatedly
shifts between gears on uphill or downhill
Towing a trailer215
Driving and parking
Z
Page 218 of 386
gradients, shift to a lower gear using the
left-hand steering wheel paddle shifter.
A lower gear and lower speed reduce the
risk of engine failure.
R When driving downhill, shift to a lower gear
to utilize the engine's braking effect.
Avoid continuous brake application as this
may overheat the vehicle brakes and, if
installed, the trailer brakes.
R If the coolant temperature increases dra-
matically while the air-conditioning system
is switched on, switch off the air-condition-
ing system.
Coolant heat can additionally be dissipated
by opening the windows and by setting the blower fan and the interior temperature to
maximum.
R When overtaking, pay particular attention
to the extended length of your vehicle/
trailer combination.
Due to the length of the vehicle/trailer
combination, you require additional road
space in relation to the vehicle you are
overtaking, before you can change back to
the original lane.
Decoupling a trailer
GWARNING
If you uncouple a trailer with the overrun
brake engaged, you could trap your hand
between the vehicle and the trailer drawbar.
There is a risk of injury.
Do not uncouple a trailer if the overrun brake is engaged.
! Do not disconnect a trailer with an
engaged overrun brake. Otherwise, your
vehicle could be damaged by the rebound- ing of the overrun brake.
X Make sure that the automatic transmission
is set to position P.
X Apply the vehicle's parking brake. X
Close all doors and the tailgate.
X Apply the trailer's parking brake.
X Remove the trailer cable and decouple the
trailer.
Permissible trailer loads and drawbar
loads
Weight specifications
The gross trailer weight is calculated by add-
ing the weight of the trailer to the weight of
the load and equipment on the trailer.
You will find installing dimensions and loads
under "Technical data" ( Y page 381).
Loading a trailer
R
When loading the trailer, make sure that
neither the permissible gross weight of the
trailer nor the gross vehicle weight is
exceeded. The permissible gross vehicle
weight is indicated on the identification
plate on the B-pillar on the driver's side of
the vehicle.
You can find the maximum permissible val-
ues on the type plates of your vehicle and
the trailer. When calculating how much
weight the vehicle and trailer may carry,
pay attention to the respective lowest val-
ues.
R The trailer drawbar load on the ball coupling
must be added to the rear axle load to avoid exceeding the permissible gross axle
weight. The permissible gross vehicle
weight is indicated on the identification
plate on the B-pillar on the driver's side of
the vehicle.
iMercedes-Benz recommends a trailer
load where the trailer drawbar noseweight
accounts for 8% to 15% of the trailer's per-
missible gross weight.
216Towing a trailer
Driving and parking
Page 326 of 386
ROnly use jumper cables which have a sufficient cross-section and insulated terminal clamps.
R If the battery is fully discharged, leave the battery tha t is being used to jump-start connected
for a few minutes before attempting to start. This charges the batter y slightly.
R Make sure that the two vehicles do not touch.
Make sure that:
R the jumper cables are not damaged.
R bare parts of the terminal clamp do not come into con tact with other metal parts while the
jumper cables are connected to the battery.
R the jumper cables cannot come into contact with parts su ch as the V-belt pulley or the fan.
These parts move when the engine is started and while it is running.
X Apply the parking brake firmly.
X Shift the automatic transmission to position P.
X Switch off all electrical consumers, e.g. rear window defroster , lighting, etc.
X Open the hood.
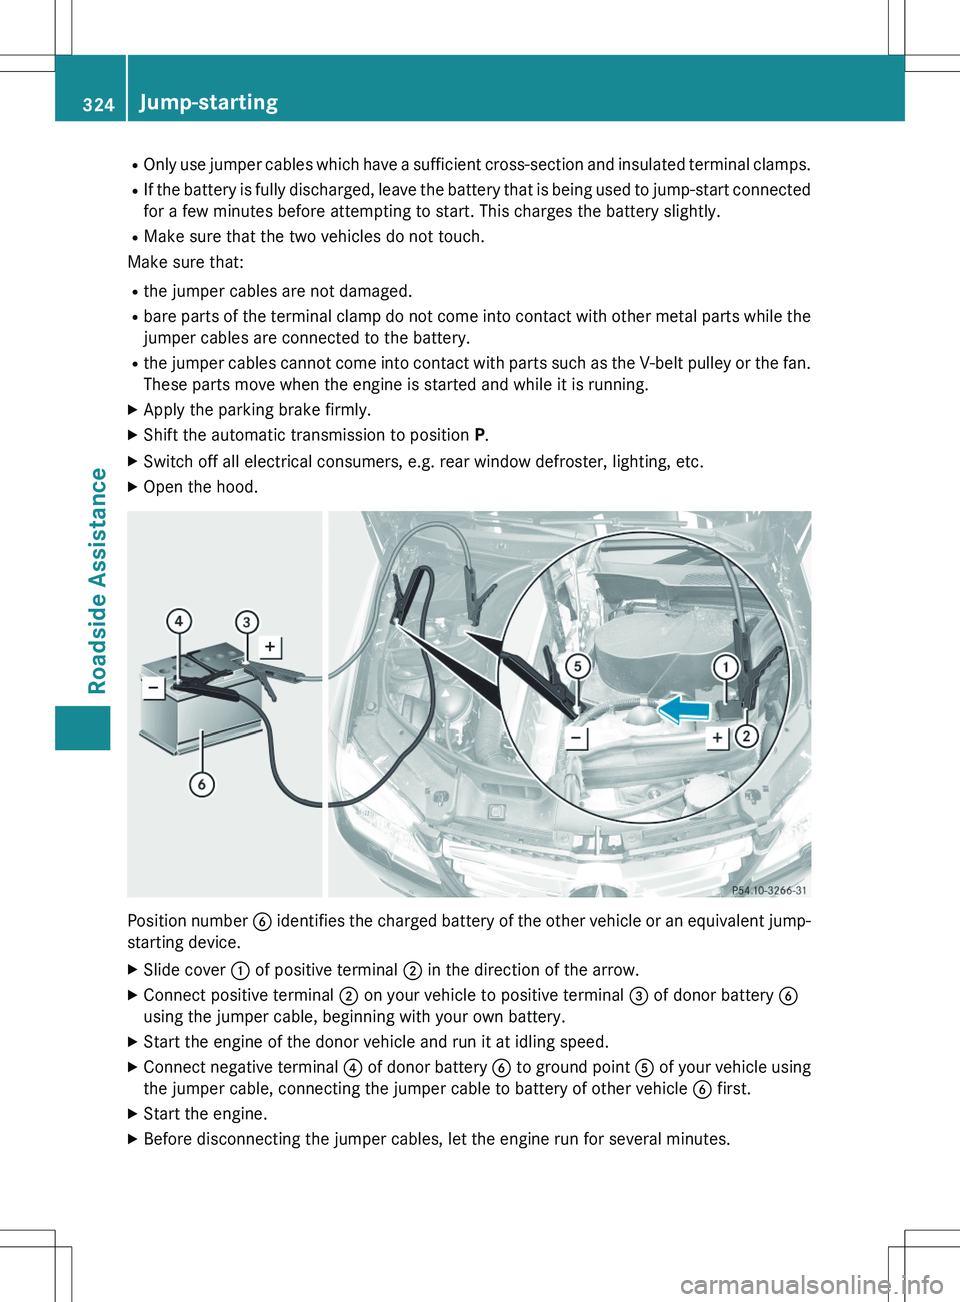
Position number B identifies the charged battery of the other vehicle or a n equivalent jump-
starting device.
X Slide cover : of positive terminal ; in the direction of the arrow.
X Connect positive terminal ; on your vehicle to positive terminal = of donor battery B
using the jumper cable, beginning with your own battery.
X Start the engine of the donor vehicle and run it at idling speed.
X Connect negative terminal ? of donor battery B to ground point A of your vehicle using
the jumper cable, connecting the jumper cable to battery of othe r vehicle B first.
X Start the engine.
X Before disconnecting the jumper cables, let the engine run for sev eral minutes.
324Jump-starting
Roadside Assistance
Page 329 of 386
Towing a vehicle with both axles on
the ground
It is important that you observe the safety
instructions when towing away your vehicle
(Y page 325).
X Switch on the hazard warning lamps
(Y page 119).
iWhen towing with the hazard warning
lamps switched on, use the combination
switch as usual to signal a change of direc- tion. In this case, only the indicator lamps
for the direction of travel flash. After reset- ting the combination switch, the hazard
warning lamp starts flashing again.
X Turn the SmartKey to position 2 in the igni-
tion lock.
X When the vehicle is stationary, depress the
brake pedal and keep it depressed.
X Shift the automatic transmission to posi-
tion N.
X Release the brake pedal.
X Release the parking brake.
Towing the vehicle with the rear axle
raised
Only possible for vehicles without
4MATIC.
When towing your vehicle with the rear axle
raised, it is important that you observe the
safety instructions ( Y page 325).
! The ignition must be switched off if you
are towing the vehicle with the rear axle
raised. Intervention by ESP ®
could other-
wise damage the brake system.
X Bring the front wheels into the straight-
ahead position.
X Switch on the hazard warning lamps
(Y page 119). X
Turn the SmartKey to position 0 in the igni-
tion lock and remove the SmartKey from
the ignition lock.
X When leaving the vehicle, take the Smart-
Key or the KEYLESS-GO key with you.
Transporting the vehicle
The towing eyes or trailer tow hitch can be
used to pull the vehicle onto a trailer or trans-
porter if you wish to transport it.
X Turn the SmartKey to position 2 in the igni-
tion lock.
X Shift the automatic transmission to posi-
tion N.
As soon as the vehicle has been loaded:
X Prevent the vehicle from rolling away by
applying the parking brake.
X Shift the automatic transmission to posi-
tion P.
X Turn the SmartKey to position 0 in the igni-
tion lock and remove the SmartKey from
the ignition lock.
X Secure the vehicle.
! You may only secure the vehicle by the
wheels, not by parts of the vehicle such as
axle or steering components. Otherwise,
the vehicle could be damaged.
Notes on 4MATIC vehicles
!
Vehicles with 4MATIC must not be towed
with either the front or the rear axle raised, as doing so will damage the transmission.
If the vehicle has transmission damage or
damage to the front or rear axle, have it trans-
ported on a transporter or trailer.
In the event of damage to the electrical
system
If the battery is defective, the automatic
transmission will be locked in position P. To
shift the automatic transmission to position
N , you must provide power to the vehicle's
Towing and tow-starting327
Roadside Assistance
Z
Page 358 of 386
Mounting a wheel
Preparing the vehicle
XStop the vehicle on solid, non-slippery and
level ground.
X Apply the parking brake.
X Bring the front wheels into the straight-
ahead position.
X Move the selector lever to position P.
X Switch off the engine.
X Vehicles without KEYLESS-GO: remove
the SmartKey from the ignition lock.
X Vehicles with KEYLESS-GO: open the
driver's door.
The on-board electronics have status 0,
which is the same as the SmartKey having
been removed.
X Vehicles with KEYLESS-GO: remove the
Start/Stop button from the ignition lock
( Y page 149).
X If a trailer is coupled to the vehicle, uncou-
ple it.
X If included in the vehicle equipment,
remove the tire-change tool kit from the
vehicle.
X In addition, safeguard the vehicle against
rolling away.
Securing the vehicle to prevent it
from rolling away
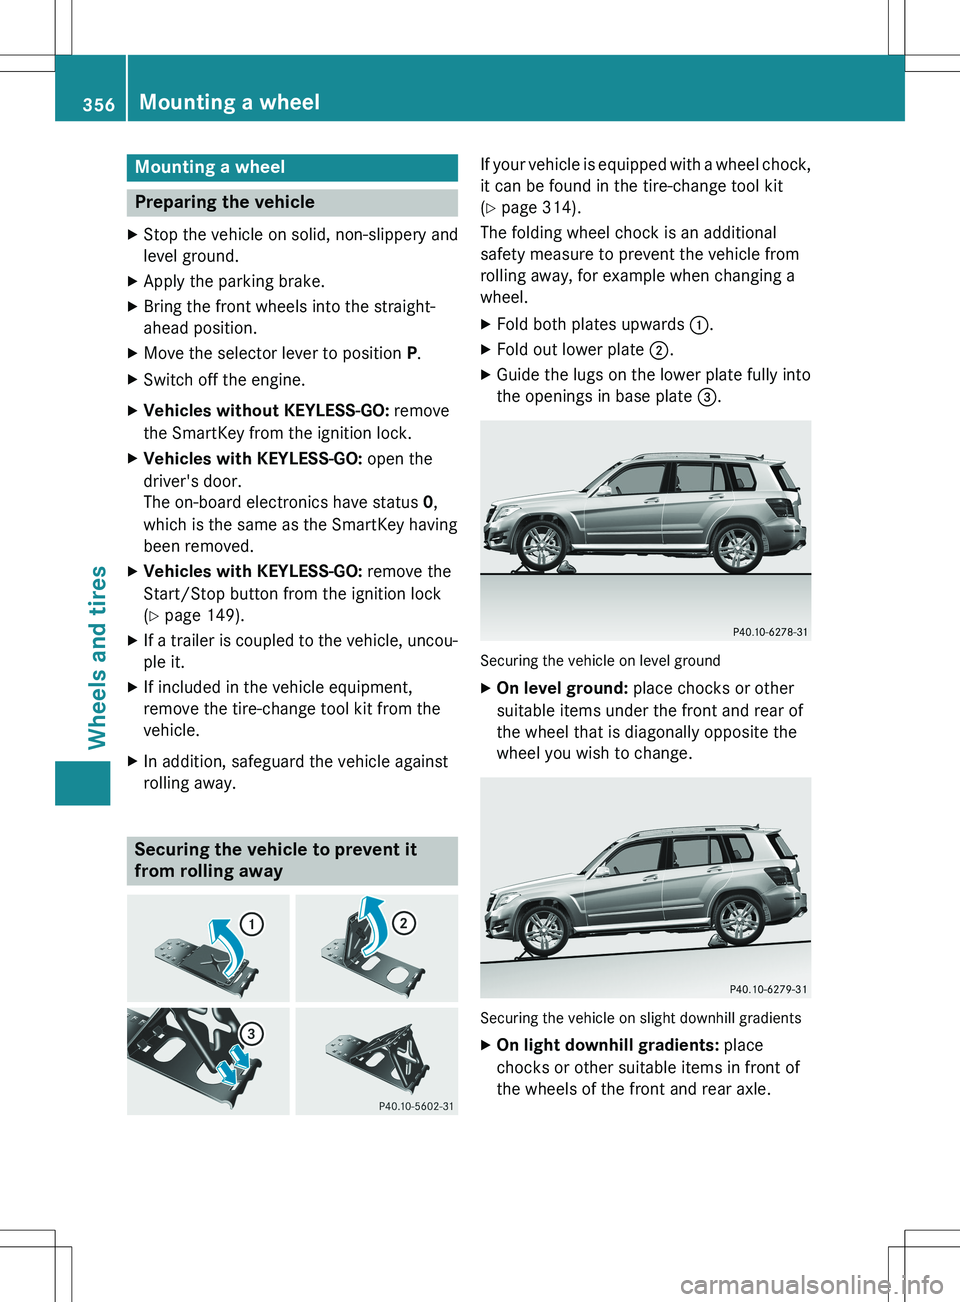
If your vehicle is equipped with a wheel chock,
it can be found in the tire-change tool kit
( Y page 314).
The folding wheel chock is an additional
safety measure to prevent the vehicle from
rolling away, for example when changing a
wheel.
X Fold both plates upwards :.
X Fold out lower plate ;.
X Guide the lugs on the lower plate fully into
the openings in base plate =.
Securing the vehicle on level ground
X
On level ground: place chocks or other
suitable items under the front and rear of
the wheel that is diagonally opposite the
wheel you wish to change.
Securing the vehicle on slight downhill gradients
X On light downhill gradients: place
chocks or other suitable items in front of
the wheels of the front and rear axle.
356Mounting a wheel
Wheels and tires
Page 359 of 386
Raising the vehicle
GWARNING
If you do not position the jack correctly at theappropriate jacking point of the vehicle, the
jack could tip over with the vehicle raised.
There is a risk of injury.
Only position the jack at the appropriate jack-
ing point of the vehicle. The base of the jack
must be positioned vertically, directly under
the jacking point of the vehicle.
Observe the following when raising the vehi-
cle: R To raise the vehicle, only use the vehicle-
specific jack that has been tested and
approved by Mercedes-Benz. If used incor-
rectly, the jack could tip over with the vehi-
cle raised.
R The jack is designed only to raise and hold
the vehicle for a short time while a wheel
is being changed. It is not suited for per-
forming maintenance work under the vehi-
cle.
R Avoid changing the wheel on uphill and
downhill slopes.
R Before raising the vehicle, secure it from
rolling away by applying the parking brake
and inserting wheel chocks. Do not disen-
gage the parking brake while the vehicle is
raised.
R The jack must be placed on a firm, flat and
non-slip surface. On a loose surface, a
large, flat, load-bearing underlay must be
used. On a slippery surface, a non-slip
underlay must be used, e.g. rubber mats.
R Do not use wooden blocks or similar
objects as a jack underlay. Otherwise, the
jack will not be able to achieve its load-
bearing capacity due to the restricted
height.
R Make sure that the distance between the
underside of the tires and the ground does
not exceed 1.2 in (3 cm).
R Never place your hands and feet under the
raised vehicle. R
Do not lie under the vehicle.
R Do not start the engine when the vehicle is
raised.
R Never open or close a door or the tailgate
when the vehicle is raised.
R Make sure that no persons are present in
the vehicle when the vehicle is raised.
! The jack is designed exclusively for jack-
ing up the vehicle at the jacking points.
Otherwise, your vehicle could be damaged.
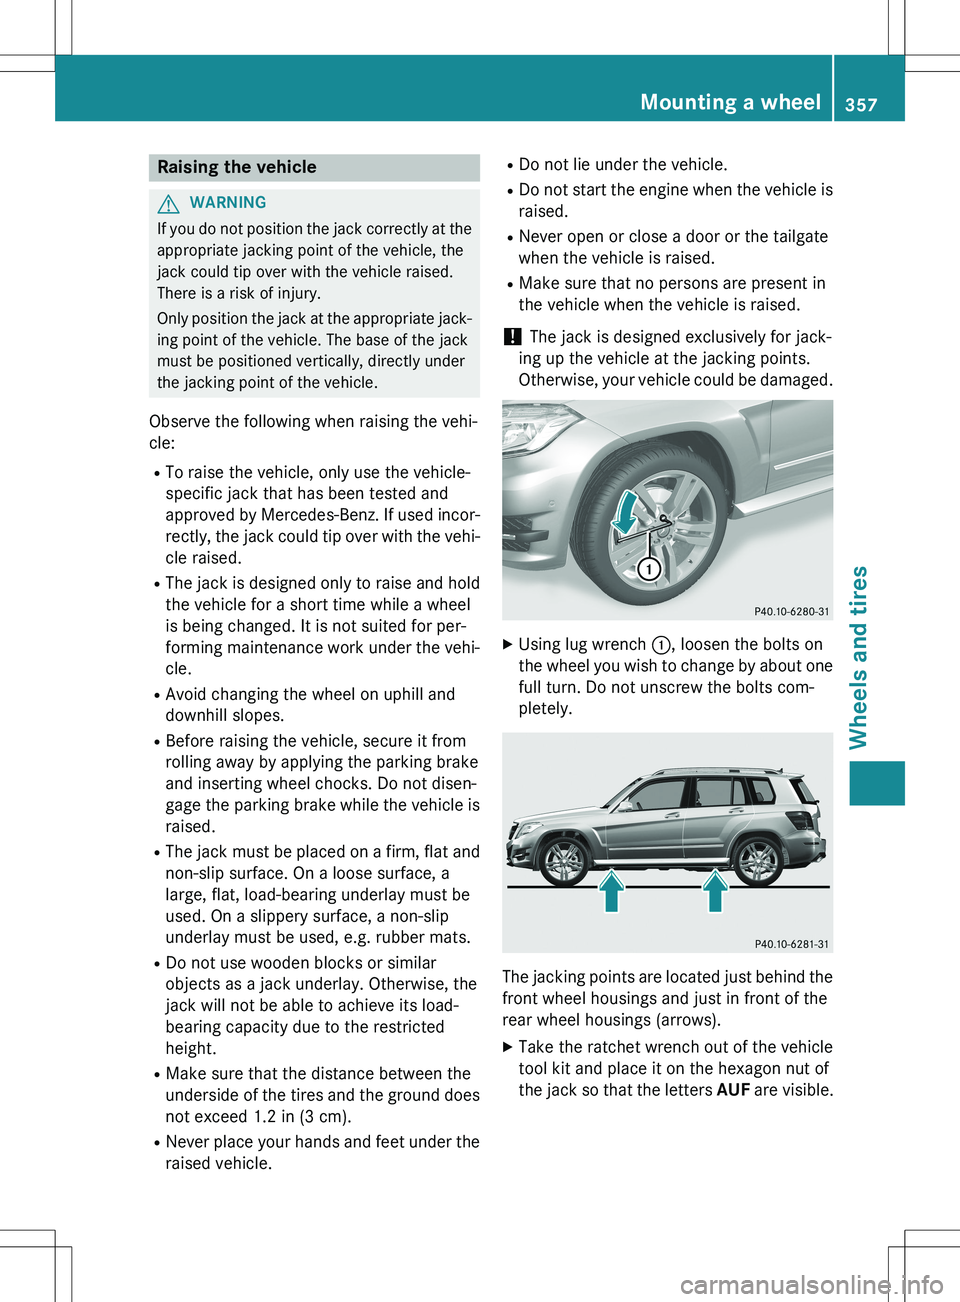
X Using lug wrench :, loosen the bolts on
the wheel you wish to change by about one full turn. Do not unscrew the bolts com-
pletely.
The jacking points are located just behind the
front wheel housings and just in front of the
rear wheel housings (arrows).
X Take the ratchet wrench out of the vehicle
tool kit and place it on the hexagon nut of
the jack so that the letters AUF are visible.
Mounting a wheel357
Wheels and tires
Z