check engine MERCEDES-BENZ GLK SUV 2008 Owners Manual
[x] Cancel search | Manufacturer: MERCEDES-BENZ, Model Year: 2008, Model line: GLK SUV, Model: MERCEDES-BENZ GLK SUV 2008Pages: 261, PDF Size: 8.67 MB
Page 9 of 261
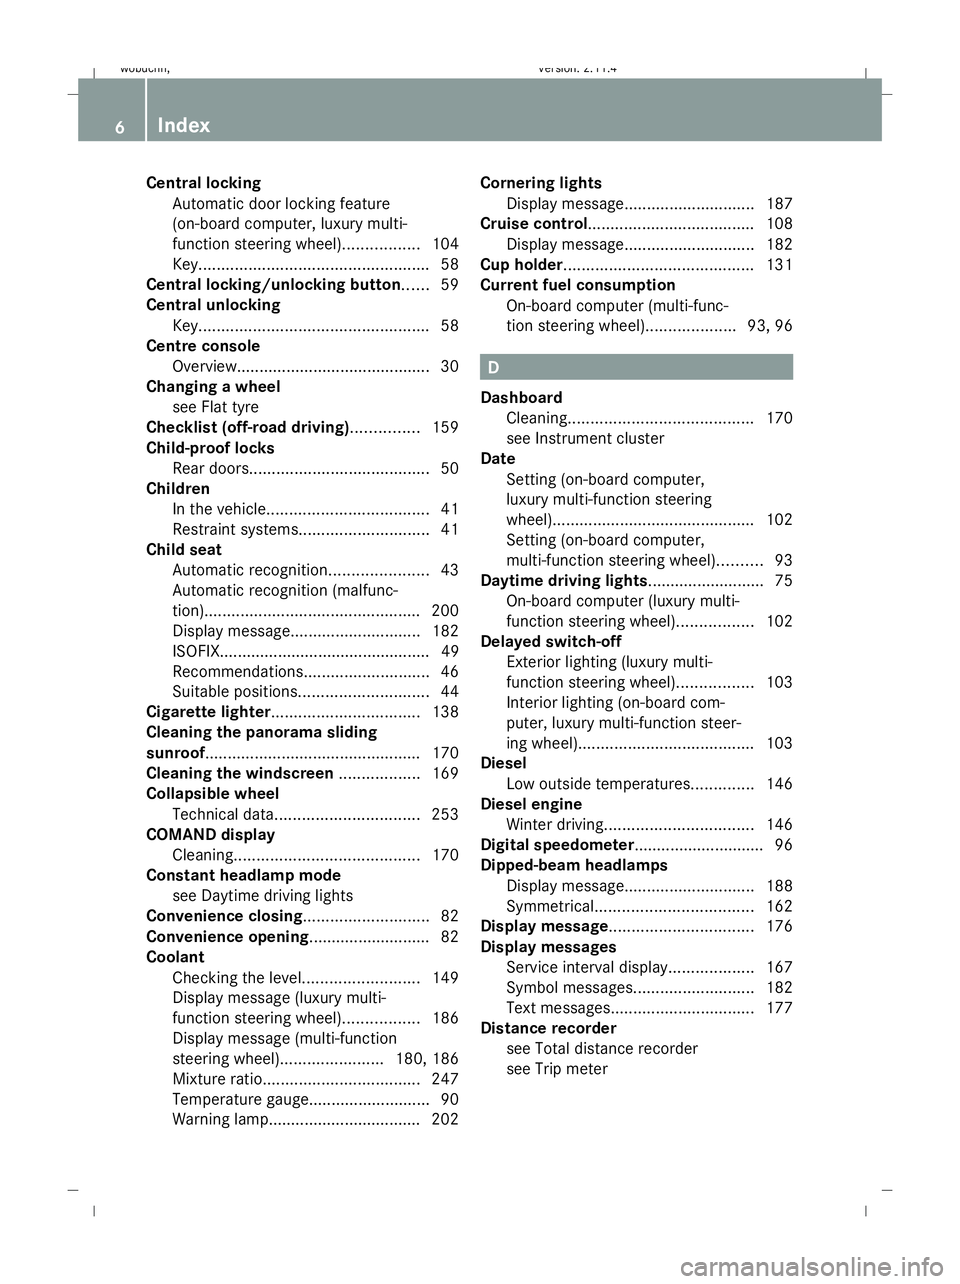
Central locking
Automatic door locking feature
(on-board computer, luxury multi-
function steering wheel). ................104
Key. .................................................. 58
Central locking/unlocking button ......59
Central unlocking Key. .................................................. 58
Centre console
Overview. .......................................... 30
Changing a wheel
see Flat tyre
Checklist (off-road driving)............... 159
Child-proof locks Rear doors. ....................................... 50
Children
In the vehicle. ................................... 41
Restraint systems. ............................ 41
Child seat
Automatic recognition ......................43
Automatic recognition (malfunc-
tion). ............................................... 200
Display message ............................. 182
ISOFIX............................................... 49
Recommendations. ...........................46
Suitable positions. ............................ 44
Cigarette lighter................................. 138
Cleaning the panorama sliding
sunroof................................................ 170
Cleaning the windscreen ..................169
Collapsible wheel Technical data. ............................... 253
COMAND display
Cleaning. ........................................ 170
Constant headlamp mode
see Daytime driving lights
Convenience closing ............................82
Convenience opening ........................... 82
Coolant Checking the level. .........................149
Display message (luxury multi-
function steering wheel) .................186
Display message (multi-function
steering wheel). ......................180, 186
Mixture ratio ................................... 247
Temperature gauge ...........................90
Warning lamp.................................. 202 Cornering lights
Display message ............................. 187
Cruise control..................................... 108
Display message ............................. 182
Cup holder.......................................... 131
Current fuel consumption On-board computer (multi-func-
tion steering wheel). ...................93, 96 D
Dashboard Cleaning. ........................................ 170
see Instrument cluster
Date
Setting (on-board computer,
luxury multi-function steering
wheel). ............................................ 102
Setting (on-board computer,
multi-function steering wheel) ..........93
Daytime driving lights.......................... 75
On-board computer (luxury multi-
function steering wheel) .................102
Delayed switch-off
Exterior lighting (luxury multi-
function steering wheel) .................103
Interior lighting (on-board com-
puter, luxury multi-function steer-
ing wheel). ...................................... 103
Diesel
Low outside temperatures. .............146
Diesel engine
Winter driving. ................................ 146
Digital speedometer............................ .96
Dipped-beam headlamps Display message ............................. 188
Symmetrical. .................................. 162
Display message................................ 176
Display messages Service interval display. ..................167
Symbol messages. ..........................182
Text messages. ............................... 177
Distance recorder
see Total distance recorder
see Trip meter 6 Index
X204_AKB; 1; 5, en-GB
wobuchh,
Version: 2.11.4 2008-10-15T13:20:56+02:00 - Seite 6Dateiname: 6515_0671_02_buchblock.pdf; preflight
Page 12 of 261
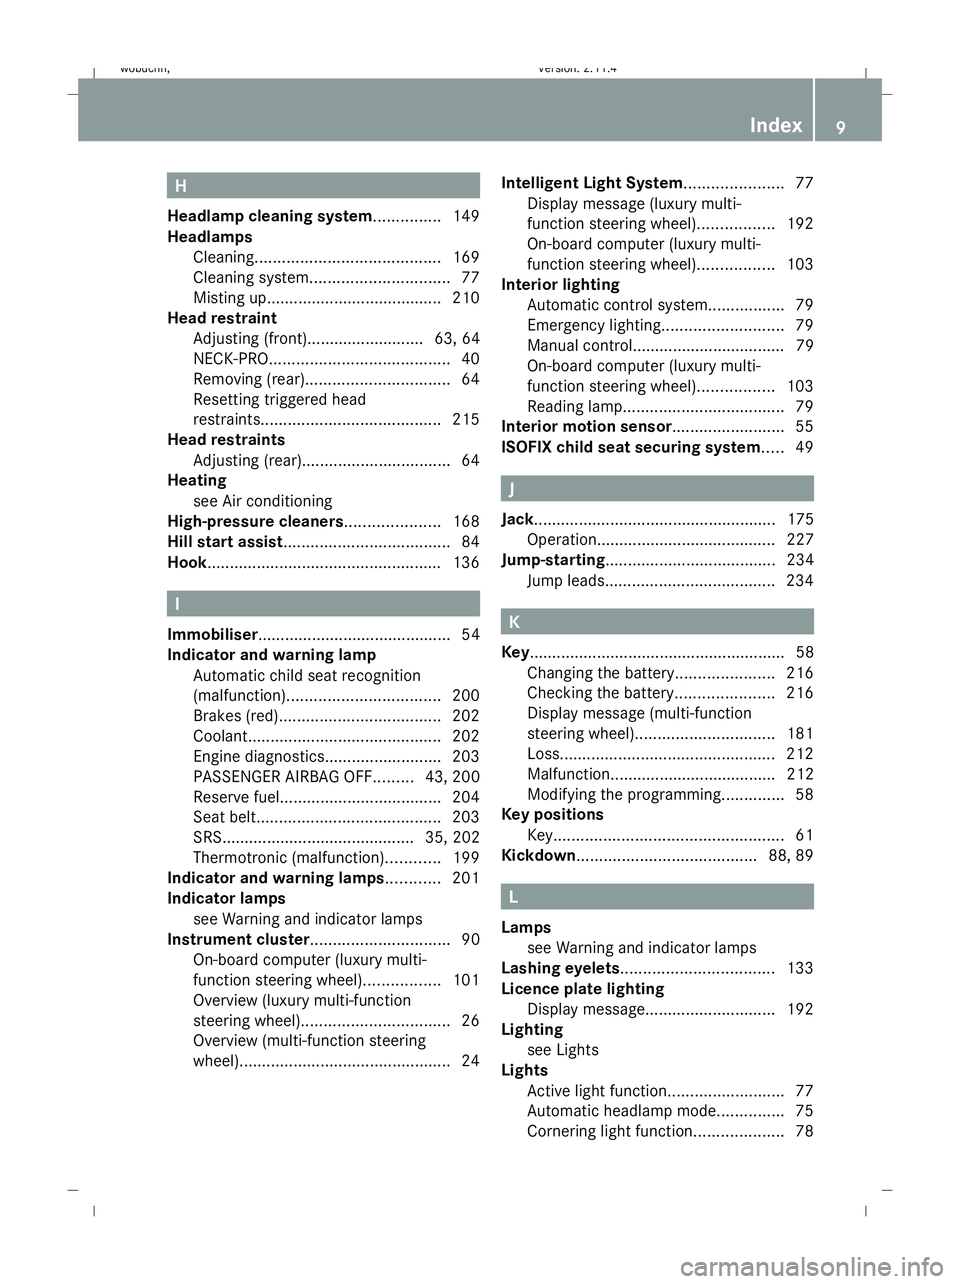
H
Headlamp cleaning system............... 149
Headlamps Cleaning. ........................................ 169
Cleaning system. .............................. 77
Misting up. ...................................... 210
Head restraint
Adjusting (front).......................... 63, 64
NECK-PRO. ....................................... 40
Removing (rear). ............................... 64
Resetting triggered head
restraints. ....................................... 215
Head restraints
Adjusting (rear). ................................ 64
Heating
see Air conditioning
High-pressure cleaners..................... 168
Hill start assist..................................... 84
Hook.................................................... 136I
Immobiliser........................................... 54
Indicator and warning lamp Automatic child seat recognition
(malfunction). ................................. 200
Brakes (red). ................................... 202
Coolant. .......................................... 202
Engine diagnostics ..........................203
PASSENGER AIRBAG OFF .........43, 200
Reserve fuel. ................................... 204
Seat belt. ........................................ 203
SRS........................................... 35, 202
Thermotronic (malfunction) ............199
Indicator and warning lamps............ 201
Indicator lamps see Warning and indicator lamps
Instrument cluster ............................... 90
On-board computer (luxury multi-
function steering wheel) .................101
Overview (luxury multi-function
steering wheel). ................................ 26
Overview (multi-function steering
wheel). .............................................. 24Intelligent Light System
......................77
Display message (luxury multi-
function steering wheel) .................192
On-board computer (luxury multi-
function steering wheel) .................103
Interior lighting
Automatic control system .................79
Emergency lighting. ..........................79
Manual control.................................. 79
On-board computer (luxury multi-
function steering wheel) .................103
Reading lamp .................................... 79
Interior motion sensor......................... 55
ISOFIX child seat securing system .....49 J
Jack...................................................... 175 Operation........................................ 227
Jump-starting ...................................... 234
Jump leads ...................................... 234 K
Key......................................................... 58 Changing the battery ......................216
Checking the battery ......................216
Display message (multi-function
steering wheel). .............................. 181
Loss. ............................................... 212
Malfunction..................................... 212
Modifying the programming. .............58
Key positions
Key. .................................................. 61
Kickdown........................................ 88, 89 L
Lamps see Warning and indicator lamps
Lashing eyelets.................................. 133
Licence plate lighting Display message ............................. 192
Lighting
see Lights
Lights
Active light function ..........................77
Automatic headlamp mode. ..............75
Cornering light function ....................78 Index
9 X204_AKB; 1; 5, en-GB
wobuchh,
Version: 2.11.4
2008-10-15T13:20:56+02:00 - Seite 9 Dateiname: 6515_0671_02_buchblock.pdf; preflight
Page 14 of 261
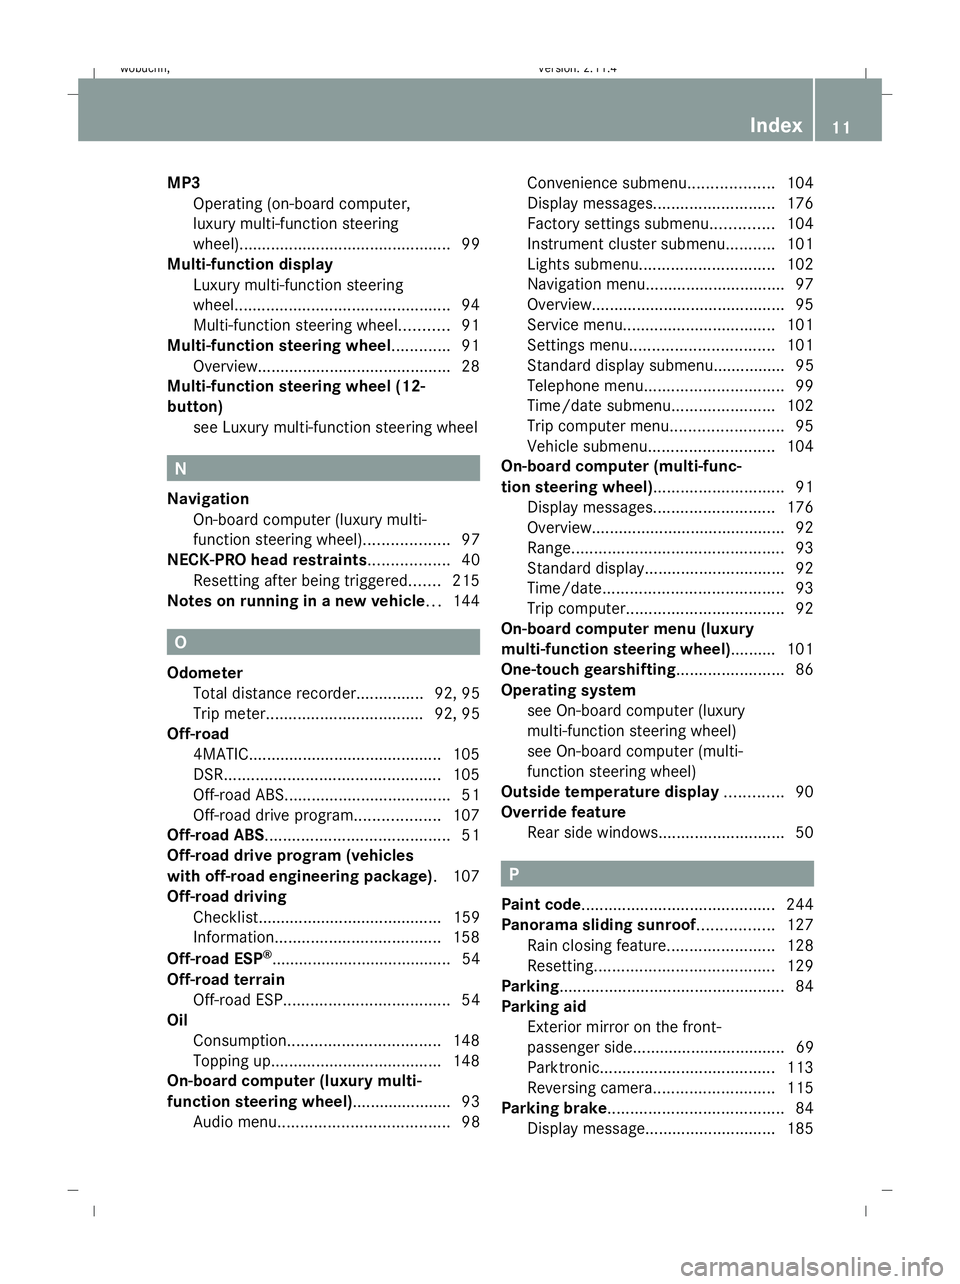
MP3
Operating (on-board computer,
luxury multi-function steering
wheel). .............................................. 99
Multi-function display
Luxury multi-function steering
wheel. ............................................... 94
Multi-function steering wheel. ..........91
Multi-function steering wheel............. 91
Overview. .......................................... 28
Multi-function steering wheel (12-
button)
see Luxury multi-function steering wheel N
Navigation On-board computer (luxury multi-
function steering wheel) ...................97
NECK-PRO head restraints ..................40
Resetting after being triggered. ......215
Notes on running in a new vehicle ...144 O
Odometer Total distance recorder. ..............92, 95
Trip meter. .................................. 92, 95
Off-road
4MATIC ........................................... 105
DSR. ............................................... 105
Off-road ABS. .................................... 51
Off-road drive program. ..................107
Off-road ABS ......................................... 51
Off-road drive program (vehicles
with off-road engineering package) .107
Off-road driving Checklist......................................... 159
Information. .................................... 158
Off-road ESP ®
........................................ 54
Off-road terrain Off-road ESP. .................................... 54
Oil
Consumption. ................................. 148
Topping up. ..................................... 148
On-board computer (luxury multi-
function steering wheel) ......................93
Audio menu ...................................... 98Convenience submenu.
..................104
Display messages ........................... 176
Factory settings submenu ..............104
Instrument cluster submenu ...........101
Lights submenu. ............................. 102
Navigation menu. .............................. 97
Overview. .......................................... 95
Service menu .................................. 101
Settings menu ................................ 101
Standard display submenu................ 95
Telephone menu. .............................. 99
Time/date submenu. ......................102
Trip computer menu. ........................95
Vehicle submenu. ........................... 104
On-board computer (multi-func-
tion steering wheel)............................. 91
Display messages ........................... 176
Overview. .......................................... 92
Range. .............................................. 93
Standard display. .............................. 92
Time/date. ....................................... 93
Trip computer. .................................. 92
On-board computer menu (luxury
multi-function steering wheel).......... 101
One-touch gearshifting........................ 86
Operating system see On-board computer (luxury
multi-function steering wheel)
see On-board computer (multi-
function steering wheel)
Outside temperature display .............90
Override feature Rear side windows ............................ 50 P
Paint code........................................... 244
Panorama sliding sunroof................. 127
Rain closing feature. .......................128
Resetting. ....................................... 129
Parking .................................................. 84
Parking aid Exterior mirror on the front-
passenger side.................................. 69
Parktronic. ...................................... 113
Reversing camera. ..........................115
Parking brake ....................................... 84
Display message ............................. 185 Index
11 X204_AKB; 1; 5, en-GB
wobuchh,
Version: 2.11.4
2008-10-15T13:20:56+02:00 - Seite 11 Dateiname: 6515_0671_02_buchblock.pdf; preflight
Page 21 of 261
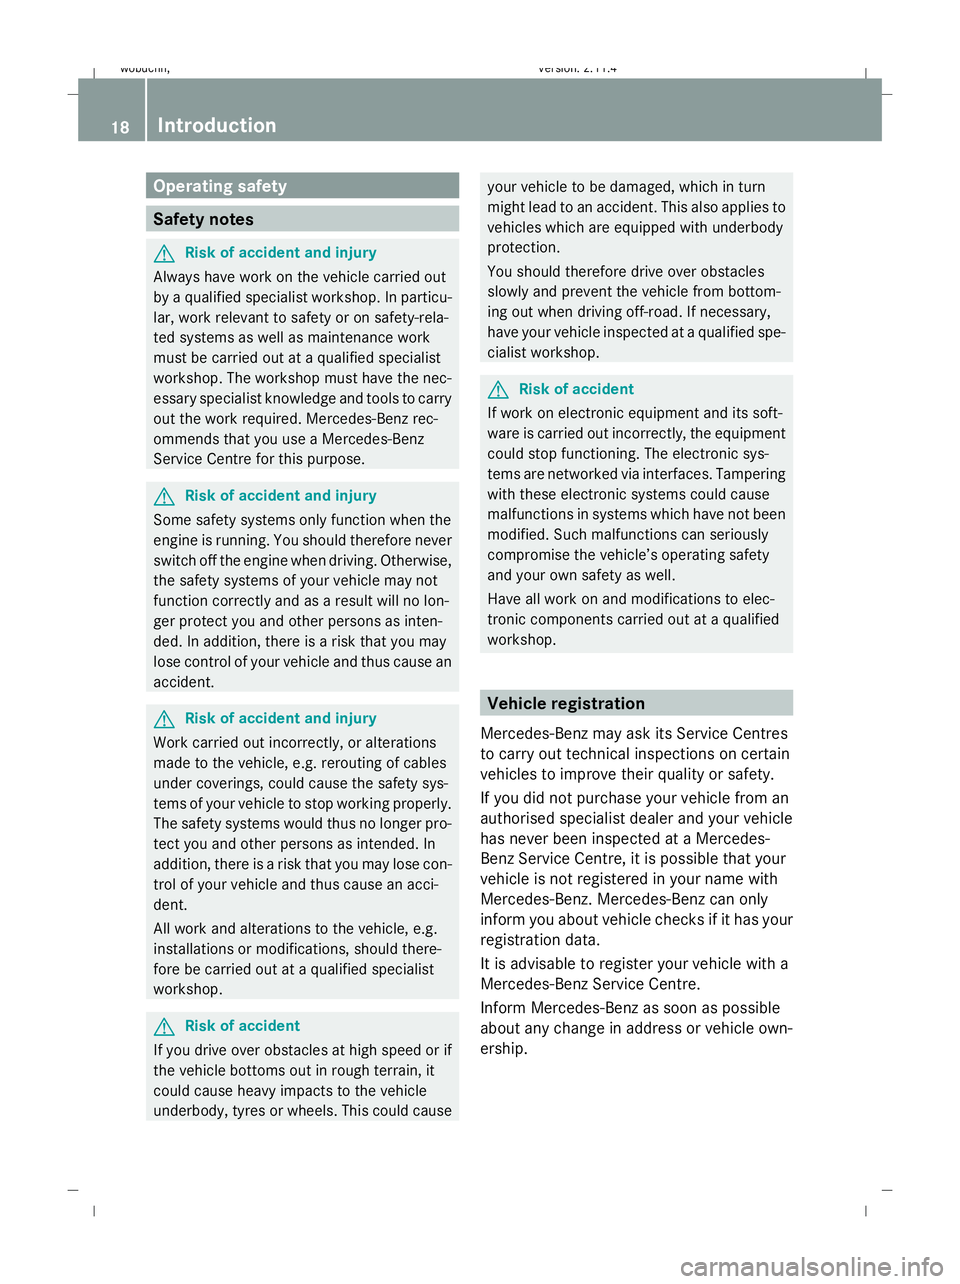
Operating safety
Safety notes
G
Risk of accident and injury
Always have work on the vehicle carried out
by a qualified specialist workshop. In particu-
lar, work relevant to safety or on safety-rela-
ted systems as well as maintenance work
must be carried out at a qualified specialist
workshop. The workshop must have the nec-
essary specialist knowledge and tools to carry
out the work required. Mercedes-Benz rec-
ommends that you use a Mercedes-Benz
Service Centre for this purpose. G
Risk of accident and injury
Some safety systems only function when the
engine is running. You should therefore never
switch off the engine when driving. Otherwise,
the safety systems of your vehicle may not
function correctly and as a result will no lon-
ger protect you and other persons as inten-
ded. In addition, there is a risk that you may
lose control of your vehicle and thus cause an
accident. G
Risk of accident and injury
Work carried out incorrectly, or alterations
made to the vehicle, e.g. rerouting of cables
under coverings, could cause the safety sys-
tems of your vehicle to stop working properly.
The safety systems would thus no longer pro-
tect you and other persons as intended. In
addition, there is a risk that you may lose con-
trol of your vehicle and thus cause an acci-
dent.
All work and alterations to the vehicle, e.g.
installations or modifications, should there-
fore be carried out at a qualified specialist
workshop. G
Risk of accident
If you drive over obstacles at high speed or if
the vehicle bottoms out in rough terrain, it
could cause heavy impacts to the vehicle
underbody, tyres or wheels. This could cause your vehicle to be damaged, which in turn
might lead to an accident. This also applies to
vehicles which are equipped with underbody
protection.
You should therefore drive over obstacles
slowly and prevent the vehicle from bottom-
ing out when driving off-road. If necessary,
have your vehicle inspected at a qualified spe-
cialist workshop. G
Risk of accident
If work on electronic equipment and its soft-
ware is carried out incorrectly, the equipment
could stop functioning. The electronic sys-
tems are networked via interfaces. Tampering
with these electronic systems could cause
malfunctions in systems which have not been
modified. Such malfunctions can seriously
compromise the vehicle’s operating safety
and your own safety as well.
Have all work on and modifications to elec-
tronic components carried out at a qualified
workshop. Vehicle registration
Mercedes-Benz may ask its Service Centres
to carry out technical inspections on certain
vehicles to improve their quality or safety.
If you did not purchase your vehicle from an
authorised specialist dealer and your vehicle
has never been inspected at a Mercedes-
Benz Service Centre, it is possible that your
vehicle is not registered in your name with
Mercedes-Benz. Mercedes-Benz can only
inform you about vehicle checks if it has your
registration data.
It is advisable to register your vehicle with a
Mercedes-Benz Service Centre.
Inform Mercedes-Benz as soon as possible
about any change in address or vehicle own-
ership. 18 Introduction
X204_AKB; 1; 5, en-GB
wobuchh,
Version: 2.11.4 2008-10-15T13:20:56+02:00 - Seite 18Dateiname: 6515_0671_02_buchblock.pdf; preflight
Page 38 of 261
Never tamper with electronic components
and their software.
SRS (Supplemental Restraint System)
The SRS reduces the risk of occupants com-
ing into contact with the vehicle's interior in
the event of an accident. It can also reduce
the forces to which occupants are subjected
during an accident.
The SRS consists of:
R the 6 SRS warning lamp
R belt tensioners
R belt force limiters
R airbags
The 6 6SRS warning lamp The SRS functions are checked regularly
when you turn on the ignition and when the
engine is running. Therefore, malfunctions
can be detected in good time.
The
6 warning lamp in the instrument
cluster lights up when the ignition is switched
on. It goes out no later than a few seconds
after the engine is started. G
Risk of injury
If SRS is malfunctioning, individual systems
may be activated unintentionally or not be
deployed in the event of an accident with
heavy braking.
A malfunction has occurred if the 6warn-
ing lamp:
R does not light up when you switch on the
ignition
R does not go out after the engine has been
running for a few seconds
R lights up again once the engine is running
In this case, have SRS checked immediately
at a qualified specialist workshop. Triggering of belt tensioners, belt force
limiters and airbags In the event of a collision, the sensor in the
airbag control unit evaluates important phys-
ical data such as duration, direction and force
of the vehicle deceleration or acceleration.
Based on the evaluation of this data and
depending on the vehicle's rate of longitudi-
nal deceleration in a collision, in the first
stage the airbag control unit pre-emptively
triggers the belt tensioners.
i
The front belt tensioners can only be trig-
gered if the belt tongue is correctly
engaged in the seat belt buckle.
The front airbags are only deployed if there is
an even higher rate of vehicle deceleration in
a longitudinal direction.
Your vehicle has adaptive, dual stage front
airbags. When the first activation threshold is
reached, the front airbag is filled with enough
propellant gas to reduce the risk of injuries.
The front airbag is only fully inflated if a sec-
ond threshold is reached within a few milli-
seconds, due to the control unit having detec-
ted further deceleration.
Criteria for triggering belt tensioners and
airbags
In the first stage of a collision, the airbag con-
trol unit evaluates the duration and direction
of vehicle acceleration or deceleration in
order to determine whether it is necessary to
trigger the belt tensioner and/or airbag.
The belt tensioner and airbag triggering
thresholds are variable and are adapted to the
rate of deceleration of the vehicle. This proc-
ess is pre-emptive in nature as the airbag
must be deployed during – and not at the end
of – the collision.
i Airbags are not deployed in all types of
accidents. They are controlled by complex
sensor technology and evaluation logic.
This process is pre-emptive in nature as
airbag deployment must take place during
the impact and must be adapted to provide Occupant safety
35Safety
X204_AKB; 1; 5, en-GB
wobuchh,V ersion: 2.11.4
2008-10-15T13:20:56+02:00 - Seite 35 ZDateiname: 6515_0671_02_buchblock.pdf; preflight
Page 77 of 261
Make sure that:
R
you are as far away from the driver's front
airbag as possible.
R you are sitting in a normal upright posi-
tion.
R you can fasten the seat belt properly.
R you have moved the backrest to an
almost vertical position.
R you have set the seat angle so that your
thighs are gently supported.
R you can depress the pedals properly.
R you have adjusted the head restraint so
that the back of your head is supported
at eye level by the central area of the
head restraint.
X Check whether steering wheel :is adjus-
ted properly (Y page 66).
Make sure that:
R you can hold the steering wheel with your
arms slightly bent.
R you can move your legs freely.
R you can see all the displays in the instru-
ment cluster clearly.
X Check whether you have fastened seat
belt ;properly (Y page 70).
It should:
R fit snugly across your body.
R be routed across the middle of your
shoulder.
R be routed in your pelvic area across the
hip joints. Lights
Light switch
For safety reasons, Mercedes-Benz recom-
mends that you drive with the lights switched
on even during the daytime. In some coun-
tries, daytime operation of headlamps varies
due to legal and voluntary requirements. In these countries, daytime driving lights are
automatically switched on when the engine is
started.
i
If you drive in countries in which traffic
drives on the opposite side of the road to
the country where the vehicle is registered,
oncoming traffic may be dazzled by the
asymmetrical dipped-beam headlamps.
Have the headlamps changed to symmet-
rical dipped beam when driving in these
countries. You can obtain information
about this from any Mercedes-Benz Service
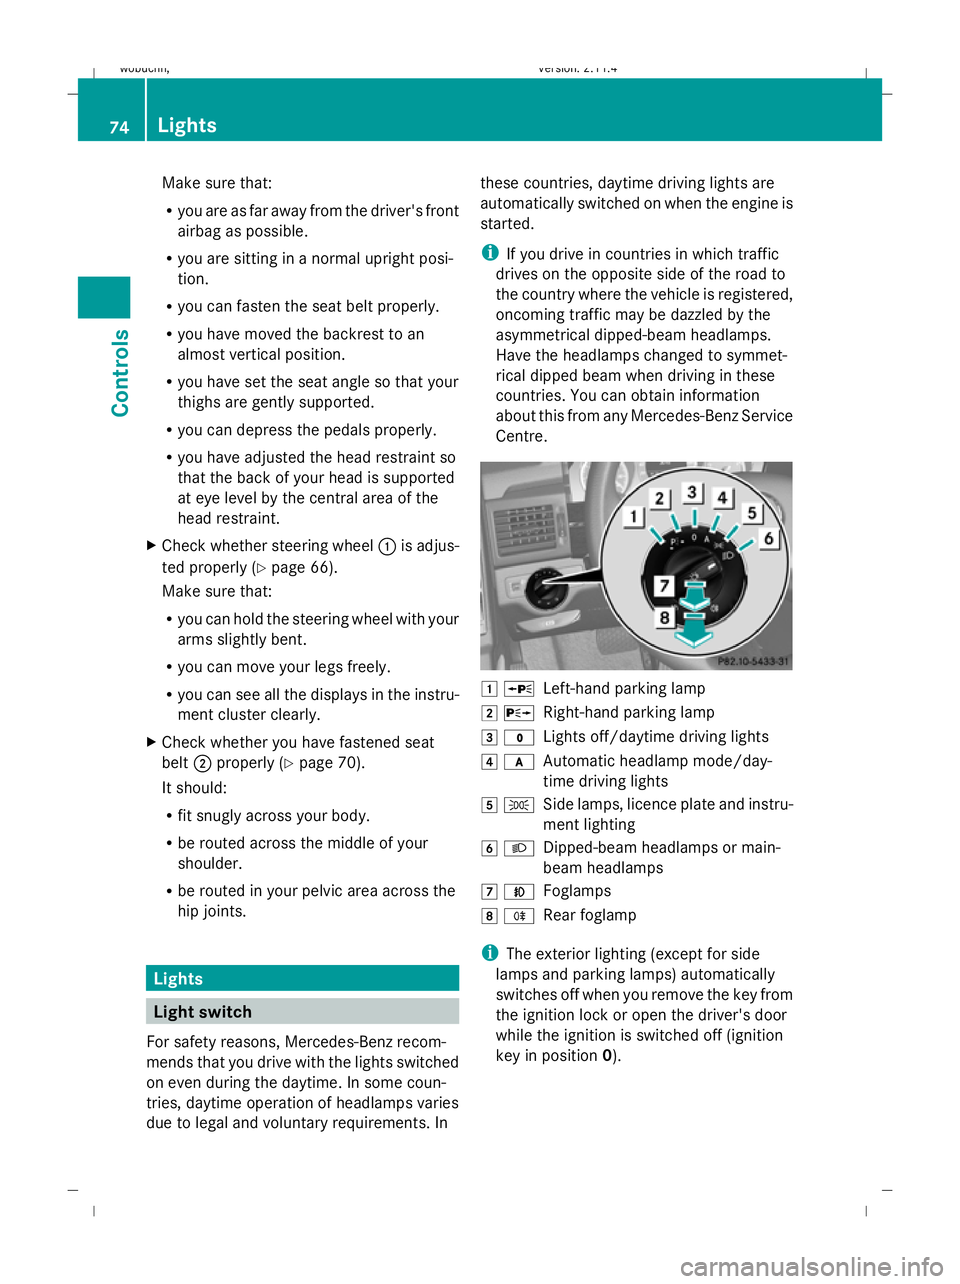
Centre. 1
W
Left-hand parking lamp
2 X
Right-hand parking lamp
3 $
Lights off/daytime driving lights
4 c
Automatic headlamp mode/day-
time driving lights
5 T
Side lamps, licence plate and instru-
ment lighting
6 L
Dipped-beam headlamps or main-
beam headlamps
7 N
Foglamps
8 R
Rear foglamp
i The exterior lighting (except for side
lamps and parking lamps) automatically
switches off when you remove the key from
the ignition lock or open the driver's door
while the ignition is switched off (ignition
key in position 0). 74 LightsControls
X204_AKB; 1; 5, en-GB
wobuchh,
Version: 2.11.4 2008-10-15T13:20:56+02:00 - Seite 74Dateiname: 6515_0671_02_buchblock.pdf; preflight
Page 114 of 261

You can set a variable or permanent limit
speed:
R
variable for speed limits, e.g. in built-up
areas
R permanent for long-term speed restric-
tions, e.g. for driving on winter tyres
(Y page 112) G
Risk of accident
Speedtronic is only an aid designed to assist
driving. You are responsible for the vehicle's
speed and for braking in good time.
i The speed indicated in the speedometer
may differ slightly from the limit speed
stored.
Variable Speedtronic You can operate cruise control* and variable
Speedtronic with the cruise control lever.
The LIM indicator lamp on the cruise control
lever indicates which system you have selec-
ted:
R LIM indicator lamp off:
Cruise control* is selected
R LIM indicator lamp lit:
variable Speedtronic is selected
You can use the cruise control lever to limit
the speed to any speed above 30 km/h while
the engine is running. :
To store the current speed or a higher
speed
; LIM indicator lamp =
To store the current speed or call up the
last stored speed
? To store the current speed or a lower
speed
A To switch between cruise control* and
variable Speedtronic
B To deactivate variable Speedtronic
Selecting variable Speedtronic X
Check whether LIM indicator lamp ;is on.
If it is on, variable Speedtronic is already
selected.
If it is not, press the cruise control lever in
the direction of arrow A.
LIM indicator lamp ;in the cruise control
lever lights up. Variable Speedtronic is
selected. G
Risk of accident
If there is a change of drivers, advise the new
driver of the limit speed stored.
Only use Speedtronic when you do not have
to accelerate suddenly to a speed higher than
the stored limit speed allows. You could, oth-
erwise, cause an accident.
You can only exceed the limit speed stored if
you deactivate variable Speedtronic:
R using the cruise control lever
R by depressing the accelerator pedal
beyond the pressure point (kickdown)
It is not possible to deactivate variable Speed-
tronic by braking.
Storing the current speed You can use the cruise control lever to limit
the speed to any speed above 30 km/h while
the engine is running.
X
Briefly press the cruise control lever to the
pressure point up :or down ?.
The current speed is stored. For five sec-
onds, the multi-function display shows the
stored speed, e.g. Limit 100 km/h. Driving systems
111Controls
* optional
X204_AKB; 1; 5, en-GB
wobuchh,
Version: 2.11.4 2008-10-15T13:20:56+02:00 - Seite 111 ZDateiname: 6515_0671_02_buchblock.pdf; preflight
Page 150 of 261
Vehicles with a petrol engine:
The electronic ignition system uses high volt-
age. For this reason, you must never touch
components of the ignition system (ignition
coil, ignition cable, spark plug connector or
test socket) when:
R the engine is running.
R the engine is being started.
R the ignition is switched on and the engine
is being cranked by hand.
You could otherwise suffer an electric shock
and be seriously or even fatally injured.
Vehicles with a diesel engine:
The electronic injection control uses high volt-
age. Therefore, never touch fuel injection sys-
tem components when:
R the engine is running.
R the engine is being started.
R the ignition is switched on.
You could otherwise suffer an electric shock
and be seriously or even fatally injured.
X Make sure that the windscreen wipers are
switched off. G
Risk of injury
The windscreen wipers and wiper linkage
could be set in motion.
When the bonnet is open, you or others could
be injured by the wiper rods.
Make sure that the windscreen wipers are
switched off and that the key has been pulled
out of the ignition lock before opening the
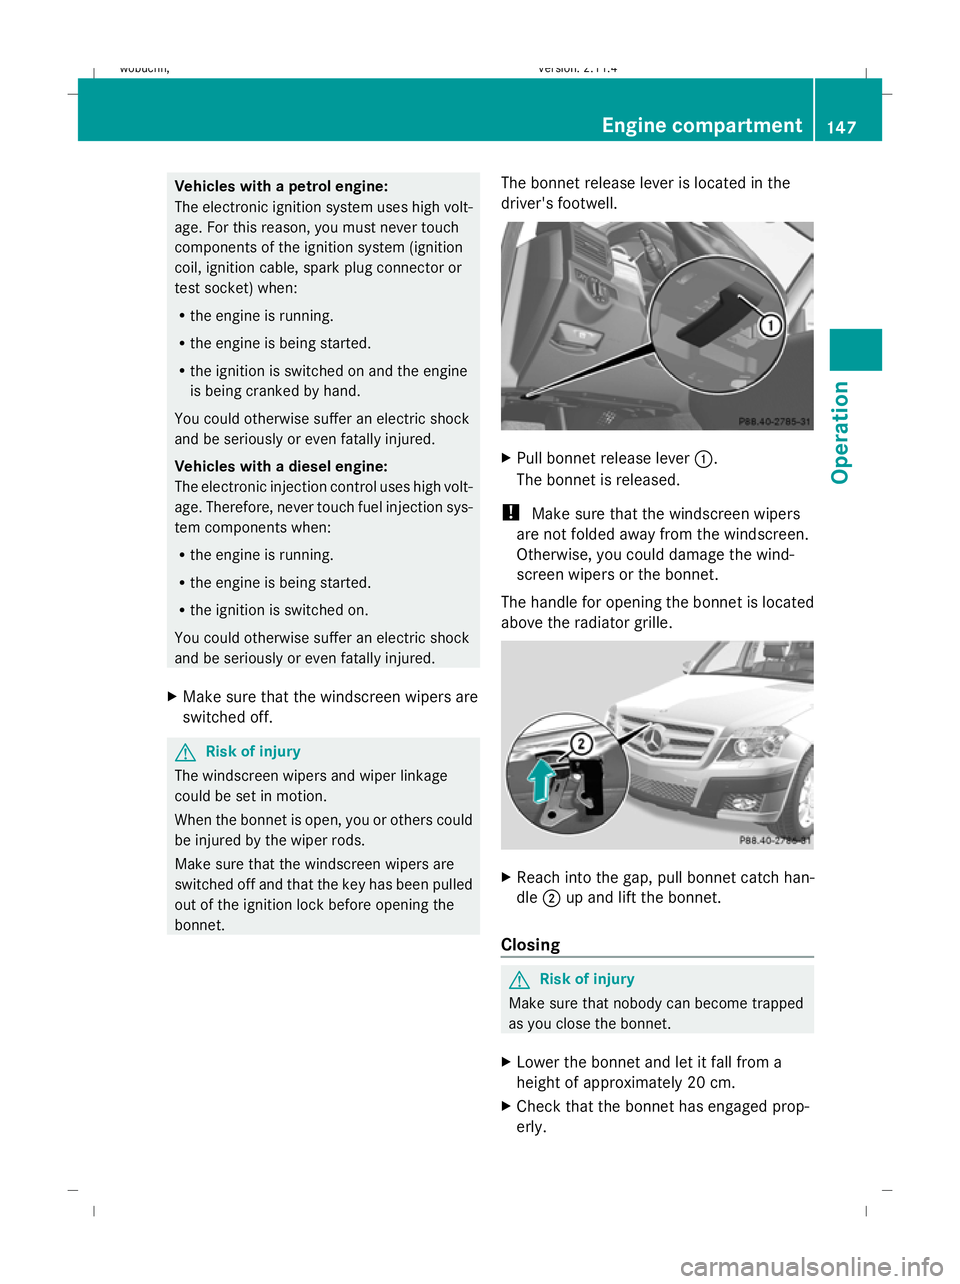
bonnet. The bonnet release lever is located in the
driver's footwell. X
Pull bonnet release lever :.
The bonnet is released.
! Make sure that the windscreen wipers
are not folded away from the windscreen.
Otherwise, you could damage the wind-
screen wipers or the bonnet.
The handle for opening the bonnet is located
above the radiator grille. X
Reach into the gap, pull bonnet catch han-
dle ;up and lift the bonnet.
Closing G
Risk of injury
Make sure that nobody can become trapped
as you close the bonnet.
X Lower the bonnet and let it fall from a
height of approximately 20 cm.
X Check that the bonnet has engaged prop-
erly. Engine compartment
147Operation
X204_AKB; 1; 5, en-GB
wobuchh, Version: 2.11.4 2008-10-15T13:20:56+02:00 - Seite 147 ZDateiname: 6515_0671_02_buchblock.pdf; preflight
Page 151 of 261
i
If the bonnet can be raised slightly, it is
not properly engaged. Open it again and
close it with a little more force. Engine oil
Depending on driving style, the vehicle con-
sumes up to 0.8 l oil per 1,000 km. The oil
consumption may be higher than this when
the vehicle is new or if you frequently drive at
high engine speeds.
Further information on engine oil
(Y page 246).
Checking the engine oil level When doing so:
R
the vehicle should be parked on level
ground.
R the engine should be switched off for at
least five minutes if the engine is at normal
operating temperature.
R the engine should be switched off for at
least 30 minutes if the engine is not at
operating temperature (i.e. if you only start
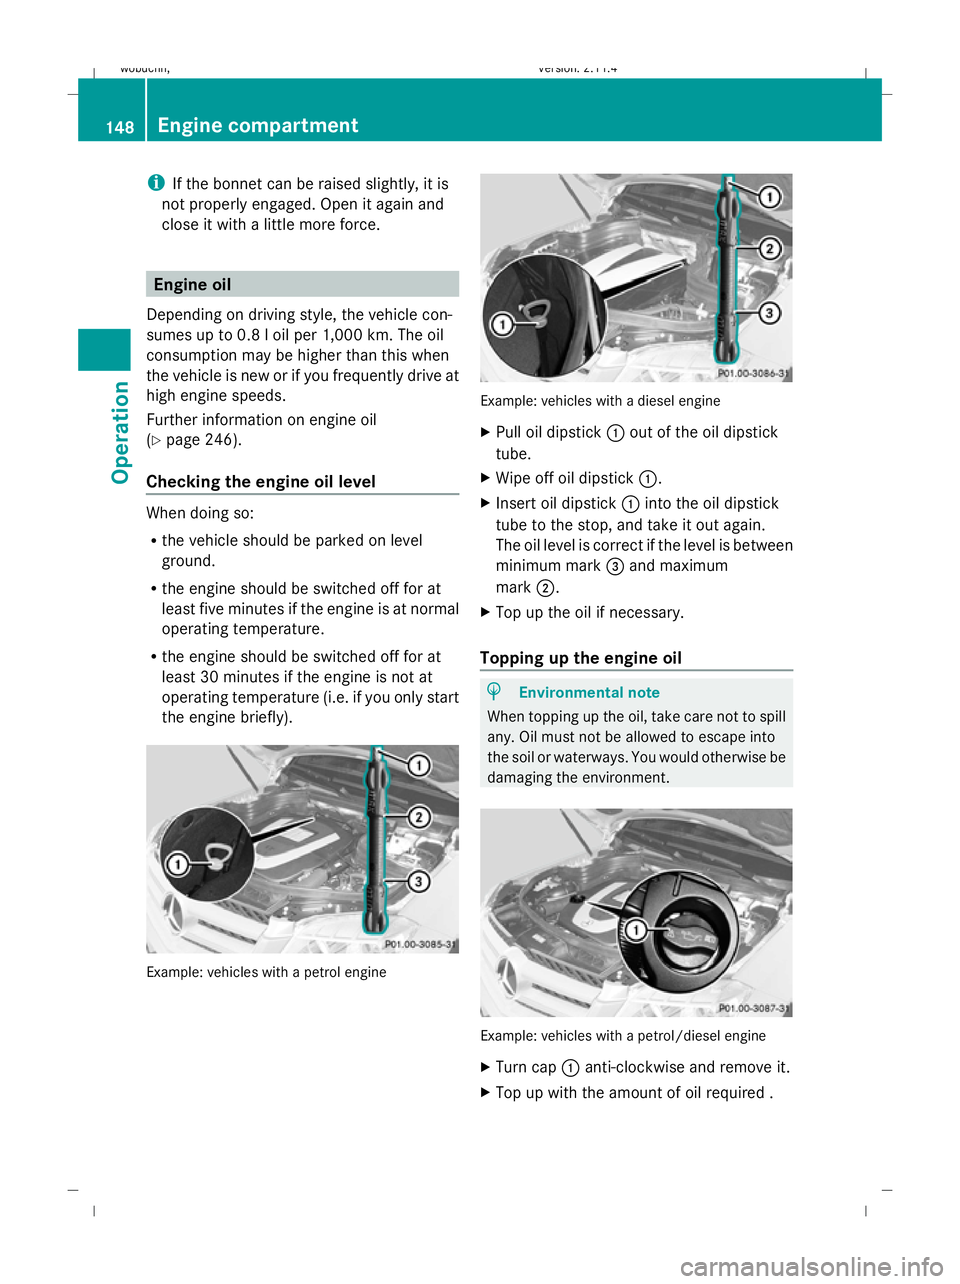
the engine briefly). Example: vehicles with a petrol engine Example: vehicles with a diesel engine
X Pull oil dipstick :out of the oil dipstick
tube.
X Wipe off oil dipstick :.
X Insert oil dipstick :into the oil dipstick
tube to the stop, and take it out again.
The oil level is correct if the level is between
minimum mark =and maximum
mark ;.
X Top up the oil if necessary.
Topping up the engine oil H
Environmental note
When topping up the oil, take care not to spill
any. Oil must not be allowed to escape into
the soil or waterways. You would otherwise be
damaging the environment. Example: vehicles with a petrol/diesel engine
X
Turn cap :anti-clockwise and remove it.
X Top up with the amount of oil required . 148 Engine compartmentOperation
X204_AKB; 1; 5, en-GB
wobuchh,
Version: 2.11.4 2008-10-15T13:20:56+02:00 - Seite 148Dateiname: 6515_0671_02_buchblock.pdf; preflight
Page 152 of 261

i
The difference in quantity between the
minimum mark and maximum mark is
approximately 2 litres.
! Do not add too much oil. If too much oil
is added and the oil level is above the max-
imum mark on the dipstick, the engine or
catalytic converter could be damaged.
Have excess oil siphoned off.
X Replace cap :on the filler neck and
tighten clockwise.
Ensure that the cap locks into place
securely.
For further information on engine oil, see
(Y page 246). Coolant
Only check the coolant level when the vehicle
is on a level surface and the engine has cooled
down.
X Turn the key to position 2(Y page 61) in
the ignition lock.
X Check the coolant temperature gauge in
the multi-function display. G
Risk of injury
The cooling system is pressurised. Therefore,
only unscrew the cap once the engine has
cooled down. The coolant temperature gauge
must display less than 70 †. Otherwise, you
could be scalded by escaping hot coolant. The coolant expansion tank is located in the
engine compartment on the right when
viewed in the direction of travel. X
Slowly turn cap :half a turn anti-clock-
wise to allow excess pressure to escape.
X Turn cap :further anti-clockwise and
remove it.
There is sufficient coolant in expansion
tank ;if the coolant is level with marker
bar =in the filler neck when cold or
approximately 1.5 cm higher when hot.
X Top up the coolant if necessary.
X Replace cap :and tighten all the way to
the stop.
For further information on coolant, see
(Y page 247). Windscreen washer system/head-
lamp cleaning system*
The washer fluid reservoir for the windscreen
washer system and headlamp cleaning sys-
tem* is located in the engine compartment Engine compartment
149Operation
* optional
X204_AKB; 1; 5, en-GB
wobuchh,
Version: 2.11.4
2008-10-15T13:20:56+02:00 - Seite 149 ZDateiname: 6515_0671_02_buchblock.pdf; preflight