change time MERCEDES-BENZ GLK350 4MATIC 2010 X204 Owner's Manual
[x] Cancel search | Manufacturer: MERCEDES-BENZ, Model Year: 2010, Model line: GLK350 4MATIC, Model: MERCEDES-BENZ GLK350 4MATIC 2010 X204Pages: 344, PDF Size: 8.45 MB
Page 23 of 344
Program brochure (in the USA) or the
Roadside Assistance section of the Service
and Warranty Information Booklet (in
Canada) in your vehicle literature portfolio.
Change of address or ownership
If you change your address, be sure to send
in the “Change of Address Notice” found in
the Service and Warranty Information
Booklet, or simply call the Mercedes-Benz
Customer Assistance Center (in the USA) at
1-800-FOR-MERCedes (1-800-367-6372), or
Customer Service (in Canada) at
1-800-387-0100. This will assist us in
contacting you in a timely manner should the
need arise.
If you sell your Mercedes, please leave all
literature with the vehicle to make it available
to the next operator.
If you bought this vehicle used, be sure to
send in the “Notice of Purchase of Used
Truck” found in the Service and Warranty
Information Booklet, or call the Mercedes-
Benz Customer Assistance Center (in the
USA) at 1-800-FOR-MERCedes
(1-800-367-6372), or Customer Service (in
Canada) at 1-800-387-0100.
Operating your vehicle outside the
USA or Canada
If you plan to operate your vehicle in foreign
countries, please be aware that:
R Service facilities or replacement parts may
not be readily available.
R Unleaded gasoline for vehicles with
catalytic converters may not be available;
the use of leaded fuels will damage the
catalysts.
R Gasoline may have a considerably lower
octane rating, and improper fuel can cause
engine damage.
Certain Mercedes-Benz models are available
for delivery in Europe under our European
Delivery Program. For details, consult an
authorized Mercedes-Benz Center or write to:
In the USA:
Mercedes-Benz USA, LLC
European Delivery Department
One Mercedes Drive
Montvale, NJ 07645-0350
In Canada:
Mercedes-Benz Canada, Inc.
European Delivery Department
98 Vanderhoof Avenue
Toronto, Ontario M4G 4C9
Sport Utility Vehicle
GWarning!
This Sport Utility Vehicle is designed for both
on-road and off-road use. It can go places and
perform tasks for which conventional 2-wheel
drive passenger cars are not intended. This
vehicle will handle and maneuver differently
from conventional passenger cars in driving
conditions which may occur on streets,
highways and off-road use.
This vehicle has a higher ground clearance
and a higher center of gravity than many
passenger cars. As with other vehicles of this
type, if you make sharp turns at excessive
speeds or abrupt maneuvers, the vehicle may
roll over or may go out of control and crash.
Utility vehicles have a significantly higher
rollover rate than other types of vehicles.
Failure to operate this vehicle safely may
result in an accident, rollover of the vehicle,
and severe or fatal injury.
Before you start to drive this vehicle, read the
Operator’s Manual. Take time to become
familiar with the driving characteristics of this
vehicle. Be sure you are familiar with all
vehicle controls. Learn how your vehicle
handles on different road surfaces. Do not
attempt sharp turns at excessive speeds or
abrupt maneuvers or other unsafe driving
actions that can cause loss of vehicle control.
When driving off-road or working the vehicle
hard, do not overload it. And, always wear
Introduction21X204_AKB; 3; 23, en-USd2ureepe,Version: 2.11.8.12009-07-16T19:16:58+02:00 - Seite 21Z
Page 41 of 344
bags repaired. This will help to make sure the
air bags will continue to provide supplemental
crash protection for occupants.
Safety guidelines for the seat belt,
Emergency Tensioning Device (ETD)
and air bag GWarning!
R Damaged seat belts or seat belts that have
been subjected to stress in an accident
must be replaced. Their anchoring points
must also be checked. Only use seat belts
installed or supplied by an authorized
Mercedes-Benz Center.
R Air bags and pyrotechnic Emergency
Tensioning Devices (ETDs) contain
perchlorate material, which may require
special handling and regard for the
environment. Check with your local
government’s disposal guidelines.
California residents, see
www.dtsc.ca.gov/HazardousWaste/
Perchlorate/index.cfm .
R Air bags and ETDs are designed to function
on a one-time-only basis. An air bag or ETD
that has deployed must be replaced.
R Do not pass seat belts over sharp edges.
They could tear.
R Do not make any modification that could
change the effectiveness of the seat belts.
R Do not bleach or dye seat belts as this may
severely weaken them. In a crash they may
not be able to provide adequate protection.
R No modifications of any kind may be made
to any components or wiring of the SRS.
R Do no change or remove any component or
part of the SRS.
R Do not install additional trim material, seat
covers, badges, etc. over the steering
wheel hub, front passenger front air bag
cover, outboard sides of the seat
backrests, door trim panels, or door frame
trims.
R Do not install additional electrical/
electronic equipment on or near SRS
components and wiring.
R Keep area between air bags and occupants
free of objects (e.g. packages, purses,
umbrellas, etc.).
R Do not hang items such as coat hangers
from the coat hooks or handles over the
door. These items may be thrown around in
the vehicle and cause head and other
injuries when the window curtain air bag is
deployed.
R Air bag system components will be hot after
an air bag has inflated. Do not touch them.
R Never place your feet on the instrument
panel, dashboard, or on the seat. Always
keep both feet on the floor in front of the
seat.
R Improper repair work on the SRS creates a
risk of rendering the SRS inoperative or
causing unintended air bag deployment.
Work on the SRS must therefore only be
performed by qualified technicians.
Contact an authorized Mercedes-Benz
Center.
R For your protection and the protection of
others, when scrapping the air bag unit or
ETD, our safety instructions must be
followed. These instructions are available
from any authorized Mercedes-Benz
Center.
R Given the considerable deployment speed,
required inflation volume, and the material
of the air bags, there is the possibility of
abrasions or other, potentially more serious
injuries resulting from air bag deployment.
If you sell your vehicle, we strongly
recommend that you inform the subsequent
owner that the vehicle is equipped with SRS.
Also refer them to the applicable section in
the Operator’s Manual.Occupant safety39Safety and securityX204_AKB; 3; 23, en-USd2ureepe,Version: 2.11.8.12009-07-16T19:16:58+02:00 - Seite 39Z
Page 56 of 344
GWarning!
When leaving the vehicle, always remove the
SmartKey from the starter switch. Always
take the SmartKey with you and lock the
vehicle. Do not leave children unattended in
the vehicle, even if they are secured in a child
restraint system, or with access to an
unlocked vehicle. A child’s unsupervised
access to a vehicle could result in an accident
and/or serious personal injury. The children
could
R injure themselves on parts of the vehicle
R be seriously or fatally injured through
excessive exposure to extreme heat or cold
R injure themselves or cause an accident with
vehicle equipment that can be operated
even if the SmartKey is removed from the
starter switch or removed from the vehicle,
such as seat adjustment, steering wheel
adjustment, or the memory function
If children open a door, they could injure other
persons or get out of the vehicle and injure
themselves or be injured by following traffic.
Do not expose the child restraint system to
direct sunlight. The child restraint system’s
metal parts, for example, could become very
hot, and the child could be burned by these
parts.
GWarning!
Do not carry heavy or hard objects in the
passenger or cargo compartment unless they
are firmly secured in place.
Unsecured or improperly positioned cargo
increases a child’s risk of injury in the event
of
R strong braking maneuvers
R sudden changes of direction
R an accident
Infant and child restraint systemsGObserve Safety notes, see page 53.
We recommend all infants and children be
properly restrained at all times while the
vehicle is in motion.
Canada only:
Only use a BabySmart™ compatible child
restraint for the front passenger seat in this
vehicle.
All lap/shoulder belts except the driver’s seat
belt have special seat belt retractors for
secure fastening of child restraints.
To fasten a child restraint, follow the child
restraint manufacturer’s instructions for
mounting.
To activate the special seat belt retractor:
XPull the shoulder belt out completely and
let it retract.
During seat belt retraction, a ratcheting
sound can be heard to indicate that the
special seat belt retractor is activated.
The seat belt is now locked.XPush down on child restraint to take up any
slack.
To deactivate the special seat belt retractor:
XRelease the seat belt buckle and let the
seat belt retract completely.
The seat belt can then again be used in the
usual manner.
To deactivate the special seat belt retractor
for the front passenger seat, the front
passenger seat must be in the most backward
position.
GWarning!
Never release the seat belt buckle while the
vehicle is in motion, since the special seat belt
retractor will be deactivated.
i Information on child seats with mounting
fittings for tether anchorages
( Y page 56).
For information on LATCH-type (ISOFIX)
child seat anchors ( Y page 57).
54Occupant safetySafety and security
X204_AKB; 3; 23, en-USd2ureepe,Version: 2.11.8.12009-07-16T19:16:58+02:00 - Seite 54
Page 92 of 344
Locator lighting
The locator lighting is described in the
“Control system” section, see “Switching
locator lighting on or off” (Y page 122).
Combination switch
Turn signals
XPress the combination switch in direction
of arrow ; or ?.
The corresponding turn signal indicator
lamp ! or # in the instrument
cluster flashes.
The combination switch resets automatically
after major steering wheel movements.
To signal minor directional changes:
XPress the combination switch only to the
point of resistance in direction of
arrow ; or ? and release.
The corresponding turn signal lamps will
flash three times.
High beam
XTurn the exterior lamp switch to position
L (Y page 87).
XSwitching on: Push the combination
switch in direction of arrow :.
The high-beam headlamp indicator lamp
K in the instrument cluster comes on.
XSwitching off: Pull the combination switch
in direction of arrow = to its original
position.
iAlso note the information on high-beam
headlamps with activated automatic
headlamp mode (Y page 88) or the daytime
running lamp mode (Y page 88).
High-beam flasher
XSwitching on: Pull the combination switch
briefly in direction of arrow =.
Hazard warning flasher
The hazard warning flasher can be switched
on at all times, even with the SmartKey
removed from the starter switch.
The hazard warning flasher comes on
automatically when an air bag deploys.
XSwitching on: Press hazard warning
flasher switch :.
All turn signal lamps are flashing.
iWith the hazard warning flasher activated
and the combination switch set for either
left or right turn, only the respective left or
right turn signals will operate when the
ignition is switched on.
XSwitching off: Press hazard warning
flasher switch : again.
iIf the hazard warning flasher has been
activated automatically, press hazard
warning flasher switch : to switch it off.
90LightingControls in detail
X204_AKB; 3; 23, en-USd2ureepe,Version: 2.11.8.12009-07-16T19:16:58+02:00 - Seite 90
Page 96 of 344
! Vehicles with rain sensor: If you have set
intermittent wiping, dirt on the surface of
the rain sensor or optical effects may cause
the windshield wipers to wipe in an
undesired fashion. This could then damage
the windshield wiper blades or scratch the
windshield. You should therefore switch off
the windshield wipers when weather
conditions are dry.
Vehicles with rain sensor: Intermittent wiping
interval is dependent on the wetness of the
windshield. After the initial wipe, pauses
between wipes are controlled by the rain
sensor automatically.
XTurn the combination switch to position
Ä or Å.
Intermittent wiping starts with selected
wiping interval.
Intermittent wiping is interrupted when the
vehicle is at a standstill and a front door is
opened. This protects persons getting into or
out of the vehicle from being sprayed.
Intermittent wiping will be continued when all
doors are closed andRthe automatic transmission is in drive
position D or reverse gear R
or
Rthe wiper setting is changed using the
combination switch
Single wipe
XPress the combination switch briefly in
direction of arrow B to the resistance
point.
The windshield wipers wipe one time
without washer fluid.
Wiping with washer fluid
XPress the combination switch in direction
of arrow B past the resistance point.
The windshield wipers operate with washer
fluid.
iTo prevent smears on the windshield or
noisy/chattering wiper blades, wipe with
washer fluid every now and then even when
it is raining.
For information on filling up the washer
reservoir, see “Washer system and headlamp
cleaning system” (Y page 217).
For information on cleaning the headlamps
with washer fluid, see “Headlamp cleaning
system” (Y page 91).
Rear window wiper/washer
XObserve notes on page (Y page 93).
The rear window wiper engages automatically
when the automatic transmission is shifted
into reverse gear R with the windshield wipers
switched on.
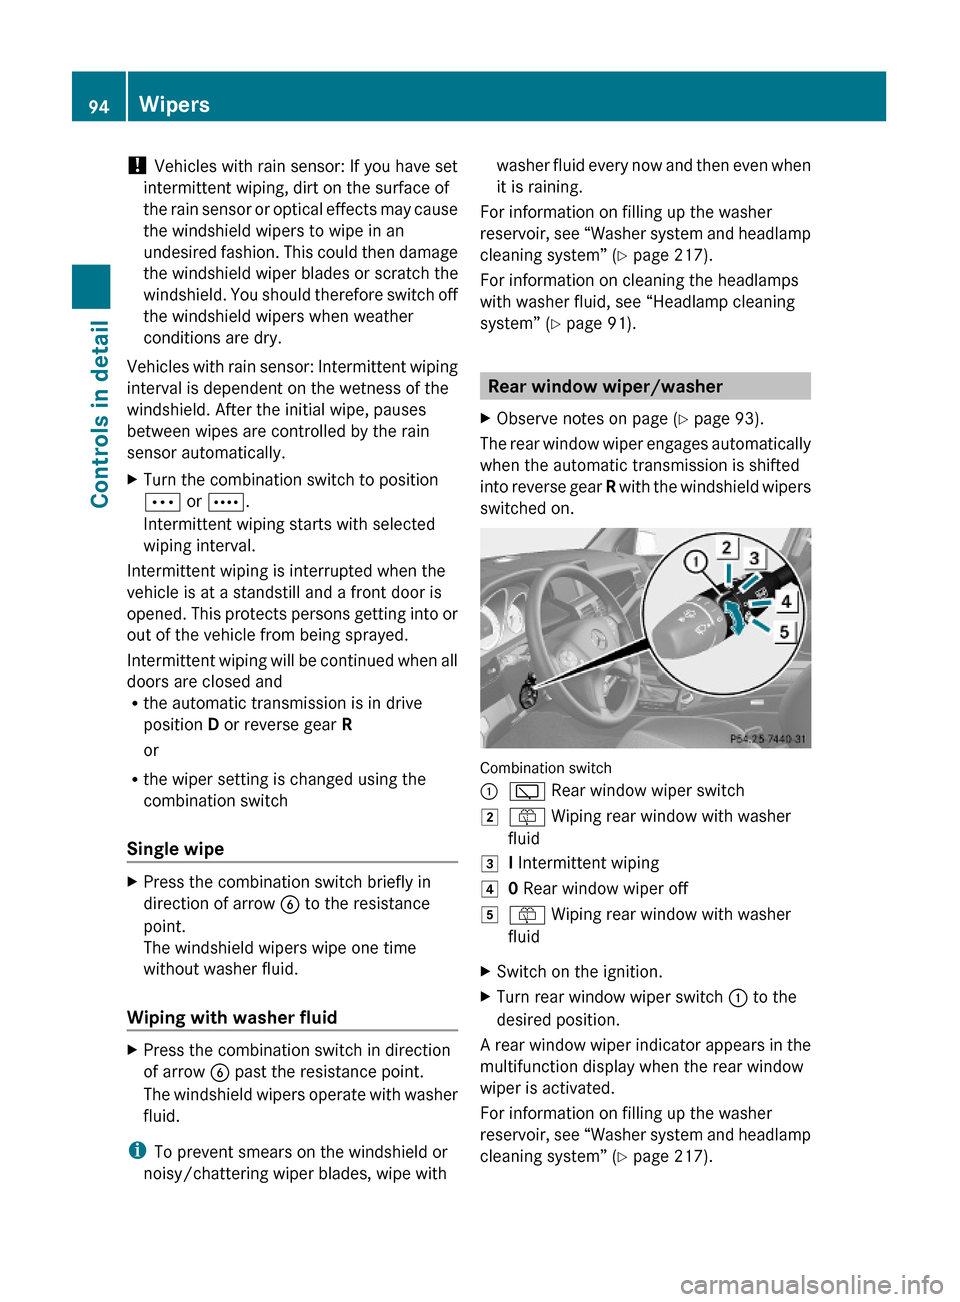
Combination switch
:è Rear window wiper switch2ô Wiping rear window with washer
fluid
3I Intermittent wiping40 Rear window wiper off5ô Wiping rear window with washer
fluid
XSwitch on the ignition.XTurn rear window wiper switch : to the
desired position.
A rear window wiper indicator appears in the
multifunction display when the rear window
wiper is activated.
For information on filling up the washer
reservoir, see “Washer system and headlamp
cleaning system” (Y page 217).
94WipersControls in detail
X204_AKB; 3; 23, en-USd2ureepe,Version: 2.11.8.12009-07-16T19:16:58+02:00 - Seite 94
Page 122 of 344
XPress button : or 9 to select a
submenu.
Scroll down with button :, scroll up with
button 9.
With the selection marker on the desired
submenu, use the button a to access the
individual functions within that submenu.
Once within the submenu, you can use button
9 to move to the next function or
button : to move to the previous function
within that submenu.
The following lists show what settings can be
changed within the various menus. Detailed
instructions on making individual settings can
be found on the following pages.
Instrument cluster submenu
RSelecting speedometer display mode
(Y page 120)
RPermanent display (speed display or
outside temperature) (Y page 121)
Time/Date submenu
RSetting the time (Y page 121)
RSetting the date (Y page 121)
Lights submenu
RSwitching daytime running lamp mode on
or off (USA only) (Y page 122)
RSwitching locator lighting on or off
(Y page 122)
RSwitching interior lighting delayed shut-off
on or off (Y page 123)
Vehicle submenu
RSwitching automatic central locking on or
off (Y page 124)
Convenience submenu
RActivating easy-entry/exit feature
(Y page 124)
RSwitching fold-in function for exterior rear
view mirrors on or off (Y page 124)
Instrument cluster submenu
Access the Instr. Cluster submenu via
the Settings menu. Use the Instr.
Cluster submenu to change the instrument
cluster display settings.
The following functions are available:
RSelecting speedometer display mode
(Y page 120)
RPermanent display (speed display or
outside temperature) (Y page 121)
Selecting speedometer display mode
XPress = or ; to select the
Settings menu.
XPress button : or 9 to select the
Instr. Cluster submenu.
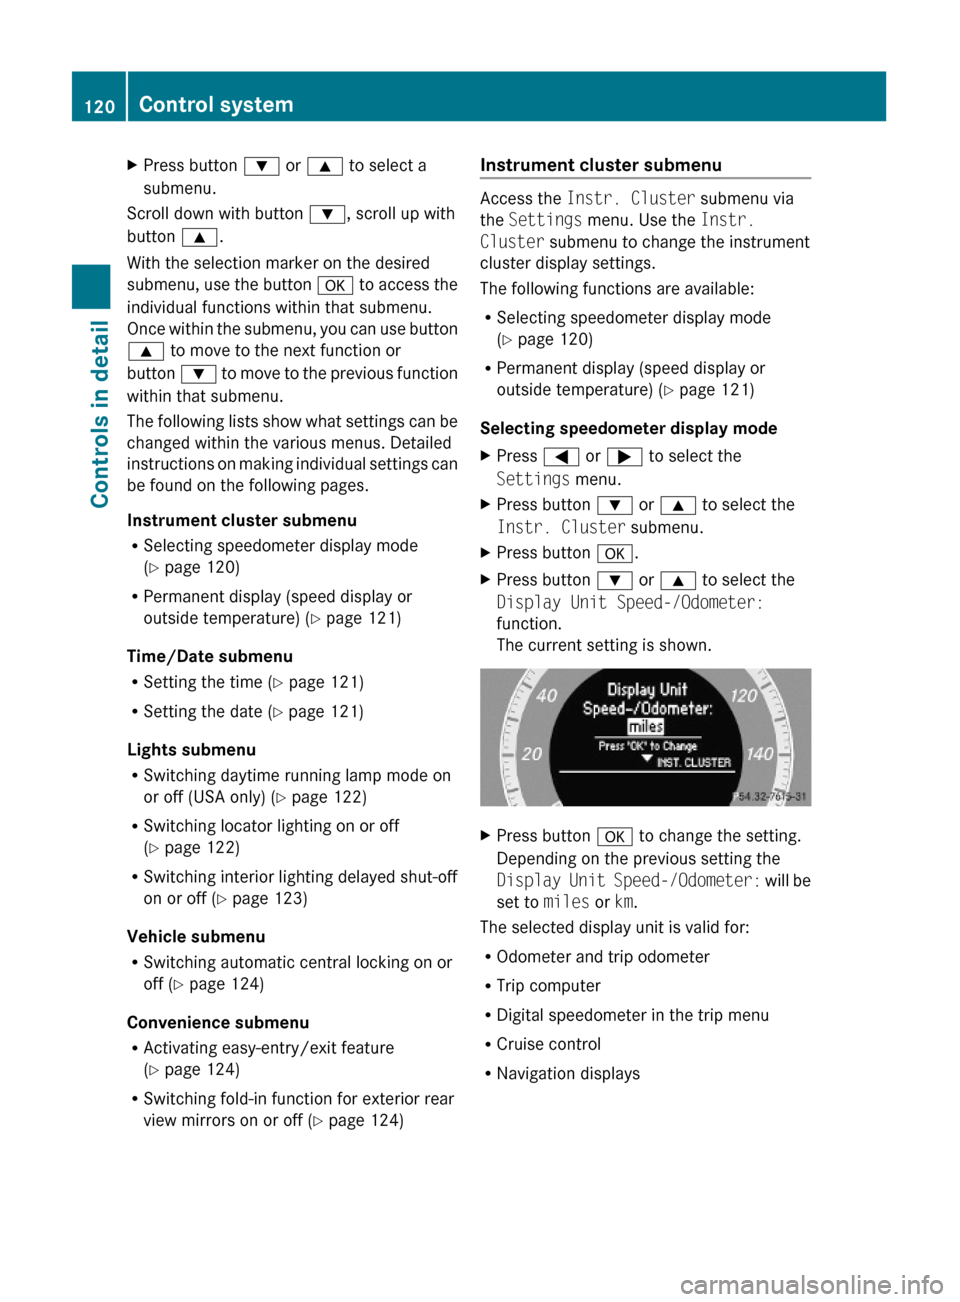
XPress button a.XPress button : or 9 to select the
Display Unit Speed-/Odometer:
function.
The current setting is shown.
XPress button a to change the setting.
Depending on the previous setting the
Display Unit Speed-/Odometer: will be
set to miles or km.
The selected display unit is valid for:
ROdometer and trip odometer
RTrip computer
RDigital speedometer in the trip menu
RCruise control
RNavigation displays
120Control systemControls in detail
X204_AKB; 3; 23, en-USd2ureepe,Version: 2.11.8.12009-07-16T19:16:58+02:00 - Seite 120
Page 123 of 344
Permanent display
You can use the Permanent Display:
function to choose to display either the
outside temperature or the speed in
kilometers (USA) or miles (Canada)
permanently.
XPress button = or ; to select the
Settings menu.
XPress button : or 9 to select the
Instr. Cluster submenu.
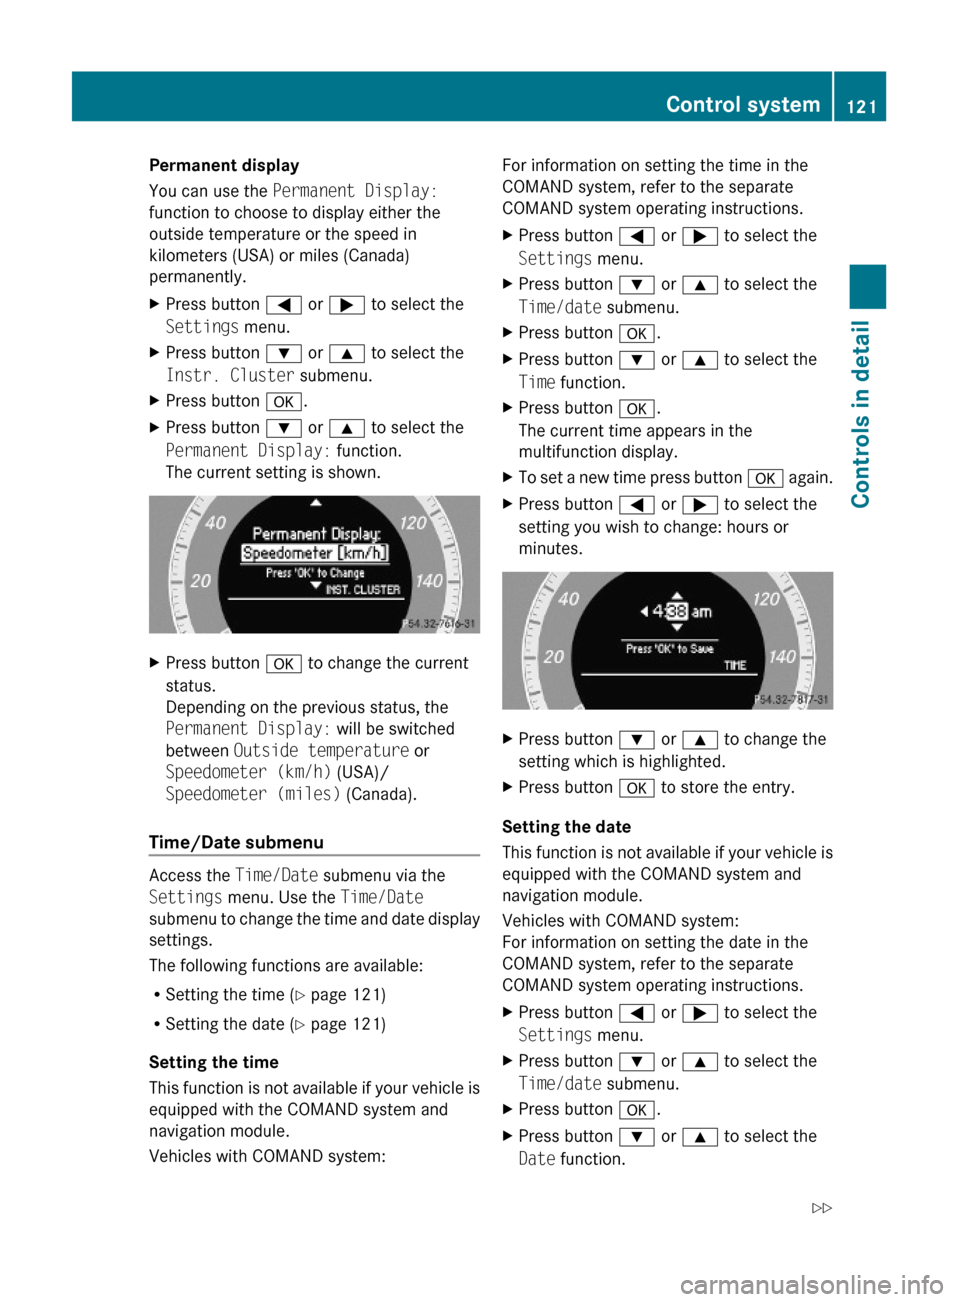
XPress button a.XPress button : or 9 to select the
Permanent Display: function.
The current setting is shown.
XPress button a to change the current
status.
Depending on the previous status, the
Permanent Display: will be switched
between Outside temperature or
Speedometer (km/h) (USA)/
Speedometer (miles) (Canada).
Time/Date submenu
Access the Time/Date submenu via the
Settings menu. Use the Time/Date
submenu to change the time and date display
settings.
The following functions are available:
RSetting the time (Y page 121)
RSetting the date (Y page 121)
Setting the time
This function is not available if your vehicle is
equipped with the COMAND system and
navigation module.
Vehicles with COMAND system:
For information on setting the time in the
COMAND system, refer to the separate
COMAND system operating instructions.
XPress button = or ; to select the
Settings menu.
XPress button : or 9 to select the
Time/date submenu.
XPress button a.XPress button : or 9 to select the
Time function.
XPress button a.
The current time appears in the
multifunction display.
XTo set a new time press button a again.XPress button = or ; to select the
setting you wish to change: hours or
minutes.
XPress button : or 9 to change the
setting which is highlighted.
XPress button a to store the entry.
Setting the date
This function is not available if your vehicle is
equipped with the COMAND system and
navigation module.
Vehicles with COMAND system:
For information on setting the date in the
COMAND system, refer to the separate
COMAND system operating instructions.
XPress button = or ; to select the
Settings menu.
XPress button : or 9 to select the
Time/date submenu.
XPress button a.XPress button : or 9 to select the
Date function.
Control system121Controls in detailX204_AKB; 3; 23, en-USd2ureepe,Version: 2.11.8.12009-07-16T19:16:58+02:00 - Seite 121Z
Page 124 of 344
XPress button a.
The current date appears in the
multifunction display.
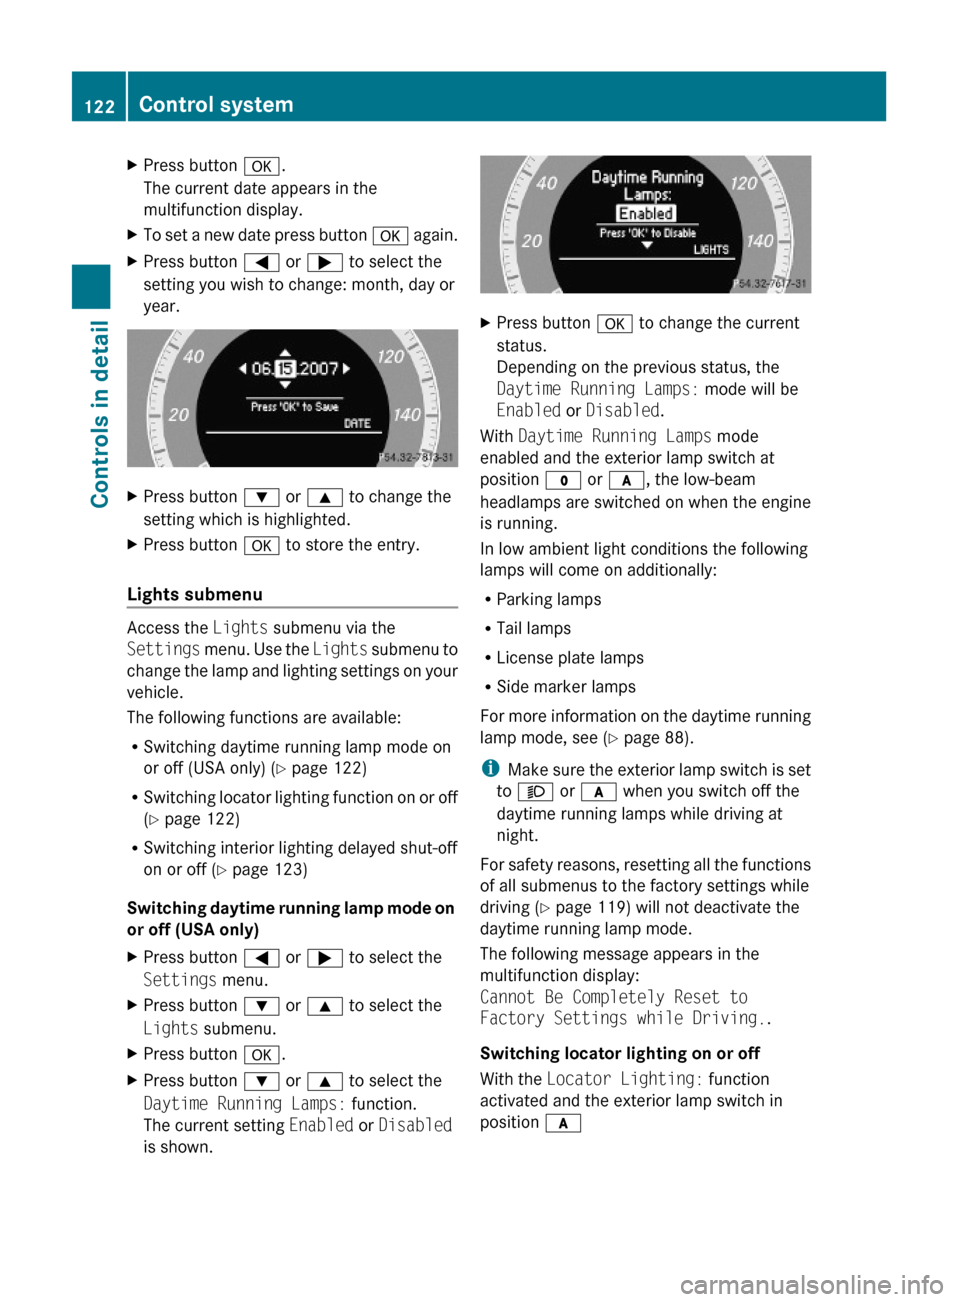
XTo set a new date press button a again.XPress button = or ; to select the
setting you wish to change: month, day or
year.
XPress button : or 9 to change the
setting which is highlighted.
XPress button a to store the entry.
Lights submenu
Access the Lights submenu via the
Settings menu. Use the Lights submenu to
change the lamp and lighting settings on your
vehicle.
The following functions are available:
RSwitching daytime running lamp mode on
or off (USA only) (Y page 122)
RSwitching locator lighting function on or off
(Y page 122)
RSwitching interior lighting delayed shut-off
on or off (Y page 123)
Switching daytime running lamp mode on
or off (USA only)
XPress button = or ; to select the
Settings menu.
XPress button : or 9 to select the
Lights submenu.
XPress button a.XPress button : or 9 to select the
Daytime Running Lamps: function.
The current setting Enabled or Disabled
is shown.
XPress button a to change the current
status.
Depending on the previous status, the
Daytime Running Lamps: mode will be
Enabled or Disabled.
With Daytime Running Lamps mode
enabled and the exterior lamp switch at
position $ or c, the low-beam
headlamps are switched on when the engine
is running.
In low ambient light conditions the following
lamps will come on additionally:
RParking lamps
RTail lamps
RLicense plate lamps
RSide marker lamps
For more information on the daytime running
lamp mode, see (Y page 88).
iMake sure the exterior lamp switch is set
to M or c when you switch off the
daytime running lamps while driving at
night.
For safety reasons, resetting all the functions
of all submenus to the factory settings while
driving (Y page 119) will not deactivate the
daytime running lamp mode.
The following message appears in the
multifunction display:
Cannot Be Completely Reset to
Factory Settings while Driving..
Switching locator lighting on or off
With the Locator Lighting: function
activated and the exterior lamp switch in
position c
122Control systemControls in detail
X204_AKB; 3; 23, en-USd2ureepe,Version: 2.11.8.12009-07-16T19:16:58+02:00 - Seite 122
Page 143 of 344
Contact an authorized Mercedes-Benz
Center for details and availability for your
vehicle.
SIRIUS XM Satellite Radio provides over
130 channels of digital-quality radio,
including 100 % commercial-free music,
sports, news and entertainment. SIRIUS XM
Satellite Radio uses a fleet of high-power
satellites to broadcast 24 hours per day,
coast to coast, in the contiguous U. S. and
Canada.
This diverse, satellite-delivered programming
is available for a monthly subscription fee.
For more information and service availability
call the SIRIUS XM Service Center at
1-888-539-7474 (Y page 145), or visit
www.sirius.com (USA) or
www.siriuscanada.ca (Canada).
iNote that categories and channels shown
in illustrations are dependent on
programming content delivered by the
service provider. Programming content is
subject to change. Therefore, channels and
categories shown in illustrations and
descriptions contained in this manual may
differ from the channels and categories
delivered by the service provider.
iSatellite radio service may be unavailable
or interrupted from time to time for a
variety of reasons, such as environmental
or topographic conditions and other things
we cannot control. Service might also not
be available in certain places (e.g. in
tunnels, parking garages, under leafy trees,
or within or next to buildings) or near other
obstructions. In such situations, the
satellite radio’s main menu shows the No
Service screen. At this point, the radio’s
functions are restricted.
Subscribing to satellite radio
XPress button $ on audio control unit
repeatedly until Sat is selected.
The following conditions are possible:
RSatellite radio service is not activated
(only the preview channel is displayed).
RSatellite radio service is activated.
iIf a satellite receiver is not installed or not
properly installed:
The message Device Unavailable will
appear.
If the satellite radio service is not activated,
the “SIRIUS Preview” display appears.
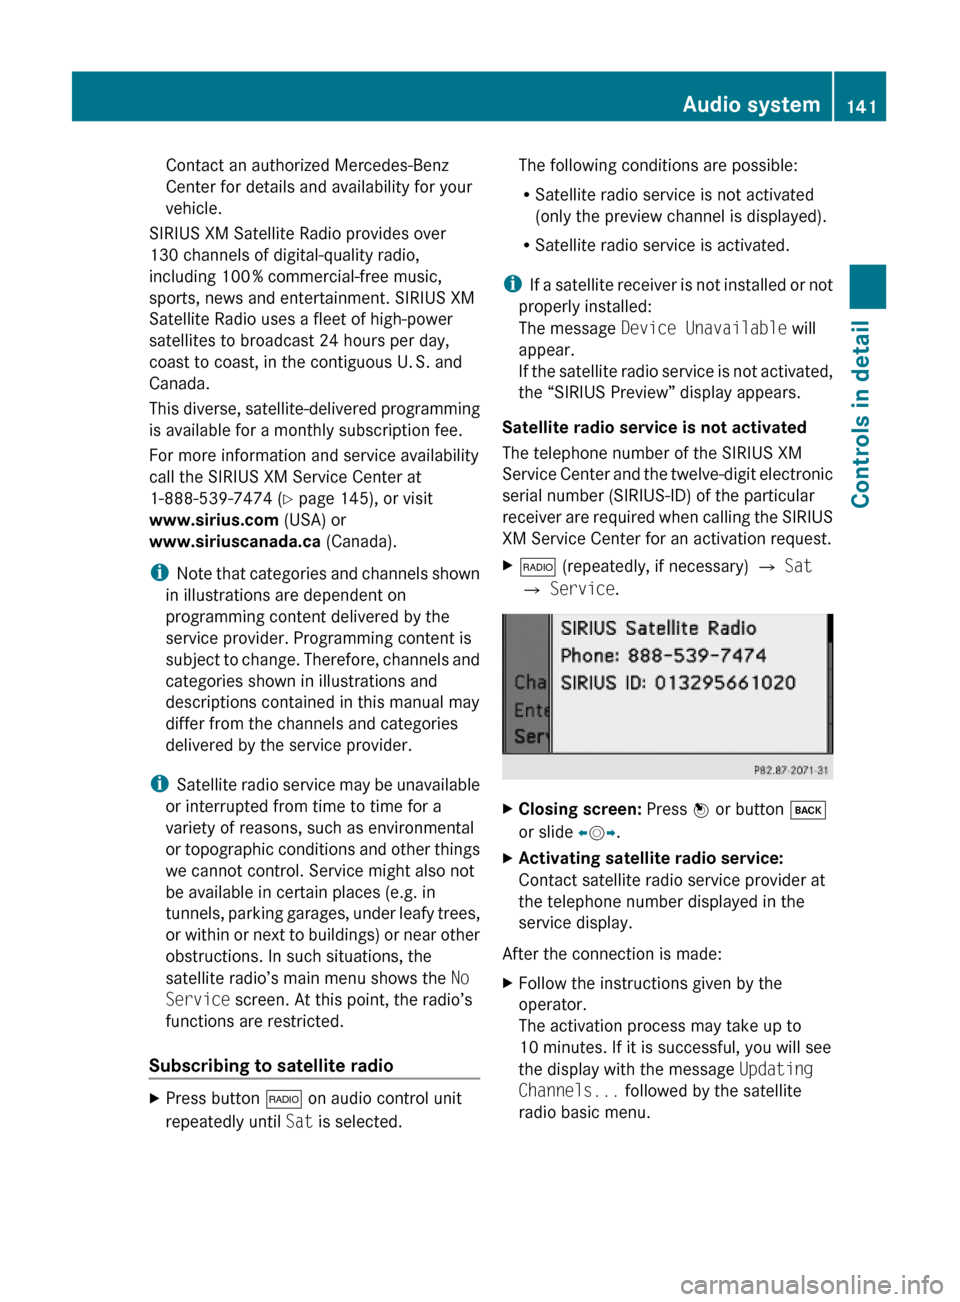
Satellite radio service is not activated
The telephone number of the SIRIUS XM
Service Center and the twelve-digit electronic
serial number (SIRIUS-ID) of the particular
receiver are required when calling the SIRIUS
XM Service Center for an activation request.
X$ (repeatedly, if necessary) Q Sat
Q Service.
XClosing screen: Press W or button k
or slide XVY.
XActivating satellite radio service:
Contact satellite radio service provider at
the telephone number displayed in the
service display.
After the connection is made:
XFollow the instructions given by the
operator.
The activation process may take up to
10 minutes. If it is successful, you will see
the display with the message Updating
Channels... followed by the satellite
radio basic menu.
Audio system141Controls in detailX204_AKB; 3; 23, en-USd2ureepe,Version: 2.11.8.12009-07-16T19:16:58+02:00 - Seite 141Z
Page 149 of 344
! Do not affix stickers or labels to the CDs,
they can become warped due to the heat
that develops in the CD drive or CD
changer.
In certain situations, the CDs can then no
longer be ejected and cause damage to the
drive. Such damage is not covered by the
Mercedes-Benz Limited Warranty.
! Your CD drive or CD changer has been
designed to play CDs which correspond to
the IEC 60908 standard. You can therefore
only use CDs with a maximum thickness of
1.3 mm.
If you insert thicker discs, e.g. ones that
have data on both sides (one side with DVD
data, the other side with audio data), they
cannot be ejected and will damage the
drive.
Do not use CDs with a diameter of 8 cm.
Attempting to play CDs with a diameter of
8 cm or playing such CDs with an adapter may
cause damage to the CD drive. Such damage
is not covered by the Mercedes-Benz Limited
Warranty.
Only use round discs with a diameter of
12 cm.
Should excessively high or low temperatures
occur while in CD changer mode, a message
will appear in the display, and the CD will be
muted until the temperature has reached an
acceptable level for the system to continue
operation.
Tips on handling CDs
R Only touch the CDs at the edges.
R Handle CDs carefully to prevent
interference during playback.
R Avoid scratches, fingerprints and dust on
the CDs.
R The CDs must only be labeled using pens
specially designed for this purpose.
R Clean CDs from time to time with a
commercially available cleaning cloth.
Never wipe the CD in a circular motion;instead, wipe it in a straight line starting in
the center and moving outward. Do not use
solvents, anti-static sprays, etc. for
cleaning.
R Replace the CD in its case after use.
R Protect CDs from heat and direct sunlight.
Notes about MP3 mode
The single CD player and the CD changer can
play audio CDs as well as CDs with MP3/
WMA files.
i Due to the branched data structure,
playback of the first track may be delayed
slightly.
Permissible media for MP3/WMA files
R CD-R
R CD-RW
Permissible file systems
R ISO9660/Joliet for CDs
Multisession CDs
For multisession CDs, the first session type
of the CD determines how the audio system
will process the CD.
For example, if the first session type is
according to the audio CD standard and the
second session type is according to the data
CD standard containing MP3/WMA tracks,
the audio system will treat the CD as a
conventional audio CD. This means that it is
only possible to access the audio CD tracks.
Access to the MP3/WMA tracks is not
possible.
Similarly, if the first session type is according
to the data CD standard containing MP3/
WMA tracks and the second session type is
according to the audio CD standard, the audio
system will treat the CD as a data CD. This
means that it is only possible to access the
MP3/WMA tracks. Access to the audio CD
tracks is not possible.
Audio system147Controls in detailX204_AKB; 3; 23, en-USd2ureepe,Version: 2.11.8.12009-07-16T19:16:58+02:00 - Seite 147Z