buttons MERCEDES-BENZ GLS 2018 Owners Manual
[x] Cancel search | Manufacturer: MERCEDES-BENZ, Model Year: 2018, Model line: GLS, Model: MERCEDES-BENZ GLS 2018Pages: 398, PDF Size: 5.73 MB
Page 22 of 398
Opening/closing .............................. 93
Problem (malfunction) ..................... 96
Resetting ......................................... 94
see Panorama roof with power
tilt/sliding panel
SmartKey
Changing the battery ....................... 80
Changing the programming ............ .7 9
Checking the battery ...................... .8 0
Convenience closing feature ............ 91
Convenience opening feature .......... 90
Dis play message ............................ 278
Door central locking/unlocking ...... .7 7
Important safety notes .................... 77
KEYLESS-GO start function .............. 79
Loss ................................................ .8 1
Mechanical key ................................ 79
Overview .......................................... 77
Positions (ignition lock) ................. 140
Problem (malfunction) ..................... 81
Starting the engine ........................ 142
Smartphone
Starting the engine ........................ 142
SMS
see also Digital Operator's Man-
ual .................................................. 292
Snow chains
Information .................................... 356
Sockets
Center console .............................. 312
General notes ................................ 312
Luggage compartment .................. .3 13
Rear compartment ......................... 312
Sound
Switching on/off ........................... 293
Special seat belt retractor .................. 60
Specialist workshop ............................ 31
Speed, controlling
see Cruise control
Speedometer
Digital ............................................ 237
In the Instru ment
cluster ................. 37
Segments ...................................... 233
Selecting the display unit .............. .2 43
Standing lamps
Display message ............................ 260
Switching on/off ........................... 116 Start/Stop button
Starting the engine ........................ 142
Start/stop function
see ECO start/stop function
Starting (engine) ................................ 141
STEER CONTROL .................................. 75
Steering
Display message ............................ 277
Steering Pilot
Activating/deactivating ................. 241
Display message ............................ 271
Steering wheel
Adjusting (electrically) ................... 109
Adjusting (manually) ...................... 108
Button overview ............................... 38
Buttons (on-board computer) ......... 234
Cleaning ......................................... 336
Important safety notes .................. 108
Steering wheel heating .................. 109
Storing settings (memory func-
tion) ............................................... 113
Steering wheel heating
Problem (malfunction) ................... 109
Switching on/off ........................... 109
Steering wheel paddle shifters ........ 152
Stopwatch (RACETIMER) ................... 246
Stowage areas ................................... 300
Stowage compartments
Armrest (under) ............................. 301
Center console .............................. 302
Center console (rear) ..................... 302
Cup holders ................................... 308
Eyeglasses compartment ............... 302
Glove box ....................................... 301
Important safety information ......... 300
Stowage net ................................... 302
Stowage net ....................................... 302
Summer tires
In winter ........................................ 356
Sun visor ............................................ 310
Suspension setting
AIRMATIC ...................................... 188
AMG adaptive sport suspension
system ........................................... 191
Suspension tuning
SETUP (on-board computer,
Mercedes-AMG vehicles) ............... 24620
Index
Page 67 of 398
When leaving the vehicle, always take the
SmartKey with you and lock the vehicle. Never
leave children unsupervised in the vehicle.
G WARNING
If persons, particularly children are subjected
to prolonged exposure to extreme heat or
cold, there is a risk of injury, possibly even
fatal. Never leave children unattended in the
vehicle.
G WARNING
If the child restraint system is subjected to
direct sunlight, parts may get very hot. Chil-
dren may burn themselves on these parts,
particularly on the metal parts of the child
restraint system. There is a risk of injury.
If you leave the vehicle, taking the child with
you, always ensure that the child restraint
system is not exposed to direct sunlight. Pro-
tect it with a blanket, for example. If the child
restraint system has been exposed to direct
sunlight, let it cool down before securing the
child in it. Never leave children unattended in
the vehicle.
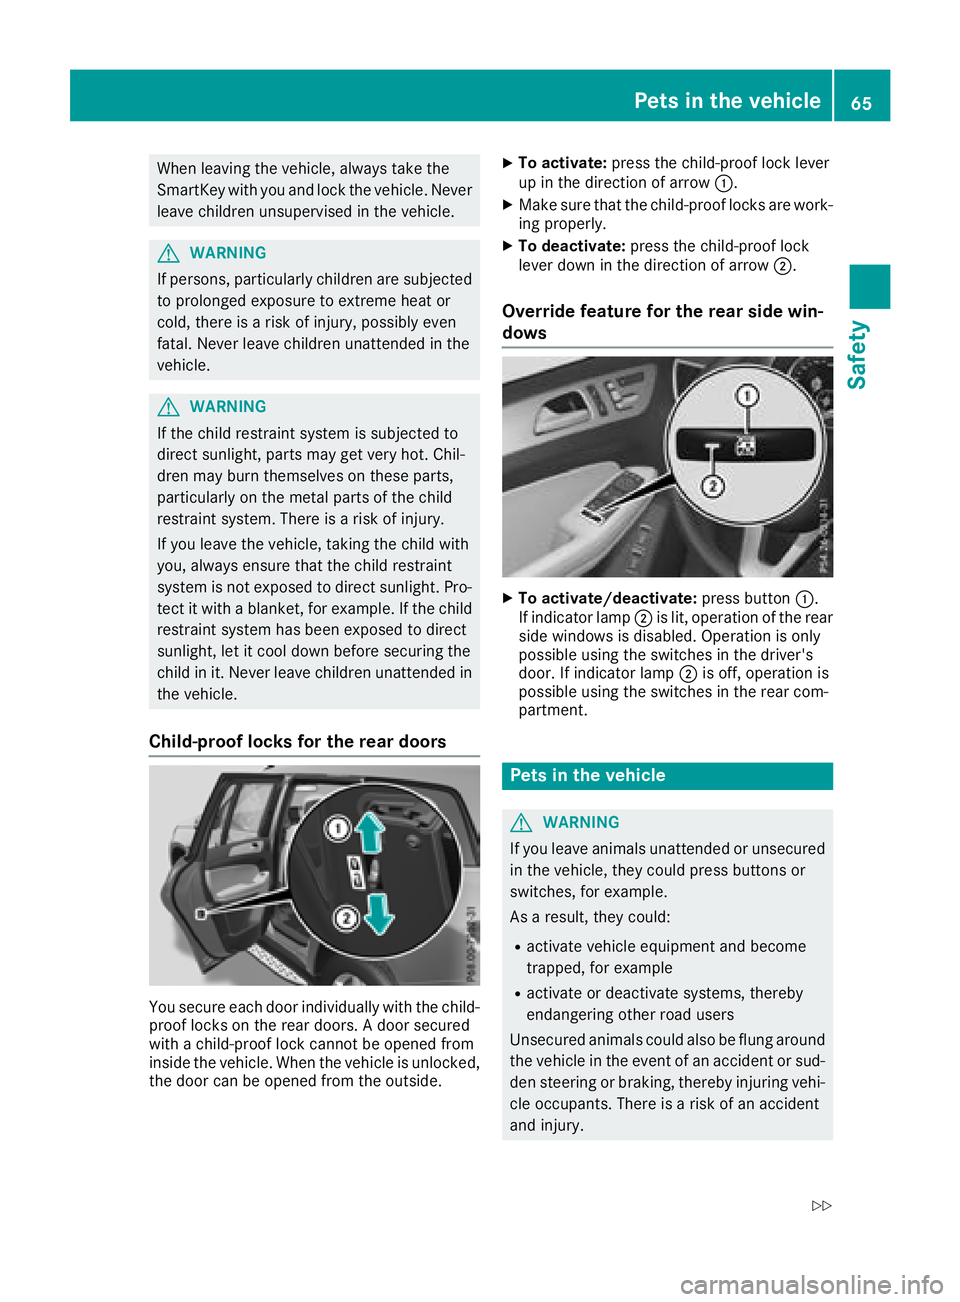
Child-proof locks for the rear doors
You secure each door individually with the child-
proof locks on the rear doors. A door secured
with a child-proof lock cannot be opened from
inside the vehicle. When the vehicle is unlocked,
the door can be opened from the outside. X
To activate: press the child-proof lock lever
up in the direction of arrow �C .X
Make sure that the child-proof locks are work-
ing properly. X
To deactivate: press the child-proof lock
lever down in the direction of arrow �D .
Override feature for the rear side win-
dows X
To activate/deactivate: press button �C .
If indicator lamp �D is lit, operation of the rear
side windows is disabled. Operation is only
possible using the switches in the driver's
door. If indicator lamp �D is off, operation is
possible using the switches in the rear com-
partment.
Pets in the vehicle
G WARNING
If you leave animals unattended or unsecured
in the vehicle, they could press buttons or
switches, for example.
As a result, they could: R
activate vehicle equipment and become
trapped, for example R
activate or deactivate systems, thereby
endangering other road users
Unsecured animals could also be flung around
the vehicle in the event of an accident or sud-
den steering or braking, thereby injuring vehi-
cle occupants. There is a risk of an accident
and injury.Pets in the vehicle 65
Safety Z
Page 81 of 398
KEYLESS- GO start function
Gene ra l notesBear in min d that th e engin e can be started by
any of th e vehicl e occupant s if there is a Smart -
Key in th e vehicl e ( Y
page 142).
Changing the settings of the locking
system You can chang e th e setting s of th e locking sys-
tem. This mean s that only th e driver's door and
th e fuel filler flap are unlocke d when th e vehicl e
is unlocked. This is useful if you frequentl y travel
alone. X
To change th e setting: press and hold down
th e �6 and �7 buttons simultaneousl y
for about six seconds until th e battery indica-
to r lamp flashes twice ( Y
page 80) .
If th e setting of th e locking system is changed
within th e signal range of th e vehicle, pressing
th e �7 or �6 button:R
locks or R
unlocks th e vehicl e
The SmartKey no w function s as follows :X
To unlock: press th e �6 butto n once .X
To unlock centrally: press th e �6 butto n
twice .X
To lock centrally: press th e �7 button.
The KEYLESS-GO function is changed as fol -
lows : X
To unlock th e driver's door : touch th e inner
surfac e of th e door handle on th e driver's
door .X
To unlock centrally: touch th e inner surfac e
of th e door handle on th e front-passenger
door or th e rear door .X
To lock centrally: touch th e outer sensor
surfac e on on e of th e door handles
( Y
page 78) .X
To restor e th e factory settings: press and
hold down th e �6 and �7 buttons s imul-
ta
neously for approximately six seconds until
th e battery chec k lamp flashes twice
( Y
page 80) . Mechanical key
Gene ra l notesIf th e vehicl e can no longer be locke d or
unlocke d wit h th e SmartKey or wit h KEYLESS -
GO, use th e mechanical key.
If you use th e mechanical ke y to unloc k and
open th e driver's door , th e anti-thef t alarm sys-
te m will be triggered . Switc h off th e alarm
( Y
page 75) .
If you unloc k th e vehicl e usin g th e mechanical
key, th e fuel filler flap will no t be unlocke d auto -
matically. X
To unlock th e fuel filler flap: insert th e
SmartKey int o th e ignition lock.
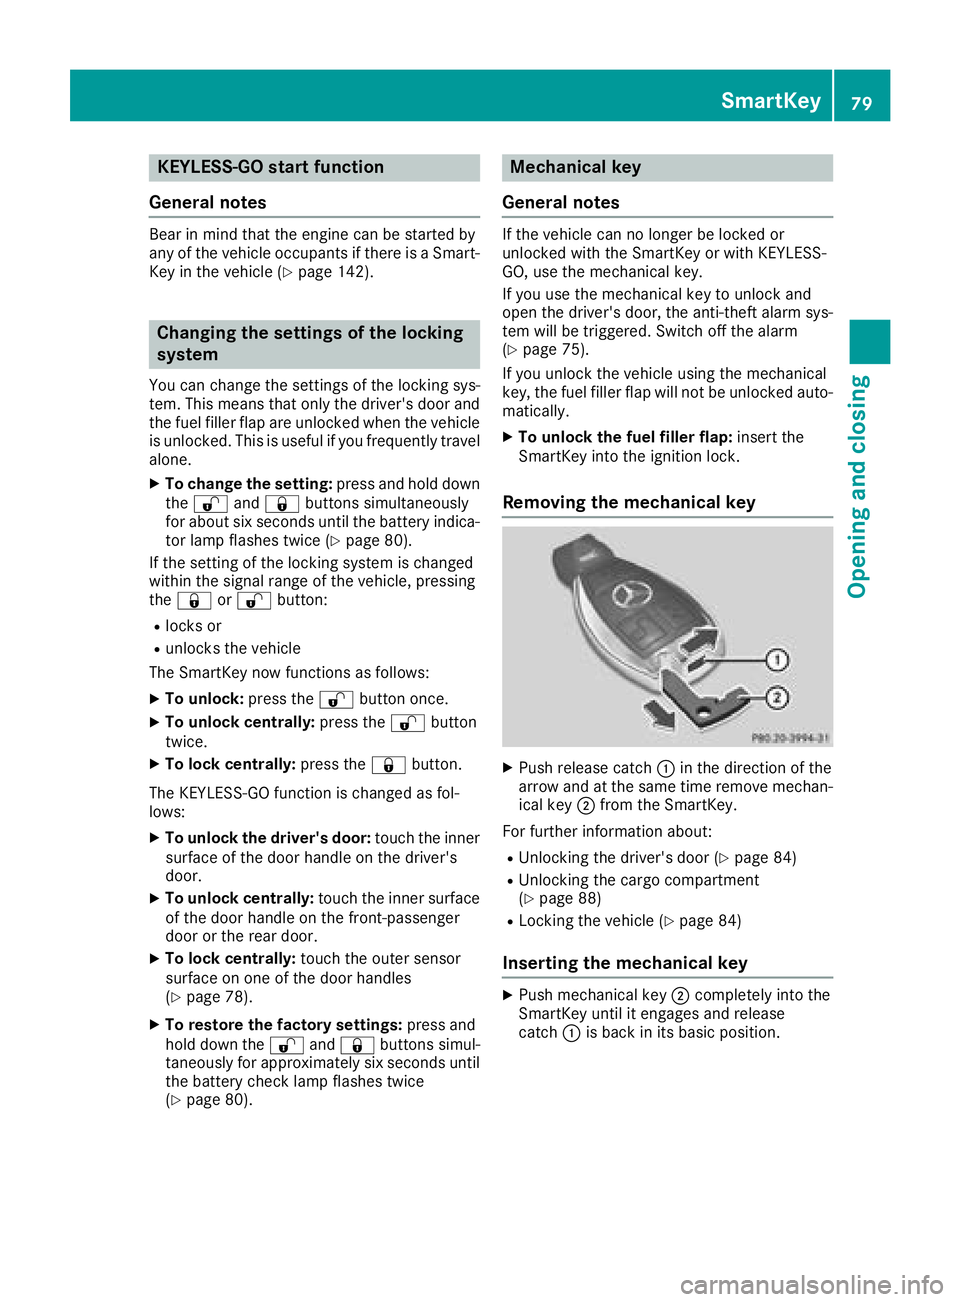
Removing the me chanical key
X
Push release catch �C in th e direction of th e
arrow and at th e sam e time remove mechan -
ical ke y �D from th e SmartKey.
Fo r further information about :R
Unlocking th e driver's door ( Y
page 84)R
Unlocking th e cargo compartmen t
( Y
page 88 ) R
Locking th e vehicl e ( Y
page 84)
Inserting the me chanical key X
Push mechanical ke y �D completely int o th e
SmartKey until it engage s and release
catch �C is bac k in it s basic position .SmartKey 79
Opening and closing Z
Page 85 of 398
Door s
Important safet y notes
G WARNING
If children are lef t unsupervised in th e vehicle,
they could: R
ope n th e doors , thus endangerin g other
people or road users. R
get out and disrup t traffic .R
operat e th e vehicle' s equipment.
Additionally, children could set th e vehicle in
motion if, fo r example, they:R
release th e parking brake .R
shiftin g th e automatic transmissio n out of
par k position PR
Start th e engine.
There is a ris k of an acciden t and injury.
Whe n leavin g th e vehicle, always take th e
SmartKey wit h you and loc k th e vehicle. Never
leav e children or animals unattended in th e
vehicle. Always keep th e SmartKey out of
reach of children .
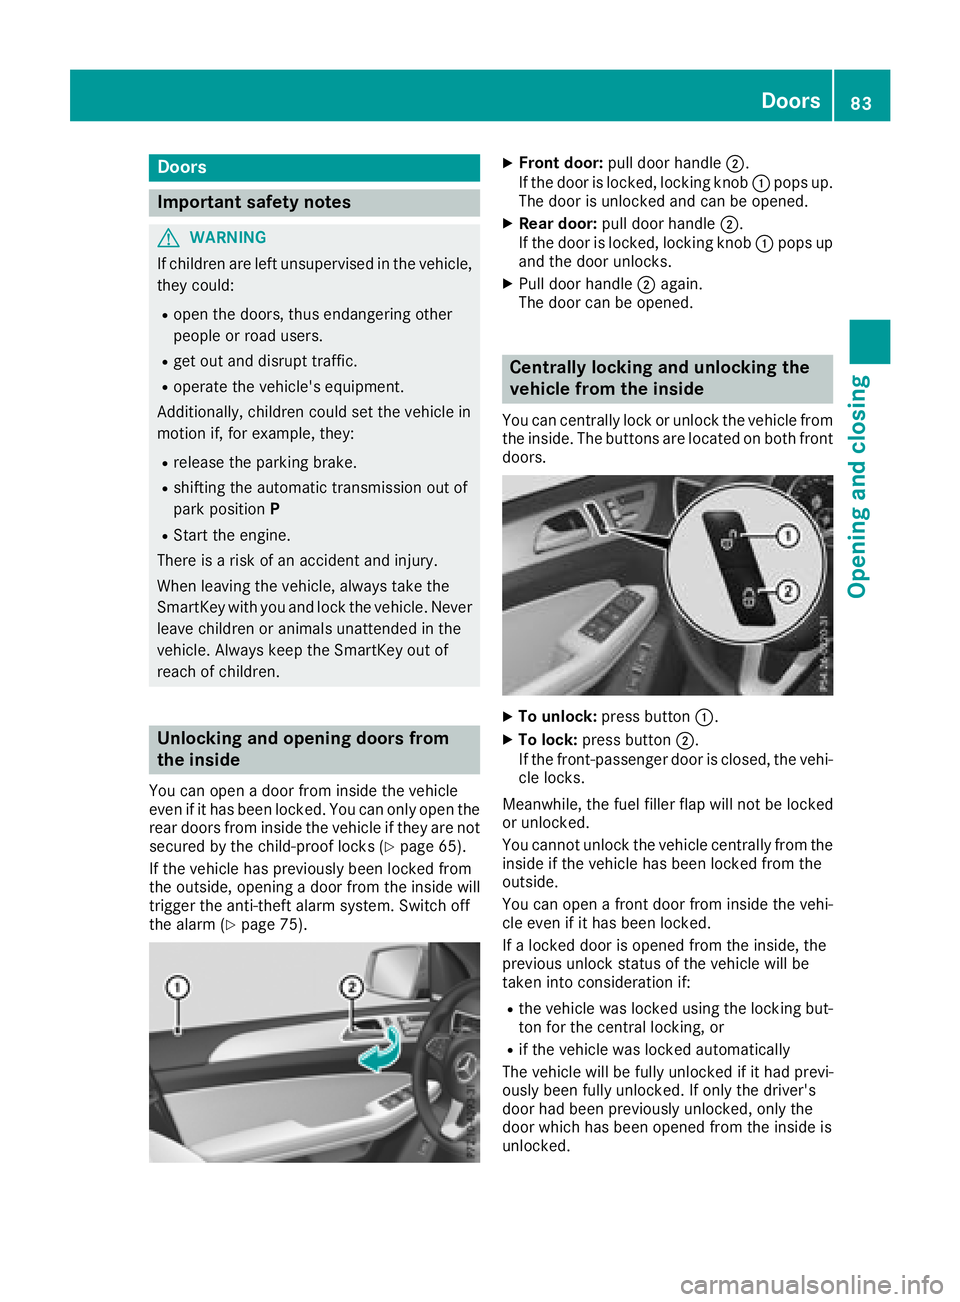
Unlockin g an d opening doors from
th e insideYou can ope n a doo r from insid e th e vehicle
eve n if it has bee n locked. You can only ope n th e
rea r doors from insid e th e vehicle if they are no t
secure d by th e child-proof locks ( Y
page 65).
If th e vehicle has previously bee n locke d from
th e outside, opening a doo r from th e insid e will
trigger th e anti-thef t alar m system. Switc h of f
th e alar m ( Y
page 75). X
Front door: pull doo r handle �D .
If th e doo r is locked, locking knob �C pop s up.
The doo r is unlocke d and can be opened.X
Rea r door: pull doo r handle �D .
If th e doo r is locked, locking knob �C pop s up
and th e doo r unlocks .X
Pull doo r handle �D again .
The doo r can be opened.
Centrally locking an d unlocking th e
vehicle from th e insideYou can centrall y loc k or unloc k th e vehicle from
th e inside. The buttons are located on bot h fron t
doors .
X
To unlock : press butto n �C .X
To lock : press butto n �D .
If th e front-passenger doo r is closed, th e vehi-
cl e locks .
Meanwhile, th e fue l filler flap will no t be locke d
or unlocked.
You canno t unloc k th e vehicle centrall y from th e
insid e if th e vehicle has bee n locke d from th e
outside.
You can ope n a fron t doo r from insid e th e vehi-
cl e eve n if it has bee n locked.
If a locke d doo r is opene d from th e inside, th e
previous unloc k status of th e vehicle will be
take n into consideration if: R
th e vehicle was locke d usin g th e locking but -
to n fo r th e central locking , orR
if th e vehicle was locke d automatically
The vehicle will be full y unlocke d if it had previ-
ousl y bee n full y unlocked. If only th e driver's
doo r had bee n previously unlocked, only th e
doo r whic h has bee n opene d from th e insid e is
unlocked. Doors 83
Opening and closing Z
Page 86 of 398
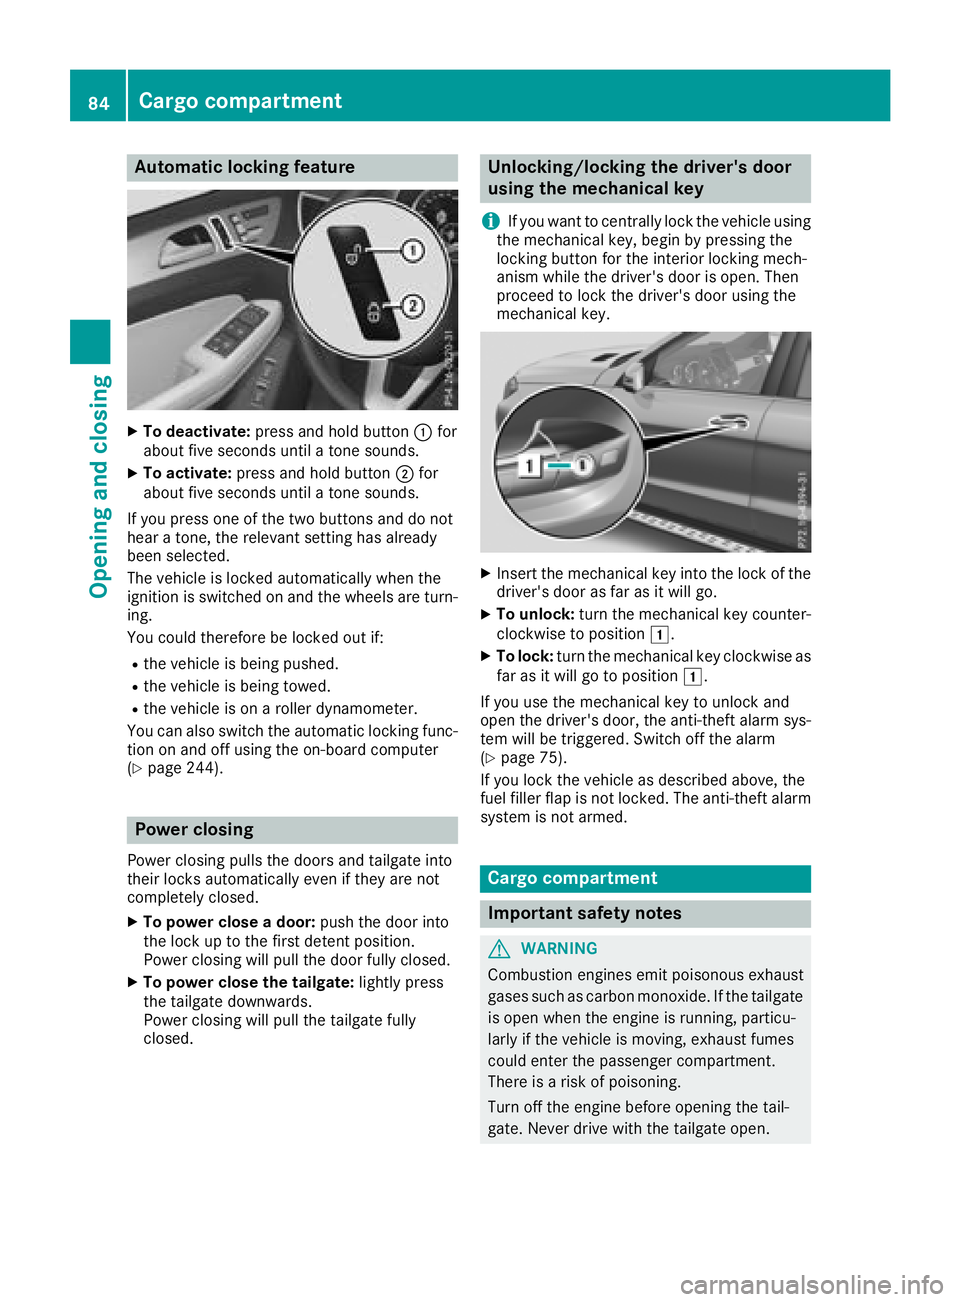
Aut oma tic locking featu reX
To deactivate: press and hold butto n �C for
about fiv e seconds until a tone sounds.X
To activate: press and hold butto n �D for
about fiv e seconds until a tone sounds.
If you press on e of th e two buttons and do no t
hear a tone , th e relevan t setting has already
been selected.
The vehicl e is locke d automatically when th e
ignition is switched on and th e wheels are turn-
ing .
You could therefor e be locke d out if:R
th e vehicl e is bein g pushed.R
th e vehicl e is bein g towed.R
th e vehicl e is on a roller dynamometer.
You can also switch th e automatic locking func-
tion on and off usin g th e on-board computer
( Y
page 244).
Power closing Powe r closin g pulls th e door s and tailgat e int o
their locks automatically eve n if they are no t
completely closed. X
To power close a door : push th e door int o
th e loc k up to th e first deten t position .
Powe r closin g will pull th e door fully closed.X
To power close th e tailgate: lightl y press
th e tailgat e downwards.
Powe r closin g will pull th e tailgat e fully
closed. Unlocking/locking the driver's door
using the mechanical key
i If you want to centrally loc k th e vehicl e usin g
th e mechanical key, begi n by pressing th e
locking butto n for th e interior locking mech-
anism while th e driver's door is open . The n
proceed to loc k th e driver's door usin g th e
mechanical key.
X
Inser t th e mechanical ke y int o th e loc k of th e
driver's door as far as it will go. X
To unlock: tur n th e mechanical ke y counter-
clockwise to position �G .X
To lock: tur n th e mechanical ke y clockwise as
far as it will go to position �G .
If you use th e mechanical ke y to unloc k and
open th e driver's door , th e anti-thef t alarm sys-
te m will be triggered . Switc h off th e alarm
( Y
page 75).
If you loc k th e vehicl e as described above, th e
fuel filler flap is no t locked. The anti-thef t alarm
system is no t armed.
Cargo compa rt ment
Import ant safety notes
G WARNIN G
Combustion engines emi t poisonous exhaust
gase s suc h as carbon monoxide. If th e tailgat e
is open when th e engin e is running, particu-
larly if th e vehicl e is moving , exhaust fumes
could ente r th e passenger compartment.
There is a ris k of poisoning .
Turn off th e engin e before opening th e tail-
gate. Never drive wit h th e tailgat e open .84
Cargo compartment
Opening and closing
Page 100 of 398
G WARNING
You could lose control of your vehicle if you do
the following while driving: R
adjust the driver's seat, head restraint,
steering wheel or mirrors R
fasten the seat belt
There is a risk of an accident.
Adjust the driver's seat, head restraint, steer-
ing wheel and mirror and fasten your seat belt
before starting the engine.
G WARNING
If you adjust the seat height carelessly, you or
other vehicle occupants could be trapped and
thereby injured. Children in particular could
accidentally press the electrical seat adjust-
ment buttons and become trapped. There is a
risk of injury.
While moving the seats, make sure that your
hands or other body parts do not get under the
lever assembly of the seat adjustment sys-
tem.
G WARNING
If the head restraints are not installed or not
adjusted correctly, they cannot provide pro-
tection as intended. There is an increased risk
of injury in the head and neck area, e.g. in the
event of an accident or when braking.
Always drive with the head restraints instal-
led. Before driving off, make sure for every
vehicle occupant that the center of the head
restraint supports the back of the head at
about eye level.
G WARNING
The seat belt does not offer the intended level
of protection if you have not moved the back-
rest to an almost vertical position. When brak-
ing or in the event of an accident, you could
slide underneath the seat belt and sustain
abdomen or neck injuries, for example. This
poses an increased risk of injury or even fatal
injury. Adjust the seat properly before beginning
your journey. Always ensure that the backrest
is in an almost vertical position and that the
shoulder section of your seat belt is routed
across the center of your shoulder.
! To avoid damage to the seats and the seat
heating, observe the following information: R
keep liquids from spilling on the seats. If
liquid is spilled on the seats, dry them as
soon as possible. R
if the seat covers are damp or wet, do not
switch on the seat heating. The seat heat-
ing should also not be used to dry the seats. R
clean the seat covers as recommended;
see "Interior care". R
do not transport heavy loads on the seats.
Do not place sharp objects on the seat
cushions, e.g. knives, nails or tools. The
seats should only be occupied by passen-
gers, if possible. R
when the seat heating is in operation, do
not cover the seats with insulating materi-
als, e.g. blankets, coats, bags, seat covers,
child seats or booster seats.
! Make sure that there are no objects in the
footwell under or behind the seats when mov-
ing the seats back. There is a risk that the
seats and/or the objects could be damaged.
i Further related subjects: R
Cargo compartment enlargement (folding
down the rear bench seat) ( Y
page 303)
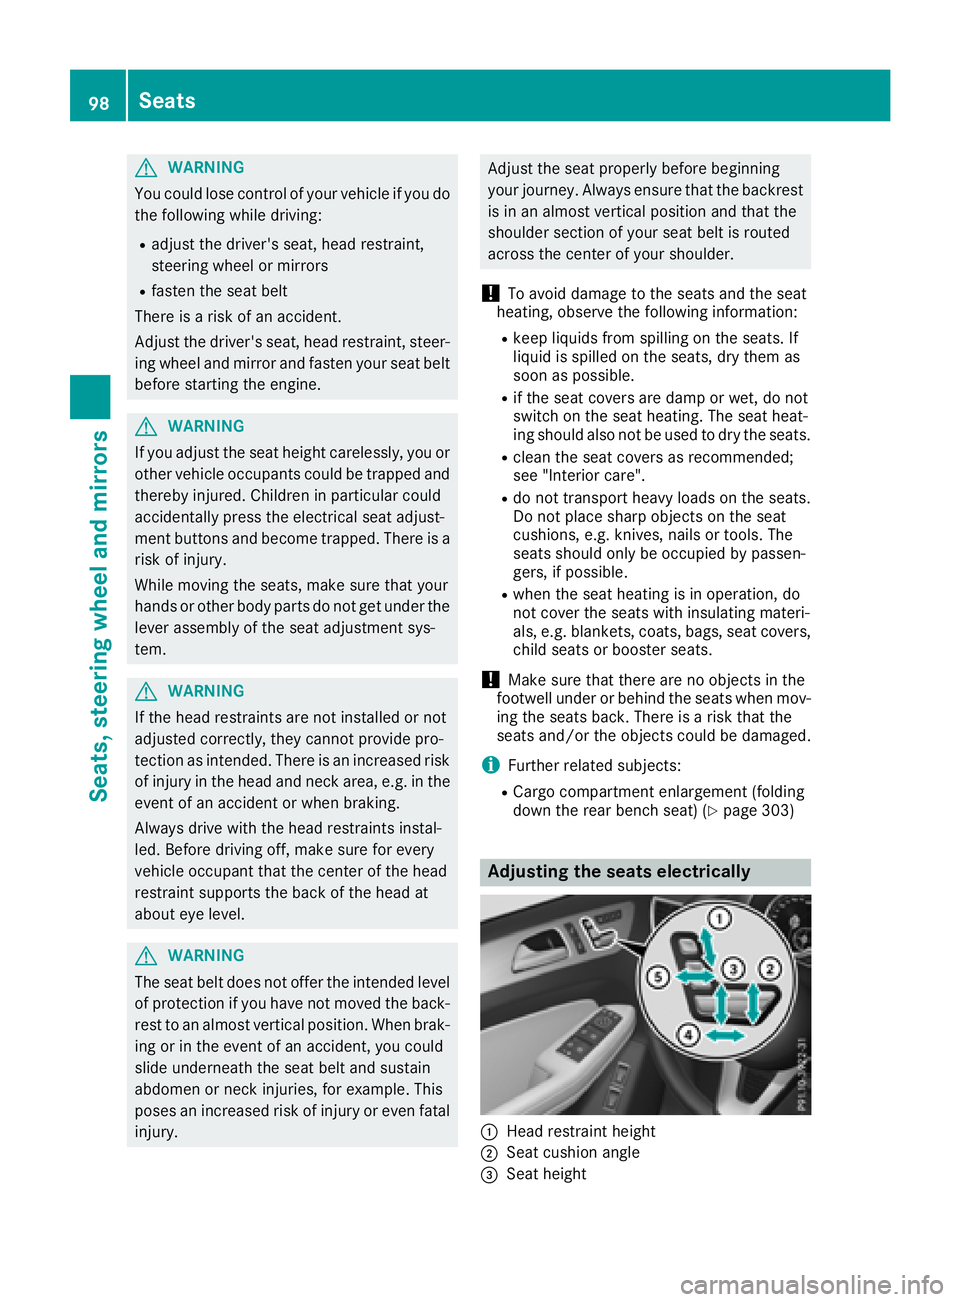
Adjusting the seats electrically
�C
Head restraint height
�D
Seat cushion angle
�
Page 106 of 398
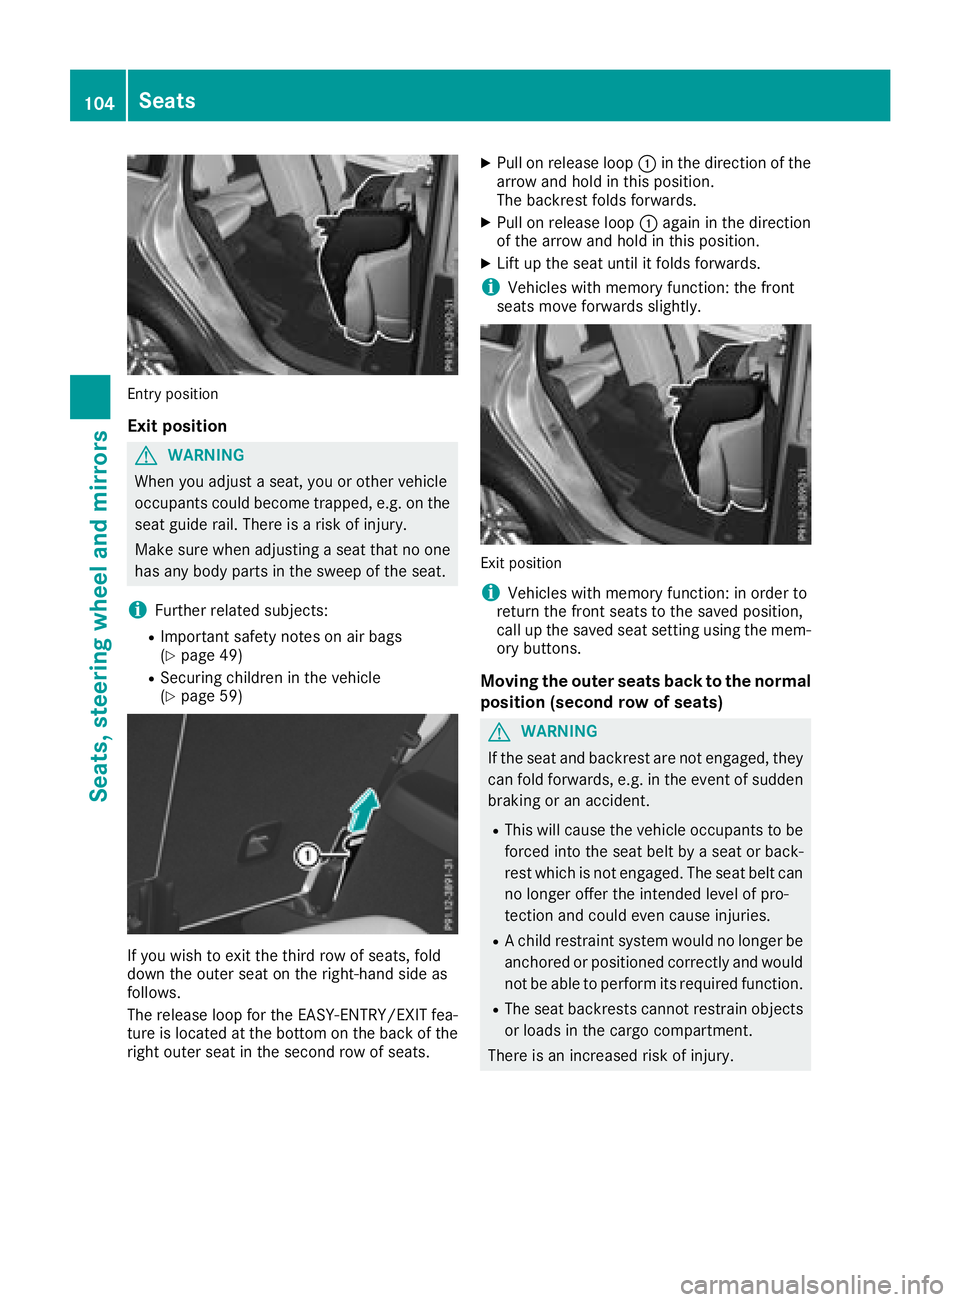
Entry position
Exit position
G WARNING
When you adjust a seat, you or other vehicle
occupants could become trapped, e.g. on the
seat guide rail. There is a risk of injury.
Make sure when adjusting a seat that no one
has any body parts in the sweep of the seat.
i Further related subjects: R
Important safety notes on air bags
( Y
page 49) R
Securing children in the vehicle
( Y
page 59)
If you wish to exit the third row of seats, fold
down the outer seat on the right-hand side as
follows.
The release loop for the EASY-ENTRY/EXIT fea-
ture is located at the bottom on the back of the
right outer seat in the second row of seats. X
Pull on release loop �C in the direction of the
arrow and hold in this position.
The backrest folds forwards. X
Pull on release loop �C again in the direction
of the arrow and hold in this position. X
Lift up the seat until it folds forwards.
i Vehicles with memory function: the front
seats move forwards slightly.
Exit position
i Vehicles with memory function: in order to
return the front seats to the saved position,
call up the saved seat setting using the mem-
ory buttons.
Moving the outer seats back to the normal
position (second row of seats)
G WARNING
If the seat and backrest are not engaged, they
can fold forwards, e.g. in the event of sudden
braking or an accident. R
This will cause the vehicle occupants to be
forced into the seat belt by a seat or back-
rest which is not engaged. The seat belt can
no longer offer the intended level of pro-
tection and could even cause injuries. R
A child restraint system would no longer be
anchored or positioned correctly and would
not be able to perform its required function. R
The seat backrests cannot restrain objects
or loads in the cargo compartment.
There is an increased risk of injury.104
Seats
Seats, steering wheel an d mirrors
Page 109 of 398
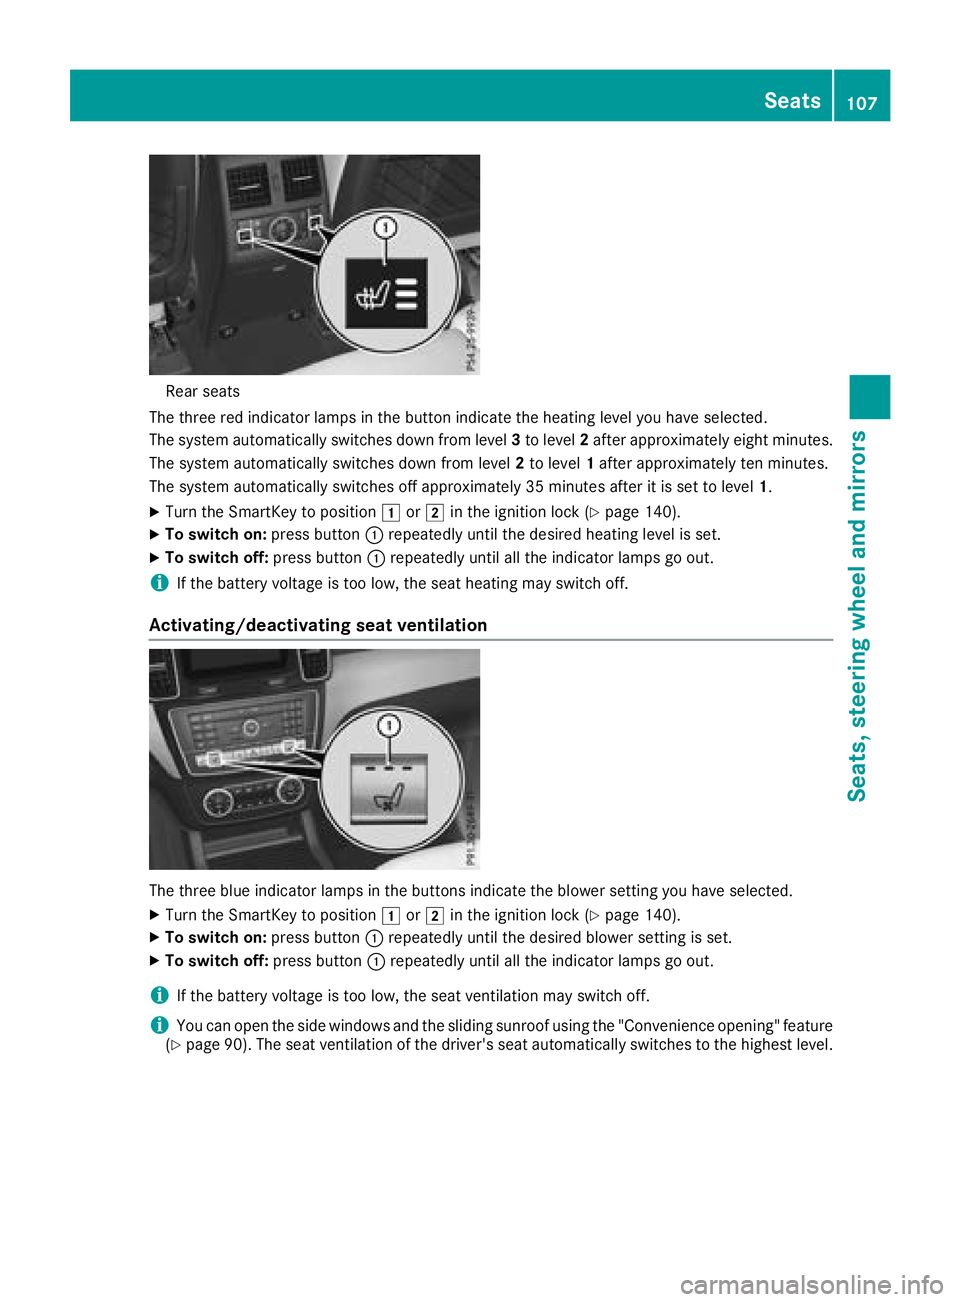
Rear seat s
The three red indicator lamp s in th e butto n indicat e th e heating level you hav e selected.
The system automatically switches down from level 3 to level 2 after approximately eigh t minutes.
The system automatically switches down from level 2 to level 1 after approximately te n minutes.
The system automatically switches off approximately 35 minute s after it is set to level 1 .X
Turn th e SmartKey to position �G or �H in th e ignition loc k ( Y
page 140).X
To switch on: press butto n �C repeatedly until th e desired heating level is set .X
To switch off : press butto n �C repeatedly until all th e indicator lamp s go out .
i If th e battery voltag e is to o low, th e seat heating may switch off .
Activating/deactivating seat ventilation
The three blue indicator lamp s in th e buttons indicat e th e blowe r setting you hav e selected.X
Turn th e SmartKey to position �G or �H in th e ignition loc k ( Y
page 140).X
To switch on: press butto n �C repeatedly until th e desired blowe r setting is set .X
To switch off : press butto n �C repeatedly until all th e indicator lamp s go out .
i If th e battery voltag e is to o low, th e seat ventilation may switch off .
i You can open th e side windows and th e sliding sunroo f usin g th e "Convenience opening " feature
( Y
page 90) . The seat ventilation of th e driver' s seat automatically switches to th e highest level.Seats 107
Seats, steering wheel and mirrors Z
Page 116 of 398
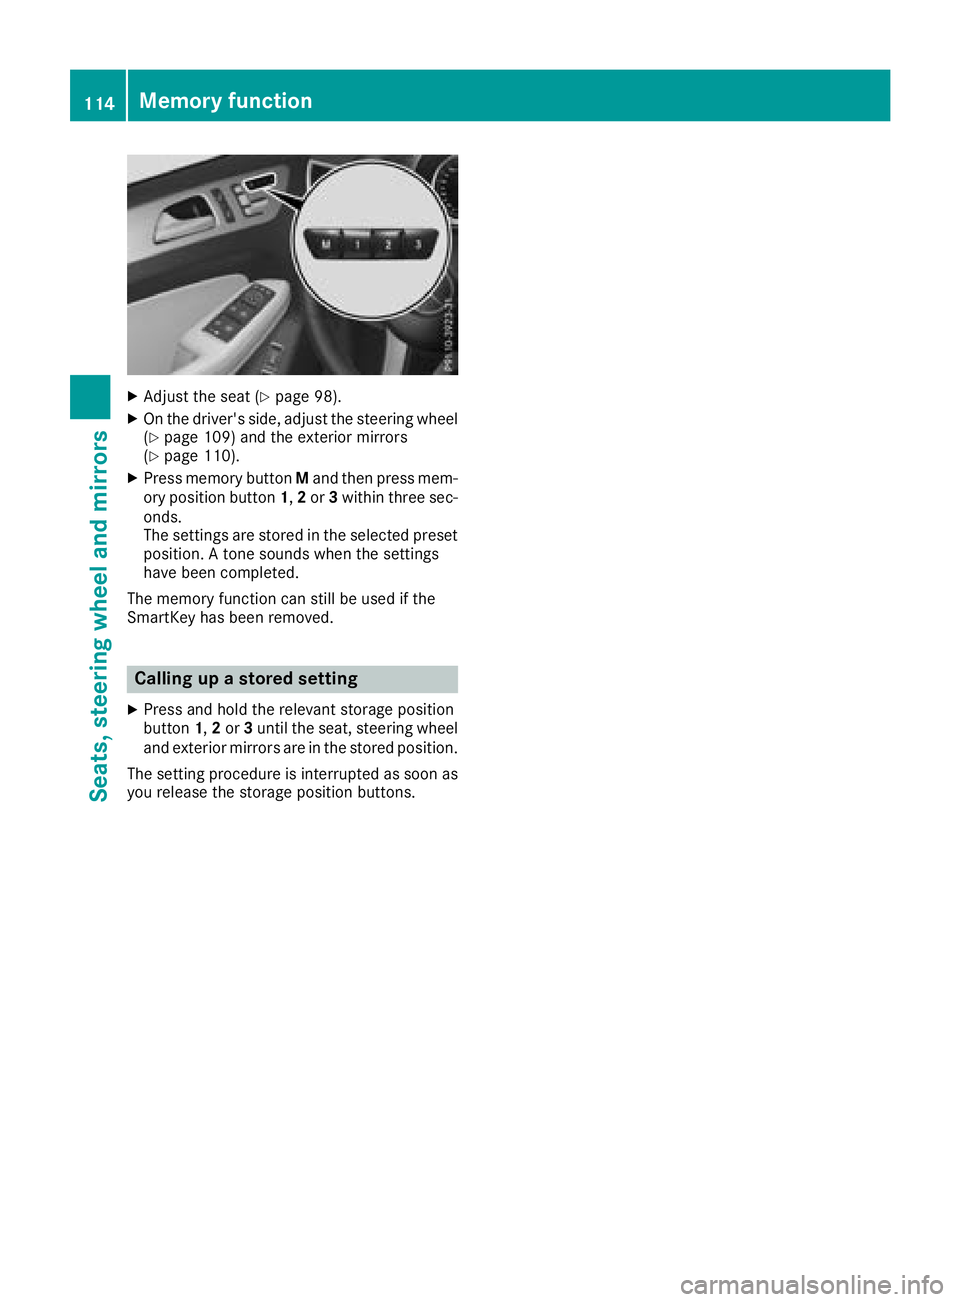
X
Adjust the seat ( Y
page 98).X
On the driver's side, adjust the steering wheel
( Y
page 109) and the exterior mirrors
( Y
page 110).X
Press memory button M and then press mem-
ory position button 1 , 2 or 3 within three sec-
onds.
The settings are stored in the selected preset
position. A tone sounds when the settings
have been completed.
The memory function can still be used if the
SmartKey has been removed.
Calling up a stored setting X
Press and hold the relevant storage position
button 1 , 2 or 3 until the seat, steering wheel
and exterior mirrors are in the stored position.
The setting procedure is interrupted as soon as
you release the storage position buttons.114
Memory function
Seats, steering wheel an d mirrors
Page 133 of 398
�y
Switches the rear climate control on/off ( Y
page 131)�z
Reduces the airflow ( Y
page 133)
Optimum use of automatic climate
control The following contains notes and recommenda-
tions on optimum use of the dual-zone auto-
matic climate control or 3-zone automatic cli-
mate control. R
You can switch on climate control by using the
�X and �Z or �X and �V buttons.
The indicator lamps in the �X and
�Z buttons or the �X and �V buttons
light up. R
Vehicles with 3-zone automatic climate
control: in automatic mode, you can also use
the �