ECU MERCEDES-BENZ GLS-Class SUV 2017 X166 Owner's Manual
[x] Cancel search | Manufacturer: MERCEDES-BENZ, Model Year: 2017, Model line: GLS-Class SUV, Model: MERCEDES-BENZ GLS-Class SUV 2017 X166Pages: 390, PDF Size: 9.71 MB
Page 17 of 390
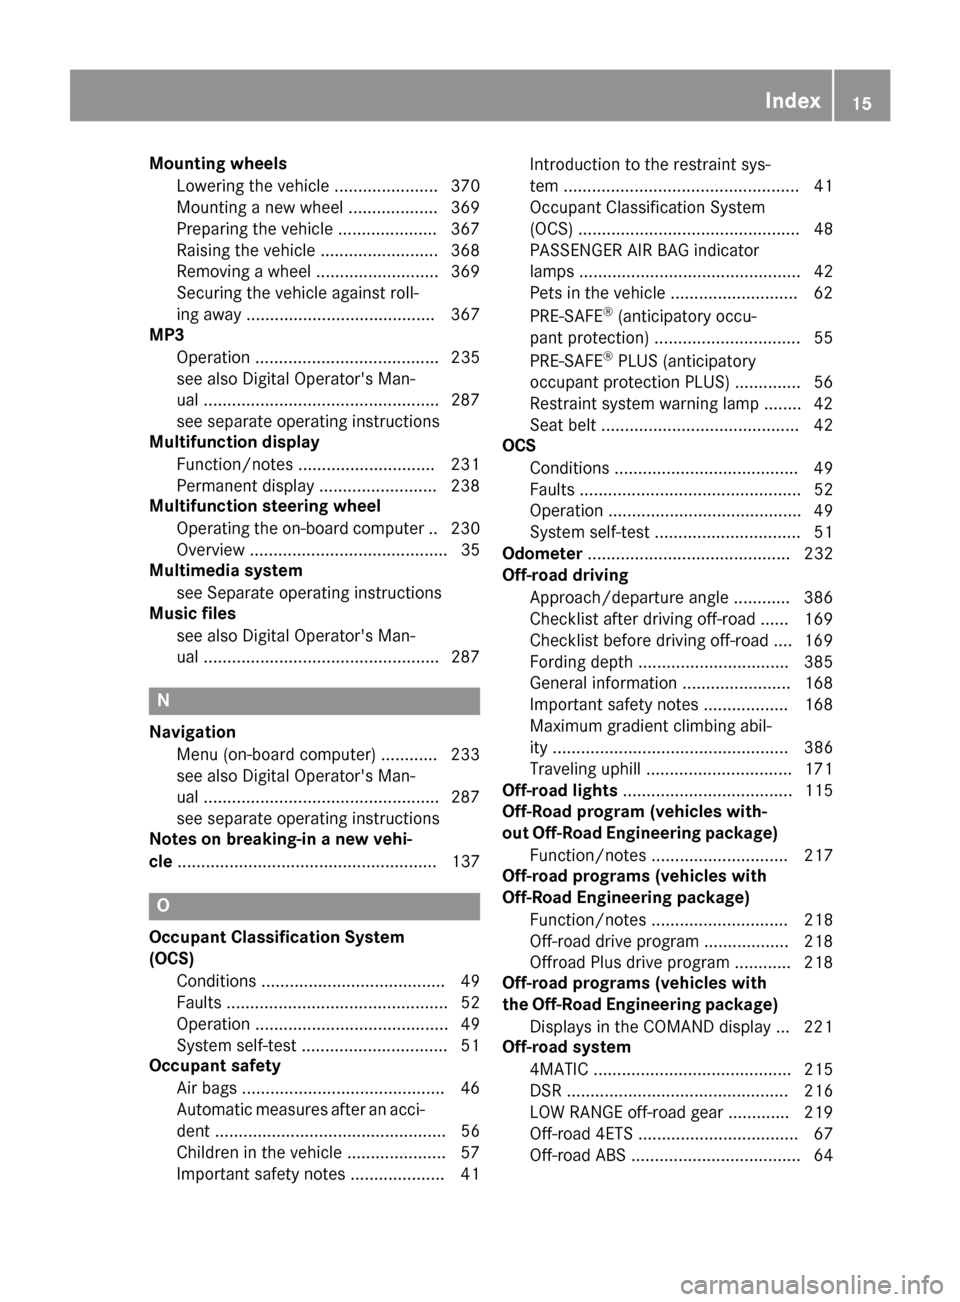
Mounting wheelsLowering the vehicle ...................... 370
Mounting a new wheel ................... 369
Preparing the vehicle .....................3 67
Raising the vehicle ......................... 368
Removing a wheel .......................... 369
Securing the vehicle against roll-
ing away ........................................ 367
MP3
Operation ....................................... 235
see also Digital Operator's Man-
ual ..................................................2 87
see separate operating instructions
Multifunction display
Function/notes .............................2 31
Permanent display ......................... 238
Multifunction steering wheel
Operating the on-board computer .. 230
Overview .......................................... 35
Multimedia system
see Separate operating instructions
Music files
see also Digital Operator's Man-
ual ..................................................2 87
N
Navigation
Menu (on-board computer) ............ 233
see also Digital Operator's Man-
ual ..................................................2 87
see separate operating instructions
Notes on breaking-in a new vehi-
cle ....................................................... 137
O
Occupant Classification System
(OCS)
Conditions ....................................... 49
Faults ............................................... 52
Operation ......................................... 49
System self-test ............................... 51
Occupant safety
Air bags ...........................................4 6
Automatic measures after an acci-
dent ................................................. 56
Children in the vehicle ..................... 57
Important safety notes .................... 41 Introduction to the restraint sys-
tem .................................................. 41
Occupant Classification System
(OCS) ............................................... 48
PASSENGER AIR BAG indicator
lamps ............................................... 42
Pets in the vehicle ........................... 62
PRE-SAFE
®(anticipatory occu-
pant protection) ............................... 55
PRE-SAFE
®PLUS (anticipatory
occupant protection PLUS) .............. 56
Restraint system warning lamp ........ 42
Seat belt .......................................... 42
OCS
Conditions ....................................... 49
Faults ............................................... 52
Operation ......................................... 49
System self-test ............................... 51
Odometer ........................................... 232
Off-road driving
Approach/departure angle ............ 386
Checklist after driving off-road ...... 169
Checklist before driving off-road .... 169
Fording depth ................................ 385
General information ....................... 168
Important safety notes .................. 168
Maximum gradient climbing abil-
ity .................................................. 386
Traveling uphill ............................... 171
Off-road lights .................................... 115
Off-Road program (vehicles with-
out Off-Road Engineering package)
Function/notes ............................. 217
Off-road programs (vehicles with
Off-Road Engineering package)
Function/notes ............................. 218
Off-road drive program .................. 218
Offroad Plus drive program ............ 218
Off-road programs (vehicles with
the Off-Road Engi neerin
g package)
Displays in the COMAND display ... 221
Off-road system
4MATIC .......................................... 215
DSR ............................................... 216
LOW RANGE off-road gear ............. 219
Off-road 4ETS .................................. 67
Off-road ABS .................................... 64
Index15
Page 25 of 390
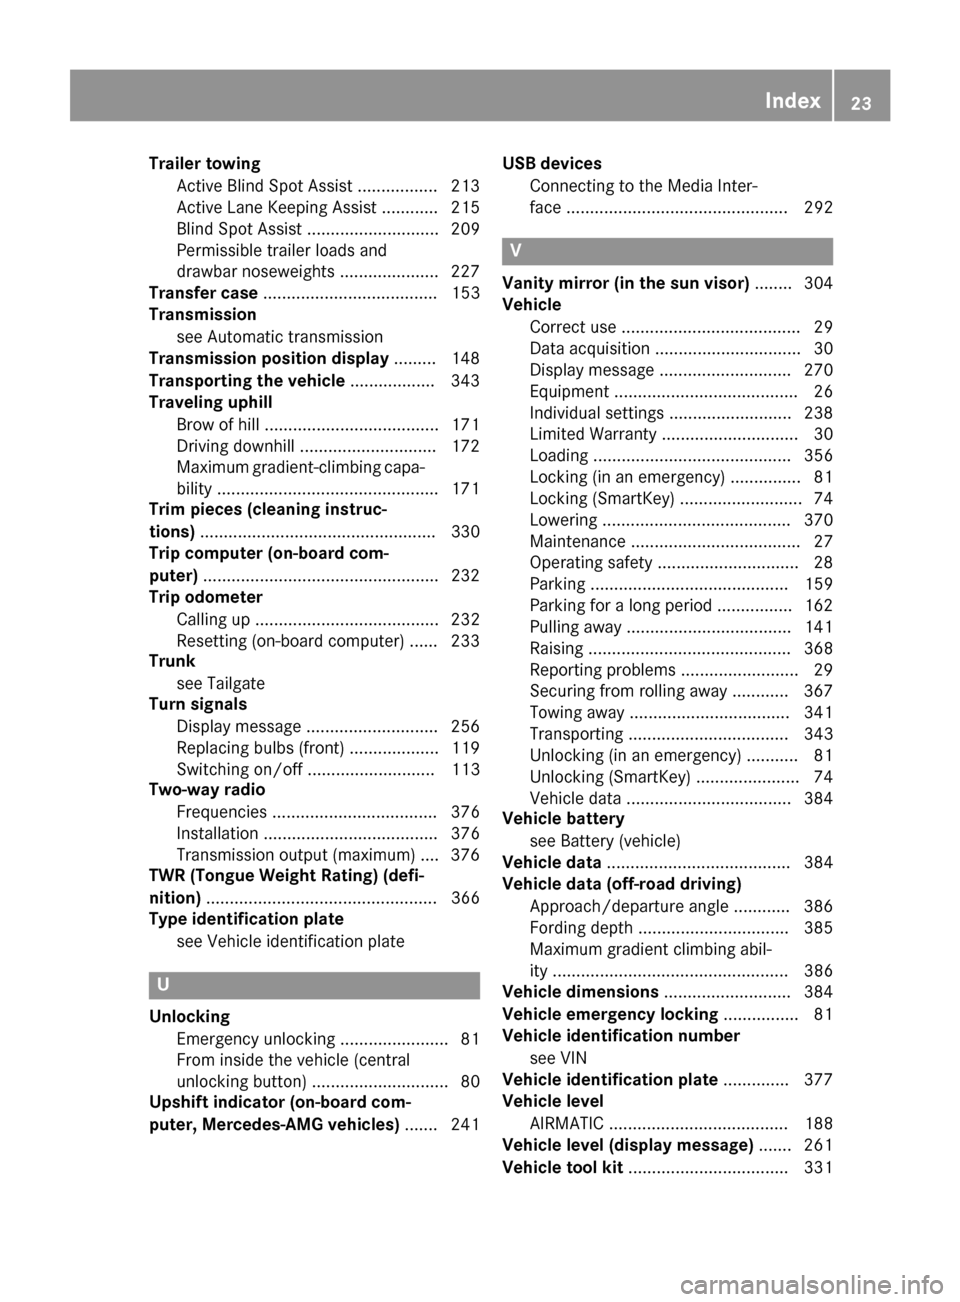
Trailer towingActive Blind Spot Assist ................. 213
Active Lane Keeping Assist ............ 215
Blind Spot Assist ............................ 209
Permissible trailer loads and
drawbar noseweights ..................... 227
Transfer case ..................................... 153
Transmission
see Automatic transmission
Transmission position display ......... 148
Transporting the vehicle .................. 343
Traveling uphill
Brow of hill ..................................... 171
Driving downhill ............................. 172
Maximum gradient-climbing capa-
bility ...............................................1 71
Trim pieces (cleaning instruc-
tions) ..................................................3 30
Trip computer (on-board com-
puter) ..................................................2 32
Trip odometer
Calling up ....................................... 232
Resetting (on-board computer) ...... 233
Trunk
see Tailgate
Turn signals
Display message ............................ 256
Replacing bulbs (front) ................... 119
Switching on/off ........................... 113
Two-way radio
Frequencies ................................... 376
Installation ..................................... 376
Transmission output (maximum) .... 376
TWR (Tongue Weight Rating) (defi-
nition) ................................................. 366
Type identification plate
see Vehicle identification plate
U
UnlockingEmergency unlocking ....................... 81
From inside the vehicle (central
unlocking button) .............................8 0
Upshift indicator (on-board com-
puter, Mercedes-AMG vehicles) .......241 USB devices
Connecting to the Media Inter-
face ............................................... 292
V
Vanity mirror (in the sun visor) ........304
Vehicle
Correct use ...................................... 29
Data acquisition ............................... 30
Display message ............................ 270
Equipment ....................................... 26
Individual settings .......................... 238
Limited Warranty .............................3 0
Loading .......................................... 356
Locking (in an emergency) ............... 81
Locking (SmartKey) .......................... 74
Lowering ........................................ 370
Maintenance .................................... 27
Operating safety .............................. 28
Parking .......................................... 159
Parking for a long period ................ 162
Pulling away ................................... 141
Raising ........................................... 368
Reporting problems ......................... 29
Securing from rolling away ............ 367
Towing away .................................. 341
Transporting .................................. 343
Unlocking (in an emergency) ........... 81
Unlocking (SmartKey) ...................... 74
Vehicle data ................................... 384
Vehicle battery
see Battery (vehicle)
Vehicle data ....................................... 384
Vehicle data (off-road driving)
Approach/departure angle ............ 386
Fording depth ................................ 385
Maximum gradient climbing abil-
ity .................................................. 386
Vehicle dimensions ........................... 384
Vehicle emergency locking ................ 81
Vehicle identification number
see VIN
Vehicle identification plate .............. 377
Vehicle level
AIRMATIC ...................................... 188
Vehicle level (display message) ....... 261
Vehicle tool kit .................................. 331
Index23
Page 31 of 390
These devices may not cause harmful interfer-
ence, and 2) These devices must accept any
interference received, including interference
that may cause undesired operation. Changes
or modifications not expressly approved by the
party responsible for compliance could void the
user’s authority to operate the equipment."
Canada:"The wireless devices of this vehicle
comply with Industry Canada license-exempt
RSS standard(s). Operation is subject to the fol-
lowing two conditions: (1) These devices may
not cause interference, and (2) These devices
must accept any interference, including inter-
ference that may cause undesired operation of
the device."
Diagnostics connection
The diagnostics connection is only intended for
the connection of diagnostic equipment at a
qualified specialist workshop.
GWARNING
If you connect equipment to a diagnostics
connection in the vehicle, it may affect the
operation of vehicle systems. As a result, the
operating safety of the vehicle could be affec-
ted. There is a risk of an accident.
Only connect equipment to a diagnostics con-
nection in the vehicle, which is approved for
your vehicle by Mercedes-Benz.
GWARNING
Objects in the driver's footwell can restrict the pedal travel or obstruct a depressed pedal.
The operating and road safety of the vehicle is
jeopardized. There is a risk of an accident.
Make sure that all objects in the vehicle are
stowed correctly, and that they cannot enter
the driver's footwell. Install the floormats
securely and as specified in order to ensure
sufficient clearance for the pedals. Do not use
loose floormats and do not place floormats on
top of one another.
!If the engine is switched off and equipment
on the diagnostics connection is used, the
starter battery may discharge.
Connecting equipment to the diagnostics con-
nection can lead to emissions monitoring infor- mation being reset, for example. This may lead
to the vehicle failing to meet the requirements of
the next emissions test during the main inspec-
tion.
Qualified specialist workshop
An authorized Mercedes-Benz Center is a quali-
fied specialist workshop. It has the necessary
specialist knowledge, tools and qualifications to
correctly carry out the work required on your
vehicle. This is especially the case for work rel-
evant to safety.
Observe the notes in the Maintenance Booklet.
Always have the following work carried out at an
authorized Mercedes-Benz Center:
Rwork relevant to safety
Rservice and maintenance work
Rrepair work
Ralterations, installation work and modifica-
tions
Rwork on electronic components
Correct use
If you remove any warning stickers, you or oth-
ers could fail to recognize certain dangers.
Leave warning stickers in position.
Observe the following information when driving
your vehicle:
Rthe safety notes in this manual
Rthe vehicle technical data
Rtraffic rules and regulations
Rlaws and safety standards pertaining to motor
vehicles
Problems with your vehicle
If you should experience a problem with your
vehicle, particularly one that you believe may
affect its safe operation, we urge you to contact
an authorized Mercedes-Benz Center immedi-
ately to have the problem diagnosed and recti-
fied. If the problem is not resolved to your sat-
isfaction, please discuss the problem again with
the Mercedes-Benz Center or, if necessary, con-
tact us at one of the following addresses.
In the USA
Customer Assistance Center
Introduction29
Z
Page 32 of 390
Mercedes-Benz USA, LLC
3 Mercedes Drive
Montvale, NJ 07645-0350
In Canada
Customer Relations Department
Mercedes-Benz Canada, Inc.
98 Vanderhoof Avenue
Toronto, Ontario M4G 4C9
Reporting safety defects
USA only:
The following text is reproduced as required of
all manufacturers under Title 49, Code of U.S.
Federal Regulations, Part 575 pursuant to the
National Traffic and Motor Vehicle Safety Act of
1966.
If you believe that your vehicle has a defect
which could cause a crash or could cause injury
or death, you should immediately inform the
National Highway Traffic Safety Administration
(NHTSA) in addition to notifying Mercedes-Benz
USA, LLC.
If NHTSA receives similar complaints, it may
open an investigation, and if it finds that a safety
defect exists in a group of vehicles, it may order
a recall and remedy campaign. However, NHTSA
cannot become involved in individual problems
between you, your dealer, or Mercedes-Benz
USA, LLC.
To contact NHTSA, you may call the Vehicle
Safety Hotline toll-free at 1-888-327-4236
(TTY: 1-800-424-9153); go to http://
www.safercar.gov; or write to: Administrator,
NHTSA, 400 Seventh Street, SW., Washington,
DC 20590.
You can also obtain other information about
motor vehicle safety from
http://www.safercar.gov
Limited Warranty
!
Follow the instructions in this manual about
the proper operation of your vehicle as well as
about possible vehicle damage. Damage to
your vehicle that arises from culpable contra-
ventions against these instructions is not cov-
ered either by the Mercedes-Benz Limited
Warranty or by the New or Used-Vehicle War-
ranty.
QR codes for the rescue card
The QR codes are secured in the fuel filler flap
and on the opposite side on the B-pillar. In the
event of an accident, rescue services can use
the QR code to quickly find the appropriate res- cue card for your vehicle. The current rescue
card contains the most important information
about your vehicle in a compact form, e.g. the
routing of the electric cables.
You can find more information under http://
portal.aftersales.i.daimler.com/public/
content/asportal/en/communication/
informationen_fuer/QRCode.html.
Data stored in the vehicle
Data storage
A wide range of electronic components in your
vehicle contain data memories.
These data memories temporarily or perma-
nently store technical information about:
Rthe vehicle's operating state
Rincidents
Rmalfunctions
In general, this technical information docu-
ments the state of a component, a module, a
system or the surroundings.
These include, for example:
Roperating conditions of system components,
e.g. fluid levels
Rthe vehicle's status messages and those of its
individual components, e.g. number of wheel
revolutions/speed, deceleration in move-
ment, lateral acceleration, accelerator pedal
position
Rmalfunctions and defects in important system
components, e.g. lights, brakes
Rvehicle reactions and operating conditions in
special driving situations, e.g. air bag deploy-
ment, intervention of stability control sys-
tems
Rambient conditions, e.g. outside temperature
30Introduction
Page 43 of 390
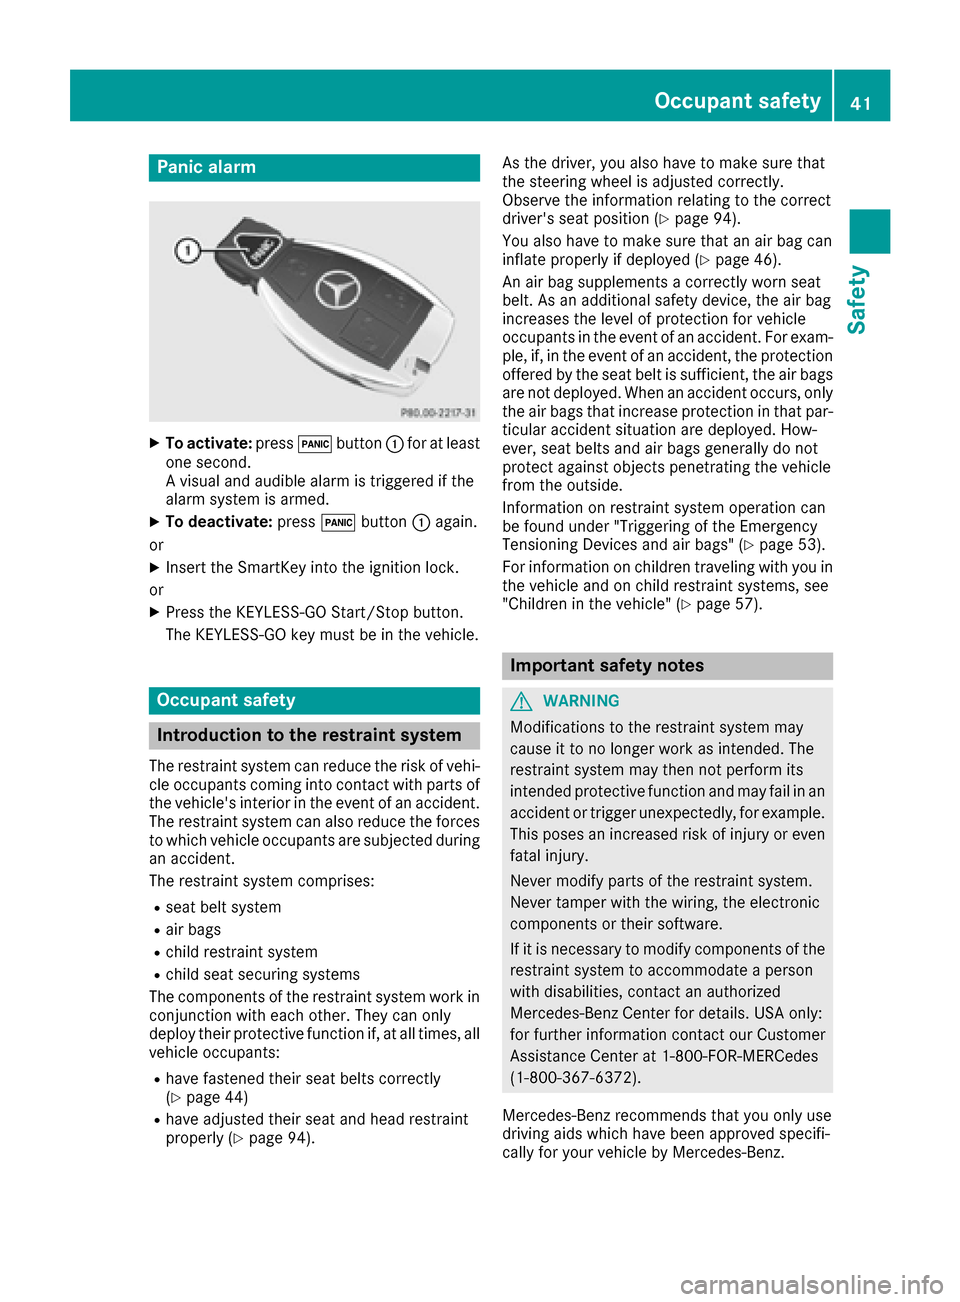
Panic alarm
XTo activate:press!button :for at least
one second.
A visual and audible alarm is triggered if the
alarm system is armed.
XTo deactivate: press!button :again.
or
XInsert the SmartKey into the ignition lock.
or
XPress the KEYLESS-GO Start/Stop button.
The KEYLESS-GO key must be in the vehicle.
Occupant safety
Introduction to the restraint system
The restraint system can reduce the risk of vehi- cle occupants coming into contact with parts of
the vehicle's interior in the event of an accident.
The restraint system can also reduce the forces to which vehicle occupants are subjected during
an accident.
The restraint system comprises:
Rseat belt system
Rair bags
Rchild restraint system
Rchild seat securing systems
The components of the restraint system work in
conjunction with each other. They can only
deploy their protective function if, at all times, all vehicle occupants:
Rhave fastened their seat belts correctly
(Ypage 44)
Rhave adjusted their seat and head restraint
properly (Ypage 94). As the driver, you also have to make sure that
the steering wheel is adjusted correctly.
Observe the information relating to the correct
driver's seat position (
Ypage 94).
You also have to make sure that an air bag can
inflate properly if deployed (
Ypage 46).
An air bag supplements a correctly worn seat
belt. As an additional safety device, the air bag
increases the level of protection for vehicle
occupants in the event of an accident. For exam-
ple, if, in the event of an accident, the protection
offered by the seat belt is sufficient, the air bags are not deployed. When an accident occurs, only
the air bags that increase protection in that par-ticular accident situation are deployed. How-
ever, seat belts and air bags generally do not
protect against objects penetrating the vehicle
from the outside.
Information on restraint system operation can
be found under "Triggering of the Emergency
Tensioning Devices and air bags" (
Ypage 53).
For information on children traveling with you in
the vehicle and on child restraint systems, see
"Children in the vehicle" (
Ypage 57).
Important safety notes
GWARNING
Modifications to the restraint system may
cause it to no longer work as intended. The
restraint system may then not perform its
intended protective function and may fail in an
accident or trigger unexpectedly, for example.
This poses an increased risk of injury or even fatal injury.
Never modify parts of the restraint system.
Never tamper with the wiring, the electronic
components or their software.
If it is necessary to modify components of the
restraint system to accommodate a person
with disabilities, contact an authorized
Mercedes-Benz Center for details. USA only:
for further information contact our Customer
Assistance Center at 1-800-FOR-MERCedes
(1‑800‑367‑6372).
Mercedes-Benz recommends that you only use
driving aids which have been approved specifi-
cally for your vehicle by Mercedes-Benz.
Occupant safety41
Safety
Z
Page 45 of 390
occupant in the best position in relation to the
air bag.
The seat belt system comprises:
RSeat belts
REmergency Tensioning Devices for the front
seat belts and the outer seat belts in the sec-
ond row of seats as well as the seat belts in
the third row
RSeat belt force limiters for the front seat belts
and the outer seat belts in the second row of
seats as well as the seat belts in the third row
If the seat belt is pulled out of the belt outlet
quickly or with a jerky movement, the belt
retractor locks. The belt strap cannot be extrac-
ted any further.
The Emergency Tensioning Device tightens the
seat belt in an accident, pulling the belt close
against the body. However it does not pull the
vehicle occupant back in the direction of the
backrest.
The Emergency Tensioning Device does not cor- rect an incorrect seat position or the routing of
an incorrectly fastened seat belt.
When triggered, a seat belt force limiter helps to
reduce the force exerted by the seat belt on the
vehicle occupant.
The seat belt force limiters for the front seats are
synchronized with the front air bags, which
absorb part of the deceleration force. This can
reduce the force exerted on the vehicle occu-
pants during an accident.
!If the front-passenger seat is unoccupied,
do not insert the belt tongue into the buckle of the front-passenger seat. This may otherwise
lead to the triggering of the Emergency Ten-
sioning Device in the event of an accident,
which will then need to be replaced.
Important safety notes
The use of seat belts and child restraint systemsis required by law in:
Rall 50 states
Rthe U.S. territories
Rthe District of Columbia
Rall Canadian provinces
Even where this is not required by law, all vehicle
occupants should correctly fasten their seat
belts before starting the journey.
GWARNING
If the seat belt is not worn correctly, it cannot
perform its intended protective function. An
incorrectly fastened seat belt can also cause
injuries, for example, in the event of an acci-
dent or when braking or changing direction
abruptly. This poses an increased risk of injury
or even fatal injury.
Always ensure that all vehicle occupants have
their seat belts fastened correctly and are sit-
ting properly.
GWARNING
The seat belt does not offer the intended level of protection if you have not moved the back-
rest to an almost vertical position. When brak-
ing or in the event of an accident, you could
slide underneath the seat belt and sustain
abdomen or neck injuries, for example. This
poses an increased risk of injury or even fatal injury.
Adjust the seat properly before beginning
your journey. Always ensure that the backrest
is in an almost vertical position and that the
shoulder section of your seat belt is routed
across the center of your shoulder.
GWARNING
Persons less than 5 ft (1.50 m) tall cannot
wear the seat belt correctly without an addi-
tional and suitable restraint system. If the
seat belt is not worn correctly, it cannot per-
form its intended protective function. An
incorrectly fastened seat belt can also cause
injuries, for example, in the event of an acci-
dent or when braking or changing direction
abruptly. This poses an increased risk of injury or even fatal injury.
For this reason, always secure persons under
5 ft (1.50 m) tall in suitable additional restraint
systems.
If a child younger than twelve years old and
under 5 ft (1.50 m) in height is traveling in the
vehicle:
Ralways secure the child in a child restraint
system suitable for this Mercedes-Benz vehi-
Occupant safety43
Safety
Z
Page 46 of 390
cle. The child restraint system must be appro-
priate to the age, weight and size of the child
Ralways observe the instructions and safety
notes on "Children in the vehicle"
(
Ypage 57) in addition to the child restraint
system manufacturer's installation and oper-
ating instructions
Rbe sure to observe the instructions and safety
notes on the "Occupant classification system
(OCS)" (
Ypage 48)
GWARNING
The seat belts may not perform their intended protective function if:
Rthey are damaged, modified, extremely
dirty, bleached or dyed
Rthe seat belt buckle is damaged or
extremely dirty
Rthe Emergency Tensioning Devices, belt
anchorages or inertia reels have been modi-
fied.
Seat belts may be damaged in an accident,
although the damage may not be visible, e.g.
due to splinters of glass. Modified or damaged
seat belts may tear or fail, e.g. in an accident.
Modified Emergency Tensioning Devices
could accidentally trigger or fail to deploy
when necessary. This poses an increased risk
of injury or even fatal injury.
Never modify the seat belts, Emergency Ten-
sioning Devices, belt anchorages and inertia
reels. Make sure that the seat belts are
undamaged, not worn out and clean. Follow-
ing an accident, have the seat belts checked
immediately at a qualified specialist work-
shop.
Only use seat belts that have been approved for
your vehicle by Mercedes-Benz.
Proper use of the seat belts
Observe the safety notes on the seat belt
(Ypage 43).
All vehicle occupants must be wearing the seat
belt correctly before beginning the journey. Also
make sure that all vehicle occupants are always
wearing the seat belt correctly while the vehicle
is in motion. When fastening the seat belt, always make sure
that:
Rthe seat belt tongue is only inserted to the belt
buckle belonging to that seat.
Rthe seat belt is tight across your body.
Avoid wearing bulky clothing, e.g. a winter
coat.
Rthe seat belt is not twisted.
Only then can the forces which occur be dis-
tributed over the area of the belt.
Rthe shoulder section of the belt is always
routed across the center of your shoulder.
The shoulder section of the belt must not
come into contact with your neck or be routed
under your arm. Where possible, adjust the
seat belt to the appropriate height.
Rthe lap belt passes tightly and as low down as
possible across your lap.
The lap belt must always be routed across
your hip joints and not across your abdomen.
This applies particularly to pregnant women.
If necessary, push the lap belt down to your
hip joint and pull it tight using the shoulder
section of the belt.
Rthe seat belt is not routed across sharp, poin-
ted or fragile objects.
If you have su
ch i
tems located on or in your
clothing, e.g. pens, keys or eyeglasses, store
these in a suitable place.
Ronly one person is using a seat belt at a time.
Infants and children must never travel sitting
on the lap of a vehicle occupant. In the event of an accident, they could be crushed
between the vehicle occupant and seat belt.
Robjects are never secured with a seat belt if
the seat belt is also being used by one of the
vehicle's occupants.
Also ensure that there are never objects
between a person and the seat, e.g. cushions.
Seat belts are only intended to secure and
restrain vehicle occupants. Always observe the
"Loading guidelines" for securing objects, lug-
gage or loads (
Ypage 294).
Fastening and adjusting the seat belts
Observe the safety notes on the seat belt
(Ypage 43) and the notes on correct use of seat
belts (Ypage 44).
44Occupant safety
Safety
Page 47 of 390
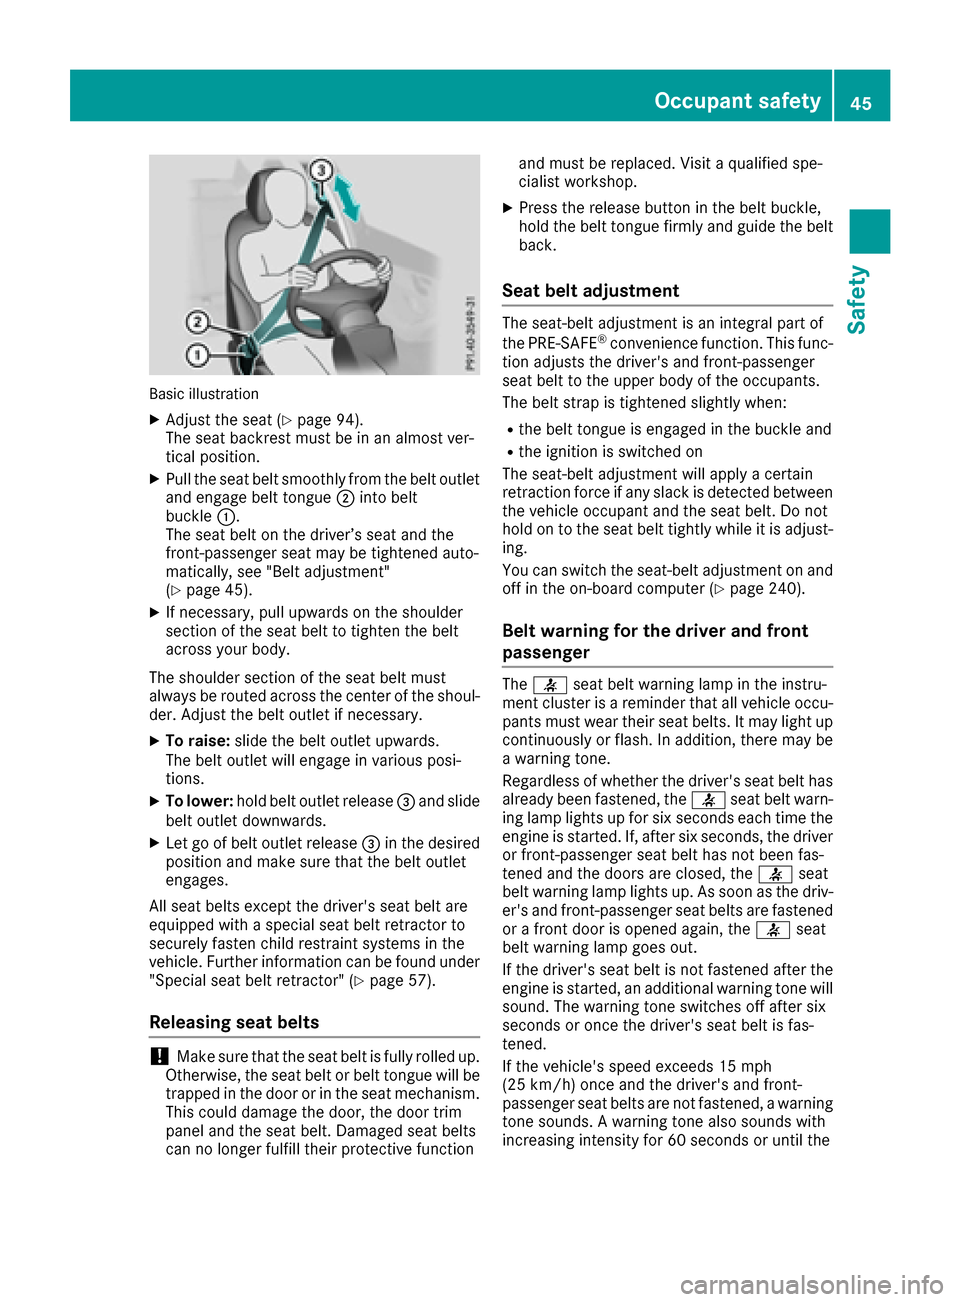
Basic illustration
XAdjust the seat (Ypage 94).
The seat backrest must be in an almost ver-
tical position.
XPull the seat belt smoothly from the belt outlet
and engage belt tongue ;into belt
buckle :.
The seat belt on the driver’s seat and the
front-passenger seat may be tightened auto-
matically, see "Belt adjustment"
(
Ypage 45).
XIf necessary, pull upwards on the shoulder
section of the seat belt to tighten the belt
across your body.
The shoulder section of the seat belt must
always be routed across the center of the shoul-
der. Adjust the belt outlet if necessary.
XTo raise: slide the belt outlet upwards.
The belt outlet will engage in various posi-
tions.
XTo lower: hold belt outlet release =and slide
belt outlet downwards.
XLet go of belt outlet release =in the desired
position and make sure that the belt outlet
engages.
All seat belts except the driver's seat belt are
equipped with a special seat belt retractor to
securely fasten child restraint systems in the
vehicle. Further information can be found under
"Special seat belt retractor" (
Ypage 57).
Releasing seat belts
!Make sure that the seat belt is fully rolled up.
Otherwise, the seat belt or belt tongue will be
trapped in the door or in the seat mechanism.
This could damage the door, the door trim
panel and the seat belt. Damaged seat belts
can no longer fulfill their protective function and must be replaced. Visit a qualified spe-
cialist workshop.
XPress the release button in the belt buckle,
hold the belt tongue firmly and guide the belt
back.
Seat belt adjustment
The seat-belt adjustment is an integral part of
the PRE-SAFE®convenience function. This func-
tion adjusts the driver's and front-passenger
seat belt to the upper body of the occupants.
The belt strap is tightened slightly when:
Rthe belt tongue is engaged in the buckle and
Rthe ignition is switched on
The seat-belt adjustment will apply a certain
retraction force if any slack is detected between
the vehicle occupant and the seat belt. Do not
hold on to the seat belt tightly while it is adjust-
ing.
You can switch the seat-belt adjustment on and
off in the on-board computer (
Ypage 240).
Belt warning for the driver and front
passenger
The 7 seat belt warning lamp in the instru-
ment cluster is a reminder that all vehicle occu-
pants must wear their seat belts. It may light up
continuously or flash. In addition, there may be
a warning tone.
Regardless of whether the driver's seat belt has
already been fastened, the 7seat belt warn-
ing lamp lights up for six seconds each time the engine is started. If, after six seconds, the driver
or front-passenger seat belt has not been fas-
tened and the doors are closed, the 7seat
belt warning lamp lights up. As soon as the driv-
er's and front-passenger seat belts are fastened
or a front door is opened again, the 7seat
belt warning lamp goes out.
If the driver's seat belt is not fastened after the
engine is started, an additional warning tone will
sound. The warning tone switches off after six
seconds or once the driver's seat belt is fas-
tened.
If the vehicle's speed exceeds 15 mph
(25 km/h) once and the driver's and front-
passenger seat belts are not fastened, a warning
tone sounds. A warning tone also sounds with
increasing intensity for 60 seconds or until the
Occupant safety45
Safety
Z
Page 48 of 390
driver or front passenger have fastened their
seat belts.
If the driver or front passenger unfasten their
seat belts during the journey, the seat belt warn-
ing is activated again.
Air bags
Introduction
The installation point of an air bag can be rec-
ognized by the AIR BAG symbol.
An air bag complements the correctly fastened
seat belt. It is no substitute for the seat belt. The
air bag provides additional protection in appli-
cable accident situations.
Not all air bags are deployed in an accident. The
different air bag systems function independ-
ently from one another (
Ypage 53).
However, no system available today can com-
pletely eliminate injuries and fatalities.
It is also not possible to rule out a risk of injury
caused by an air bag due to the high speed at
which the air bag must be deployed.
Important safety notes
GWARNING
If you do not sit in the correct seat position,
the air bag cannot protect as intended and
could even cause additional injury when
deployed. This poses an increased risk of
injury or even fatal injury.
To avoid hazardous situations, always make
sure that all of the vehicle's occupants:
Rhave fastened their seat belts correctly,
including pregnant women
Rare sitting correctly and maintain the great-
est possible distance to the air bags
Rfollow the following instructions
Always make sure that there are no objects
between the air bag and the vehicle's occu-
pants.
RAdjust the seats properly before beginning
your journey. Always make sure that the seat
is in an almost upright position. The center of the head restraint must support the head at
about eye level.
RMove the driver's and front-passenger seats
as far back as possible. The driver's seat posi-
tion must allow the vehicle to be driven safely.
ROnly hold the steering wheel on the outside.
This allows the air bag to be fully deployed.
RAlways lean against the backrest while driv-
ing. Do not lean forwards or lean against the
door or side window. You may otherwise be in
the deployment area of the air bags.
RAlways keep your feet in the footwell in front
of the seat. Do not put your feet on the dash-
board, for example. Your feet may otherwise
be in the deployment area of the air bag.
RFor this reason, always secure persons less
than 5 ft (1.50 m) tall in suitable restraint sys-
tems. Up to this height, the seat belt cannot
be worn correctly.
If a child is traveling in your vehicle, also
observe the following notes:
RAlways secure children under twelve years of
age and less than 5 ft (1.50 m)tall in suitable
child restraint systems.
RChild restraint systems should be installed on
the rear seats.
ROnly secure a child in a rearward-facing child
restraint system on the front-passenger seat
when the front-passenger front air bag is
deactivated. If the PASSENGER AIR BAG OFF
indicator lamp is permanently lit, the front-
passenger front air bag is deactivated
(
Ypage 42).
RAlways observe the instructions and safety
notes on the "Occupant Classification System
(OCS)" (
Ypage 48) and on "Children in the
vehicle" (Ypage 57 )in addition to the child
restraint system manufacturer's installation
and operating instructions.
Objects in the vehicle interior may prevent
an air bag from functioning correctly. Before
starting your journey and to avoid risks resulting from the speed of the air bag as it deploys, make
sure that:
Rthere are no people, animals or objects
between the vehicle occupants and an air
bag.
Rthere are no objects between the seat, door
and B-pillar.
Rno hard objects, e.g. coat hangers, hang on
the grab handles or coat hooks.
46Occupant safety
Safety
Page 52 of 390
GWARNING
If the PASSENGER AIR BAG OFF indicator
lamp is lit, the front-passenger front air bag is
disabled. It will not be deployed in the event of
an accident and cannot perform its intended
protective function. A person in the front-
passenger seat could then, for example, come
into contact with the vehicle's interior, espe-
cially if the person is sitting too close to the
dashboard. This poses an increased risk of
injury or even fatal injury.
When the front-passenger seat is occupied,
always ensure that:
Rthe classification of the person in the front- passenger seat is correct and the front-
passenger front air bag is enabled or disa-
bled in accordance with the person in the
front-passenger seat
Rthe front-passenger seat has been moved
back as far back as possible.
Rthe person is seated correctly.
Make sure, both before and during the jour-
ney, that the status of the front-passenger
front air bag is correct.
GWARNING
If you secure a child in a rearward-facing child
restraint system on the front-passenger seat
and the PASSENGER AIR BAG OFF indicator
lamp is off, the front-passenger front air bag
may deploy in the event of an accident. The
child could be struck by the air bag. This poses an increased risk of injury or even fatal injury.
Make sure that the front-passenger front air
bag has been disabled. The PASSENGER AIR
BAG OFF indicator lamp must be lit.
If the PASSENGER AIR BAG OFF indicator lamp
stays off, do not install a rearward-facing child
restraint system on the front-passenger seat.
You can find more information on OCS under
"Problems with the Occupant Classification Sys-
tem" (
Ypage 52).
GWARNING
If you secure a child in a forward-facing child
restraint system on the front-passenger seat
and you position the front-passenger seat too close to the dashboard, the child could, in the
event of an accident:
Rcome into contact with the vehicle's inte-
rior if the PASSENGER AIR BAG OFF indi-
cator lamp is lit, for example
Rbe struck by the air bag if the PASSENGER
AIR BAG OFF indicator lamp is off
This poses an increased risk of injury or even
fatal injury.
Move the front-passenger seat as far back as
possible. Always make sure that the shoulder
belt strap is correctly routed from the vehicle
belt sash guide to the shoulder belt guide on
the child restraint system. The shoulder belt
strap must be routed forwards and down-
wards from the vehicle belt sash guide. If nec- essary, adjust the vehicle belt sash guide and
the front-passenger seat accordingly. Always
observe the child restraint system manufac-
turer's installation instructions.
If OCS determines that:
Rthe front-passenger seat is unoccupied, the
PASSENGER AIR BAG OFF indicator lamp
lights up after the system self-test and
remains lit. This indicates that the front-
passenger front air bag is deactivated.
Rthe front-passenger seat is occupied by a
child of up to twelve months old, in a standard
child restraint system, the PASSENGER AIR
BAG OFF indicator lamp lights up after the
system self-test and remains lit. This indi-
cates that the front-passenger front air bag is
deactivated.
But even in the case of a twelve-month-old
child, in a standard child restraint system, the
PASSENGER AIR BAG OFF indicator lamp can
go out after the system self-test. This indi-
cates that the front-passenger front air bag is
activated. The result of the classification is
dependent on, among other factors, the child
restraint system and the child's stature. It is
recommended that you install the child
restraint sy
stem on a suitable rear seat.
50Occupant safety
Safety