ECO mode MERCEDES-BENZ GLS SUV 2020 Owners Manual
[x] Cancel search | Manufacturer: MERCEDES-BENZ, Model Year: 2020, Model line: GLS SUV, Model: MERCEDES-BENZ GLS SUV 2020Pages: 549, PDF Size: 9.9 MB
Page 26 of 549
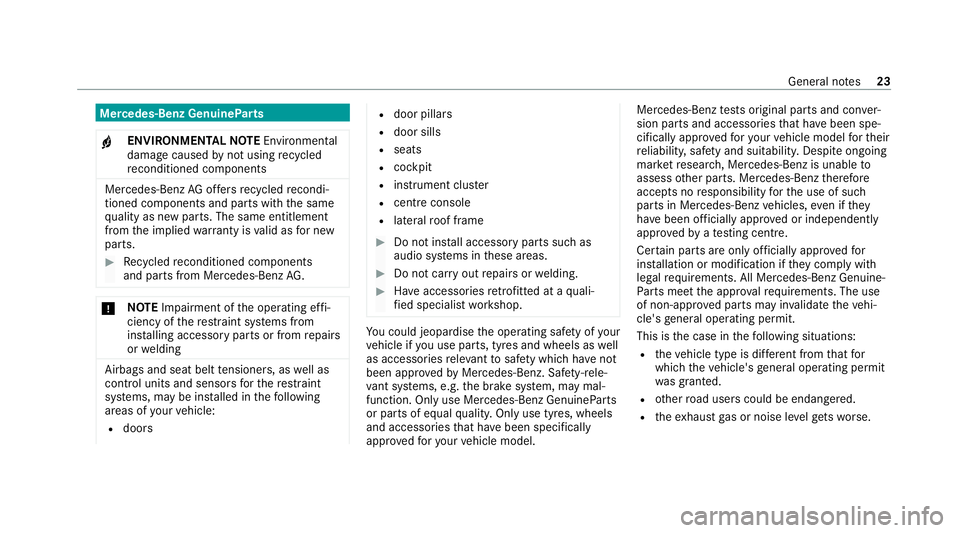
Mercedes-Benz GenuineParts
+ ENVIRONMENTAL
NOTEEnvironmental
dama gecaused bynot using recycled
re conditioned components Mercedes‑Benz
AGoffers recycled recondi‐
tioned components and pa rts with the same
qu ality as new parts. The same entitlement
from the implied warranty is valid as for new
parts. #
Recycled reconditioned components
and pa rts from Mercedes‑Benz AG.*
NO
TEImpairment of the operating ef fi‐
ciency of there stra int sy stems from
ins talling accessory parts or from repairs
or we lding Airbags and seat belt
tensioners, as well as
control units and sensors forth ere stra int
sy stems, may be ins talled in thefo llowing
areas of your vehicle:
R doors R
door pillars
R door sills
R seats
R cockpit
R instrument clus ter
R centre console
R late ra lro of frame #
Do not ins tall accessory parts such as
audio sy stems in these areas. #
Do not car ryout repairs or welding. #
Have accesso ries retrofitted at a quali‐
fi ed specialist workshop. Yo
u could jeopardise the operating saf ety of your
ve hicle if you use parts, tyres and wheels as well
as accessories releva nt tosaf ety which ha venot
been appr ovedby Mercedes-Benz. Saf ety-re le‐
va nt sy stems, e.g. the brake sy stem, may mal‐
function. Only use Mercedes-Benz GenuineParts
or parts of equal qualit y.Only use tyres, wheels
and accessories that ha vebeen specifically
appr ovedfo ryo ur vehicle model. Mercedes-Benz
tests original parts and con ver‐
sion parts and accessories that ha vebeen spe‐
cifically appr ovedfo ryo ur vehicle model forth eir
re liability, saf ety and suitabilit y.Despite ongoing
ma rket resear ch, Mercedes-Benz is unable to
assess other parts. Mercedes-Benz therefore
accepts no responsibility forth e use of such
parts in Mercedes-Benz vehicles, even if they
ha ve been of ficially appr oved or independently
appr ovedby ate sting centre.
Cer tain parts are only of ficially appr ovedfor
ins tallation or modification if they comply wi th
legal requirements. All Mercedes-Benz Genuine‐
Pa rts meet the appr oval requ irements. The use
of non-appr oved parts may in validate theve hi‐
cle's general operating pe rmit.
This is the case in thefo llowing situations:
R theve hicle type is dif fere nt from that for
which theve hicle's general operating pe rmit
wa s granted.
R other road users could be endangered.
R theex haust gas or noise le velge ts wo rse. General no
tes23
Page 34 of 549
B) ISO 4063, ISO
14341- A,DBL 7392. 10, MBN
10 435
C) DBL 7392. 10, DBL 8230. 10
The tech nical documentation of the product is
st ored at the manufacturer's plant. Representa‐
tive forth e compilation of thete ch nical docu‐
mentation: Director of theTe ch nical Department
Brano a.s.
4.
Hradec nad Mor avicí
City
5.
05.05.20 15
Date
Signed by
Director of Quality TIREFIT kit
Co
py and translation of the original declaration
of confo rmity:
EC declaration of conformity In accordance with EC Directive 2006/42/EC
We
hereby declare that the product
Product designation: Daimler electric air pump
Model designation: 086 7,DT /UW 200056
MB pa rtno.: A 000 583 5101
complies wi th thefo llowing releva nt regulations:
2004/108/EC
Applied harmonised standards, in particular:
DIN EN 55 014-1: 20 12
DIN EN 550 14-2: 20 16
Manufacturer: Dunlop Tech GmbH
Ad dress: Of fenba cher Landstr. 8, 63456 Hanau
Auth orised representative: IMS dept.
Date: October 20 19
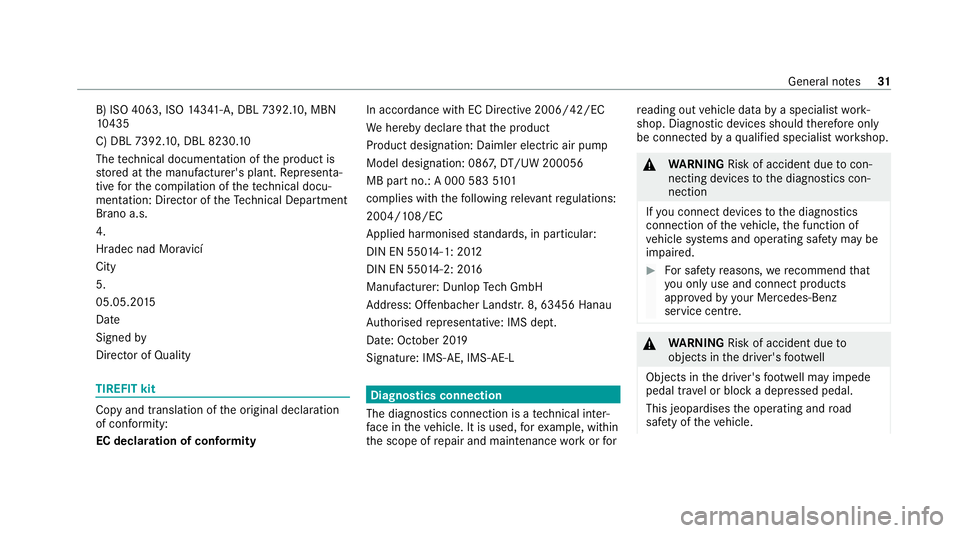
Signatu re: IMS-AE, IMS-AE-L Diagnostics connection
The diagnostics connection is a tech nical inter‐
fa ce in theve hicle. It is used, forex ample, within
th e scope of repair and maintenance workor for re
ading out vehicle data bya specialist work‐
shop. Diagnostic devices should therefore only
be connected byaqu alified specialist workshop. &
WARNING Risk of accident due tocon‐
necting devices tothe diagnostics con‐
nection
If yo u connect devices tothe diagnostics
connection of theve hicle, the function of
ve hicle sy stems and operating saf ety may be
impaired. #
For saf etyre asons, werecommend that
yo u on lyuse and connect products
appr ovedby yo ur Mercedes-Benz
service centre. &
WARNING Risk of accident due to
objects in the driver's foot we ll
Objects in the driver's foot we ll may impede
pedal tr avel or block a depressed pedal.
This jeopardises the operating and road
saf ety of theve hicle. General no
tes31
Page 65 of 549
Fi
tting an ISOFIX or i-Size child restra int sys‐
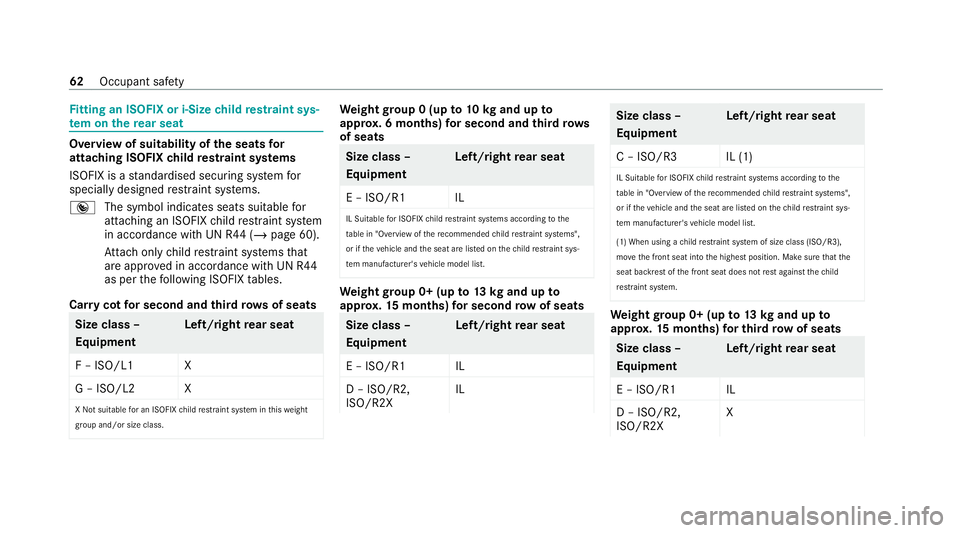
te m on the rear seat Overview of suitability of
the seats for
attaching ISOFIX child restra int sy stems
ISOFIX is a standardised securing sy stem for
specially designed restra int sy stems.
® The symbol indicates seats suitable for
attaching an ISOFIX child restra int sy stem
in accordance with UN R44 (/ page 60).
At tach only child restra int sy stems that
are appr oved in accordance with UN R44
as per thefo llowing ISOFIX tables.
Car rycot for second and third rows of seats Size class –
Equipment
Left/right
rear seat
F – ISO/L1 X
G – ISO/L2 X
X Not sui table for an ISOFIX child restrai nt sy stem in this we ight
group and/or size class. We
ight group 0 (up to10 kgand up to
appr ox. 6 months) for second and third rows
of seats Size class –
Equipment
Left/right
rear seat
E – ISO/R1 IL
IL Suitable for ISOFIX child restra int sy stems according tothe
ta ble in "Overview of there commended child restra int sy stems",
or if theve hicle and the seat are lis ted on thech ild restrai nt sys‐
te m manufacturer's vehicle model list. We
ight group 0+ (up to13 kgand up to
appr ox.15 months) for second row of seats Size class –
Equipment
Left/right
rear seat
E – ISO/R1 IL
D – ISO/R2,
ISO/R2X IL Size class –
Equipment
Left
/right rear seat
C – ISO/R3 IL (1) IL Suitable for ISOFIX child restrai nt sy stems according tothe
ta ble in "Overview of there commended child restrai nt sy stems",
or if theve hicle and the seat are lis ted on thech ild restrai nt sys‐
te m manufacturer's vehicle model list.
(1) When using a child restra int sy stem of size class (ISO/R3),
mo vethe front seat into the highest position. Make sure that the
seat backrest of the front seat does not rest against thech ild
re strai nt sy stem. We
ight group 0+ (up to13 kgand up to
appr ox.15 months) for third row of seats Size class –
Equipment
Left/right
rear seat
E – ISO/R1 IL
D – ISO/R2,
ISO/R2X X62
Occupant saf ety
Page 66 of 549
Size class –
Equipment
Left/right
rear seat
C – ISO/R3 X
IL Suitable for ISOFIX child restra int sy stems according tothe
ta ble in "Overview of there commended child restra int sy stems",
or if theve hicle and the seat are lis ted on thech ild restra int sys‐
te m manufacturer's vehicle model list.
X Not suitable for an ISOFIX child restrai nt sy stem in this we ight
group and/or size class. We
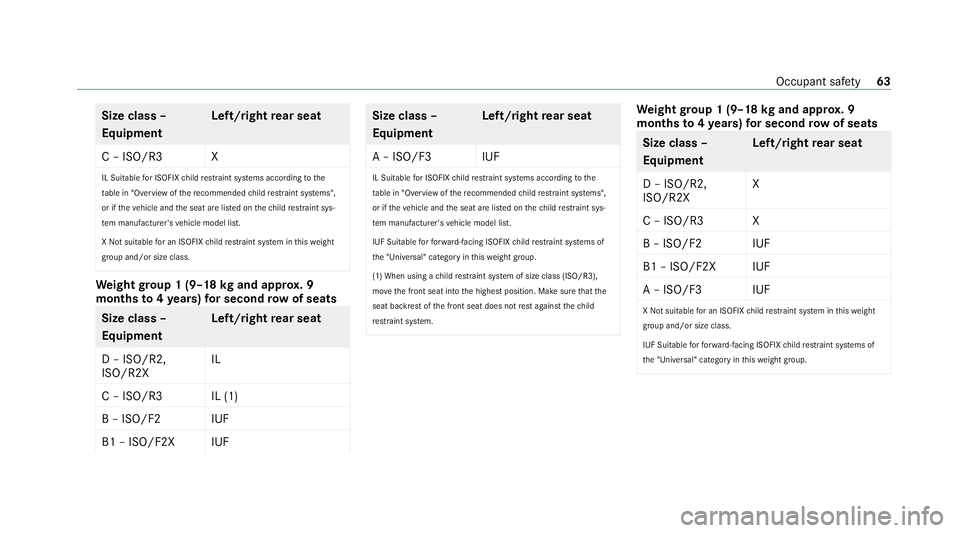
ight group 1 (9–18 kgand appr ox. 9
months to4ye ars) for second row of seats Size class –
Equipment
Left/right
rear seat
D – ISO/R2,
ISO/R2X IL
C – ISO/R3 IL (1)
B – ISO/F2 IUF
B1 – ISO/F2X IUF Size class –
Equipment
Left
/right rear seat
A – ISO/F3 IUF
IL Suitable for ISOFIX child restra int sy stems according tothe
ta ble in "Overview of there commended child restra int sy stems",
or if theve hicle and the seat are lis ted on thech ild restrai nt sys‐
te m manufacturer's vehicle model list.
IUF Suitable forfo rw ard-facing ISOFIX child restra int sy stems of
th e "Universal" category in this we ight group.
(1) When using a child restrai nt sy stem of size class (ISO/R3),
mo vethe front seat into the highest position. Make sure that the
seat backrest of the front seat does not rest against thech ild
re stra int sy stem. We
ight group 1 (9–18 kgand appr ox. 9
months to4ye ars) for second row of seats Size class –
Equipment
Left/right
rear seat
D – ISO/R2,
ISO/R2X X
C – ISO/R3 X
B – ISO/F2 IUF
B1 – ISO/F2X IUF
A – ISO/F3 IUF
X Not sui table for an ISOFIX child restra int sy stem in this we ight
group and/or size class.
IUF Suitable forfo rw ard-facing ISOFIX child restra int sy stems of
th e "Universal" category in this we ight group. Occupant saf
ety63
Page 73 of 549
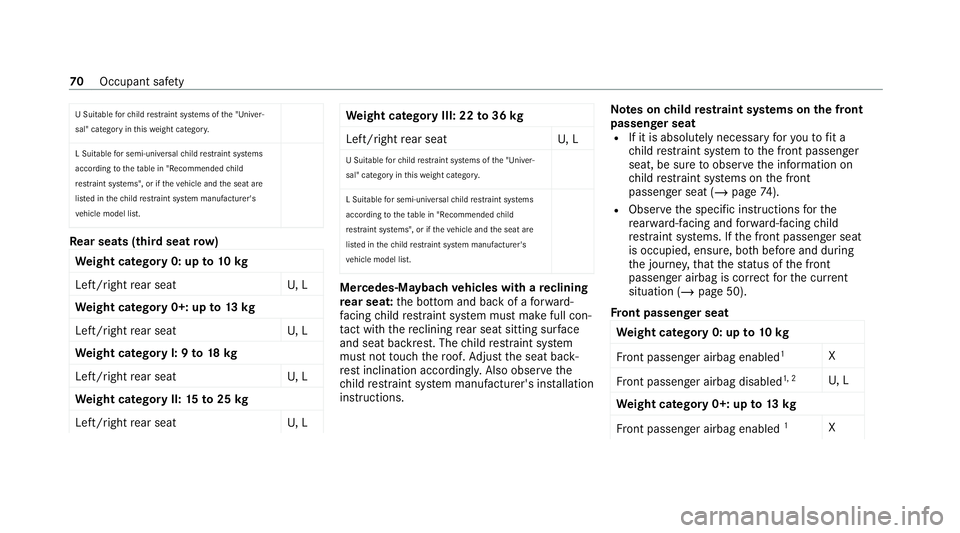
U Suitable
forch ild restra int sy stems of the "Univer‐
sal" category in this we ight categor y.
L Suitable for semi-universal child restra int sy stems
according totheta ble in "Recommended child
re stra int sy stems", or if theve hicle and the seat are
lis ted in thech ild restrai nt sy stem manufacturer's
ve hicle model list. Re
ar seats (third seat row)
We ight category 0: up to10 kg
Left/right rear seat U, L
We ight category 0+: up to13 kg
Left/right rear seat U, L
We ight category I: 9 to18 kg
Left/right rear seat U, L
We ight category II: 15to25 kg
Left/right rear seat U, L We
ight category III: 22 to36 kg
Left/right rear seat U, L
U Suitable forch ild restra int sy stems of the "Univer‐
sal" category in this we ight categor y.
L Suitable for semi-universal child restrai nt sy stems
according totheta ble in "Recommended child
re strai nt sy stems", or if theve hicle and the seat are
lis ted in thech ild restra int sy stem manufacturer's
ve hicle model list. Mercedes-Maybach
vehicles with a reclining
re ar seat: the bottom and back of a forw ard-
fa cing child restra int sy stem must make full con‐
ta ct wi th there clining rear seat sitting sur face
and seat ba ckrest. The child restra int sy stem
must not touch thero of. Adjust the seat back‐
re st inclination accordingly. Also obser vethe
ch ild restra int sy stem manufacturer's ins tallation
instructions. Note
s onchild restra int sy stems on the front
passenger seat
R If it is absolutely necessary foryo uto fit a
ch ild restra int sy stem tothe front passenger
seat, be sure toobser vethe information on
ch ild restra int sy stems on the front
passenger seat (/ page74).
R Obser vethe specific instructions forthe
re ar wa rd-facing and forw ard-facing child
re stra int sy stems. If the front passenger seat
is occupied, ensure, bo thbefore and during
th e journe y,that thest atus of the front
passenger airbag is cor rect forth e cur rent
situation (/ page 50).
Fr ont passenger seat
We ight category 0: up to10 kg
Fr ont passenger airbag enabled 1
X
Fr ont passenger airbag disabled 1, 2
U, L
We ight category 0+: up to13 kg
Fr ont passenger airbag enabled 1
X 70
Occupant saf ety
Page 74 of 549
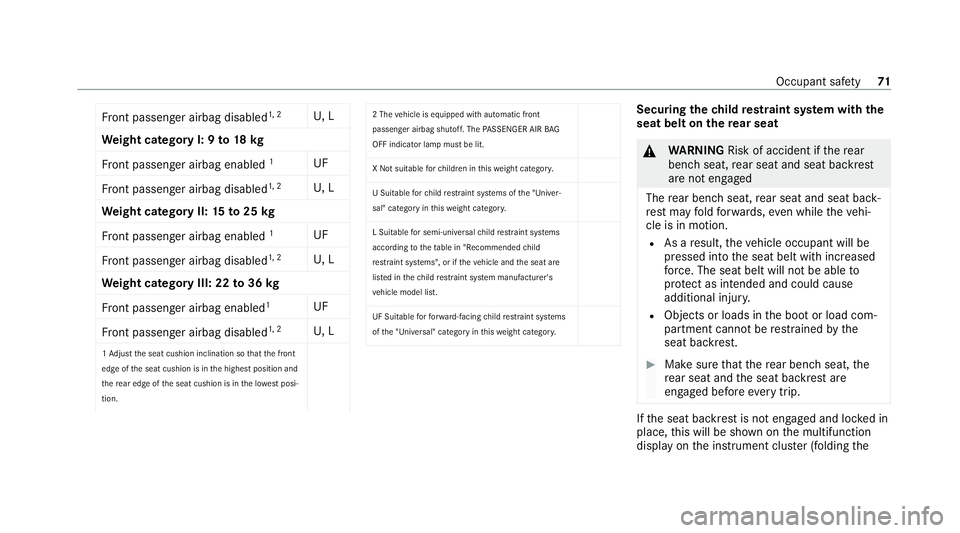
Fr
ont passenger airbag disabled 1, 2
U, L
We ight category I: 9 to18 kg
Fr ont passenger airbag enabled 1
UF
Fr ont passenger airbag disabled 1, 2
U, L
We ight category II: 15to25 kg
Fr ont passenger airbag enabled 1
UF
Fr ont passenger airbag disabled 1, 2
U, L
We ight category III: 22 to36 kg
Fr ont passenger airbag enabled 1
UF
Fr ont passenger airbag disabled 1, 2
U, L
1 Ad just the seat cushion inclination so that the front
edge of the seat cushion is in the highest position and
th ere ar edge of the seat cushion is in the lo west posi‐
tion. 2 The
vehicle is equipped with automatic front
passenger airbag shutoff. The PASSENGER AIR BAG
OFF indicator lamp must be lit.
X Not suitable forch ildren in this we ight categor y.
U Suitable forch ild restra int sy stems of the "Univer‐
sal" category in this we ight categor y.
L Suitable for semi-universal child restra int sy stems
according totheta ble in "Recommended child
re stra int sy stems", or if theve hicle and the seat are
lis ted in thech ild restrai nt sy stem manufacturer's
ve hicle model list.
UF Suitable forfo rw ard-facing child restra int sy stems
of the "Universal" category in this we ight categor y. Securing
thech ild restra int sy stem with the
seat belt on there ar seat &
WARNING Risk of accident if there ar
ben chseat, rear seat and seat backrest
are not engaged
The rear ben chseat, rear seat and seat back‐
re st may fold forw ards, even while theve hi‐
cle is in motion.
R As a result, theve hicle occupant will be
pressed into the seat belt with increased
fo rc e. The seat belt will not be able to
pr otect as intended and could cause
additional injur y.
R Objects or loads in the boot or load com‐
partment cann otbe restra ined bythe
seat backrest. #
Make sure that there ar ben chseat, the
re ar seat and the seat backrest are
engaged before everytrip. If
th e seat backrest is not engaged and loc ked in
place, this will be shown on the multifunction
display on the instrument clus ter (folding the Occupant saf
ety71
Page 89 of 549
R
Ifyo u are driving at a speed greaterth an
4 km/h.
If yo u ha veselected the automatic mode in the
multimedia sy stem and you manually extend the
ru nning boards when the doors are closed, the
ru nning boards will remain extended. Even if you
open a door and then close it again, theru nning
boards will remain extended. Automatic mode
will be reactivated on ly whenyou are driving at a
speed greater than 4 km/h. &
WARNING Risk of inju rywhen extending
or retracting theru nning boards
The running boards extend at the side during
ex tension. During retraction, theru nning
boards are integrated in the side skirt. Parts
of the body could become trapped. There
may be people in thera nge of mo vement.
There is a risk of injur y. #
Alw ays ensure that there are no people
within thera nge of mo vement of the
ru nning boards. *
NO
TEDama getotheru nning boards
du ring extension or retraction The
running boards extend at the side during
ex tension. During retraction, theru nning
boards are integrated in the side skirt. #
Make sure that there is suf ficient space
du ring extension and retraction. *
NO
TEDama getotheve hicle body or
underbody due tolow ground clearance The
running boards are attached totheve hi‐
cle body via the underbody. This limits the
ground clearance. #
Drive over obs tacles, su chaskerbs,
particula rly careful lyand slowl y. Obser
vethe cor responding display messages in
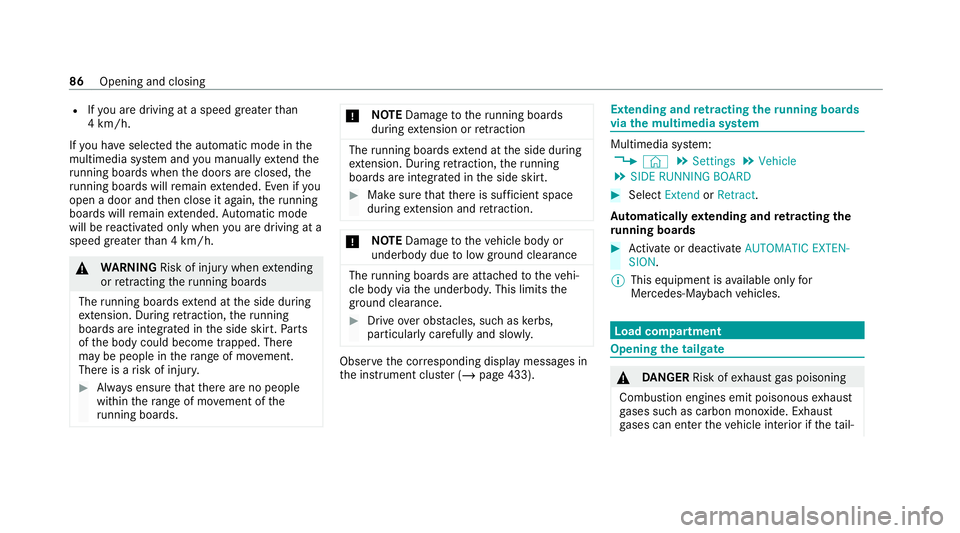
th e instrument clus ter (/ page 433). Extending and
retracting the running boards
via the multimedia sy stem Multimedia sy
stem:
4 © 5
Settings 5
Vehicle
5 SIDE RUNNING BOARD #
Select Extend orRetract .
Au tomatically extending and retracting the
ru nning boards #
Activate or deacti vate AUTOMATIC EXTEN-
SION .
% This equipment is available on lyfor
Mercedes-Maybach vehicles. Load compartment
Opening
the tailgate &
DANG ER Risk of exhaust gas poisoning
Combustion engines emit poisonous exhaust
ga ses such as carbon monoxide. Exhaust
ga ses can enter theve hicle interior if theta il‐ 86
Opening and closing
Page 177 of 549
Overview of climate control sy
stems Note
s on climate control An interior air
filter in combination with the pre‐
fi lter in the engine compartment must alw ays be
used so that the air conditioning sy stem, pollu‐
tion le vel monitoring and the air filtration work
cor rectl y.Make sure that thefilter is ins talled
cor rectly and thefilter housing in the engine
compartment is closed cor rectly using the cap
and alw ays tightly sealed when in operation. Use
fi lters recommended and appr ovedby
Mercedes-Benz. Alw ays ha veservice workcar‐
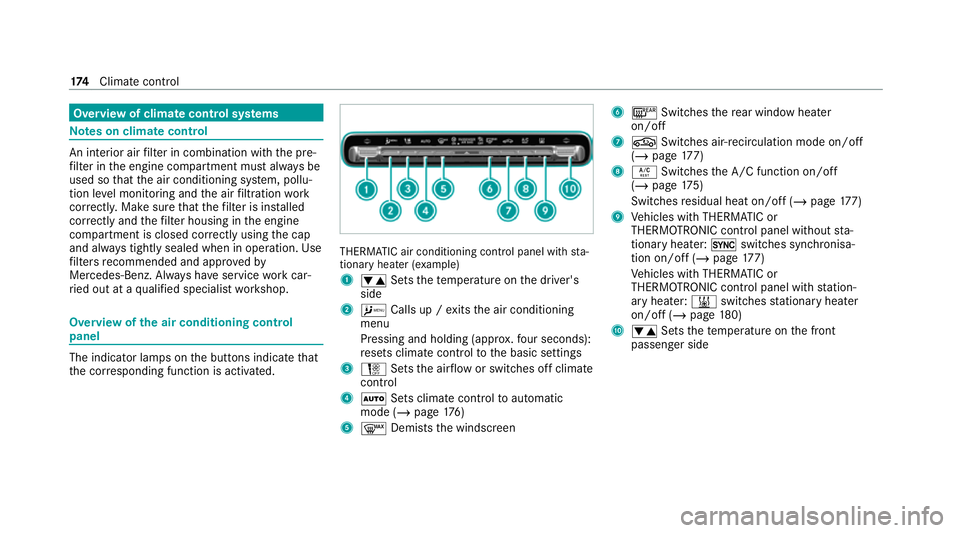
ri ed out at a qualified specialist workshop. Overview of
the air conditioning control
panel The indicator lamps on
the buttons indicate that
th e cor responding function is activated. THERMATIC air conditioning contro
l panel withsta‐
tionary heater (e xamp le)
1 w Setsthete mp erature on the driver's
side
2 A Calls up / exits the air conditioning
menu
Pressing and holding (appr ox.fo ur seconds):
re sets climate contro lto the basic settings
3 H Setsthe air flow or switches off climate
control
4 Ã Sets climate control toautomatic
mode (/ page176)
5 ¬ Demists the windscreen 6
¤ Switches there ar wind owheater
on/off
7 g Switches air-recirculation mode on/off
(/ page 177)
8 Á Switches the A/C function on/off
(/ page 175)
Switches residual heat on/off (/ page177)
9 Vehicles with THERMATIC or
THERMOTRONIC contro l panel withoutsta‐
tionary heater: 0switches synchronisa‐
tion on/off (/ page177)
Ve hicles with THERMATIC or
THERMOTRONIC contro l panel withstation‐
ary heater: &switches stationary heater
on/off (/ page180)
A w Setsthete mp erature on the front
passenger side 174
Climate cont rol
Page 178 of 549
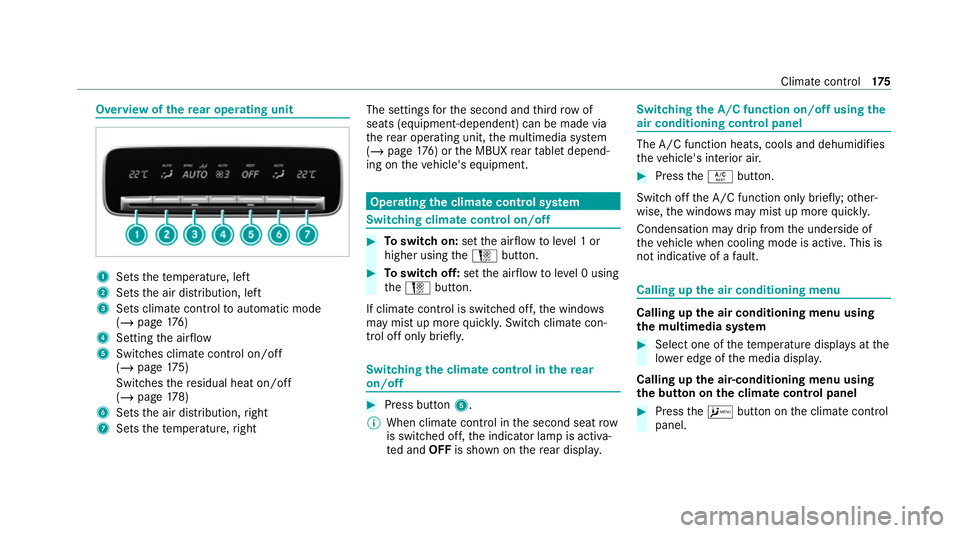
Overview of
there ar operating unit 1
Sets thete mp erature, left
2 Sets the air distribution, left
3 Sets climate control toautomatic mode
(/ page 176)
4 Setting the air flow
5 Switches climate control on/off
(/ page 175)
Switches there sidual heat on/off
(/ page 178)
6 Sets the air distribution, right
7 Sets thete mp erature, right The settings
forth e second and third row of
seats (equipment-dependent) can be made via
th ere ar operating unit, the multimedia sy stem
(/ page 176) or the MBUX rear tablet depend‐
ing on theve hicle's equipment. Operating
the clima tecont rol sy stem Switching clima
tecont rol on/off #
Toswitch on: setthe air flow toleve l 1 or
higher using theH button. #
Toswitch off: setthe air flow toleve l 0 using
th eH button.
If climate control is switched off, the windo ws
may mist up more quickl y.Switch climate con‐
trol off only brie fly. Switching
the clima tecont rol in there ar
on/off #
Press button 5.
% When clima tecontrol in the second seat row
is switched off, the indicator lamp is activa‐
te d and OFFis shown on there ar displa y. Switching
the A/C function on/off using the
air conditioning control panel The A/C function heats, cools and dehumidi
fies
th eve hicle's interior air. #
Press theÁ button.
Switch off the A/C function only brief ly;ot her‐
wise, the windo wsmay mist up more quickl y.
Condensation may drip from the underside of
th eve hicle when cooling mode is active. This is
not indicative of a fault. Calling up
the air conditioning menu Calling up
the air conditioning menu using
th e multimedia sy stem #
Select one of thete mp erature displa ysatthe
lo we r edge of the media displa y.
Calling up the air-conditioning menu using
th e but ton on the clima tecont rol panel #
Press theA button on the climate control
panel. Climate control
175
Page 179 of 549
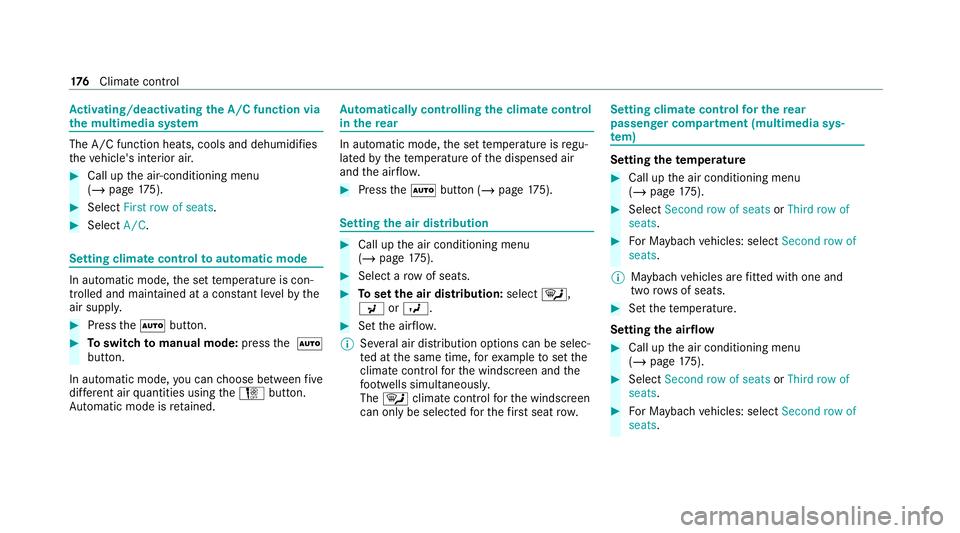
Ac
tivating/deactivating the A/C function via
the multimedia sy stem The A/C function heats, cools and dehumidifies
th eve hicle's interior air. #
Call up the air-conditioning menu
(/ page 175). #
Select First row of seats .#
Select A/C. Setting climate control
toautomatic mode In auto
matic mode, the set temp erature is con‐
trolled and maintained at a const ant levelby the
air suppl y. #
Press theà button. #
Toswitch tomanual mode: pressthe Ã
button.
In automatic mode, you can choose between five
dif fere nt air quantities using theH button.
Au tomatic mode is retained. Au
tomatically controlling the climate control
in the rear In auto
matic mode, the set temp erature is regu‐
lated bythete mp erature of the dispensed air
and the air flow. #
Press theà button (/ page175). Setting
the air distribution #
Call up the air conditioning menu
(/ page 175). #
Select a rowof seats. #
Toset the air distribution: select¯,
P orO. #
Set the air flow.
% Several air distribution options can be selec‐
te d at the same time, forex ample toset the
climate control forth e windscreen and the
fo ot we lls simultaneousl y.
The ¯ climate contro lfo rth e windscreen
can only be selected forth efirs t seat row. Setting climate control
for the rear
passenger comp artment (multimedia sys‐
te m) Setting the
temperature #
Call up the air conditioning menu
(/ page 175). #
Select Second row of seats orThird row of
seats. #
For Maybach vehicles: select Second row of
seats.
% Maybach vehicles are fitted wi thone and
two rows of seats. #
Set thete mp erature.
Setting the airflow #
Call up the air conditioning menu
(/ page 175). #
Select Second row of seats orThird row of
seats. #
For Maybach vehicles: select Second row of
seats. 176
Climate cont rol