oil pressure MERCEDES-BENZ M-Class 2013 W166 Owner's Manual
[x] Cancel search | Manufacturer: MERCEDES-BENZ, Model Year: 2013, Model line: M-Class, Model: MERCEDES-BENZ M-Class 2013 W166Pages: 458, PDF Size: 6.24 MB
Page 21 of 458
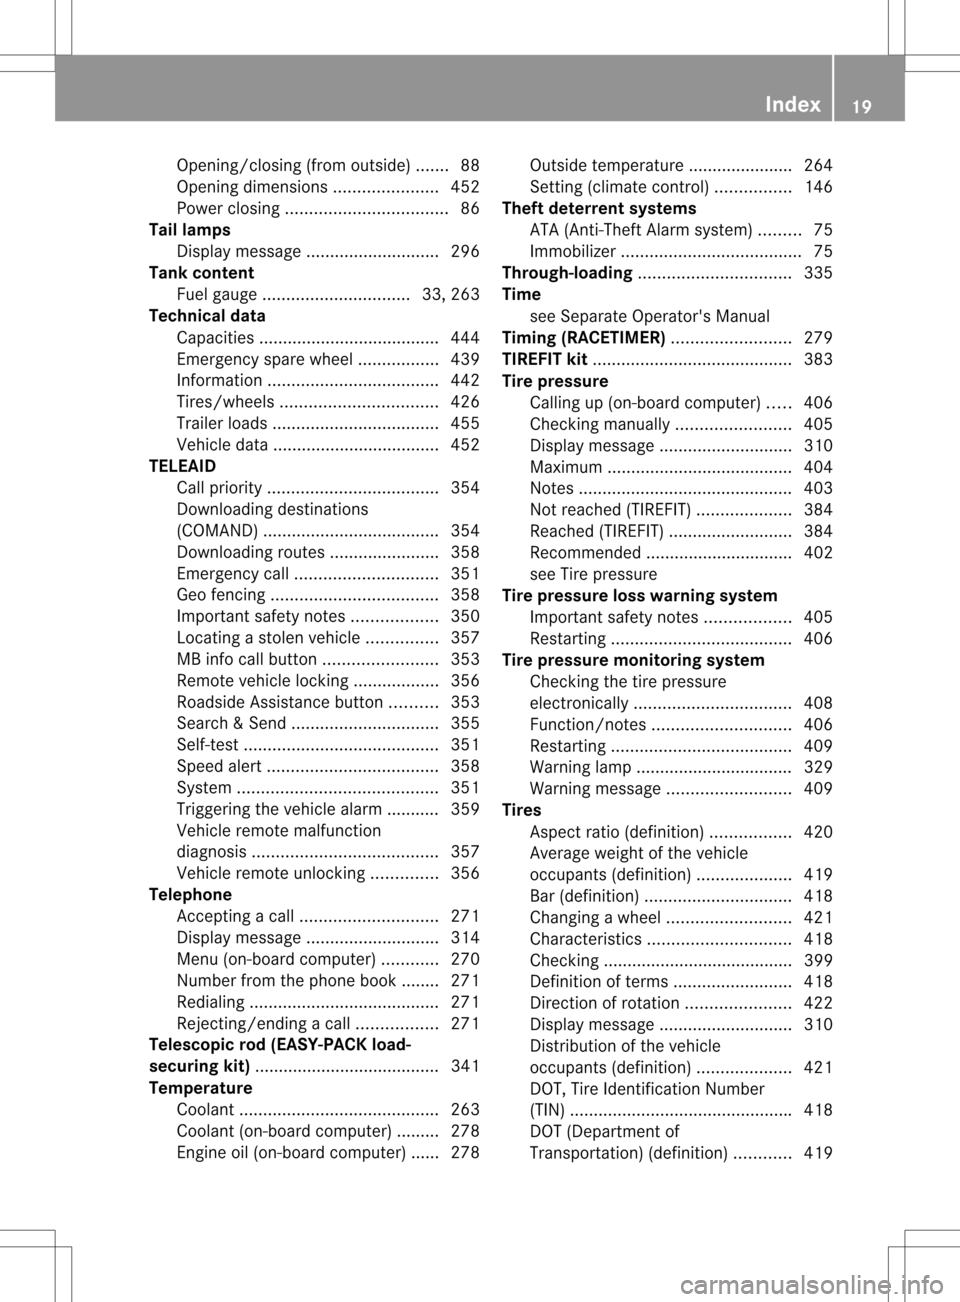
Opening/closing (from outside)
.......88
Opening dimensions ......................452
Power closing .................................. 86
Tail lamps
Display message ............................ 296
Tank content
Fuel gauge ............................... 33, 263
Technical data
Capacities ...................................... 444
Emergency spare wheel .................439
Information .................................... 442
Tires/wheels ................................. 426
Trailer loads ................................... 455
Vehicle data ................................... 452
TELEAID
Call priority .................................... 354
Downloading destinations
(COMAND) ..................................... 354
Downloading route s....................... 358
Emergency call .............................. 351
Geo fencing ................................... 358
Important safety notes ..................350
Locating astolen vehicl e............... 357
MB info call button ........................353
Remote vehicle locking ..................356
Roadside Assistance button ..........353
Search &Send ............................... 355
Self-test ......................................... 351
Speed alert .................................... 358
System .......................................... 351
Triggering the vehicle alarm ........... 359
Vehicle remote malfunction
diagnosi s....................................... 357
Vehicle remote unlocking ..............356
Telephone
Accepting acall............................. 271
Display message ............................ 314
Menu (on-board computer) ............270
Number from the phone book ....... .271
Redialing ........................................ 271
Rejecting/ending acall................. 271
Telescopic rod (EASY-PACK load-
securing kit) ....................................... 341
Temperature Coolant .......................................... 263
Coolant (on-board computer) ......... 278
Engine oil (on-board computer) ...... 278 Outside temperature .....................
.264
Setting (climate control) ................146
Theft deterrent systems
ATA (Anti-Theft Alarm system) .........75
Immobilize r...................................... 75
Through-loading ................................ 335
Time see Separate Operator's Manual
Timing (RACETIMER) .........................279
TIREFIT kit .......................................... 383
Tire pressure Calling up (on-board computer) .....406
Checking manually ........................405
Display message ............................ 310
Maximum ....................................... 404
Notes ............................................. 403
Not reached (TIREFIT) ....................384
Reached (TIREFIT) ..........................384
Recommended ............................... 402
see Tire pressure
Tire pressure loss warning system
Important safety notes ..................405
Restarting ...................................... 406
Tire pressure monitoring system
Checking the tire pressure
electronically ................................. 408
Function/notes ............................. 406
Restarting ...................................... 409
Warning lamp ................................. 329
Warning message .......................... 409
Tires
Aspect ratio (definition) .................420
Average weight of the vehicle
occupants (definition) ....................419
Bar (definition) ............................... 418
Changing awheel .......................... 421
Characteristics .............................. 418
Checking ........................................ 399
Definition of terms .........................418
Directio nofrotation ...................... 422
Display message ............................ 310
Distributio nofthe vehicle
occupants (definition) ....................421
DOT, Tire Identification Number
(TIN) .............................................. .418
DOT (Department of
Transportation) (definition) ............419 Index
19
Page 190 of 458
damaging the vehicle, make sure there is
always sufficient ground clearance.
R Check that items of luggage and loads are
stowed safely and are well secured
(Y page 337).
R Always keep the engine running and in gear
when driving on a downhill gradient.
Activate DSR( Ypage 246).
R Always keep the doors, tailgate, windows
and sliding sunroof closed while driving.
R Adapt your speed to the terrain. The
rougher, steeper or more ruts on the
terrain, the slower your speed should be.
R Drive slowly and at an even speed through
the water. Ensure that a bow wave does not
form as you drive.
R Drive with extreme care on unfamiliar off-
road routes where visibility is poor. For
safety reasons, get out of the vehicle first
and survey the off-road route.
R Look out for obstacles, such as rocks,
holes, tree stumps and furrows.
R Check the depth of water before fording
rivers and streams.
R When fording, do not stop and do not
switch off the engine.
R On sand, drive quickly to overcome the
rolling resistance. Otherwise the vehicle's
wheels could become stuc kinloose
ground.
R Do not jump with the vehicle as this will
interrupt the vehicle's propulsion.
R Always keep the engine running and in gear
when driving on a slope.
R Do not shift the automatic transmission to
transmission position N.
i Do not use the HOLD function when
driving off-road, on steep uphill or downhill
gradients or on slippery or loose surfaces.
The HOLD function cannot hold the vehicle
on such surfaces. Checklist before driving off-road !
If the engine oil warning lamp lights up
while the vehicle is in motion, stop the
vehicle in a safe place as soon as possible.
Check the engine oil level. The engine oil
warning lamp warning must not be ignored.
Continuing the journey while the symbol is
displayed could lead to engine damage.
X Engine oil level: check the engine oil level
and add oil if necessary.
When driving on steep gradients, the
engine oil level must be sufficiently high to
ensure a correc toil supply in the vehicle.
X DEF tank (BlueTEC vehicles): check the
fluid level and, if necessary, refill to the
maximum (13 l) (Y page 177).
X Wheel-changing tool kit: check that the
jac kis working and make sure you have the
lug wrench, a robust tow cable and a folding
spade in the vehicle.
X Wheels and tires: check the tire tread
depth and tire pressure.
X Check for damage and remove any foreign
objects, e.g. small stones, from the
wheels/tires.
X Replace any missing valve caps.
X Replace dented or damaged wheels.
X Rims: dented or bent rims can result in a
loss of tire pressure and damage the tire
bead. Therefore, check your rims before
driving off-road and replace them as
required.
Checklist after driving off-road !
If you detect damage to the vehicle after
driving off-road, have the vehicle checked
immediately at a qualified specialist
workshop.
X Deactivate DSR (Y page 246).
X Vehicles with the AIRMATIC package:
lower the vehicle to a ride height suitable
for the road conditions, e.g. to the
highway/high-speed level. 188
Driving tipsDriving and parking
Page 303 of 458
Display messages Possible causes/consequences and
0001 Solutions
0013
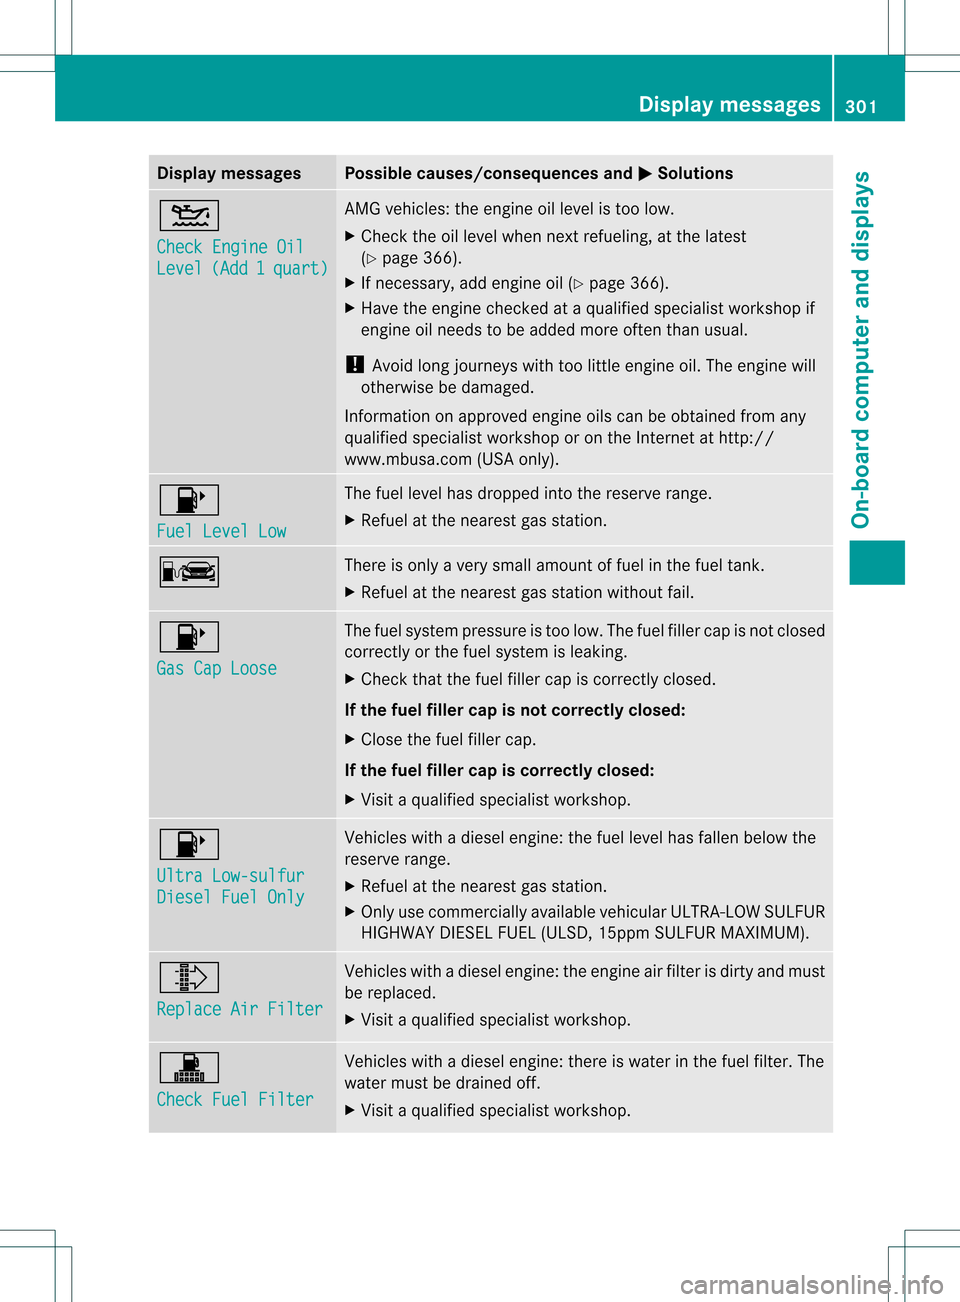
Check Engine Oil
Level (Add 1 quart) AMG vehicles: the engine oil level is too low.
X
Chec kthe oil level when next refueling, at the latest
(Y page 366).
X If necessary, add engine oil (Y page 366).
X Have the engine checked at a qualified specialist workshop if
engine oil needs to be added more often than usual.
! Avoid long journeys with too little engine oil. The engine will
otherwise be damaged.
Information on approved engine oils can be obtained from any
qualified specialist workshop or on the Internet at http://
www.mbusa.com (USA only). 0012
Fuel Level Low The fuel level has dropped into the reserve range.
X
Refuel at the nearest gas station. 000A There is only a very small amount of fuel in the fuel tank.
X
Refuel at the nearest gas station without fail. 0012
Gas Cap Loose The fuel system pressure is too low. The fuel filler cap is not closed
correctly or the fuel system is leaking.
X
Check that the fuel filler cap is correctly closed.
If the fuel filler cap is not correctly closed:
X Close the fuel filler cap.
If the fuel filler cap is correctly closed:
X Visit a qualified specialist workshop. 0012
Ultra Low-sulfur
Diesel Fuel Only Vehicles with a diesel engine: the fuel level has fallen below the
reserve range.
X Refuel at the nearest gas station.
X Only use commercially available vehicular ULTRA-LOW SULFUR
HIGHWAY DIESEL FUEL (ULSD, 15ppm SULFUR MAXIMUM). 0004
Replace Air Filter Vehicles with a diesel engine: the engine air filter is dirty and must
be replaced.
X
Visit a qualified specialist workshop. 0001
Check Fuel Filter Vehicles with a diesel engine: there is water in the fuel filter. The
water must be drained off.
X
Visit a qualified specialist workshop. Display messages
301On-board computer and displays Z
Page 360 of 458
about various special offers at your
workshop.
R monthly status informatio nE-Mail on oil
level, ai rpressure, maintenance, brakes,
etc. If applicable, you will receive
information on special offers in the E-Mail.
USA only: this information can also be
called up under "Owners Online" at http://
www.mbusa.com.
Information on the data stored in the vehicle
(Y page 28).
Information on roadside assistance
(Y page 25).
Downloading routes Downloading routes allows you to transfer
and save predefined routes in the navigation
system. To do this, an SD memory card must
be inserted into the COMAND system. If no
SD memory card is inserted, you must insert
the card into the card slot on the COMAND
system before saving.
Ar
oute can be prepared and sent either by a
customer service representative or via the
mbrace portal on the Internet. Each route can
include up to 20 way points. When a route has
been received by the navigation system, the
'Route name' has been saved to memory card. Do you want to start
route guidance? message appears on the
COMAND display .The route is saved to the
SD memory card.
X To start route guidance: selectYes .
An overview of the route is shown in the
display.
i If you select No , the saved route can be
called up later in the navigation menu.
X Select Start .
Route guidance is started.
i Downloaded and saved data can be called
up again in COMAND.
You can find further information in the
separate COMAND operating instructions. Speed alert You can define the upper speed limit, which
must not be exceeded by the vehicle. If this
selected speed is exceeded by the vehicle, a
message will be sent to the Customer
Assistance center. The Customer Assistance
center then forwards this information to you.
You can select the way in which you receive
this information beforehand. Possible options
include SMS, E-Mail or an automated call.
The data which is sent to the Customer
Assistance center contains the following
information:
R the location where the speed limit was
exceeded
R the time at which the speed limit was
exceeded
R the selected speed limit which was
exceeded
Geo fencing Geo fencing allows you to select areas which
the vehicle should not enter or leave. You will
be informed if the vehicle crosses the
boundaries of the selected areas. You can
select the way in which you receive this
information beforehand. Possible options
include SMS, E-Mail or an automated call.
The area can be determined as either a circle
or a polygon with a maximum of ten corners.
You can specify up to ten areas
simultaneously
.Differen tsettings are
possible for each area.
USA only: these settings can be called up
under "Owners Online" at http://
www.mbusa.com.
Alternatively, you can trigger an MB Info call
and inform the customer service
representative that you wish to activate geo
fencing.
Currently inactive areas can be activated by
SMS. 358
FeaturesStowage and features
Page 369 of 458

Example: engine oil cap
X
Turn cap 0002counter-clockwise and remove
it.
X Add engine oil.
If the oil level is at or below the MIN mark
on the oil dipstick, add 1.1 US qt (1.0 liter)
of engine oil.
X Replace cap 0002on the filler neck and turn
clockwise.
Ensure that the cap locks into place
securely.
X Check the oil level agai nwith the oil
dipstick (Y page 366).
Further information on engine oil
(Y page 449). Additional service products
Checking coolant level G
WARNING
The engine cooling system is pressurized,
particularly when the engine is warm. When
opening the cap, you could be scalded by hot
coolan tspraying out. There is a risk of injury.
Let the engine cool down before opening the
cap. Wear eye and hand protection when
opening the cap. Open the cap slowly half a
turn to allow pressure to escape. X
Park the vehicle on a level surface.
Only chec kthe coolant level when the
vehicle is on a level surface and the engine
has cooled down.
X Turn the SmartKey to position 2in the
ignition lock (Y page 157).
On vehicles with KEYLESS-GO, press the
Start/Stop button twice (Y page 158).
X Check the coolant temperature gauge in
the multifunction display.
The coolant temperature must be below
158 ‡ (70 †).
X Turn the SmartKey to position
0(Y page 157) in the ignition lock.
X Slowly turn cap 0002half a turn counter-
clockwise to allow excess pressure to
escape.
X Turn cap 0002further counter-clockwise and
remove it.
If the coolant is at the level of marker bar
001F in the filler neck when cold, there is
enough coolant in coolant expansion
tank 0003.
If the coolant level is approximately 0.6 in
(1.5 cm) above marker bar 001Fin the fuel
filler neck when warm, there is enough
coolant in expansion tank 0003.
X If necessary, add coolant that has been
tested and approved by Mercedes-Benz.
X Replace cap 0002and turn it clockwise as far
as it will go.
For further information on coolant, see
(Y page 451). Engine compartment
367Maintenance and care Z
Page 376 of 458
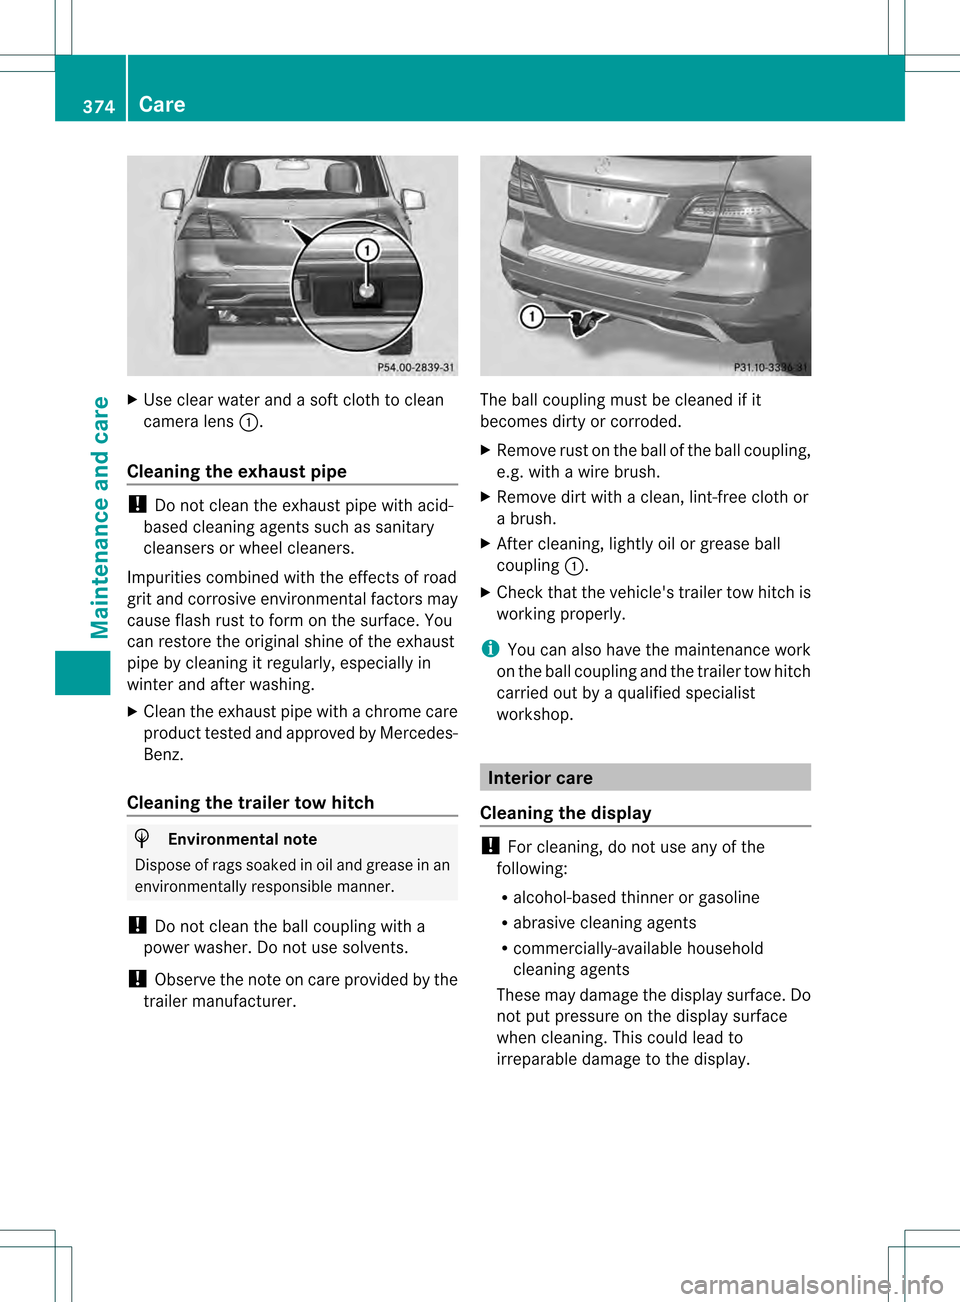
X
Use clear water and a soft cloth to clean
camera lens 0002.
Cleaning the exhaust pipe !
Do not clean the exhaust pipe with acid-
based cleaning agents such as sanitary
cleansers or wheel cleaners.
Impurities combined with the effects of road
grit and corrosive environmental factors may
cause flash rust to form on the surface. You
can restore the original shine of the exhaust
pipe by cleaning it regularly, especially in
winter and after washing.
X Cleant he exhaust pipe with a chrome care
product tested and approved by Mercedes-
Benz.
Cleaning the trailer tow hitch H
Environmental note
Dispose of rags soaked in oil and grease in an
environmentally responsible manner.
! Do not clean the ball coupling with a
power washer. Do not use solvents.
! Observe the note on care provided by the
trailer manufacturer. The ball coupling must be cleaned if it
becomes dirty or corroded.
X
Remove rust on the ball of the ball coupling,
e.g. with a wire brush.
X Remove dirt with a clean, lint-free cloth or
a brush.
X After cleaning, lightly oil or grease ball
coupling 0002.
X Check that the vehicle's trailer tow hitch is
working properly.
i You can also have the maintenance work
on the ball coupling and the trailer tow hitch
carried out by a qualified specialist
workshop. Interior care
Cleaning the display !
For cleaning, do not use any of the
following:
R alcohol-based thinner or gasoline
R abrasive cleaning agents
R commercially-available household
cleaning agents
These may damage the display surface. Do
not put pressure on the display surface
when cleaning. This could lead to
irreparable damage to the display. 374
CareMaintenance and care
Page 386 of 458
If
at ire pressure of 180 kPa (1.8 ba r/26 psi)
has not bee nattained after five minutes:
(Y page 384).
i If tire sealant leaks out, allow it to dry .It
can then be removed like a laye roffilm.
If your clothes are soiled with tire sealant,
have the mcleaned with perchloroethylene
at a dry cleaner as soon as possible.
Tire pressure not reached If
ap ressure of 180 kPa (1.8 ba r/26 psi) has
not bee nachieved afte rfive minutes:
X Switch off the tire inflation compressor.
X Unscrew the filler hose fro mthe valve of
the faulty tire.
X Very slowly drive forwards or reverse
approximately 30 ft (10 m).
X Pump up the tire again.
After a maximum of five minutes the tire
pressure must be at least 180 kPa (1.8 bar/
26 psi). G
WARNING
If the required tire pressure is not reached
after the specified time, the tire is too badly
damaged. The tire sealant cannot repair the
tire in this instance. Damaged tires and a tire
pressure that is too low can significantly
impair the vehicle's braking and driving
characteristics. There is a risk of accident.
Do not continue driving. Contact a qualified
specialist workshop.
Tire pressure reached G
WARNING
At ire temporarily sealed with tire sealant
impairs the driving characteristics and is not
suitable for higher speeds. There is a risk of
accident.
You should therefore adapt your driving style
accordingly and drive carefully. Do not exceed
the specified maximum speed with a tire that
has been repaired using tire sealant. !
Residue fro mthe tire sealant may come
out of the filler hose after use. This could
cause stains.
Therefore, place the filler hose in the plastic
bag which contained the TIREFIT kit. H
Environmental note
Have the used tire sealant bottle disposed of
professionally, e.g. at aqualified specialist
workshop.
If a tire pressure of 18 0kPa (1.8 bar/26 psi)
has been attained after five minutes:
X Switch off the tire inflation compressor.
X Unscrew the filler hose from the valve of
the faulty tire.
X Stow the tire sealant bottle and the tire
inflation compressor.
X Pull away immediately.
The maximum speed for a tire sealed with
tire sealant is 50 mph (80 km/h). The upper
part of the TIREFIT sticker must be affixed
to the instrument cluster in the driver's
field of vision.
X Stop after driving for approximately ten
minutes and check the tire pressure with
the tire inflation compressor.
The tire pressure must now be at least
130 kPa (1.3 bar/19 psi). G
WARNING
If the required tire pressure is not reached
after driving for a short period, the tire is too
badly damaged. The tire sealant cannot repair
the tire in this instance. Damaged tires and a
tire pressure that is too low can significantly
impair the vehicle's braking and driving
characteristics. There is a risk of accident.
Do not continue driving. Contact a qualified
specialist workshop.
X Correct the tire pressure if it is still at least
130 kPa (1.3 bar/19 psi) (for the values,
see the Tire and Loading Information 384
Flat tireBreakdown assistance
Page 422 of 458
Load index
In addition to the load-bearing index, the load
inde
xmay also be imprinted on the sidewall
of the tire. This specifie sthe load-bearing
capacity more precisely.
Curb weight
The weight of a vehicle with standard
equipment including the maximum capacity
of fuel, oil and coolant. It also includes the air-
conditioning system and optional equipment
if these are installed in the vehicle, but does
not include passengers or luggage.
Maximum load rating
The maximum tire load is the maximum
permissible weight in kilograms or lbs for
which a tire is approved.
Maximum permissible tire pressure
Maximum permissible tire pressure for one
tire.
Maximum load on one tire
Maximum load on one tire. This is calculated
by dividing the maximum axle load of one axle
by two.
PSI (pounds per square inch)
As tandard uni tofmeasure for tire pressure.
Aspect ratio
Relationship between tire height and tire
width in percent.
Tire pressure
This is pressure inside the tire applying an
outward force to each square inch of the tire's
surface. The tire pressure is specified in
pounds per square inch (psi), in kilopascal
(kPa) or in bar. The tire pressure should only
be corrected when the tires are cold. Cold tire pressure
The tires are cold:
R
if the vehicle has been parked without
direct sunlight on the tires for at least three
hours and
R if the vehicle has been driven for less than
1 mile (1.6 km).
Tread
The part of the tire that comes into contact
with the road.
Bead
The tire bead ensures that the tire sits
securely on the wheel. There are several steel
wires in the bead to prevent the tire from
coming loose from the wheel rim.
Sidewall
The part of the tire between the tread and the
bead.
Weight of optional extras
The combined weight of those optional extras
that weigh more than the replaced standard
parts and more than 2.3 kilograms (5 lbs).
These optional extras, such as high-
performance brakes, level control, a roof rack
or a high-performance battery, are not
included in the curb weight and the weight of
the accessories.
TIN (Tire Identification Number)
This is a unique identifier which can be used
by a tire manufacturer to identify tires, for
example for a product recall, and thus identify
the purchasers. The TIN is made up of the
manufacturer's identity code, tire size, tire
type code and the manufacturing date.
Load bearing index
The load bearing index (also load index) is a
code that contains the maximum load bearing
capacity of a tire. 420
All about wheels and tiresWheels and tires
Page 448 of 458
If there is no premium-grade unleaded
gasoline available and regular unleaded
gasoline must be used, please observe the
following precautions:
R
only fill the fuel tank to half full with
regular unleaded gasoline and fill the rest
with premium-grade unleaded gasoline
as soon as possible.
R do not drive at the maximum speed.
R avoid sudden acceleration.
R if the vehicle is carrying a lightl oad, e.g.
two passengers without luggage, do not
allow the engine to rev above 3000 rpm.
R if the vehicle is fully loaded or is being
operated in mountainous terrain, do not
depress the accelerator pedal further
than 0001of the pedal travel.
Only refuel using premium-grade unleaded
gasoline with a minimum octane rating of 91.
Reformulated Gasoline (RFG) and/or
unleaded gasoline with additives can be used.
The concentration of additives in the fuel,
however, must not exceed 10%, e.g.:
R Ethanol
R TAME
R ETBE
R IPA
R TBA
For MTBE, the concentration should not
exceed 15%.
The concentration of methanol in gasoline,
including other additives, must not exceed
3%.
Using mixtures of methanol and ethanol is not
permitted. Gasohol, a mixture of 10% ethanol
and 90% unleaded gasoline, may be used.
All of these blends must fulfill the fuel
requirements, e.g.:
R knock resistance
R boiling point
R vapor pressure
You will usually find information about the fuel
grade on the pump. If you cannot find the label on the pump, ask the staff for
assistance.
i
For further information, consult a
qualified specialist workshop or on the
Internet at http://www.mbusa.com (USA
only).
Information on refueling (Y page 174).
Additives
! Operating the engine with fuel additives
can increase wear and tear to the fuel
system high-pressure pump and lead to
contamination of the entire fuel system.
The repair costs are high. This does not
include additives for the removal and
prevention of residue buildup. gasoline
must only be mixed with additives
recommended by Mercedes-Benz. More
information about recommended additives
can be obtained from any authorized
Mercedes-Benz Center.
One of the main problems of poor fuel quality
is the forming of deposits that are created
during the gasoline combustion process.
Mercedes-Benz recommends that you use
branded fuels that have additives.
If you use fuels without these additives over
a longer period of time, carbon deposits may
build up. These deposits form at the inlet
valves and in the combustion chamber in
particular.
This could lead to engine problems, e.g.:
R longer engine warm-up phase
R uneven idle
R engine noise
R misfiring
R loss of power
Carbon deposits may form if the availability
of gasoline with relevant additives is
insufficient (in certain regions). In this case,
Mercedes-Benz recommends additives
approved for use in Mercedes-Benz vehicles;
see http://bevo.mercedes-benz.com.
For a list of approved products, consult an
authorized Mercedes-Benz Center. Comply 446
Service products and filling capacitiesTechnical data