check oil MERCEDES-BENZ M-Class 2014 W166 Owner's Manual
[x] Cancel search | Manufacturer: MERCEDES-BENZ, Model Year: 2014, Model line: M-Class, Model: MERCEDES-BENZ M-Class 2014 W166Pages: 462, PDF Size: 6.23 MB
Page 12 of 462
Exhaus
tcheck ............................... 182
Fuel ................................................ 182
General .......................................... 182
Hydroplaning ................................. 186
Icy road surfaces ........................... 187
Limited braking efficiency on
salted road s................................... 184
Off-road driving .............................. 188
Off-road fording ............................. 186
Snow chains .................................. 401
Symmetrical low bea m.................. 120
Tire ruts ......................................... 190
Towing atrailer .............................. 253
Traveling uphill ............................... 190
Wet road surface ........................... 184
DSR (Downhill Spee dRegulation)
Display message ............................ 304
Function/notes ............................. 246
DVD audio
Operating (on-board computer) .....270
DVD video
Operating (on-board computer) .....270 E
EASY-ENTRY feature Activating/deactivating .................277
Function/notes ............................. 113
EASY-EXIT feature
Crash-responsive ........................... 114
Function/notes ............................. 113
Switching on/off ........................... 277
EASY-PACK load-securing kit ...........340
EBD (electronic brake force
distribution)
Display message ............................ 285
Function/notes ................................ 74
ECO display
Function/notes ............................. 183
On-board computer .......................267
ECO start/stop function
Automatic engine start ..................162
Automatic engine switch-off ..........162
Deactivating/activating .................163
General information .......................161
Important safety notes ..................161
Introduction ................................... 161Electronic Stability Program
see ESP ®
(Electroni cStability Program)
Emergenc yrelease
Driver's door .................................... 88
Vehicle ............................................. 88
Emergency spare wheel
General notes ................................ 436
Important safety notes ..................436
Removing ....................................... 436
Storage location ............................ 436
Technical data ............................... 438
Emergency Tensioning Devices
Function .......................................... .59
Safety guideline s............................. 43
Emergency unlocking
Tailgate ............................................ 93
Emissions control
Service and warranty information ....24
Engine
Check Engine warning lamp ........... 325
Display message ............................ 298
ECO start/stop function ................161
Engine number ............................... 443
Irregularr unning............................ 164
Jump-starting ................................. 389
Starting problems ..........................164
Starting the engine with the
SmartKey ....................................... 159
Starting with KEYLESS-GO .............160
Switching off .................................. 180
Tow-starting (vehicle) ..................... 394
Engine electronics
Problem (malfunction) ...................164
Engine oil
Adding ........................................... 366
Additives ........................................ 449
Checking the oil level ..................... 365
Checking the oil level using the
dipstick .......................................... 365
Display message ............................ 300
Filling capacity ............................... 449
Notes about oil grades ................... 448
Notes on oil level/consumption ....365
Temperature (on-board computer) .278
Viscosity ........................................ 44910
Index
Page 21 of 462
Limiting the opening angle
...............93
Opening/closing (automatically
from inside) ...................................... 92
Opening/closing (automatically
from outside) ................................... 91
Opening/closing (from outside) .......90
Opening dimensions ......................452
Power closing .................................. 88
Tail lamps
Display message ............................ 296
Tank content
Fuel gauge ............................... 33, 263
Technical data
Capacities ...................................... 444
Emergency spare wheel .................438
Information .................................... 442
Tires/wheels ................................. 426
Trailer loads ................................... 456
Vehicle data ................................... 452
TELEAID
Call priority .................................... 354
Downloading destinations
(COMAND) ..................................... 354
Downloading route s....................... 358
Emergency call .............................. 351
Geo fencing ................................... 358
Locating astolen vehicl e............... 357
MB info call button ........................353
Remote vehicle locking ..................356
Roadside Assistance button ..........353
Search &Send ............................... 355
Self-test ......................................... 351
Speed alert .................................... 358
System .......................................... 351
Triggering the vehicle alarm ........... 359
Vehicle remote malfunction
diagnosi s....................................... 357
Vehicle remote unlocking ..............356
Tele Aid
General notes ................................ 350
Telephone
Accepting acall............................. 271
Display message ............................ 314
Menu (on-board computer) ............270
Number from the phone book ....... .271
Redialing ........................................ 271
Rejecting/ending acall................. 271Telescopic rod (EASY-PACK load-
securing kit)
....................................... 341
Temperature Coolant .......................................... 263
Coolant (on-board computer) ......... 278
Engine oil (on-board computer) ...... 278
Outside temperature ..................... .264
Setting (climate control) ................147
Theft deterrent systems
ATA (Anti-Theft Alarm system) .........76
Immobilize r...................................... 76
Through-loading ................................ 335
Time see separate operating instructions
Timing (RACETIMER) .........................279
TIREFIT kit .......................................... 383
Tire pressure Calling up (on-board computer) .....406
Checking manually ........................405
Display message ............................ 310
Important safety notes ..................406
Maximum ....................................... 404
Notes ............................................. 403
Not reached (TIREFIT) ....................384
Reached (TIREFIT) ..........................384
Recommended ............................... 402
Tire pressure loss warning
system
Important safety notes ..................405
Restarting ...................................... 406
Tire pressure monitoring system
Checking the tire pressure
electronically ................................. 408
Function/notes ............................. 406
General notes ................................ 406
Important safety notes ..................407
Restarting ...................................... 409
Warning lamp ................................. 329
Warning message .......................... 408
Tires
Aspect ratio (definition) .................420
Average weight of the vehicle
occupants (definition) ....................419
Bar (definition) ............................... 418
Changing awheel .......................... 421
Characteristics .............................. 418
Checking ........................................ 399
Definition of terms .........................418 Index
19
Page 159 of 462

G
WARNING
If you switch off the ignitio nwhile driving,
safety-relevant functions are only available
with limitations, or not at all. This could affect,
for example, the power steering and the brake
boosting effect.Y ou will require considerably
more effort to steer and brake. There is a risk
of an accident.
Do not switch off the ignition while driving. G
WARNING
If the parking brake has not been fully
released when driving, the parking brake can:
R overheat and cause a fire
R lose its hold function.
There is a risk of fire and an accident .Release
the parking brake fully before driving off.
! Warm up the engine quickly. Do not use
the engine's full performance until it has
reached operating temperature.
Only shift the automatic transmission to
the desired drive position when the vehicle
is stationary.
Where possible, avoid spinning the drive
wheels when pulling away on slippery
roads. You could otherwise damage the
drive train.
! AMG vehicles: at low engine oil
temperatures below 68 ‡(+20 †), the
maximu mengine speed is restricted in
order to protect the engine .To protec tthe
engine and maintain smooth engine
operation, avoid driving at full throttle when
the engine is cold. Key positions
SmartKey 000E
To remove the SmartKey
0005 Power supply for some consumers, such
as the windshield wipers
0006 Ignition (power supply for all consumers)
and drive position
0007 To start the engine
As soon as the ignition is switched on, all the
indicator lamps in the instrumentc luster light
up. If an indicator lamp does not go out after
starting the engine or lights up while driving,
see (Y page 318).
If the SmartKey is in position 0in the ignition
lock for an extended period of time, it can no
longer be turned in the ignition lock .The
steering is then locked. To unlock, remove the
SmartKey and reinsert it into the ignition lock.
The steering is locked when you remove the
SmartKey from the ignition lock.
X Remove the SmartKey when the engine is
switched off.
The starter battery could otherwise be
discharged.
If you cannot turn the SmartKey in the ignition
lock, the starter battery may not be charged
sufficiently.
X Check the starter battery and recharge if
necessary (Y page 388).
or
X Jump-start the vehicle (Y page 389). Driving
157Driving and parking Z
Page 175 of 462
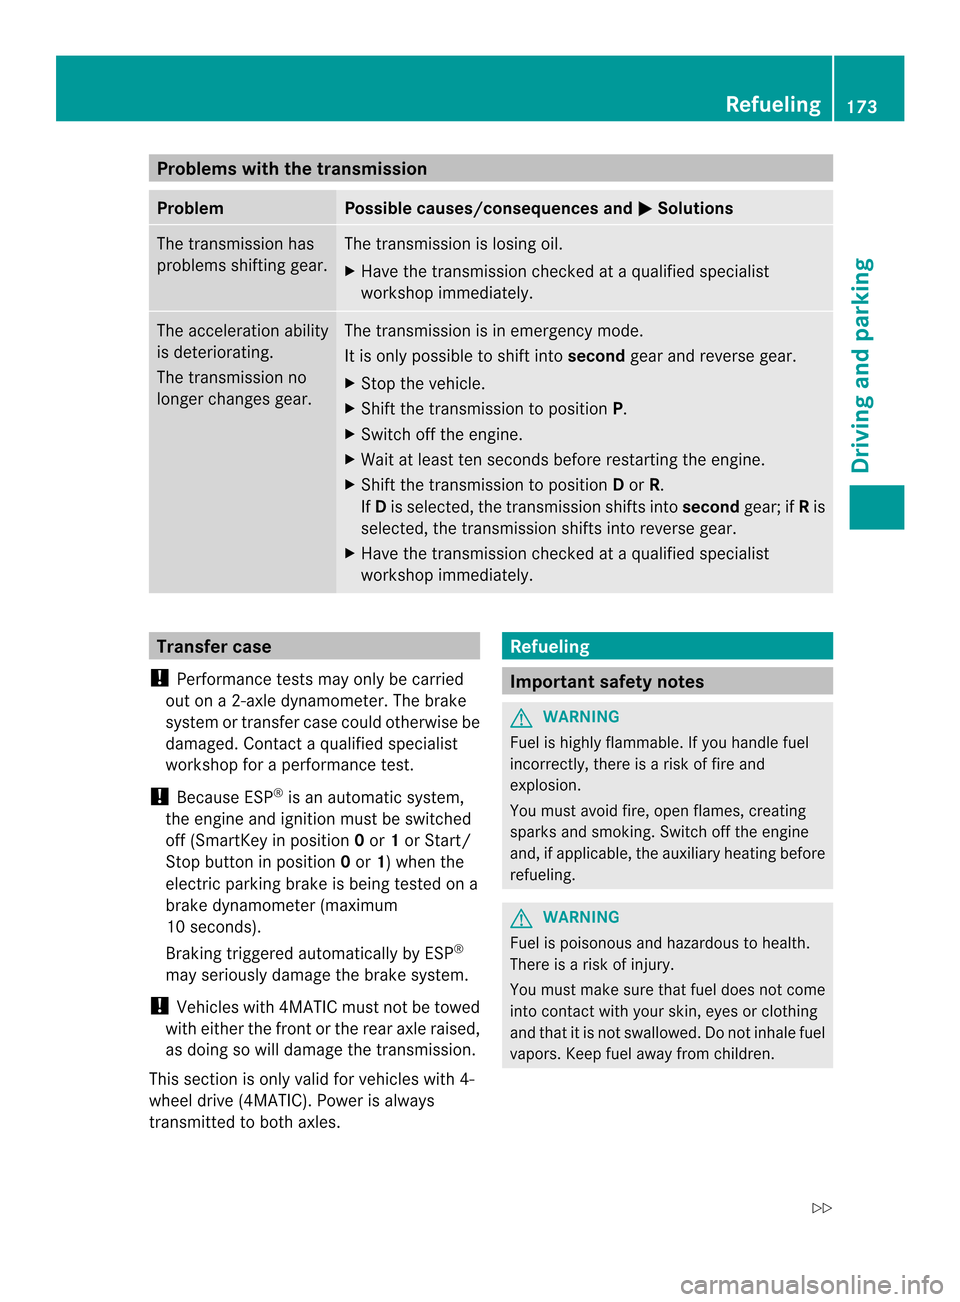
Problems with the transmission
Problem Possible causes/consequences and
0001 Solutions
The transmission has
problems shifting gear. The transmission is losing oil.
X
Have the transmission checked at a qualified specialist
workshop immediately. The acceleration ability
is deteriorating.
The transmission no
longer changes gear. The transmission is in emergency mode.
It is only possible to shift into
secondgear and reverse gear.
X Stop the vehicle.
X Shift the transmission to position P.
X Switch off the engine.
X Wait at least ten seconds before restarting the engine.
X Shift the transmission to position Dor R.
If D is selected, the transmission shifts into secondgear; ifRis
selected, the transmission shifts into reverse gear.
X Have the transmission checked at a qualified specialist
workshop immediately. Transfer case
! Performance tests may only be carried
out on a 2-axle dynamometer. The brake
system or transfer case could otherwise be
damaged. Contact a qualified specialist
workshop for a performance test.
! Because ESP ®
is an automatic system,
the engine and ignition must be switched
off (SmartKey in position 0or 1or Start/
Stop button in position 0or 1) when the
electric parking brake is being tested on a
brake dynamometer (maximum
10 seconds).
Braking triggered automatically by ESP ®
may seriously damage the brake system.
! Vehicles with 4MATIC must not be towed
with either the front or the rear axle raised,
as doing so will damage the transmission.
This section is only valid for vehicles with 4-
wheel drive (4MATIC). Power is always
transmitted to both axles. Refueling
Important safety notes
G
WARNING
Fuel is highly flammable. If you handle fuel
incorrectly, there is a risk of fire and
explosion.
You must avoid fire, open flames, creating
sparks and smoking. Switch off the engine
and, if applicable, the auxiliary heating before
refueling. G
WARNING
Fuel is poisonous and hazardous to health.
There is a risk of injury.
You must make sure that fuel does not come
into contact with your skin, eyes or clothing
and that it is not swallowed. Do not inhale fuel
vapors. Keep fuel away from children. Refueling
173Driving and parking
Z
Page 190 of 462
G
WARNING
If the vehicle level is high, the vehicle center
of gravity is raised. This could cause the
vehicle to tip over more easily on uphill or
downhill gradients. There is arisk of an
accident.
Selec tthe lowest possible vehicle level.
When driving off-road, sand, mud and water,
possibly mixed with oil, for example, could get
into the brakes. This could result in a reduced
braking effect or in total brake failure and also
in increased wear and tear. The braking
characteristics change depending on the
material ingressing the brakes. Cleant he
brakes after driving off-road. If you detect a
reduced braking effect or grinding noises,
have the brake system checked in a qualified
specialist workshop as soon as possible.
Adapt your driving style to the different
braking characteristics.
Driving off-road increases the likelihood of
damage to the vehicle, which, in turn, can lead
to failure of the mechanical assembly or
systems. Adapt your driving style to suit the
terrain conditions. Drive carefully. Have
damage to the vehicle rectified immediately
at a qualified specialist workshop.
Do not switch to transmission position N
when driving off-road. You could lose control
of the vehicle if you attempt to brake using
the service brake. If the gradient is too steep,
drive backwards in reverse gear.
General notes Read this section carefully before driving your
vehicle off-road. Practice by driving over more
gentle off-road terrain first.
Familiarize yourself with the characteristics
of your vehicle and the gear shift operation
before driving through difficult terrain. The following driving systems are specially
adapted to off-road driving:
R
Off-road ABS (Y page 67)
R AIRMATIC package (vehicle level)
(Y page 207)
R DSR (Downhill Speed Regulation)
(Y page 246)
Observe the following notes:
R Stop the vehicle before starting to drive
along an off-road route.
R For vehicles with the AIRMATIC
package: select a vehicle level that is
suitable for the off-road terrain. To avoid
damaging the vehicle, make sure there is
always sufficient ground clearance.
R Check that items of luggage and loads are
stowed safely and are well secured
(Y page 337).
R Always keep the engine running and in gear
when driving on a downhill gradient.
Activate DSR (Y page 246).
R Always keep the doors, tailgate, windows
and sliding sunroof closed while driving.
R Adapt your speed to the terrain. The
rougher, steeper or more ruts on the
terrain, the slower your speed should be.
R Drive slowly and at an even speed through
the water. Ensure that a bow wave does not
form as you drive.
R Drive with extreme care on unfamiliar off-
road routes where visibility is poor. For
safety reasons, get out of the vehicle first
and survey the off-road route.
R Look out for obstacles, such as rocks,
holes, tree stumps and furrows.
R Check the depth of water before fording
rivers and streams.
R When fording, do not stop and do not
switch off the engine.
R On sand, drive quickly to overcome the
rolling resistance. Otherwise the vehicle's
wheels could become stuck in loose
ground. 188
Driving tipsDriving and parking
Page 191 of 462
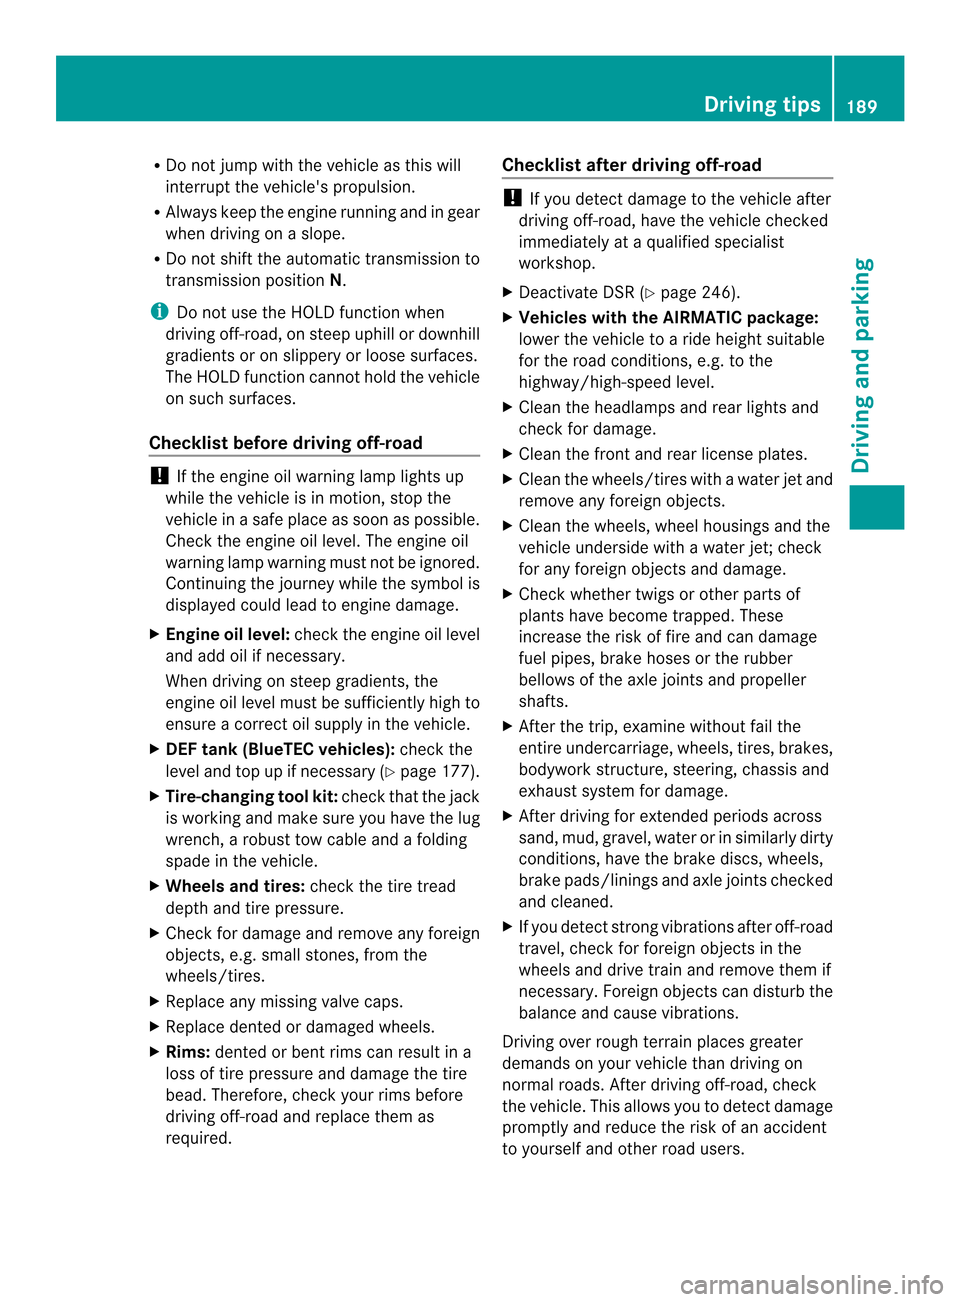
R
Do not jump with the vehicle as this will
interrupt the vehicle's propulsion.
R Always keep the engine running and in gear
when driving on a slope.
R Do not shift the automatic transmission to
transmission position N.
i Do not use the HOLD function when
driving off-road, on steep uphill or downhill
gradients or on slippery or loose surfaces.
The HOLD functio ncannot hold the vehicle
on such surfaces.
Checklist before driving off-road !
If the engine oil warning lamp lights up
while the vehicle is in motion, stop the
vehicle in a safe place as soon as possible.
Chec kthe engine oil level. The engine oil
warning lamp warning must not be ignored.
Continuing the journey while the symbol is
displayed could lead to engine damage.
X Engine oil level: check the engine oil level
and add oil if necessary.
When driving on steep gradients, the
engine oil level must be sufficiently high to
ensure a correct oil supply in the vehicle.
X DEF tank (BlueTEC vehicles): check the
level and top up if necessary (Y page 177).
X Tire-changing tool kit: check that the jack
is working and make sure you have the lug
wrench, a robust tow cable and a folding
spade in the vehicle.
X Wheels and tires: check the tire tread
depth and tire pressure.
X Check for damage and remove any foreign
objects, e.g. small stones, from the
wheels/tires.
X Replace any missing valve caps.
X Replace dented or damaged wheels.
X Rims: dented or bent rims can result in a
loss of tire pressure and damage the tire
bead. Therefore, check your rims before
driving off-road and replace them as
required. Checklist after driving off-road !
If you detect damage to the vehicle after
driving off-road, have the vehicle checked
immediately at a qualified specialist
workshop.
X Deactivate DSR (Y page 246).
X Vehicles with the AIRMATIC package:
lower the vehicle to a ride height suitable
for the road conditions, e.g. to the
highway/high-speed level.
X Cleant he headlamps and rear lights and
check for damage.
X Cleant he front and rear license plates.
X Cleant he wheels/tires with a water jet and
remove any foreign objects.
X Cleant he wheels, wheel housings and the
vehicle underside with a water jet; check
for any foreign objects and damage.
X Check whether twigs or other parts of
plants have become trapped. These
increase the risk of fire and can damage
fuel pipes, brake hoses or the rubber
bellows of the axle joints and propeller
shafts.
X After the trip, examine without fail the
entire undercarriage, wheels, tires, brakes,
bodywork structure, steering, chassis and
exhaust system for damage.
X After driving for extended periods across
sand, mud, gravel, water or in similarly dirty
conditions, have the brake discs, wheels,
brake pads/linings and axle joints checked
and cleaned.
X If you detect strong vibrations after off-road
travel, check for foreign objects in the
wheels and drive train and remove them if
necessary. Foreign objects can disturb the
balance and cause vibrations.
Driving over rough terrain places greater
demands on your vehicle than driving on
normal roads. After driving off-road, check
the vehicle. This allows you to detect damage
promptly and reduce the risk of an accident
to yourself and other road users. Driving tips
189Driving and parking Z
Page 302 of 462
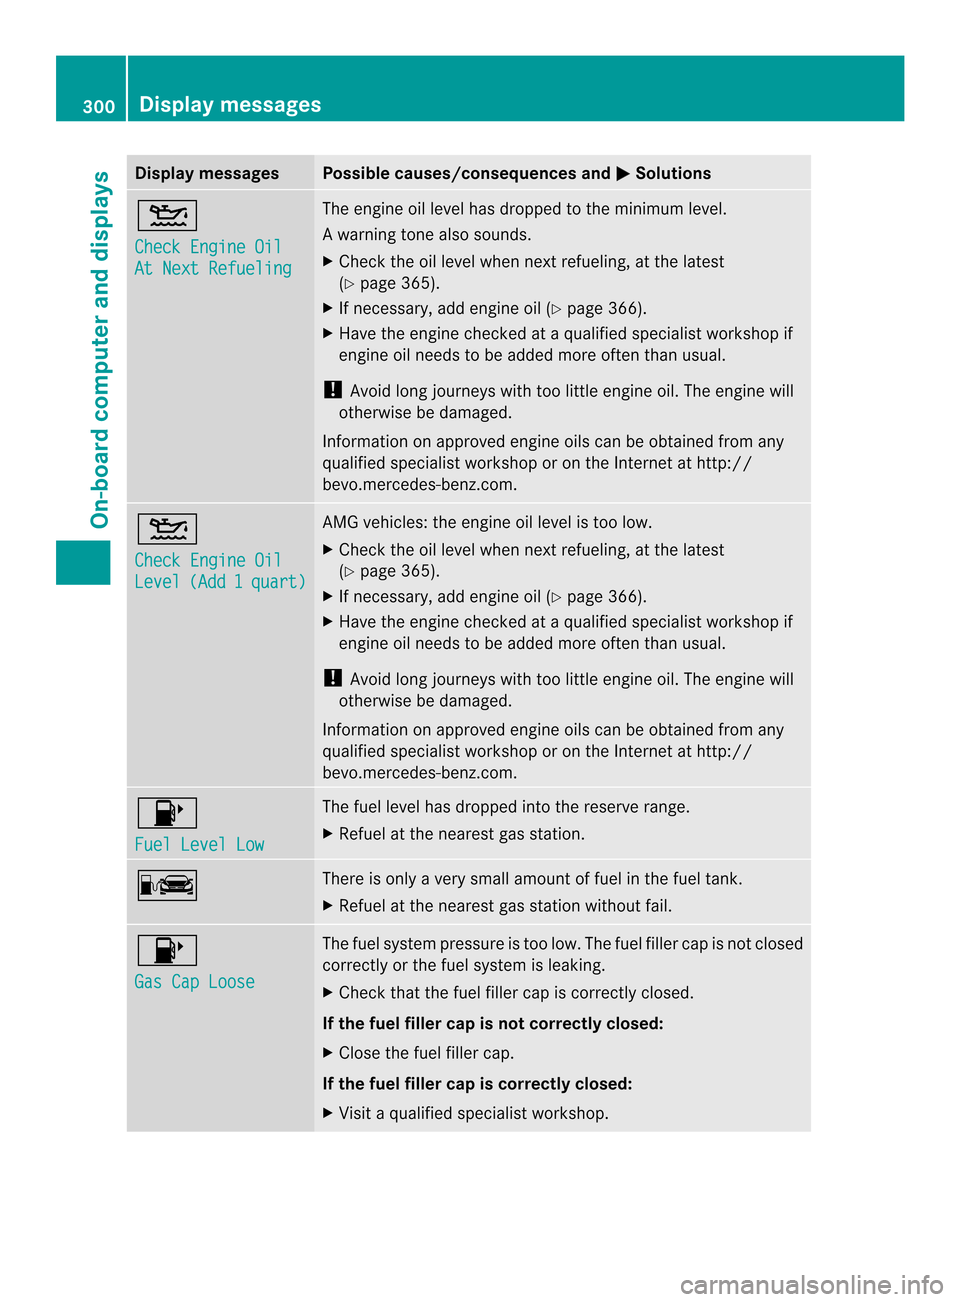
Display messages Possible causes/consequences and
0001 Solutions
0013
Check Engine Oil
At Next Refueling The engine oil level has dropped to the minimum level.
Aw
arning tone also sounds.
X Chec kthe oil level when next refueling, at the latest
(Y page 365).
X If necessary, add engine oil (Y page 366).
X Have the engine checked at a qualified specialist workshop if
engine oil needs to be added more often than usual.
! Avoid long journeys with too little engine oil. The engine will
otherwise be damaged.
Information on approved engine oils can be obtained from any
qualified specialist workshop or on the Internet at http://
bevo.mercedes-benz.com. 0013
Check Engine Oil
Level (Add 1 quart) AMG vehicles: the engine oil level is too low.
X
Check the oil level when next refueling, at the latest
(Y page 365).
X If necessary, add engine oil (Y page 366).
X Have the engine checked at a qualified specialist workshop if
engine oil needs to be added more often than usual.
! Avoid long journeys with too little engine oil. The engine will
otherwise be damaged.
Information on approved engine oils can be obtained from any
qualified specialist workshop or on the Internet at http://
bevo.mercedes-benz.com. 0012
Fuel Level Low The fuel level has dropped into the reserve range.
X
Refuel at the nearest gas station. 000A There is only a very small amount of fuel in the fuel tank.
X
Refuel at the nearest gas station without fail. 0012
Gas Cap Loose The fuel system pressure is too low. The fuel filler cap is not closed
correctly or the fuel system is leaking.
X
Check that the fuel filler cap is correctly closed.
If the fuel filler cap is not correctly closed:
X Close the fuel filler cap.
If the fuel filler cap is correctly closed:
X Visit a qualified specialist workshop. 300
Display messagesOn-board computer and displays
Page 367 of 462

could otherwise damage the windshield
wipers or the hood. X
Make sure that the windshield wipers are
turned off.
X Pull release lever 0002on the hood.
The hood is released. X
Reach into the gap, pull hoo dcatch
handle 0003up and lift the hood.
If you lift the hood by approximately 15 in
(40 cm), the hood is opened and held open
automatically by the gas-filled strut.
Closing the hood X
Lowe rthe hood and let it fall from a height
of approximately 8 in (20 cm).
X Check that the hood has engaged properly.
If the hood can be raised slightly, it is not
properly engaged. Open it again and close
it with a little more force. Radiator
Vehicles with adiesel engine: do not cover
the radiator, for example with a winter front
or bug cover. The reading softhe on-board-
diagnostic system may otherwise be
inaccurate. Some of these readings are
required by law and must be accurate at all
times. Engine oil
General notes Depending on the driving style, the vehicle
consumes up to 0.9 US qts (0.8 l) of oil over
a distance of 600 miles (1000 km). The oil
consumption may be higher than this when
the vehicle is new or if you frequently drive at
high engine speeds.
Depending on the engine, the oil dipstick may
be in a different location.
When checking the oil level:
R park the vehicle on a level surface.
R the engine should be switched off for
approximately five minutes if the engine is
at normal operating temperature.
R if the engine is not at normal operating
temperature, e.g. if the engine was only
started briefly: wait about 30 minutes
before carrying out the measurement.
Checking the oil level using the oil
dipstick G
WARNING
Certain components in the engine
compartment, such as the engine, radiator
and parts of the exhaust system, can become
very hot. Working in the engine compartment
poses a risk of injury.
Where possible, let the engine cool down and
touch only the components described in the
following. Engine compartment
365Maintenance and care Z
Page 369 of 462

Example: engine oil cap
X
Turn cap 0002counter-clockwise and remove
it.
X Add engine oil.
If the oil level is at or below the MIN mark
on the oil dipstick, add 1.1 US qt (1.0 l) of
engine oil.
X Replace cap 0002on the filler neck and turn
clockwise.
Ensure that the cap locks into place
securely.
X Check the oil level agai nwith the oil
dipstick (Y page 365).
Further information on engine oil
(Y page 448). Additional service products
Checking coolant level G
WARNING
Certain components in the engine
compartment, such as the engine, radiator
and parts of the exhaust system, can become
very hot .Working in the engine compartment
poses a risk of injury.
Where possible, let the engine cool down and
touch only the components described in the
following. G
WARNING
The engine cooling system is pressurized,
particularly when the engine is warm. When opening the cap, you could be scalded by hot
coolant spraying out. There is a risk of injury.
Let the engine cool down before opening the
cap. Wear eye and hand protection when
opening the cap. Open the cap slowly half a
turn to allow pressure to escape. X
Park the vehicle on a level surface.
Only check the coolant level when the
vehicle is on a level surface and the engine
has cooled down.
X Turn the SmartKey to position 2in the
ignition lock (Y page 157).
On vehicles with KEYLESS-GO, press the
Start/Stop button twice (Y page 158).
X Check the coolant temperature gauge in
the multifunction display.
The coolant temperature must be below
158 ‡ (70 †).
X Turn the SmartKey to position
0(Y page 157) in the ignition lock.
X Slowly turn cap 0002half a turn counter-
clockwise to allow excess pressure to
escape.
X Turn cap 0002further counter-clockwise and
remove it.
If the coolant is at the level of marker bar
0023 in the filler neck when cold, there is
enough coolant in coolant expansion
tank 0003.
If the coolant level is approximately 0.6 in
(1.5 cm) above marker bar 0023in the filler
neck when warm, there is enough coolant
in expansion tank 0003. Engine compartment
367Maintenance and care Z
Page 372 of 462
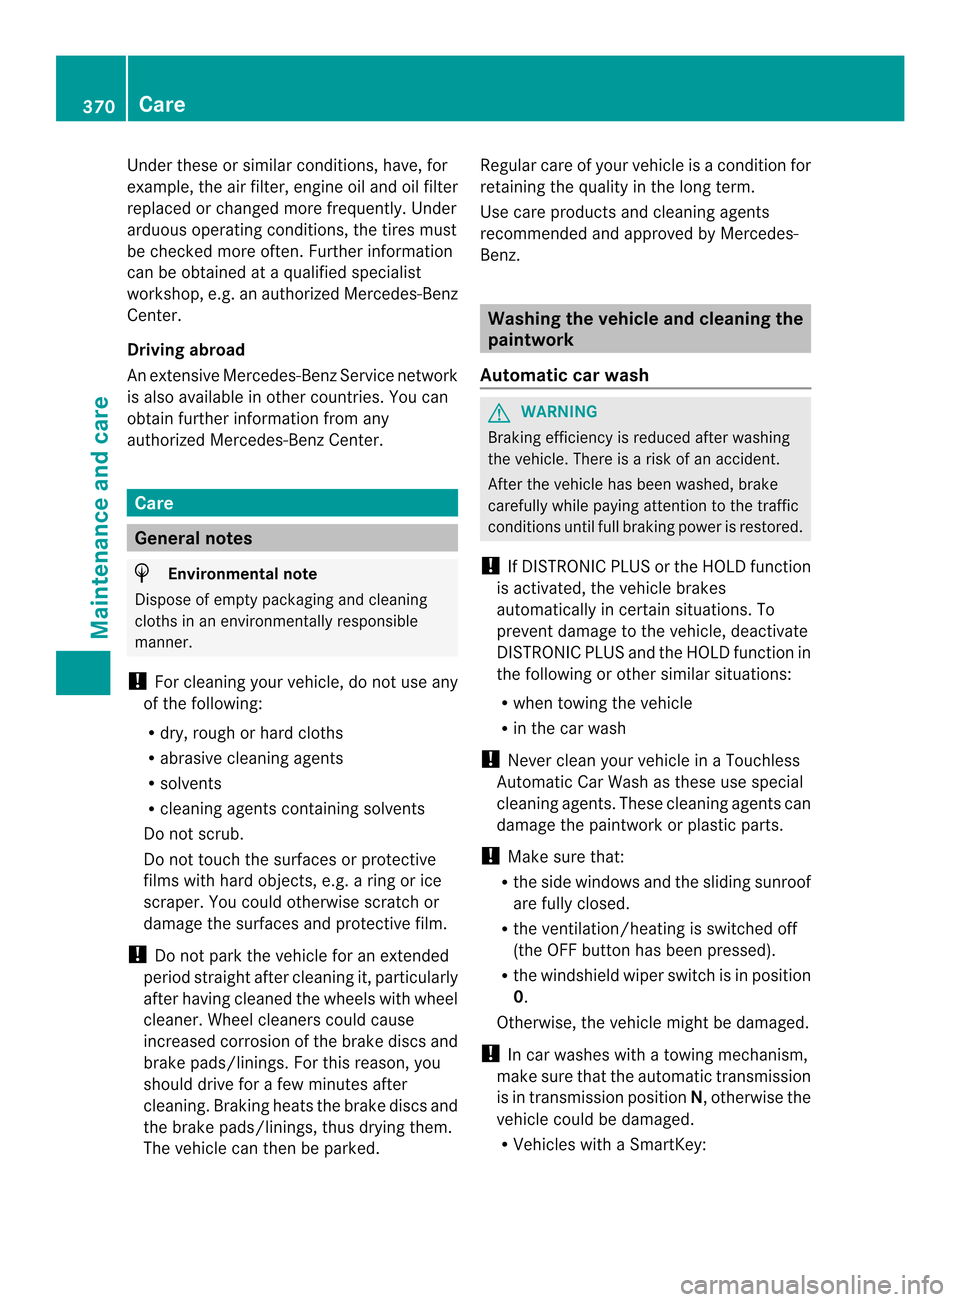
Under these or similarc
onditions, have, for
example, the air filter, engine oil and oil filter
replaced or changed more frequently. Under
arduous operating conditions, the tires must
be checked more often. Further information
can be obtained at a qualified specialist
workshop, e.g. an authorized Mercedes-Benz
Center.
Driving abroad
An extensive Mercedes-Benz Servic enetwork
is also available in other countries. You can
obtain further information from any
authorized Mercedes-BenzC enter.Care
General notes
H
Environmental note
Dispose of empty packaging and cleaning
cloths in an environmentally responsible
manner.
! For cleaning your vehicle, do not use any
of the following:
R dry, rough or hard cloths
R abrasive cleaning agents
R solvents
R cleaning agents containing solvents
Do not scrub.
Do not touch the surfaces or protective
films with hard objects, e.g. a ring or ice
scraper. You could otherwise scratch or
damage the surfaces and protective film.
! Do not park the vehicle for an extended
period straight after cleaning it, particularly
after having cleaned the wheels with wheel
cleaner. Wheel cleaners could cause
increased corrosion of the brake discs and
brake pads/linings. For this reason, you
should drive for a few minutes after
cleaning. Braking heats the brake discs and
the brake pads/linings, thus drying them.
The vehicle can then be parked. Regular care of your vehicle is a condition for
retaining the quality in the long term.
Use care products and cleaning agents
recommended and approved by Mercedes-
Benz.
Washing the vehicle and cleaning the
paintwork
Automatic car wash G
WARNING
Braking efficiency is reduced after washing
the vehicle. There is a risk of an accident.
After the vehicle has been washed, brake
carefully while paying attention to the traffic
conditions until full braking power is restored.
! If DISTRONIC PLUS or the HOLD function
is activated, the vehicle brakes
automatically in certain situations. To
preven tdamage to the vehicle, deactivate
DISTRONI CPLUS and the HOLD function in
the following or other similar situations:
R when towing the vehicle
R in the car wash
! Never clean yourv ehicle in a Touchless
Automatic Car Wash as these use special
cleaning agents .These cleaning agents can
damage the paintwork or plastic parts.
! Make sure that:
R the side windows and the sliding sunroof
are fully closed.
R the ventilation/heating is switched off
(the OFF button has been pressed).
R the windshield wiper switch is in position
0.
Otherwise, the vehicle might be damaged.
! In car washes with a towing mechanism,
make sure that the automatic transmission
is in transmission position N, otherwise the
vehicle could be damaged.
R Vehicles with a SmartKey: 370
CareMaintenance and care