tyre pressure MERCEDES-BENZ M-CLASS SUV 2011 Owners Manual
[x] Cancel search | Manufacturer: MERCEDES-BENZ, Model Year: 2011, Model line: M-CLASS SUV, Model: MERCEDES-BENZ M-CLASS SUV 2011Pages: 389, PDF Size: 9.22 MB
Page 9 of 389
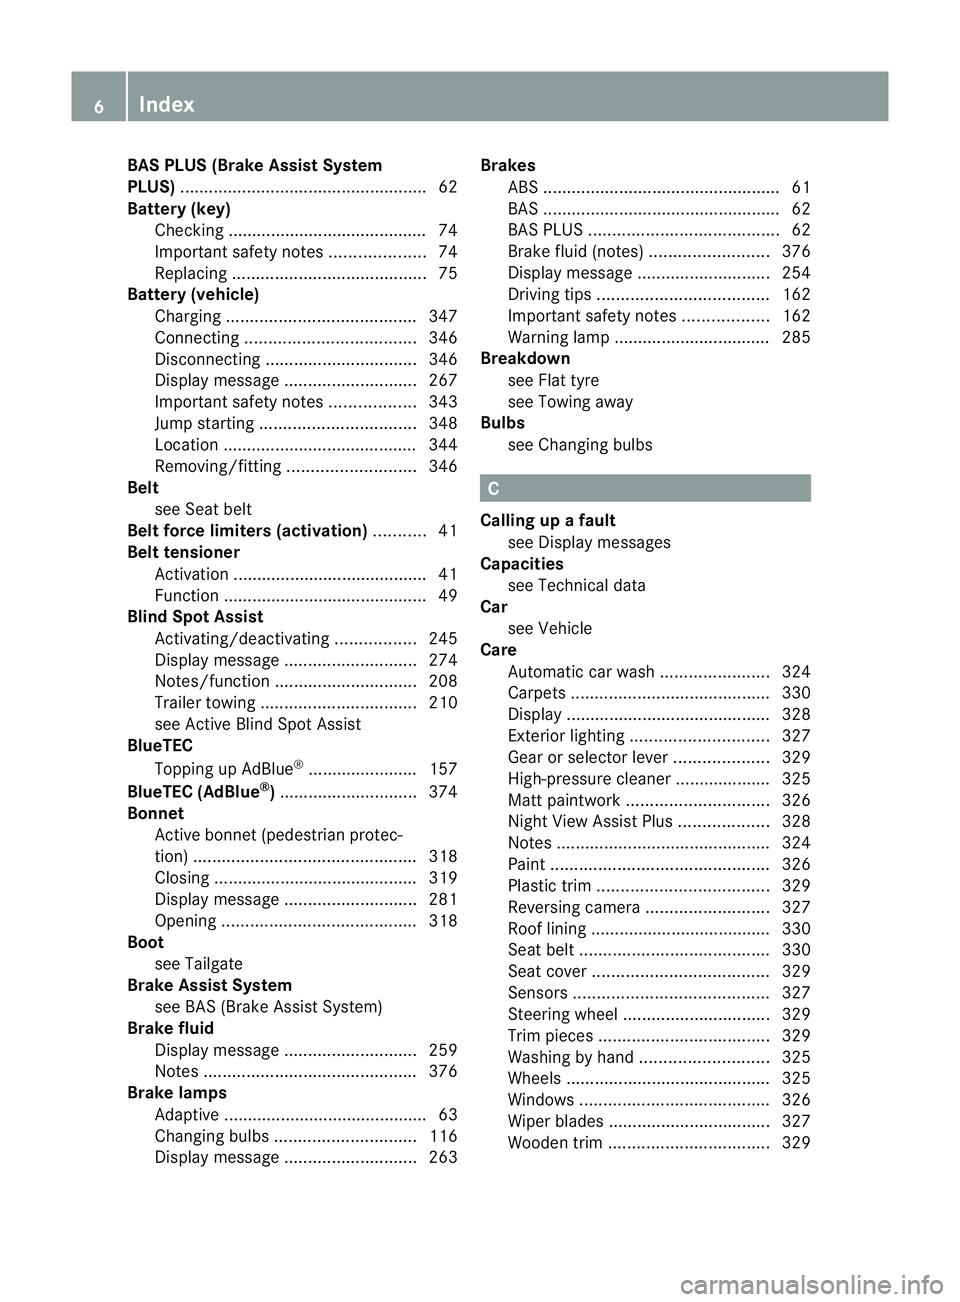
BAS PLUS (Brake Assist System
PLUS) .................................................... 62
Battery (key) Checking .......................................... 74
Important safety notes ....................74
Replacing ......................................... 75
Battery (v ehicle)
Charging ........................................ 347
Connectin g.................................... 346
Disconnecting ................................ 346
Display message ............................ 267
Important safety notes ..................343
Jump starting ................................. 348
Location ......................................... 344
Removing/fittin g........................... 346
Belt
seeS eat belt
Belt force limiters (activation) ...........41
Bel ttensioner
Activation ......................................... 41
Function .......................................... .49
Blind Spo tAssist
Activating/deactiva ting ................. 245
Display message ............................ 274
Notes/function .............................. 208
Traile rtowing ................................. 210
se eA ctive Blind Spo tAssist
BlueTEC
Topping up AdBlue ®
...... ................. 157
BlueTE C(AdBlue ®
) ............................. 374
Bon net
Active bonne t(pedestrian protec-
tion) ............................................... 318
Closing ........................................... 319
Display message ............................ 281
Opening ......................................... 318
Boot
seeT ailgate
Brak eAssist System
see BAS (Brake Assist System)
Brake fluid
Display message ............................ 259
Note s............................................. 376
Brake lamps
Ada ptive .......................................... .63
Changin gbulbs .............................. 116
Display message ............................ 263Brakes
ABS .................................................. 61
BAS .................................................. 62
BAS PLUS ........................................ 62
Brake fluid (notes )......................... 376
Display message ............................ 254
Driving tip s.................................... 162
Important safety notes ..................162
Warn ingl am p................................. 285
Breakdown
seeF lat tyre
see Towing away
Bulbs
see Changing bulbs C
Callin gupaf ault
se eD isplay messages
Capacities
see Technical data
Car
see Vehicle
Care
Automatic car was h....................... 324
Carpets .......................................... 330
Display ........................................... 328
Exterio rlighting ............................. 327
Gea rors electo rlever .................... 329
High-pressure cle aner ...... .............. 325
Matt paintwork .............................. 326
Nig htVie wA ssist Plus ................... 328
Note s............................................. 324
Pa int. ............................................. 326
Pl ast ic trim .................................... 329
Revers ingc amera .......................... 327
Roo flining ...................................... 330
Seat bel t........................................ 330
Sea tcover ..................................... 329
Sensors ......................................... 327
Steering wh eel............................... 329
Tri mp ieces .................................... 329
Washing by hand ........................... 325
Wheels ........................................... 325
Windows ........................................ 326
Wi perb lades .................................. 327
Wooden trim .................................. 3296
Index
Page 23 of 389
Two-way radio
Frequencie s................................... 371
Installati on .................................... .371
Transmission output (maximum ).... 371
Type identification plate
seeV ehicle identificat ionp late
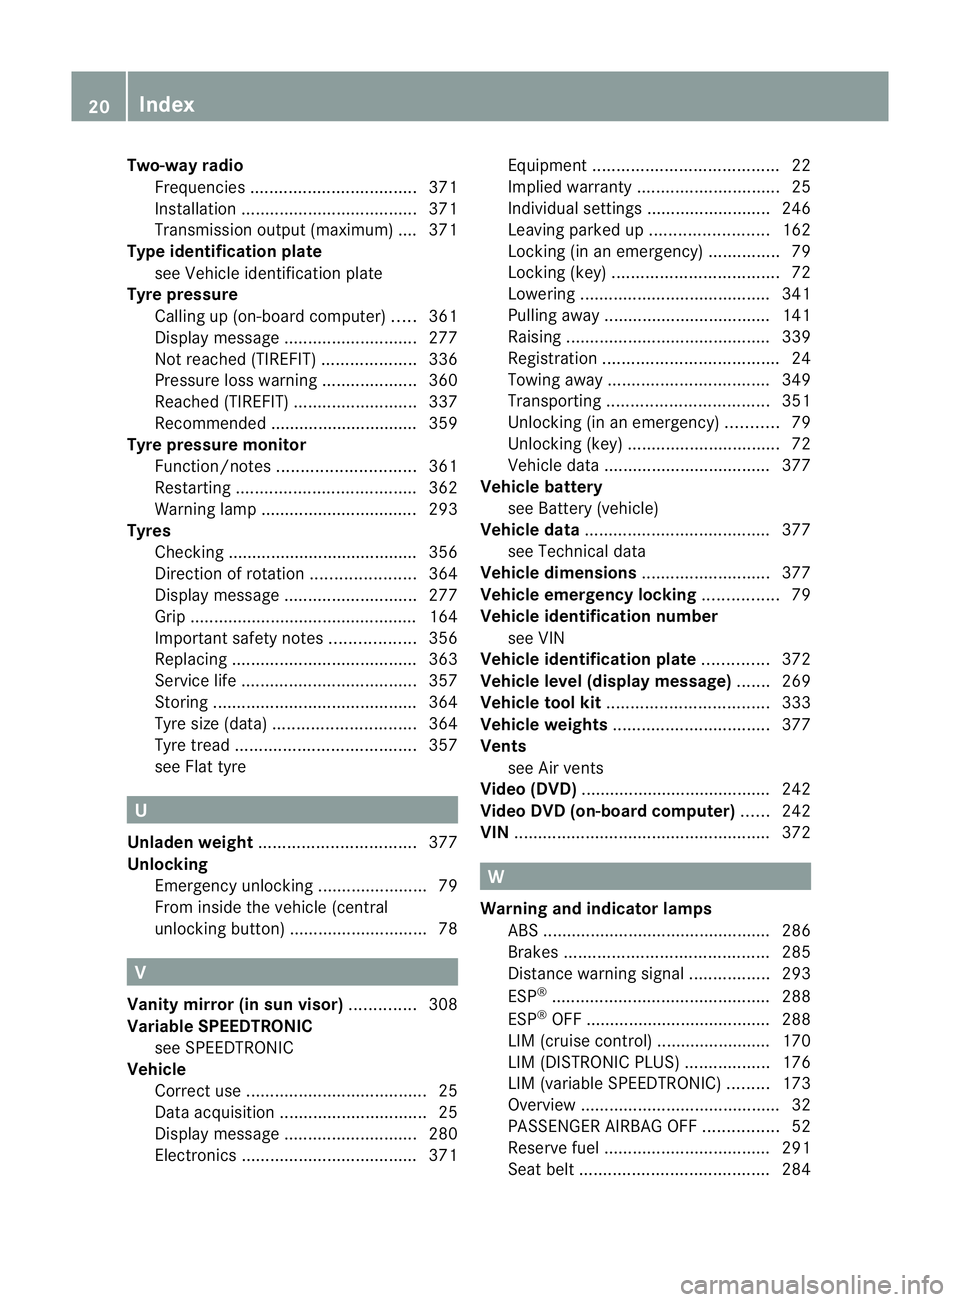
Tyr epressure
Calling up (on-bo ardc omputer )..... 361
Display message ............................ 277
Not reac hed( TIREFIT) .................... 336
Pressure loss warning ....................360
Reache d(TIREFIT) .......................... 337
Rec ommended ............................... 359
Tyre pressur emonitor
Function/notes ............................. 361
Restarting ...................................... 362
Warn ingl am p................................. 293
Tyres
Checking ........................................ 356
Directi on ofrotation ...................... 364
Display message ............................ 277
Gri p................................................ 164
Important safety note s.................. 356
Replacing ....................................... 363
Service life ..................................... 357
Storing ........................................... 364
Tyr esize (data) .............................. 364
Tyr etrea d...................................... 357
se eF lat tyre U
Unladen weight ................................. 377
Un lock ing
Emergency unlocking .......................79
From insid ethe vehicle (central
unl ocking button) ............................. 78V
Vanity mirror (in sun visor) ..............308
Variable SP EEDTRONIC
se eS PEEDTRONIC
Vehicle
Corr ectu se ...................................... 25
Data acq uisition ............................... 25
Display message ............................ 280
Electronics ..................................... 371Equ
ipment ....................................... 22
Implied warranty .............................. 25
Individua lsettings .......................... 246
Leaving pa rkedup. ........................ 162
Locking (i nanemergency) ............... 79
Locking (ke y)................................... 72
Lowering ........................................ 341
Pullin gaway................................... 141
Rais ing. .......................................... 339
Registratio n..................................... 24
To wing away .................................. 349
Transporting .................................. 351
Unlockin g(in an emergency) ...........79
Unlockin g(key )................................ 72
Veh icle data ................................... 377
Vehi cleb attery
se eB attery (vehicle)
Vehicle data ....................................... 377
se eT echnical data
Vehicle dimensions ...........................377
Vehi clee mergency locking ................79
Vehi clei dentification number
se eV IN
Vehi clei dentification plate ..............372
Vehi clel evel (display message) .......269
Vehi clet ool kit .................................. 333
Vehi clew eights ................................. 377
Vents seeA ir vents
Video (DVD) ....................................... .242
Vide oDVD (on-board computer) ......242
VIN ...................................................... 372 W
Warning and indicator lamps ABS ................................................ 286
Brake s........................................... 285
Distance warning signa l................. 293
ESP ®
.............................................. 288
ESP ®
OFF ....................................... 288
LIM (cruise control )........................ 170
LIM (DISTRONIC PLUS) ..................176
LIM (variabl eSPEEDTRONI C)......... 173
Overview .......................................... 32
PASSENGER AIRBAG OFF ................52
Reserve fuel ................................... 291
Sea tbelt. ....................................... 28420
Index
Page 25 of 389
Protection of th
eenvironment Notes
H
Environmental note
Daimler's declared polic yisone of integrated
environmental protection.
The objectives are for the natural resources
which form the basis of our existence on this
plane ttobeu sed sparingl yand in amanner
which takes the requirements of both nature
and humanity into account.
You too can help to protect the environment
by operating your vehicle in an environmen-
tally responsible manner.
Fuel consumption and the rate of engine,
transmission, brake and tyre wear depend on
the following factors:
R operating conditions of your vehicle
R your personal driving style
You can influence both factors. You should
bear the following in mind:
Operating conditions:
R avoid short trips as these increase fuel con-
sumption.
R make sure that the tyre pressures are
always correct.
R do not carr yany unnecessary weight.
R keep an eye on the vehicle's fuel consump-
tion.
R remove roof racks once you no longer need
them.
R ar egularly serviced vehicle will contribute
to environmental protec tion. You should
therefor eadhere to the service inter vals.
R always have maintenance work carried out
at aq ualified specialist workshop ,e.g. a
Mercedes-Benz Service Centre.
Personal driving style:
R do not depress the accelerator pedal when
starti ngthe engine.
R do not warm up the engine with the vehicle
stationary. R
drive carefully and maintain asafe distance
from the vehicle in front.
R avoid frequent, sudden acceleration.
R change gear in good time and use each gear
only up to Ôof its maximum engine speed.
R switch off the engine in stationary traffic. Returning end-of-life vehicles
Mercedes-Benz will take back your
Mercedes-Benz to dispose of it in an environ-
mentally responsible manner, in accordance
with the European Union (EU) End of Life
Vehicles Directive.
The End of Life Vehicles Directive applies to
vehicles with agros svehicle weight of up to
3. 5t ,ina ccordance with national regulations.
For several years ,Mercedes-Benz has been
meeting all the legal requirements for a
design which allows for recycling and reuse.
There is anetwor kofreturnpoint sand dis-
assembly plants which can recycle your vehi-
cle in an environmentally responsible man-
ner. The options for recycling vehicles and
parts are constantly being develope dand
improved .This means that your Mercedes-
Ben zwill also continue to meet even the
increased recycling quotas in the futur ein
good time. You can obtai nfurther information
from your national Mercedes-Benz homepage
or your national hotline number. Vehicle equipment
This Owner's Manual describes all models
and all standard and optional equipment of
your vehicle available at the time of publica-
tion of the Owner's Manual. Country-specific
differences are possible. Pleas enote that
your vehicle ma ynot be equipped with all fea-
tures described. This also applies to safety-
relevant system sand functions .The equip-
men tiny our vehicle ma ytherefore differ from
that shown in the descriptions and illustra-
tions. All the system sfound in your vehicle 22
Introduction
Page 35 of 389
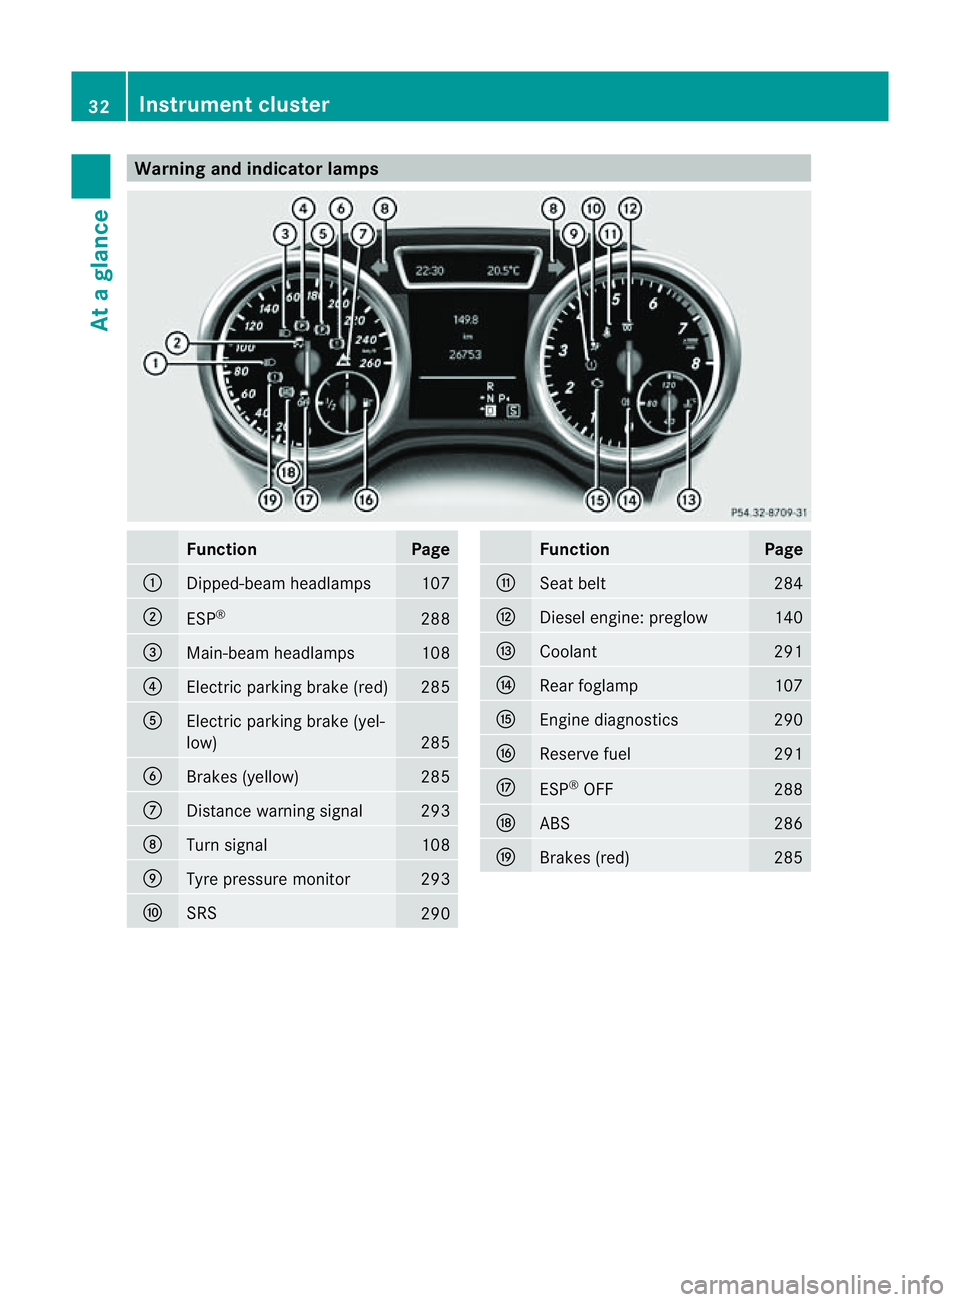
Warnin
gand indicator lamps Fun
ction Page
:
Dipped-bea
mheadlamps 107
;
ESP
® 288
=
Main-beam headlamps 108
?
Electric parkin
gbrake (red) 285
A
Electric parking brake (yel-
low)
285
B
Brakes (yellow) 285
C
Distance warning signal 293
D
Turn signal 108
E
Tyre pressure moni
tor 293
F
SRS
290 Function Page
G
Sea
tbelt 284
H
Diesel engine: preglow 140
I
Coolant 291
J
Rear foglamp 107
K
Engine diagnostics 290
L
Reserv
efuel 291
M
ESP
®
OFF 288
N
ABS 286
O
Brakes (red) 28532
Instrument clusterAt
ag lance
Page 64 of 389
R
ABS ( Anti-lock BrakingSystem)
R BAS ( Brake Assist System)
R BAS PLU S(Brake Assist Sys tem Plus*)
R Adaptive brake lamps
R ESP ®
(Elec tronic Stability Program)
R EBD ( electronic brake force distribution)
R ADAP TIVE BRA KE
R PRE- SAFE ®
Brake
R STEER CONTROL Important safety notes
If yo ufail to adap tyou rd riving style, the driv-
ing safety systems ca nneither reduc ethe risk
of accident nor override the laws of physics.
Drivi ngsafety systems ar emerely aids
designed to assist driving. You are responsi-
ble for the distance to the vehicle in front ,for
vehicle speed and for brakin gingood time.
Always adapt your drivin gstyle to suit the
prevailing road and weather conditions, as
well as the traffic conditions and maintain a
safe distance from the vehicle in front .Drive
carefully.
i Please note that th edriving safetys ys-
tems described only work as effectively as
possibl ewhen ther eisadequate contact
between the tyres and the road surface.
Pay particula rattention to the information
regarding tyres, recommended minimum
tyre tread depth setc. in the "Wheels and
tyres" sectio n(Ypage 356).
In wintr ydriving conditions ,always use
winter tyres (M+S tyres) and if necessary,
snow chains. Only in this way will the driv-
ing safety systems described in this section
work as effec tivel yasp ossible. ABS (Anti-loc
kBrak ing System)
Impor tant safety notes i
Observ ethe "Importan tsafety notes" sec-
tion (Y page 61). ABS regulates brake pressure in such
away
that the wheels do not lock when you brake.
This allows you to continue steering the vehi-
cle when braking.
ABS works from aspeed of about 8km/h
upwards, regardless of road-surfac econdi-
tions. AB Sworksons lippery surfaces, even
when you only brake gently. G
WARNING
If ABS is faulty, the wheels could lock when
braking. This limits the steerability of the vehi-
cle when brakin gand the braking distance
may increase.
If ABS is deactivated due to amalfunction,
then BAS and ESP are also deactivated. There
is an increased risk of your vehicle skidding in
certain situations.
You shoul dalways adapt your drivin gstyle to
suit the prevailing road and weather condi-
tions.
Braking If ABS intervenes whe
nbraking, yo uwill feel
ap ulsing in the brake pedal.
X If ABS intervenes: continue to depressthe
brake pedal with force until the brakin gsit-
uation is over.
X To mak eafull brake application:
depress th ebrake peda lwith full force.
The pulsating brake pedal can be an indica-
tion of hazardous road conditions and func-
tions as areminder to take extr acare while
driving. G
WARNING
Do not depress the brake pedal several times
in quick succession (pumping). Pumping the
brake pedal reduces the braking effect .You
might otherwise not be able to stop the vehi-
cle in tim eand could cause an accident.
Depres sthe brake pedal firmly and smoothly. Driving safety systems
61Safety Z
Page 157 of 389
R
paraffin
R kerosene
Do not mix these fuels with diesel fuels and
do not use any special additives. Other-
wise, this can lead to damage to the engine.
This excludes flow improver ;see "Low out-
side temperatures".
! Use afilter when adding fuel from afuel
can. Otherwise, the fuel lines and/or the
diesel injection system could be blocked by
particles from the fuel can.
For further information on "Fuel", see
(Y page 374).
Low outsid etemperatures Diesel fuel with improved cold flow qualities
is available during the winter months. In
Europe, various climate-dependent low-tem-
peratur eclasses are defined in EN 590 .Refu-
elling with diesel fuel which complies with the
climatic specification sofstandard EN 590
can hel ptoprevent operatin gproblems. At
exceptionall ylow tempera tures, it is possible
that the flow properties of the fuel ma ybe
inadequate. This also applies to fuel that has
not been adapted to suit the climatic condi-
tions, e.g. diesel fuel from warmer regions.
i Further information about country-spe-
cific fuel properties can be obtained from
oil companies, e.g. at filling stations.
Flow improver Flow improvers can be added to improv
ethe
cold resistan ceof diesel fuel. The effective-
ness of aflow improver is not guaranteed with
every diesel fuel.
Correc tdosage and thorough mixing ar edeci-
sive factor sinensuring improvement in low-
temperature resistance. Avoid excessive dos-
age .Exce ssiv edosage ma yactuall ydecrease
low-temperature resistanc eunder certain cir-
cumstances. Follo wthe manufacturer's dos-
ing inst ructions. Mix the additive with the diese
ling ood time,
befor ethe flo wproperties of th ediesel
become inadequate. Malfunction scan other-
wise only be rectified by heating the entire
fuel system, e.g. by parking the vehicle in a
heated garage.
Observe the information provided by the man-
ufacturer when using aflow improver. Only
use flow improvers that have been tested and
approved by Mercedes-Benz. You can obtain
further information from any Mercedes-Benz
Servic eCentre. Refuelling
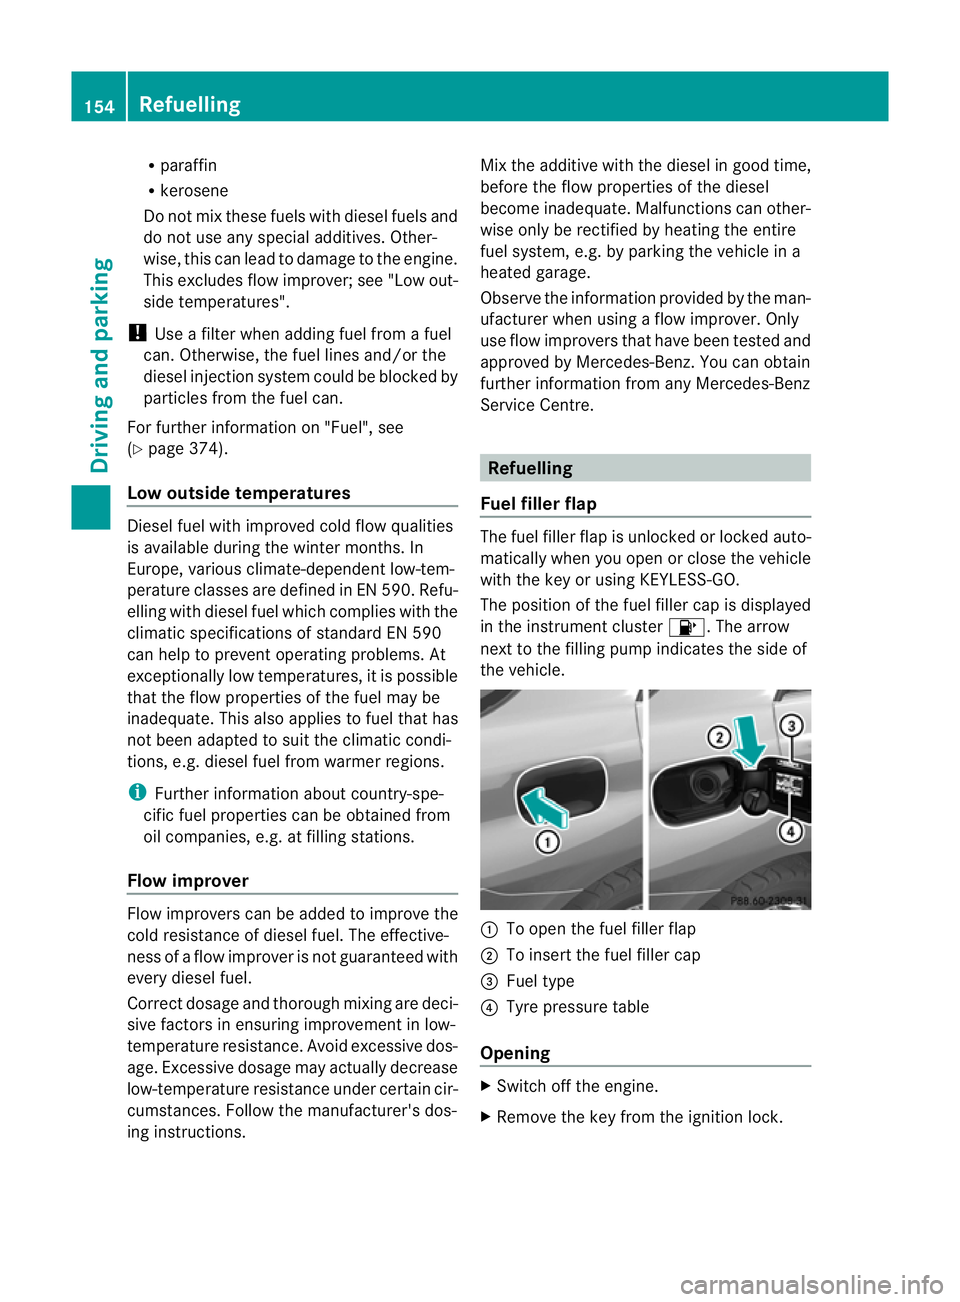
Fuel filler flap The fuel filler fla
pisunlocke dorlockedauto-
matically when you open or close the vehicle
with the key or using KEYLESS-GO.
The position of the fuel filler cap is displayed
in the instrument cluster 8.The arrow
nex ttot he filling pum pindicate sthe side of
the vehicle. :
To open the fuel filler flap
; To inser tthe fuel filler cap
= Fue ltype
? Tyre pressure table
Opening X
Switch off the engine.
X Remove the key from the ignitio nlock. 154
RefuellingDriving and parking
Page 170 of 389
safety reasons, get out of the vehicle first
and survey the off-road route.
R chec kthe depth of water before fording
river sand streams.
R loo kout for obstacle ssuch as rocks, holes,
tree stumps and furrows.
R take care when turning on an uphil lor
downhill slope and when turning at sharp
angles. The vehicle could otherwise tip
over.
R always keep the side windows and the pan-
oram asliding sunroof closed during the
journey.
R do not stray from marked routes or paths.
i Information abou tretrofitting special all-
ter rain tyres is available from any
Mercedes-Benz Service Centre. H
Environmental note
Protection of the environmen tisofprimary
importance .Trea tnature with respect.
Observe all prohibiting signs.
Checklist before drivin goff-road X
Engine oi llevel: checkthe engin eoil and
top it up if necessary.
When drivin gonsteep gradients, the oil
level must be sufficiently hig htoensure a
correct oil supply in the vehicle.
X AdBlue ®
tank (BlueTEC vehicl es):check
the fluid leve land, if necessary, refill to the
maximum (13 l) (Y page157).
X Tyre-chang etool kit: check that the jack
is working and make sure you have the
wheelbrace, arobust tow cabl eand afold-
ing spade in the vehicle.
X Wheels and tyres: checkthe tyr etread
depth and tyre pressure.
X Check for damag eand remove any foreign
objects, e.g. small stones, from the
wheels/tyres.
X Repl acea ny missing valve caps. X
Repl aced ented or damaged wheels.
X Wheels: dented or bent wheels can lead to
al oss of tyr epressure and damag etot he
tyr eb ead. Before driving off-road, check
the wheels and replace them if necessary.
Checklist after driving off-road !
If you detect damage to the vehicle after
driving off-road, have the vehicle checked
immediately at aqualified specialist work-
shop.
Driving over rough terrain places greater
demands on your vehicle than driving on nor-
mal roads. After driving off-road, check the
vehicle. This allow syou to detec tdamage
promptly and reduce the risk of an accident
to yourself and other road users.
X Vehicles with the ON&OFFROAD pack-
age: activate the on-road program
(Y page 222).
X Vehicles without the ON&OFFROAD
package: deactivate the on-road program
(Y page 222).
X Deactivate the LOW RANGE off-road gear
(Y page 223).
X Deactivate DSR (Y page 220).
X Lower the vehicle level again to alevel suit-
able to the road conditions, e.g. to the high-
way/high-speed level.
X Clean the headlamps and rear lights and
check for damage.
X Clean the front and rear licence plates.
X Clean the wheels/tyres with awater jet and
remove any foreign objects.
X Clea nthe wheels, wheel arches and the
vehicle underside with awater jet; check
for any foreign objects and damage.
X Check whethe rtwigs or other parts of
plants have become trapped. These
increase the risk of fire and can damage
fuel pipes, brake hose sorthe rubber bel-
lows of the axl ejoint sand propeller shafts.
X After the trip, examine without fail the
entire undercarriage, wheels ,tyres, brakes, Driving tips
167Drivingand park ing Z
Page 177 of 389
X
Release the cruise con trol lever.
The ne wspeed is stored.
X Makin gadjustments in1k m/ hincre-
ments: brieflypress the cruis econtrol
lever to the pressurepoint.
The last store dspeed increase sordecrea-
ses in 1km/ hincre ments.
X Mak ing adjustment sin10km/hincre-
ments: brieflypress the cruis econtrol
lever beyon dthe pressur epoint.
The last store dspeed increase sordecrea-
ses in 10 km/h increments.
Deactivating variabl eSPEED TRONIC G
WARNING
It is not possible to deactivate variable Speed-
tronic by braking.
There are severa lways to deactivate variable
SPEEDTRONIC:
X Briefly press the cruise control lever for-
wards B.
or
X Briefly press the cruise control lever in the
direction of arrow A.
LIM indicator lamp ;in the cruise control
lever goes out. Variable SPEEDTRONIC is
deactivated.
Cruise control or DISTRONIC PLUS is selec-
ted.
Variable SPEEDTRONIC is automatically
deactivated if:
R you depress the accelerator pedal beyond
the pressure point (kickdown), but only if
your current spee ddoes not differ by more
than 20 km /h from the stored speed. You
will hear awarning tone if this is the case.
R you activate DSR.
R you activate off-road program 2(vehicles
wit hthe ON&OFFROAD package).
i When you switch off the engine, the last
speed stored is cleared. Permane
nt SPEEDTRONIC You can use the on-board computer to limit
the speed permanently to
avalue between
16 0k m/ h(e.g. for driving on winter tyres)
and th emaximum speed ( Ypage 249).
Shor tlyb efore th estore dspeed is reached, it
appear sinthe multifunction display.
Permanent SPEEDTRONIC remain sactive,
even if variabl eSPEEDTRONI Cisdeactivated.
You can note xceed the sto redl imit speed,
even if you depress the accelerator pedal
beyond the pressure point (kickdown). DISTRONIC PLUS
Importan tsafety notes G
WARNING
Do not change down for additiona lengine
braking on aslippery road surface. This could
cause the drive wheels to lose their grip and
the vehicle could skid. G
WARNING
DISTRONIC PLU Siso nly an aid designe dto
assis tdriving. Th edrive rremain sfully respon-
sible for the vehicle's distance from other
vehicles, the vehicle's spee dand for braking
in goo dtime.
DISTRONIC PLU Sdoes not react in particular
to:
R pedestrians
R stationar yobstacles on the road, e.g. stop-
ped or parked vehicles
R oncoming and crossin gtraffic
DISTRONIC PLUS may not detect narrow vehi-
cle sdriving in front, e.g .motorcycles, or vehi-
cles driving on adifferen tline. Therefore,
always pay attention to traffic condition seven
when DISTRO NICP LUS is activated. Other-
wise ,you may fai ltorecognise danger sin
time, cause an accident and injure yourself
and others. 174
Drivin
gsystemsDrivin gand parking
Page 198 of 389
procedure is calculated, e. g. overhanging
loads, tail sections or loading ramps of goods
vehicles. In some cir
cumstances, Active Park-
ing Assist may therefore guide you into the
parking space too early. Thi smay lead to a
collision. For this reason, you shoul davoid
using Active Parking Assist in such situatio ns.G
WARNING
Th ef ront of th evehicle will veer out in the
direc tion of the oncomin gtraffic during the
parking operatio n. Insome cases the vehicle
will also take you onto section softhe oncom-
ing lan eduring the parking procedure.
You are responsible for safety at all times and
must pay attention to any road users
approaching or passing. Stop the vehicle if
necessary or cancel the Active Parking Assist
parking procedure. G
WARNING
Make sure that no persons or animals are in
the manoeuvring range. Otherwise, they
could be injured.
Use Active Parking Assis tfor parkin gspaces:
R that are parallel to the direction of travel
R that are on straight roads, not bends
R that are on the same level as the road, e.g.
not on the pavement
Parking tips:
R on narrow roads, driv easclosely as possi-
ble past the parkin gspace.
R parking spaces that are littered, overgrown
or partially occupied by trailer drawbars
might be identified incor rectly or not at all.
R snowfall or heavy rain may lea dtoap arking
space being measured inaccurately.
R pay attention to the PARKTRONIC
(Y page 192 )warning message sduring the
parking procedure.
R you can intervene in the steering procedure
to correc titatany time. Active Parking
Assist will then be cancelled. R
whe ntransporting aload which protrudes
from your vehicle, you should not use
Active Parkin gAssist.
R never use Ac tive Parkin gAssist when snow
chains or an emergenc yspare wheel are
fit ted.
R mak esure that the tyre pressures are
always correct. This has adirec tinfluence
on the parking characteristics of the vehi-
cle.
R the wa yyourv ehicle is positioned in the
parking space after parking is dependent
on various factor s. Theseinclude the posi-
tion and shape of the vehicles parked in
front and behind it and the conditions of the
location. In some cases, Active Parking
Assist may guid eyou too far int oaparking
space, or not far enough into it. In some
cases, it may also lead you across or onto
the kerb. If necessary, you should abort the
parking procedure with Active Parking
Assist.
R you can also engage forward gear prema-
turely. The vehicle redirects and does not
drive as far into the parking space. Should
ag ear be changed too earl ytoa chieve a
sensible parkin gposition ,the parkin gpro-
cedure wil lbeaborted.
! If unavoidable, you should driv eover
obstacles such as kerb sslowly and not at
as har pangle .Otherwise, you may damage
the wheels or tyres.
Detectin gparking spaces Active Parking Assis
tiss witched on automat-
ically when driving forwards. The system is
operational at speed sofuptoa pproximately
35 km/h. While in operation, the system inde-
pendently locates and measures parking
spaces on both sides of the vehicle. When
driving at speeds below 30 km/ h,you will see
the parking symbol as astatus indicato rinthe
instrumen tcluster. Activ eParking Assist only
displays parking spaces on the front-
passe nger side as standar d.Parking spaces
on the driver' sside are displayed as soon as Driving systems
195Drivingand parking Z
Page 218 of 389
R
the Off-roa dprogra misa ctivate d(vehicles
without th eON&OFFROAD package).
R Off-road progra m1or2isactivated(vehi-
cle sw ith the ON&OFFROAD package).
R the LOW RANGE off-road gear is activated
(vehicles with the ON&OFFROAD package).
R al oss of tyr epressure or adefectiv etyre is
detected.
Activating Active Blind Spot Assist
X On vehicles without anavigation system,
make sure that the Becker ®
MAP PILOT is
connected; see the separate operating
instructions for Audio 20.
X Make sure that the radar senso rsystem
(Y page 249) and Active Blind Spot Assist
(Y page 245) are activated in the on-board
computer.
X Turn the key to position 2in the ignition
lock.
Warning lamps :ligh tupr ed in the exte-
rior mirror sfor approximately 1. 5seconds
and then tur nyellow.
Trailer towing
If you attach atrailer, make sure that yo uhave
correctly established the electrical connec-
tion. This can be accomplished by checking
the trailer lighting .Active Blind Spo tAssist is
then deactivated. The indicator lam plights up
yellow in the exterior mirrors and the ActiveBlind Spot Assist currently unavail‐
able Se
eOwner's Manual message
appe arsint he multifunction display.
Active Lan eKeeping Assist Import
ants afety notes
Active Lane Keeping Assis tmonitors the area
in front of your vehicle by means of acamera
at the top of the windscreen. Active Lane
Keeping Assis tdetect slane markings on the
road and warns you before you leave your
lane unintentionally .Ifyou do not react to the
warning, alane-correcting application of the
brakes can bring the vehicle back into the
original lane. :
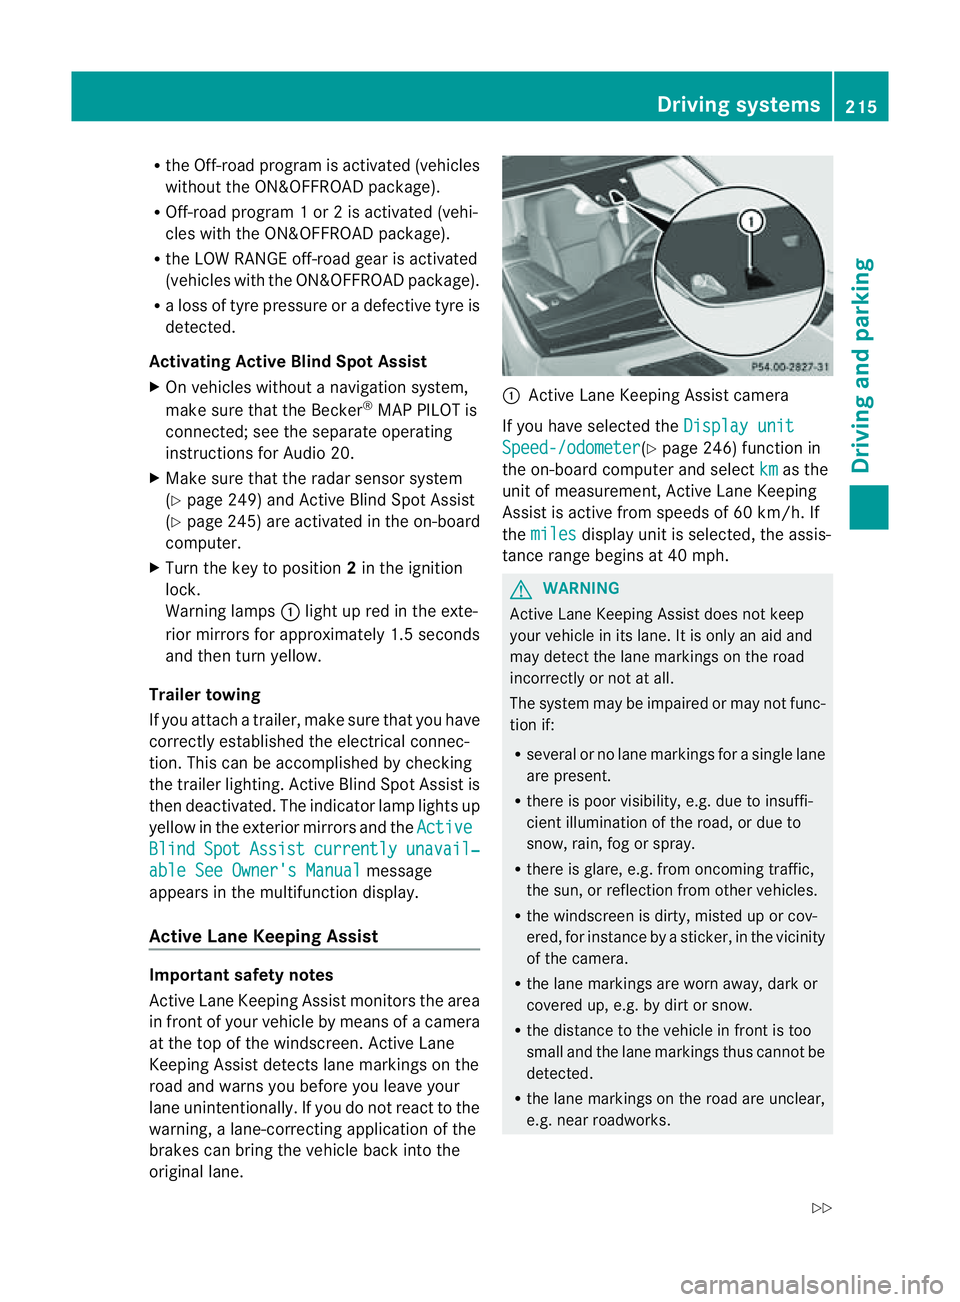
Active Lane Keeping Assis tcamera
If you have selected the Displayunit Speed-/odometer (Y
page 246) function in
th eo n-board compute rand select km as the
unit of measurement, Active Lane Keeping
Assist is active from speeds of 60 km/h. If
the miles display unit is selected
,the assis-
tan ce ra nge begins at 40 mph. G
WARNING
Active Lane Keeping Assist doe snot keep
your vehicle in its lane. It is only an aid and
may detec tthe lan emarkings on the road
incorrectly or not at all.
The system may be impaired or may not func-
tion if:
R several or no lane markings for asingle lane
are present.
R there is poor visibility, e.g. due to insuffi-
cient illumination of the road, or due to
snow, rain, fog or spray.
R there is glare, e.g. from oncoming traffic,
the sun, or reflec tion from other vehicles.
R the windscreen is dirty, misted up or cov-
ered, for insta ncebyasticker, in the vicinity
of the camera.
R the lane markings are worn away ,dark or
covered up, e.g. by dirt or snow.
R the distance to the vehicle in front is too
small and the lane markings thus cannot be
detected.
R the lane markings on the road are unclear,
e.g. near roadworks. Driving systems
215Drivingand park ing
Z