lock MERCEDES-BENZ M320 2000 W163 Workshop Manual
[x] Cancel search | Manufacturer: MERCEDES-BENZ, Model Year: 2000, Model line: M320, Model: MERCEDES-BENZ M320 2000 W163Pages: 317, PDF Size: 10.4 MB
Page 109 of 317
106 Interior equipment
Te ch n ica l
data Instruments
and controlsOperationDrivingInstrument
cluster displayPractical hints Car care Index
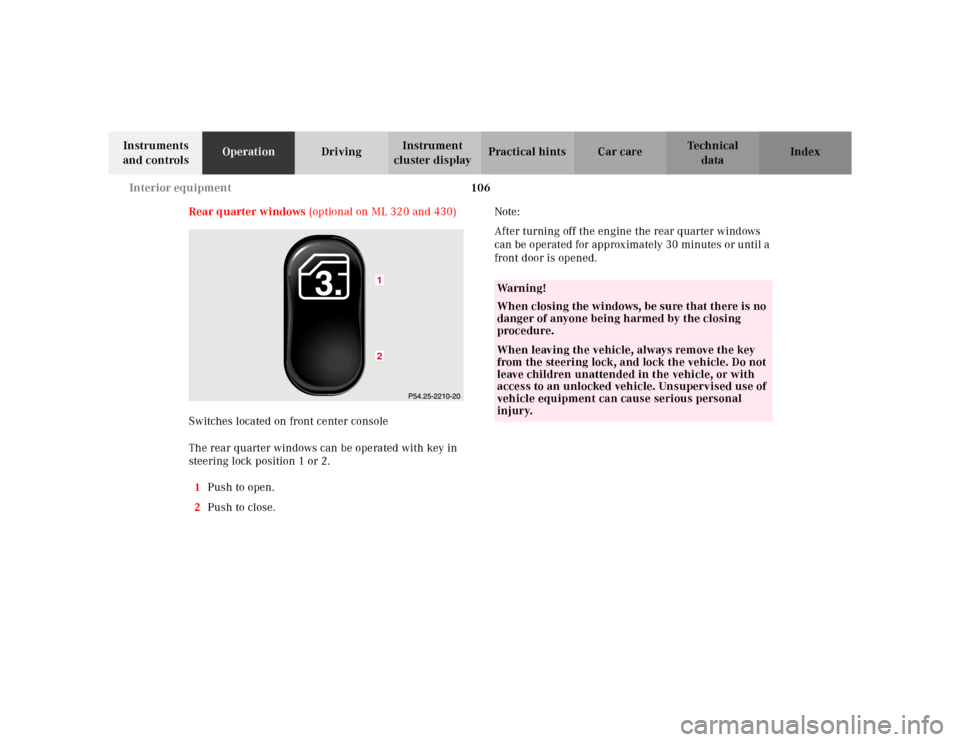
Rear quarter windows (optional on ML 320 and 430)
Switches located on front center console
The rear quarter windows can be operated with key in
steering lock position 1 or 2.
1Push to open.
2Push to close.Note:
After turning off the engine the rear quarter windows
can be operated for approximately 30 minutes or until a
front door is opened.
12
Wa r n i n g !
When closing the windows, be sure that there is no
danger of anyone being harmed by the closing
procedure.When leaving the vehicle, always remove the key
from the steering lock, and lock the vehicle. Do not
leave children unattended in the vehicle, or with
access to an unlocked vehicle. Unsupervised use of
vehicle equipment can cause serious personal
injury.
Page 110 of 317
107 Interior equipment
Te ch n ica l
data Instruments
and controlsOperationDrivingInstrument
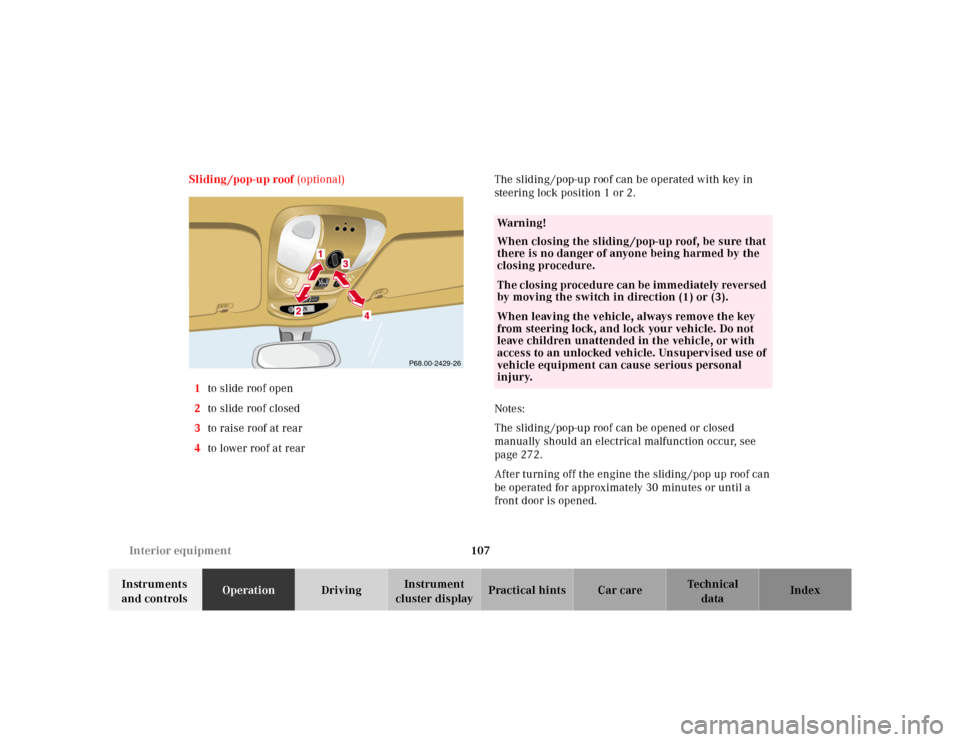
cluster displayPractical hints Car care Index Sliding /pop-up roof (optional)
1to slide roof open
2to slide roof closed
3to raise roof at rear
4to lower roof at rearThe sliding /pop-up roof can be operated with key in
steering lock position 1 or 2.
Notes:
The sliding /pop-up roof can be opened or closed
manually should an electrical malfunction occur, see
page 272.
After turning off the engine the sliding /pop up roof can
be operated for approximately 30 minutes or until a
front door is opened.
RESETMODE
P68.00-2429-26
Wa r n i n g !
When closing the sliding /pop-up roof, be sure that
there is no danger of anyone being harmed by the
closing procedure.The closing procedure can be immediately reversed
by moving the switch in direction (1) or (3).When leaving the vehicle, always remove the key
from steering lock, and lock your vehicle. Do not
leave children unattended in the vehicle, or with
access to an unlocked vehicle. Unsupervised use of
vehicle equipment can cause serious personal
injury.
Page 112 of 317
109 Interior equipment
Te ch n ica l
data Instruments
and controlsOperationDrivingInstrument
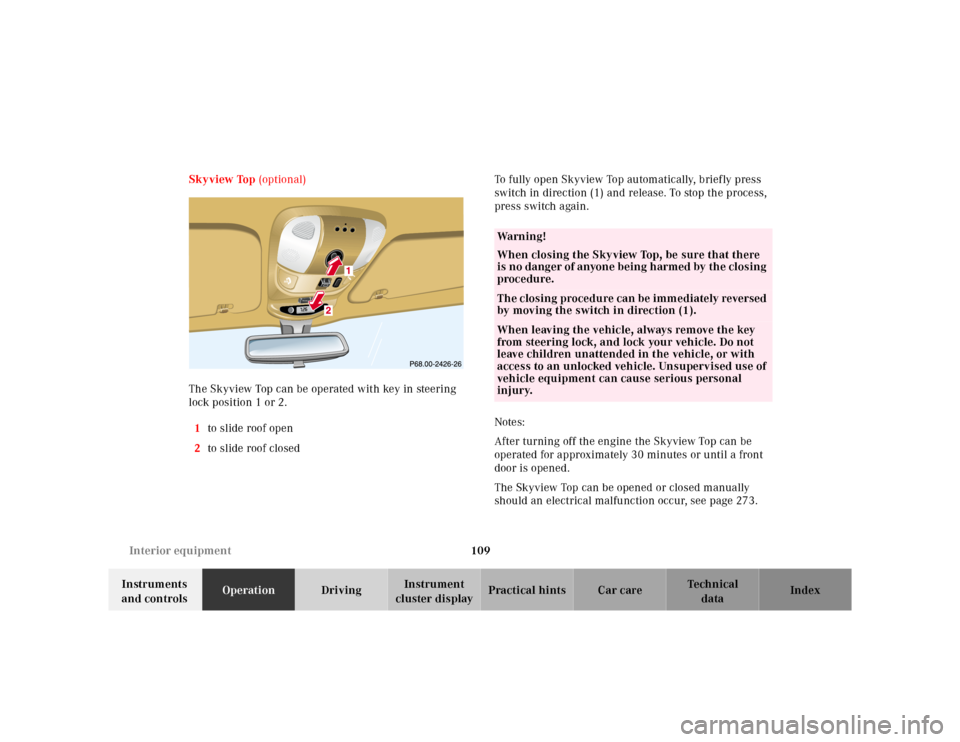
cluster displayPractical hints Car care Index Skyview Top (optional)
The Skyview Top can be operated with key in steering
lock position 1 or 2.
1to slide roof open
2to slide roof closedTo fully open Skyview Top automatically, brief ly press
switch in direction (1) and release. To stop the process,
press switch again.
Notes:
After turning off the engine the Skyview Top can be
operated for approximately 30 minutes or until a front
door is opened.
The Skyview Top can be opened or closed manually
should an electrical malfunction occur, see page 273.
RESETMODE
Wa r n i n g !
When closing the Skyview Top, be sure that there
is no danger of anyone being h armed by th e closing
procedure.The closing procedure can be immediately reversed
by moving the switch in direction (1).When leaving the vehicle, always remove the key
from steering lock, and lock your vehicle. Do not
leave children unattended in the vehicle, or with
access to an unlocked vehicle. Unsupervised use of
vehicle equipment can cause serious personal
injury.
Page 113 of 317
110 Interior equipment
Te ch n ica l
data Instruments
and controlsOperationDrivingInstrument
cluster displayPractical hints Car care Index
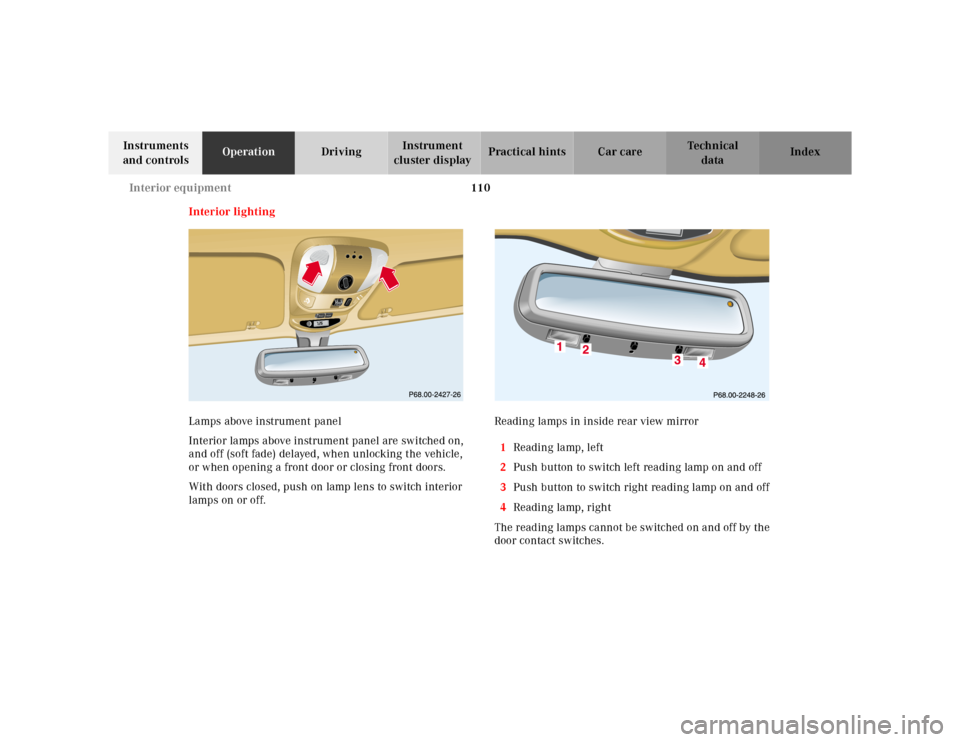
Interior lighting
Lamps above instrument panel
Interior lamps above instrument panel are switched on,
and off (soft fade) delayed, when unlocking the vehicle,
or when opening a front door or closing front doors.
With doors closed, push on lamp lens to switch interior
lamps on or off.Reading lamps in inside rear view mirror
1Reading lamp, left
2Push button to switch left reading lamp on and off
3Push button to switch right reading lamp on and off
4Reading lamp, right
The reading lamps cannot be switched on and off by the
door contact switches.
RESETMODE
Page 116 of 317
113 Interior equipment
Te ch n ica l
data Instruments
and controlsOperationDrivingInstrument
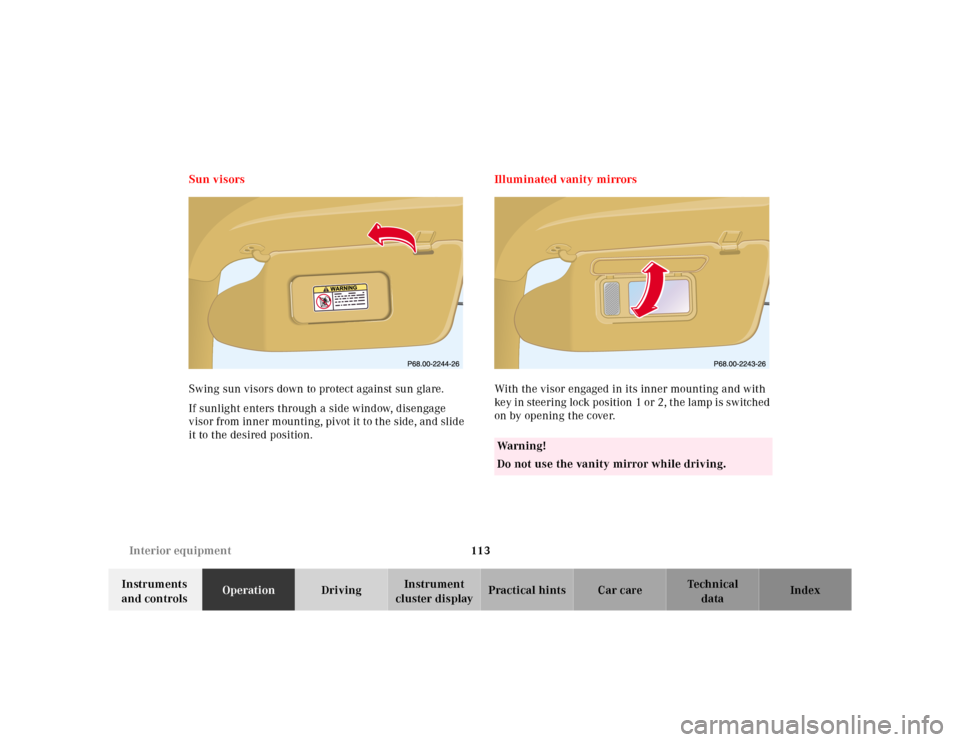
cluster displayPractical hints Car care Index Sun visors
Swing sun visors down to protect against sun glare.
If sunlight enters through a side window, disengage
visor from inner mounting, pivot it to the side, and slide
it to the desired position.Illuminated vanity mirrors
With the visor engaged in its inner mounting and with
key in steering lock position 1 or 2, the lamp is switched
on by opening the cover.
Wa r n i n g !
Do not use the vanity mirror while driving.
Page 118 of 317
115 Interior equipment
Te ch n ica l
data Instruments
and controlsOperationDrivingInstrument
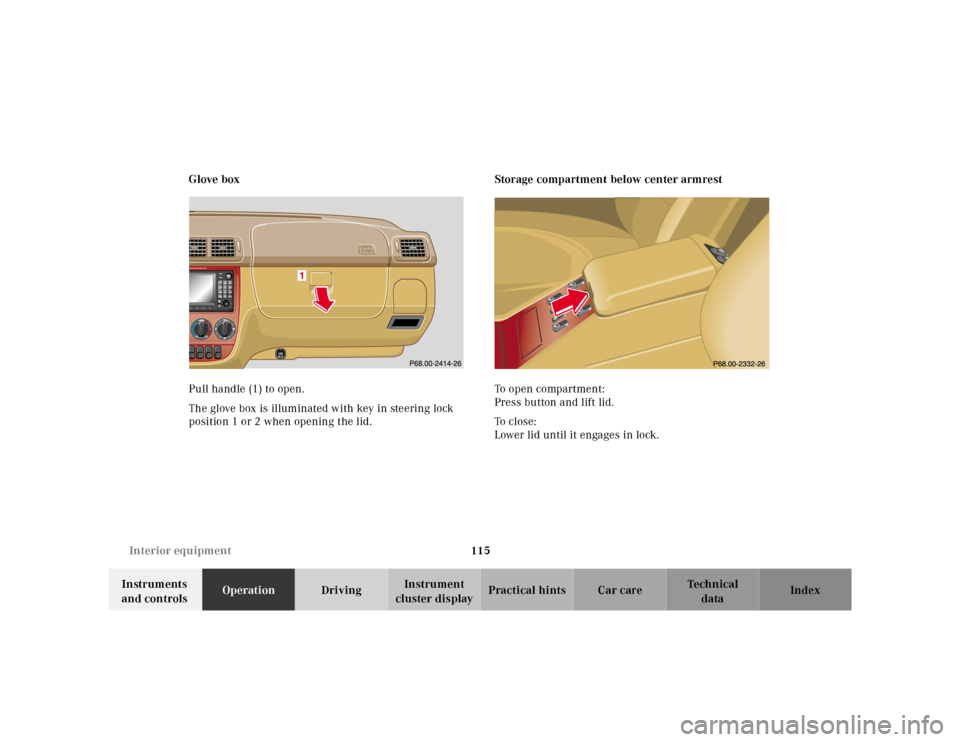
cluster displayPractical hints Car care Index Glove box
Pull handle (1) to open.
The glove box is illuminated with key in steering lock
position 1 or 2 when opening the lid.Storage compartment below center armrest
To open compartment:
Press button and lift lid.
To c l o s e :
Lower lid until it engages in lock.
Page 119 of 317
116 Interior equipment
Te ch n ica l
data Instruments
and controlsOperationDrivingInstrument
cluster displayPractical hints Car care Index
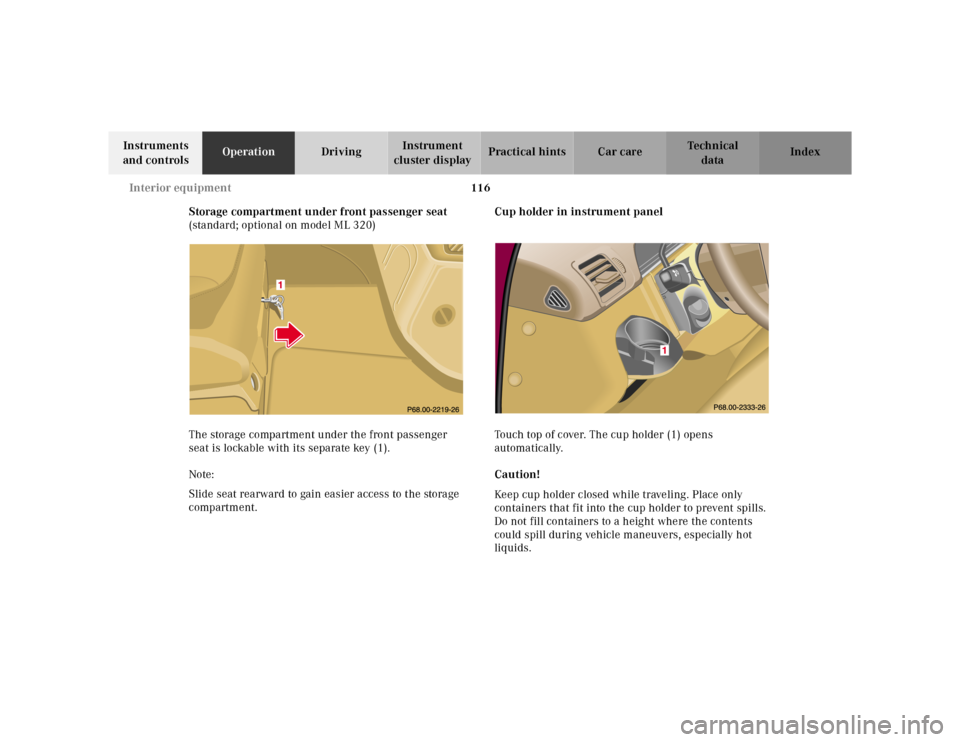
Storage compartment under front passenger seat
(standard; optional on model ML 320)
The storage compartment under the front passenger
seat is lockable with its separate key (1).
Note:
Slide seat rearward to gain easier access to the storage
compartment.Cup holder in instrument panel
Touch top of cover. The cup holder (1) opens
automatically.
Caution!
Keep cup holder closed while traveling. Place only
containers that fit into the cup holder to prevent spills.
Do not fill containers to a height where the contents
could spill during vehicle maneuvers, especially hot
liquids.
Page 122 of 317
119 Interior equipment
Te ch n ica l
data Instruments
and controlsOperationDrivingInstrument
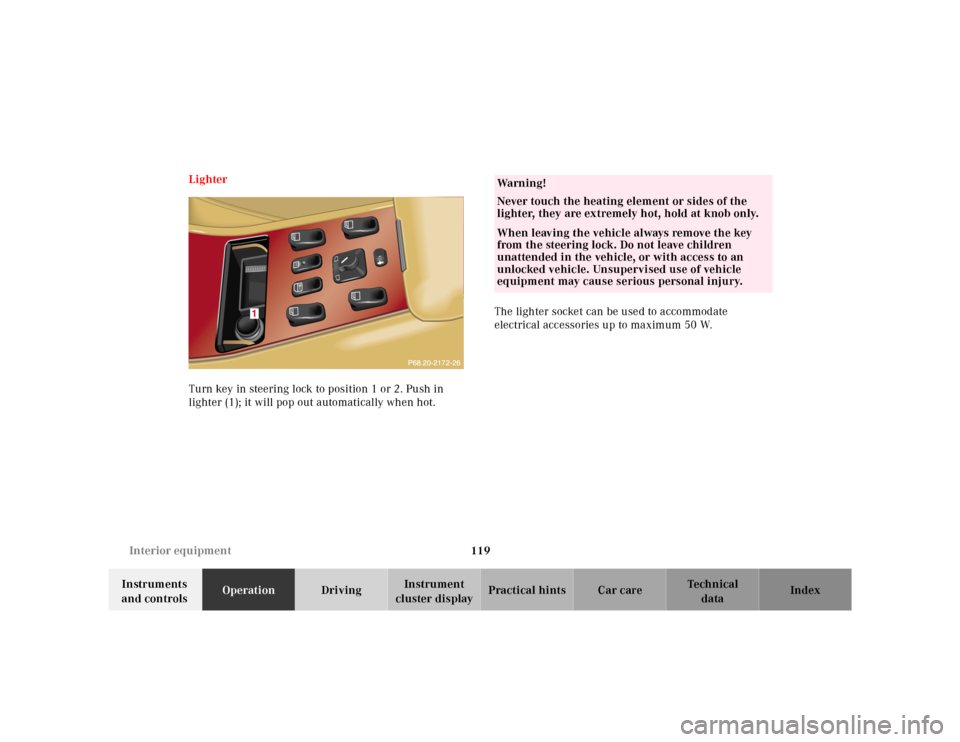
cluster displayPractical hints Car care Index Lighter
Turn key in steering lock to position 1 or 2. Push in
lighter (1); it will pop out automatically when hot.The lighter socket can be used to accommodate
electrical accessories up to maximum 50 W.
Wa r n i n g !
Never touch the heating element or sides of the
lighter, they are extremely hot, hold at knob only.When leaving the vehicle always remove the key
from the steering lock. Do not leave children
unattended in the vehicle, or with access to an
unlocked vehicle. Unsupervised use of vehicle
equipment may cause serious personal injury.
Page 123 of 317
120 Interior equipment
Te ch n ica l
data Instruments
and controlsOperationDrivingInstrument
cluster displayPractical hints Car care Index
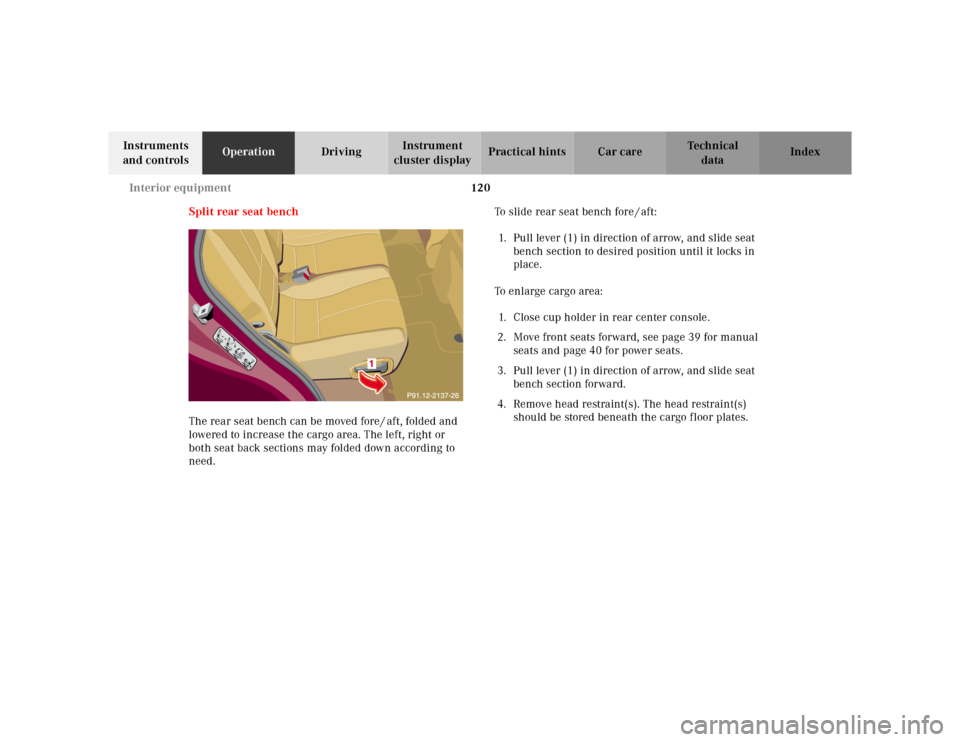
Split rear seat bench
The rear seat bench can be moved fore / aft, folded and
lowered to increase the cargo area. The left, right or
both seat back sections may folded down according to
need.To slide rear seat bench fore / aft:
1. Pull lever (1) in direction of arrow, and slide seat
bench section to desired position until it locks in
place.
To enlarge cargo area:
1. Close cup holder in rear center console.
2. Move front seats forward, see page 39 for manual
seats and page 40 for power seats.
3. Pull lever (1) in direction of arrow, and slide seat
bench section forward.
4. Remove head restraint(s). The head restraint(s)
should be stored beneath the cargo f loor plates.
Page 124 of 317
121 Interior equipment
Te ch n ica l
data Instruments
and controlsOperationDrivingInstrument
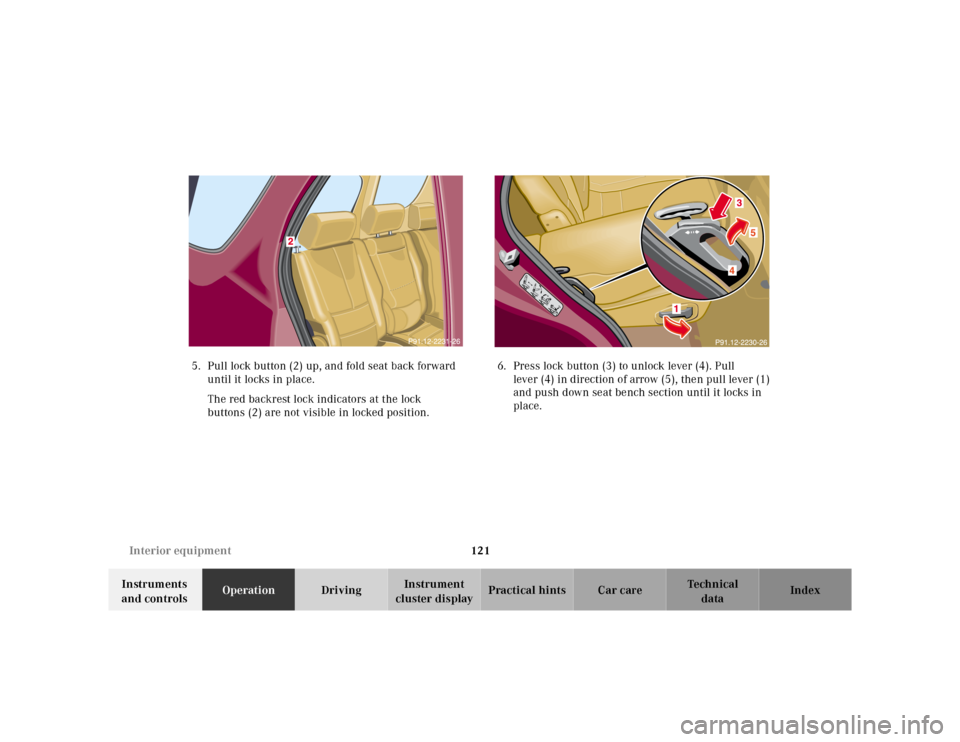
cluster displayPractical hints Car care Index 5. Pull lock button (2) up, and fold seat back forward
until it locks in place.
The red backrest lock indicators at the lock
buttons (2) are not visible in locked position.6. Press lock button (3) to unlock lever (4). Pull
lever (4) in direction of arrow (5), then pull lever (1)
and push down seat bench section until it locks in
place.