reset MERCEDES-BENZ METRIS 2016 MY16 Operator’s Manual
[x] Cancel search | Manufacturer: MERCEDES-BENZ, Model Year: 2016, Model line: METRIS, Model: MERCEDES-BENZ METRIS 2016Pages: 310, PDF Size: 7.28 MB
Page 173 of 310
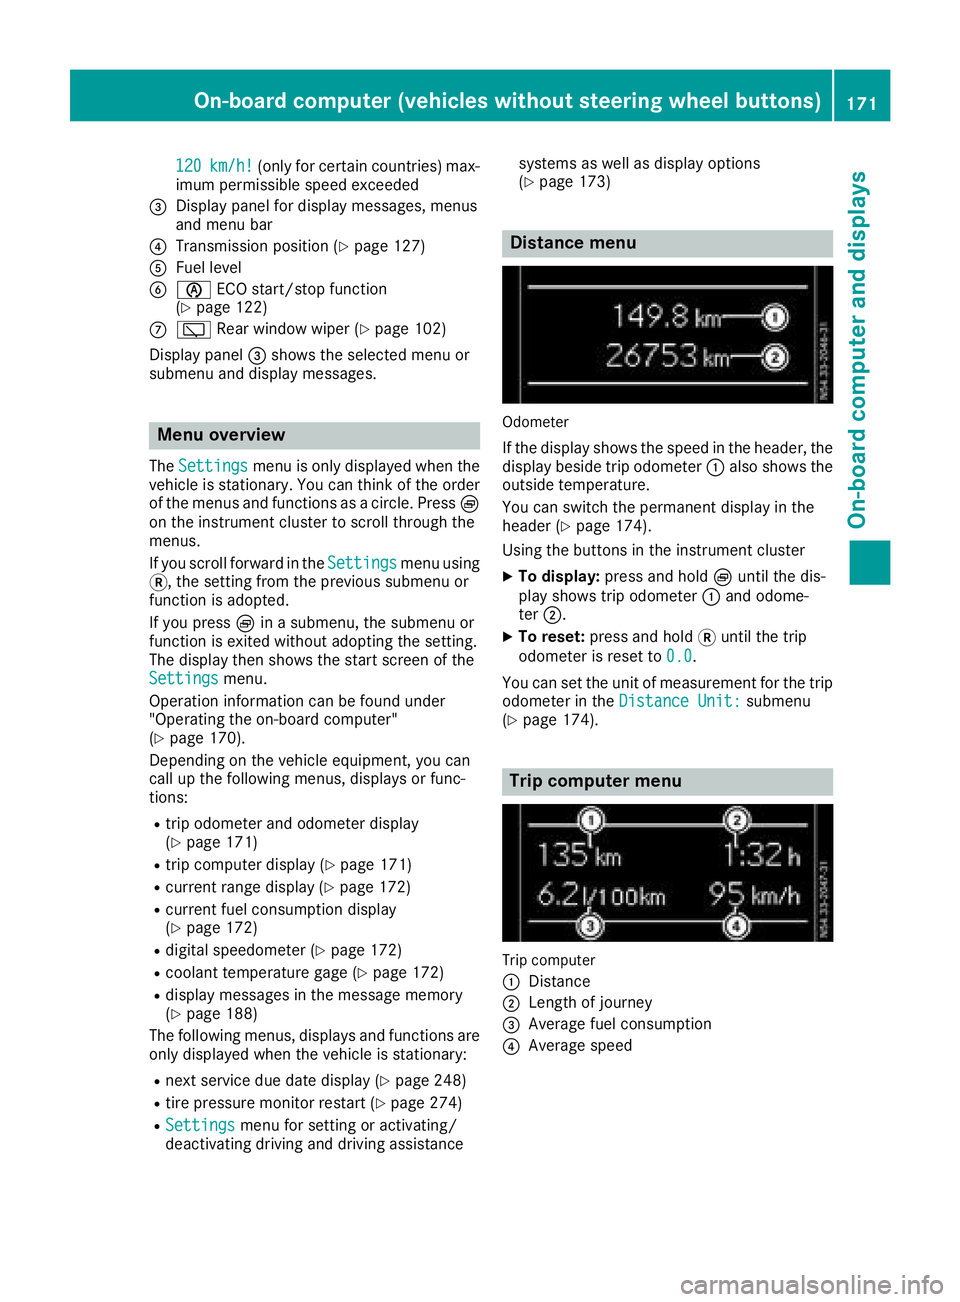
120km/h!(only for certain countries) max-
imum permissibles peed exceeded
=Display panel for displaym essages, menus
and menu bar
?Transmission position (Ypage 127)
AFuel level
Bè ECO start/stop function
(Ypage 122)
Cè Rear window wiper (Ypage 102)
Display panel =shows the selected menu or
submenu and displaym essages.
Menu overview
TheSettingsmenu is only displayed when the
vehicle is stationary. You can think of the order
of the menus and functions as acircle. Press È
on the instrument cluster to scroll through the
menus.
If you scroll forward in the Settings
menu using
3,t he setting from the previous submenu or
function is adopted.
If you press Èinas ubmenu, the submenu or
function is exited without adopting the setting.
The displayt hen shows the start screen of the
Settings
menu.
Operation information can be found under
"Operating the on-board computer"
(
Ypage 170).
Depending on the vehicle equipment, you can
call up the following menus, displays or func-
tions:
Rtrip odometer and odometer display
(Ypage 171)
Rtrip computer display(Ypage 171)
Rcurrent range display(Ypage 172)
Rcurrent fuel consumption display
(Ypage 172)
Rdigital speedometer (Ypage 172)
Rcoolant temperature gage (Ypage 172)
Rdisplaym essages in the message memory
(Ypage 188)
The following menus, displays and functions are only displayed when the vehicle is stationary:
Rnext service due date display(Ypage 248)
Rtire pressure monitor restart (Ypage 274)
RSettingsmenu for setting or activating/
deactivating driving and driving assistance systems as well as displayo
ptions
(
Ypage 173)
Distance menu
Odometer
If the displays hows the speed in the header, the
displayb eside trip odometer :also shows the
outside temperature.
You can switch the permanent displayint he
header (
Ypage 174).
Using the buttons in the instrument cluster
XTo display: press and hold Èuntil the dis-
play shows trip odometer :and odome-
ter ;.
XTo reset: press and hold 3until the trip
odometer is reset to 0.0
.
You can set the unit of measurement for the trip
odometer in the Distance Unit:
submenu
(Ypage 174).
Trip computer menu
Trip computer
:
Distance
;Length of journey
=Average fuel consumption
?Average speed
On-board computer (vehicles without steering wheelb uttons)171
On-board computer and displays
Z
Page 174 of 310
Use the buttons in the instrument cluster.
XTo display:pressÈto select the trip com-
puter display.
The valuesd isplayed relate to those meas-
ured since the trip computer was last reset.
XTo reset values: press and hold3until all
valuesa re reset.
The trip computer is automaticallyr eset if the
value exceeds 9,999 hours or 99,999 miles.
You can set the unit of measurement for con-
sumption and distance in the Distance Unit:
submenu (Ypage 174).
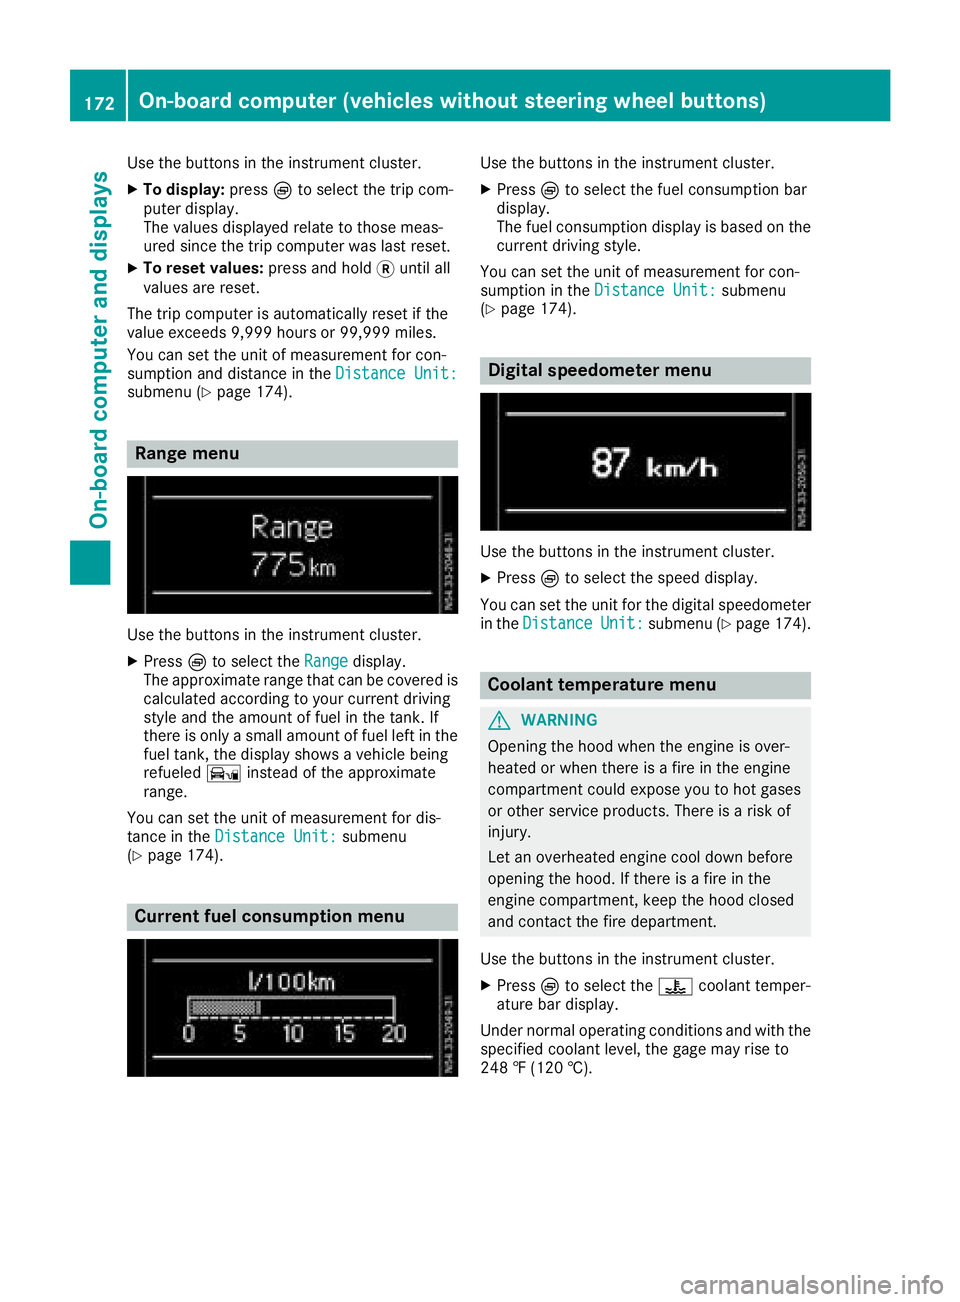
Range menu
Use the buttons in the instrument cluster.
XPressÈto select the Rangedisplay.
The approximate range that can be covered is calculated according to your current driving
style and the amount of fuel in the tank. If
there is only asmall amount of fuel left in the
fuel tank, the displays howsavehicle being
refueled Ïinstead of the approximate
range.
You can set the unit of measurement for dis-
tance in the Distance Unit:
submenu
(Ypage 174).
Current fuel consumption menu
Use the buttons in the instrument cluster.
XPress Èto select the fuel consumption bar
display.
The fuel consumption displayisb ased on the
current driving style.
You can set the unit of measurement for con-
sumption in the Distance Unit:
submenu
(Ypage 174).
Digital speedometer menu
Use the buttons in the instrument cluster.
XPress Èto select the speed display.
You can set the unit for the digital speedometer
in the Distance
Unit:submenu (Ypage 174).
Coolant temperaturem enu
GWARNING
Opening the hood when the engine is over-
heated or when there is afire in the engine
compartment could expose you to hot gases
or other service products. There is arisk of
injury.
Let an overheated engine cool down before
opening the hood. If there is afire in the
engine compartment,k eep the hood closed
and contact the fire department.
Use the buttons in the instrument cluster.
XPress Èto select the ?coolant temper-
ature bar display.
Under normal operating conditions and with the
specified coolant level, the gage may rise to
248 ‡(120 †).
172On-board computer (vehicles without steering wheelb uttons)
On-board computer and displays
Page 175 of 310
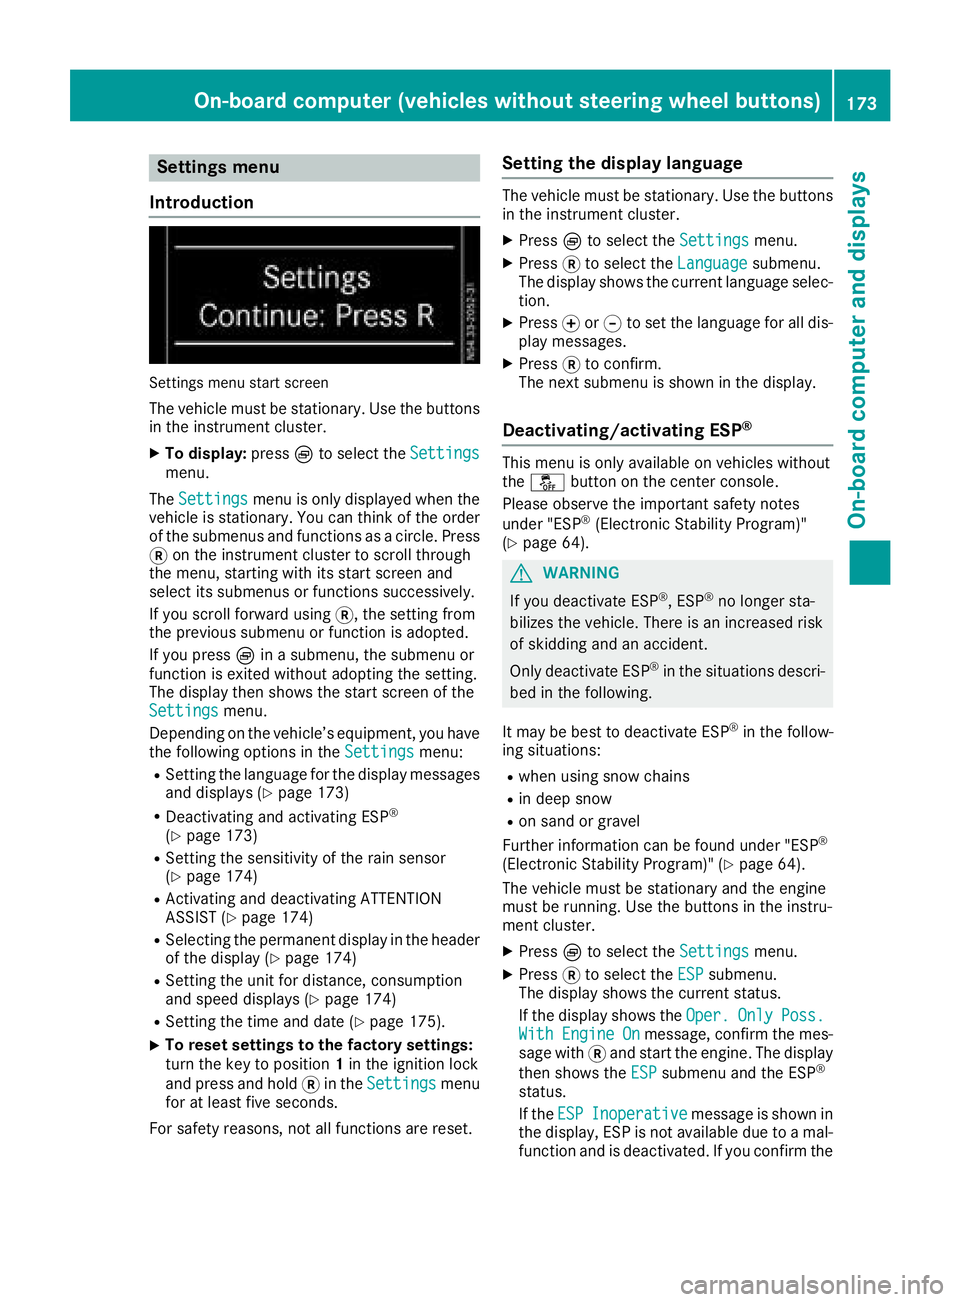
Settings menu
Introduction
Settings menu start screen
The vehicle must be stationary. Use the buttons
in the instrumentc luster.
XTo display:pressÈto select the Settingsmenu.
The Settings
menu is only displayed when the
vehicle is stationary. You can think of the order
of the submenus and functions as acircle. Press
3 on the instrumentc luster to scroll through
the menu, startin gwith its start screen and
select its submenus or functions successively.
If you scroll forward using 3,the settingf rom
the previous submenu or function is adopted.
If you press Èinas ubmenu, the submenu or
function is exited without adopting the setting.
The display then shows the start screen of the
Settings
menu.
Depending on the vehicle’s equipment, you have the following options in the Settings
menu:
RSetting the language for the display messages
and displays(Ypage 173)
RDeactivating and activating ESP®
(Ypage 173)
RSetting the sensitivity of the rain sensor
(Ypage 174)
RActivating and deactivating ATTENTION
ASSIST (Ypage 174)
RSelectingthe permanent display in the header
of the display (Ypage 174)
RSetting the unit for distance, consumption
and speed displays(Ypage 174)
RSetting the time and date (Ypage 175).
XTo reset settings to the factory settings:
turn the key to position 1in the ignition lock
and press and hold 3in the Settings
menu
for at least five seconds.
For safety reasons, not all functions are reset.
Setting the display language
The vehicle must be stationary. Use the buttons
in the instrumentc luster.
XPressÈto select the Settingsmenu.
XPress3to select the Languagesubmenu.
The display shows the current language selec- tion.
XPress forg to set the language for all dis-
play messages.
XPress 3to confirm.
The next submenu is shown in the display.
Deactivating/activating ESP®
This menu is only available on vehicles without
the å button on the center console.
Please observe the important safety notes
under "ESP
®(Electronic Stability Program)"
(Ypage 64).
GWARNING
If you deactivate ESP
®,E SP®no longer sta-
bilizes the vehicle. There is an increased risk
of skidding and an accident.
Only deactivate ESP
®in the situations descri-
bed in the following.
It may be best to deactivate ESP
®in the follow-
ing situations:
Rwhen using snow chains
Rin deep snow
Ron sand or gravel
Further information can be found under "ESP®
(Electronic Stability Program)" (Ypage 64).
The vehicle must be stationary and the engine
must be running. Use the buttons in the instru-
ment cluster.
XPress Èto select the Settingsmenu.
XPress3to select the ESPsubmenu.
The display shows the current status.
If the display shows the Oper.
OnlyPoss.WithEngineOnmessage, confirm the mes-
sage with 3and start the engine. The display
then shows the ESP
submenu and the ESP®
status.
If theESP
Inoperativemessage is shown in
the display,E SP is not available due to amal-
function and is deactivated. If you confirm the
On-board computer (vehicles without steering wheel buttons)173
On-board computer and displays
Z
Page 180 of 310
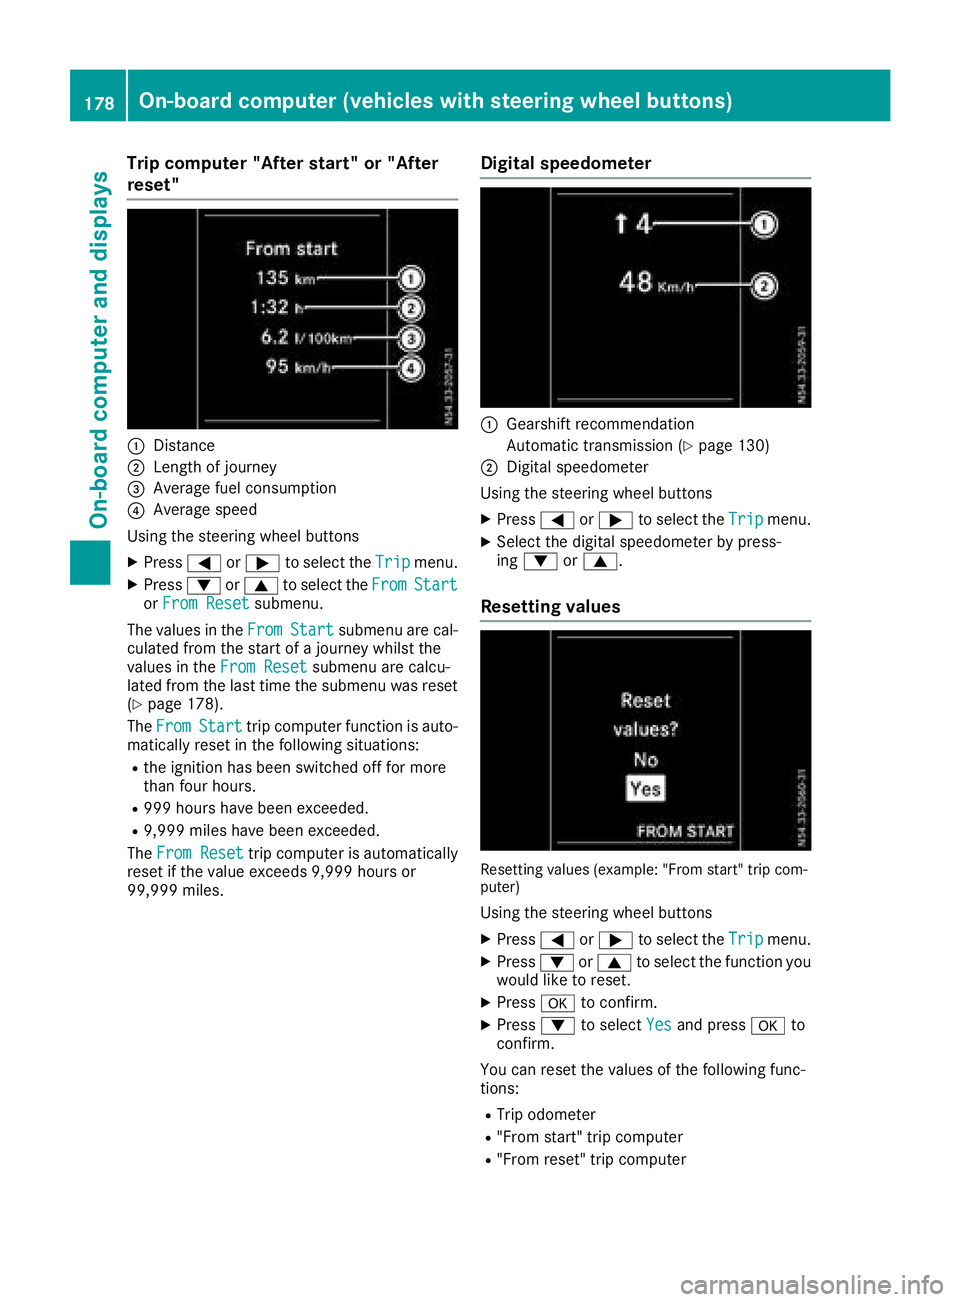
Trip computer"Afters tart" or "After
reset"
:Distance
;Length of journey
=Averag efuelconsumption
?Averag espeed
Using the steerin gwheel buttons
XPress =or; to select the Tripmenu.
XPress:or9 to select the FromStartorFro mResetsubmenu.
The values in the From
Startsubmenu arecal-
culate dfromt he start of ajourney whilst the
values in the FromReset
submenu ar ecalcu-
lated fromt he last time the submenu wa sreset
(
Ypage 178).
The From
Starttrip compute rfun ctio nisa uto-
maticall yreset in the following situations:
Rthe ignition hasb eens witched off for more
thanf ourh ours.
R999 hours have been exceeded.
R9,999 miles have been exceeded.
The FromReset
trip compute risautomatically
reset if the valu eexceed s9,999 hours or
99,999 miles.
Digital speedometer
:Gearshift recommendation
Automatic transmission (
Ypage 130)
;Digita lspeedom eter
Using the steerin gwheel buttons
XPress =or; to select the Tripmenu.
XSelect the digital speedomete rbyp ress-
ing : or9.
Resetting values
Resetting values (example: "From start" trip com-
puter)
Using the steerin gwheel buttons
XPress =or; to select the Tripmenu.
XPress:or9 to select the functio nyou
woul dliketor eset.
XPress ato confirm.
XPress :to select Yesand press ato
confirm.
Yo uc an reset the values of the following func-
tions:
RTri po dometer
R"From start" trip computer
R"From reset" trip computer
178On-board computer (vehicle swiths teering whee lbuttons)
On-board computera nd displays
Page 182 of 310
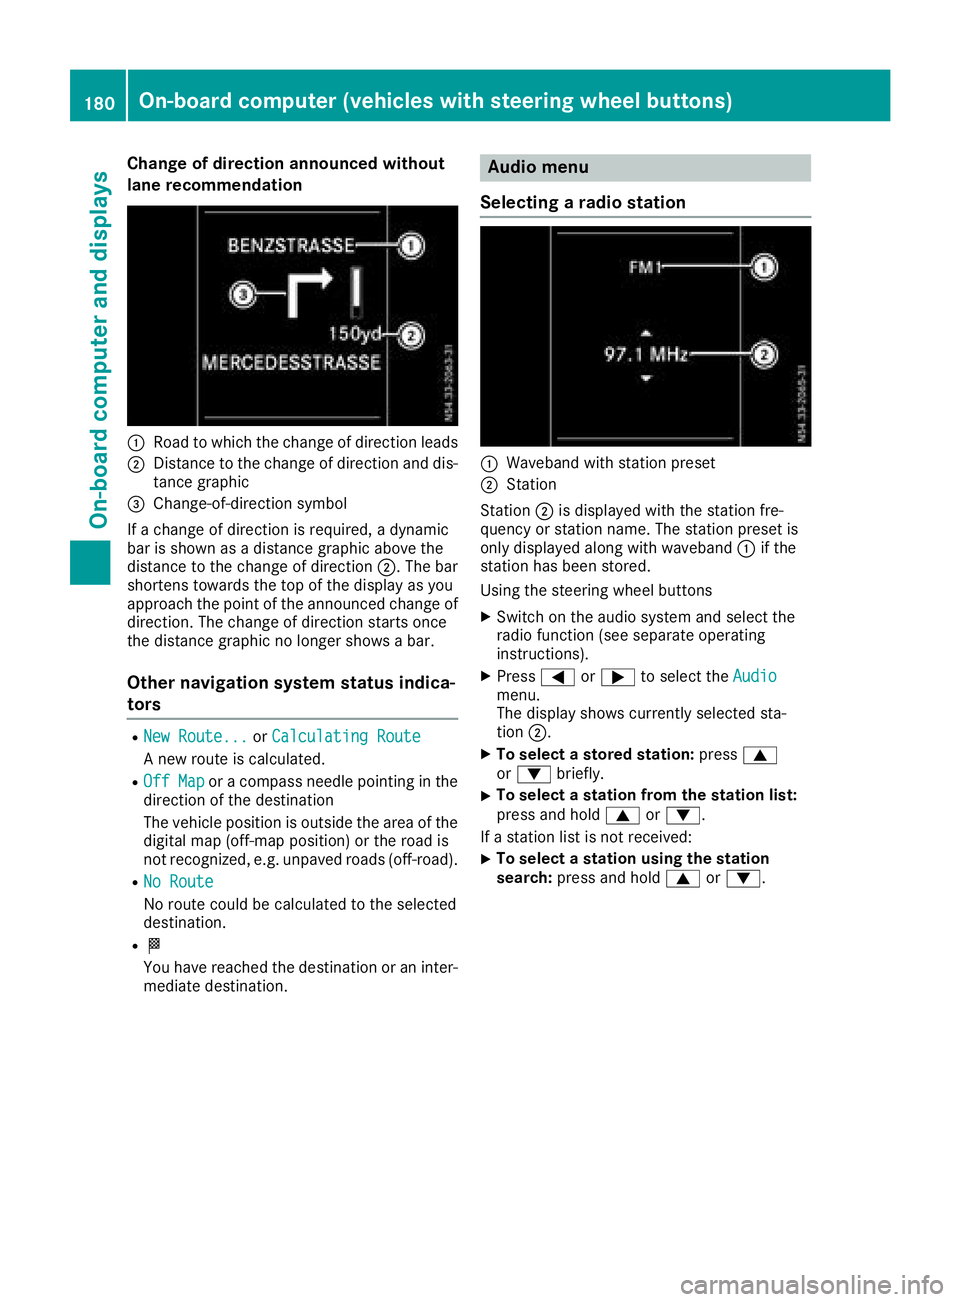
Change of direction announced without
lane recommendation
:Road to whichthechange of direction leads
;Distance to th echange of direction and dis-
tance graphic
=Change-of-direction symbol
If ac hange of direction is required, adynamic
bar is shownasadistanc egraphic above the
distanc etothechange of direction ;.The bar
shortens towards th etop of th edisplay as you
approach th epointoft heannounced change of
direction.T he change of direction start sonce
th ed istanc egraphic no longer showsab ar.
Other navigation system status indica-
tors
RNew Route...orCalculating Route
An ew rout eiscalculated.
ROff Maporac ompass needle pointin ginthe
direction of th edestination
The vehicle position is outside th earea of the
digital map (off-map position)ort heroad is
no trecognized, e.g .unpaved roads (off-road).
RNo Route
No rout ecoul dbec alculate dtotheselected
destination.
RO
You have reached th edestination or an inter-
mediate destination.
Audio menu
Selecting aradio station
:Waveband with statio npreset
;Station
Station ;is displayedw ith thestatio nfre-
quency or statio nname. The statio npreset is
only displayeda longwith waveband :if the
statio nhas been stored.
Usingt hesteering wheel buttons
XSwitch on th eaudio system and selectt he
radio function (see separate operating
instructions).
XPress =or; to selectt heAudiomenu.
The display showsc urrently selectedsta-
tion ;.
XTo select astored stati on:press 9
or : briefly.
XTo select astatio nfromt hestation list:
pres sand hold 9or:.
If as tatio nlist is no treceived:
XTo select astatio nusingthe station
search: pressand hold 9or:.
180On-boardc omputer (vehicles with steerin gwheel buttons)
On-boardc omputer and displays
Page 187 of 310
Depending on the vehicle’sequipment ,you have
the following options in the Servicemenu:
RCalling up displaymessage sinthe message
memory (Ypage 202)
RRestartin gthe tire pressure loss warning sys-
tem or checking the tire pressure electroni-
cally (
Ypage 274)
RCalling up the servic eduedate (ASSYST
PLUS) (Ypage 248)
Settings menu
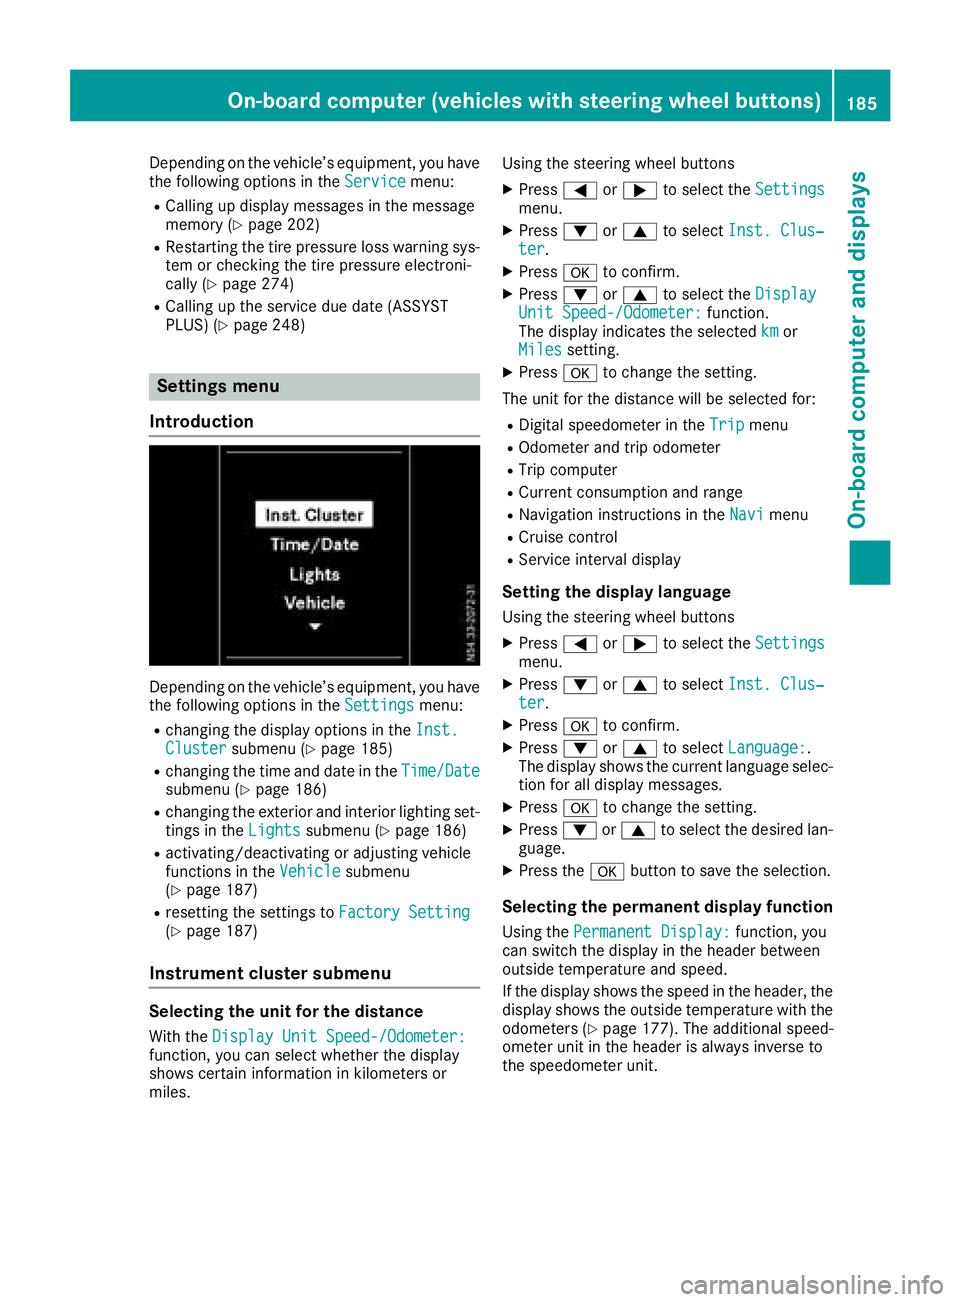
Introduction
Depending on the vehicle’ sequipment ,you have
the following options in the Settingsmenu:
Rchanging the displayoptions in the Inst.Clustersubmenu (Ypage 185)
Rchanging the time and date in the Time/Datesubmenu (Ypage 186)
Rchanging the exteriorand interio rlighting set-
ting sint heLightssubmenu (Ypage 186)
Ractivating/deactivating or adjusting vehicle
functions in the Vehiclesubmenu
(Ypage 187)
Rresetting the settings to FactorySetting(Ypage 187)
Instrument cluste rsubmenu
Selecting the uni tfor the distance
With the DisplayUnitS peed-/Odometer:function, yo ucan select whether the display
shows certain informatio ninkilometers or
miles. Using the steerin
gwheel buttons
XPress =or; to select the Settingsmenu.
XPress:or9 to select Inst. Clus‐ter.
XPressato confirm.
XPress :or9 to select the DisplayUnitSpeed-/Odometer:function.
The displa yindicates the selected kmor
Milessetting.
XPress ato change the setting.
The uni tfor the distance will be selecte dfor:
RDigita lspeedom eterint heTripmenu
ROdometer and trip odometer
RTripc omputer
RCurrent consumption and range
RNavigation instructions in the Navimenu
RCruise control
RService intervaldisplay
Settingthe display language
Using the steerin gwheel buttons
XPress =or; to select the Settingsmenu.
XPress:or9 to select Inst. Clus‐ter.
XPressato confirm.
XPress :or9 to select Language:.
The displa yshows the current languag eselec-
tio nfor al ldisplay messages.
XPressato change the setting.
XPress :or9 to select the desired lan-
guage.
XPress the abutton to save the selection.
Selecting the permanent display function
Using the Permanent Display:function, you
can switch the displa yinthe header between
outside temperatur eand speed.
If the displa yshows the spee dinthe header, the
displa yshows the outside temperatur ewitht he
odometers (
Ypage 177). The additional speed-
ometer uni tinthe header is always invers eto
the speedomete runit.
On-board computer (vehicle swiths teering whee lbuttons)18 5
On-board computera nd displays
Z
Page 189 of 310
Activating/deactivatinginteri orlighting
delayed switch-off
If you activat ethe Interior Lighting Delayfunction ,the interio rlightin gremains lit for a
further 20 seconds after th ekeyis removed.
Usin gthe steering whee lbuttons
XPress =or; to select th eSettingsmenu.
XPress :or9 to select Lights.
XPressato confirm .
XPress:or9 to select th eInteriorLighting Delayfunction .
The curren tstatus is shown.
XTo act ivate/deact ivate:pressaagain.
Vehicle submenu
Settin gthe sensitivity of therains ensor
Usin gthe steering whee lbuttons
XPress =or; to select th eSettingsmenu.
XPress :or9 to select Vehicle.
XPressato confirm .
XPress:or9 to select th eRai nSen‐sor Sensitivityfunction .
The display shows th ecurren tsetting.
XPress ato chang ethe setting.
XPress :or9 to select th eHig h,
Standardor Lowsetting. This settin gcontrols
th er ain sensor's sensitivit ytop recipitation.
The windshield wiper then wipes mor eorless
frequently at th esame precipitatio nintensity.
XPress th ea buttontos tore th eentry.
You can fin dfurther information under "Wind-
shield wiper "(
Ypage 101).
Switchingthe autom atic lockin gfeature
on/off
Usin gthe steering whee lbuttons
XPress =or; to select th eSettingsmenu.
XPress :or9 to select Vehicle.
XPressato confirm .
XPress:or9 to select th eAutomaticDoo rLockfunction .
The curren tstatus is shown.
XTo act ivate/deact ivate:pressaagain.If you activat
ethe Automatic
Doo rLockfunc-
tion, your vehicl ewill loc kautomatically from a
spee dofa pproximately 15 km/h.
You can fin dfurther information under "Auto-
matic door lock" (
Ypage 72).
Activating/deactivatin gthe acoustic
lockin gconfirm ation
Usingthe steering whee lbuttons
XPress =or; to select th eSettingsmenu.
XPress :or9 to select Vehicle.
XPressato confirm .
XPress:or9 to select AcousticLockFeedback.
The curren tstatus is shown.
XTo act ivate/deact ivate:pressaagain.
If you activat ethe Acoustic Loc kFeedback
function ,anacoustic tone sounds when th e
vehicl eislocked.
Restoring th efactor ysettings
Usin gthe steering whee lbuttons
XPress =or; to select th eSettingsmenu.
XPress :or9 to select FactorySet‐tin g.
XPress ato confirm .
The Reset All Settings?function is dis-
played.
XPress :or9 to select NoorYes.
XPress ato confirm th echoice.
If you select Yes,the display shows aconfir -
mation message .
On-boardcomputer (vehicles with steering wheel buttons)187
On-boardcomputer and displays
Z
Page 250 of 310
service interval displayshould therefore not
be confused with the engine oil level display.
For example, the displays hows one of the fol-
lowing service messages for afew seconds:
RNext Service Ain..Days
RServiceADueorService ADue
RServ. AExceed. by .. Days
Then either the remaining time or distance until
the next service due date is displayed. If the
service due date has been exceeded, the
elapsedt ime or distance traveled after the over-
due service date is shown. The letter in the dis-
play message indicates which service is due. A
stands foraminor service and Bforam ajor ser-
vice.
Aq ualified specialist workshop, e.g. an author-
ized Mercedes-Benz Commercial Van Center,
will reset the service interval displaya fter the
service work has been carried out. You can also
obtain further information on maintenance
work, for example.
The prescribed service interval is based on nor- mal vehicle use. Service work will need to be
performed more frequently than prescribed if
the vehicle is operated under more arduousc on-
ditions or with higher loads. Such arduousc on-
ditions include:
Rregularc ity driving with frequent intermediate
stops
Rdriving predominantly short distances
Rfrequent operation in mountainous terrain or
on poor road surfaces
Rleaving the engine idling for long periods on a frequent basis
In these or similar operating conditions, have
the air filter, engine oil and oil filter, for example,
replaced more frequently. Under more arduous
operating conditions, the tires must be checked more often. Further information can be obtained
at aq ualified specialist workshop, e.g. an
authorized Mercedes-Benz Commercial Van
Center.
Hiding service messages
Vehicles without steering wheel buttons
XPress the 3button on the instrument clus-
ter.
Vehicles with steering wheel buttons
XPress the aor% button on the steering
wheel.
Callingupt he service due date
Vehicles without steering wheel buttons
The vehicle must be stationary. Use the buttons
in the instrument cluster.
XTurn the key to position 2in the ignition lock.
XPress Èto select the service display.
The displays howsapossible service mes-
sage.
Vehicles with steering wheel buttons
Using the steering wheel buttons
XTurn the key to position 2in the ignition lock.
XPress =or; to select the Servicemenu.
XPress the9or: button to select the
ASSYST PLUSsubmenu and press ato
confirm.
The displays hows the service due date.
Battery
Important safety notes
Work on the battery, e.g. removing or installing,
requires specialist knowledge and the use of
special tools. Therefore, always have work on
the battery carried out at aqualified specialist
workshop.
GWARNING
Work carried out incorrectly on the battery
can lead, for example, to ashort circuit and
thus damage the vehicle electronics. This can
lead to function restrictions applying to
safety-relevant systems, e.g the lighting sys-
tem, the ABS (anti-lock braking system) or the
ESP
®(Electronic Stability Program). The oper-
ating safety of your vehicle may be restricted.
You could lose control of the vehicle, for
example:
Rwhen braking
Rin the event of abrupt steering maneuvers
and/or when the vehicle's speed is not
adapted to the road conditions
There is arisk of an accident.
In the event of ashort circuit or asimilari nci-
dent, contact aqualified specialist workshop
248Battery
Maintenance and care