spare tire MERCEDES-BENZ METRIS 2016 MY16 Operator’s Manual
[x] Cancel search | Manufacturer: MERCEDES-BENZ, Model Year: 2016, Model line: METRIS, Model: MERCEDES-BENZ METRIS 2016Pages: 310, PDF Size: 7.28 MB
Page 13 of 310
Flat tireChangingaw heel/mountin gthe
sparew heel .................................. .287
Fogged-up windows
see Climate control
Frequencies
Mobile phone ................................. 294
Two-way radio ................................ 294
Fron tfog lamps
Changing bulbs ................................ 98
Display messages (vehicle with
steering wheel buttons) ................. 210
Display messages (vehicle with-
out steering wheel buttons) ........... 196
Switching on/off .............................. 93
Front-passenger seat
see Seats
Fuel
Additives (gasoline) ........................ 297
Consumption information .............. 297
Consumption statistics (vehicle
with steering wheel buttons) ......... 178
Consumption statistics (vehicle
without steering wheel buttons) .... 171
Displaying the current consump-
tion (vehicle with steering wheel
buttons) ......................................... 177
Displaying the current consump-
tion (vehicle without steering
wheel buttons) ............................... 172
Displaying the range (vehicle with
steering wheel buttons) ................. 177
Displaying the range (vehicle with-
out steering wheel buttons) ........... 172
Driving abroad ............................... 136
Driving tips ....................................1 35
Fuel content displa y(vehicle with-
out steering wheel buttons) ........... 170
Fuel gauge (vehicle with steering
wheel buttons) ................................. 37
Grade (gasoline) ............................ 296
Important safety notes .................. 296
Problem (malfunction) ................... 132
Refueling ........................................ 131
Tank content/reserve fuel ............. 296
Fue lcon tent
Display (vehicle without steering
wheel buttons) ............................... 170 Fue
llevel
Gauge (vehicle with steering
wheel buttons) ............................ ..... 37
F ue ltank
Probl
em (malfunction) ................... 132
Fue ltank reserve level
Display messages (vehicle with
steering wheel buttons) ................. 212
Display messages (vehicle with-
out steering wheel buttons) ........... 198
Fuses ..................................................2 66
G
Gasoline............................................. 296
Gearshift recommendation
Display (vehicle with steering
wheel buttons) ............................... 176
Display (vehicle without steering
wheel buttons) ............................... 170
Genuine parts ...................................... 31
Glove box ...........................................2 28
GTW (Gros sTrailer Weight) (defini-
tion) .................................................... 284
Guide rail
Maximum tensil estrength ............. 304
H
Handbrake
see Parking brake
Handling control system
see ESP
®(Electroni cStability Program)
Hazard warning lamps ........................ 94
Head restraints
Adjusting (manually). ....................... 88
Important safety notes .................... 88
Removing/installing ........................ 88
Headlamps
Changing bulb s(halogen head-
lamps ).............................................. 98
Fogging up ....................................... 95
see Automati cheadlamp mode
Heating
see Climate control
High-beam headlamps
Displa ymessages (vehicle with
steering wheelb uttons) ................. 209
Index11
Page 26 of 310
Mountingawheel .......................... 287
Removing awheel .......................... 288
Removing and mounting the spare
wheel ............................................. 292
Snow chains ..................................2 70
Storing ...........................................2 86
Tightening torque. .......................... 289
Wheels ize/tire size ....................... 290
Windo wcurtain air bag
Display message (vehicle with
steering wheel buttons) ................. 208
Display message (vehicle without
steering wheel buttons) ................. 194
Operation ......................................... 50
Windows
see Side windows
Windshield
Cleaning ......................................... 256
Defrosting ...................................... 114
Windshiel dwashe rfluid
Adding ...........................................2 46
Windshiel dwiper
Setting the sensitivity of the rain
sensor (vehicle with steering
wheel buttons) ............................... 187
Setting the sensitivity of the rain
sensor (vehicle without steering
wheel buttons) ............................... 174
Windshiel dwiper
see Windshield
Windshiel dwipers
Problem (malfunction) ................... 106
Rea rwindow wiper ........................ 102
Replacing the wiper blades ............ 103
Switching on/off ........................... 101
Winte rdriving
Slippery road surfaces ................... 138
Snow chains .................................. 270
Winte roperation
General notes ................................ 269
Radiator cover ................................. 31
Winte rtires
M+S tires ....................................... 269
Setting alimit speed. .....................1 35
Wiper blades
Cleaning ......................................... 256
Important safety notes .................. 103
Replacing (rearw indow) ................ 104 Replacing (windshield).
.................. 103
Service indica tor ............................ 103
Wo rk
shop
see Qualifie dspecialist workshop
24Index
Page 262 of 310
Useful information
This Operator's Manual describes all models as
well as standard and optional equipment of your
vehicle that were available at the time of going
to print.Country-specific variation sare possi-
ble. Note that your vehicle may not be equipped
with all of the described functions. This also
applies to system sand function srelevantt o
safety.
Read the information on qualified specialist
workshops (
Ypage 29).
Wherew illIfind...?
Vehicle tool kit
Genera lnotes
Depending on the equipment version of the vehi-
cle, the vehicle tool kit is:
Rin the seat base of the left fronts eat
Rin the rear stowage compartment
Rin the tool holder in the cargo compartment
Apart from some country-specific variants, vehi-
cles without aspare wheel are not equipped
with tire-changing tools. If your vehicle is equip-
ped with tire-changing tools, thes eare in the
vehicle tool kit .Ifthe vehicle tool kit is stowed in
the driver'ss eat base, the jack is in aseparate
holder in the cargo compartmen tonthe right-
hand side of the vehicle nex ttothe tailgate/rear
door (
Ypage 262).
Some tools for changing awheel are specific to
the vehicle. For more information on which tools are required and approved to performaw heel
change on your vehicle, consult aqualified spe-
cialist workshop.
Necessary tire-changing tools can include, for
example:
RJack
RLug wrench
RRatchet wrench
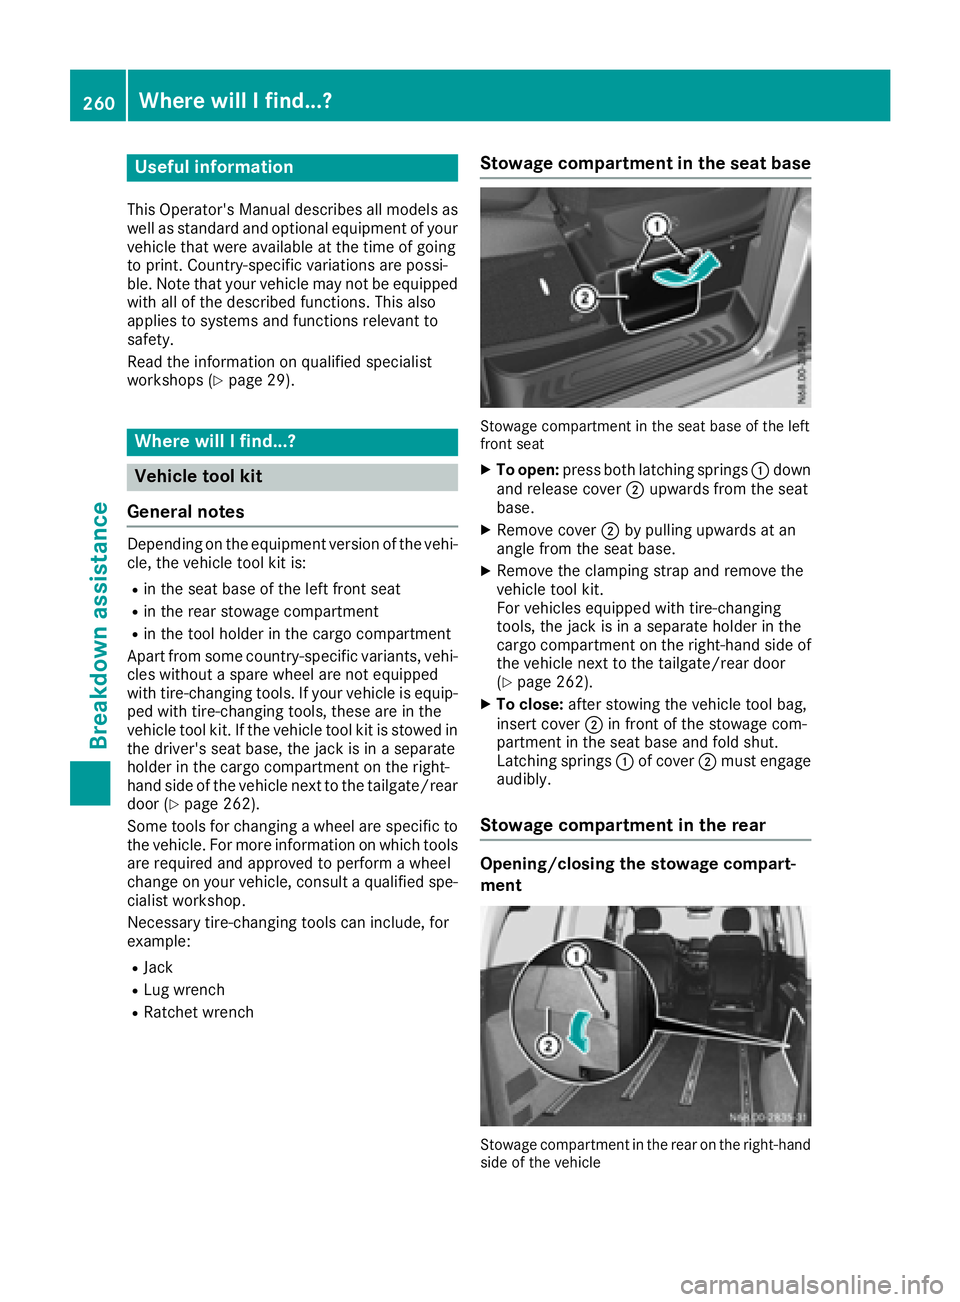
Stowage compartment in the seat base
Stowage compartmen tinthe seat base of the left
fronts eat
XTo open: press both latching springs :down
and release cover ;upwards from the seat
base.
XRemove cover ;by pulling upwards at an
angle from the seat base.
XRemove the clampings trap and removethe
vehicle tool kit.
For vehicles equipped with tire-changing
tools, the jack is in aseparate holder in the
cargo compartmen tonthe right-han dside of
the vehicle nex ttothe tailgate/rear door
(
Ypage 262).
XTo close: after stowin gthe vehicle tool bag,
inser tcover ;in frontoft he stowage com-
partment in the seat base and fold shut.
Latching springs :of cover ;must engage
audibly.
Stowage compartment in the rear
Opening/closing the stowage compart-
ment
Stowage compartmen tinthe rear on the right-hand
side of the vehicle
260Wherew illIfind...?
Breakdown assistance
Page 264 of 310
XTo remove tools:release clamping strap ;.
XRemove tool holdercover :
XCarefull ypullt he tool kit and jack outoft he
tool holder.
XTo stowt ools:before stowing ,windt he jack
to the fully closed positio nand place it so that
the hand whee lisfacing forward sand the
plate is facing inwards.
XPlace the jack and vehicl etool kit into the tool
holder.
XReplace tool holde rcover :.
XTighte nclamping strap ;.
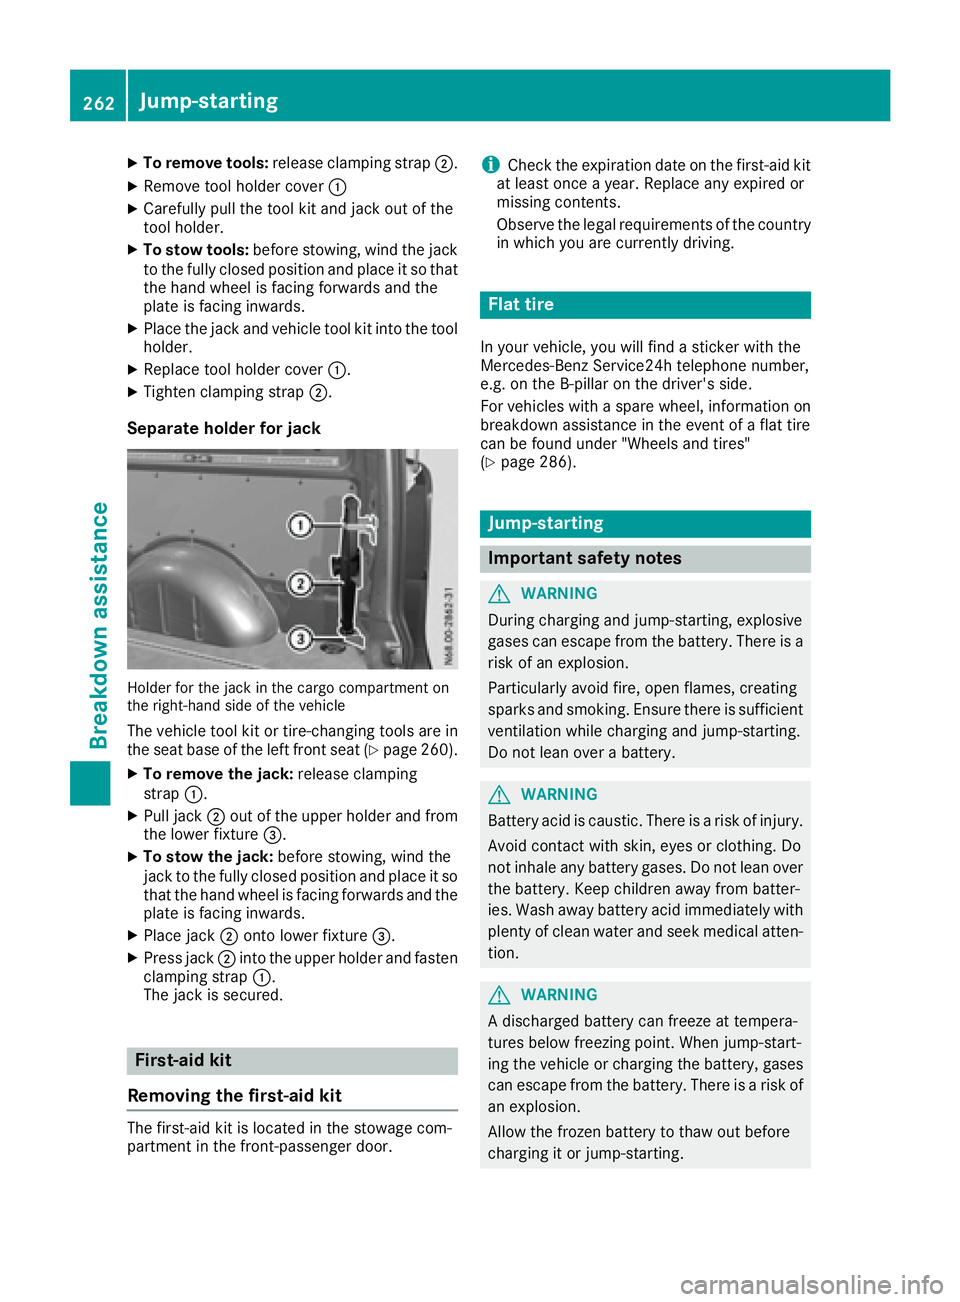
Separate holder for jack
Holderfor the jack in the cargo compartment on
the right-hand side of the vehicle
The vehicl etool kit or tire-changing tool sare in
the sea tbaseoft he left front sea t(Ypage 260).
XTo remove the jack: release clamping
strap :.
XPull jack ;outoft he uppe rholde rand from
the lowe rfixture =.
XTo stowt he jack:before stowing ,windt he
jack to the fully closed positio nand place it so
thatt he hand whee lisfacing forward sand the
plate is facing inwards.
XPlace jack ;onto lowe rfixture =.
XPress jack ;into the uppe rholde rand fasten
clamping strap :.
The jack is secured.
First-ai dkit
Removing the first-aid kit
The first-aid kit is locate dinthe stowag ecom-
partment in the front-passenger door.
iCheck the expiratio ndateont he first-aid kit
at leas tonce ayear. Replace any expire dor
missing contents.
Observe the legalr equirements of the country
in which yo uare currentl ydriving.
Flat tire
In your vehicle, yo uwillf ind asticker with the
Mercedes-Benz Service24h telephone number,
e.g .ont he B-pillar on the driver' sside.
For vehicles with aspare wheel, informatio non
breakdowna ssistance in the event of aflatt ire
can be found under "Wheels and tires"
(
Ypage 286).
Jump-starting
Important safety notes
GWARNING
During charging and jump-starting ,explosive
gases can escape from the battery .There is a
ris kofane xplosion.
Particularly avoid fire, open flames ,creating
sparks and smoking .Ensure ther eissufficient
ventilatio nwhile charging and jump-starting.
Do not lean ove rabattery.
GWARNING
Battery aci discaustic .There is ariskofi njury.
Avoi dcontact with skin, eyes or clothing. Do
not inhal eany battery gases .Donot lean over
the battery .Keepc hildren away from batter-
ies. Wash away battery aci dimmediatelyw ith
plenty of clean water and see kmedica latten-
tion.
GWARNING
Ad ischarge dbattery can freeze at tempera-
ture sbelow freezing point. Whe njump-start-
ing the vehicl eorcharging the battery ,gases
can escape from the battery .There is arisko f
an explosion.
Allow the froze nbattery to thawo utbefore
charging it or jump-starting.
262Jump-starting
Breakdo wn assis tance
Page 269 of 310
Useful information
This Operator's Manual describes all models as
well as standard and optional equipment of your
vehicle that were available at the time of going
to print.Country-specific variation sare possi-
ble. Note that your vehicle may not be equipped
with all of the described functions. This also
applies to system sand function srelevantt o
safety.
Read the information on qualified specialist
workshops (
Ypage 29).
Important safetyn otes
GWarning
Af lat tire severely impairs the driving, steer-
ing and brakin gcharacteristic softhe vehicle.
There is arisk of an accident.
do not drive with aflat tire. Immediately
replace the flat tire with your spare wheel, or
consult aqualified specialist workshop.
GWARNING
If wheels and tires of the wrong size are used, the wheel brakes or suspensio ncomponents
may be damaged. There is arisk of an acci-
dent.
Always replace wheels and tires with those
that fulfill the specification softhe original
part.
When replacingw heels, make sure to use the
correct:
Rdesignation
Rmodel
When replacingt ires,make sure to use the
correct:
Rdesignation
Rmanufacturer
Rmodel
Accessories that are not approved for your vehi-
cle by Mercedes-Benz or are not being used cor-
rectly can impair operatin gsafety. Beforep
urchasin gand using non-approved
accessories, visit aqualified specialist work-
shop and inquire about:
Rsuitability
Rlegal stipulations
Rfactory recommendations
Information on the dimensions and types of
wheels and tires for your vehicle can be found
under "Wheel and tire combinations"
(
Ypage 290).
Information on your vehicle' stire pressure can
be found:
Rin the Tire and Loading Information placard on
the B-pillar, driver'ss ide
Rin the tire pressure table inside the fuel filler
flap (Ypage 271)
Runder "Tire pressure tables" (Ypage 278)
Runder "Tire pressure" (Ypage 270)
Modifications to the brake system or wheels are not permitted. The use of aspacer and brake
dust shields is not permitted. This invalidates
the general operatin gpermit for the vehicle.
Further information on wheels and tires can be
obtained at any qualified specialist workshop.
Operation
Information for ajourney
If the vehicle is heavily laden, checkt he tire
pressures,a nd correct them ,ifnecessary
(
Ypage 270).
While driving, pay attention to vibrations, noises
and unusual handling characteristics, e.g. pull-
ing to one side. This may indicat ethat the
wheels or tires are damaged. If you suspect that
at ire is defective, reduce your speed immedi-
ately. Stop the vehicle as soon as possible to
checkt he wheels and tires for damage. Hidden
tire damage could also be causing the unusual
handling characteristics. If you find no signs of
damage, have the tires and wheels checked at a
qualified specialist workshop.
When parkin gyour vehicle, make sure that the
tires do not get deformed by the curb or other
obstacles. If it is necessary to drive over curbs,
speed humps or similar elevations, try to do so
slowly and not at asharp angle. Otherwise, the
tires ,particularly the sidewalls, can get dam-
aged.
Operation267
Wheels and tires
Z
Page 271 of 310
RDo not drive with tireswhich have too little
trea ddepth,ast hissignificantl yreduce sthe
tractio nonw etroads (hydroplaning).
RReplace the tire safter 6y ears at the latest,
regardless of wear .Thisa lsoa pplies to the
spar ewheel .
Operatio ninwinter
General notes
Hav eyourv ehicl ewinterproofed at aquali fied
specialis tworkshop at the onse tofwinter.
Onlyu sewheels with tire sizes approved by
Mercedes-Benz.
Prior to the onse tofwinter, ensur ethats now
chains ar estowed in the vehicl e(
Ypage 270).
Snow chains canno tbem ounted on al lwheel /
tire combinations. Observe the restrictions on
the us eofsnow chains under "Wheel/tir ecom-
binations" (
Ypage 291).
Als oo bserve the note sinthe "Changing a
wheel" sectio n(
Ypage 286).
Driving with summe rtires
At temperatures belo w45‡(+7 †),summer
tire slos ee last icity and therefore tractio nand
braking power. Chang ethe tire sonyourvehicle
to M+S tire s. Usingsumme rtires at very cold
temperatures could cause tears to form,
thereby damaging the tires permanently.
Mercedes-Benz cannot accept responsibility for
this type of damage.
M+S tires
GWARNING
Wheel and tire dimensions as wel lasthe type
of tire can vary betwee nthe spare whee land
the whee ltobereplaced. When the spare
whee lismounted, driving characteristics may
be severelya ffected. There is arisk of an acci-
dent.
In order to reduce risks:
Ryou should therefore adapt you rdriving
style and drive carefully.
Rnever mount more than one spare wheel
that differs from the whee ltobereplaced.
Ronly use aspare whee lthat differs from the
whee ltober eplaced for ashort time.
Rhave aspare whee lthat differs from the
whee lthat has been changed replaced at
the nearest qualified specialist workshop.
You must observe the correct whee land
tire dimensions as wel lasthe whee ltype.
GWARNING
M+S tires with atire tread depth of less than
ã in (4 mm) are not suitable for use in winter
and do not provid esufficient traction. There is
ar isk of an accident.
M+S tires with atread depth of less than ãin
(4 mm) must be replaced immediately.
Use winter tires or all-season tires at tempera-
tures below4 5‡(+7 †). Both types of tire are
identified by the M+S marking.
Only winter tires bearing the isnowflake
symbo linaddition to the M+S marking provide
the best possible grip in wintry road conditions.
Only these tires wil lallow driving safety systems
such as ABS and ESP
®to function optimally in
winter. These tires have been developed specif-
ically for driving in snow.
For safe driving, use M+S tires of the same make
and tread pattern on all wheels.
Always observe the maximu mpermissible
speed specified for the M+S tires you have
mounted.
If you mount M+S tires that have alower maxi-
mum permissibl espeed than the maximum
design speed of the vehicle, affix acorrespond-
ing warning label in the driver' sfieldofv ision.
You can obtai nthis at aqualified specialist work-
shop.
Once you have mounted the winter tires:
XCheck the tire pressure (Ypage 270).
XRestart the tire pressure monitor
(Ypage 277).
Operation in winter269
Wheel sand tires
Z
Page 273 of 310
Follow recommendedtire inflation pressures
and check the pressure of al lthe tires includ-
ing the spare wheel:
Rmonthly, at least
Rif the loa dchanges
Rbefore beginning along journey
Runder different operating conditions, e.g.
off-roadd riving
If necessary ,correct the tire pressure.
GWARNING
If yo ufit unsuitable accessories onto tire
valves, the tire valves may be overloaded and
malfunction, which can cause tire pressure
loss. Due to thei rdesign, retrofitted tire pres-
sur em onitors keep the tire valve open. This
can also result in tire pressure loss. There is a
risk of an accident.
Only screw the standard valve cap or other
valve cap sapproved by Mercedes-Benz for
your vehicle onto the tire valve.
!The pressure difference between tires on
any one axl emustb enog reater than 10 kPa
(0.1 bar/1.5 psi).
iThe specifications shownont he sample Tire
and Loading Information placard and tire
pressure tabl eare examples. Tir epressure
data are vehicle-specific and may deviate
from the data illustrate dhere .The tire pres-
sur especifications that are valid for your vehi-
cle can be found on the Tir eand Loading
Information placard and the tire pressure
tabl eont he vehicle.
HEnvironmental note
Check the tire pressure regularly ,atleast
ever y14d ays.
General notes
You will find information on tire pressure for the
vehicle' sfactory-mounted tires on the plates
described here.
The recommende dtire pressure for various
operating conditions can be found on the Tire
and Loading Information placard on the B-pillar
on the driver's sid eofthe vehicle or on the tire
pressure tabl einside the fue lfiller flap. Furthe
rinformation on tire pressure can be
obtained at aquali fied specialist workshop.
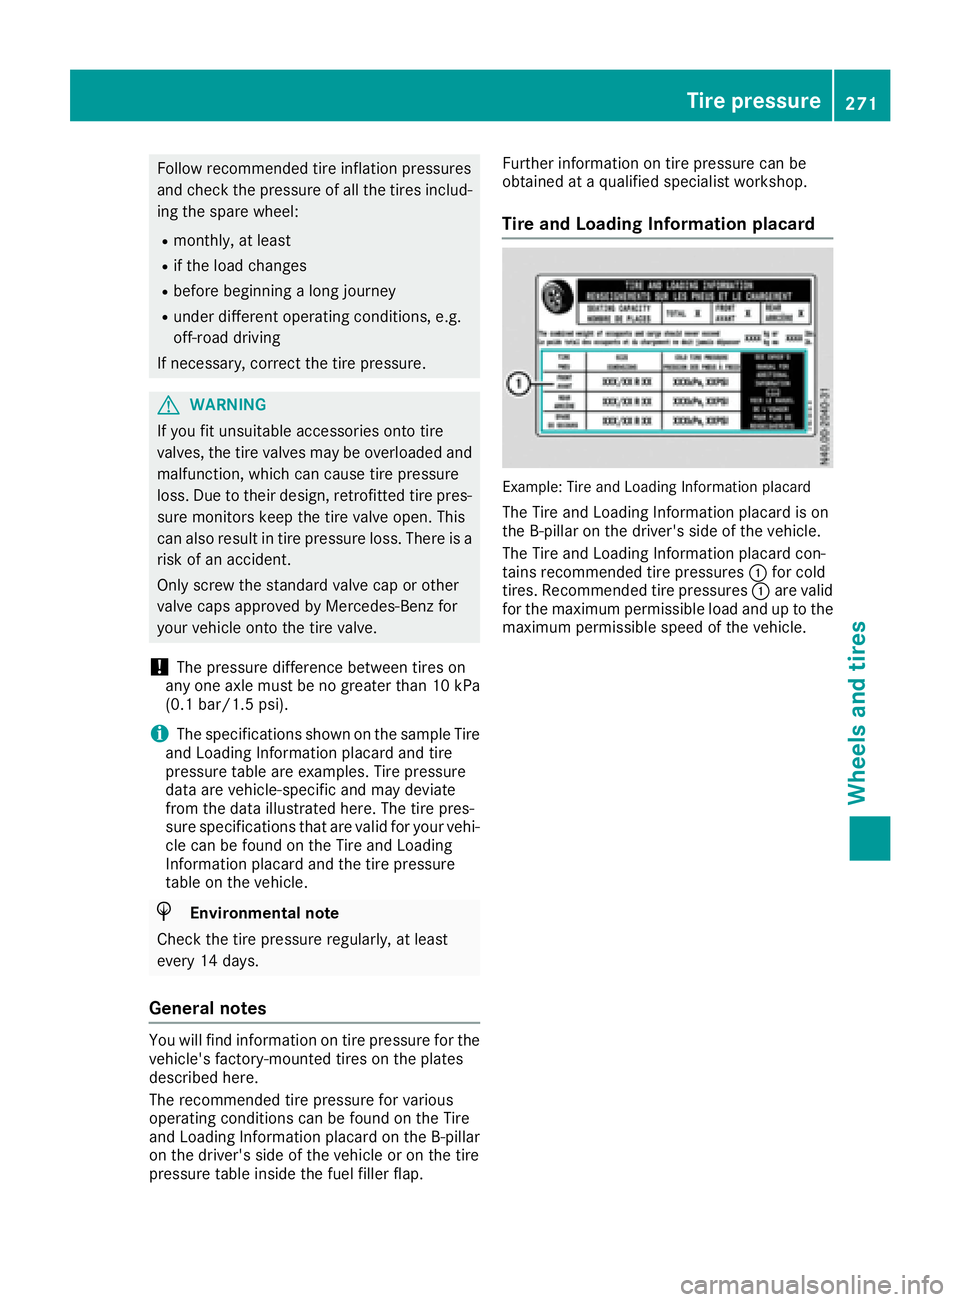
Tire and Loading Informatio nplacard
Example: Tir eand Loading Information placard
The Tir eand Loading Information placard is on
the B-pilla ronthe driver's sid eofthe vehicle.
The Tir eand Loading Information placard con-
tains recommende dtire pressures :for cold
tires .Recommended tire pressures :are valid
for the maximum permissibl eloa da nd up to the
maximum permissibl espeed of the vehicle.
Tire pressure271
Wheels and tires
Z
Page 275 of 310
Important notes on tire pressure
GWARNING
If th etirep ressur edrops repeatedly, th e
wheel, valv eortirem ay be damaged. Tir e
pressur ethatist oolow may result in atire
blow-out .Ther eisar iskofana ccident.
RCheckthe tire for foreign objects .
RCheckwhether th ewhee lislosing air or th e
valv eisl eaking .
If you are unable to rectify th edamage, con-
tac taq ualified specialist workshop.
Use asuitable pressur egage to chec kthe tire
pressure. The outer appearanc eofatired oes
no tp ermit any reliable conclusio nabout th etire
pressure. On vehicles equipped wit hthe elec -
tronic tire pressur emonitor, th etirep ressur e
can be checke dusingthe on-board computer.
The tire temperature and pressur eincreas e
when th evehicl eisinm otion.This is dependen t
on th edriving spee dand th eload.
Therefore, you should only correc ttirep ressur e
when th etires are cold.
The tires are cold:
Rif th evehicl ehas been parked for at least
three hour swithout direct sunligh tonthe
tires ,and
Rif th evehicl ehas no tbeen driven further than
1m ile(1.6 km )
Tire temper aturechanges dependingont he
ambient temperature, driving speeda nd tire
load. If th etiret em peratur echanges by 18 ‡
(10 †), th etirep ressure changes by approx-
imately 10 kP a(0.
1b ar/1.5 psi). Taket hisi n
to
accountw hen checking th epressure of warm
tires. Only correc tthe tirep ressure if it is to olow
for th ecurren toperatin gconditions. If you
check th etirep ressure when th etires are warm,
it results in ahigher value than when th etires
are cold. This is normal. Do no tunde rany cir-
cumstances release th eair in orde rtoadjustthe
pressure to th eprescribed value for col dtires.
The tir epressure would otherwise be to olow.
Observ ethe recommended tir epressure for
col dtires on th etirep ressure table in th efuel
fille rflap. Drivin
gwith tir epressure that is to ohigh or too
low can:
Rshorte nthe servic elife of th etires
Rcaus eincreased tir edamage
Rhave anegativ eeffect on handlingc haracter-
istics and thus th edriving safety (e.g. hydro-
planing)
Underinflated or overinflated tires
Underinflated tires:
GWARNING
Tire swith pressure that is to olow can over-
heat and burs tasaconsequence. In addition,
they also suffer from excessive and/or irreg-
ular wear, whichc an severelyimpair thebrak-
ing properties and th edriving characteristics.
Thereisar isk of an accident.
Avoid tir epressurest hata re to olow in all the
tires, includingt hesparew heel.
Underinflate dtires can:
Rfail from beingo verheated
Radversely affect handling
Rwear excessively and/or unevenly
Rhave an adverse effect on fuel consumption
Overinflated tires
GWARNING
Tire swith excessively high pressure can burst
because they are damage dmoree asily by
road debris, potholes etc. In addition,t hey
also suffer from irregular wear, whichc an
severelyi mpair thebraking properties and the
driving characteristics .Thereisar isk of an
accident.
Avoid tir epressurest hatare to ohigh in all the
tires, includingt hesparew heel.
Overinflated tires can:
Rincreas ethe braking distance
Radversely affect handling
Rwear excessively and/or unevenly
Radversely affect ride comfort
Rbe mores usceptible to damage
Tirep ressure273
Wheels and tires
Z
Page 277 of 310
For further information on displaying the current
tire pressures, referto"Checking the tire pres-
sur eelectronically" (
Ypage 276).
Important safety notes
GWARNING
Each tire, including the spare (ifp rovided),
should be checked at least once amonth
whe ncold and inflated to the pressure rec-
ommended by the vehicle manufacturer on
the Tir eand Loading Information placard on
the driver's doo rB-pilla rort he tire pressure
label on the inside of the fue lfiller flap. If your
vehicle has tires of adifferent size than the
size indicated on the Tir eand Loading Infor-
mation placard or the tire pressure label ,you
should determine the proper tire pressure for
those tires.
As an added safety feature ,you rv ehicle has
bee nequipped with atire pressure monitoring
system (TPMS) that illuminates alow tire pres-
sur etelltal ewheno ne or more of your tires
are significantly underinflated. Accordingly,
whe nthe low tire pressure telltal eillumi nates,
yo us hould stop and check your tires as soon
as possible, and inflate them to the proper
pressure. Driving on asignificantly underin-
flated tire causes the tire to overheata nd can
lea dtot ire failure. Underinflation also
reduce sfue lefficiency and tire treadl ife, and
may affect the vehicle' shandling and stop-
ping ability.
Please note that the TPMSisn otas ubstitute
for proper tire maintenance, and it is the driv-
er's responsibility to maintain correct tire
pressure, even if underinflation has not
reached the level to trigger illumination of the
TPMSl ow tire pressure telltale.
USA only:
You rvehicle has also bee
nequipped with a
TPM
Sm alfunction indicator to indicate if the
system is not operating properly. The TPMS
malfunction indicator is combined with the
low tire pressure telltale. Whe nthe system
detects amalfunction, the warning lamp will
flash for approximately aminute and then
remain continuously illuminated. This
sequence will be repeated ever ytime the vehi-
cle is starte daslong as the malfunction
exists.
Whe nthe malfunction indicator is illuminated,
the system may not be able to detect or signal
low tire pressure as intended. TPMSm alfunc-
tions may occur for avariety of reasons,
including the mounting of incompatible
replacement or alternate tires or wheels on
the vehicle that prevent the TPMSf rom func-
tioning properly. Alway scheck the TPMSm al-
function telltal eafterreplacing one or more
tires or wheels on your vehicle to ensure that the replacement or alternate tires and wheels
allow the TPMStoc ontinuetofunction prop-
erly.
It is the driver's responsibility to set the tire
pressure to the recommende dcold tire pressure
suitabl efor the operating conditions
(
Ypage 270).
Note that the correct tire pressure for the cur-
rent operating conditions mus tfirs tb ep ro-
gramed into the tire pressure monitor. If there is
as ubstantial los sofpressure, the warning
threshol dfor the warning messag eisaligne dto
the reference value sprograme din. Restart the
tire pressure monito rafte radjusting the cold
tire pressure (
Ypage 277). The current pres-
sures are saved as new reference values. This
will ensure that awarning messag ewillo nly
appea rifthe tire pressure drop ssignificantly.
The tire pressure monito rdoesn ot warn yo uifa
tire pressure is incorrect. Observe the notes on
the
recommende dtire pressure (Ypage 270).
The tire pressure monito risnot able to warn you
of as udden los sofpressure, e.g. following pen-
etration by aforeign object. In this event, brake
the vehicle until it comes to astandstill. Avoid
sudden steering movements.
The tire pressure monito rhas ayello wh
warning lamp in the instrument cluster for indi-
cating pressure loss/malfunctions (USA) or
pressure los s(Ca nada). Depending on how the
warning lamp flashesorl ights up ,anunderin-
flated tire or amalfunction in the tire pressure
monito risdisplayed:
Rif the h warning lamp is li tcontinuously,
the tire pressure on one or more tires is sig-
Tire pressure275
Wheels and tires
Z
Page 280 of 310
Tire pressure tables
Vehicle swithag ross vehicle weight of 6,724 lb s(3.05 t)
!The pressure differenc ebetween tire sonany one axl emustbenog reaterthan1 0kPa (0.1 ba r/
1.5 psi).
The following tire pressure values apply to vehicles with:
Rag ross vehicle weight of 6,724 lbs (3.05 t)
Ragross axle weight rating of 3,418 lbs(1,550 kg)on the rear axle and
Rthe tires referredtounder"Wheel and tire combinations" (Ypag e291).
Always observe the notes unde r"Information on tire pressures "(
Ypage270).
The tire pressure for the spare wheelis 340 kPa (3.4 bar/49 psi).
Partiallyladen vehicleFully laden vehicle
Tire sizeFron taxleRear axleFron taxleRear axle
225/55 R17RF270 kPa
(2.7 bar/ 39 psi)270 kPa
(2.7 bar/ 39 psi)300 kPa
(3.0 bar/ 44 psi)310 kPa
(3.1 bar/45 psi)
Loading the vehicle
Instruction labels for tires and loads
GWARNING
Overloaded tires can overheat, causing a
blowout. Overloaded tires can also impair the steering and driving characteristics and lead
to brake failure. There is arisk of accident.
Observe the loa drating of the tires. The load
rating must be at least hal fofthe GAWR of
you rvehicle. Never overload the tires by
exceeding the maximu mload.
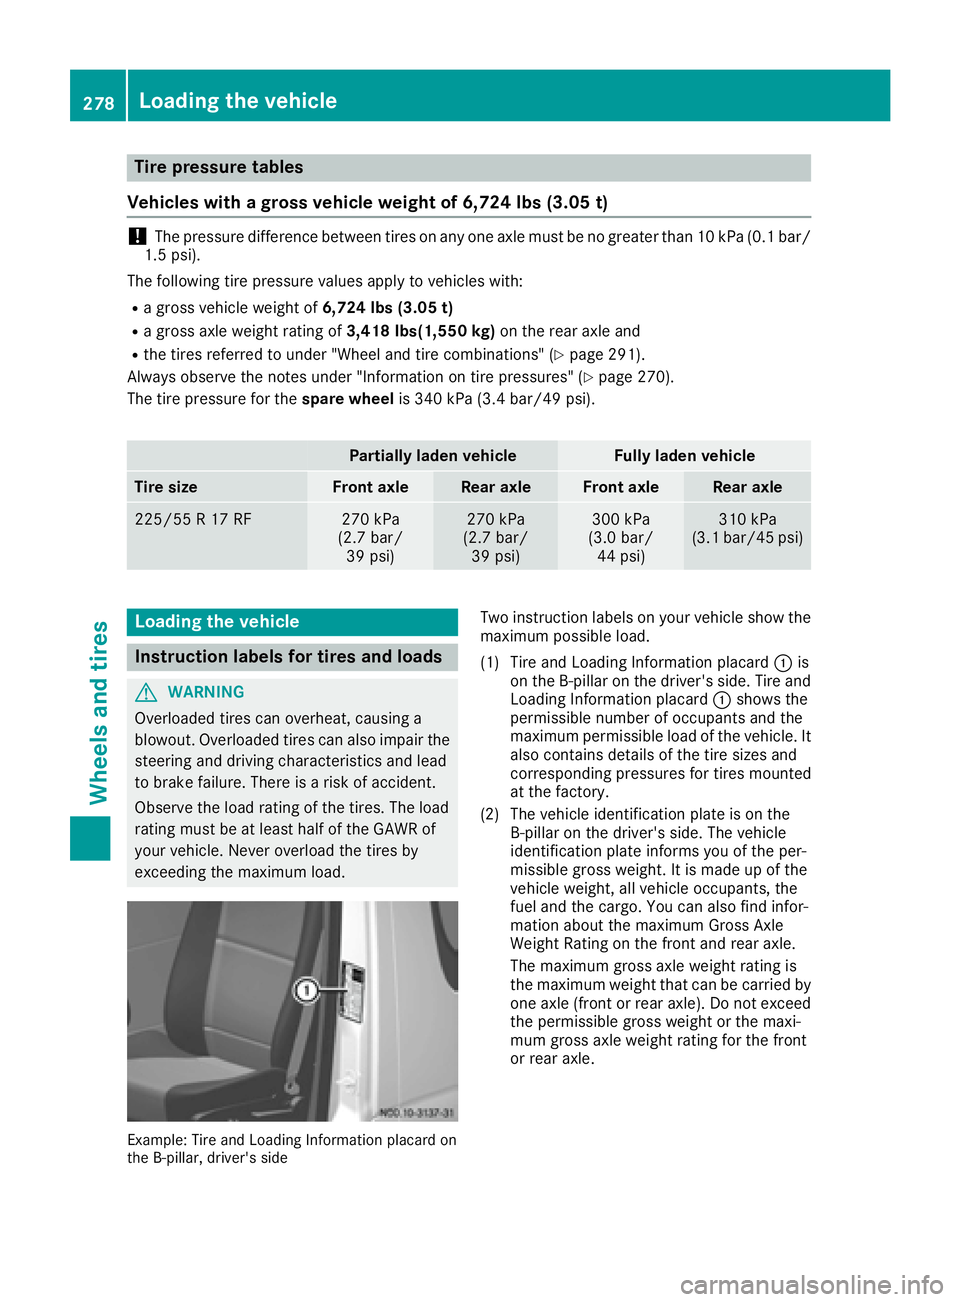
Example: Tire and Loading Information placard on
the B-pillar, driver's side
Two instructio nlab elsony ourvehicle show the
maximu mpossibl eload.
(1) Tire and Loading Information placard :is
on the B-pillar on the driver's side .Tire and
Loading Information placard :showst he
permissible numbe rofoccupants and the
maximu mpermissible loa dofthe vehicle. It
also contains details of the tire sizes and
corresponding pressures for tires mounted
at the factory.
(2) The vehicle identification plate is on the B-pillar on the driver's side .The vehicle
identification plate informs you of the per-
missible gross weight. It is made up of the
vehicle weight, al lvehicle occupants, the
fuel and the cargo .You can also find infor-
matio nabout the maximu mGrossAxle
Weight Rating on the front and rear axle.
The maximu mgross axle weight rating is
the maximu mweight that can be carrie dby
one axle (front or rear axle). Do not exceed the permissible gross weight or the maxi-
mum gross axle weight rating for the front
or rear axle.
278Loading the vehicle
Wheels and tires