jump start MERCEDES-BENZ METRIS 2017 MY17 Operator’s Manual
[x] Cancel search | Manufacturer: MERCEDES-BENZ, Model Year: 2017, Model line: METRIS, Model: MERCEDES-BENZ METRIS 2017Pages: 318, PDF Size: 5.01 MB
Page 5 of 318
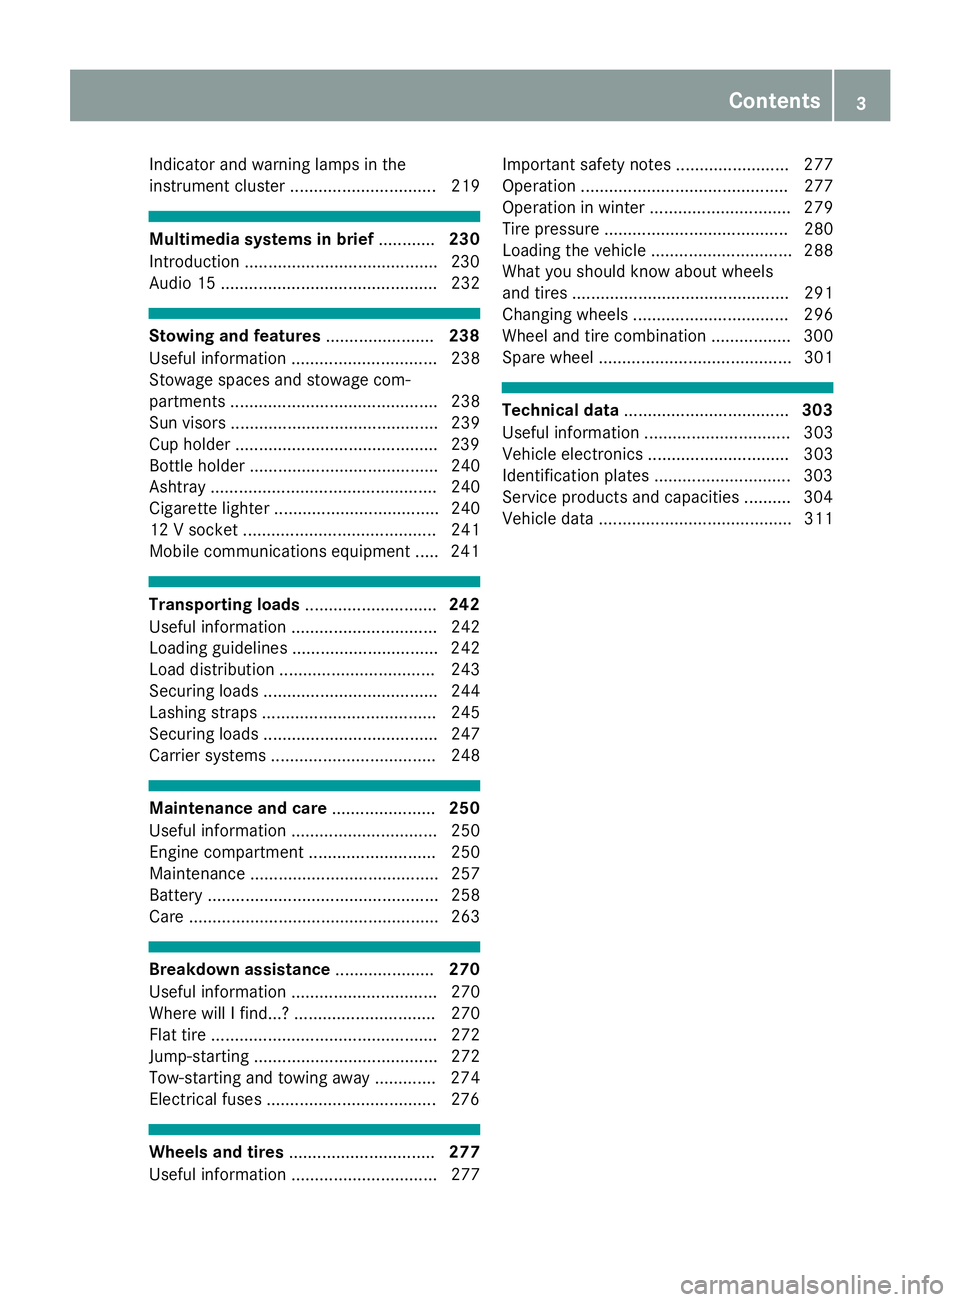
Indicator and warning lamps in the
instrument cluster ............................... 219
Multimedia systems in brief............230
Introduction .........................................2 30
Audio 15 .............................................. 232
Stowing and features .......................238
Useful information ............................... 238
Stowage spaces and stowage com-
partments ............................................ 238
Sun visors ............................................ 239
Cup holder ...........................................2 39
Bottle holder ........................................ 240
Ashtray ................................................ 240
Cigarette lighter ................................... 240
12 V socket ......................................... 241
Mobile communications equipment ..... 241
Transporting loads ............................242
Useful information ............................... 242
Loading guidelines ............................... 242
Load distribution ................................. 243
Securing loads ..................................... 244
Lashing straps ..................................... 245
Securing loads ..................................... 247
Carrier systems ................................... 248
Maintenance and care ......................250
Useful information ............................... 250
Engine compartment ........................... 250
Maintenance ........................................ 257
Battery ................................................. 258
Care ..................................................... 263
Breakdown assistance .....................270
Useful information ............................... 270
Where will I find...? .............................. 270
Flat tire ................................................ 272
Jump-starting ....................................... 272
Tow-starting and towing away ............. 274
Electrical fuses ....................................2 76
Wheels and tires............................... 277
Useful information ............................... 277 Important safety notes ........................ 277
Operation ............................................ 277
Operation in winter .............................. 279
Tire pressure ....................................... 280
Loading the vehicle .............................. 288
What you should know about wheels
and tires .............................................. 291
Changing wheels ................................. 296
Wheel and tire combination ................. 300
Spare wheel ......................................... 301
Technical data
................................... 303
Useful information ............................... 303
Vehicle electronics .............................. 303
Identification plates .............................3 03
Service products and capacities .......... 304
Vehicle data ......................................... 311
Contents3
Page 7 of 318
Display messages (vehicle with-
out steering wheel buttons) ........... 200
Function/notes ............................. 150
ATTENTION ASSIST
see ATTENTION ASSIST
Audio 10
Important safety notes .................. 230
Audio 15
Bluetooth
®settings ....................... 234
Display overview ............................ 233
Entering the passkey ..................... 234
Important safety notes .................. 230
Making a call ................................. 236
Media mode ................................... 235
Navigation ..................................... 236
Overview ........................................ 232
Telephone mode ............................ 236
Authorized workshop
see Qualified specialist workshop
AUTO lamp
Display messages (vehicle with-
out steering wheel buttons) ........... 196
AUTO lights
Display messages (vehicle with
steering wheel buttons) ................. 210
see Lights
Automatic car wash (care) ............... 264
Automatic engine start (ECO start/
stop function) .................................... 124
Automatic engine switch-off (ECO
start/stop function) .......................... 124
Automatic headlamp mode ................ 95
Automatic locking ............................... 74
Automatic transmission
Accelerator pedal position ............. 130
Changing gear ............................... 128
DIRECT SELECT lever ..................... 126
Display message ............................ 218
Drive program display .................... 128
Driving tips .................................... 130
Emergency running mode .............. 132
Engaging drive position .................. 127
Engaging neutral ............................ 127
Engaging reverse gear ................... 127
Engaging the park position ............ 127
Gearshift recommendation ............ 131
Important safety notes .................. 126 Kickdown ....................................... 130
Manual shifting .............................. 130
Overview ........................................ 126
Problem (malfunction) ................... 132
Program selector button ................ 129
Rocking the
vehi
cle free ................ 130
Shift ranges ................................... 128
Starting the engine ........................ 122
Steering wheel paddle shifters ...... 130
Trailer towing ................................. 130
Transmission oil change ................ 308
Transmission position display
(DIRECT SELECT lever) ................... 128
Transmission positions .................. 127
Automatic transmission emer-
gency mode ....................................... 132
Axle load, permissible (trailer tow-
ing) ...................................................... 314
B
Backup lamp
Display messages (vehicle with
steering wheel buttons) ................. 211
Backup lamps
Display messages (vehicle with-
out steering wheel buttons) ........... 197
Replacing bulbs ............................. 103
BAS (Brake Assist System)
Function/notes ................................ 65
Basic settings
see Settings
Battery (SmartKey)
Checking .......................................... 71
Important safety notes .................... 71
Replacing ......................................... 72
Battery (vehicle)
Care ............................................... 263
Charging ........................................ 262
Connecting and installing .............. 261
Disconnecting and removing ......... 259
Display messages (vehicle with
steering wheel buttons) ................. 212
Display messages (vehicle with-
out steering wheel buttons) ........... 198
Important safety notes .................. 258
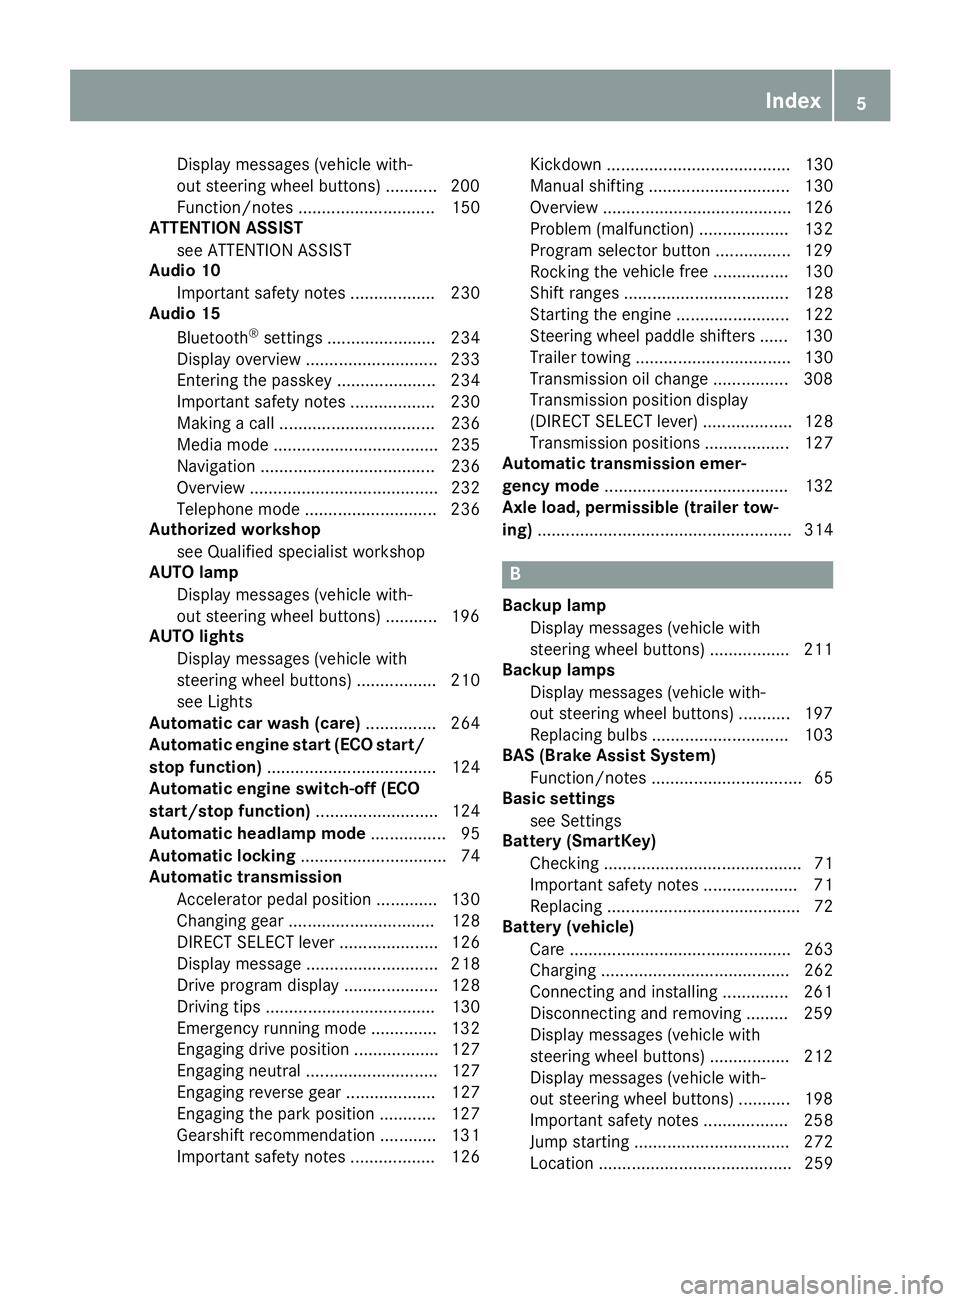
Jump starting ................................. 272
Location ......................................... 259
Index5
Page 13 of 318
Limited braking efficiency on sal-
ted roads ....................................... 138
New brake disks ............................ 138
New brake pads/linings ................ 138
Off-road driving .............................. 140
Overrun cut-off .............................. 136
Snow chains .................................. 280
Speed limitation .............................136
Towing a trailer .............................. 163
Wet road surface ........................... 138
E
EBD (electronic brake force distri-
bution)
Display message (vehicle with
steering wheel buttons) ................. 207
Display message (vehicle without
steering wheel buttons) ................. 193
Function/notes ................................ 65
ECO start/stop function
Automatic engine start .................. 124
Automatic engine switch-off .......... 124
Deactivating/activating ................. 125
General information ....................... 123
Important safety notes .................. 124
Electric sliding door
Function ...........................................7 6
Important safety notes .................... 75
Obstacle detection ........................... 76
Opening/closing from the inside .....7 7
Problem (malfunction) ..................... 78
Programming the key button ........... 78
Resetting ......................................... 78
Reversing feature ............................. 76
Electrical fuses
see Fuses
Electrical sliding door
Opening/closing from the out-
side .................................................. 76
Electronic brake force distribution
see EBD (electronic brake force
distribution)
Electronic Stability Program
see ESP
®(Electronic Stability Program)
Emergency
Automatic measures after an acci-
dent .................................................5 8Emergency braking
see BAS (Brake Assist System)
Emergency release
Vehicle ............................................ .71
Emergency Tensioning Devices
Activation ........................................ .56
Emissions control
Service and warranty information .... 27
Engine
Altitude limit (diesel engine) .......... 141
Changing the power output ............. 31
Check Engine warning lamp ........... 225
Cleaning instr uctio
ns ..................... 265
Display messages (vehicle with
steering wheel buttons) ................. 212
Display messages (vehicle with-
out steering wheel buttons) ........... 198
ECO start/stop function ................ 123
Engine number ............................... 304
Irregular running ............................ 125
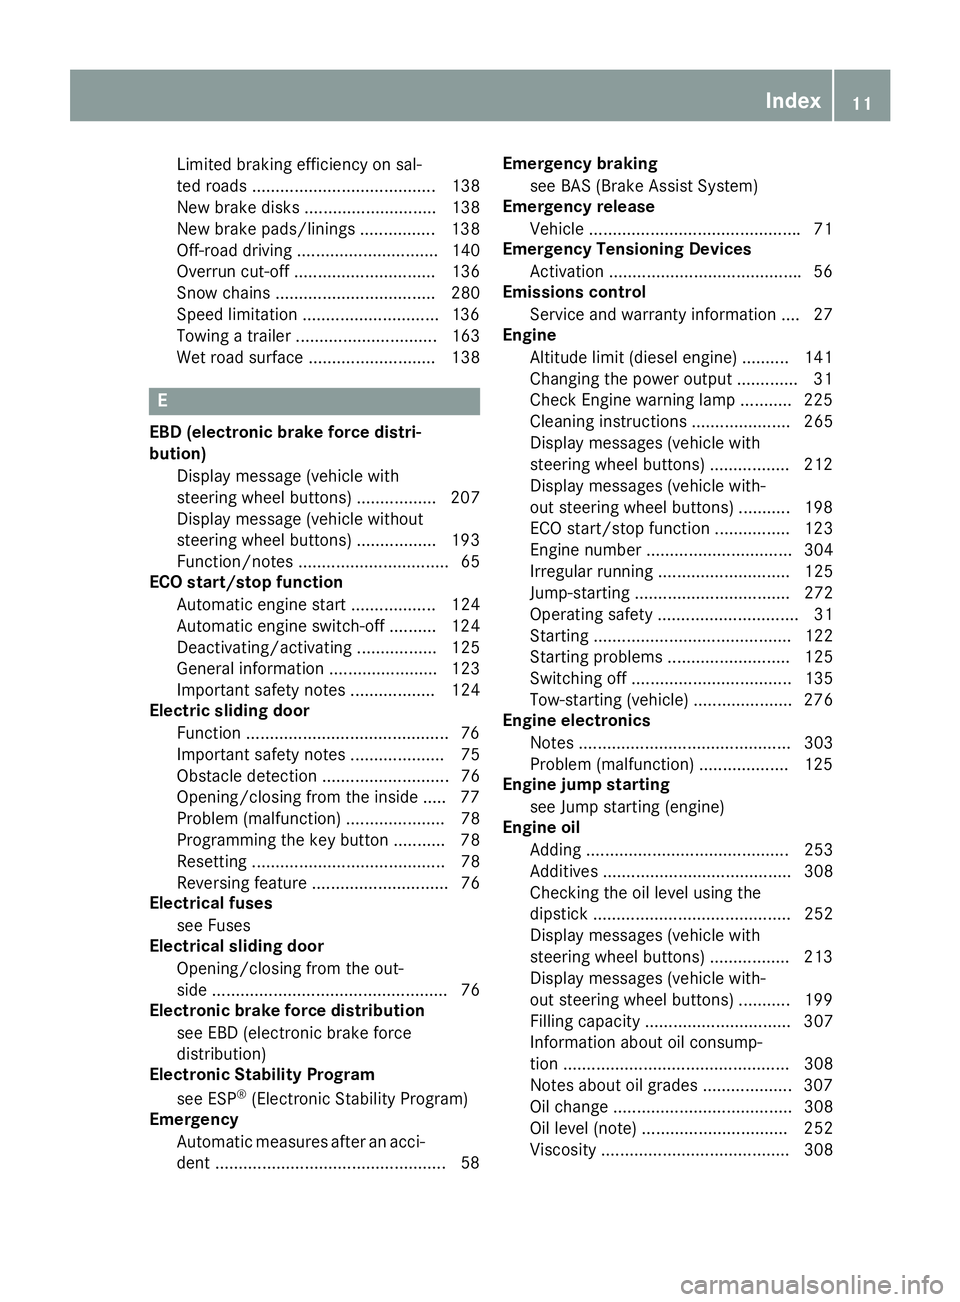
Jump-starting ................................. 272
Operating safety .............................. 31
Starting .......................................... 122
Starting problems .......................... 125
Switching off .................................. 135
Tow-starting (vehicle) ..................... 276
Engine electronics
Notes ............................................. 303
Problem (malfunction) ................... 125
Engine jump starting
see Jump starting (engine)
Engine oil
Adding ........................................... 253
Additives ........................................ 308
Checking the oil level using the
dipstick .......................................... 252
Display messages (vehicle with
steering wheel buttons) ................. 213
Display messages (vehicle with-
out steering wheel buttons) ........... 199
Filling capacity ............................... 307
Information about oil consump-
tion ................................................ 308
Notes about oil grades ................... 307
Oil change ...................................... 308
Oil level (note) ............................... 252
Viscosity ........................................ 308
Index11
Page 16 of 318
J
JackHolder in the cargo compartment. .272
Jacking points ................................ 297
Scope of tire-changing tools .......... 270
Storage location ............................ 270
Stowage compartment in the rear .. 270
Stowage space in the cargo com-
partment ........................................ 271
Using ............................................. 297
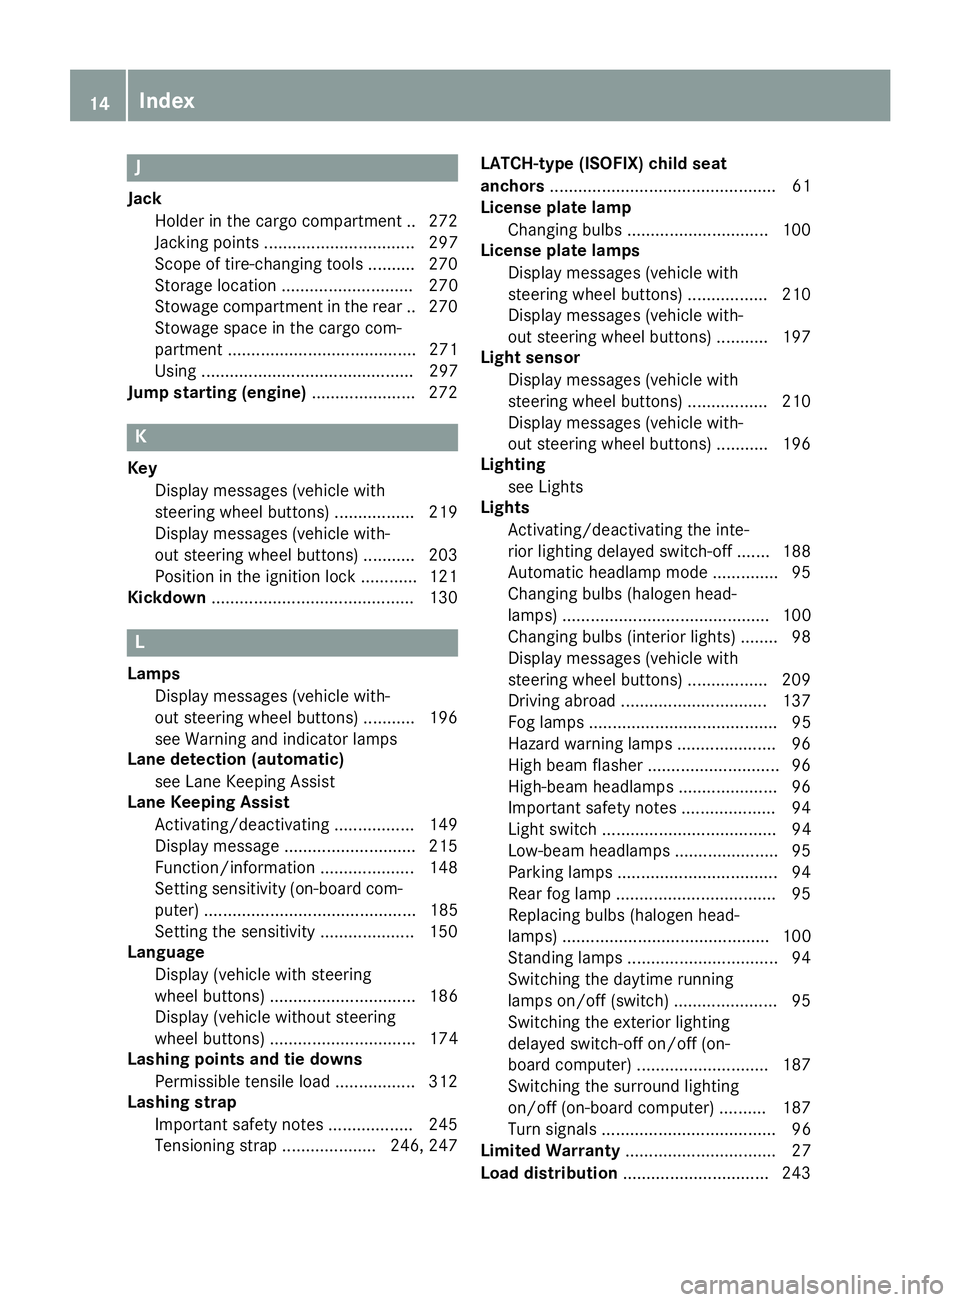
Jump starting (engine) ......................272
K
Key
Display messages (vehicle with
steering wheel buttons) ................. 219
Display messages (vehicle with-
out steering wheel buttons) ........... 203
Position in the ignition lock ............ 121
Kickdown ...........................................1 30
L
Lamps
Display messages (vehicle with-
out steering wheel buttons) ........... 196
see Warning and indicator lamps
Lane detection (automatic)
see Lane Keeping Assist
Lane Keeping Assist
Activating/deactivating ................. 149
Display message ............................ 215
Function/information .................... 148
Setting sensitivity (on-board com-
puter) ............................................. 185
Setting the sensitivity .................... 150
Language
Display (vehicle with steering
wheel buttons) ............................... 186
Display (vehicle without steering
wheel buttons) ............................... 174
Lashing points and tie downs
Permissible tensile load ................. 312
Lashing strap
Important safety notes .................. 245
Tensioning strap .................... 246, 247 LATCH-type (ISOFIX) child seat
anchors
................................................ 61
License plate lamp
Changing bulbs .............................. 100
License plate lamps
Display messages (vehicle with
steering wheel buttons) ................. 210
Display messages (vehicle with-
out steering wheel buttons) ........... 197
Light sensor
Display messages (vehicle with
steering wheel buttons) ................. 210
Display messages (vehicle with-
out steering wheel buttons) ........... 196
Lighting
see Lights
Lights
Activating/deactivating the inte-
rior lighting delayed switch-off ....... 188
Automatic headlamp mode .............. 95
Changing bulbs (halogen head-
lamps) ............................................ 100
Changing bulbs (interior lights) ........ 98
Display messages (vehicle with
steering wheel buttons) ................. 209
Driving abroad ............................... 137
Fog lamps ........................................ 95
Hazard warning lamps ..................... 96
High beam flasher ............................ 96
Hi
gh-beam headlamps ..................... 96
Important safety notes .................... 94
Light switch ..................................... 94
Low-beam headlamps ...................... 95
Parking lamps .................................. 94
Rear fog lamp .................................. 95
Replacing bulbs (halogen head-
lamps) ............................................ 100
Standing lamps ................................ 94
Switching the daytime running
lamps on/off (switch) ...................... 95
Switching the exterior lighting
delayed switch-off on/off (on-
board computer) ............................ 187
Switching the surround lighting
on/off (on-board computer) .......... 187
Turn signals ..................................... 96
Limited Warranty ................................ 27
Load distribution ............................... 243
14Index
Page 75 of 318
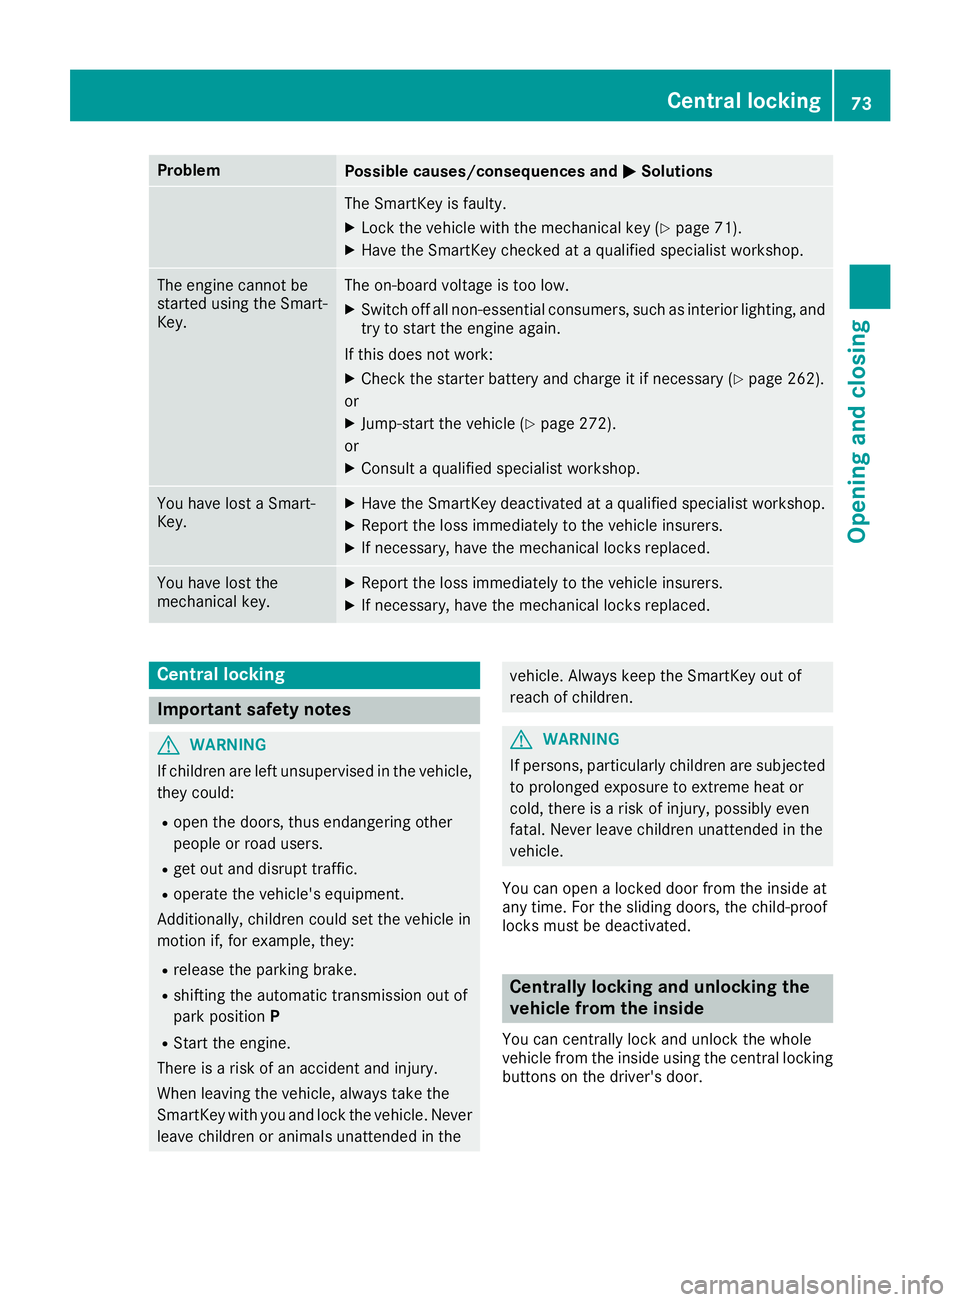
ProblemPossible causes/consequences andMSolutions
The SmartKey is faulty.
XLock the vehicle with the mechanical key (Ypage 71).
XHave the SmartKey checked at a qualified specialist workshop.
The engine cannot be
started using the Smart-
Key.The on-board voltage is too low.
XSwitch off all non-essential consumers, such as interior lighting, and
try to start the engine again.
If this does not work:
XCheck the starter battery and charge it if necessary (Ypage 262).
or
XJump-start the vehicle (Ypage 272).
or
XConsult a qualified specialist workshop.
You have lost a Smart-
Key.XHave the SmartKey deactivated at a qualified specialist workshop.
XReport the loss immediately to the vehicle insurers.
XIf necessary, have the mechanical locks replaced.
You have lost the
mechanical key.XReport the loss immediately to the vehicle insurers.
XIf necessary, have the mechanical locks replaced.
Central locking
Important safety notes
GWARNING
If children are left unsupervised in the vehicle,
they could:
Ropen the doors, thus endangering other
people or road users.
Rget out and disrupt traffic.
Roperate the vehicle's equipment.
Additionally, children could set the vehicle in
motion if, for example, they:
Rrelease the parking brake.
Rshifting the automatic transmission out of
park position P
RStart the engine.
There is a risk of an accident and injury.
When leaving the vehicle, always take the
SmartKey with you and lock the vehicle. Never
leave children or animals unattended in the
vehicle. Always keep the SmartKey out of
reach of children.
GWARNING
If persons, particularly children are subjected to prolonged exposure to extreme heat or
cold, there is a risk of injury, possibly even
fatal. Never leave children unattended in the
vehicle.
You can open a locked door from the inside at
any time. For the sliding doors, the child-proof
locks must be deactivated.
Centrally locking and unlocking the
vehicle from the inside
You can centrally lock and unlock the whole
vehicle from the inside using the central locking
buttons on the driver's door.
Central locking73
Opening and closing
Z
Page 127 of 318
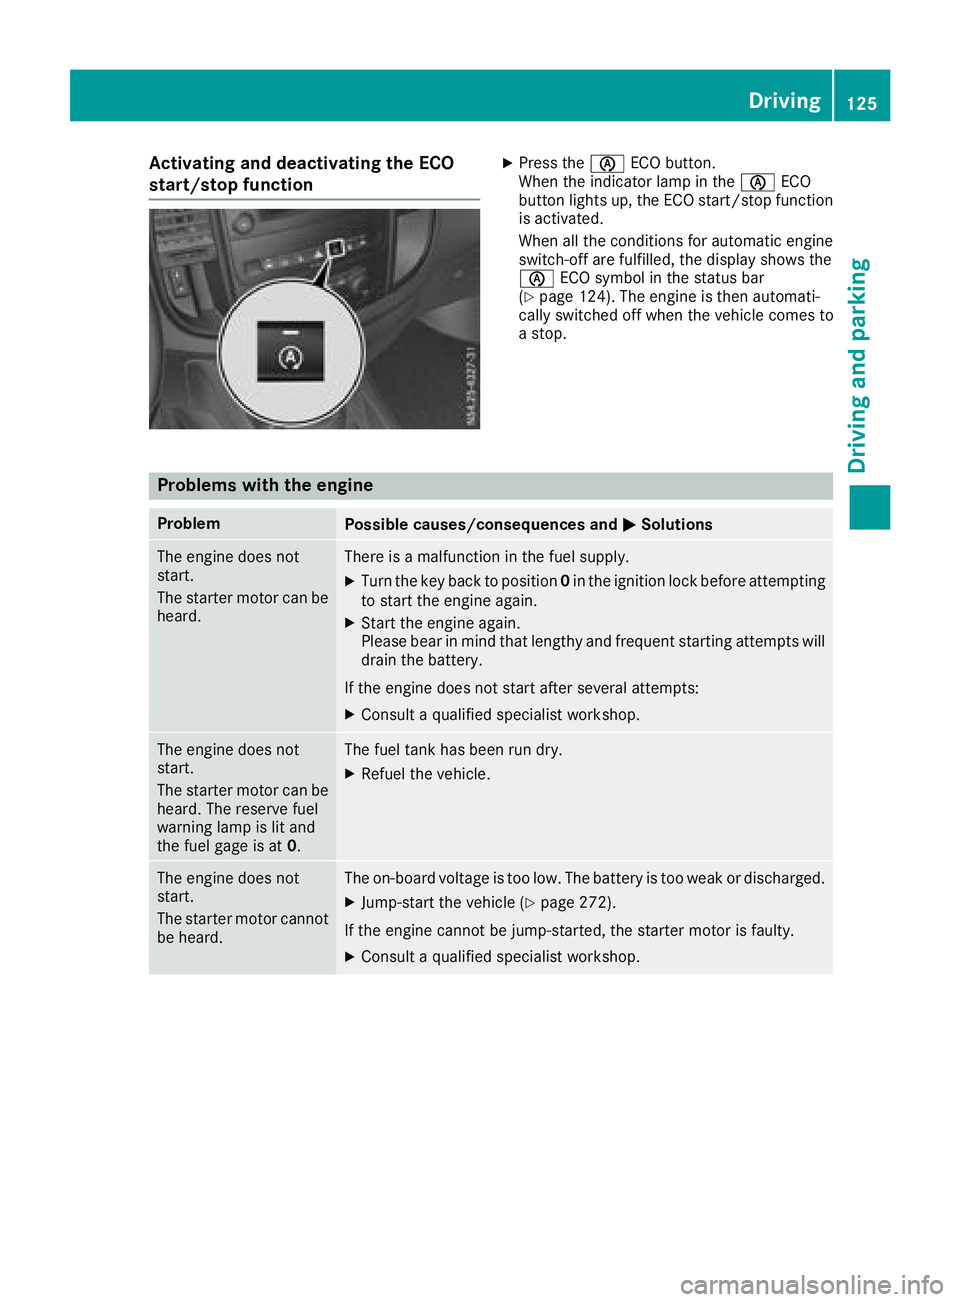
Activating and deactivating the ECO
start/stop functionXPress theè ECO button.
When th eindicator lamp in th eè ECO
butto nlights up, th eECO start/sto pfunction
is activated.
When all th econdition sfor automatic engin e
switch-off are fulfilled ,th edisplay shows th e
è ECO symbol in th estatus bar
(
Ypage 124). The engin eis then automati-
call yswitched off when th evehicl ecomes to
a stop.
Problems with the engine
ProblemPossible causes/consequences and MSolutions
The enginedoes no t
start .
The starter motor can be
heard.There is amalfunction in th efuel supply.
XTurn th eke ybac kto position 0in th eignition loc kbefore attempting
to start th eengin eagain .
XStart th eengin eagain .
Pleas ebear in min dthat lengthy and frequen tstarting attempts will
drai nth ebattery.
If th eengin edoes no tstart after several attempts :
XConsultaqualified specialist workshop .
The enginedoes no t
start .
The starter motor can be
heard. The reserv efuel
warning lamp is lit and
th efuel gage is at 0.The fuel tankhas been run dry.
XRefue lth evehicle.
The engin edoes no t
start .
The starter motor canno t
be heard.The on-board voltag eis to olow. The battery is to oweak or discharged.
XJump-start th evehicl e (Ypage 272).
If th eengin ecanno tbe jump-started, th estarter motor is faulty.
XConsult aqualified specialist workshop .
Driving125
Driving and parking
Z
Page 191 of 318
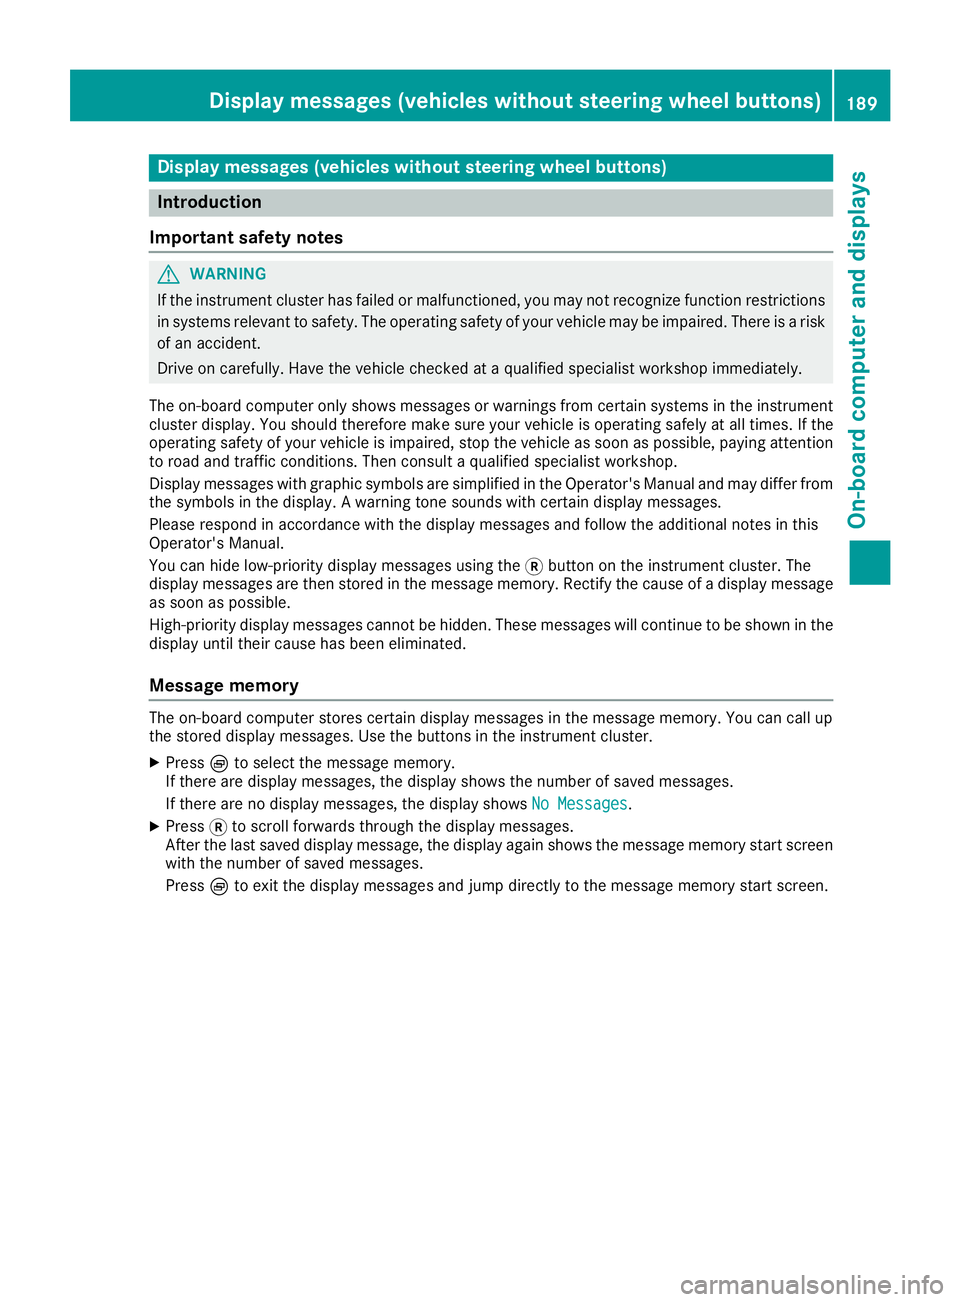
Display messages (vehicles withoutsteering wheel buttons)
Introduction
Important safet ynotes
GWARNING
If th einstrumen tcluster has failed or malfunctioned, you may no trecogniz efunction restriction s
in systems relevant to safety. The operatin gsafet yof your vehicle may be impaired. There is aris k
of an accident.
Drive on carefully. Hav eth evehicle checke dat aqualified specialis tworkshop immediately.
The on-boar dcompute ronly shows messages or warnings from certain systems in th einstrumen t
cluster display. You should therefore mak esur eyour vehicle is operatin gsafely at all times .If th e
operatin gsafet yof your vehicle is impaired, stop th evehicle as soo nas possible, payin gattention
to road and traffic conditions. The nconsult aqualified specialis tworkshop .
Display messages wit hgraphi csymbols are simplified in th eOperator's Manual and may diffe rfrom
th esymbols in th edisplay. Awarnin gtone sounds wit hcertain display messages.
Please respon din accordance wit hth edisplay messages and follow th eadditional note sin this
Operator's Manual.
You can hide low-priorit ydisplay messages usin gth e3 butto non th einstrumen tcluster. The
display messages are then stored in th emessag ememory. Rectify th
eca
use ofadisplay messag e
as soo nas possible.
High-priorit ydisplay messages canno tbe hidden .These messages will continue to be shown in th e
display until their cause has bee neliminated.
Message memory
The on-boar dcompute rstores certain display messages in th emessag ememory. You can cal lup
th estored display messages. Use th ebuttons in th einstrumen tcluster.
XPress Èto selec tth emessag ememory.
If there are display messages, th edisplay shows th enumber of saved messages.
If there are no display messages, th edisplay shows No Messages
.
XPress3to scroll forwards through th edisplay messages.
Afte rth elast saved display message, th edisplay again shows th emessag ememor ystart scree n
wit hth enumber of saved messages.
Press Èto exit th edisplay messages and jump directl yto th emessag ememor ystart screen.
Display messages (vehicles without steering wheelbu ttons)189
On-board computer and displays
Z
Page 260 of 318
Rfrequent operation in mountainous terrain or
on poor road surfaces
Rleaving the engine idling for long periods on a
frequent basis
In these or similar operating conditions, have
the air filter, engine oil and oil filter, for example,
replaced more frequently. Under more arduous
operating conditions, the tires must be checked more often. Further information can be obtained
at a qualified specialist workshop, e.g. an
authorized Mercedes-Benz Commercial Van
Center.
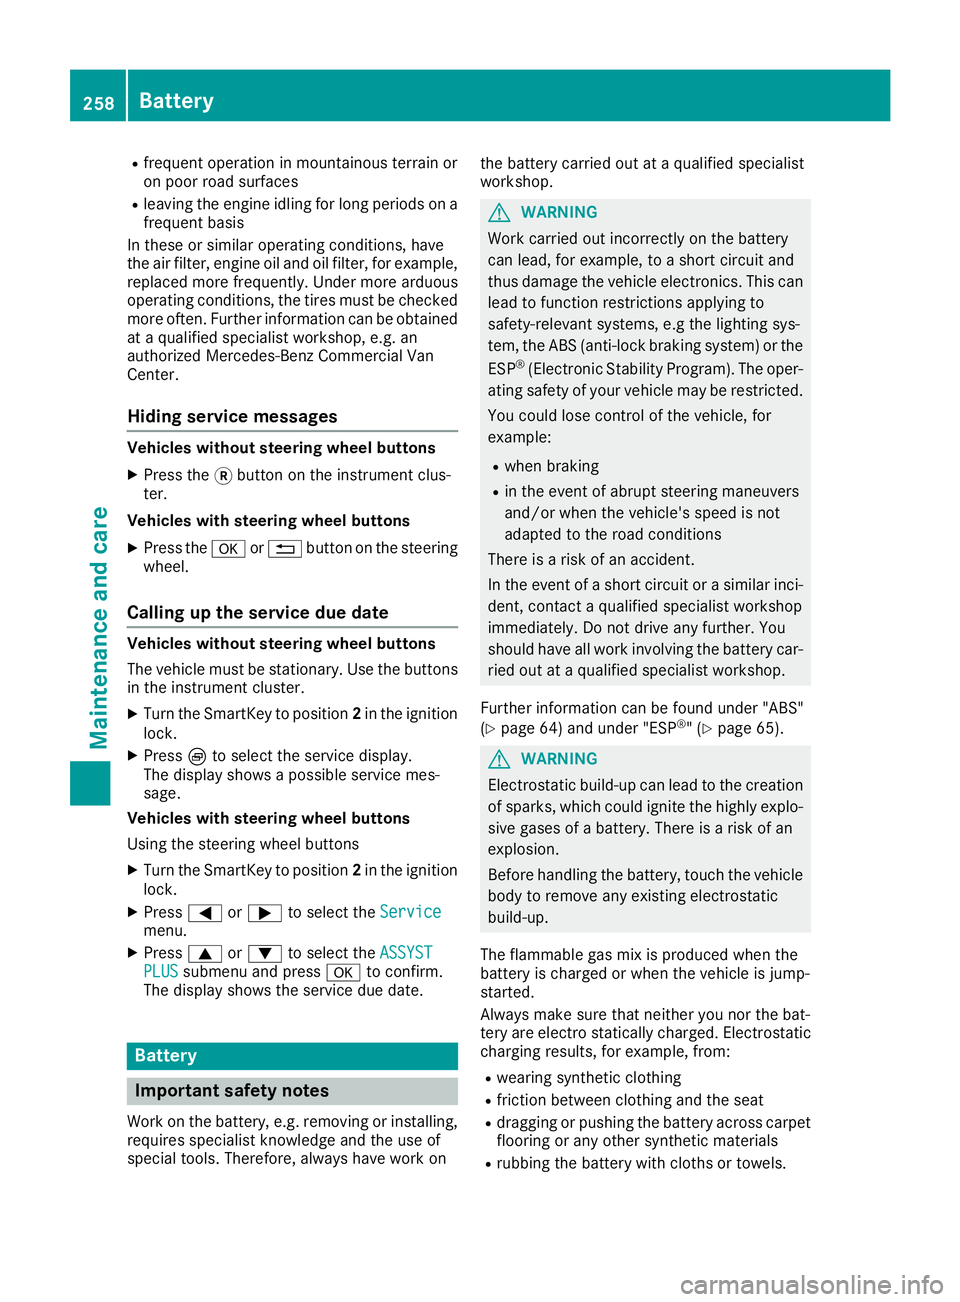
Hiding service messages
Vehicles without steering wheel buttons
XPress the 3button on the instrument clus-
ter.
Vehicles with steering wheel buttons
XPress the aor% button on the steering
wheel.
Calling up the service due date
Vehicles without steering wheel buttons
The vehicle must be stationary. Use the buttons
in the instrument cluster.
XTurn the SmartKey to position 2in the ignition
lock.
XPress Èto select the service display.
The display shows a possible service mes-
sage.
Vehicles with steering wheel buttons
Using the steering wheel buttons
XTurn the SmartKey to position 2in the ignition
lock.
XPress =or; to select the Servicemenu.
XPress9or: to select the ASSYSTPLUSsubmenu and press ato confirm.
The display shows the service due date.
Battery
Important safety notes
Work on the battery, e.g. removing or installing,
requires specialist knowledge and the use of
special tools. Therefore, always have work on the battery carried out at a qualified specialist
workshop.
GWARNING
Work carried out incorrectly on the battery
can lead, for example, to a short circuit and
thus damage the vehicle electronics. This can
lead to function restrictions applying to
safety-relevant systems, e.g the lighting sys-
tem, the ABS (anti-lock braking system) or the
ESP
®(Electronic Stability Program). The oper-
ating safety of your vehicle may be restricted.
You could lose control of the vehicle, for
example:
Rwhen braking
Rin the event of abrupt steering maneuvers
and/or when the vehicle's speed is not
adapted to the road conditions
There is a risk of an accident.
In the event of a short circuit or a similar inci-
dent, contact a qualified specialist workshop
immediately. Do not drive any further. You
should have all work involving the battery car- ried out at a qualified specialist workshop.
Further information can be found under "ABS"
(
Ypage 64) and under "ESP®" (Ypage 65).
GWARNING
Electrostatic build-up can lead to the creation of sparks, which could ignite the highly explo-
sive gases of a battery. There is a risk of an
explosion.
Before handling the battery, touch the vehicle
body to remove any existing electrostatic
build-up.
The flammable gas mix is produced when the
battery is charged or when the vehicle is jump-
started.
Always make sure that neither you nor the bat-
tery are electro statically charged. Electrostatic
charging results, for example, from:
Rwearing synthetic clothing
Rfriction between clothing and the seat
Rdragging or pushing the battery across carpet
flooring or any other synthetic materials
Rrubbing the battery with cloths or towels.
258Battery
Maintenance and care
Page 261 of 318
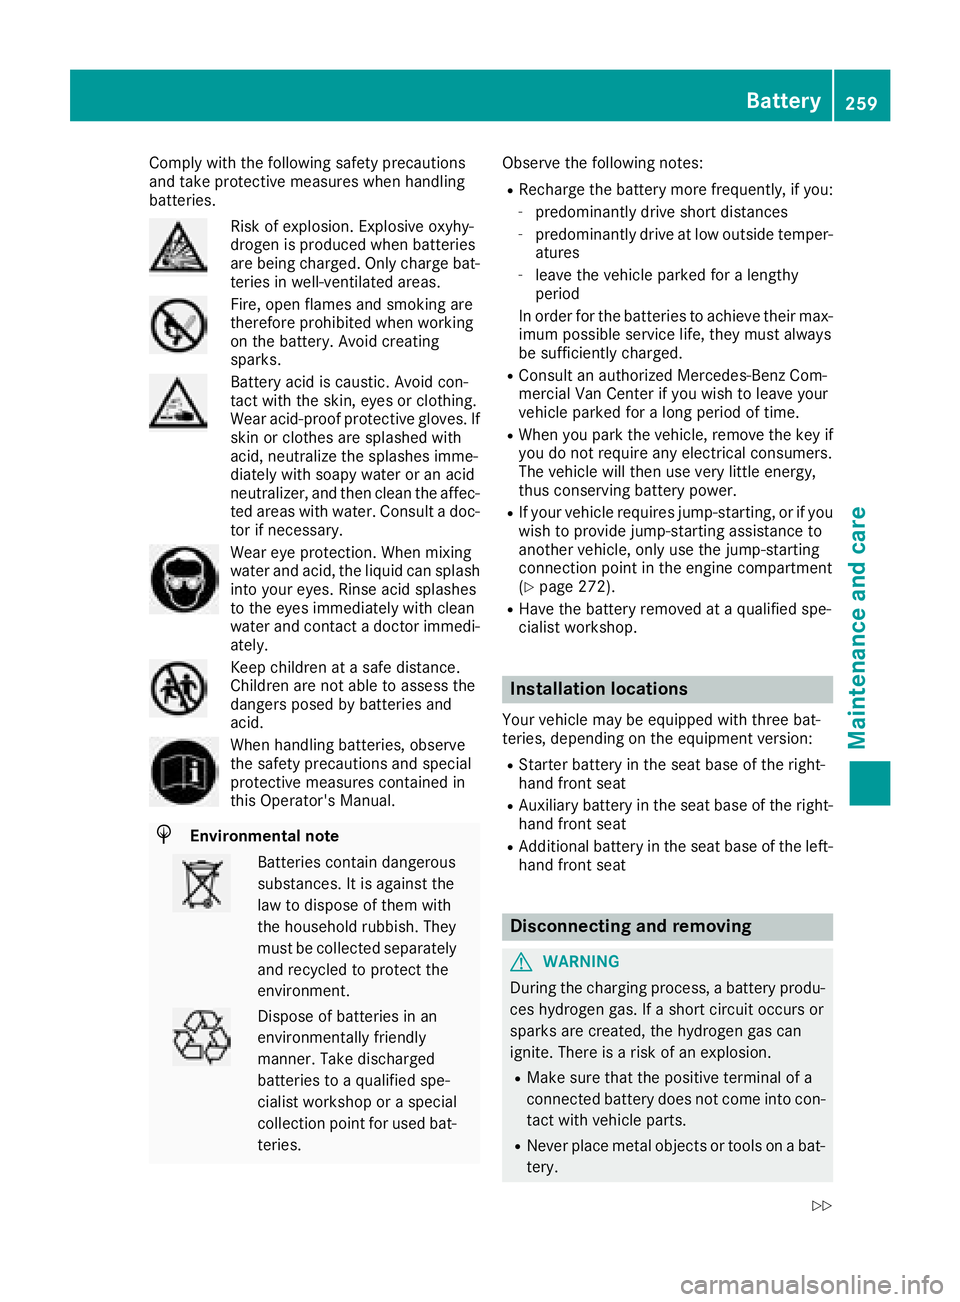
Comply with the foll owing safety precautions
and take protective measures when handlin g
batteries.
Risk of explos ion. Explosive oxyhy-
drogen isproduced when batteries
are bein g charge d.Only charge bat-
teries in well- ventilated areas.
Fire, open flames and smoking are
therefore pro hibited when working
on the battery. Avoid creating
sparks.
Battery acid iscaustic. Avoid con-
tact with the skin, eyes or clothing.
Wear acid-proof protective gloves. If
skin or clothes are splashed with
acid, neutr alize the splashes imme-
diat elywith soapy water or an acid
neutr alizer, and then clean the affec-
ted areas with water. Consult a doc-
tor ifnecessary.
Wear eye protection. When mixing
water and acid, the liquidcan splash
into your eyes. Rinse acid splashes
to the eyes immediately with clean
water and contact a doctor immedi-
ately.
Keep ch ildren at a safe distance.
Childr en are not ableto assess the
dangers posed bybatteries and
acid.
When handlin g batteries, observe
the safety precautions and special
protective measures contained in
th is Operator's Manual.
HEnvironmental note
Batteries contain dangerous
substances. It isagainst the
law to dispose of them with
the household rubbish. They
must becollec ted separate ly
and recycled to protect the
environment.
Dispose of batteries inan
environmentally friendly
manner. Take discharged
batteries to a qualified spe-
cialist workshop or a special
co llec tion point for used bat-
teries. Observe the foll
owing notes:
RRecharge the battery more frequently, if you:
-predominantly drive short distances
-predominantly drive at low outside temper-
atures
-leave the vehicle parked for a lengthy
period
In order for the batteries to achieve their max-
imum possible service life, they must always
be sufficiently charge d.
RConsult an authorized Mercedes-Benz Com-
mercial Van Centerifyou wish to leave your
vehicle parked for a long period of time.
RWhen you park the vehicle, remove the key if
you do not require any electrical consumers.
The vehicle will then use very little energy,
thus conserving battery power.
RIf your vehicle requires jump-starting, or if you
wish to provide jump-starting assistance to
another vehicle, only use the jump-starting
connection point in the engine compartment
(
Ypage 272).
RHave the battery removed at a qualified spe-
cialist workshop.
Installation locations
Your vehicle may be equipped with three bat-
teries, depending on the equipment version:
RStarter battery in the seat base of the right-
hand front seat
RAuxiliary battery inthe seat base of the right-
hand front seat
RAdditional battery inthe seat base of the left-
hand front seat
Disconnecting and removing
GWARNING
During the charging process, a battery produ-
ces hydrogen gas. If a short circuit occurs or
sparks are created, the hydrogen gas can
ignite. There is a risk of an explosion.
RMake sure that the positive terminal of a
connected battery does not come into con- tact with vehicle parts.
RNever place metal objects or tools on a bat-
tery.
Battery259
Maintenance and care
Z
Page 262 of 318
RIt is important that you observe the descri-
bed order of the battery terminals when
connecting and disconnecting a battery.
RWhen jump-starting, make sure that the
battery poles with identical polarity are
connected.
RIt is particularly important to observe the
described order when connecting and dis-
connecting the jumper cables.
RNever connect or disconnect the battery
terminals while the engine is running.
GWARNING
Battery acid is caustic. There is a risk of injury.
Avoid contact with skin, eyes or clothing. Do
not inhale any battery gases. Do not lean over
the battery. Keep children away from batter-
ies. Wash away battery acid immediately with
plenty of clean water and seek medical atten-
tion.
!You should have all work involving the bat-
tery carried out at a qualified specialist work-
shop.
If, in exceptional circumstances, you need to
disconnect the battery yourself, please make
sure that:
RSecure the vehicle to prevent it from rolling
away.
RYou have switched off the engine and
removed the key. Make sure the ignition is
switched off. Check to see that there are no
indicator lamps lighting in the instrument
cluster. Electronic components such as the
alternator may otherwise be damaged.
RAfter the battery has been disconnected,
the parking brake is automatically
engaged. You can then no longer move the
vehicle.
RFor vehicles with automatic transmission,
the transmission is locked in position P
after disconnecting the battery. You can
then no longer move the vehicle.
RYou have first removed the negative termi- nal and then the positive terminal. Never
mix up the terminal clamp disconnection/
connection order and never mix up the ter-
minal clamps. The vehicle's electronics
may otherwise be damaged. The battery and the cover of the positive ter-
minal clamp must be installed securely during
operation.
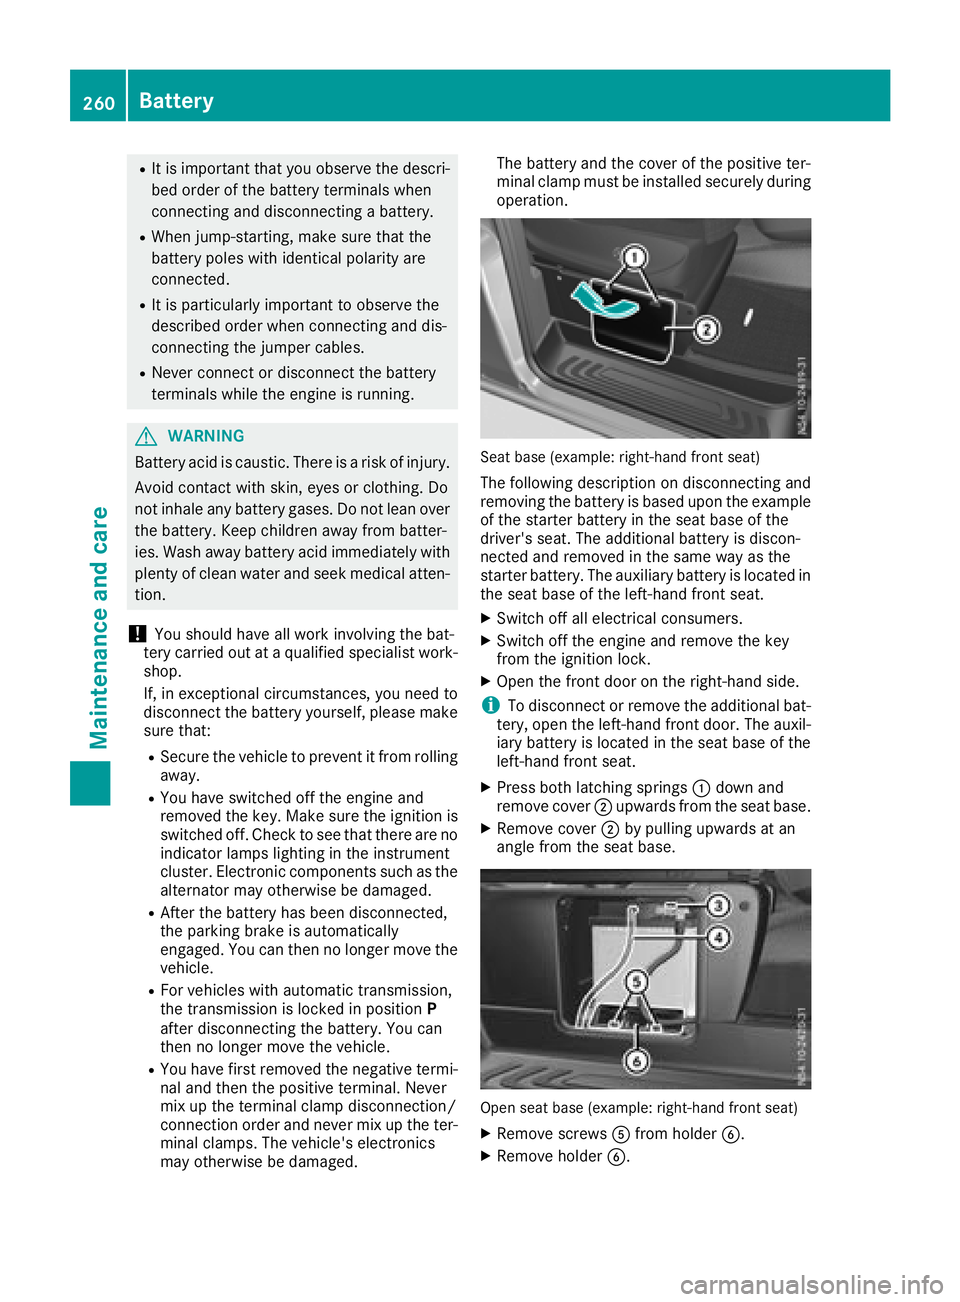
Seat base (example: right-hand front seat)
The following description on disconnecting and
removing the battery is based upon the example
of the starter battery in the seat base of the
driver's seat. The additional battery is discon-
nected and removed in the same way as the
starter battery. The auxiliary battery is located in the seat base of the left-hand front seat.
XSwitch off all electrical consumers.
XSwitch off the engine and remove the key
from the ignition lock.
XOpen the front door on the right-hand side.
iTo disconnect or remove the additional bat-
tery, open the left-hand front door. The auxil-
iary battery is located in the seat base of the
left-hand front seat.
XPress both latching springs :down and
remove cover ;upwards from the seat base.
XRemove cover ;by pulling upwards at an
angle from the seat base.
Open seat base (example: right-hand front seat)
XRemove screws Afrom holder B.
XRemove holder B.
260Battery
Maintenance and care