wipers MERCEDES-BENZ ML SUV 2008 Owners Manual
[x] Cancel search | Manufacturer: MERCEDES-BENZ, Model Year: 2008, Model line: ML SUV, Model: MERCEDES-BENZ ML SUV 2008Pages: 381, PDF Size: 7.18 MB
Page 15 of 381
12
Rain closing feature (sliding/tilt-
ing sunroof) . . . . . . . . . . . . . . . . . . . .189
Rain sensor Windscreen wipers . . . . . . . . . . . . . .98
Range (on-board computer) . . . . . ..136
Rear bench seat Folding forward/back . . . . . . . . . .194
Rear foglamp
Display message . . . . . . . . . . . . . .278
Rear-view mirror
Adjusting . . . . . . . . . . . . . . . . . . . . .85
Anti-dazzle (manual) . . . . . . . . . . . . .85
Anti-dazzle mode (automatic) . . . . .86
Rear window
Cleaning . . . . . . . . . . . . . . . . . . . . .249
Rear window heating . . . . . . . . . . ..182
Malfunction indicator lamp . . . . . .286
Rear window wiper . . . . . . . . . . . . . ..99
Replacing the wiper blade . . . . . . .322
Refuelling . . . . . . . . . . . . . . . . . . . . . .216
Remote control Auxiliary heating . . . . . . . . . . . . . .185
Changing the batteries (auxiliary
heating) . . . . . . . . . . . . . . . . . . . . .312
Garage door opene r.. . . . . . . . . . .209
Programming (garage door
opener) . . . . . . . . . . . . . . . . . . . . . .209
Replacing the wiper blades . . . . . ..321 Reserve
Display message . . . . . . . . . . . . . .283
Warning lamp . . . . . . . . . . . . . . . . .293
Reserve fuel . . . . . . . . . . . . . . . . . . . .366
Display message . . . . . . . . . . . . . .283
Fuel tank . . . . . . . . . . . . . . . . . . . .366
Warning lamp . . . . . . . . . . . . . . . . .293
Restraint System
see SRS
Restraint systems
For children . . . . . . . . . . . . . . . . . . .48
Rev counter . . . . . . . . . . . . . . . . . . . .114
Reversing camera . . . . . . . . . . . . . ..167
Reversing lamp Display message . . . . . . . . . . . . . .279
Roof load, maximum . . . . . . . ..363, 364
Roof rack . . . . . . . . . . . . . . . . . . . . . .190
Run-on time (mobile phone) . . . . . ..207 S
Safety net . . . . . . . . . . . . . . . . . . . . . .197
Seat Adjusting . . . . . . . . . . . . . . .76, 77, 78
Correct driver's seat position . . . . . .91
Storing settings . . . . . . . . . . . . . . . .87
Seat belt
Adjusting the height . . . . . . . . . . . . .91
Fastening . . . . . . . . . . . . . . . . . . . . .89
Warning lamp . . . . . . . . . . . . . .90, 291 Seat cushion
Removing (rear bench seat) . . . . . .196
Seat heating . . . . . . . . . . . . . . . . . . . . .82
Seat ventilation . . . . . . . . . . . . . . . . . .81
Malfunction indicator lamp . . . . . .285
Securing a load . . . . . . . . . . . . . . . . .193
Securing hooks . . . . . . . . . . . . . . . . .194
Selector lever Positions . . . . . . . . . . . . . . . . . . . .107
Service indicator . . . . . . . . . . . . . . . .246
Service products . . . . . . . . . . . . . . . .366
Brake fluid . . . . . . . . . . . . . . . . . . .372
Coolant . . . . . . . . . . . . . . . . . . . . .370
Windscreen washer fluid . . . . . . . .372
Settings
Calling up a stored setting . . . . . . . .87
Factory (key ).. . . . . . . . . . . . . .66, 67
Factory (KEYLESS GO) . . . . . . . . . . .68
Factory (on-board computer) . . . . .127
Setting the unit (on-board computer)
Speedometer . . . . . . . . . . . . . . . . .128
Shift ranges
Automatic transmission . . . . . . . . .108
Sidebags . . . . . . . . . . . . . . . . . . . . . . . .45
Side window Fault . . . . . . . . . . . . . . . . . . . . . . . .302
Side windows
Cleaning . . . . . . . . . . . . . . . . . . . . .249
Opening/closing . . . . . . . . . . . . . . .99
Resettin g.. . . . . . . . . . . . . . . . . . .101 Index
164_AKB; 5; 5, en-GB
wobuchh,
Version: 2.10.6 2008-05-11T11:55:12+02:00 - Seite 12Dateiname: 6515_4293_02_buchblock.pdf; preflight
Page 18 of 381
15U
Unladen weight . . . . . . . . . . . . . . . . .363
Unlocking Emergency unlocking . . . . . . . . . . .308
From the inside (central unlocking
button) . . . . . . . . . . . . . . . . . . . . . . .74
Up (display message) . . . . . . . . . . ..121 V
Variable Speedtronic . . . . . . . . . . . ..154
Vehicle Emergency unlocking . . . . . . .308, 309
Individual settings (on-board com-
puter) . . . . . . . . . . . . . . . . . . . . . . .127
Leaving parked up . . . . . . . . . . . . .307
Towing . . . . . . . . . . . . . . . . . . . . . .342
Transporting . . . . . . . . . . . . . . . . . .342
Vehicle battery . . . . . . . . . . . . . . . . .334
Vehicle dimensions . . . . . . . . . . . . ..361
Vehicle electronics . . . . . . . . . . . . ..349
Vehicle identification number
(VIN) . . . . . . . . . . . . . . . . . . . . . .350, 351
Vehicle identification plates . . . . ..350
Vehicle level Display message. . . . . . . . . . . . . . . . . . . . . . .271, 272
Vehicle tool kit . . . . . . . . . . . . . . . . . .255
Vehicle weights . . . . . . . . . . . . . . . . .363 W
Warning and indicator lamp ABS (yellow) . . . . . . . . . . . . . . . . . .288
LIM (Cruise control) . . . . . . . . . . . .145
LIM (Distronic) . . . . . . . . . . . . . . . .149
LIM (variable Speedtronic) . . . . . . .154
Warning signal
Audible . . . . . . . . . . . . . . . . . . . . . .293
Warning triangle . . . . . . . . . . . . . . . .254
Washer fluid Display message . . . . . . . . . . . . . .284
Wearing seat belts . . . . . . . . . . . . . . ..89
Wheel bolts Tightening torque . . . . . . . . . . . . . .332
Wheel chock
Use . . . . . . . . . . . . . . . . . . . . . . . . .258
Wheels
General notes . . . . . . . . . . . . . . . . .224
Interchanging . . . . . . . . . . . . . . . . .230
Technical data . . . . . . . . . . . .355, 358
Windowbags . . . . . . . . . . . . . . . . . . . . .46
Windows Cleaning . . . . . . . . . . . . . . . . . . . . .249
Cleaning the windscreen . . . . . . . .249
Side windows . . . . . . . . . . . . . . . . . .99
Windscreen
Cleaning . . . . . . . . . . . . . . . . . . . . .249
Infrared reflecting . . . . . . . . . . . . .214 Windscreen washer fluid
. . . . . . . ..372
Topping up . . . . . . . . . . . . . . . . . . .223
Windscreen washer fluid reservoir
. . . . . . . . . . . . . . . . . . . . . . . . . .223, 372
Windscreen washer reservoir Capacity . . . . . . . . . . . . . . . . . . . . .372
Windscreen washer system . . . . . ..372
Windscreen wipers . . . . . . . . . . . . . ..98
Cleaning . . . . . . . . . . . . . . . . . . . . .249
Malfunction . . . . . . . . . . . . . . . . . .301
Replacing the wiper blades . . . . . .321
Winter diesel . . . . . . . . . . . . . . . . . . .218
Winter driving . . . . . . . . . . . . . .231, 232
Winter tyres . . . . . . . . . . . . . . . . . . . .231
Limiting the speed (on-board com-
puter) . . . . . . . . . . . . . . . . . . . . . . .156 Index
164_AKB; 5; 5, en-GB
wobuchh,
Version: 2.10.6 2008-05-11T11:55:12+02:00 - Seite 15Dateiname: 6515_4293_02_buchblock.pdf; preflight
Page 24 of 381
Exterior view
21Function Page
1 Opening and closing the
tailgate 70
Vehicle tool kit 255
Opening and closing the
exterior spare wheel
holder* 69
2 Rear window heating
182
3 Rear lights
318
4 Fuel filler flap
216
Fuel requirements
216 Function Page
5 Opening and closing the
doors 66
6 Adjusting the exterior mir-
rors
85
7 Fitting the towing eye
341
8 Front lights
315 Function Page
9 Opens the bonnet
219
Engine oil 220
Coolant 223
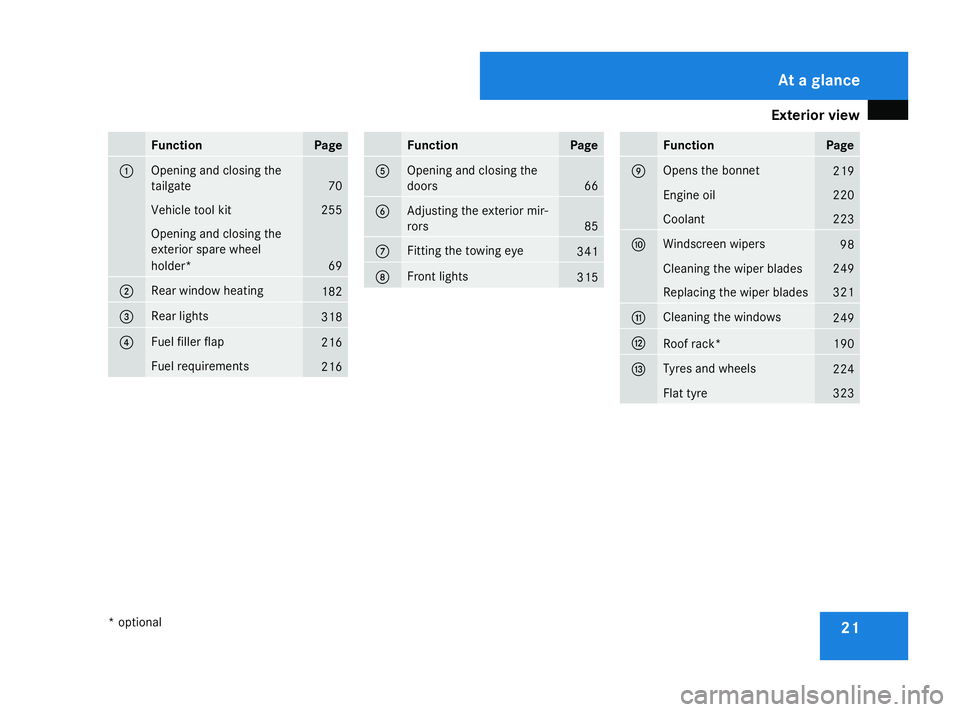
a Windscreen wipers
98
Cleaning the wiper blades 249
Replacing the wiper blades 321
b Cleaning the windows
249
c
Roof rack* 190
d Tyres and wheels
224
Flat tyre 323At a glance
* optional
164_AKB; 5; 5, en-GB
wobuchh,
Version: 2.10.6 2008-05-11T11:55:12+02:00 - Seite 21Dateiname: 6515_4293_02_buchblock.pdf; preflight
Page 26 of 381
Cockpit
23Function Page
1 Combination switch:
• main-beam headlamps 94
• turn signals 94
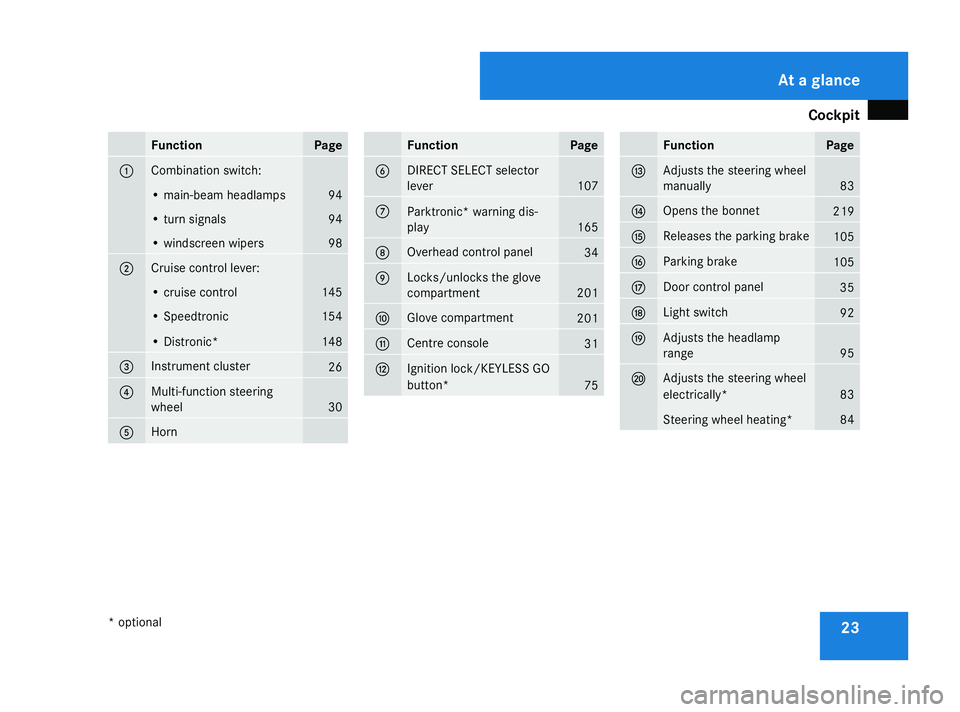
• windscreen wipers 98
2 Cruise control lever:
• cruise control 145
• Speedtronic 154
• Distronic* 148
3 Instrument cluster
26
4 Multi-function steering
wheel
30
5 Horn Function Page
6 DIRECT SELECT selector
lever
107
7
Parktronic* warning dis-
play
165
8 Overhead control panel
34
9 Locks/unlocks the glove
compartment 201
a Glove compartment
201
b Centre console
31
c Ignition lock/KEYLESS GO
button*
75 Function Page
d Adjusts the steering wheel
manually
83
e Opens the bonnet
219
f Releases the parking brake
105
g Parking brake
105
h Door control panel
35
j Light switch
92
k Adjusts the headlamp
range
95
l Adjusts the steering wheel
electrically*
83
Steering wheel heating* 84At a glance
* optional
164_AKB; 5; 5, en-GB
wobuchh,
Version: 2.10.6 2008-05-11T11:55:12+02:00 - Seite 23Dateiname: 6515_4293_02_buchblock.pdf; preflight
Page 28 of 381
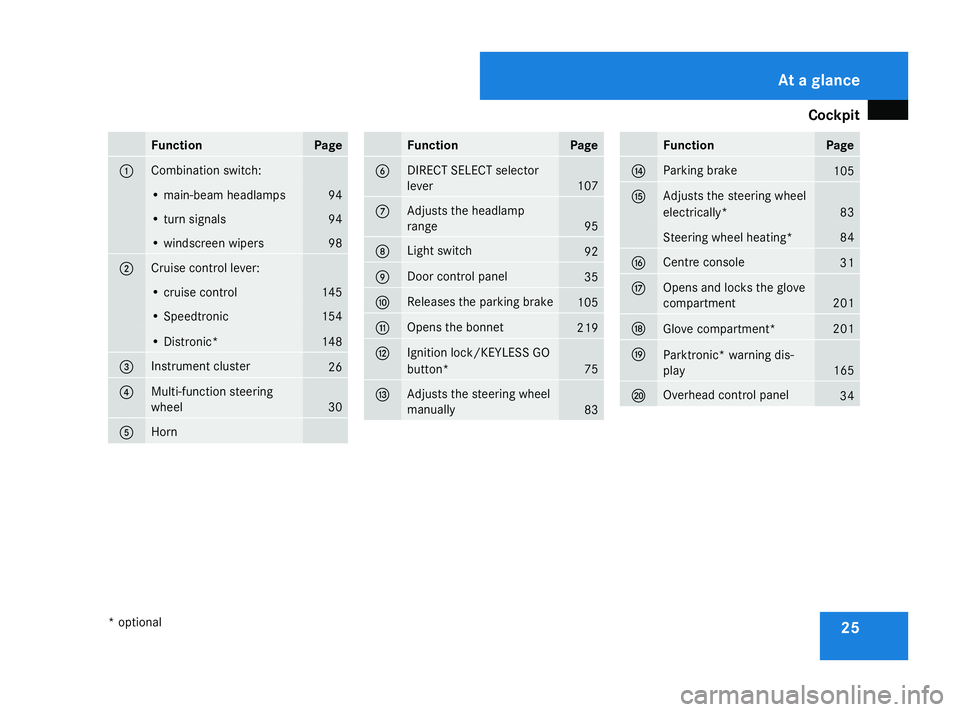
Cockpit
25Function Page
1 Combination switch:
• main-beam headlamps 94
• turn signals 94
• windscreen wipers 98
2 Cruise control lever:
• cruise control 145
• Speedtronic 154
• Distronic* 148
3 Instrument cluster
26
4 Multi-function steering
wheel
30
5 Horn Function Page
6 DIRECT SELECT selector
lever
107
7 Adjusts the headlamp
range
95
8 Light switch
92
9 Door control panel
35
a Releases the parking brake
105
b Opens the bonnet
219
c Ignition lock/KEYLESS GO
button*
75
d Adjusts the steering wheel
manually
83 Function Page
e Parking brake
105
f Adjusts the steering wheel
electrically*
83
Steering wheel heating* 84
g Centre console
31
h Opens and locks the glove
compartment
201
j
Glove compartment* 201
k
Parktronic* warning dis-
play
165
l Overhead control panel
34At a glance
* optional
164_AKB; 5; 5, en-GB
wobuchh,
Version: 2.10.6 2008-05-11T11:55:12+02:00 - Seite 25Dateiname: 6515_4293_02_buchblock.pdf; preflight
Page 68 of 381
65
Opening and closing
...........................66
Key positions ....................................... 75
Seats .................................................... 76
Steering wheel .................................... 83
Mirrors ................................................. 85
Memory functions* .............................87
Seat belts ............................................. 89
Lights ................................................... 92
Windscreen wipers .............................98
Side windows ...................................... 99Driving and parking
..........................103
Transmission ..................................... 106
Instrument cluster ............................113
On-board computer ..........................115
Off-road driving ................................. 138
Driving systems ................................ 145
Air conditioning ................................. 169
Sliding sunroof .................................. 187
Loading and stowing ........................190
Features ............................................. 203 Controls
164_AKB; 5; 5, en-GB
wobuchh,
Version: 2.10.6 2008-05-11T11:55:12+02:00 - Seite 65Dateiname: 6515_4293_02_buchblock.pdf; preflight
Page 78 of 381
Key positions
75Key positions
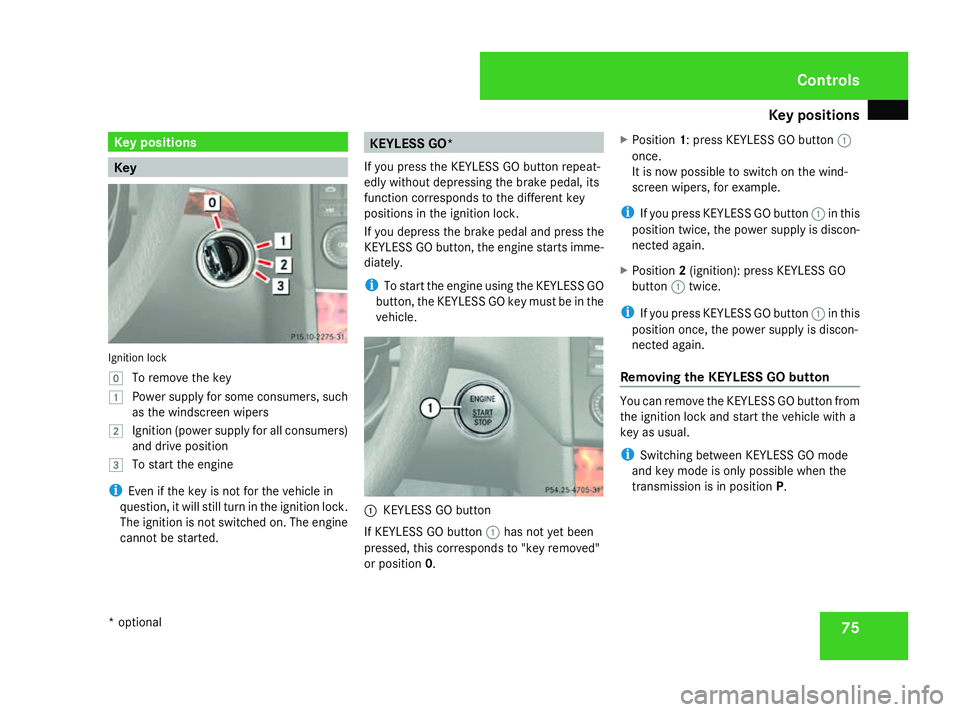
Key
Ignition lock
}
To remove the key
$ Power supply for some consumers, such
as the windscreen wipers
% Ignition (power supply for all consumers)
and drive position
& To start the engine
i Even if the key is not for the vehicle in
question, it will still turn in the ignition lock.
The ignition is not switched on. The engine
cannot be started. KEYLESS GO*
If you press the KEYLESS GO button repeat-
edly without depressing the brake pedal, its
function corresponds to the different key
positions in the ignition lock.
If you depress the brake pedal and press the
KEYLESS GO button, the engine starts imme-
diately.
i To start the engine using the KEYLESS GO
button, the KEYLESS GO key must be in the
vehicle. 1
KEYLESS GO button
If KEYLESS GO button 1has not yet been
pressed, this corresponds to "key removed"
or position 0. X
Position 1: press KEYLESS GO button 1
once.
It is now possible to switch on the wind-
screen wipers, for example.
i If you press KEYLESS GO button 1in this
position twice, the power supply is discon-
nected again.
X Position 2(ignition): press KEYLESS GO
button 1twice.
i If you press KEYLESS GO button 1in this
position once, the power supply is discon-
nected again.
Removing the KEYLESS GO button You can remove the KEYLESS GO button from
the ignition lock and start the vehicle with a
key as usual.
i
Switching between KEYLESS GO mode
and key mode is only possible when the
transmission is in position P. Cont
rols
* optional
164_AKB; 5; 5, en-GB
wobuchh
,V ersion: 2.10.6
2008-05-11T11:55:12+02:00 - Seite 75 ZDateiname: 6515_4293_02_buchblock.pdf; preflight
Page 101 of 381
Windscreen wipers
98 Windscreen wipers
Switching the windscreen wipers on/
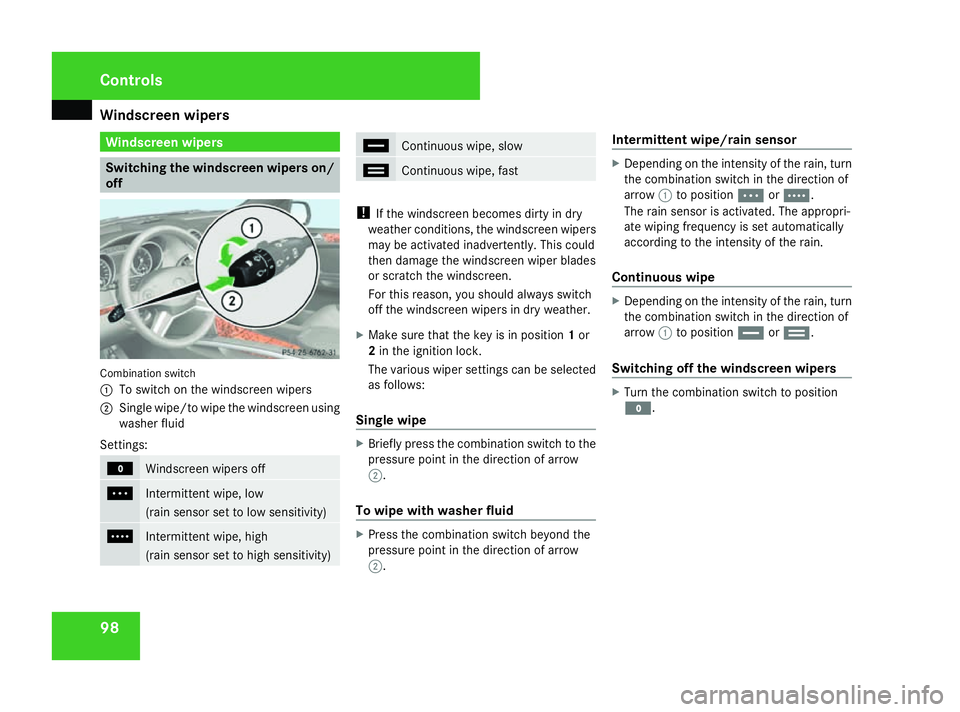
off Combination switch
1
To switch on the windscreen wipers
2 Single wipe/to wipe the windscreen using
washer fluid
Settings: M
Windscreen wipers off
U
Intermittent wipe, low
(rain sensor set to low sensitivity)
V
Intermittent wipe, high
(rain sensor set to high sensitivity) u
Continuous wipe, slow
t
Continuous wipe, fast
!
If the windscreen becomes dirty in dry
weather conditions, the windscreen wipers
may be activated inadvertently. This could
then damage the windscreen wiper blades
or scratch the windscreen.
For this reason, you should always switch
off the windscreen wipers in dry weather.
X Make sure that the key is in position 1or
2 in the ignition lock.
The various wiper settings can be selected
as follows:
Single wipe X
Briefly press the combination switch to the
pressure point in the direction of arrow
2.
To wipe with washer fluid X
Press the combination switch beyond the
pressure point in the direction of arrow
2. Intermittent wipe/rain sensor X
Depending on the intensity of the rain, turn
the combination switch in the direction of
arrow 1to position UorV.
The rain sensor is activated. The appropri-
ate wiping frequency is set automatically
according to the intensity of the rain.
Continuous wipe X
Depending on the intensity of the rain, turn
the combination switch in the direction of
arrow 1to position uort.
Switching off the windscreen wipers X
Turn the combination switch to position
M. Controls
164_AKB; 5; 5, en-GB
wobuchh,
Version: 2.10.6 2008-05-11T11:55:12+02:00 - Seite 98Dateiname: 6515_4293_02_buchblock.pdf; preflight
Page 185 of 381
Air conditioning
182
or
X
Press the Ubutton.
or
X Turn the thumbwheels for the temperature
clockwise or anti-clockwise.
or
X Press the Qor· button. Demisting the windows
Windows misted up on the inside X
Activate the "cooling function with air-
dehumidification" function.
X Activate the automatic mode.
X If the windows continue to mist up, activate
the "demisting" function.
Windows misted up on the outside X
Activate the windscreen wipers.
X Press the a/7orY/ 8air
distribution button.
i You should only select this setting until
the windscreen is clear again. Switching the rear window heating
on/off G
Risk of accident
Clear all windows of ice or snow before set-
ting off. Impaired visibility could otherwise
endanger you and others.
i At very low temperatures, the rear win-
dow heating is only switched on once the
vehicle interior has warmed up.
i The rear window heating has a high cur-
rent draw. You should therefore switch it
off as soon as the window is clear, as it only
switches off automatically after several
minutes.
i If the battery voltage is too low, the rear
window heating may switch off.
X Turn the key to position 2in the ignition
lock.
X Press the 1button.
The indicator lamp in the 1button lights
up or goes out. Activating/deactivating air-recircula-
tion mode
You can deactivate the flow of fresh air if
unpleasant odours are entering the vehicle
from outside. The air already inside the vehi-
cle will then be recirculated. G
Risk of accident
Only switch over to air-recirculation mode
briefly at low outside temperatures. Other-
wise, the windows could mist up, thus
impairing visibility and endangering your-
self and others. This may prevent you from
observing the traffic conditions, thereby
causing an accident.
X Turn the key to position 2in the ignition
lock.
X To activate: press the:button.
The indicator lamp in the :button
comes on.
i Air-recirculation mode is activated auto-
matically at high outside temperatures.
When air-recirculation mode is activated
automatically, the indicator lamp in
the : button is not lit.
Outside air is added after about 30
minutes. Cont
rols
164_AKB; 5; 5, en-GB
wobuchh
,V ersion: 2.10.6
2008-05-11T11:55:12+02:00 - Seite 182 Dateiname: 6515_4293_02_buchblock.pdf; preflight
Page 216 of 381
Features
213
X
Use æ orç on the multi-function
steering wheel to select the Vehiclesub-
menu.
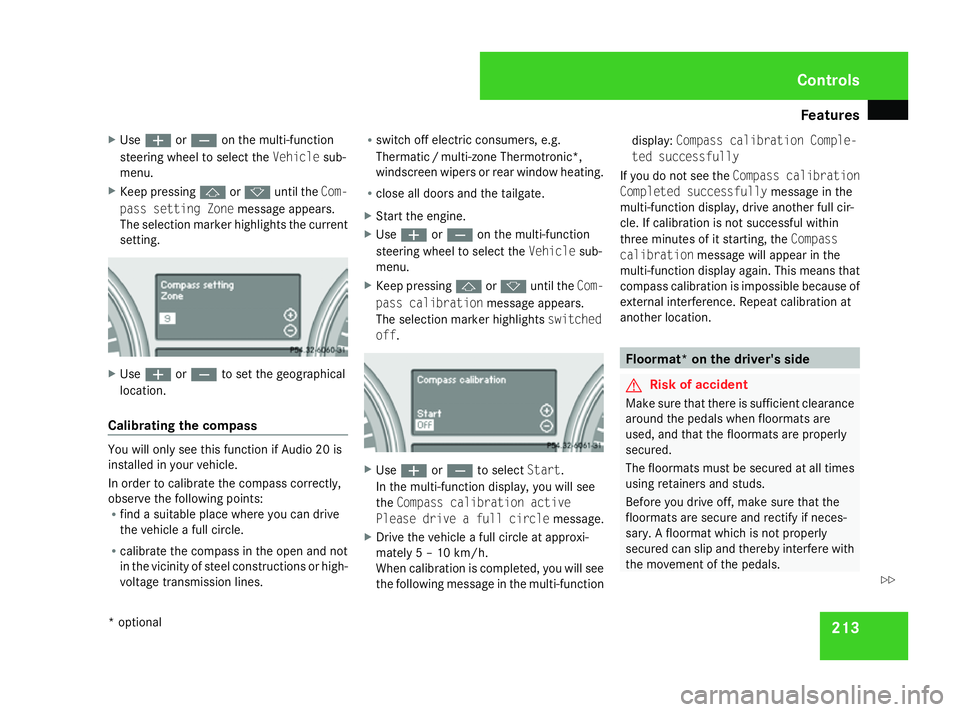
X Keep pressing jork until the Com-
pass setting Zone message appears.
The selection marker highlights the current
setting. X
Use æ orç to set the geographical
location.
Calibrating the compass You will only see this function if Audio 20 is
installed in your vehicle.
In order to calibrate the compass correctly,
observe the following points:
R find a suitable place where you can drive
the vehicle a full circle.
R calibrate the compass in the open and not
in the vicinity of steel constructions or high-
voltage transmission lines. R
switch off electric consumers, e.g.
Thermati c/multi-zone Thermotronic*,
windscreen wipers or rear window heating.
R close all doors and the tailgate.
X Start the engine.
X Use æ orç on the multi-function
steering wheel to select the Vehiclesub-
menu.
X Keep pressing jork until the Com-
pass calibration message appears.
The selection marker highlights switched
off . X
Use æ orç to select Start.
In the multi-function display, you will see
the Compass calibration active
Please drive a full circle message.
X Drive the vehicle a full circle at approxi-
mately 5 – 10 km/h.
When calibration is completed, you will see
the following message in the multi-function display:
Compass calibration Comple-
ted successfully
If you do not see the Compass calibration
Completed successfully message in the
multi-function display, drive another full cir-
cle. If calibration is not successful within
three minutes of it starting, the Compass
calibration message will appear in the
multi-function display again. This means that
compass calibration is impossible because of
external interference. Repeat calibration at
another location. Floormat* on the driver's side
G
Risk of accident
Make sure that there is sufficient clearance
around the pedals when floormats are
used, and that the floormats are properly
secured.
The floormats must be secured at all times
using retainers and studs.
Before you drive off, make sure that the
floormats are secure and rectify if neces-
sary. A floormat which is not properly
secured can slip and thereby interfere with
the movement of the pedals. Controls
* optional
164_AKB; 5; 5, en-GB
wobuchh,
Version: 2.10.6 2008-05-11T11:55:12+02:00 - Seite 213 ZDateiname: 6515_4293_02_buchblock.pdf; preflight