AUX MERCEDES-BENZ ML320 2001 W163 Owner's Manual
[x] Cancel search | Manufacturer: MERCEDES-BENZ, Model Year: 2001, Model line: ML320, Model: MERCEDES-BENZ ML320 2001 W163Pages: 317, PDF Size: 10.4 MB
Page 22 of 317
19 Instruments and controls
Te ch n ica l
data Instruments
and controlsOperation DrivingInstrument
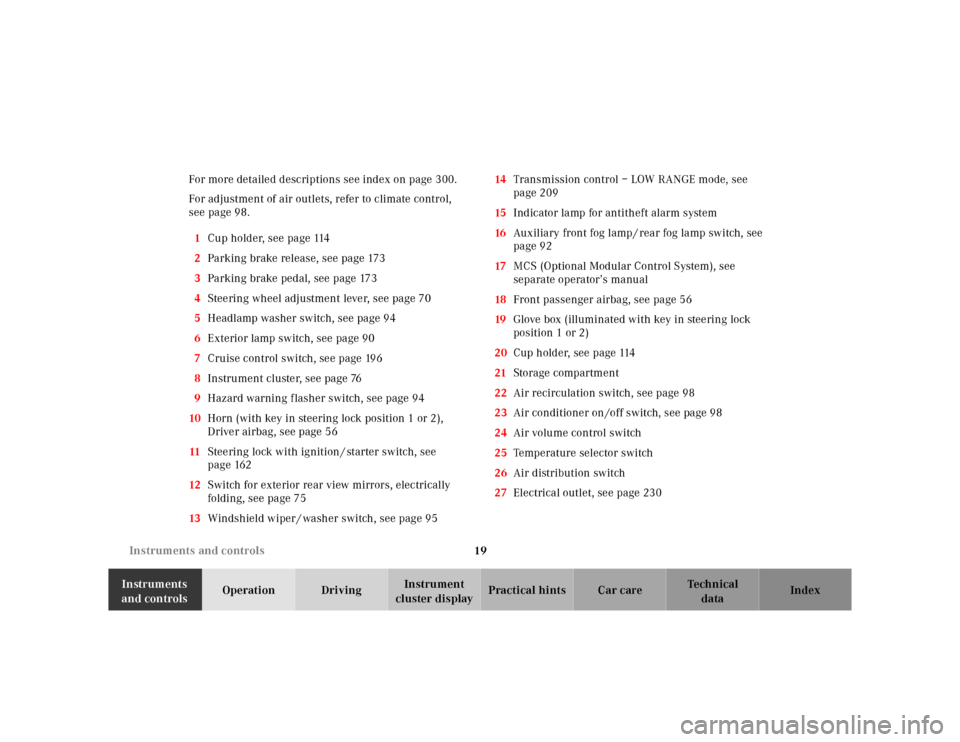
cluster displayPractical hints Car care Index For more detailed descriptions see index on page 300.
For adjustment of air outlets, refer to climate control,
see page 98.
1Cup holder, see page 114
2Parking brake release, see page 173
3Parking brake pedal, see page 173
4Steering wheel adjustment lever, see page 70
5Headlamp washer switch, see page 94
6Exterior lamp switch, see page 90
7Cruise control switch, see page 196
8Instrument cluster, see page 76
9Hazard warning flasher switch, see page 94
10Horn (with key in steering lock position 1 or 2),
Driver airbag, see page 56
11Steering lock with ignition / starter switch, see
page 162
12Switch for exterior rear view mirrors, electrically
folding, see page 75
13Windshield wiper / washer switch, see page 9514Transmission control – LOW RANGE mode, see
page 209
15Indicator lamp for antitheft alarm system
16Auxiliary front fog lamp / rear fog lamp switch, see
page 92
17MCS (Optional Modular Control System), see
separate operator’s manual
18Front passenger airbag, see page 56
19Glove box (illuminated with key in steering lock
position 1 or 2)
20Cup holder, see page 114
21Storage compartment
22Air recirculation switch, see page 98
23Air conditioner on /off switch, see page 98
24Air volume control switch
25Temperature selector switch
26Air distribution switch
27Electrical outlet, see page 230
Page 95 of 317
92 Fog lamp switch
Te ch n ica l
data Instruments
and controlsOperationDrivingInstrument
cluster displayPractical hints Car care Index
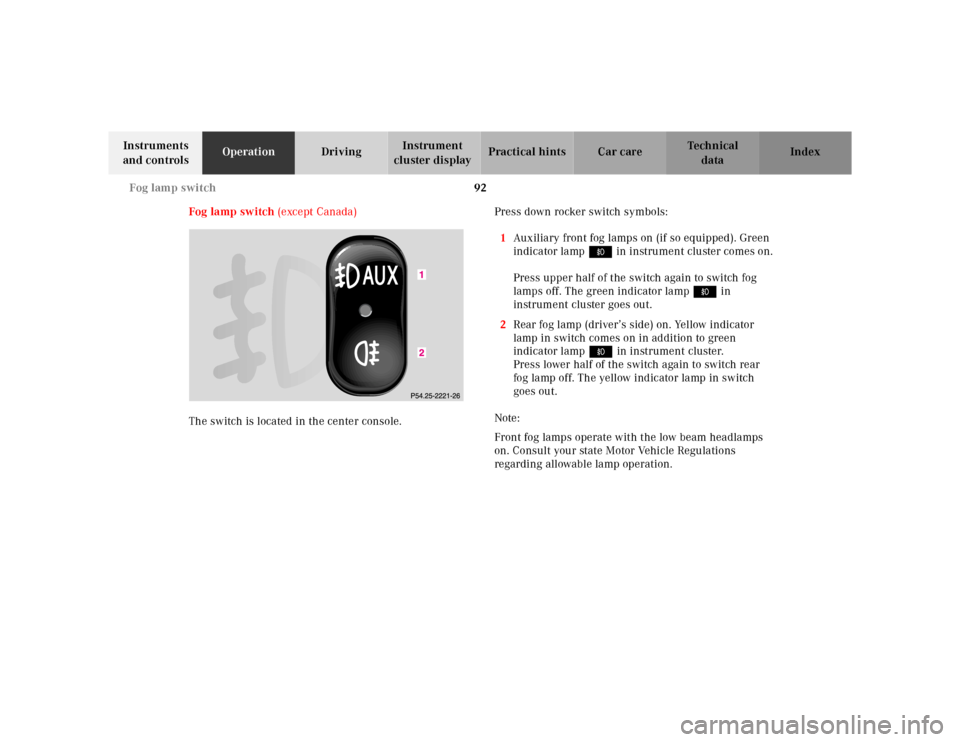
Fog lamp switch (except Canada)
The switch is located in the center console.Press down rocker switch symbols:
1Auxiliary front fog lamps on (if so equipped). Green
indicator lamp ‡ in instrument cluster comes on.
Press upper half of the switch again to switch fog
lamps off. The green indicator lamp‡ in
instrument cluster goes out.
2Rear fog lamp (driver’s side) on. Yellow indicator
lamp in switch comes on in addition to green
indicator lamp‡ in instrument cluster.
Press lower half of the switch again to switch rear
fog lamp off. The yellow indicator lamp in switch
goes out.
Note:
Front fog lamps operate with the low beam headlamps
on. Consult your state Motor Vehicle Regulations
regarding allowable lamp operation.
Page 232 of 317
229 Fuses
Te ch n ica l
data Instruments
and controlsOperation DrivingInstrument
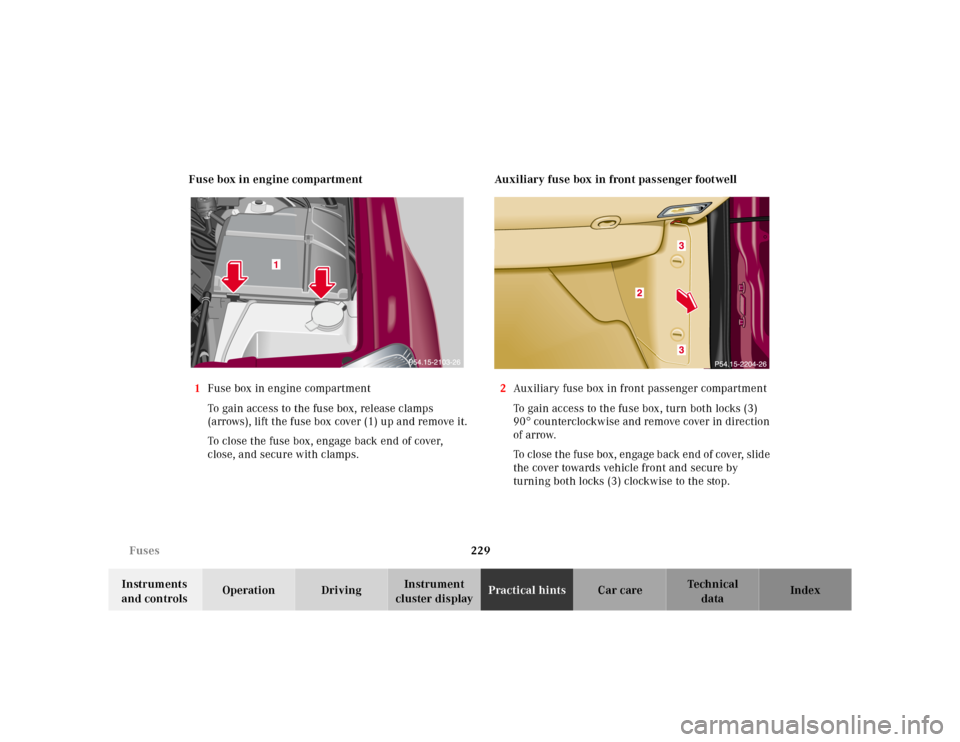
cluster displayPractical hintsCar care Index Fuse box in engine compartment
1Fuse box in engine compartment
To gain access to the fuse box, release clamps
(arrows), lift the fuse box cover (1) up and remove it.
To close the fuse box, engage back end of cover,
close, and secure with clamps.Auxiliary fuse box in front passenger footwell
2Auxiliary fuse box in front passenger compartment
To gain access to the fuse box, turn both locks (3)
90° counterclockwise and remove cover in direction
of arrow.
To close the fuse box, engage back end of cover, slide
the cover towards vehicle front and secure by
turning both locks (3) clockwise to the stop.
1
Page 233 of 317
230 Electrical outlet
Te ch n ica l
data Instruments
and controlsOperation DrivingInstrument
cluster displayPractical hintsCar care Index
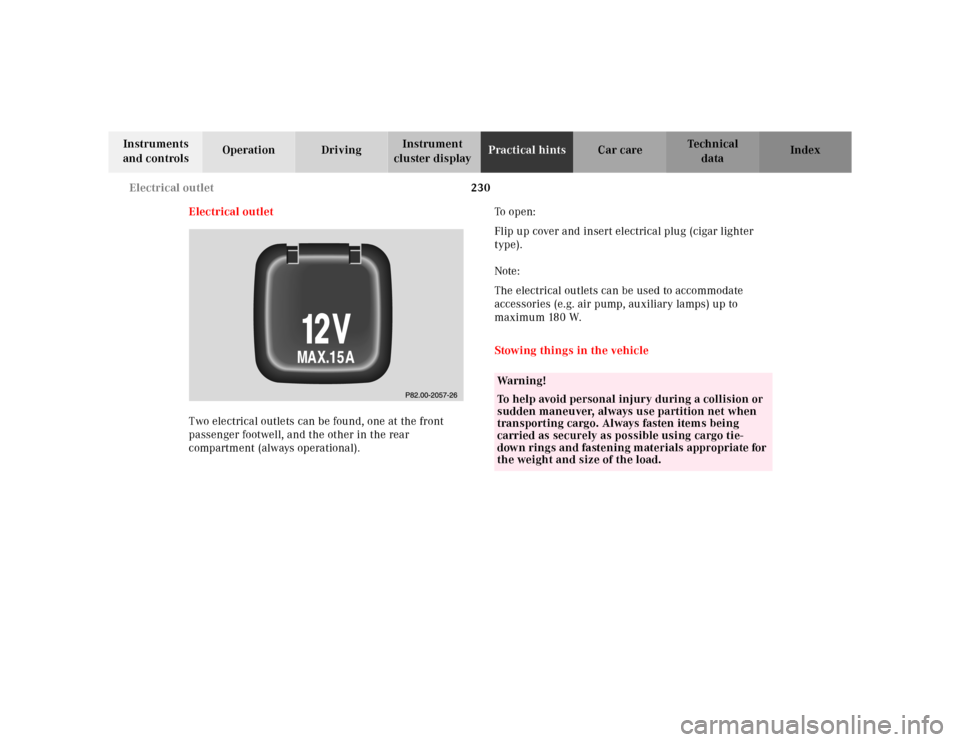
Electrical outlet
Two electrical outlets can be found, one at the front
passenger footwell, and the other in the rear
compartment (always operational).To o p e n :
Flip up cover and insert electrical plug (cigar lighter
type).
Note:
The electrical outlets can be used to accommodate
accessories (e.g. air pump, auxiliary lamps) up to
maximum 180 W.
Stowing things in the vehicle
Wa r n i n g !
To help avoid personal injury during a collision or
sudden maneuver, always use partition net when
transporting cargo. Always fasten items being
carried as securely as possible using cargo tie-
down rings and fastening materials appropriate for
the weight and size of the load.
Page 264 of 317
261 Exterior lamps
Te ch n ica l
data Instruments
and controlsOperation DrivingInstrument
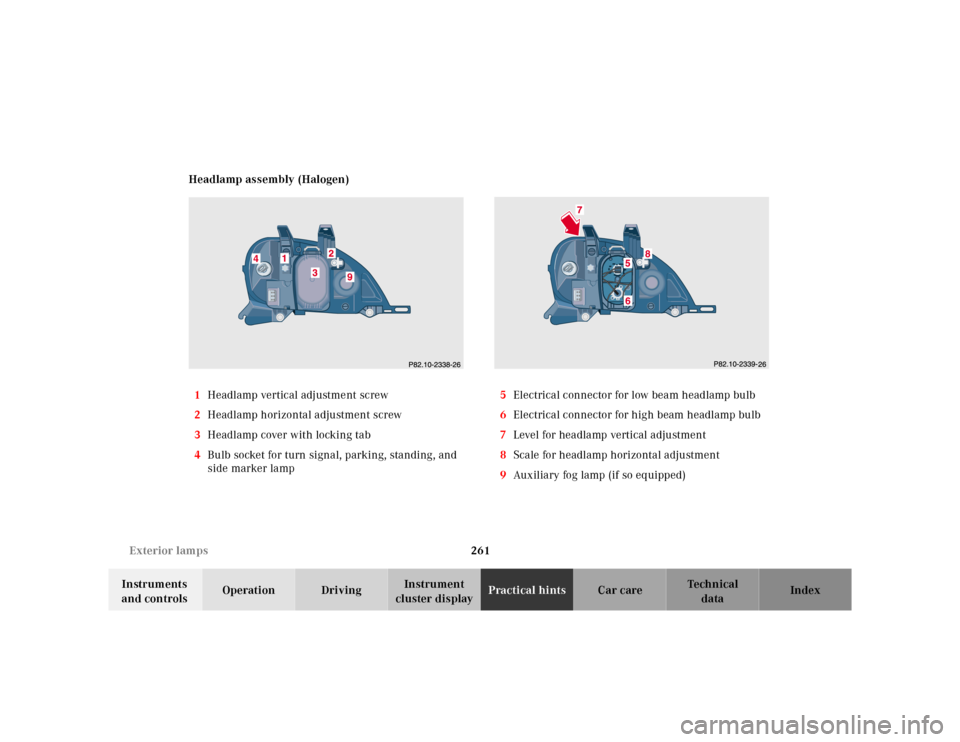
cluster displayPractical hintsCar care Index Headlamp assembly (Halogen)
1Headlamp vertical adjustment screw
2Headlamp horizontal adjustment screw
3Headlamp cover with locking tab
4Bulb socket for turn signal, parking, standing, and
side marker lamp5Electrical connector for low beam headlamp bulb
6Electrical connector for high beam headlamp bulb
7Level for headlamp vertical adjustment
8Scale for headlamp horizontal adjustment
9Auxiliary fog lamp (if so equipped)
Page 265 of 317
262 Exterior lamps
Te ch n ica l
data Instruments
and controlsOperation DrivingInstrument
cluster displayPractical hintsCar care Index
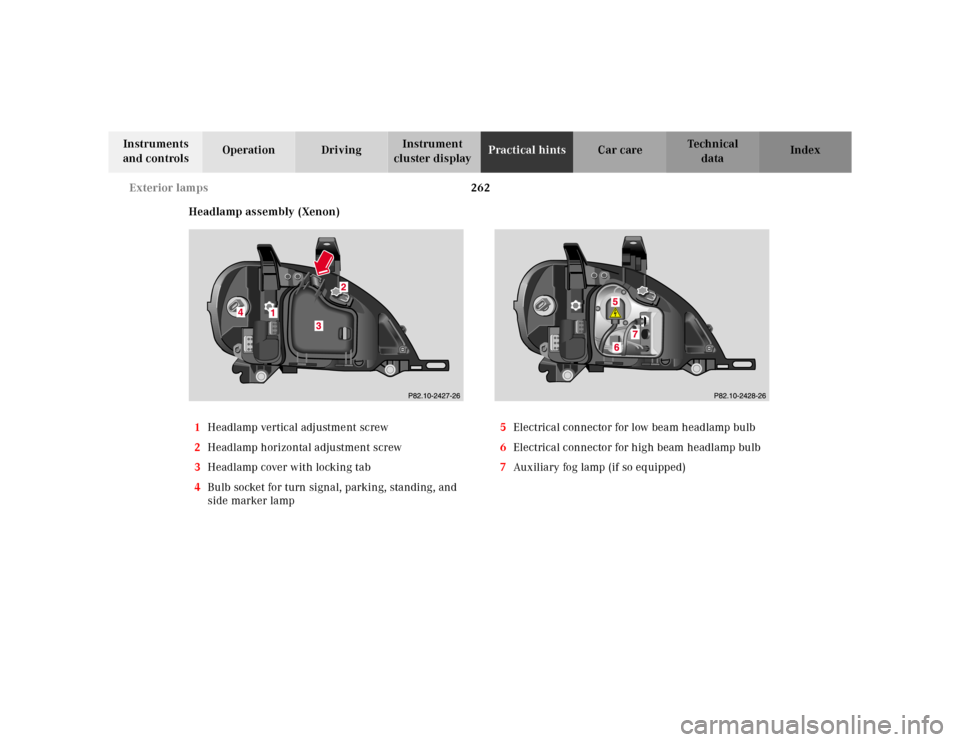
Headlamp assembly (Xenon)
1Headlamp vertical adjustment screw
2Headlamp horizontal adjustment screw
3Headlamp cover with locking tab
4Bulb socket for turn signal, parking, standing, and
side marker lamp5Electrical connector for low beam headlamp bulb
6Electrical connector for high beam headlamp bulb
7Auxiliary fog lamp (if so equipped)
Page 267 of 317
264 Exterior lamps
Te ch n ica l
data Instruments
and controlsOperation DrivingInstrument
cluster displayPractical hintsCar care Index
Parking, standing, side marker and turn signal lamp
115 6 N A ( 3 2 / 4 c p b u l b )
Open hood.
Twist bulb socket (4) counterclockwise and pull out.
Push bulb into socket, turn counterclockwise and
remove.
Insert new bulb in socket, push in and twist clockwise.
Reinstall bulb socket.Bulbs for auxiliary fog lamp (optional)
H3 U (55 W)
Open hood.
Remove cover (9). Unhook clamping ring and remove
bulb. Pull off electrical connector.
Insert new bulb in socket (seating properly in cutouts of
bulb socket), and mount clamping ring. Reinstall and
push electrical connector on securely.
Reinstall cover (9).
Page 306 of 317
303 Index
Te ch n ica l
data Instruments
and controlsOperation DrivingInstrument
cluster displayPractical hints Car careIndex Emission control label ..................................................285
Engine compartment ..................................................... 231
Engine malfunction
CHECK ENGINE malfunction indicator lamp ....... 218
Engine oil additives .......................................................294
Engine oil consumption ................................................234
Engine oil level
Checking ............................................................. 89, 233
Warning ......................................................................224
Engine oil level indicator ................................................ 89
Engine oils ......................................................................294
Capacities ...................................................................292
Low engine oil level warning ..................................224
Engine overheating ......................................................... 81
Engine speed limit
Overrevving ................................................................. 82
Enlarged cargo area ....................................................... 131
Entrance lamps ...............................................................112
ESP
LOW RANGE — ESP ..................................................208
ESP (Electronic stability program) ..............................205
Control switch ...........................................................207
Malfunction indicator lamp ..................................... 221
Synchronizing ...........................................................206
Warning lamp ............................................................ 221ETR (Emergency tensioning retractor) .........................55
ETS (4-ETS+) .................................................................. 203
LOW RANGE – 4-ETS+ ............................................ 204
Exterior lamp switch .......................................................90
Exterior lamps ............................................................... 260
Adjusting headlamp aim ......................................... 268
Auxiliary fog lamp ............................................. 92, 264
Fog lamps .....................................................................93
Headlamp assembly ......................................... 261, 262
Headlamps .................................90, 261, 262, 268, 280
High mounted stop lamp ......................................... 267
License plate lamps ................................................. 267
Low and high beam ............................................90, 263
Parking lamp ...................................................... 90, 264
Replacing bulbs ........................................................ 260
Side marker lamp ..................................................... 264
Standing lamp .....................................................90, 264
Taillamp assemblies ................................................ 265
Turn signal lamp ................................................90, 264
Turn signal lamp, side ............................................. 266
Exterior rear view mirrors ..............................................73
Electrically folding ...................................................... 75
Page 308 of 317
305 Index
Te ch n ica l
data Instruments
and controlsOperation DrivingInstrument
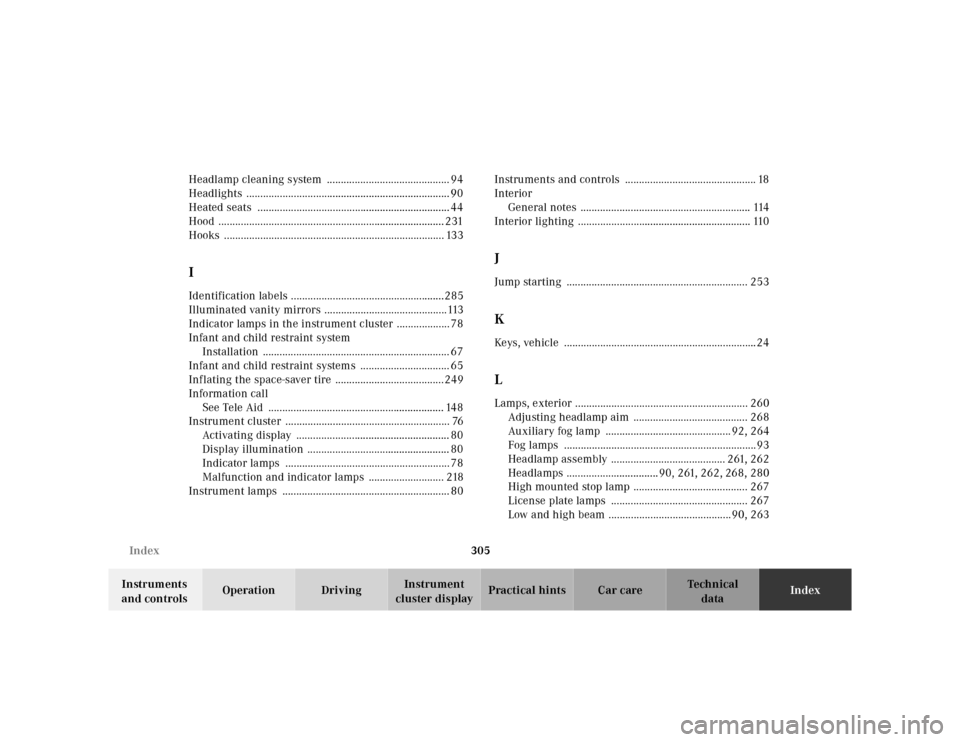
cluster displayPractical hints Car careIndex Headlamp cleaning system ............................................ 94
Headlights ......................................................................... 90
Heated seats ..................................................................... 44
Hood ................................................................................. 231
Hooks ............................................................................... 133
IIdentification labels .......................................................285
Illuminated vanity mirrors ............................................113
Indicator lamps in the instrument cluster ................... 78
Infant and child restraint system
Installation ................................................................... 67
Infant and child restraint systems ................................ 65
Inflating the space-saver tire .......................................249
Information call
See Tele Aid ............................................................... 148
Instrument cluster ........................................................... 76
Activating display ....................................................... 80
Display illumination ................................................... 80
Indicator lamps ........................................................... 78
Malfunction and indicator lamps ........................... 218
Instrument lamps ............................................................ 80Instruments and controls ............................................... 18
Interior
General notes ............................................................. 114
Interior lighting .............................................................. 110
JJump starting ................................................................. 253KKeys, vehicle .....................................................................24LLamps, exterior .............................................................. 260
Adjusting headlamp aim ......................................... 268
Auxiliary fog lamp ............................................. 92, 264
Fog lamps .....................................................................93
Headlamp assembly ......................................... 261, 262
Headlamps .................................90, 261, 262, 268, 280
High mounted stop lamp ......................................... 267
License plate lamps ................................................. 267
Low and high beam ............................................90, 263